-
Why My Cricut Won’t Connect to Computer: 7 Effective Solutions
4 days ago • 0 comments![]()
If you have been using Cricut machines for a while now, there is a good possibility you would have faced connection problems. Why Cricut won’t connect to computer is a common error that can annoy you to the core. If you are experiencing a similar issue, then there is nothing you have to worry about. Cricut machine set up have a fixed number of connection problems that can occur. If you work on those issues, you can fix them easily.
In this blog, I am going to write down all the possible connection errors that can happen to your computer and how you can resolve them. Just read the post till the end, and your problem will be fixed easily.
Solution 1: Internet Connection
Very often, the Cricut won’t connect to computer error is not caused by an internal problem in the computer or your Cricut machine but by an external issue like Internet connectivity. While using the machine, you have to make sure that your operating device is properly connected to a stable Internet connection. To ensure that, restart your Wi-Fi router and the problem will be solved.
Solution 2: Cricut Design Space Server-Related Issues
Sometimes, the problem is not related to your computer or your Cricut machine. It is not even related to your Internet connection. Sometimes, the problem may be in the server of the Design Space app. In this case, there is not much you can do. You will have to wait until the server problem is fixed. You can check the reason for this error on the internet. When the website resolves the server issue, your connection problem will be solved automatically.
Solution 3: Outdated Cricut Software
One of the reasons your Cricut won’t connect to computer is that you are using outdated Cricut Design Space software. In that case, you will have to update the Cricut app on your computer, and then the connection will start working again.
Solution 4: Bluetooth Connectivity
The Bluetooth connectivity issue is among the most common Cricut connection issues. This problem may arise for a couple of reasons. You must ensure that the distance between your Cricut machine and the computer is within its limit, which is 10 to 15 feet. If the error persists, you should unpair both devices and pair them again.
Solution 5: USB Connection
A Cricut won’t connect to computer problem may occur when using a USB cable if it is strained. First of all, you have to connect the cable at both ends to your Cricut machine and the operating system. If the connection issue is still there, change the cable right away.
Solution 6: Browser-Related Problems
If the browser you are using to connect the Cricut Design Space app to your Cricut machine is outdated, you may have connection problems. You should use a compatible browser (like Chrome, Firefox, or Safari), and the version has to be the latest. Also, clear cookies and cache in the browser very often for it to work smoothly.
Solution 7: Device Compatibility
Your computer has to have some specific quality to run the Cricut Design Space app. If you are using an old computer, then maybe it is not compatible with the software. If you want to use Cricut software app on your computer, then it should have at least 4GB RAM and 2 GB free disk space. The minimum screen resolution should be 1024x768 pixels. It should have a Bluetooth or a USB connection available. Also, stable internet connectivity should have a minimum capacity of 2-3 Mbps for downloading and 1-2 Mbps for uploading. If your computer has all this available, it will have no compatibility issue.
Conclusion
If you have a problem that your Cricut won’t connect to computer, after reading this blog, you will understand what problems your connection may have. Your computer may have an Internet connection, server issue, outdated software, Bluetooth or USB-related, browser-related, or incompatible computer issue. I have also written effective solutions for all these errors. If your computer has any of the issues, resolve them right away by reading...
Read more -
Making Shirts With Cricut: A Guide to Get Started
6 days ago • 0 comments![]()
Undoubtedly, using the Cricut machine is fun. But what about making shirts with Cricut? Obviously, it is easy. I am a professional crafter, and I own a mid-level crafting business. I love to experiment with several DIY projects, and shirts are one of them. If you are a great fan of handmade crafts and want to create shirts of your choice, I can help you with the right steps.
In the post right here, I will share with you all the crafters how to make shirts that everyone will praise. Yes, you get it right. By reading through this blog, you will get to know everything that revolves around creating shirts while using a Cricut machine. Dive deep into it and find the steps to design and make shirts with Cricut iron-on vinyl.
Why Make Shirts With a Cricut Machine?
Once you get to your Cricut machine, the first thing that comes into your mind is why make shirts when you have a Cricut. A beginner as well as an experienced crafter can find it easy and fun to create a design, iron the design onto the shirts, and more. There are other reasons, too. Find them below.
- Cricut shirt-making machine helps create the shirts exactly the way you want.
- Shirt-making is a cool crafting project that even a person without crafting experience can do.
- When you choose to create designs with your Cricut, the design will last longer than expected.
- These are ideal for clubs, holidays, and parties.
- You can start a side business.
Materials You Will Need for Making Shirts With Cricut
Did you make up your mind to make shirts with a Cricut machine? Well, first gather these materials and then enter into the tutorial.
- Plain shirt. You can use cotton or cotton blends
- Cricut everyday iron-on vinyl
- StandardGrip Cricut mat
- Cricut machine. You can use Cricut Maker Setup, Cricut Explore Air 2, or Joy.
- Cricut Design Space software
- Iron
How to Make Shirts With Cricut: 7 Easy-to-Follow Steps
There are three basic steps involved in the process of creating eye-catching shirts. In this section, I will explain all the steps thoroughly. Understand them and then follow them carefully and properly.
Step 1: Designing a Shirt
The first part of getting started with creating a shirt is making a design of your choice. Follow the below-mentioned steps to create an excellent design.
- The first thing to do is open the Cricut Design Space app.
- Once you are there, tap on the Start a New Project option.
- After that, move to the left-hand menu.
- Now, select the Template option that is present there.
- Alternatively, you can skip the template option.
- Then, select the Image option and add your predesigned image.
- Insert the design you want properly.
- Next, add the shape or text you want to include in the project.
This way, you can finalize the design you want to have in your shirt project. One thing you need to note is that if you want to get printed iron-on vinyl elements in similar colors, move to the layer menu and make changes.
Step 2: Resizing Your Shirt Design
The next step in making shirts with Cricut is to use the right size for the design. Look at the step-by-step instructions below to determine the appropriate size for the design.
- In this step, you will need to determine the placement of the iron-on elements.
- If you are satisfied, look at all the elements.
- After that, select all the elements available.
- Finally, resize the design based on your choice.
Step 3: Cutting Out the Design
After the design is resized, the following step you need to move on is cutting out your design. To do this, here are step-by-step instructions.
- If you find that the design is nice, tap on Select All.
- After that, hit the Attach option.
- Next, you will need to click Make It. You can find it at the top-right of the app.
- When the next screen appears, make sure to choose Mirror.
- On the following screen, press Continue.
- Move to your Cricut machine and set the Dial to Custom.
- Following this, enter the Cricut Design Space screen....
-
How to Make Shirts With Cricut: Creating From Scratch
05/14/2024 at 10:31 • 0 comments
how to make shirts with cricut How to make shirts with Cricut? I assume this is the sort of question you might be looking for answers to, right? Don’t worry—take a deep breath and say Thank God😁! Yes, because god has landed you on the right page!
Making shirts with Cricut is always fun for me. Even though I have made hundreds of projects to date, personalized shirts are still my favorite. I am kind of obsessed with them! But WHY??????? Because I always create them for someone I love, they are always a gift. And I like to give something handmade.
Okay, I have already explained the stepwise methods for making shirts with Cricut.com/setup. The following project is easy to create using any Cricut model. Now, let’s get started without any further ado!
What Supplies Are Required to Create a Shirt With Cricut?
Okay, so what do you need to make shirts with a Cricut? Since I am going to make a shirt for my mom on her 49th birthday, I needed some supplies. So, before you learn how to make shirts with Cricut, let’s have a look at the materials you will need to gather.
- Weeding tools
- Cricut LightGrip mat, or you can also use an older standard mat (green), which is less sticky. Ensure the mat is clean.
- EasyPress machine or household iron
- EasyPress mat or towel to keep it under the heat source
- Teflon sheets or protective sheets, e.g., wax paper
- Laptop or computer (MacBook or Windows computer) for using the Cricut software app
How to Make Shirts With Cricut: 5 Easy Steps
Once you have gathered the materials or supplies to make shirts, you can learn how to use Cricut for shirts. I will walk you through the steps one by one so that they aren’t too confusing for you. So, are you ready to start? If so, let’s start!
Step 1: Create a Shirt Design on the Cricut App
Probably the most challenging thing I’ve found was deciding which design to create. The more complex it is, the more time-consuming it will be. Therefore, I chose a text-based simple design. Everyone can create it in no time. Want to see what it is? It is “Blessed MAMA.”
In order to create it, you have to follow the steps I’ve described below:
- Launch a Cricut Design Space app on your computer and hit the New Project tab.
- In order to add text, click on the Text button on the left side.
- You can add the texts that you like and modify them accordingly. However, I have typed “Blessed” and “Mama” in two separate boxes.
- Then, select the font style you like and then weld them together using the Weld tool.
- After that, you must attach them so that Cricut will cut exactly as it is.
- Now, Save your text design and click Make It in the top right corner.
Step 2: Cut the Vinyl Using Your Cricut Machine
Now, it’s time to cut vinyl. Okay, fine, but are we forgetting something? Oh yes, it’s the MIRROR setting! We must mirror our vinyl design before cutting, especially when it is text.
For symmetrical designs, it's okay if you don’t mirror the design.
To mirror the text, you must return to the Cricut app (After clicking the Make It button) and enable the Mirror toggle button. Enabling this option will flip over your entire text or image.
Step 3: Settings for HTV or Iron-On-Vinyl
For Cricut Explore Air or Cricut Explore Air 2 Setup users, they need to turn the wheel to iron-on.
One thing I have noticed is that I get the best results when I turn the wheel to Custom and then select the material from the drop-down menu.
However, if you are using everyday iron-on vinyl, you will see this setting on Popular Materials, and you just have to click on it.
On the other hand, I prefer to select Search all materials if I am using specialty iron-on vinyl. So, from the drop-down menu, just select iron-on vinyl.
Step 4: Place HTV or Vinyl on a Cricut Mat
Placing vinyl is not something that you just grab and place on the mat. There is a shiny and dull side to your vinyl. You have to be extra careful when placing...
Read more -
How to Connect Cricut to Computer Bluetooth: Full Guide
05/01/2024 at 10:35 • 0 comments![]()
Connect Cricut to computer Bluetooth using the simplest steps described in this blog. Yes, you heard that right! I am very confident about the steps written in my blogs. This confidence comes from a year of experience as a crafter. I still remember the day I got my first Cricut new machine setup and Mac together. Connecting my Cricut to my Mac seems challenging as I was not used to using my Mac. So, I just took a USB cable that came with my Cricut, plugged it, and started using it.
Day passed, and finally, when I became a pro-Mac user, I connected my Cricut to Bluetooth. Gradually, I also got some new Cricut models and learned all the setup methods, including pairing and setting up the machine. Just like that, I am going to teach you how to connect Cricut to Bluetooth. Let’s dive into it to learn more.
System Requirements to Connect Cricut to Computer Bluetooth
Why are system requirements important? Well, it might not be very important for connecting purposes because it has nothing to do with your Windows operating system until it has a Bluetooth feature. But what is the benefit of connecting to a device that can be used further with your Cricut software app? Yes, in order to run the Cricut app on our computer, you will need a compatible device. To do this, you have to check your software as well as hardware. Let’s check it below:
For Windows
- Operating System - Windows 10 or later (64-bit)
- RAM - Minimum 4 GB
- Disk - 2 GB free
- CPU - Intel Dual Core or equivalent to AMD processor
- Display - Minimum 1024px x 768px screen resolution
- Connection Options - A USB port or Bluetooth
For Mac
- Operating System - macOS 11 or later
- CPU - 1.83 GHz
- RAM - Minimum 4 GB
- Display - Minimum 1024px x 768px screen resolution
- Connection Options - A USB port or Bluetooth
- Disk - 2 GB
Connect Cricut to Computer Bluetooth (Windows)
When connecting a Cricut machine to a computer wirelessly, you have to ensure that your computer is capable of running the Cricut software. Although every computer with Bluetooth features can not hinder you from establishing a connection, you should always pay attention to system requirements. To know the system’s needs, you can go to Cricut’s official website. Once you are sure that your device is compatible, start following the steps below:
To learn how to connect Cricut to Bluetooth, first decide where you want to place your Cricut machine. This is a must before connecting it to your Windows PC. The distance between the PC and Cricut should be no more than 15 feet. Once you have placed Cricut correctly, follow the steps:
- Head to the Start menu icon and choose a gear-like icon that is Settings.
- Next, you will need to select the option Devices.
- After that, verify if your Bluetooth is ON.
- Then, select the Add Bluetooth or other device.
- Once done, you will have to select the Bluetooth option.
- Now, wait for a while and let your computer find your Cricut cutting machine.
- As you find it in the available list, select the model to pair your devices.
Connect Cricut to Computer Bluetooth (Mac)
In order to connect Cricut to a computer using Bluetooth to the Mac computer. You have to ensure the proper placement of your computer and Cricut. In other words, you have to place them near each other. Once done, follow the steps below to connect:
- Then, you have to check whether your Mac is turned on or off.
- Afterward, turn the Mac computer on if it is off.
- Then, go to the Apple menu and choose the System Preferences option.
- Here, you need to discover the Bluetooth option on your Mac.
- Next, when you have Bluetooth on, find your available Cricut models.
- Select the machine from the available list.
- Lastly, you will be connected to your Mac.
Finally, you have learned to connect Cricut to computer Bluetooth. Now, connect your Cricut and begin your Cricut machine setup hassle-free.
FAQs
Which MacBook is best suited for a Cricut machine?
In my opinion, the Apple MacBook...
Read more -
How to Connect Cricut to Phone: A Guide for Beginners
04/26/2024 at 06:23 • 0 comments![]()
Hey readers! How is it going? I hope you are happy after getting a Cricut machine. This range of machines is excellent and creates a good impact on your crafting skills. Hence, if you want to hone your DIY projects, Cricut is something unbeatable. To get started, you need to set it up on your device, such as a computer or phone. And, today I’ll teach you how to connect Cricut to phone through this blog.
Being a full time DIYer and a blogger, I always hear from my users that they are always a little confused about their machine’s setup. Hopefully, I’ll be able to help them all. If you’ have been struggling with the connection process, here you’ll get all the clarity. So, let’s get started!
What Is a Cricut Design Space App?
If you’re expecting a Cricut machine to connect to your phone, you know that it can’t be possible without an application. Hence, Cricut offers its design app known as Cricut Design Space app to create designs that you convert into your favorite crafts. So, to get it on your phone, you need to install its application on your phone. I’ll mention all the steps.
How to Download Cricut Design Space on Phone?
Before we proceed to learn how to connect Cricut to phone, here is something more important. As you know Cricut Design Space is crucial to setup a Cricut machine on a phone, you need to download and install it on your phone. Look at the steps below to learn them quickly.
For Android
All Android users can follow these steps to get the Cricut Design app on their Android phones.
- Go to the Play Store on your Android device and open it.
- Now, locate the Cricut Design Space in the search bar.
- When you see the icon for the Cricut app as a green C letter, select it.
- After that, hit the Install button to install that app.
- Next, you’ll see your app on the home screen along with other apps.
- Now, click on the icon of Cricut Design Space.
- In the last step, begin the sign-in and design.
Finally, you have the Cricut software on your Android device. Let’s check the steps for iOS.
For iOS
If you are an iOS user, don’t worry. The steps are simple for it, too. Let’s check the steps here.
- First of all, open the App Store on the iOS device’s home screen.
- Now, navigate to the Cricut Design Space app in the search bar.
- After that, you’ll see a Get button; click on it to download your app.
- Next, when your app is downloaded, open it and select one option: Sign In or Cricut New Machine Setup.
Now, the Cricut Design app is on your iOS device. Here, the door for creativity is just a step away from you. Connect your machine to your phone to finalize the Cricut setup on the phone.
How to Connect Cricut to Phone?
Finally, you are here to learn the connection procedure between your Cricut and phone. So, let’s learn how to connect Cricut to phone wirelessly.
For Android
Are you an Android user? You can easily connect your Cricut to your phone using the following steps. Here, I’m using the Bluetooth connection. Let’s see the final steps in detail.
- In the beginning, turn on your machine and check whether it is 10-15 feet away from your phone or not.
- Then, head to the phone Settings.
- After that, head to the Bluetooth option.
- Next, enable the Bluetooth option if it’s not.
- Thereafter, select your Bluetooth module name from the list.
- If you need to enter the four-digit PIN, enter “0000”.
- Finally, you’re ready with your Cricut machine connected to an Android device.
That’s how to connect Cricut to phone. Now, you have the freedom to utilize your Cricut machine the way you want.
For iOS (iPhone or iPad)
Well, if you’re an iOS user, here are the steps for you. Below, I’m mentioning some step-by-step instructions for connecting a machine to an iOS. Let’s see how to connect Cricut to phone Bluetooth.
- In the beginning, ensure that the distance between your Cricut and phone is not exceeding 10-15 feet.
- On your phone’s screen, open the Settings option.
- After...
-
How to Connect Cricut Maker to Computer: Ultimate Guide
04/15/2024 at 10:56 • 0 comments![]()
Today, I’ll show you how to connect Cricut Maker to computer. Since I’m a regular Cricut Maker user and a professional crafter, I can provide you with the right methods to connect your Cricut machine to a computer. For the last five years, I’ve been consistently writing blogs about project-making and DIY crafting, but now I’m also sharing some connection tips to get started with your Cricut cutting machine.
The Cricut Maker Setup machine is amazing; I have used this machine for more than two years. I’m satisfied with the results so far. Hence, I’ll recommend this Cricut cutting machine to everyone who is looking for a machine to start creating DIY projects. Let’s begin with the blog!
Download Cricut Software on Your Computer
Before getting started with my blog on how to connect Cricut Maker to computer, I want you to meet a very special tool called Cricut Design Space. This tool is an amazing creation of the Cricut.
With this software, all your designing routine will become a piece of cake. As most people are not familiar with designing, an advanced tool like this helps them to go ahead without obstacles. This tool offers you various latest images, fonts, texts, pre-made designs and many more to get started.
For Windows
To download and install the Cricut app on Windows, check the steps below and follow them.
- To get started, navigate to design.cricut.com.
- Now, tick the box to accept the Cricut Terms of Use and hit the Download button.
- You may see slight changes on your screen.
- Once the download is complete, go to the Downloads folder and double-click on the folder.
- Next, your window may ask you to trust the application.
- Then, you’ll see an installation window in progress.
- After that, you need to sign in with your Cricut ID using a username and password.
- Also, the Design Space icon will be added to your desktop’s screen.
- Finally, your Cricut Design Space app is set up on your Windows PC.
That’s it for the Cricut software download and installation on a Windows PC. Now, you’re ready to use your software to create your projects.
For Mac
Below are the steps to download and install the Cricut application on your Mac system. Check them below.
- Navigate to cricut.com/setup on your internet browser and accept the Cricut Terms and Use.
- Then, click on the Download button.
- Now, you can pick a location to save your file.
- After that, you can go to the Downloads folder.
- In the following step, double-click on the file to open it.
- When you get your app icon, drag it to the Applications folder.
- Then, launch the Cricut Design app on your Mac by hitting the Cricut icon in your Applications folder.
- Now, hit the Open button to go ahead with the setup.
- Next, sign in or log in with your Cricut username and password.
- Finally, the Cricut application is set up on your Mac system.
That’s how you can get the Cricut app on your computer. Then, you can continue to connect your Cricut product to your computer.
Connect Cricut Maker to Computer (Windows/ Mac)
I’ll tell you the wireless method for connecting your Cricut to a computer. Let’s check the steps below to set up a wireless connection with your Cricut cutting machine.
Windows
As a Windows user, you should follow the steps below to connect your Cricut Maker machine to a computer on a wireless network such as Bluetooth. Here are the steps to learn how to connect Cricut Maker to computer Bluetooth.
- Make a distance of 10-15 feet between your Cricut machine and the Windows PC.
- Check whether your PC has Bluetooth connectivity or not. Most PCs have this feature by default; if not, you can opt for a Bluetooth dongle or Bluetooth adapter to start the connection.
- To check the Bluetooth connectivity, head to the Start button and launch the Device Manager.
- Next, you’ll see the Bluetooth connection listed.
- Moving forward, end the Device Manager.
- Now, open the Start menu once again and hit the Settings option.
- Then, head to the Devices...
-
Cricut Explore Air 2 Bluetooth Connection: Simplified Guide
04/09/2024 at 10:23 • 0 comments![]()
Hi there! Are you looking for a Cricut Explore Air 2 Bluetooth connection? If so, then I’ve got you covered! I’ve always preferred connecting my Cricut via Bluetooth. Do you know why? Because I can’t have my computer and Cricut on the same table☹️. I had to keep them separately, so I had no option but to use a Bluetooth connection. Besides, I hate dealing with those clumsy wires. However, I don’t think anyone would like those messy wires😅.
Well, now getting to the point: I am a professional crafter who loves making DIY projects on Cricut. As an avid Cricut user, I am here to teach you how to connect your Cricut Explore Air 2 Setup via Bluetooth. If you are ready, let’s dive in!
Cricut Explore Air 2 Bluetooth Connection on Computer
If you want to connect your Cricut cutting machine to a Windows or Mac computer, follow the steps below. Ensure you have placed your Cricut and computer within 10 to 15 feet. After that, you are ready to go😍!
For Windows
Here are the simplified steps to connect Cricut to a Windows computer using Bluetooth:
- The first thing you have to do is turn on your Bluetooth. To do so, navigate to the Start menu from the taskbar.
- And click on the Settings (Gear icon).
- Then, open the Devices option.
- Make sure you need to turn it on and click Add Bluetooth or other device.
- After that, you have to move further and select Bluetooth.
- Afterward, wait a while and see if your computer has detected your Cricut machine.
- Now, you will notice that your Cricut model is visible. The process is the same for all Cricut models.
- Finally, your Cricut machine has been paired with a Bluetooth connection.
- Launch the Cricut Design Space software and navigate to New Product Setup to confirm whether your Cricut is connected. There, you will see whether your Cricut is connected.
For MacBook
Here are the simplified steps to connect Cricut to your Mac system using Bluetooth:
- Under the Apple menu, you will find an option called System Preferences; you have to select it.
- Afterward, you will need to look for the Bluetooth app.
- Now, you should launch the Bluetooth app and check whether your Bluetooth is on or off.
- Once Bluetooth is turned on, you must wait for it to detect your Cricut machine.
- When the machine is detected, select the Pair tab to connect your Cricut with your MacBook.
- Finally, you have paired your Cricut to your Mac.
- To confirm, return to your Cricut Design Space and then Cricut New Product Setup. There, Cricut will show you that your device is connected during setup.
Cricut Explore Air 2 Bluetooth Connection on Mobile
Connecting your Cricut Explore Air 2 to your smartphone or tablet is also possible. All you need is a compatible device to install the Cricut app on it. Therefore, it is recommended that you use a compatible device only. If you are a Windows user, you must have Android 6.0 or later. If you are using iOS, you have to use iOS 11 or later.
Note: Your mobile device should be within the range of 10 to 15 feet from the Cricut machine.
For Android
Here are the simplified steps to connect Cricut to an Android phone using Bluetooth:
- On your Android phone, swipe below and click the gear icon to open your Settings.
- Once you have entered your phone Settings, go to the Bluetooth option.
- Now, turn on your Bluetooth.
- Wait and see until your device finds your nearby Cricut machine.
- Once it finds the Cricut machine, you have to click on it to pair.
- Finally, the Cricut Explore Air 2 Bluetooth connection is done.
For iOS
Here are the simplified steps to connect Cricut to an iOS phone using Bluetooth:
- Go to your iPhone and open the Settings app.
- Now, turn on the Bluetooth by tapping on the toggle button.
- Wait and let your iPhone look for your Cricut model.
- Once detected, click on it to pair.
- Now, you have connected your Cricut to your iOS device in no time.
So, weren’t those steps easy for you? I think it would be much better...
Read more -
How to Connect Cricut to iPad: A Comprehensive Guide
03/29/2024 at 11:18 • 0 comments![]()
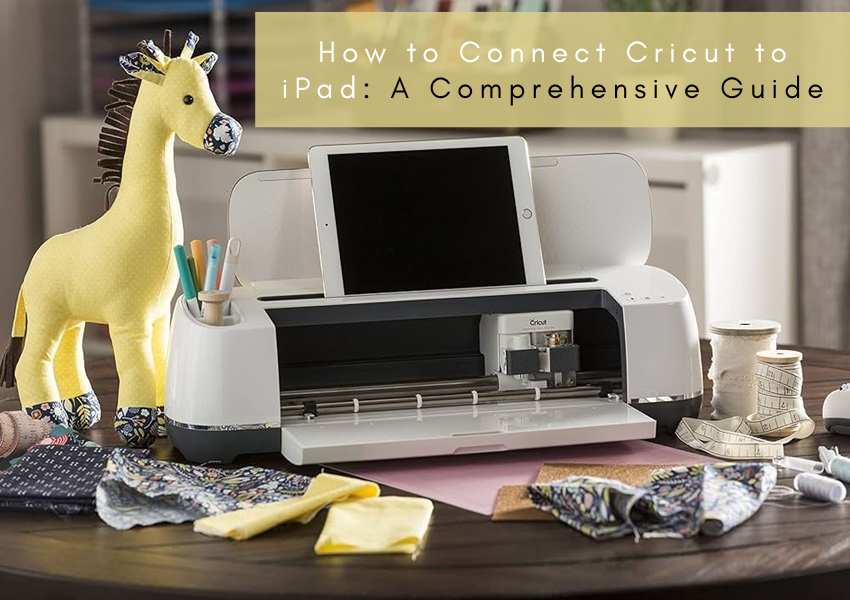
As you all know, Cricut machines are compatible with almost all devices, including desktop and mobile devices; you can easily set it up on any of these. In this blog, we will focus on how to connect Cricut to iPad. There are all types of users, and many iPad users may want to use a Cricut machine for crafting. If you also fall into this category, then this blog would be great for you.
Talking about Cricut, we can conclude that this machine is revolutionary, and almost every crafter is relying on it for its excellent performance and best results. If you’re someone who wants to learn its setup procedure on an iPad, then follow me here till the end.
How to Download Cricut Design Space on iPad?
Before learning how to connect Cricut to iPad, you must understand how to get there. The first step towards connecting a Cricut product to an iPad is to understand the Cricut Design app. This app is specifically designed for Cricut machines that you’ll need to install on your devices in order to run your machine. Below are the steps to do that.
- Initially, you should go to your iOS device and open the App Store.
- Then, search for the Cricut Design Space app in the search bar.
- Now, you’ll see the app on the screen in a green logo.
- After that, click on the Get button to allow the app installation.
- You’ll need to confirm the download when you see a prompt (You may need to supply your iTunes password).
- In the following step, open your app on the screen.
- Choose the Cricut Machine Setup when you install the app and set it up for the first time.
- To close the app, close your home screen.
- Lastly, sign in to your Cricut account using the correct Cricut credentials.
That’s it for downloading and installing the Cricut Design Space on iPad. When you understand the setup process for the Cricut app, it’s time to cover the Cricut Bluetooth connection to your iPad.
How to Connect Cricut to iPad Smartphones?
Now, you’ll finally learn how to connect Cricut to iPad wirelessly via a Bluetooth connection. Continue with the steps given below.
- Ensure that your devices are at least 10-15 feet away from each other.
- Check if your machine has the Bluetooth feature. If not, you can get a Bluetooth adapter.
- If you have Cricut Explore, you need to get one. But, if you have the latest Cricut models, they have an in-built Bluetooth feature.
- Now that you have checked everything, it confirms that the iPad’s Bluetooth is ON.
- After that, your iPad device will start looking for the available devices.
- Then, select your Cricut model or the adapter you’ve used.
- Now, you need to pick your machine and enter a PIN code.
- If you don’t know the PIN, just enter “0000” to start pairing your device.
- Once your iPad is connected to your Cricut machine, the setup has been completed.
Finally, you’ve learned how to connect Cricut to iPad. Now, you’re good to go to use it for making any stuff you want.
How to Connect Cricut to iPad via USB?
A USB connection is the best way to connect two devices together. Hence, to connect a Cricut machine to an iPad using USB, you need to follow these steps.
- You might have gotten a USB cable inside the box with your machine. Use that USB cable for the connection process.
- Then, connect your USB cable to the USB port of the iPad and another end to the machine.
- After that, ensure that your machine is ON. Next, check if the power button on the Cricut product is lit.
- Finally, go to the Cricut Design Space and click on the Cricut New Product Setup.
Finally, you’ll see your Cricut machine connected to your iPad. Now, the connection process is over for the iPad. You can get started with your machine to create multiple crafts.
Conclusion
You’ve seen how to connect Cricut to iPad using Bluetooth and USB connections. Both the connections are good for setting up your Cricut machine and starting to use the machine for something better. If you’re also a Cricut user and want to setup your machine...
Read more -
How to Connect Cricut Joy to Computer: A Complete Guide
03/23/2024 at 11:17 • 0 comments![]()
Hey, have you just got a new Cricut Joy machine? Here’s something important for you! In this blog, I am going to talk about how to connect Cricut Joy to computer. This guide will be crucial to you as every crafter who buys a new Cricut needs to set up their machine. In order to set it up, you need to connect it to your device.
But do you know which method is used to connect the Cricut cutting machine to a compatible device? Well, the short answer is Bluetooth only. Unfortunately, you can’t connect your Cricut Joy with a USB cable as there is no USB port available.
Since we can only connect it via Bluetooth, you have to know different methods to connect this Cricut model on Windows and Mac. Yes, the process of connecting the Cricut machine slightly varies for both types of computers. And I have covered them in detail. Let’s delve into it!
Minimum System Requirements for Using Cricut Design Space
Before I show you how to connect Cricut Joy to computer, you must know the basic requirements. These basic needs are important for your system to run the Cricut Design Space software.
The Cricut Design Space software is a companion app used to create amazing designs, command the machine for various operations, and set up our machine. Below, I have provided the requirements for Windows and Mac. Read them carefully:
For Windows
Operating System
- Windows 11 and Windows 10 and newer (X64 processors)
- Microsoft Windows 11 and newer (ARM64 processors)
Browsers
- Google Chrome
- Firefox
- Microsoft Edge
Hardware
- 2 GB RAM
- 1.3 GB free drive space
- 1 GHz Processor
For Mac
Operating System
- 14.x (Sonoma); 4.21.x or later
- 13.x (Ventura); 4.21.x or later
- 12.x (Monterey); 4.21.x or later
- 11.x (Big Sur); 4.21.x
- 10.15.x (Catalina); 4.21.x
Supported Browsers
- Safari
- Google Chrome
Hardware
- Processor: Intel, Apple Silicon M1, M2, and M3 processors
- 2GB RAM
- About 300 MB Hard Drive Space
How to Connect Cricut Joy to Computer?
You might not believe it, but connecting Cricut Joy to computer is a breeze. Before connecting with Joy, you must ensure that your computer meets the basic requirements to run the Cricut app. After that, you can start establishing the connection. Let’s start with a Windows computer first.
Windows
- Unbox your machine and take out all the accessories and items that come with your machine.
- Then, place your Cricut machine at a distance of 10 - 15 feet away from your computer.
- Now, you have to turn it on by plugging it into the power source.
- After that, head to the Start menu and select Settings.
- Later, you need to click on Devices.
- Make sure you have turned on your Bluetooth.
- Here, you will need to click on ‘Add Bluetooth or other device’.
- Thereon, click on the Bluetooth tab and stay until your PC is searching for your Cricut machine. Once it appears in your list, select it to connect.
- Eventually, Bluetooth is paired now.
Mac
- Power on your Mac using your power cord.
- Next, place your machine on a flat surface and keep it 10 to 15 feet away from your Mac.
- Then, head to the Apple menu and choose the option System Preferences.
- Now, find the Bluetooth option on your Mac
- So, verify whether the Bluetooth is ON.
- Later, you will need to select your Cricut model from the available list.
- Now, you have paired your Cricut machine setup with your Mac computer.
Finally, I have explained how to connect Cricut Joy to computer. Now, you are ready to make anything amazing using your Cricut cutting machine.
FAQs
Question 1: Can I setup my Cricut Joy on a mobile device?
Answer: Yes, you can easily set up your Cricut Joy on Android and iOS mobile devices. The Cricut cutting machines connect with Bluetooth only, so you will need a smartphone. Compatibility plays a pivotal role in running the Design Space app, which is a must-have app for setup.
Question 2: Do I need software to access Cricut Joy?
Answer: Absolutely, yes! Without...
Read more -
Cricut Computer Setup: Full Guide for Windows and Mac
03/22/2024 at 06:57 • 0 comments![]()
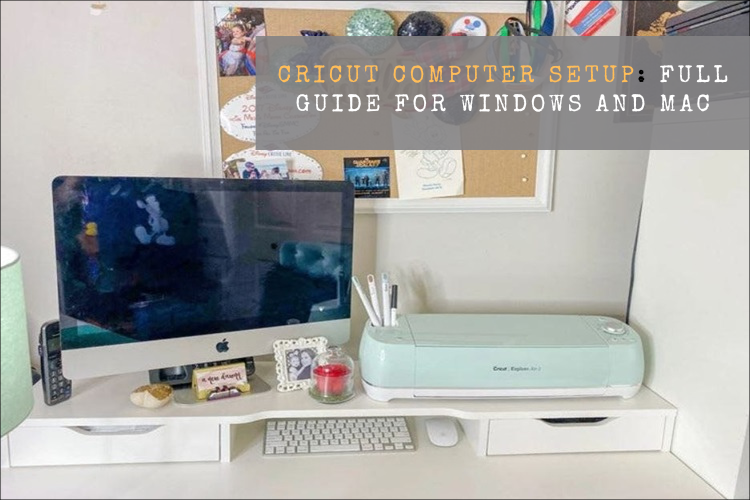
Ever since I started doing the Cricut computer setup, the excitement of setting up a new Cricut machine is still as fresh as it ever was. But do you know how to setup a Cricut machine on a computer? If your answer is no, then chillax! You have already opened the right page, so you will definitely find something helpful.
So, what do we need to do before setting up a Cricut? Well, the only thing you will need to know is to establish a connection between your Cricut and computer. But the next question is—HOW? And by which method? There are two methods: USB or Bluetooth. We can do it easily by following some easy ways. Want to know? Let’s check out this blog to learn more!
Lastly, you must complete the machine setup, and this process is the same for both Mac and Windows. Let’s get started!
Cricut Computer Setup for Windows and Mac
Setup is easy if you will do it once. But even if you are a beginner, it is going to be a breeze. Just trust me and follow the steps that I have given below. Remember the below-mentioned steps are the same for both Mac and Windows computers:
Here’s the Cricut setup on computer (Windows and Mac):
- First, launch an internet browser and head to the cricut.com/setup website.
- Now, you will need to download and install the Cricut software on your computer.
- Next, follow the steps given to your display and create your new Cricut account accordingly.
- If you already have an account, you should sign in to your Cricut ID using your username and password.
- Then, select your Cricut machine model for the setup procedure.
- Now, switch on the Cricut by inserting the power cable into its power outlet.
- Hit the power button on your Cricut machine.
- Next, establish a connection between the Cricut and your device, either using a USB cord or Bluetooth (To learn how to connect it properly, you should navigate to the next section given below).
- Afterward, you should register your Cricut cutting machine.
- Finally, your Cricut setup on computer is done, and you will be prompted to test the cut.
Now, you might have learned the Cricut computer setup. Below, I have explained how to connect your Cricut to your computer via Bluetooth. Let’s delve into it!
How to Connect Cricut Machine to Computer via Bluetooth?
Here, I want to focus on the steps to connect Cricut to a computer. Many crafters, especially beginners, can face difficulties while connecting. So, I’ve made it easier for you.
Below are the steps to connect Cricut to a Mac and Windows using a Bluetooth wireless connection:
Windows
- The first thing you need to do is keep your machine at an adequate distance, about 10-15 feet from your computer. If you are using Explore models, you should insert the wireless Bluetooth adapter.
- Now, check whether you have enabled Bluetooth. To do this, go to Settings and then move to the Devices option.
- Then, you can enable Bluetooth by clicking on the toggle button.
- Next, click on the Add Bluetooth or other device.
- So, you will have to wait until your Bluetooth finds your Cricut machine.
- Afterward, select the machine from the available list.
- Finally, you have successfully paired the machine.
Mac
- The first step would be the same as the above.
- Then, you have to hit the Apple menu and select the System Preferences option from the given options.
- Look for the Bluetooth option and check whether it is enabled or off. If it is off, you should turn it on.
- Now, you will see your Mac Bluetooth is looking for an available device, such as your Cricut machine.
- Once your Cricut machine appears in the list, you must select it to pair with your computer.
- Once the pairing is done with your Mac, you are ready to setup your machine further.
Once you complete your Cricut computer setup, you can start making your projects hassle-free.
FAQs
How is the Cricut app crucial for machine setup?
The Cricut app, Cricut Design Space, plays a pivotal role in machine setup. It helps you connect your Cricut...
Read more -
Cricut Easy Press Set up Guide for Optimal Results
03/11/2024 at 12:15 • 1 comment![]()
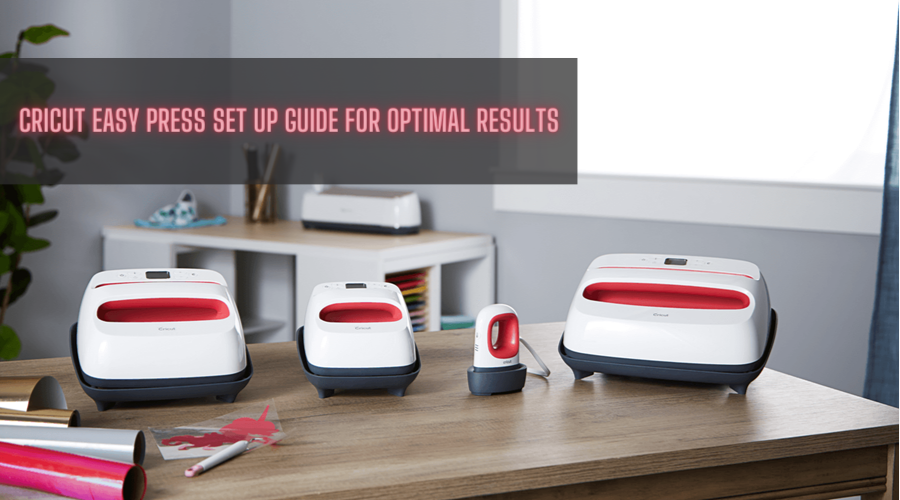
In addition to producing crafting machines, Cricut.com/setup Inc. also develops a variety of Heat Presses for DIYers worldwide. It's pretty evident that before creating custom-made projects, all users need to be aware of the proper Cricut Easy Press set up process. As a professional crafter, I prefer Cricut EasyPress 3 when making any iron-on projects.
Cricut EasyPress 3 perfectly combines heat press speed and iron convenience. It is three times faster than other models and operates with the Cricut Heat app. This EasyPress model is ideal for DIY projects like bandanas, coasters, cosmetic bags, and T-shirts. All users must set up their Cricut machines on a device and then create projects. This blog provides details on how to set up, activate, and craft with this Cricut Heat Press model.
Cricut Easy Press Set up on Your Mobile Device
Finishing the Cricut Easy Press 3 setup with mobile devices is a challenging task. But it can be done by referring to the steps shared in the below pointers:
- Start the process by going to your device's Settings app and enabling its Bluetooth feature.
- After enabling Bluetooth, connect your Heat Press's power cord to the nearby wall socket and turn it on.
- Next, open your Cricut Heat app and sign in by entering your login details inside the specific section.
- Following this, tick the Set up New Heat Press and follow the on-screen instructions appearing on the screen.
- If your Cricut EasyPress 3 is enabled, it will appear under the My Presses section.
- Now, the app will notify you about the successful connection, and you will see the press name on your Bluetooth list.
- Finally, you can start making new iron-on projects by wirelessly giving commands to the heat press.
How Do I Activate My Cricut EasyPress 3?
After successfully finishing up the Cricut Easy Press set up with smartphones, it's time to step forward and activate the press. Carefully consider the below steps to activate the Cricut EasyPress 3:
- First, download and install the Cricut Heat app on your Android/iOS devices and create your account.
- After that, sign in with your Design Space account and start unboxing the press from its packages.
- Now, plug your Cricut EasyPress 3 into the compatible wall socket and press the power button to switch it on.
- Following this, you will notice the word APP flashing on the screen, meaning your press needs to be connected to the device.
- Next, go to your Cricut Heat app and choose the Set Up option to start the activation process.
- After that, choose Cricut EasyPress 3 from the list and hit the Connect button.
- At this point, the Cricut Heat app will display connecting to Cricut EasyPress 3 with the Bluetooth logo.
- Now, the app will confirm the details, select the Terms & Conditions box, and tick the Activate option.
- At last, when the process ends, you will get the success message that the devices are ready to be used.
How to Use Cricut EasyPress 3?
With the completion of the Cricut Easy Press set up and activation process, let's discuss how you can make crafts from this Heat Press:
- Begin the process by pressing the Temperature button and adjusting the value with the plus (+) or minus (-) buttons.
- To change the temperature from Fahrenheit to Celcius, press the Temperature button until you see the change from *F to *C.
- Following this, tick the time button and then adjust the timing with (+) or (-) buttons.
- Now, you will notice an orange light, which means that your Cricut Heat Press is heating up, and a green light, which means that the temperature has been reached.
- Lastly, select the Go button to start the countdown. If you are using Cricut EasyPress 3, the app will show the countdown.
Conclusion
In conclusion, regarding the Cricut Easy Press set up blog, you must've understood that Cricut EasyPress 3 is the smartest heat press with the ability to do various do-it-yourself iron-on projects. No doubt, it's compulsory for all the users to finish the connection...
Read more -
How to Make Cards on Cricut Maker 3: Create a Birthday Card
03/06/2024 at 12:00 • 0 comments![]()
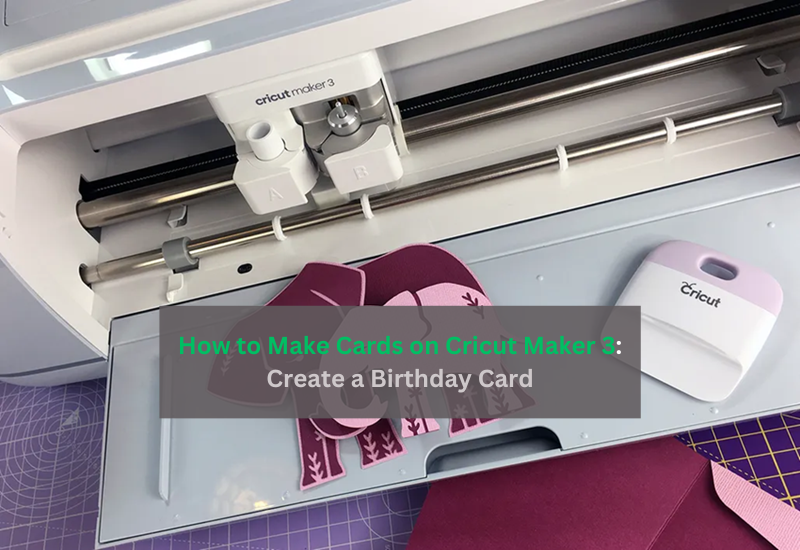
Hey daydreamers! Do you want to learn how to make cards on Cricut Maker 3? Look no further than this post, as it will guide you with every step of creating an amazing birthday card using the stunning Cricut Maker 3.
I started making this card when I wanted to meet one of my friends who had just returned from studying in Europe. I eagerly awaited to welcome her, and I thought it would be great to wish her a happy 26th birthday with this handmade card. She will arrive on her birthday (I AM SUPER EXCITED!😍).
Being a pro crafter, I have made several crafts for decor or other things. But this is the first time I am going to create something extraordinary. So, are you ready to be a part of my journey? If yes, join me on a board to craft birthday cards using Cricut that are easy to create.
Step 1: Cricut Tools & Supplies Needed for a Card
To learn how to make cards on Cricut Maker 3, ensure the following items are met. There are three different sizes of cardstock. Note down the sizes that you need while making cards using Cricut:
- 30cm x 30cm white cardstock (210gsm for the card)
- 30cm x 30cm copper glitter cardstock (250gsm for the card insert)
- 30cm x 30cm cream color cardstock (210gsm for the envelope)
After that, you will need a StandardGrip mat (Green). Despite these, you need a Cricut Metallic 1.0mm pen set, adhesive, or double-sided tape. Once you are ready with supplies, you have to move to the next steps, where I will show you how to create your own birthday cards.
Step 2: Upload the SVG Card Design
This is the first step, where I will add an SVG file from Design Space. For that, you have to go to the main page and tap on the + icon given at the bottom of the screen so that you can start a new project.
This is how you can browse the SVG file in your Design Space software.
Choose the file from your computer. Here is the SVG you need to add to your Cricut app. Finally, your file will be loaded here.
Step 3: Set Settings as per Your Project
You have to go to the Layers menu and make the changes as per the images below. Once done, select the Pen from the Operation drop-down menu. After this setting, you are ready to delve into the further steps explaining how to make cards on Cricut Maker 3.
Step 4: Edit Card Insert and Envelope
Now, you have to upload the insert design, which is again a Cricut SVG file. Next, you need to upload the envelope as your final part of the insert card design. Make the necessary changes, such as changes in color and size.
Step 5: Cutting Your Paper Card
After that, you will need to click on the Make It button from the top right-hand corner and then select the mat size accordingly.
When everything is done, you need to click on the Next button. Further prompts will ask you to Browse All Materials to select your Cardstock (for intricate cuts). Then, load the tool. Select the Scoring Stylus and click on the Continue option.
Now, you need to follow the screen’s prompts to cut the cards. After cutting, start assembling the Cricut insert card.
Here we go! This is the final birthday card and envelope.
You might have learned how to make cards on Cricut Maker 3 or other Cricut models. Try once, and let me know if you have created something unique and extraordinary.
FAQs
What different types of card ideas can I try with Cricut?
Numerous ideas are out there for cards you can easily make with Cricut. Almost all types of Cricut models can create cards easily in no time. Below are the different types of cards you can make with Cricut:
- Greeting cards
- Birthday cards
- Thank You cards
- Heart-shaped love card
- Congratulations cards and so much more.
What materials do I need to make cards on Cricut?
The material you will need to make beautiful cards is cardstock. These cards are thicker in thickness. This is the best material I can suggest to you to make any card. Besides these, you will need a LightGrip mat and a Cricut cutting machine for cards.
Can...
Read more -
How to Download Cricut Design Space for Mac: Complete Guide
03/01/2024 at 10:49 • 0 comments![]()
Hey, do you want to download Cricut Design Space for Mac? Look no further than this handy guide. I started using Cricut when I left school. Since then, I have been crafting like crazy. But how to get started with Cricut? Is there any software that we need to use? Yes, there is a free software called Cricut app. You can easily get it from the official Cricut website Cricut.com/setup login.
The best thing about Cricut software is that it works with different operating systems, like Windows, iOS, Mac, and Android. But, I will especially answer the question, how do I download Cricut Design Space on a Mac computer?
Start following the basic steps to download the Cricut app on Mac. Before that, let me show you the necessary system requirements for the Cricut software.
Minimum System Requirements for Cricut Design Space
Do you know why it is essential to know the system requirements before you download Cricut Design Space for Mac? It is important because incompatible software won’t support the app, hindering you from using it. Below are the system requirements for the Cricut app:
- macOS 11 or later
- CPU 1.83 GHz
- 4 GB RAM
- 2 GB Free Disk Space
- USB Port or Bluetooth Connection
- Minimum Display Screen Resolution - 1024px x 768px
- Minimum 2 to 3 Mbps download speed and 1 to 2 Mbps upload speed
Now, you are ready to download and install the Cricut Design app on your Mac system.
How to Download Cricut Design Space for Mac?
Below, I am providing the steps to download your Cricut app so you can start using the Cricut machine easily. The Design Space software is also very important when you have to set up your Cricut machine:
- Power on your computer and launch any browser that you use.
- On the browser search bar, you have to navigate to design.cricut.com.
- Afterward, you have to mark the checkbox to accept Cricut’s terms & conditions.
- Now, the Download button will be activated. Click on it to proceed.
- Next, you will see a page where you will be able to choose a location to save your downloaded file.
- After selecting the desired location, you have to click on the Save tab to begin downloading.
- Once you have downloaded the Design Space, you need to navigate to the Downloads folder.
- Then, double-click on the .dmg file in the Downloads folder.
- On the next window screen, you will have to drag the Cricut icon to the Applications folder icon to start the installation of the Cricut app.
Finally, you have downloaded the application to your Mac system. Now, let’s see which cutting machines are supported with the Cricut app.
Which Cricut Machines Are Compatible With Cricut Design Space?
This is the most important thing to know whether any Cricut machines are compatible with Design Space. Below is the list of machines that are compatible with this software:
- Cricut Explore Air 2
- Cricut Explore 3
- Cricut Maker
- Cricut Maker 3
- Cricut Joy
- Cricut Joy Xtra
All the machines mentioned above are compatible with your Cricut Design app so that you can control your Cricut machine.
How to Setup Cricut Machine Using Design Space?
Now you have downloaded Design Space, use the same app to complete the setup of your Cricut. Below are the steps I have provided to set up Cricut machine on Mac:
- Start your Cricut machine by plugging its cable into the power socket.
- Connect Cricut to the computer with the USB cable or pair it via Bluetooth.
- Since you have already downloaded the Cricut app, open it and follow the steps on the screen.
- By following the instructions on the screen, you will have to create or sign in to your Cricut account.
- After that, choose the machine you want to set up, and thus, the setup is done.
Final Words
I have discussed how to download Cricut Design Space for Mac in this blog. This blog has everything you need to know about Design Space, from system requirements to Cricut setup. This guide is dedicated to beginner crafters who just got their new Cricut machine. They should ensure...
Read more -
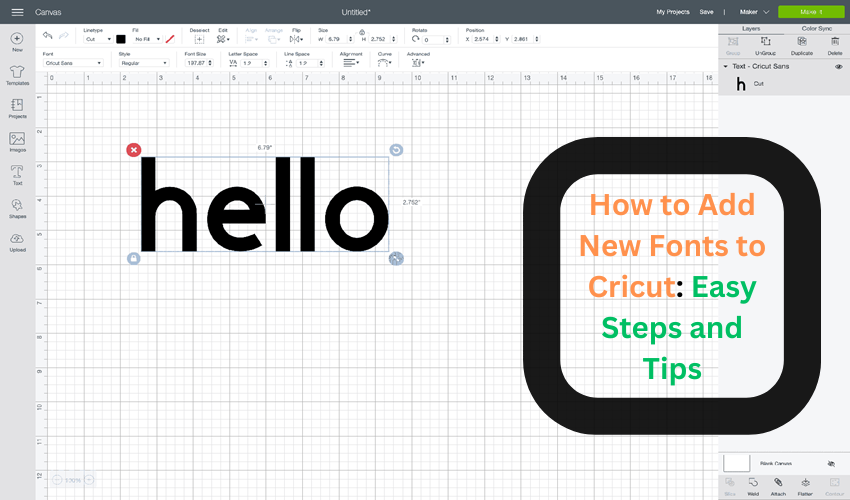
How to Add New Fonts to Cricut: Easy Steps and Tips
02/27/2024 at 06:41 • 0 comments![]()
Are you a regular Cricut user who is always looking for interesting ways to be unique? Hi five, I am one of you. In today’s tutorial, I am going to share with you a very basic thing you are all looking for. Here, you will learn how to add new fonts to Cricut. Now, when you have an ocean of fonts available on the internet, there is no old font left. Many users might not know that they can actually use different fonts with their Cricut machine setup.
Through this blog, I want to share with you all the platforms from where you can get new Cricut fonts. Well, if I tell you about myself, I discovered very late that I can add new fonts to Cricut. But, one day, when I did a little research about it, I got really excited to use the new font.
Where to Get New Cricut Fonts?
There are many platforms where you can find new Cricut fonts, and they are also free. I also downloaded random fonts from the internet in the beginning, but then I realized one big thing. The thing was that not all fonts are free, and not all have a license. Luckily, I didn’t use any fonts with a commercial license.
But it’s very important to know when to use which font. Therefore, if you have a business and you want to sell your things, you can go for fonts with a commercial license. And if you are just a hobbyist, go for the fonts for personal use.
Some of my favorite platforms for Cricut’s new fonts are dafont.com, Creative Fabrica, and Fontspace. And to get some more, you can explore the whole internet. But I really liked the fonts from these sites.
How to Add New Fonts to Cricut on a Windows PC?
Now, it’s time to check how you can add the new fonts to your Cricut machine. When you seek fonts on any website, you will have to download them and then extract the file. Look at these steps to understand how to upload the latest fonts to the Cricut machine.
- First of all, open your browser and search the fonts.
- When you like any font, you should download it from the site.
- Once it is downloaded to your computer, it will move to the Downloads folder.
- Then, go to this folder and right-click on it.
- After that, hit the Extract option to unzip your .zip file.
- Now, right-click on the font file to run the installation.
- Next, continue with the on-screen instructions.
- Once the installation is complete, you can use the fonts via your Cricut app.
Finally, you understand how to upload new fonts to Cricut. But, we have only checked the steps for Windows computers. What about other OS? Don’t worry; I have covered almost all common operating systems here.
How to Add New Fonts to Cricut on Your Mac Computer?
If you are a Mac user, the process is slightly different but not complex at all. As the Design Space is Mac-friendly, you can easily access fonts on it. Let’s see how.
- Browse a website and search for your favorite font.
- Then, download the fonts to your computer.
- Move to the folder where your file must be saved.
- After that, double-click on that file to unzip it.
- Next, double-click on your font on the Finder window.
- Now, click on the Install Font option.
- When your font is finally installed, you are ready to add fonts to the Design Space.
That’s how you can add the latest fonts to Cricut on a Mac computer. Now, you are all set to make interesting designs with these crazy fonts.
How to Add New Fonts to Cricut on an Android Device?
If a person is an Android user, can he download the new fonts? Yes, definitely, they can. However, the process is completely different from that of the computers.
- In the first step, you need to download and install a font manager app via the Google Play Store.
- Then, navigate to the downloaded file under the Downloads Folder and get the file.
- Now, open the font app and move to the My option under My Font.
- Next, open this option, see the preview, and then install the necessary fonts on your device.
- At last, click on the Set to complete the installation.
Now, you are free to use your new fonts...
Read more -
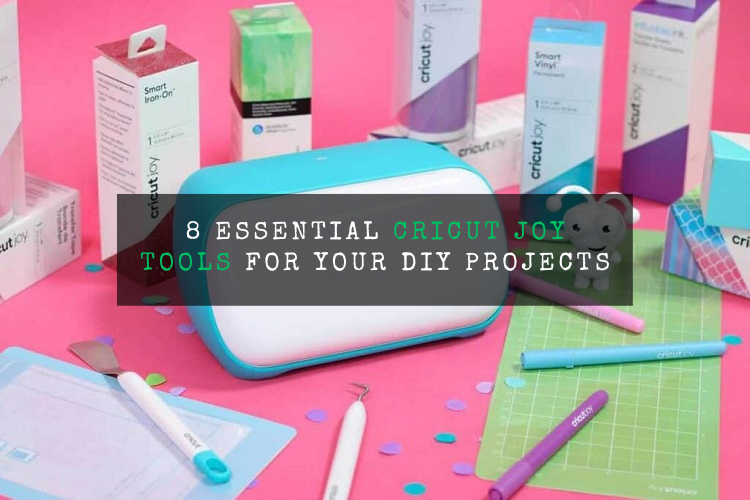
8 Essential Cricut Joy Tools for Your DIY Projects
02/05/2024 at 09:18 • 0 comments![]()
To be more creative towards crafting skills, you need to buy Cricut Joy tools and make them a part of the art room. This small, portable, and compact Cricut Joy machine cuts 50+ materials along with Smart Materials as well. Being a crazy fan of this Cricut product, I also love its supplies as they give me the freedom to make projects at the last minute and from any material within 15 minutes.
Also, these items are available at pocket-friendly prices on the official Cricut website design.cricut.com. Apart from the Cricut Joy materials and smart cutting machine, you must download the Design Space app. In the presence of all these items, you will be able to finish the craft within the time frame with the best quality. In this blog, I am going to focus on the best supplies for this Cricut machine.
1. Cricut Joy Insert Cards
Among the Cricut Joy tools list comes Insert cards, known for creating vibrant two-tone greeting cards without any mess. Also, it is easy to learn and quickly available at the fingertips. Plus, these A2 size cards include a white envelope and leave a profound impact on the recipient. It gets easier to cut the cards by using a specialized Joy cutting card mat, which is available in 12 different colors.
2. Cricut Joy Tote Case
Second, don’t you have any other option of leaving this cut-die machine product at home while going out of town? Don’t worry, as you can carry this mini but mighty small cutting machine with you. Made with a soft interior and customized pockets, you can keep all of the supplies organized and in the correct position. Plus, its magnetic back pockets easily handle the compatible Cricut cutting mats. Also, this crafting machine comes with a handle that makes it easy for the user to carry it from one place to another. This product is one of my favorite and most useful Cricut Joy tools, which I highly recommend for every crafter.
3. Cricut Joy Blade + Housing
Third, get ready to create any craft by considering this all-purpose blade along with the compatible housing. You can cut or slice the thinnest to thickest material while making any project out of a Cricut Joy cutting machine. Among the Cricut Joy tools, it is water and breakage-resistant and easily creates big or small tasks within 15 minutes. To increase the lifeline of one of these Joy machine accessories, keep replacing the blade on a regular basis.
4. Applicator and Remover Set
Another supply that you can include with the Cricut Joy tools and accessories is an applicator and remover set. Get a chance to extend the FabricGrip cutting mat for perfect application as well as removal. You can remove the wrinkles, dirt, and dust before starting the cutting process with the brayer tool. Besides, the tweezers make it easy to lift the small and fine threads from the mat without ruining the adhesive.
5. Cricut Joy Glue Gun
What’s more important, while referring to the Cricut Joy tools, you are surely going to love this glue gun like never before. This product aims towards comfort, precision, and control while creating any DIY project. Besides, its small trigger and diameter tip let the glue come out of the gun in tiny drops at the fine lines and tight spots of the material. Also, it has an auto-off feature that turns off the gun when the glue is finally ready to be used.
6. Cricut Joy Rotary Cutter, 45 mm
Referring to this Cricut product accessory, the process of cutting fabric became much more accessible, quicker, and faster. With the help of the handle, you can control this supply, and the quick-release button activates the blade when it isn’t in use. Among the Cricut Joy tools, its handle is perfect for both right & left-handed users. Plus, it is a great Cricut Joy companion during the cutting process.
7. Cricut Joy Transfer Tape
Further adding to the Cricut Joy essential tools, don’t leave the chance of transferring custom Cricut vinyl on the material. You can place this...
Read more -
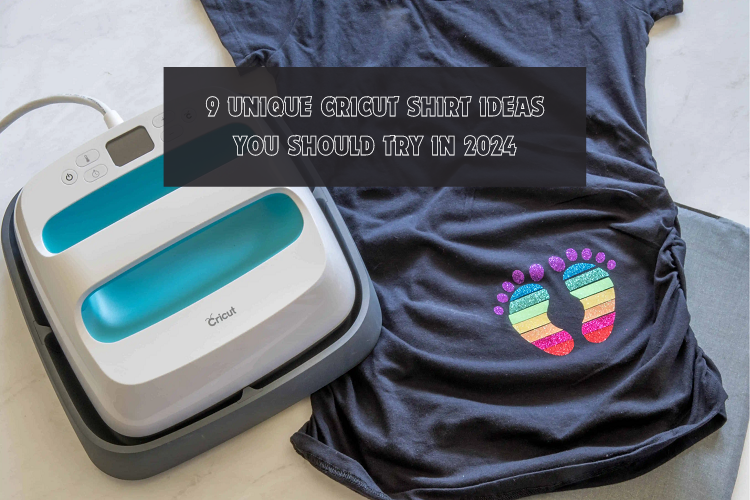
9 Unique Cricut Shirt Ideas You Should Try in 2024
02/02/2024 at 10:24 • 0 comments![]()
If you missed my 2023 blog on Cricut T-shirt ideas, that means you probably missed last year's trending ideas on shirts. If you are interested in making shirts with Cricut, I have compiled a list of Cricut shirt ideas for 2024 for you in this guide, which I will share with you in detail.
I've designed this guide so that Cricut crafters, whether beginners or experienced, can make these easily. I'll be sharing Harry Potter, 4th of July, Valentine's Day shirt ideas, and more. So, start implementing the ideas with your Cricut machine and Cricut Heat Press, iron-on vinyl, and other necessary supplies.
1. Harry Potter T-Shirt
If you love the Harry Potter film series and watched it as a child, you can relive those memories with your friends in 2024. I came up with the idea that you could invite as many friends as you want, get a plain t-shirt in their size, and customize it to a Harry Potter theme. And while enjoying the movie, you should wear a T-shirt of the same color and pattern which you have designed yourself.
2. Easter Shirt
If you ask kids what they love most about Easter, they'll probably tell you the matching shirts. For this, you can create different types of shirts using your Cricut machine. Like chocolates, egg hide designs, basket shirts, and many more. It is sometimes difficult to find cute designs, but you can go to Design Space to get multiple options.
3. Boom Squad Shirt
If you love Cricut shirt ideas for crafting, you'll definitely be preparing for the 4th of July with a variety of crafts. So you can prepare shirts of the same design for yourself and your family. This uses white, blue, and red adhesive or HTV to personalize a plain shirt in 4th of July colors. Apart from these, if I talk about some Cricut t-shirt ideas, then you can make many shirt projects on them like Boom Squad, Freedom Rocks, America Free, Brave, and so on.
4. Sports Shirt
Whether you like to see sports on television or love to play professional football, you should try to make sports shirts. This can prove to be quite unique for your crafting as it opens up a lot of opportunities.
To do this, I would suggest you buy a plain black shirt from the market and then cut your design on gold HTV vinyl with the help of the Cricut machine and apply it at the place of your choice on the shirt with the help of the Cricut Heat Press.
5. Drink Up Witches
If you attend bachelorette parties or host them yourself, this list of Cricut shirt ideas is a must-have for you. For this, you can upload an SVG of "Drink Up Witches" to Cricut Design Space and cut it out, which you can get for free online. Furthermore, it will mix a great pair of jeans and pants.
6. Fox Family Vacation Shirt
If you are planning a family vacation, take a break from your daily life to travel and make memories together. Before deciding where to go on your vacation, you can prepare Fox family vacation shirts for everyone to make your tour even more unique.
For this, buy an azure blue colored shirt from the market, then cut the vinyl in blue color, cut the file and apply it on your shirt.
7. Paris Olympics 2024 Shirt
If you love the Olympic Games, you can create a 2024 Paris Olympics design with your Cricut machine to show your passion for it. I like to use white shirts for this and cut the designs on different colored HTV vinyl. You can use different designs, sizes, and colors as per your choice. It is one of the super cool Cricut shirt ideas for Olympic lovers.
8. Birthday Squad and Boy Shirt
If your birthday is coming or it is the birthday of your loved one then you can prepare the shirt accordingly. And this way, you can enjoy your birthday in 2024 in a unique and fun way. You have many options for design; different fonts and colors will also be available in the Design Space. These Cricut shirt ideas offer a variety of features to show off your child's personality and more.
9. Gym T-shirt
Are you...
Read more -
How to Make Magnets With Cricut: An Easy Guide for Crafters
01/24/2024 at 09:55 • 0 comments![]()
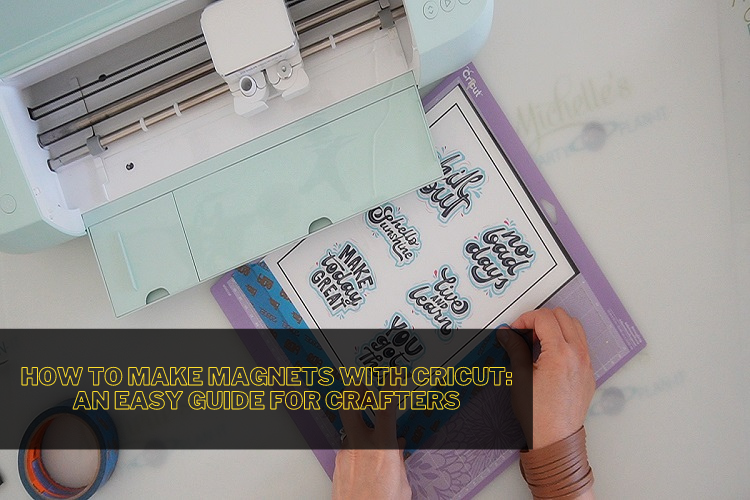
Hello, my crazy crafters - I know it's been a while since I posted my last tutorial. But this time, I am going to share with you how to make magnets with Cricut. As I was coming near my kitchen, I realized that my fridge was not looking attractive at all, and it was making my kitchen look dull. That's when I realized that I needed to renovate my fridge and decorate it by sticking funky magnets.
My kids are always keen to learn something new that can enhance their crafting skills. Keeping that in mind, I decided to let them participate with me while creating custom magnets. To make the perfect fridge magnet design, I needed some Cricut tools & Design Space as well.
Don't get anxious, as I have come up with the best way of designing magnets out of a Cricut machine setup. For that, you have to be a little calm and study this blog thoroughly.
Step 1: Create a Magnet Design on Cricut App
In the opening stage of how to make magnets with Cricut, open your Design Space sign-in page and fill in your Cricut ID & password inside the specific blank. Now, press the Upload option and choose your image from the Recently Uploads section. After selecting the image, hit the Add to Canvas option.
Now, choose any shape from the Shapes section and change its size depending on the image size. After doing that, change the background color of the shape and place the image on top of it. Next, change the size of the image and include the text inside the box using the Text toolbar.
Equally important, choose any picture of your choice from your system library or from the Recently Uploads section. After landing on the canvas, insert the shape and click the Slice button. To add the border around the image, go to Offset and add thickness by pressing the Apply option. Follow the same steps and make more magnet designs by changing the color and adding text to the magnet.
After designing all the designs, don't waste any time and take out its printout from your respective printer.
Step 2: Print Out Your Design
Further adding to the how to make magnets with Cricut blog, press the Make It and then click the Continue option. Now, tick the Send to Printer and choose your printing device model from the list. Afterward, cross-check the settings, tick the Print option, and make the necessary changes. Following this, insert your printing sheet into your printer, and after a few minutes, you will get the printout of your magnet designs in front of you.
Step 3: Cut the Design With Your Cricut Machine
In addition to designing personalized magnets, go back to the Design Space app, set your material, and then tap the Done option. Furthermore, change the pressure and load tools and materials into your Cricut product. Moreover, you can also make the necessary changes as per your preference before starting the craft machine.
Equally important, stick your printout on the Cricut cutting mat and then load it into the craft machine. With the finalization of the cutting process, unload your mat and start removing the extra material from the mat. However, you can also take the help of your Cricut spatula or weeding tool to remove the material.
Step 4: Stick Your Magnets
Summing up the how to make magnets with Cricut process, gently remove the final designs from the mat. Now, you need to ensure that all the designs are peeled out perfectly without any serious damage. Ensure that you put pressure while placing the customized magnets on your fridge. Apart from sticking this craft on your fridge, you can also give it as a birthday present to your friends or close ones.
Through the earlier-said steps, we've come up to the end of the tutorial of designing personalized magnetic for fridges. Moreover, the crafter can also design another project out of their cutting machine with the help of compatible supplies and proper knowledge about making the project.
Frequently Asked Questions
Can I Make Cricut Magnets Without a Printer?
No, it isn't going to be possible...
Read more -
How to Use Cricut Transfer Tape Easily: A Simple Guide
01/13/2024 at 09:08 • 0 comments![]()
Hey, crafting fam! If you are here to learn how to use Cricut transfer tape? Then, this blog is for you. Transfer tape is the best material for transferring any vinyl Cricut design space app to the desired surface. However, when I bought a Cricut for the first time, I was unaware of the fact that it is really an essential supply when making decals or stickers.
As days passed, I created hundreds of DIY projects using transfer tape, and the result was amazing! I understand that it can be a bit intimidating at first, but you will as you get used to it. You will definitely become a pro crafter.
Despite this, I am here to help you with this simple tutorial that will explain the basic steps of using transfer tape for Cricut projects. Through this blog, I am going to teach you about the importance of using transfer tape. Also, I will make a small project using transfer tape for your better understanding. Let’s start!
Step 1: Create a Design on Design Space
The first step in order to learn how to use Cricut transfer tape is to create a design. Hence, I will show the design that I created for this tutorial. Don’t worry; this is going to be a simple cursive text. No graphics or pictures to make this blog simpler for beginner crafters.
So, here I am adding a text, i.e., “Live Loved.”
Likewise, you can add your own picture or text as per your choice. After that, send the design to your cutting machine and let your Cricut cut it precisely.
Step 2: Weed Out Your Design
When my design was ready, I started weeding it using the weeding tool. I also recommend you use the weeding tool if you don’t want to mess up your design. Let me show you the picture of each step below:
Gently pull the extra vinyl using the weeder, as shown in the picture below.
Here’s your final design after the weeding. After weeding, the next step is to explore how to use Cricut transfer tape to transfer the design.
Step 3: Place the Cut Design on Transfer Tape
Let’s see how to use Cricut vinyl transfer tape. First of all, you have to cut a piece of transfer tape. Make sure you have cut the transfer tape larger than your design. After cutting the tape, you need to peel the backing layer off the tape and place its sticky side on the top of the vinyl design.
But what if your project is too large? Well, in that case, you should start peeling off the backing from the corner of the transfer tape and then place it on the edge of the vinyl. Then peel off the backing as you move ahead and do it until the whole vinyl is covered with your transfer tape.
This way, you can prevent bubble formation, and thus, you will get a desirable result.
You can also use a scraper, which is a Cricut tool that helps to adhere the vinyl sheet to the mat. So, it can also be used to adhere your tape to the vinyl sheet. Instead of using a scrapper, you can also use an old credit or debit card. Once the transfer tape is adhered to the vinyl, you can start peeling off the transfer tape; ensure your vinyl comes along with it.
Step 4: Apply Your Design on the Desired Surface
Now, line up the transfer tape and vinyl wherever you want it on your project. Here, I am going to use it on a pane of glass. I placed it in one corner and then gradually adhered it with the help of a scrapper and credit card.
So, use the same burnishing tool credit card and press the tape and vinyl onto the project. When it is done, finally, you can peel off the transfer tape backing to reveal the final design.
Till now, you might have understood how to use Cricut transfer tape. The easy-to-make simple project can help you practice your project yourself.
FAQs
Do I really need to use Cricut transfer tape?
When you are making a project with heat transfer vinyl (HTV), then, it is essential to use it for better results. Whenever you cut any design with the help of Cricut, the design will be on a backer. Hence, the main objective of using this tape is to transfer the cut design from...
Read more -
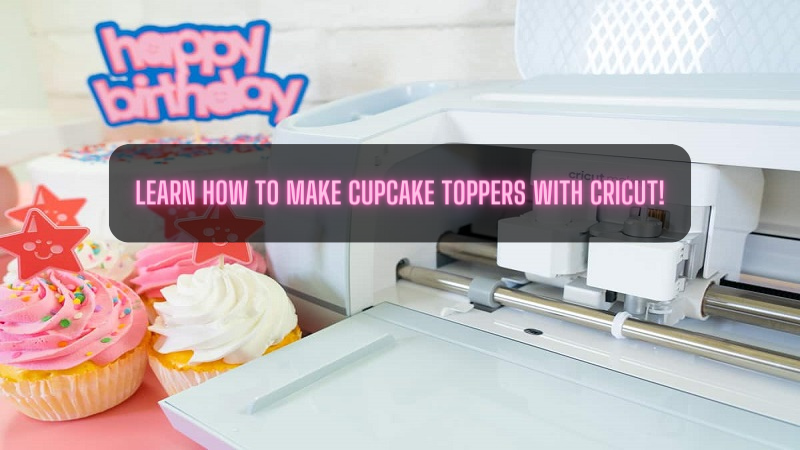
Learn How to Make Cupcake Toppers With Cricut!
09/18/2023 at 10:22 • 0 comments![]()
Finishing a meal with dessert gives the guests a different level of satisfaction. However, it becomes much more special when they are baked personally. If you love hosting parties for various occasions, then DIY decorations must be on your list. If you are fresher in the crafting industry, then coming across how to make cupcake toppers with Cricut is very important. Per the crafters, this is one of the simplest do-it-yourself crafts completed within a few minutes. In this post, you will learn how to create this custom project.
Step 1: Create a Design in the Cricut App
- Commence the process by going to Design Space software and opening a New Project.
- On the new canvas, press the Text tool and type down your respective text.
- Now, select the text and choose the font from the drop-box menu.
- Next, you need to ungroup the word and move each letter to make it touch with another one.
- After that, weld down the respective letters to give them a single shape.
- Followed by that, add an offset cut and do the necessary editing on the text.
- Once the modification completes, tick the Apply box and move further to the next step.
- It's completely up to you to change the design color to represent the paper choices. By choosing more than one color, the user won't get confused between the papers.
Step 2: Cutting Cupcake Toppers With the Machine
- Besides completing Step 1, select Make It and choose the mat option.
- Now, you must ensure the mat size is correct and compatible with Cricut.
- Under the Project Copies dialog box, increase the copies by pressing the downward arrow.
- Once the copies are final, tick the Apply button, and the design duplicates will be complete.
- In addition, choose the material and place it on the purchased cutting mat.
- After inserting the mat into the machine, press the Start button to begin cutting.
- Once the cutting process gets complete, start removing the glitter paper by peeling off the mat from the paper.
- Choose the same method and spatula tool to remove the rest of the letters from the mat.
- Take the scraper tool and remove any leftover paper from the used mat.
- Next, insert the second selected material and start the cutting process.
- Lastly, use a method to remove the paper from the LighGrip cutting mat.
Step 3: Forming Custom Cupcake Toppers
- Take the glue gun and fill it completely with strong adhesive glue to stick both the cardstock.
- After sticking the cardstock, let it dry and avoid flipping over the paper.
- Again apply hot glue in the middle of the paper and stick the skewers or toothpick in the center.
- On the other hand, you can also add a hot glue extra dot on the top of the stick.
- Following this, remove any hot glue strings within one go before it gets dried up.
- Let the glue dry up completely before placing it on the cupcake.
- Wait for a few minutes and place the prepared topper on the cupcake.
- Bravo! You have successfully created your customized cupcake topper.
To become an expert in creating this DIY project, every crafter must follow the same method very seriously. You shouldn't skip any of them; otherwise, you won't get the desired result.
Conclusion
In brief, to this blog, you must have learned how to make cupcake toppers with Cricut. It can be expected that each one of the users will follow all the steps mentioned in this process. Moreover, they must also hold all the supplies beside them during the decorative item designing process. It can be anticipated by the users that they will take this blog seriously and follow all the instructions mentioned in the earlier sections of the blog. In case you have any queries, then study the following FAQs.
FAQs
Which Cardstock Should I Use to Design Cupcake Topper?
Per the crafters, brand-smooth, solid cardstock is the best for the cupcake topper. However, you must choose the materials after confirming their thickness and quality. The thick or lightweight cardstock should be 65 lb & heavyweight cardstock...
Read more -
Introducing the Cricut EasyPress 3 and the Cricut Heat App
08/17/2023 at 06:59 • 0 comments![]()
It is an undeniable fact that crafting is fun. And when a compatible and excellent machine is by your side, all you can do is take your creative mind to the next level. Yes, with Cricut EasyPress 3 you can craft many iron-on projects. This machine provides the convenience of an iron you can use via the Cricut Heat app.
This Cricut machine acts as a great option in the craft room. It is an excellent device for heat-transfer projects with availability in two sizes, 9×9 inches, and 12×10 inches. Are you eager to know more about it? This write-up will cover the machine's overview and the compatible Cricut Heat app. Also, we will cover how EasyPress 3 differs from the heat press. Let's begin with the machine itself.
What is Cricut EasyPress 3?
Cricut has introduced this machine with the feature of a heat press. This hand-held heat press machine can adhere to several materials ranging from iron-on vinyl to sublimation transfers and Cricut infusible ink. You can use it as a crafter to create designs on t-shirts and other appearances.
Moreover, you can efficiently work on tote bags, pillowcases, and other awesome DIY projects. The machine works as a regular heat press. The simple controls and safety features make it easy for beginners and crafters and, in short, for everyone. It takes crafting to the next level with Cricut Heat. It is a new smartphone app to use the EasyPress 3 machine efficiently.
Cricut EasyPress 3 Machine's Anatomy
This machine is the same as those of its previous versions. You can see lots of controls from the left to right side. We have listed some of them below.
- Power button to turn on and off the machine.
- Temp is there to choose the temperature setting. It allows users to switch to different settings, i.e., Celsius and Fahrenheit.
- The timer is present to change the countdown timer.
- The display shows the timer counting down when you are using the machine.
- The play button is available in orange and green colors. Orange denotes the machine is still heating up, and the green says it's ready.
What is Cricut Heat App & How to Setup EasyPress 3 With it?
This Cricut app is a free smartphone app you can set up with your EasyPress machine. The app connects to the device with the help of Bluetooth connectivity. The app will take out all the guesses when you press the project you're creating. Users can easily set up the machine and the Cricut Heat app to get started with their projects.
Here are a few instructions that you can follow to set up your machine with the app. Ensure to read all the steps and follow them carefully.
- Initially, go to the Apple Store or Google Play Store.
- After that, download the Cricut Heat app and sign in to it.
- Now, unpack your machine and remove all the items from the box.
- Press the Power button and turn on your machine.
- In the later step, power on your device and keep it within 7 ft of the distance.
- Turn on your phone's Bluetooth, and the device will get connected automatically.
- Move to the app and select the Set Up option.
- InitiNow, select your device from the list of devices available.
- Click on Connect.
- The app will show connecting to EasyPress 3. It does this with a Bluetooth logo.
- After the connection, you can start a project with the machine.
How is Cricut EasyPress 3 Different from the Cricut Heat Press Machine?
Both EasyPress3 and heat press machines are heating tools from Cricut. Several features and functions make this super machine different from each other. Here are some of the pros of these two machines below.
Pros:
Here are some of the advantages of using this machine for a crafter.
- Different sizes are available.
- Small and easy to store.
- Easy to use with sublimation, HTV, and Infusible ink projects.
Cons:
Are you planning to use Cricut Heat Press for your next project? A few of the pros of this machine are:
- Can work without a mat.
- Great for running a business.
- It can get to a high temperature...
-
Cricut Explore Air 2: A Smart Machine for Making DIY Projects
08/04/2023 at 06:56 • 0 comments![]()
A Cricut machine is an electronic smart cutting machine that is designed to cut all sorts of different materials. The machine works similarly to a standard printer. The only difference is that Cricut doesn't print anything on paper but uses its blades to cut a design out of the paper. There are several Cricut machines with unique features and specifications. However, this blog will discuss Cricut's best-selling machine, i.e., Cricut Explore Air 2. We will talk about its features and specifications in more detail.
Features of Cricut Explore Air 2
We will begin with the specs, looks, and other features that made this machine. Let us begin.
Design
The Air 2 machine exposes the blades, and you can see how it moves, making it an attractive feature. It is where the user can see how the machine cuts the materials. It is a full-sized cutting machine that is perfect for any crafter. Also, the Cricut Explore Air 2 size is 5.91x22.17x7.01 inches and weighs close to 11 lbs.
Further, the machine can cut more than 100 materials, including paper, vinyl, cardstock, selected leather types, and fabric backed by a stabilizer. Moreover, it works with mats of 12 by 12 inches or 12 by 24 inches of mat size. So, the Explore Air 2 can easily be used to create full-size cuts on iron-on or large vinyl decals.
Double Speed
The Cricut Explore Air 2 is created to be faster and brings Fast mode. This machine becomes the perfect device to accomplish tasks for a crafter looking to work on complicated projects. Further, the double-speed mode is addictive; once you start using it, it will be difficult to cut to normal speed again.
Cutting Force
The cutting force of this machine is 350g, which makes it a stronger machine in its price range. Further, the machine with more cutting power means it can easily cut material. Along with its maximum cutting size of 11.5 by 23.5 inches. The Explore Air 2 can cut tougher and thicker materials like never before. Also, that is why it can cut upto 100 different materials.
Dual Carriage
The dual carriage is one of the attractive features of the Explore Air 2 machine. The two-carriage system means the machine can hold and use two tools simultaneously. So, if your projects contain drawing and cutting, this machine will do the dual task simultaneously.
Blades and Cutting Depth
The Air 2 can cut upto 2 mm thick material, which is the standard thickness. Further, the blade is made out of German carbide steel, which has high ultra resistance.
Connectivity
The Explore Air 2 machine comes with the ability to connect with computers and mobile phones. It can do that by using Bluetooth and USB cable. So, wireless connectivity helps to avoid extra wires, and your room will look more organized.
Pros and Cons of Cricut Explore Air 2
After briefly examining the machine's features, it is important to know the advantages and disadvantages of the Air 2.
Pros:
- The Air 2 machine can cut, write, foil, and even score on the materials.
- Further, the machine can cut more than 100 different materials. So, it allows you to work with any machine.
- Another attractive feature of the machine is its ability to connect wirelessly using Bluetooth.
- Also, with the fast mode, you can complete projects quickly.
- If you want to cut a print design, the Cricut Explore Air 2 machine can do that.
- Moreover, you will get free Design Space software to work with the machine.
Cons:
- The Explore Air 2 machine is not compatible with the blades of the Adaptive Tool system.
- Also, it requires a cutting mat since it cannot cut Smart materials, which can be cut without any mat.
- Further, the maximum cutting length that a machine can cut is 23 inches.
- If you are looking for a portable cutting machine, Explore Air 2 is not the one.
Conclusion
The Cricut Explore series machines are one of the best for beginners and experienced crafters. Especially the Cricut Explore Air 2 machine is a great machine that can cut at twice the speed...
Read more -
7 Best Cricut Blades for Maker Available in the Market
08/03/2023 at 11:50 • 0 comments![]()
Have you ever been concerned about whether Cricut Blades for Maker will cooperate with the cutting machine? Or are you still on the run to determine which blade will support the material? Nowadays, Cricut is one of the leading brands in creating crafts and projects, encouraging the DIYers to improve their hobbies & skills.
With this electric cutting machine, the user can confidently cut down most of the stuff. Other than that, it also gives finishing touches that make the project look much better than expected. Inside this blog, you'll go into depth and collect details about different blades for the Maker model.
1. Premium Fine-Point Replacement Blades (10 ct)
Inside the catalog of Cricut Blades for Maker, it holds out against wear and breakage for longer life. Earlier, this point blade was called the German Carbide Premium Blade. Moreover, it allows the tool to live longer, possibly creating many more projects even after hours of cutting. The validity of one of these blades for the Maker model fully depends upon the material used.
2. Deep Point-Replacement Blades (2 ct)
Furthermore, with its steeper blade angle (60 degrees vs. 45 degrees), it looks less complicated to slice through the thicker materials. It is specially constructed to create wall calendars, rubber stamps, magnets, and many more. Apart from that, this tool can cut upto 1.5 mm thick material and requires its Housing which is sold separately.
3. Perforation Blade, Basic
Also, involve the Perforation blade name inside the list of blades for Cricut Maker. By assigning the duty to this tool, you'll immediately get smooth tears with precise cuts on different crafts. Each spaced line permits cleaning, even tearing, without folding beforehand. You can expand the Cricut product tool by including various QuickSwap tips. Additionally, it is perfect for tear-out booklet pages, raffle tickets, homemade journals, and many more.
4. Wavy Blade
In addition, get a decorative edge in half the time by dragging the blade with gently curving cuts for a wide range of projects. Additionally, with Cricut blades for Maker, you can add a whimsical wavy edge to any design. After that, just command your machine to "Go," and it'll start completing the rest of the task. On the contrary, only the tip is included and buy the Housing individually.
5. Knife Blade + Drive Housing
With this smart cutting machine's assistance, DIYers can build up their creative horizon on thicker materials. Besides that, its blade can cut deeper and more precisely with its sharp edges. In addition, it is one of the perfect choices for creating extra dimension projects and requires Bluetooth facility. Lastly, the projects aren't compatible with iOS/Android devices.
6. Bonded-Fabric Replacement Blade
On the other hand, you can pair up this replacement blade with the Bonded-Fabric blade housing. This accessory is specially created to cut down fabrics to keep them sharp and on point. Moreover, these Cricut blades for Maker are made out of Premium German Carbide steel. Intending to get the expected, you need to change the blade & Housing regularly before it starts getting worn out.
7. Rotary Blade + Drive Housing
In brief, you can quickly and easily cut beautiful and demanding designs for different sewing projects. This blade can handle anything covering from silk, cotton, or denim to canvas and burlap. The blade can also cut the softest material, such as cotton & tissue paper. Apart from that, one can choose any one of the sewing projects from the library and use it to make and cut the pieces.
Frequently Asked Questions
Are Cricut Blades expensive?
Yes, Cricut blades for Maker are quite expensive compared to other models' blades. The price of the Knife blade + Drive Housing is $45.99. Following this, an Engraving Tip QuickSwap Housing is $44.99. Apart from that, the Fine-Point Blade + Housing has a price of $34.99. A set of 10 Fine Point Replacement...
Read more -
An Ultimate Guide for Cricut Setup on Mac
08/01/2023 at 06:17 • 0 comments![]()
The Cricut machine, a favorite of crafters and designers, is a smart cutting device capable of handling a variety of materials. Explore the process of setting up your Cricut machine with a Mac computer. Learn how to navigate cricut.com setup Mac, connecting the machine via wireless Bluetooth and a USB cable for smooth DIY crafting projects. Get ready to start on your creative journey!
Connecting the Cricut Machine to Mac via Bluetooth
A Cricut device comes with a built-in Bluetooth adapter. And by using Bluetooth, you will be able to pair it with a Mac. Let us know the steps involved in this process.
- The first step is to check if the Cricut machine is on and then keep it between a distance of 10-15 ft from the Mac pc.
- After switching on the computer, you need to open the Apple Menu.
- Now, from the Menu, go to the System Preferences.
- Once the preferences window opens, you must look for a Bluetooth option.
- Here, ensure that the Apple computer's Bluetooth is ON.
- After that, choose the option that says Select your Cricut machine from the list of available devices.
- Now, your Cricut machine is paired with your Mac computer.
- Finally, open the Design Space, and it should show the machine is connected.
Connecting the Cricut Machine to Mac Using a USB Cable
You can use a USB cable if Bluetooth does not support your computer or you want a more stable connection. The cable is included with the machine at the time of purchase.
- First, connect the USB end of the cable to your Mac computer and the other to the Cricut machine.
- You will find the port at the back of the Cricut machine.
- Now, connect the device to the power supply.
- Once the device is on, you will see that the white light is lit up.
- Finally, after you open the Design Space, it should show that the machine is connected.
Downloading and Installing Cricut Design Space on Mac
After connecting the machine, you must visit cricut.com setup Mac, and download the Design Space. Let us see how to download and install it.
- First, you need to open the Safari browser to download the setup.
- Next, type design.cricut.com in the search bar and press Enter.
- Now, the browser will open the Cricut official site from where you can download the setup.
- Here, select the Download option.
- Once the download begins, the screen might look different.
- After downloading the file, open the downloads folder and select the .dmg file.
- Next, you need to drag the Cricut icon to the Applications folder icon. This step begins the installation of the Design Space.
- Once the software is installed, its icon will be automatically added to Mac's Applications folder.
- Now, you need to launch the Design Space.
- Once the software opens, it will ask you to log in with your Cricut ID, or if it is your first time, you need to create one.
- To a new account of Cricut, select the option Create a Cricut ID. Later, follow the instructions and make your account.
Conclusion
A Cricut machine can be connected to your Mac computer using wireless and USB cables. Also, it needs Design Space which you can download by visiting cricut.com setup Mac. It is important to download the software as it helps you to communicate with the machine. Further, the setup and connection process is easy to follow. That's why Cricut machines are also user-friendly.
FAQs
How to install Design Space on iOS?
Cricut allows you to use the machine even from an iOS device. You must first install the Design Space app on your iPhone to use the machine. First, go to the App Store, and search for Design Space. Now, install the app on your iPhone by typing your iTunes password. After installing the app, open it and sign in with your Cricut ID. Finally, you will be prompted to design and work with the machine.
What is Offline Design Space?
Cricut machines can be used even without having an internet connection. You can design and cut projects offline. To use the Design Space offline, you must first download...
Read more -
A Full Guide for Cricut New Machine Setup on Windows
07/28/2023 at 06:00 • 0 comments![]()
Cricut machines are versatile smart cutting tools loved by crafters and designers for creative DIY projects. With various models to choose from, users can find the perfect fit for their needs. Cricut's official software, Design Space, helps in designing and personalizing projects. The Cricut machine connects easily to desktop computers and mobile devices via wireless Bluetooth and a USB cable. If you recently bought a Cricut machine, this blog will guide you through the setup process step-by-step. So, let’s get started.
Cricut New Machine Setup on Windows via Bluetooth
Your new Cricut device will have a built-in Bluetooth adapter. By using Bluetooth, you will be able to pair it with Windows. Let us pair it to a PC wirelessly.
- The first step is to ensure that your Cricut machine is turned on and within a distance of 10-15 ft from the computer.
- Next, from your Windows PC, open the computer's Settings.
- Now, in the Settings window, select the Devices options.
- Further, go to the Bluetooth & other devices option in the Devices window.
- Next, make sure that the computer's Bluetooth settings are ON. If not, then turn it ON.
- You must add a new Bluetooth device by selecting the Add Bluetooth or other device option.
- Later, the computer will ask which type of device you want to add. Here select Bluetooth.
- Now, the computer will search for nearby Bluetooth devices.
- Once your new Cricut machine is shown, choose the device to pair it with the computer.
- Finally, you can open the Design Space and set up the new product.
Cricut New Machine Setup on Windows Using a USB Cable
Sometimes Bluetooth may not work on your computer, or if your system is not supported with Bluetooth. In these cases, you can connect your Cricut machine using a USB cable. Let us see the Cricut machine setup using a USB cable.
- You don't need to buy a USB cable separately, as it comes with the machine.
- Now, using the cable, you need to connect the USB end of the cable to your computer's port.
- Next, connect the other end of the USB cable to your machine. The USB port will be at the back of your new Cricut device.
- Further, make sure that the machine is turned on. You will see that the device's power button is lit and white in color.
- Your Cricut machine is now connected to the computer via a USB cable.
- Afterward, you can visit the Design Space and select Cricut new machine setup.
Cricut Design Space Download on Windows Computers
You need to download and install the Design Space to complete the setup of the new Cricut machine. Let us know how to do it.
- First, open the Internet browser and go to design.cricut.com.
- Once you open the Cricut website, select the Download option.
- The Design Space setup will start downloading, and your Windows screen will change.
- Later, after the download is complete, you must select the setup file from the download folder.
- Sometimes, a window will open asking whether you trust the application. Here, select the option to trust the software.
- Now, the setup window will display the installation progress.
- Once the Design Space is installed on your PC, you must open it.
- After that, you must Sign in with your Cricut ID and Password.
- If it is your first time using the Cricut machine, then you need to select Cricut a Cricut ID option.
Conclusion
This blog of a Cricut new machine setup includes pairing it with a computer, either by Bluetooth or USB cable, and later, downloading and installing the Design Space. The steps are quick and easy to follow. After setting up, you will be able to work with the machine and create any crafting projects. Plus, the wireless connectivity allows users to work with the device freely.
FAQs
Why is my Cricut machine not connecting to Bluetooth?
If your Cricut device is not connecting to Bluetooth, your system might have internal errors. To fix the issue, first, ensure that both the machine and computer are within the connecting range. Next, check if the Bluetooth...
Read more -
How to Etch Glass With Cricut? [A Comprehensive Guide]
07/26/2023 at 12:07 • 0 comments![]()
Cricut machines are known for their ability to cut, write, score, and various other functions. Among all the functions, Etching is a fun way of decorating glassware. Process of permanently frosting the outer layer of glass. It is like using acid or abrasive material to scratch the design on the surface of the glass. The best way to Etch the glass is by using glass Etching cream. Now, in this blog, we will look at how to Etch glass with Cricut in a detailed manner so that you can decorate your wine glass, glass tumblers, and other glass items.
What are the Supplies You Need for Glass Etching?
The materials and tools you need to have for Etching the glass are as follows.
- First, you need to have an Etching cream.
- You need a Cricut machine to design and edit the image; you can use Cricut Maker, Explore, or Joy.
- To cut the design on the material, you need Vinyl. You can choose either Permanent Vinyl or Stencil vinyl.
- The other tools you need are Transfer Tape, Scraper or Burning tool, and Masking Tape. Also, to keep your hands safe, wear a pair of Gloves. You also need a Small paintbrush.
How to Make Etching on a Glass Surface?
In this segment, we will look at the instructions for Glass Etching. We will see how to design and cut and how to apply the Etching cream one by one.
- The first step is preparing the stencil image. So, for this, you need to select the image you like to Etch. If you don’t have a designed image, you can always upload the image or search on Cricut Access.
- If you want to design your stencil image, you can create some letters, a shape, or a combination of both.
- After finalizing the design, you can cut the design on Vinyl. You need to place the Vinyl on top of a LightGrip or StandardGrip cutting mat.
- Once you place the material on the mat, you must load it by pressing the up and down arrow; it will flash.
- Now, go to your design on the Design Space and select the Make It option.
- From the next prepared screen, you need to check whether the design looks correct. If it does, then click on Continue.
- After that, select the material as Vinyl, check the Fine-Point Blade, and start the cut by pressing Play.
- Once the machine cuts the design on the Vinyl, you need to remove the Vinyl from the mat. For that, place the mat face down on a clean work and then peel the mat instead of Vinyl.
- Using the Weeding tool, you need to remove all the design areas you want to Etch on the glass.
How to Prepare the Glass and Apply Vinyl for Etching?
You must prepare the glass surface before you Etch its design. It is important to clean the glass surface of any dust or marks as otherwise. It can hinder the Etching cream from Etching evenly.
- You need to clean the surface and remove dust, fingerprints, dirt, or oil remains. For proper cleaning, you can use either glass cleaner or alcohol.
- Next, you need to attach the vinyl design onto the Transfer Tape using a piece of Transfer Tape.
- Now, carefully place the transfer tape with the design onto the surface of the glass.
- Next, using a Cricut Scraper tool, you can brush the tape so that the Vinyl adheres to the surface. It is important as this process eliminates air bubbles or wrinkles.
- After that, with your gloves on, start gently coating the Etching cream. First, apply a thin layer across the entire area, then add more cream.
- In this process, you mustn’t apply the cream over to the edges of the Vinyl as it will leave a mark permanently.
- After evenly applying the cream to the design, you need to let it aside for a few minutes.
- Remove the Etching cream from a small area near the corner, and wipe it off using an alcohol swab or damp cloth.
- If the glass surface looks like an even Etch, you can start removing the Etching cream by gently rinsing it.
- Finally, after removing the cream, remove the Vinyl from the glass once it is dry. So, in the end, you will have learned how to Etch glass with Cricut.
Conclusion
To sum up, Etching is making...
Read more -
What is Print and Cut Cricut, and How to Use it?
07/18/2023 at 12:06 • 0 comments![]()
Cricut Maker is well-known for their ability to cut a range of materials upto 300+. The Cricut offers an interface software called Cricut Design Space through which you can design and send instructions to the machine for cutting. Further, the machine and the software can cut printed material as a pair. The special feature is called 'Print Then Cut.' It means you can first print and later cut the material. Learning how to use this feature can make a huge difference in your ability to create crafts using Cricut machines. This blog will help you understand everything about Print and Cut Cricut.
What is Print Then Cut?
The Print Then Cut feature helps you cut the materials with designs printed on them. It allows you to print designs from your regular printer and use your Cricut to cut them. Allowing you to perfect shapes every time. Whether you want to design your stickers, decals, or cutouts is helpful. It is helpful in so many ways, such as:
- Suppose you want to avoid cutting various details from different vinyl colors and layer them together. Instead, all you have to do is flatten the image into a single layer of material and then print onto a printable vinyl and cut it.
- Or, if you don't want to cut and layer many layers of iron-on, you need to print your design on a printable iron-on. And cut it via machine.
- Or, for cutting stickers, you need to print all the materials onto sticker paper and cut them all at once.
What Materials Will You Need to Use the Print and Cut Feature?
There are a lot of different materials you need to use this Print Then Cut feature.
- First, you need a Cricut Maker or Explore because these are the only machines that support Print Then Cut.
- The accessories you need are Premium Fine-Point Blade.
- StandardGrip Cutting Mat.
- Home Printer, either Inkjet or laser printer.
- Printable Materials are Basic Printer Paper, Photo papers, Cardstock, scrapbook, sticker paper, printable vinyl, or iron-on.
- Finally, you need a weeding tool.
How to Use the Print and Cut Cricut Feature?
Let us see if you can print and then cut your design.
- The first thing you need to do is upload your image to Canvas. To upload your image, log in to the Design Space and select the upload option.
- Once the image is uploaded, you need to decide if the image is Simple, Moderate, or Complex. If you want the best print quality, you need to select Complex.
- Next, you will be given the option to Remove the Background. You can remove the background depending on your project.
- Further, you must select Print Then Cut, and upload the design.
- Moving to the next stage is sending your design to the printer. For this, you need to click Send To Printer and wait for the printer to print out the design.
- Once you have your design on the paper, you must line it up on a standard grip mat and feed it into your Cricut machine.
- The final stage is cutting the design. You need to upload the same design and arrange it on your canvas. Once the design is in place, you need to highlight them and select the Attach button to stop them from moving around.
- After highlighting the design, you need to check if your images are set to Print and Cut Cricut. Otherwise, you will need to select the flatten button again.
- Finally, the last step is selecting Make It. Now, you will notice a Black Box around your image. Now, the software uses sensor marking so that machine knows where to cut.
Conclusion
The Print and Cut Cricut feature is unique to Maker or Explore machines. This feature's specialty is that it prints the designs from a standard printer, and then the Cricut machine cuts it. It is best to use if you have complex, multilayered designs to print, as it takes longer time than just simple print and cut options. So, in this blog, you will learn how to use it and set the images on your Design Space.
FAQs
1. How to calibrate the Cricut machine for Print then Cut?
The Cricut machines are pre-calibrated, but sometimes...
Read more

Design Cricut Com's pages
The Cricut machine offers to explore tech possibilities for you to create and customize impressive designs digitally.