Close
0%
0%

VegeTerrium

A decorative indoor garden/greenhouse

Similar projects worth following
This is a small (30cm * 30cm * 40cm) terrarium I am building to have an appealing place to grow small plants, the end goal would be to have automatic lighting, watering and heating. The frame will be made of a nice clear acrylic. The whole thing will be build without many special tools because I don't have access to a garage with electricity

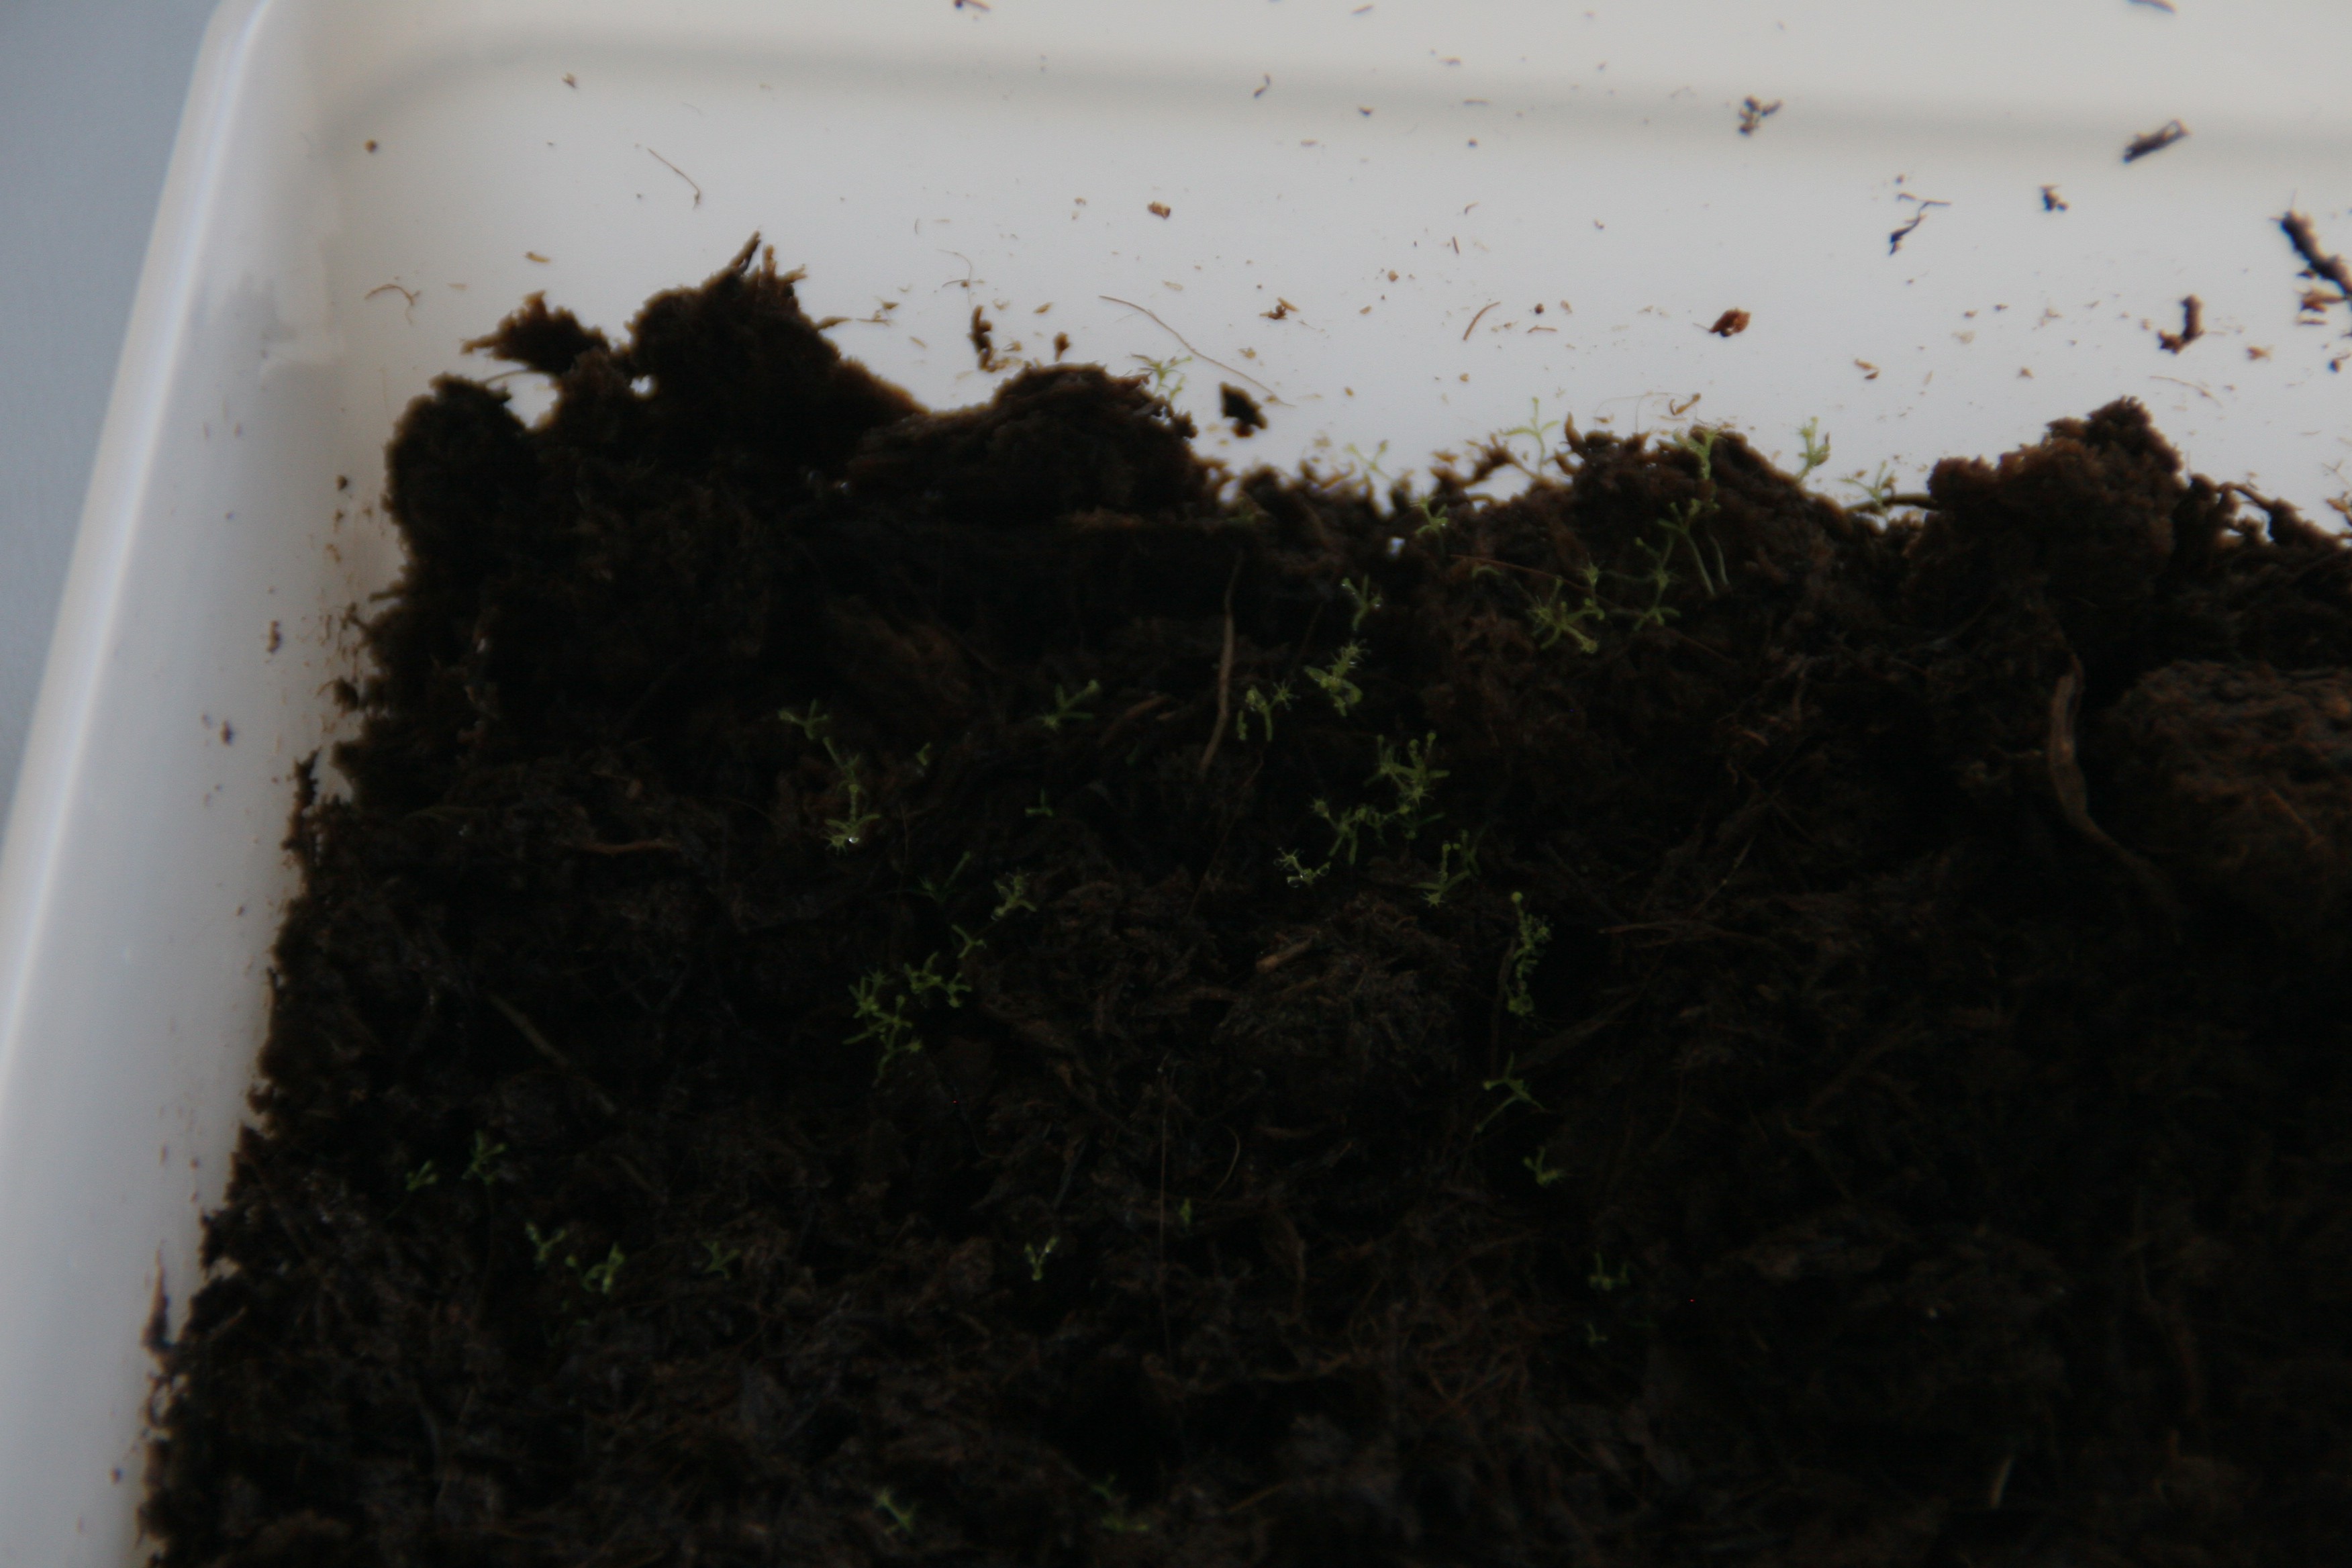
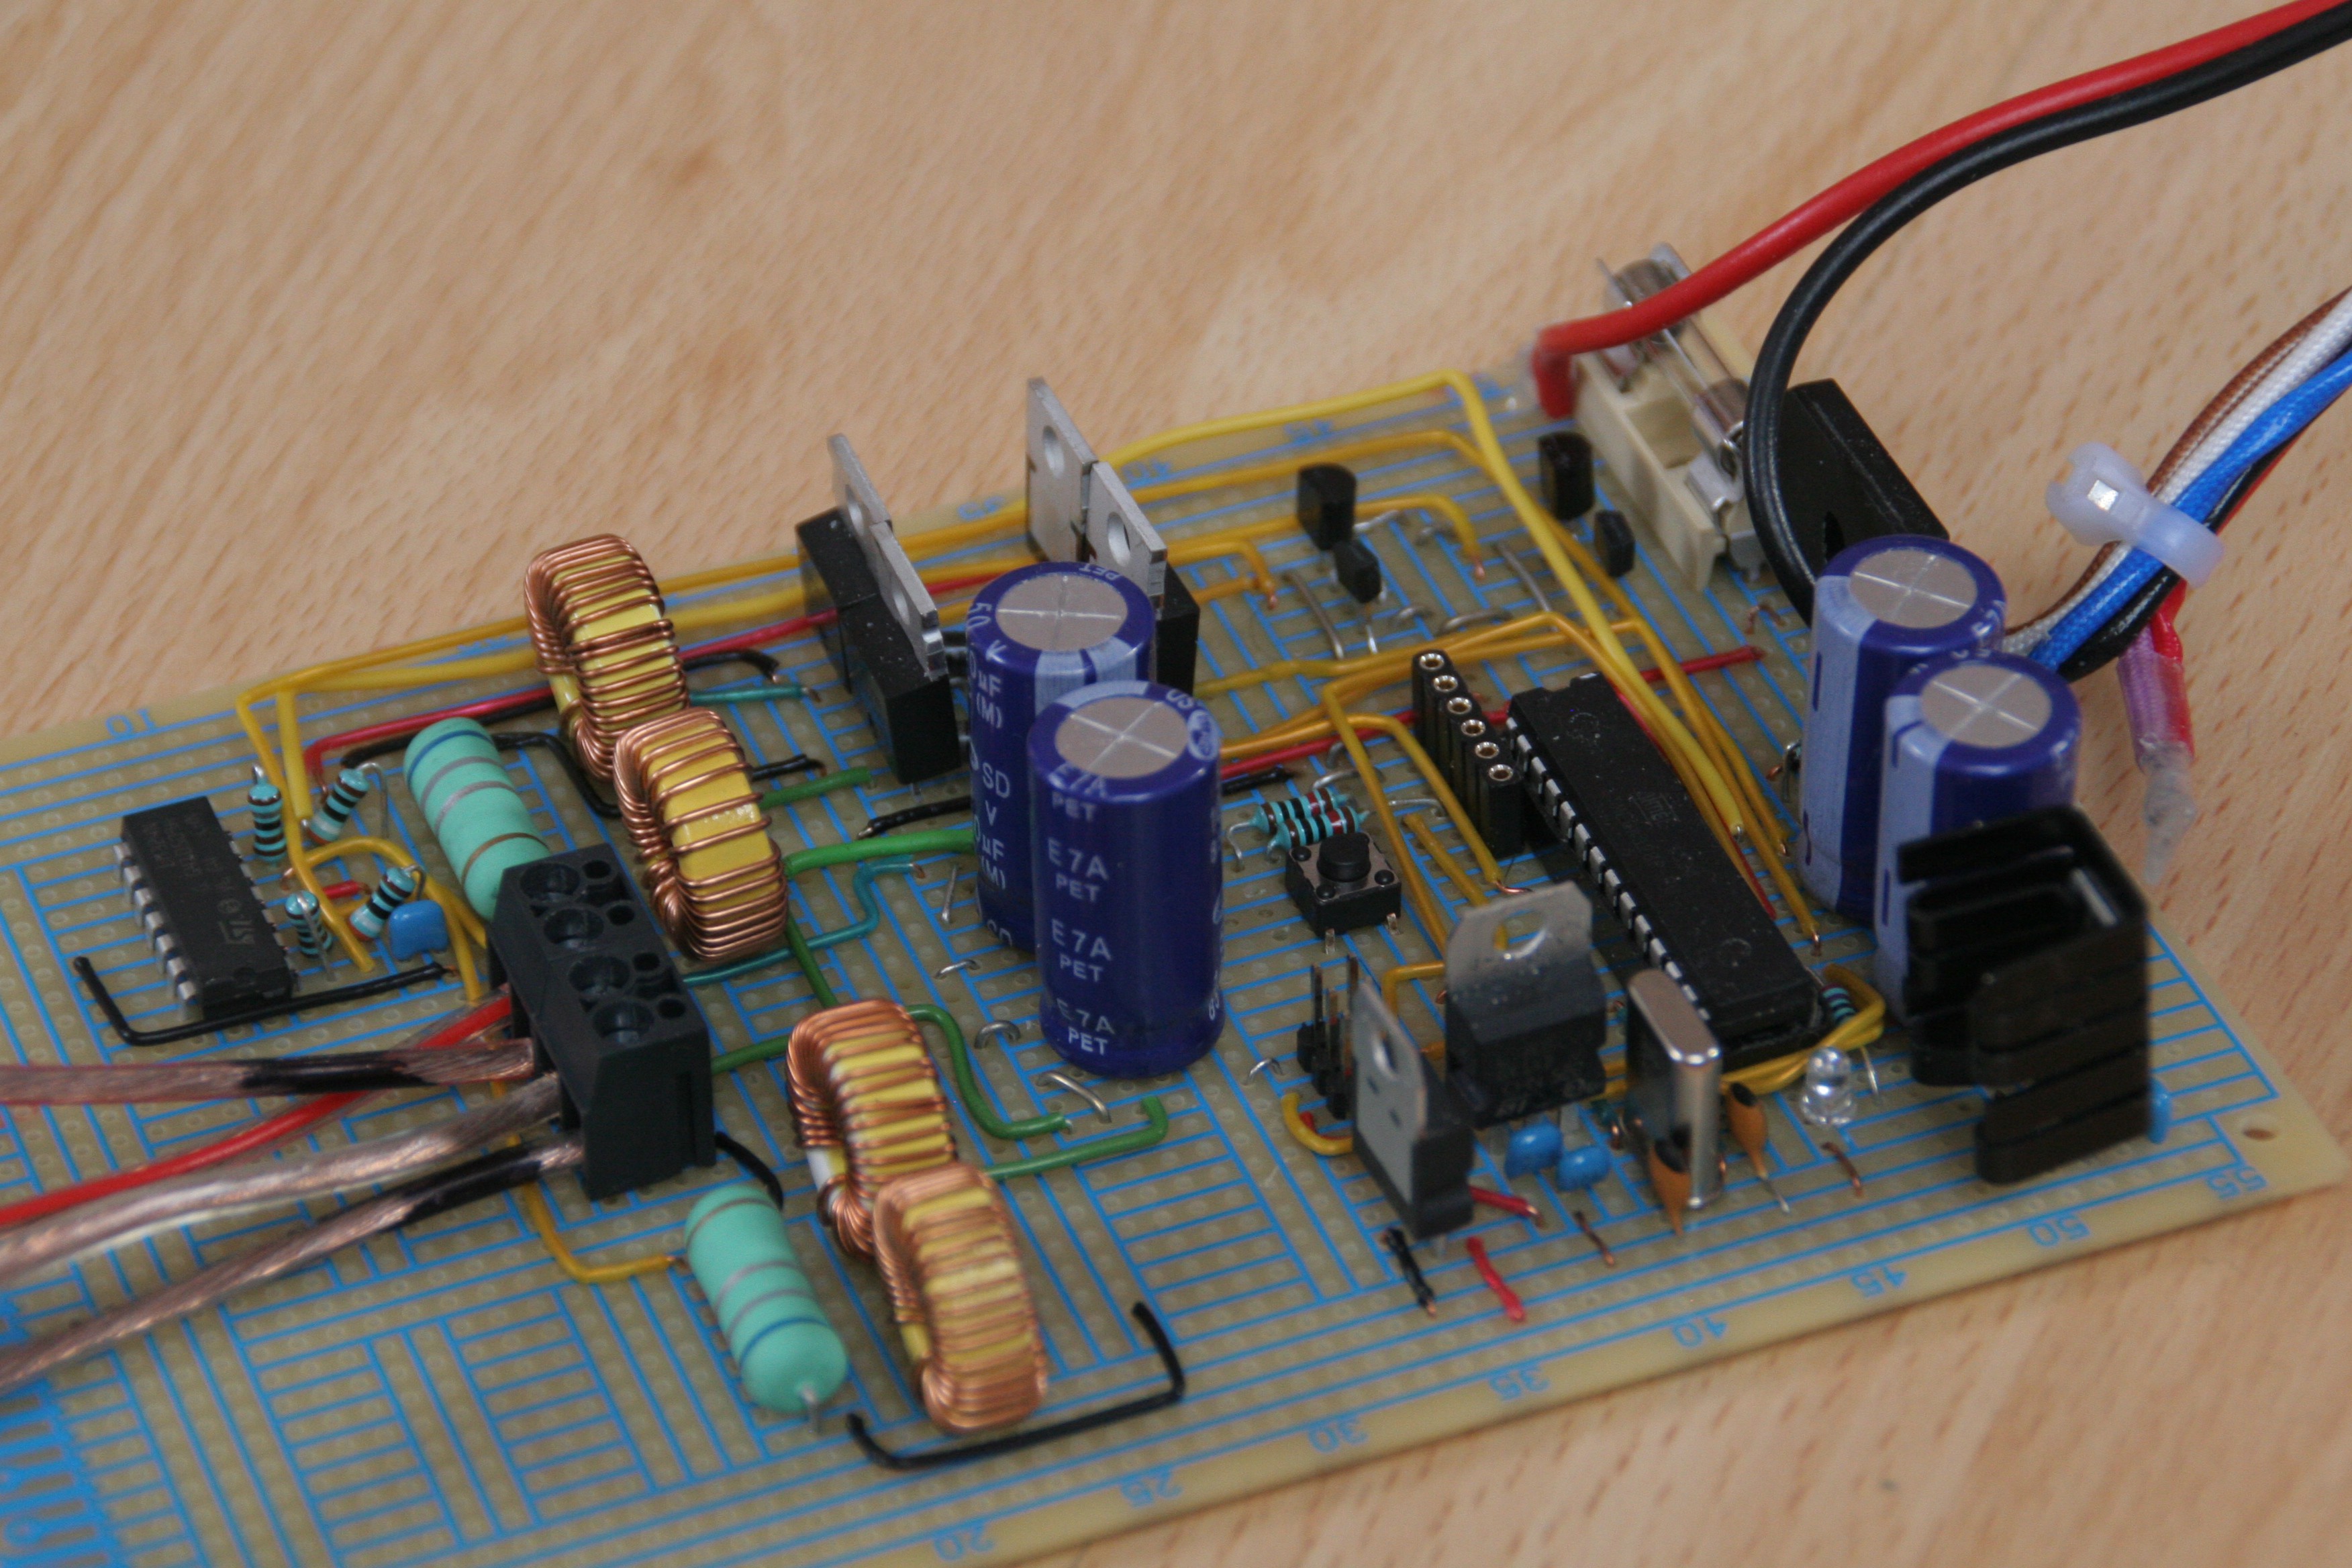
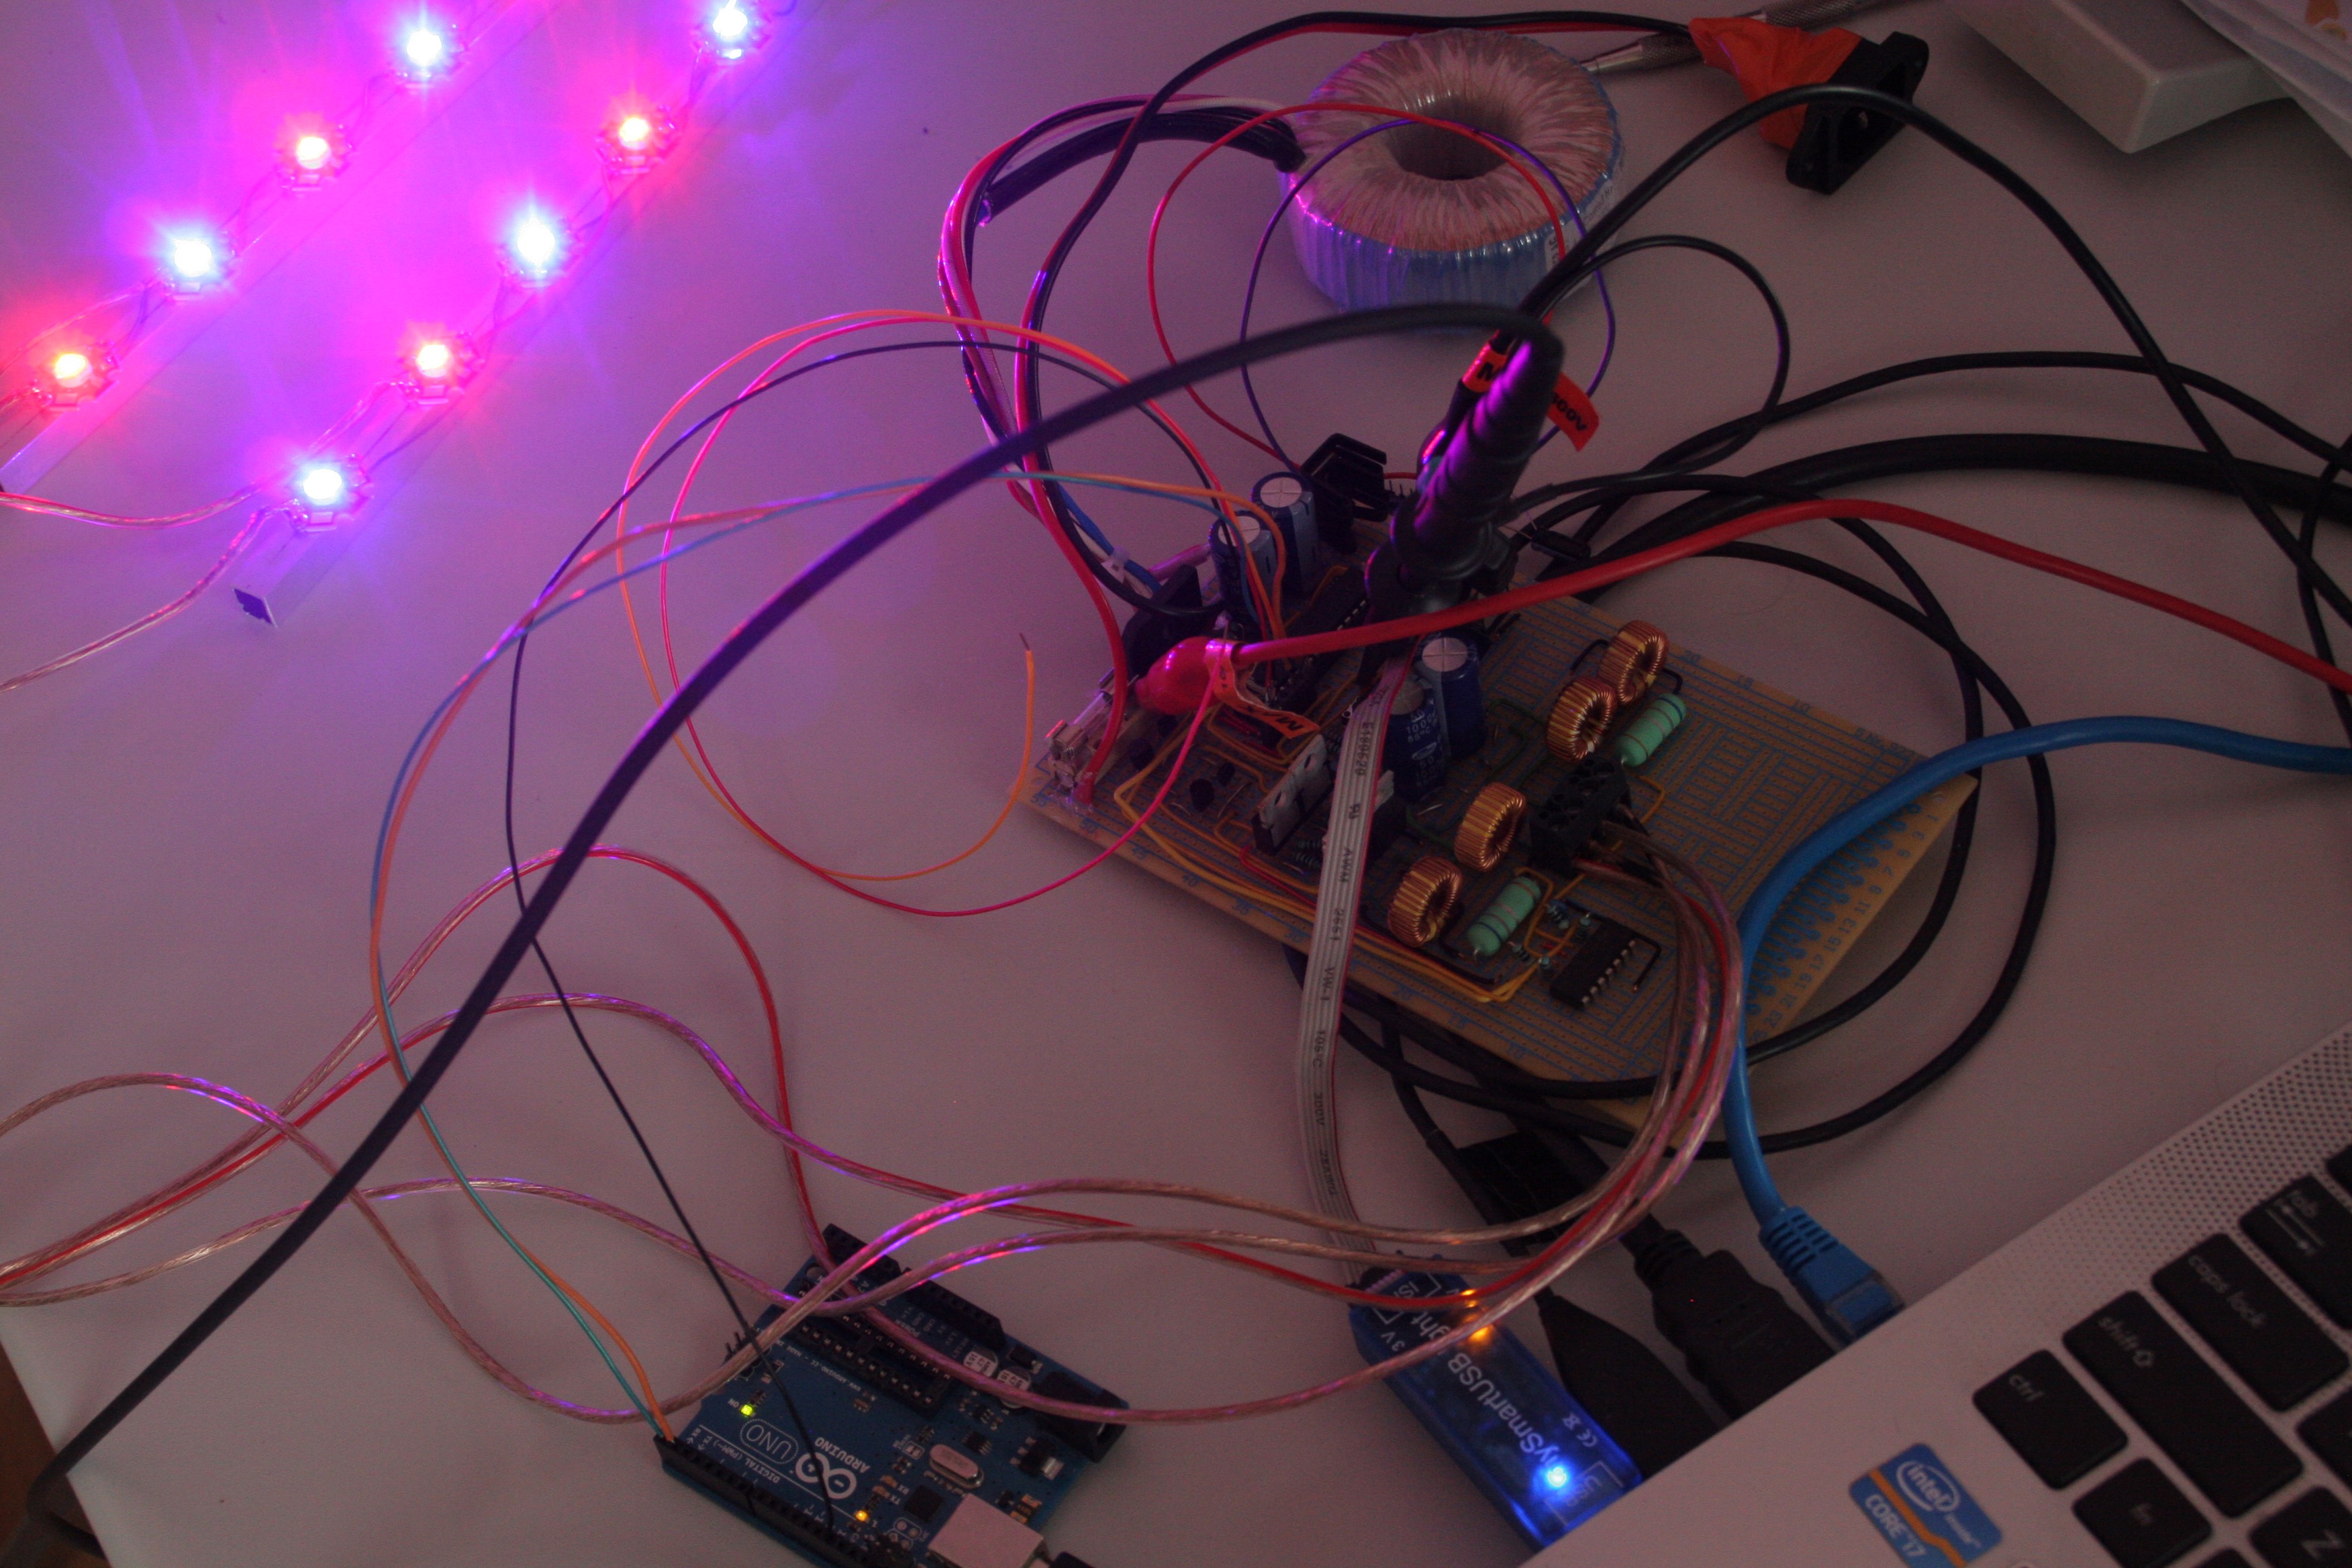
Currently the Vegeterrium (a combination of vegetation and terrerium) is only capable of simulating a day and night cycle hardware-wise. This is accomplished through a control board involving an ATMEGA328, RTC and self built current drivers to power red and blue 15W LED chains (30W total). It is powered by a simple 24V power supply over an ATX cable. The next stage will involve mounting the electronics in the acryllic enclosure and sourcing some plants to grow. If you have any suggestions for small and interesting plants please let me know!

sch - 914.06 kB - 07/26/2016 at 13:53

Download

FinishedBoard.JPG

This is the final board for me to program, unless I decide to change anything else

JPEG Image - 3.19 MB - 07/26/2016 at 10:39

Preview
Download

controlBoard.pdf

A Schematic!

Adobe Portable Document Format - 27.45 kB - 07/26/2016 at 10:37

Preview
Download

  • 2 × 6mm acrylic panel, 288mm x 388mm Side panel for the frame
  • 2 × 6mm acrylic panel, 300mm x 388mm Front and back panel for frame
  • 2 × 6mm acrylic panel, 300mm x 300m Top and bottom pieces for the enclosure
  • 1 × 10mm acrylic panel, 288mm x 288mm Divider to separate electronics and plants
  • 1 × 10mm x 10mm square aluminum tube Used as a cable channel for the LEDs

View all 15 components

  • Finally: Plants Are Growing!

    Leon03/04/2017 at 10:33 0 comments

    It's been a long time since my last update on the VegeTerrium project, I've been delaying the actual planting because I was unsure about which plants and substrate are suitable for the enviroment I created. Something that I discovered quickly after starting to search for plants, is that most of them require a hibernation period; If I were to ignore it, the plants would die. The alternative was to search for tropical species, some of which can tolerate growing conditions year round. I discovered that most carnivorous plants are tolerant to this enviroment and decided to start with the sundew, a.k.a Drosera Capensis.

    As a substrate, I am using peat moss, even though I was strongly against it (peat moss is a very unsustainable substrate). At the gardening store I was persuaded to use peat instead of coconut fibers, because the fibers would apparently not provide a good substrate (though I still have my doubts). These plants have been growing for a few weeks now, but there was an accidental dry period temporarily stunting their growth. Already, small mold spores can be seen because of the high humidity. In another few weeks/ a month I will adding earth to the vegeterrium and moving the healthiest plants over. My next task is getting some new plants, and some protein for the carnivores!

  • Parts Mounted

    Leon08/02/2016 at 08:40 0 comments

    After working out some last bugs and testing the software, I decided to finalize the hardware and mount it inside my enclosure. I wanted all of the growing area to be isolated, so I carefully and painstakingly drilled and cut every single screw hole to the perfect depth. Except one, the second to last screw had to go through the acryllic sheet! I also figured that the power supply was going to be too loud and annoy the heck out of everyone in the vincinity, so I mounted it on a vibration dampening foam sheet. Or you might know it as dirt cheap crafting foam... As I was almost finished, I managed to burn out my LED without a replacement. It gets even better, because the original seller also stopped offering them on Amazon! After some intense searching I came up with some LED's which look the same, but if it comes from China that means as good as nothing...
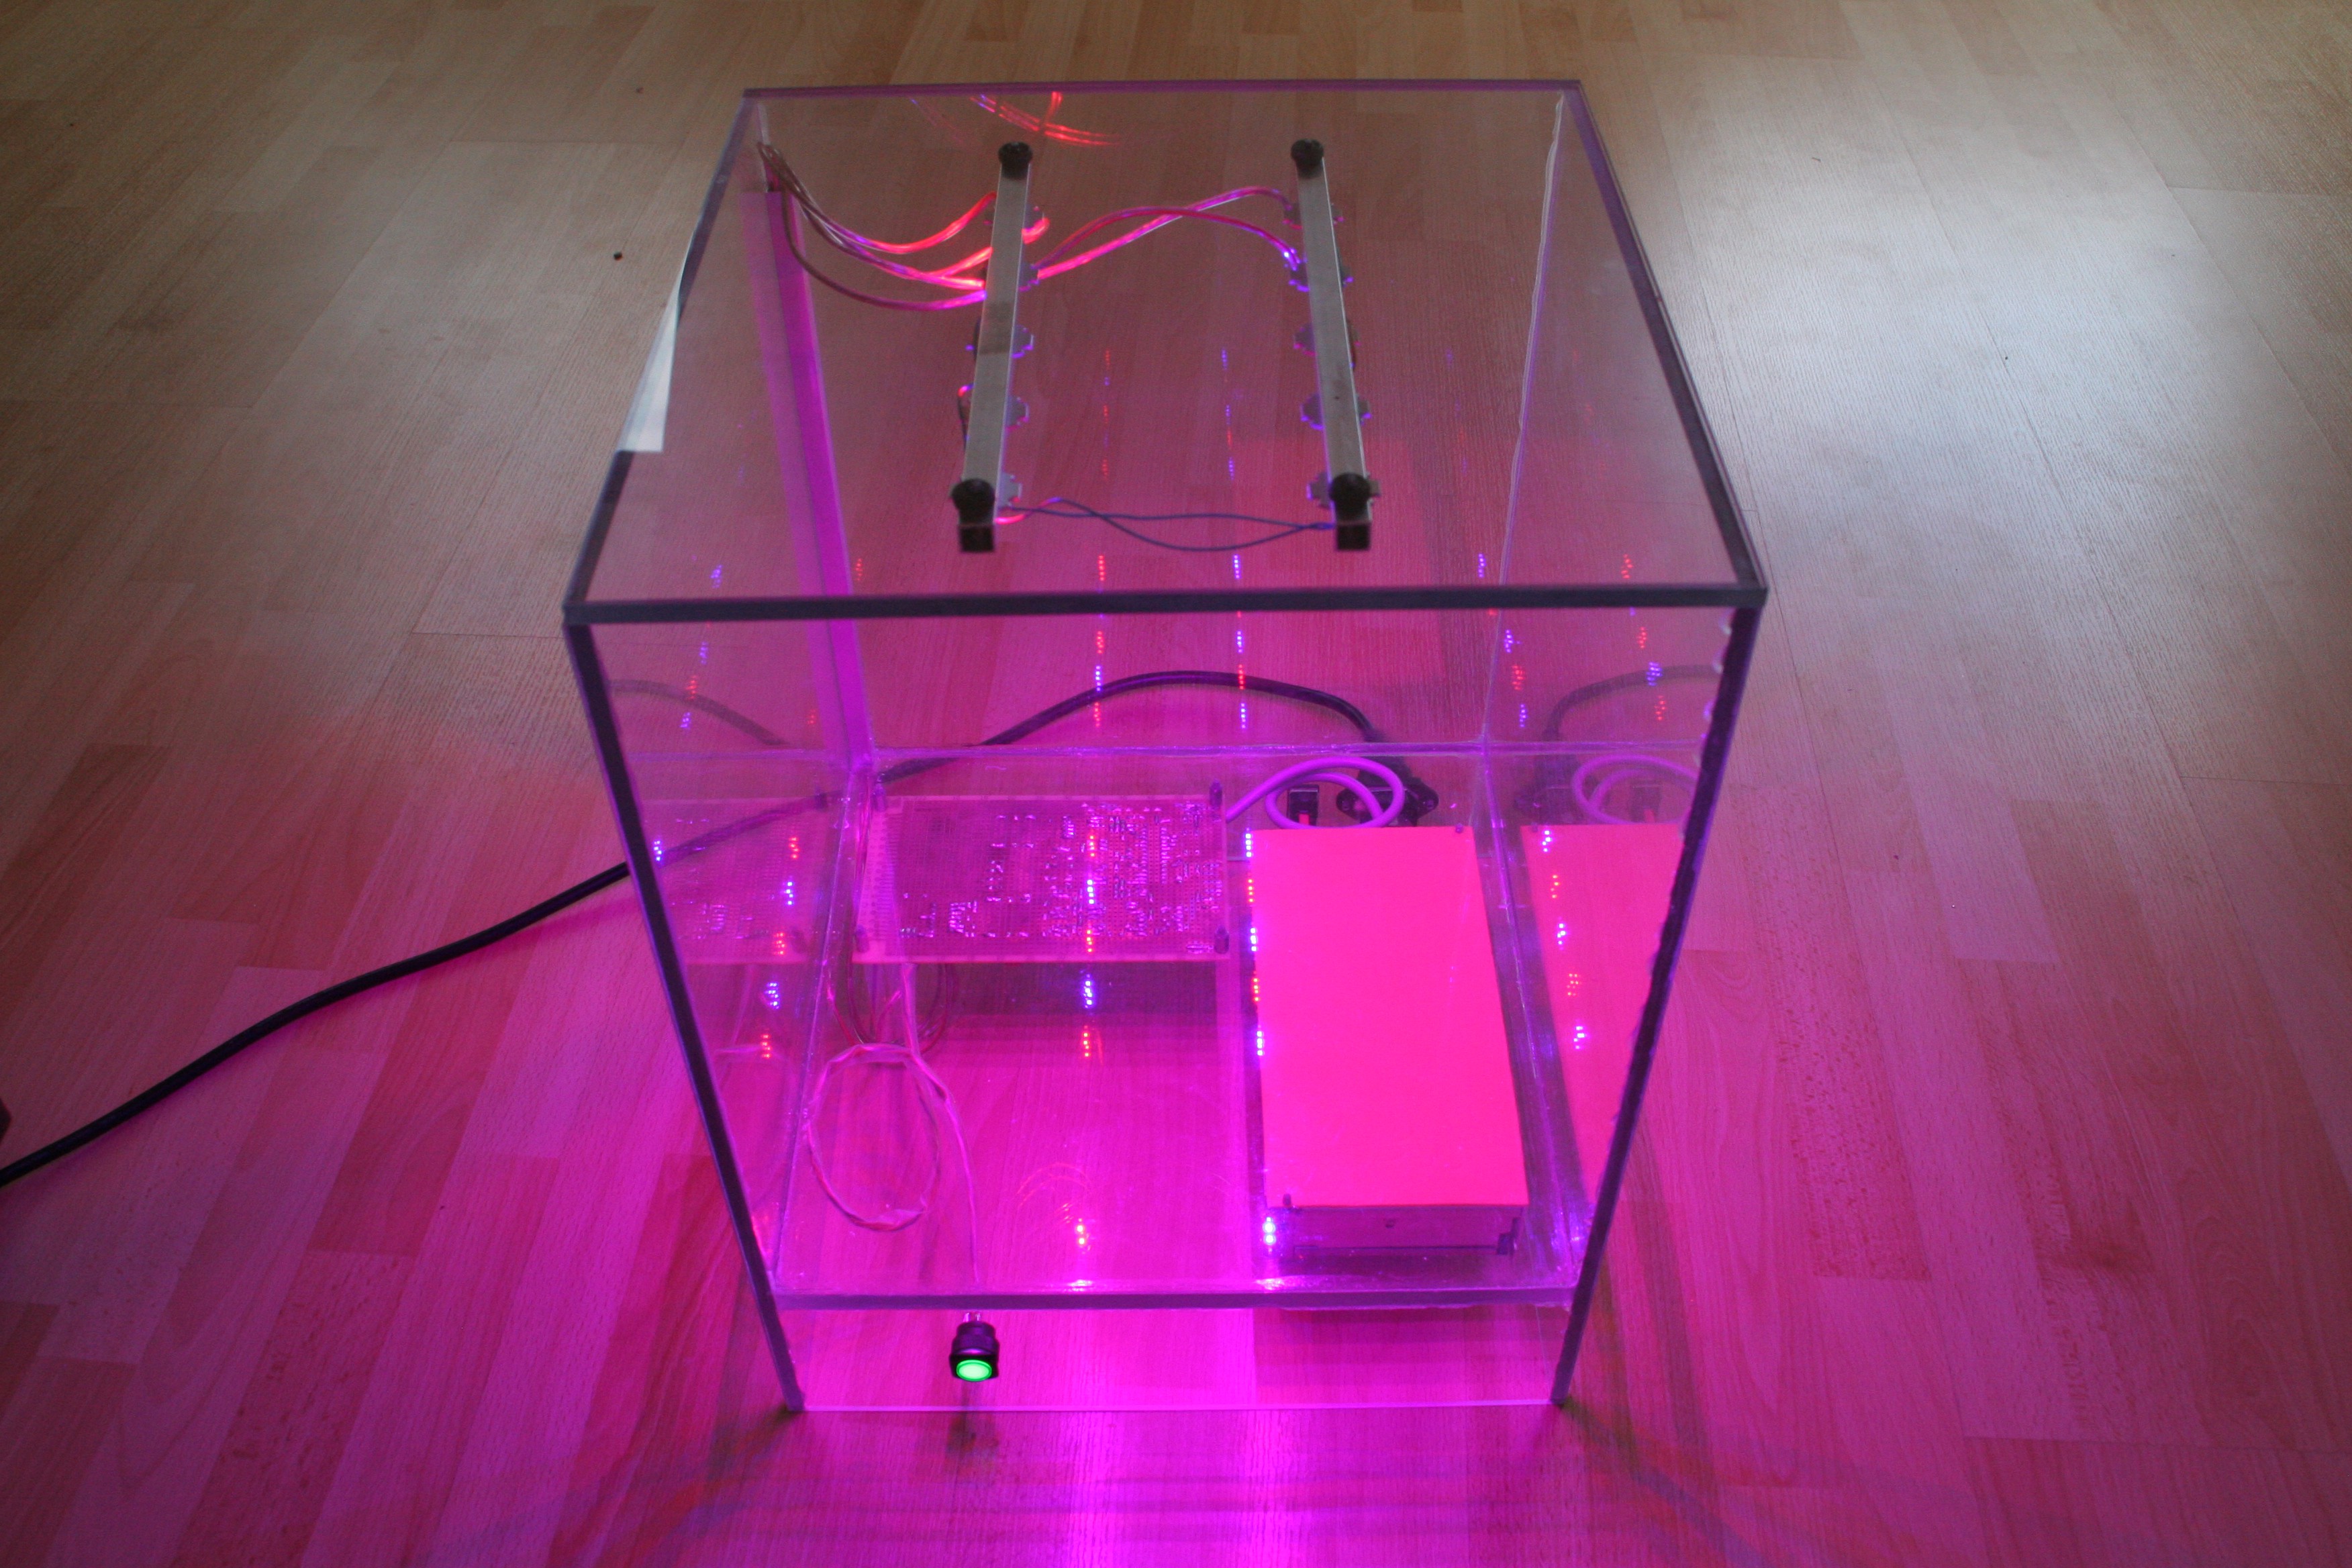
This is my enclosure with all electronics mounted and LED's on full power
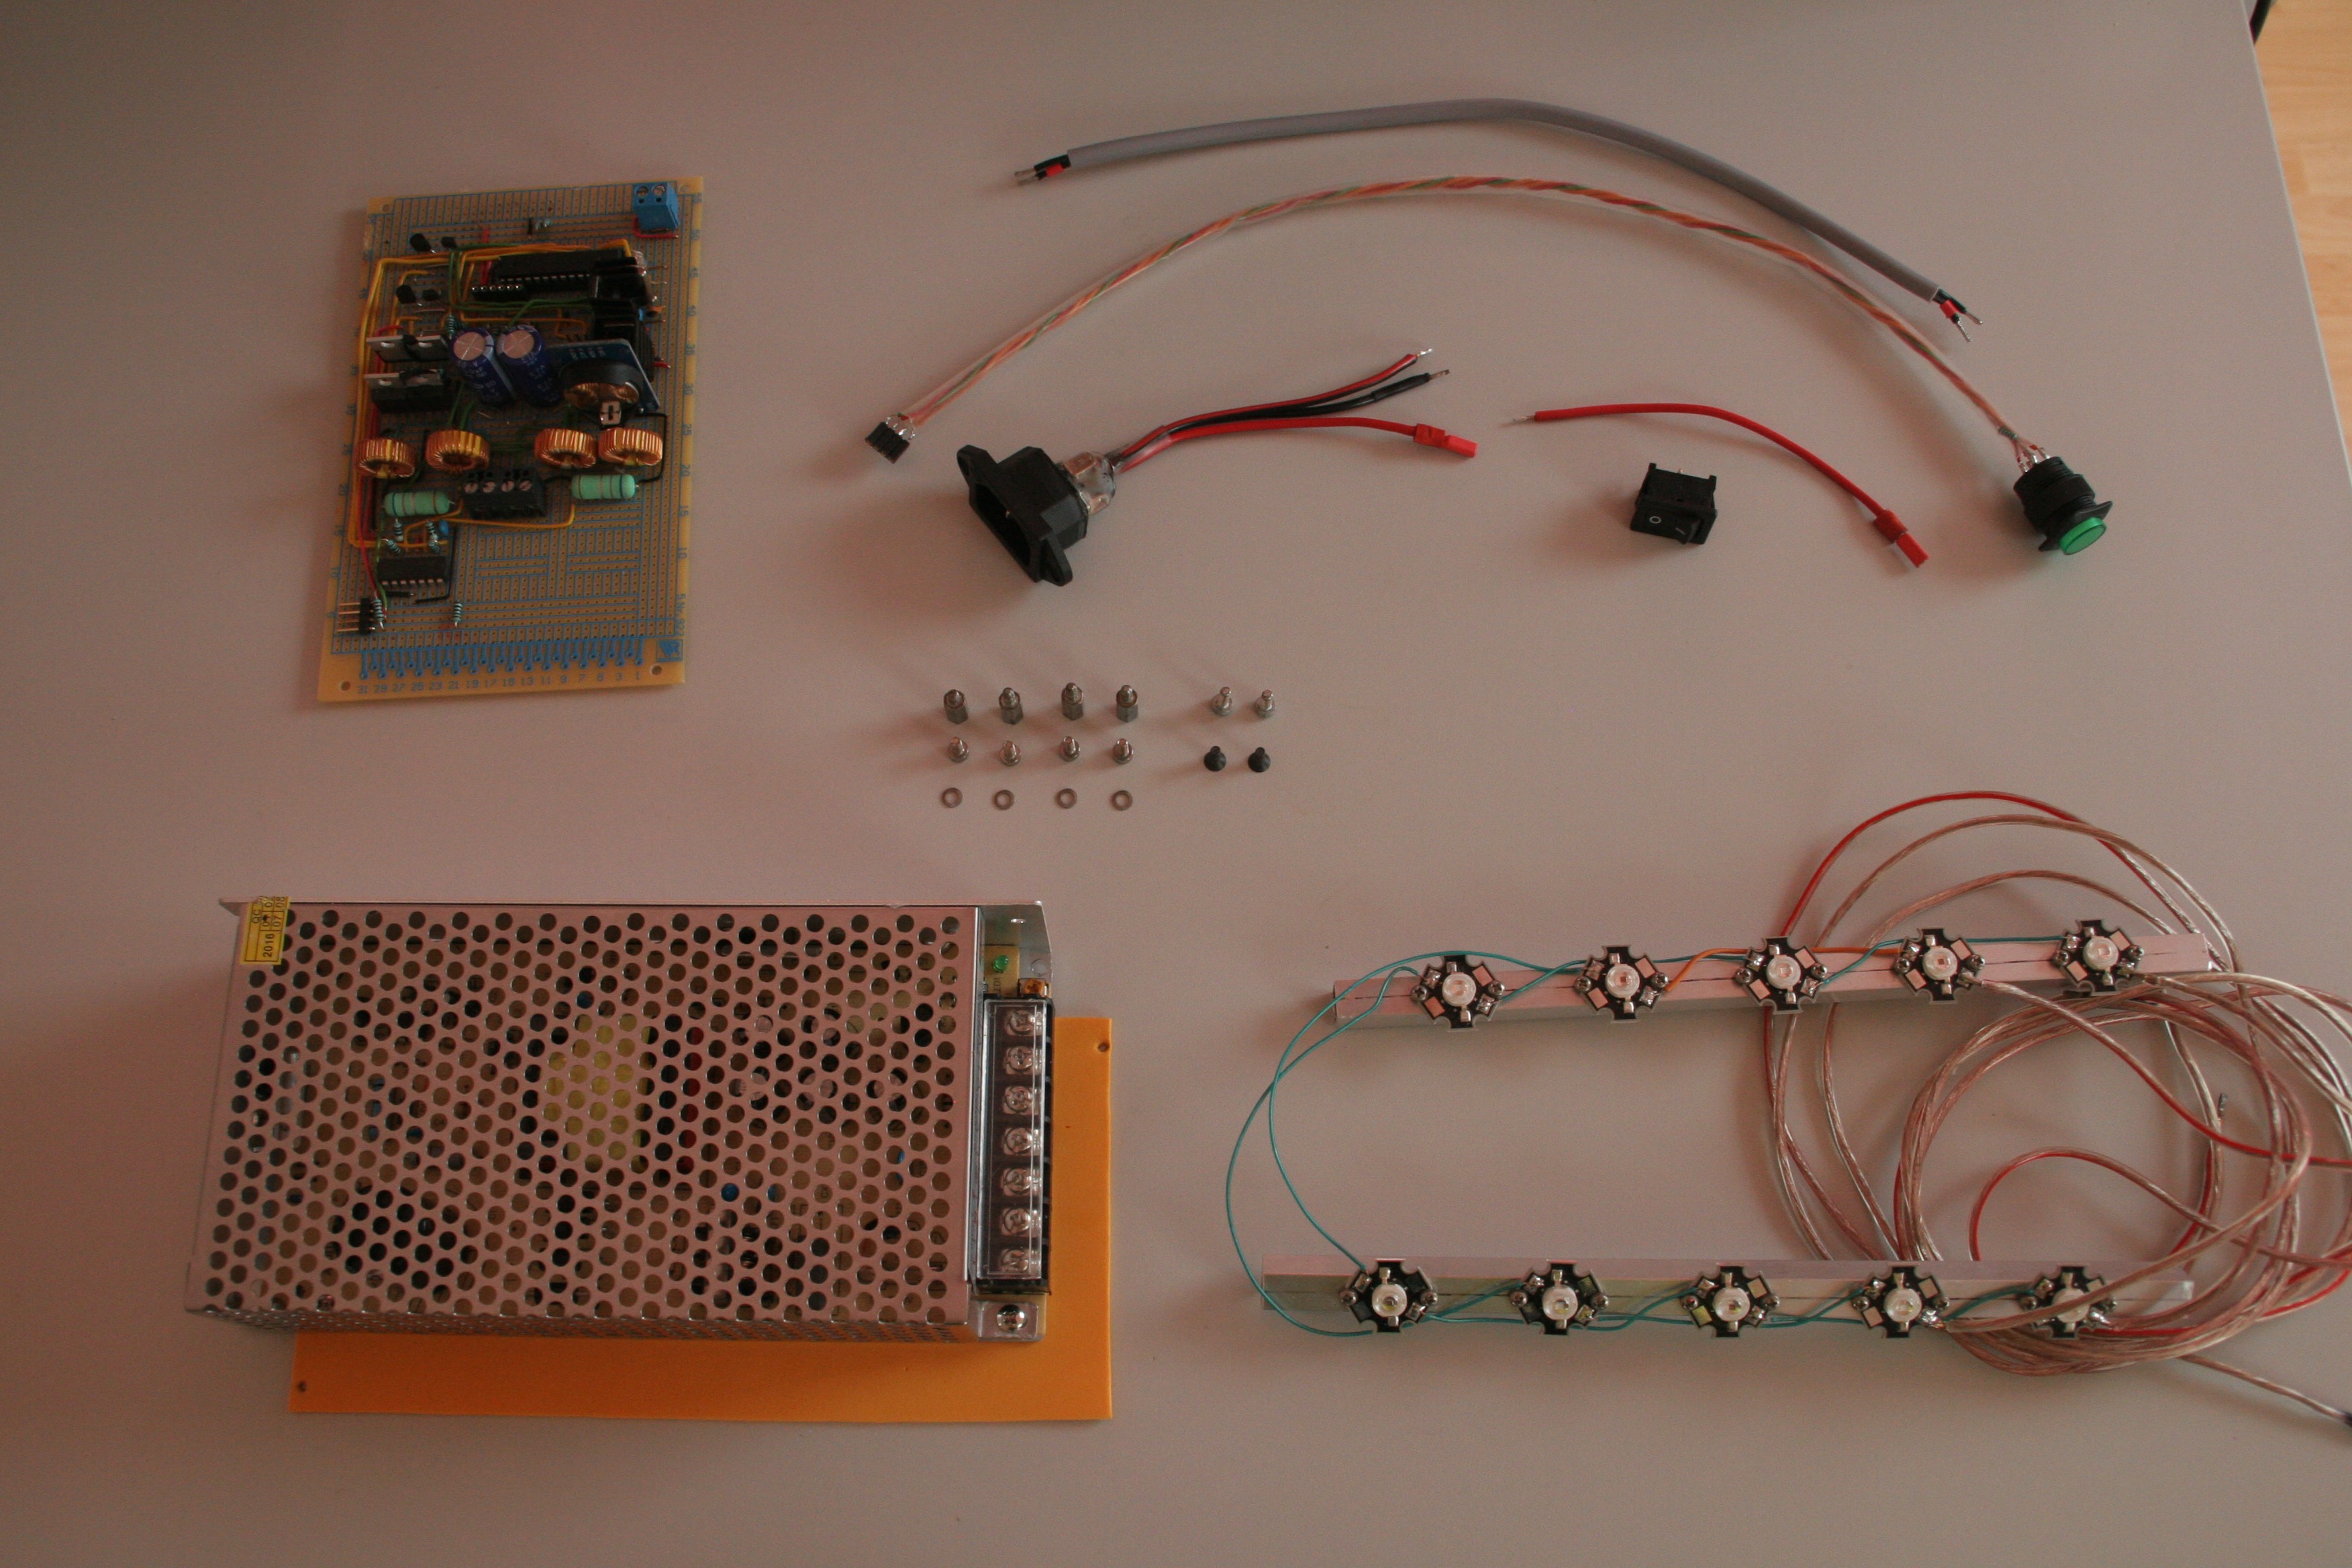
These are all of the hardware components that were mounted (and used to mount)
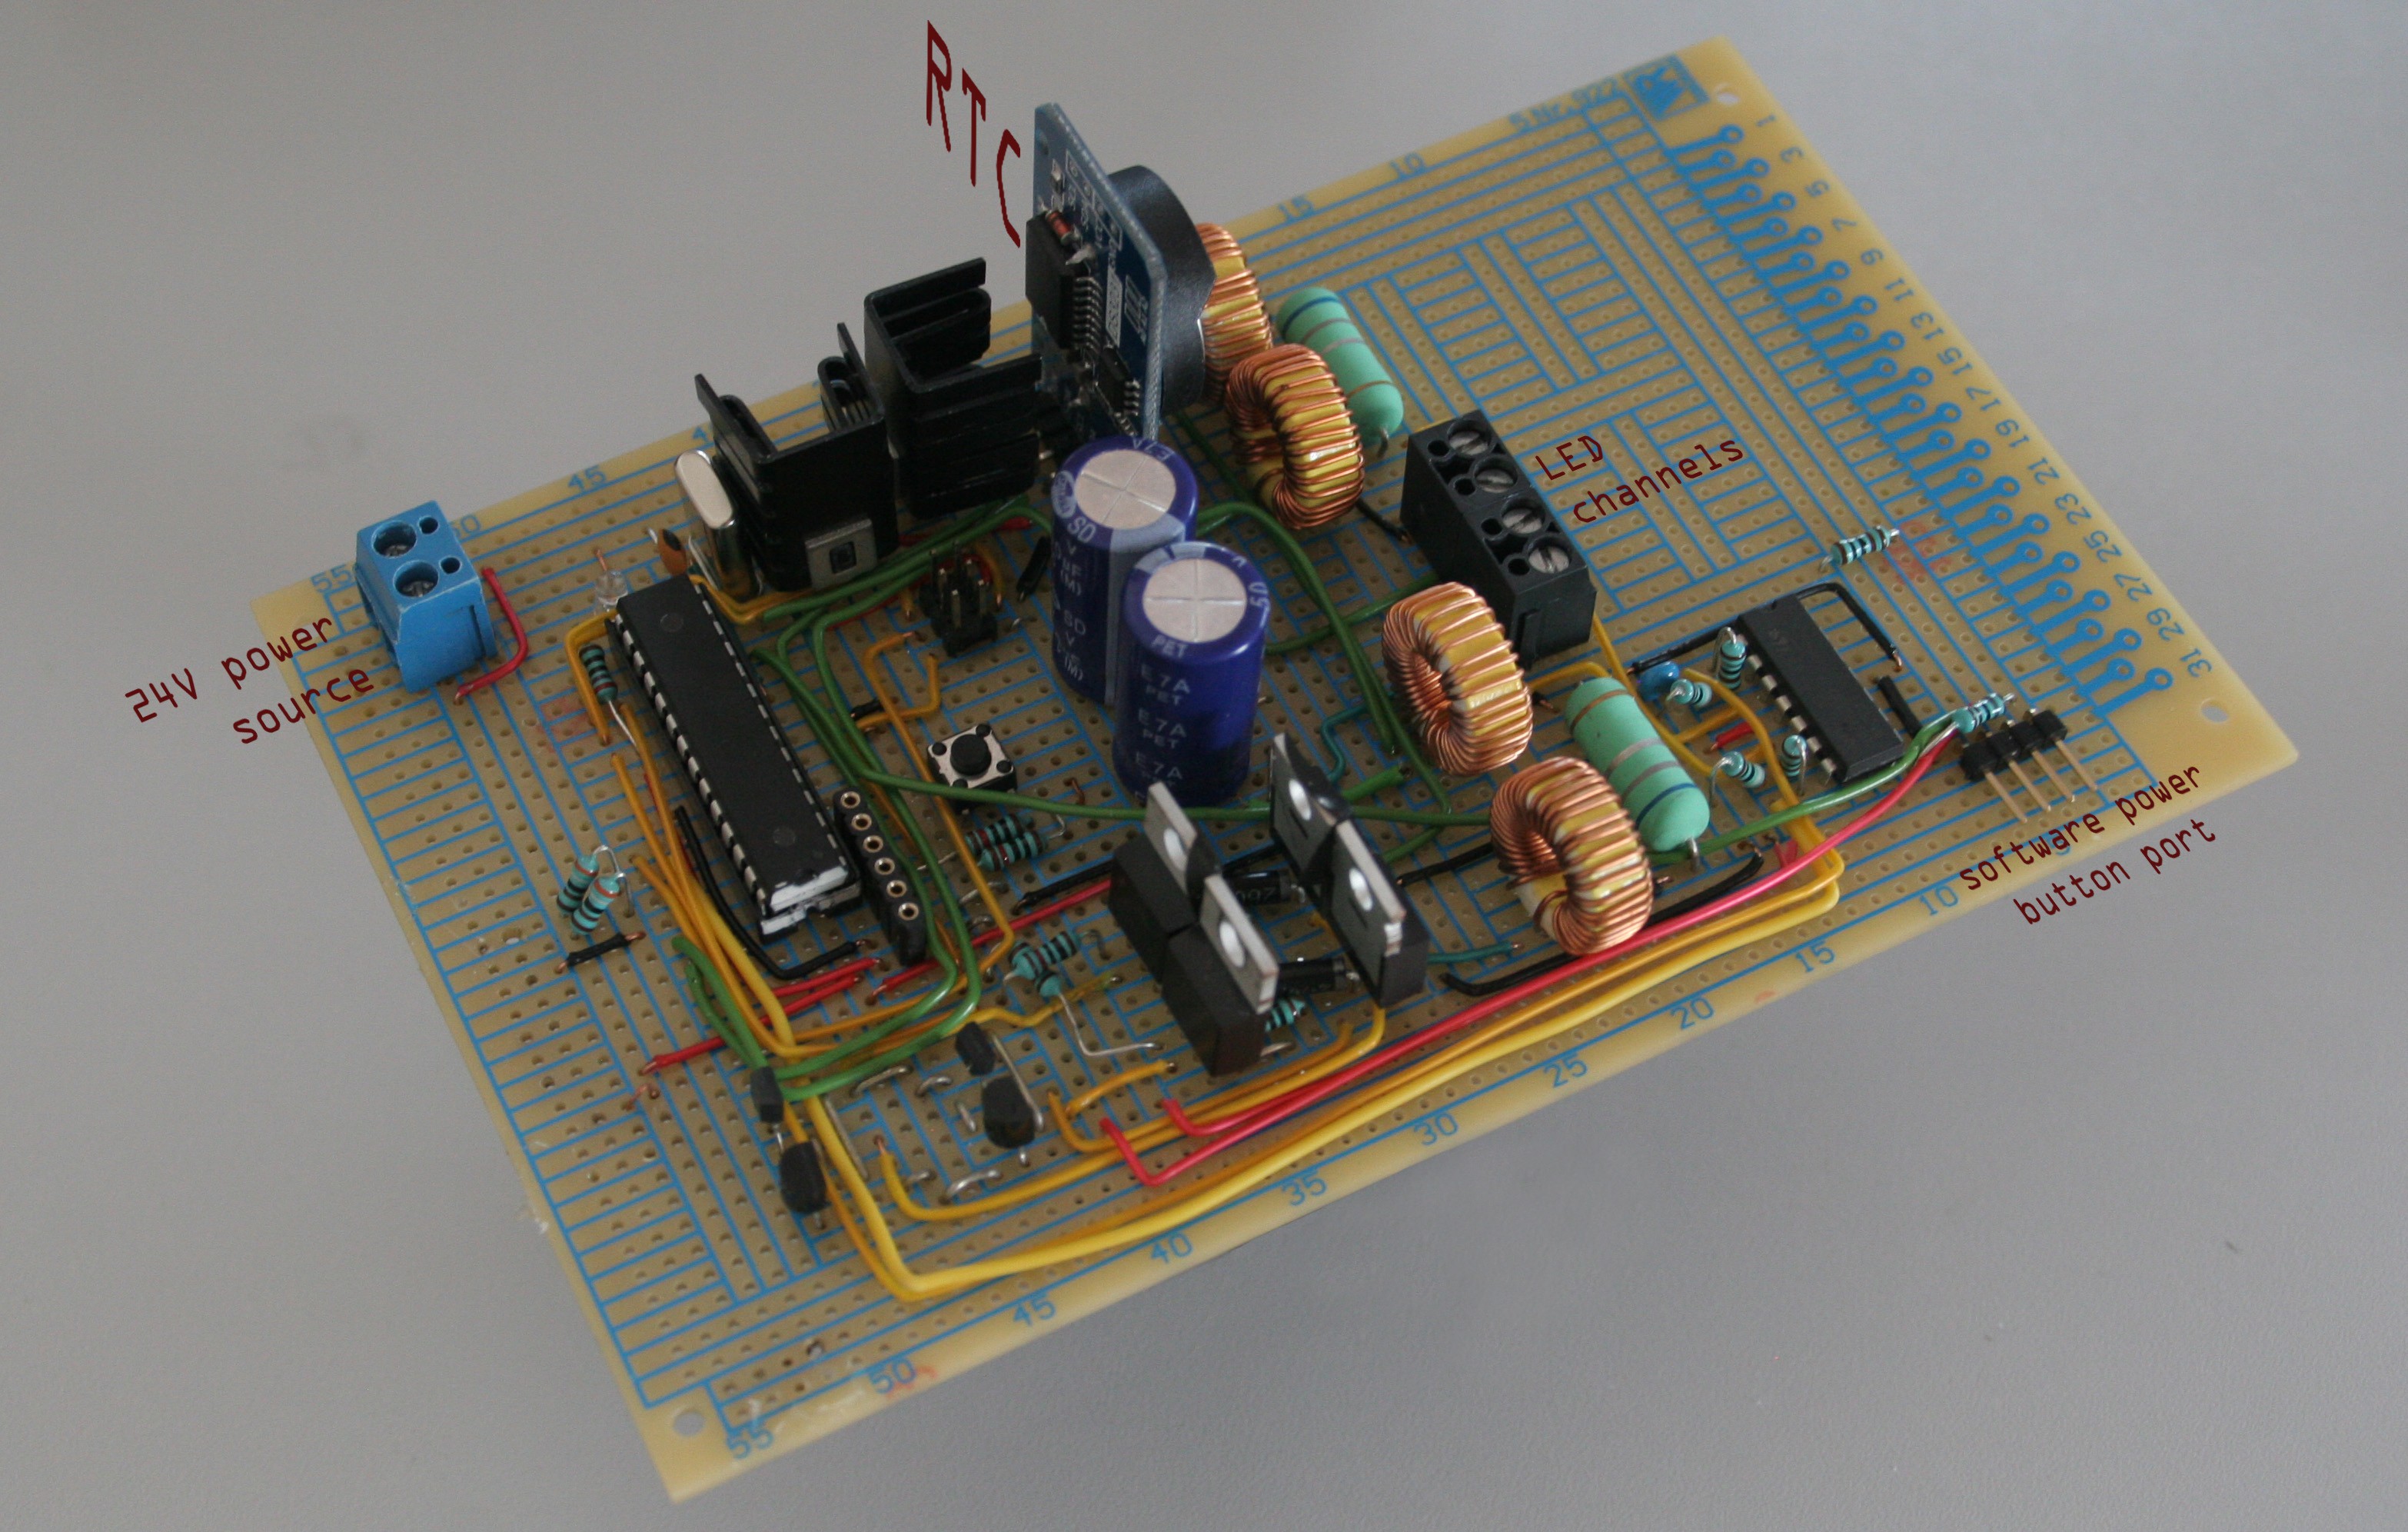
  • RTC, Power and Bug Fixes

    Leon07/27/2016 at 14:18 0 comments

    After a few month long battle with randomly crashing Arduino, the bug turned out to be something quite simple, as usual... It turns out that the Arduino was not turning off because of a brownout, software issues or noise on the reset pin, but rather overcurrent protection. The reaction of the Arduino is pretty much indistinguishable from a normal reset, and was solved by simply adding resistors between the Arduino and MOSFET's to limit surge currents because of gate capacitance. Now if you looked carefully at the schematic, you would also see that I've added an RTC (the DS3231) and a button of sorts along with the resistor. The final change that was made, is switching to an external power supply for safety and efficiency reasons, freeing alot of space on my breadboard!

    The last thing I'm going to mention is the electrical tape between the MOSFET's, I added it after thinking it was the root cause for the problem, and while it was a necassary modification it still wasn't what solved my crash.

    Now, the basic hardware is done and it's time to start coding!

  • Schematics

    Leon07/26/2016 at 13:56 0 comments

    I finally got around to creating some detailed schematics for my control board, as of the 26.07.2016 it's up to date for the version based on the external power supply. Hopefully I will be able to use Eagle to create a PCB in the future, but for now it only serves as reference. You can get My Control Board PDF, or even The Schematic to download.

    My orginal plan was actually to use the schematic for bug fixing, but I managed to solve the problem right before I completed it, so now it's just a "nice to have". If I end up making a PCB I will also release the .brd file.

  • Damn bugs!

    Leon06/21/2016 at 14:37 0 comments

    I have finally (almost) finished my switching LED driver, and boy was it journey! It started with my first time working with the mains voltage here in Germany, and hopefully also the last time. After going through the trouble of rectification, getting the right voltage out of my transformer, filtering and regulating the output voltage, I am sure to use a finished SMPS in future! Afterwards I also made my first switching power supply, while also using inductors for the first time, at this point I was starting to regret my decision. Soon after I completed the Arduino on a breadboard (you guessed it, first time) and managed to bring all of it together. This is what my final product looks like after a few months of work between long school days:

    I might release a schematic if this project makes it further (it's a lot of work to make one).

    With the board ready it took merely an hour or two to refine the fast PWM and current control and upload the code. Sadly my program was attacked by a bug, and this is what my board looks like now:

    My Uno is managing the serial IO, the Oscilliscope is monitoring the PWM and power source, the programmer is pushing new code constantly and my lab bench power supply is providing a clean power source, but I still can't for the life of me figure out why my Arduino is randomly crashing! So I guess it will be a little while until I can mount my electronics ;(

    If you wan't to see the issue, I posted a question on stack exchange: http://arduino.stackexchange.com/questions/25414/arduino-crashing-and-rebooting

View all 5 project logs

Enjoy this project?

Share

Discussions

Henrik Seres wrote 11/08/2016 at 14:06 point

Hey
Are there any news about the project? 

  Are you sure? yes | no

Leon wrote 03/04/2017 at 10:38 point

Now there is! Sorry for the delay, hopefully there's more coming in the near future!

  Are you sure? yes | no

Leon wrote 08/21/2016 at 09:41 point

Ok guys, I'm back from vacation so expect some new progress reports in the next weeks. I am hoping to get a humidity sensor, finish the basic code, add some soil and maybe paint the case with spray paint.

BTW, thank you for all the feedback and suggestions, they were all very useful.

  Are you sure? yes | no

tfolbrecht wrote 08/15/2016 at 02:34 point

Awesome idea! I threw around ideas about something similar. 
What I came up with was a box made of aluminum extrusions and plastic film, I could mount things in the t-slot style extrusion and the film was fit in the t-grooves with inexpensive drinking dtraws.
I used DIY parasitical pumps and an xpro cnc stepper driver to dose water. I was hoping to eventually add a bbb or rpi and sensors to make it closedish loop hydroponic or deliver nutrients/pesticides/fertilizer.
Awesome project, can't wait to see what you come up with.

  Are you sure? yes | no

Leon wrote 08/21/2016 at 09:47 point

Aluminium extrusions are definetly a great option for building the frame and it makes it a lot easier to route wires and mount sensors. The reason I stuck with a very simple acrylic enclosure is because it has good visibility (all transparent) and looks great.

Adding water based on humidty is also one of my plans in the future!

  Are you sure? yes | no

Leanne Silva wrote 08/08/2016 at 15:56 point

Activated charcoal is supposed to inhibit mold in terrariums.

  Are you sure? yes | no

Leon wrote 08/21/2016 at 09:49 point

Thank you for that tip! I think I am going to add three layers seperated my some sort of mesh material, gravel for a resevior, charcoal to filter the water and good quality top soil.

  Are you sure? yes | no

Nick Knatterton wrote 07/26/2016 at 15:36 point

Hey Ho, 

Pretty interesting project you´re working on! I´m working on something similar myself right now and got my first few months of growing salat.. 

But I didn´t try to do all that fancy LED stuff and went the easy way with a 12V (soon to be 24V) supply and PT4115 chips ( they ship fairly quick to Germany ;-) . They are more or less efficient if you bypass the bridge rectifier ( I wonder how that thing ever got there..) and offer all you ever want for an easy setup . But it seems like your way is working pretty well to :) Except for the Arduino problem.. But hey, that´s how you learn stuff . (mine keeps crashing too, but I guess that´s due to the cheap ethernet shield and my bad programming skills)

Do you already have a plan for your growbed? 

Nik


  Are you sure? yes | no

Leon wrote 07/27/2016 at 14:05 point

Thanks for the feedback! 


The main reason that I am not using a
finished driver (I already have a few FemtoBucks) is because I am
interested in learning some more about electrical engineering,
especially Switch Mode Power Supplies. For a production scenario, or if I
just wanted the end product with minimal design, the PT4115 or other
drivers would be awesome!


Also, no I don't know what I will use as
a grow bed yet, but it will probably be good quality gardening soil to
start with. I am worried that mold could start growing though...

  Are you sure? yes | no

Mr. Schwarz Engineering wrote 07/30/2016 at 16:28 point

To avoid mould growing you need an optimum humidity... You could use a humidity sensor, connected to the arduino which operates some flaps or a fan.

Furthermore, many plants need optmimal humidity to grow...

Another problem, caused by high humidity is, that it condenses at the walls of your terrarium

  Are you sure? yes | no

Similar Projects

Does this project spark your interest?

Become a member to follow this project and never miss any updates