Close
0%
0%

Go Kart Tank (formerly Half Track)

Go Kart Tank. Used to be a gas powered Go Kart, became a Half Track and then became a fully tracked vehicle.

Similar projects worth following
Currently, the Half Track works on 2 1000W electric motors pulling 48V each. I am using conveyor belt tracks as featured in Make Magazine's article written by the excellent Brian Bunnell. Future plans include more ground clearance through bigger wheels, instrumentation and maybe a canopy and a dozer blade so I can plow my driveway. Should be completed by end of March 2016.

Update: March 2017: After much work, the tank is done. Yes, it was a Half Track, but then, I thought, why stop there, let's go all out. Of course, that meant a total revisit to how it works....and it works! The tank is now operational and today I road tested it. It's underpowered, but the concept has been proven and it means it's time to improve it or go BIGGER!

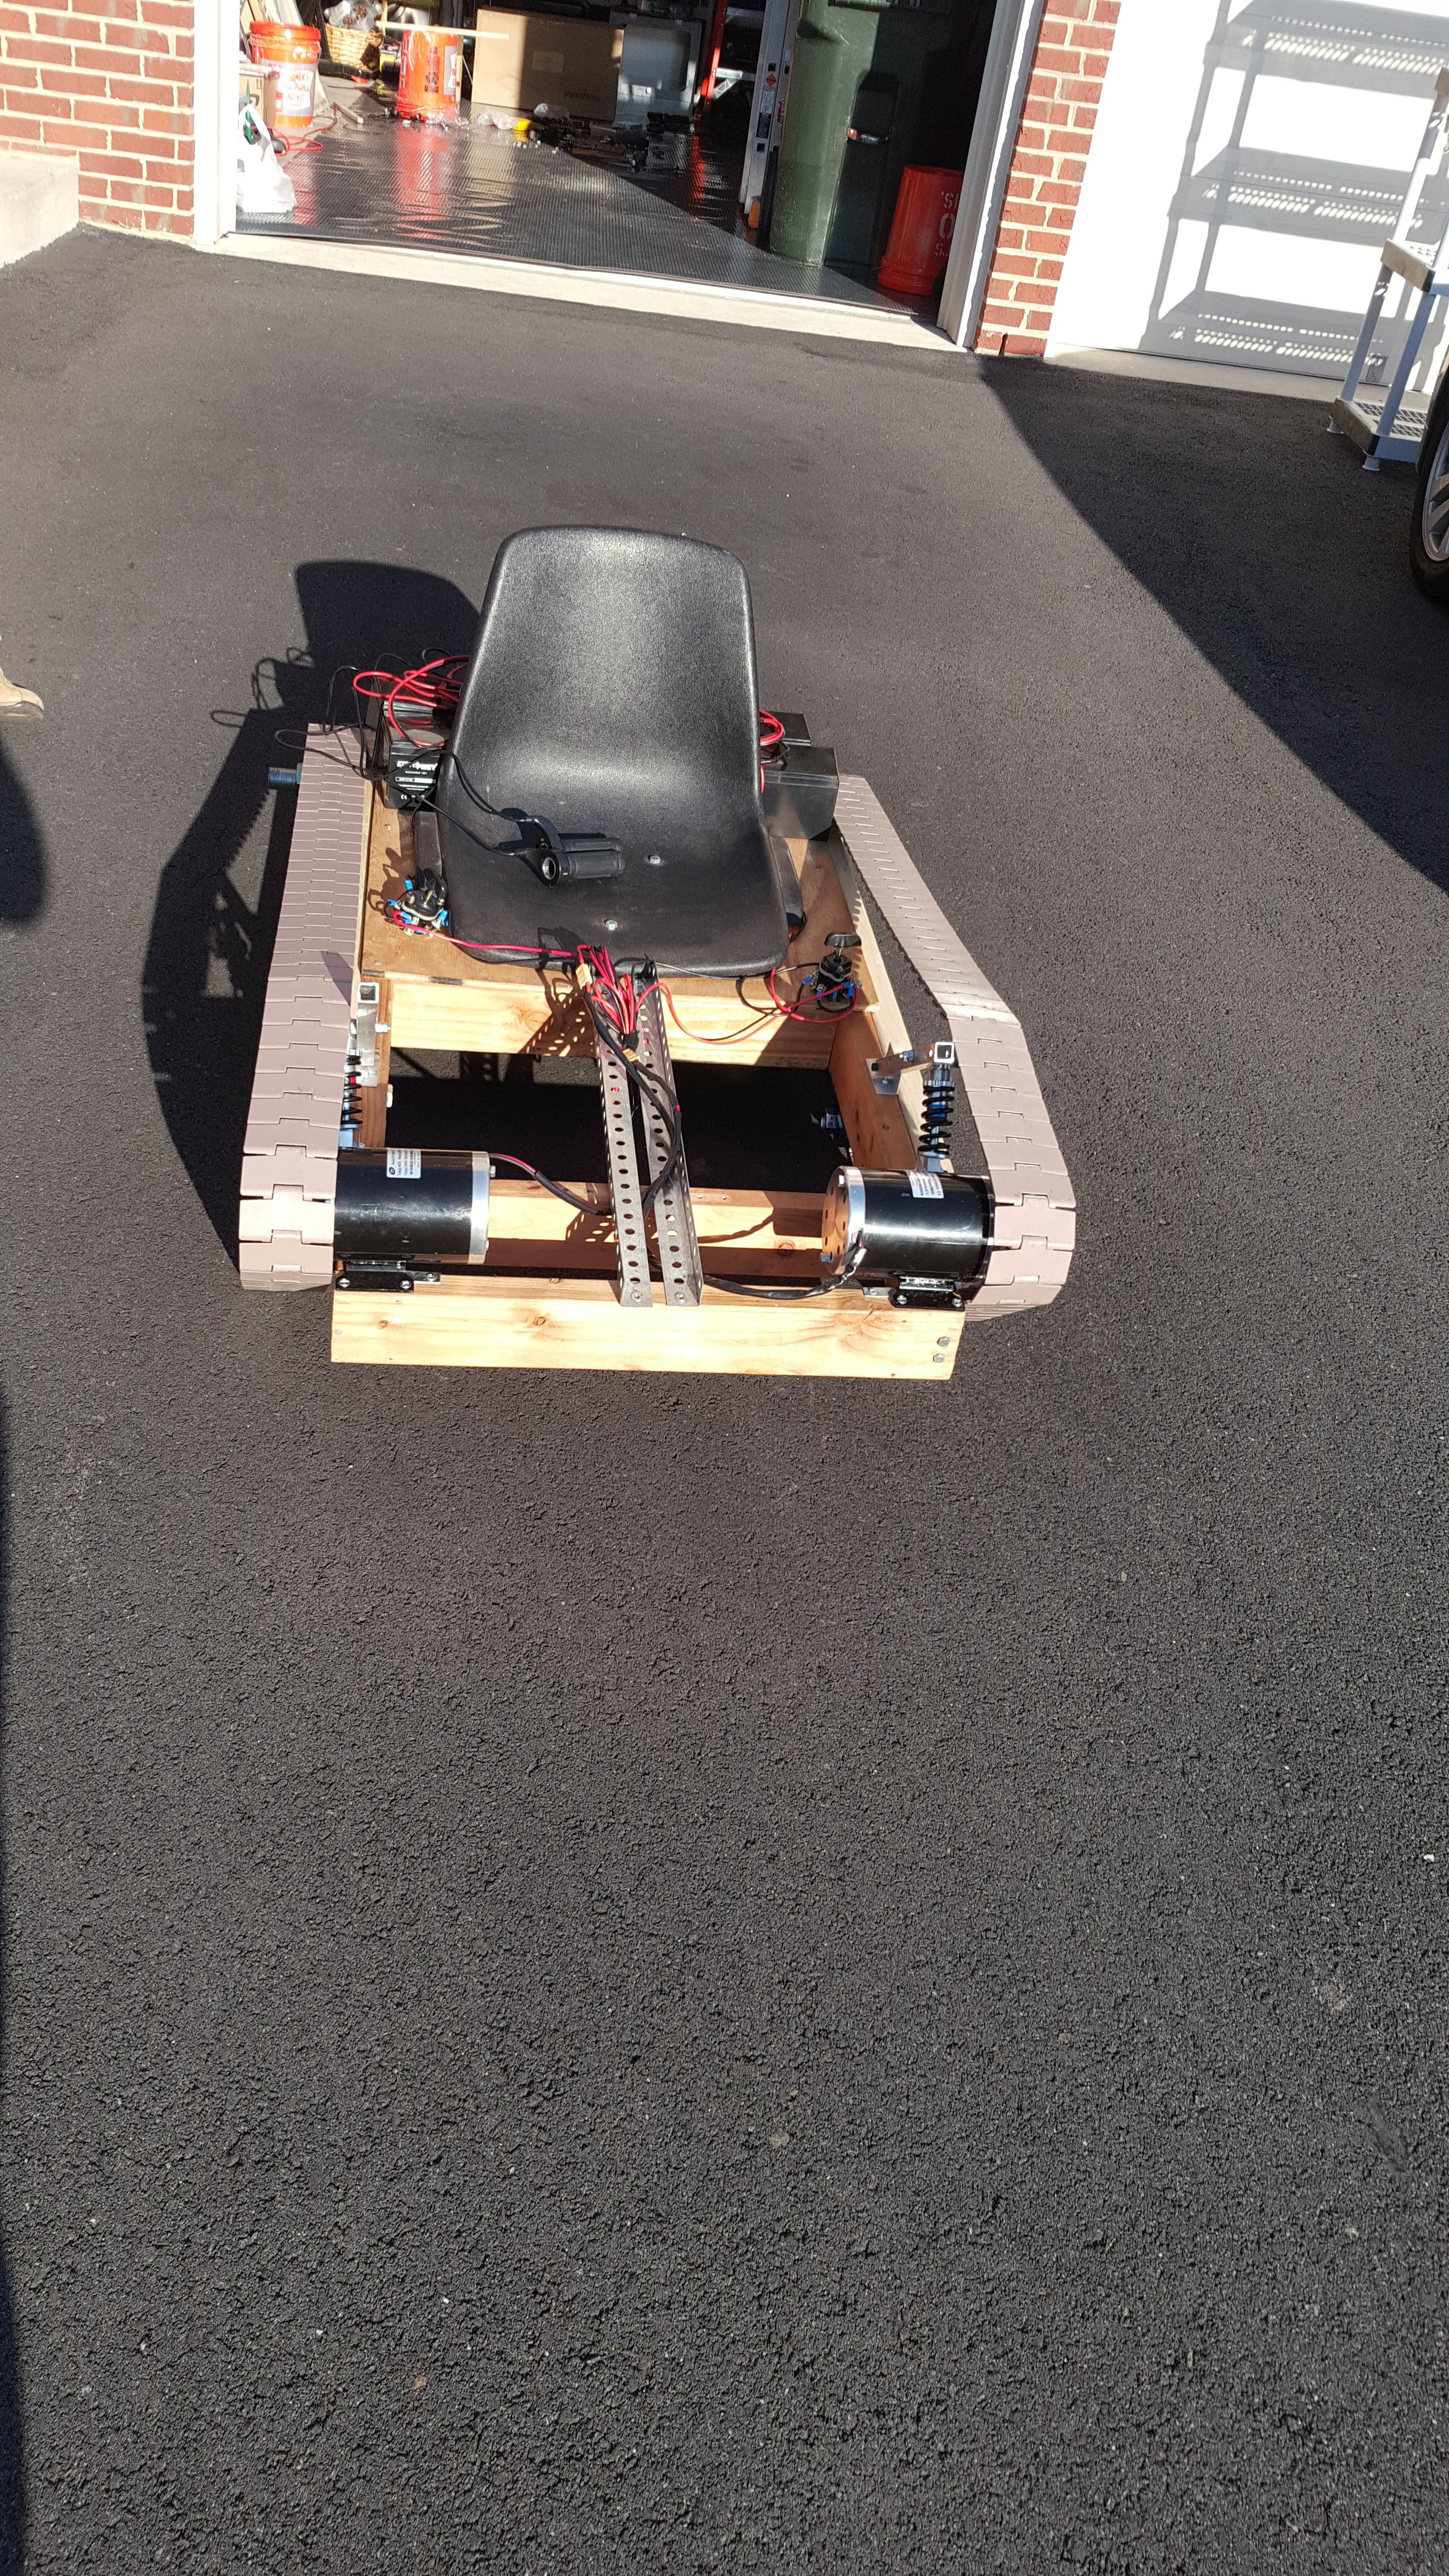
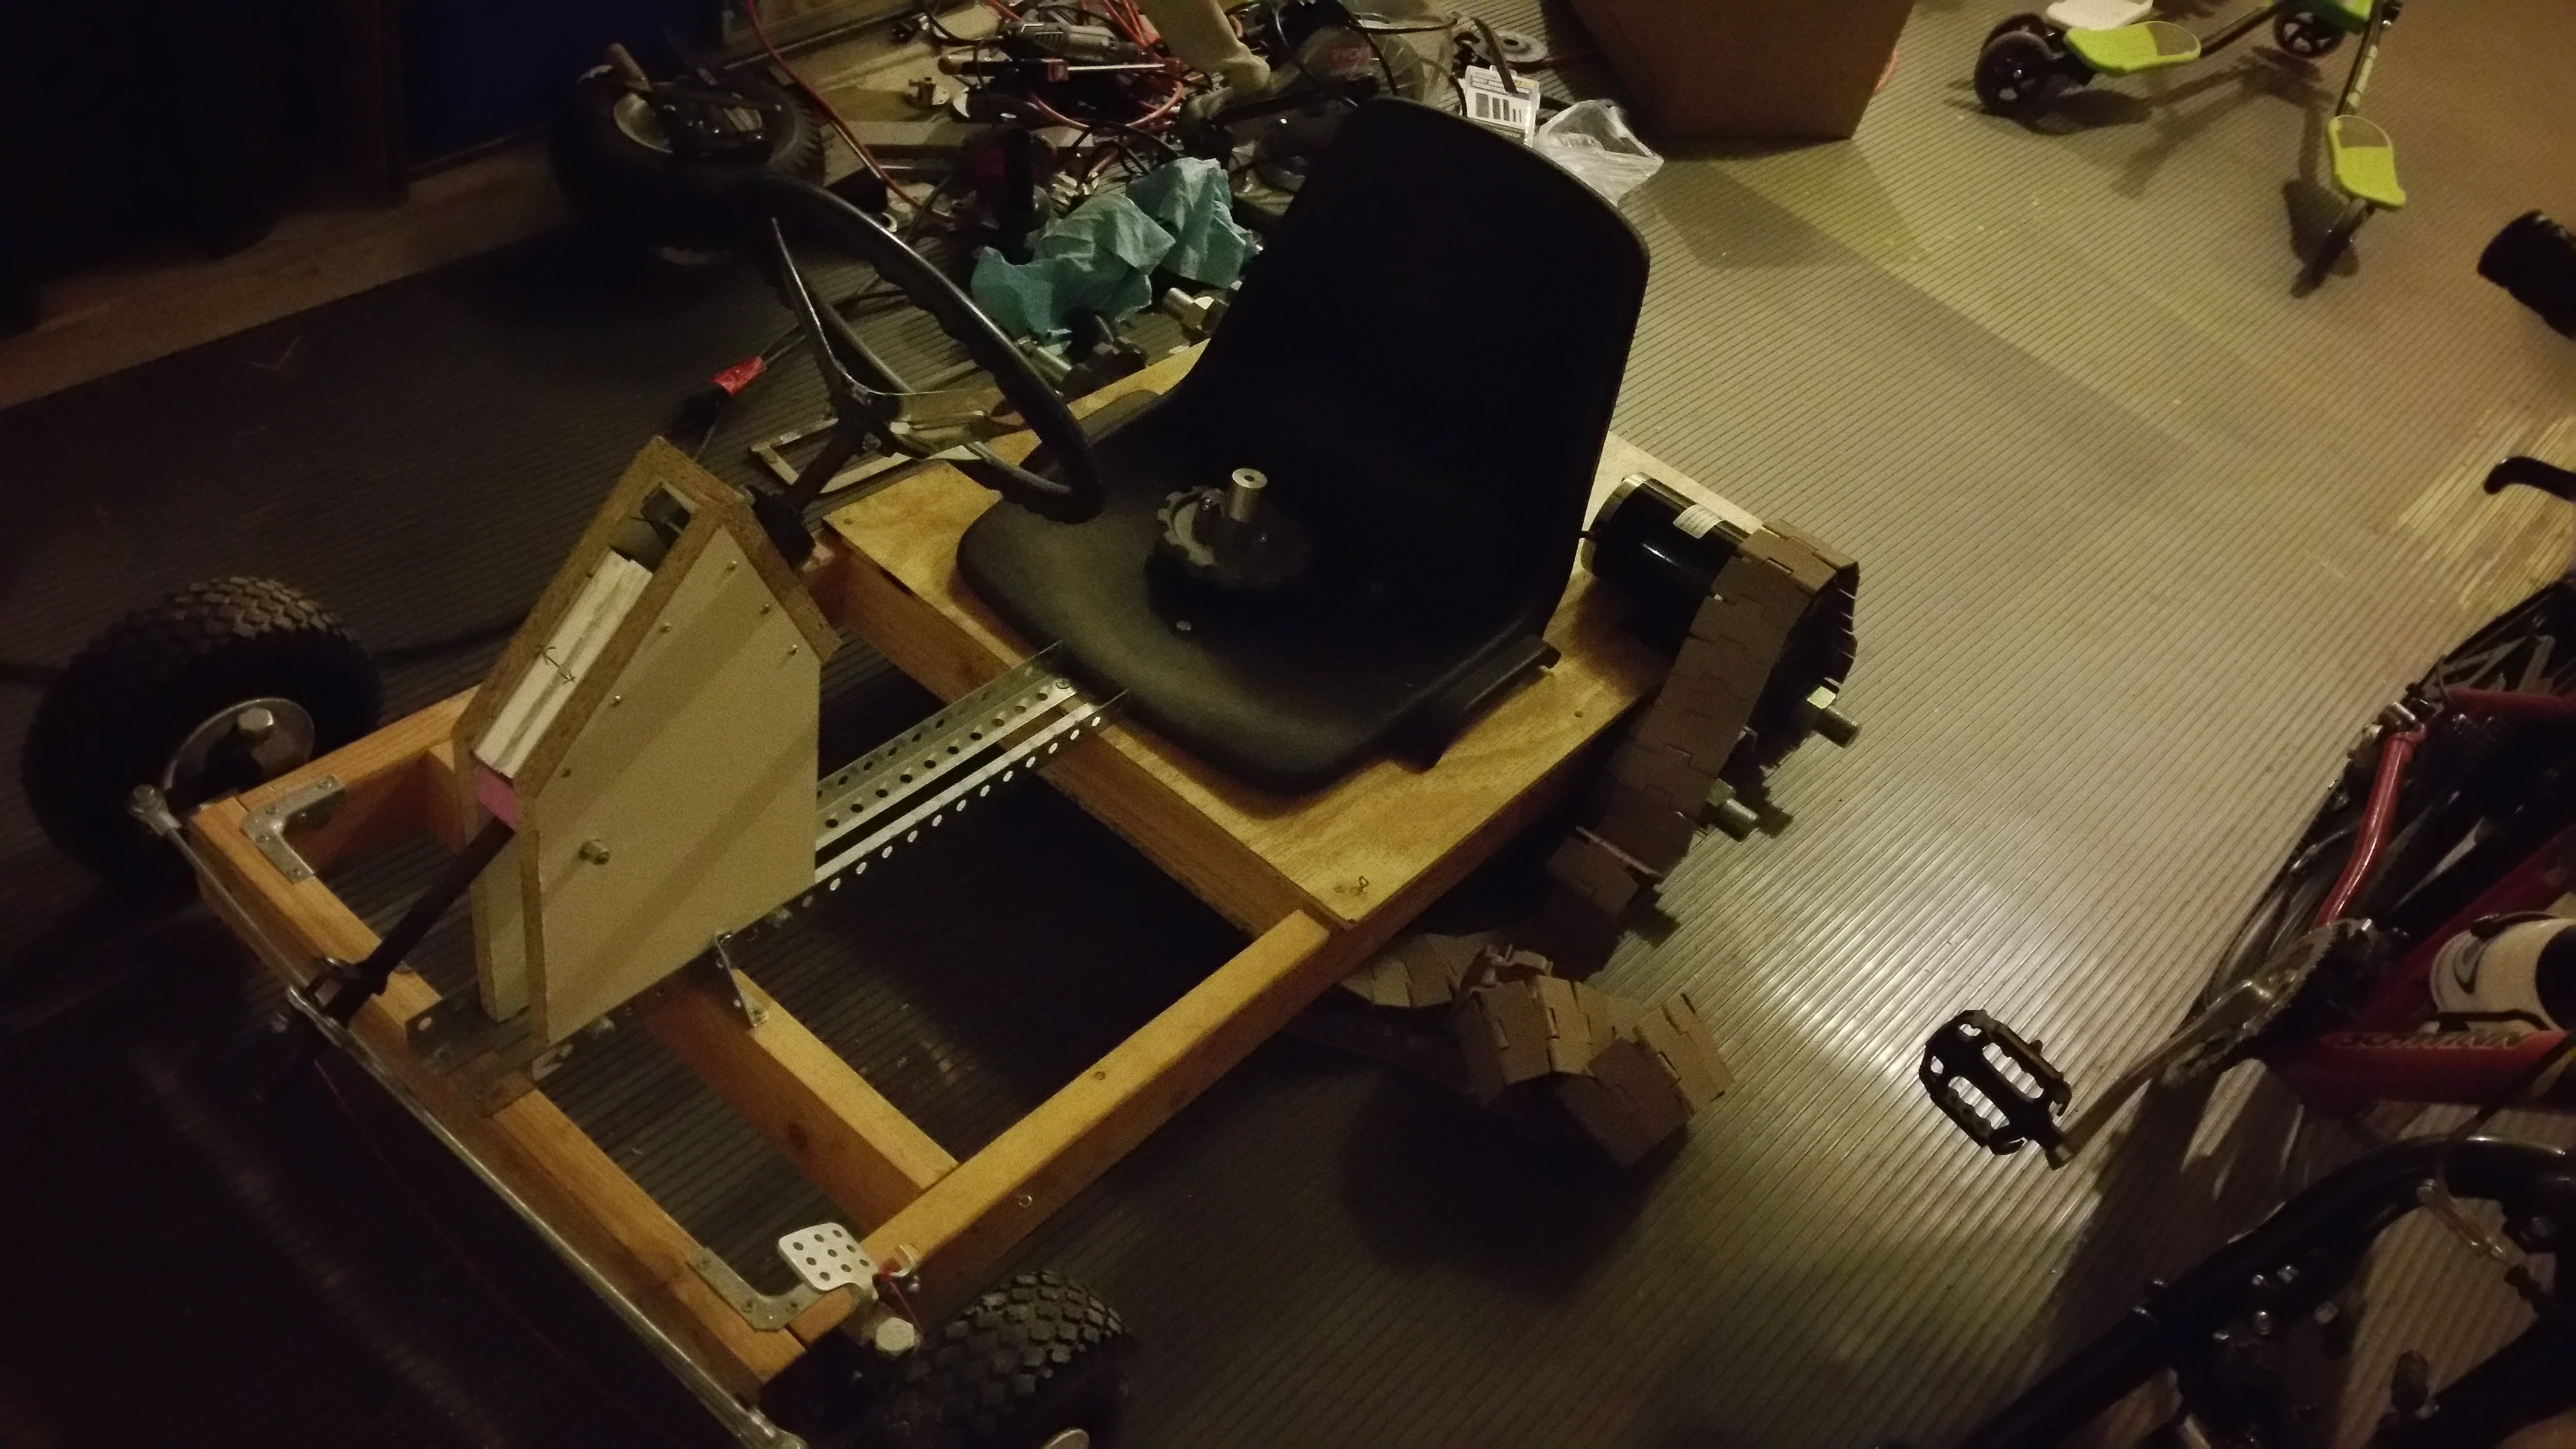
This started as an ATV build using big tires with the hope of using rubber tracks made from a treadmill. But over time it evolved into converting my very fast (30mph+) go kart. Originally, a differential was planned so that I could use differential braking and the same gasoline motor. But an invitation to a Maker Faire and the prospect of rolling it around indoors as well as outdoors said "no exhaust", so I went all electric. What is cool is that the throttles are small thumb throttles, so if this turned all tank, the steering can be handled with all of 2 fingers.

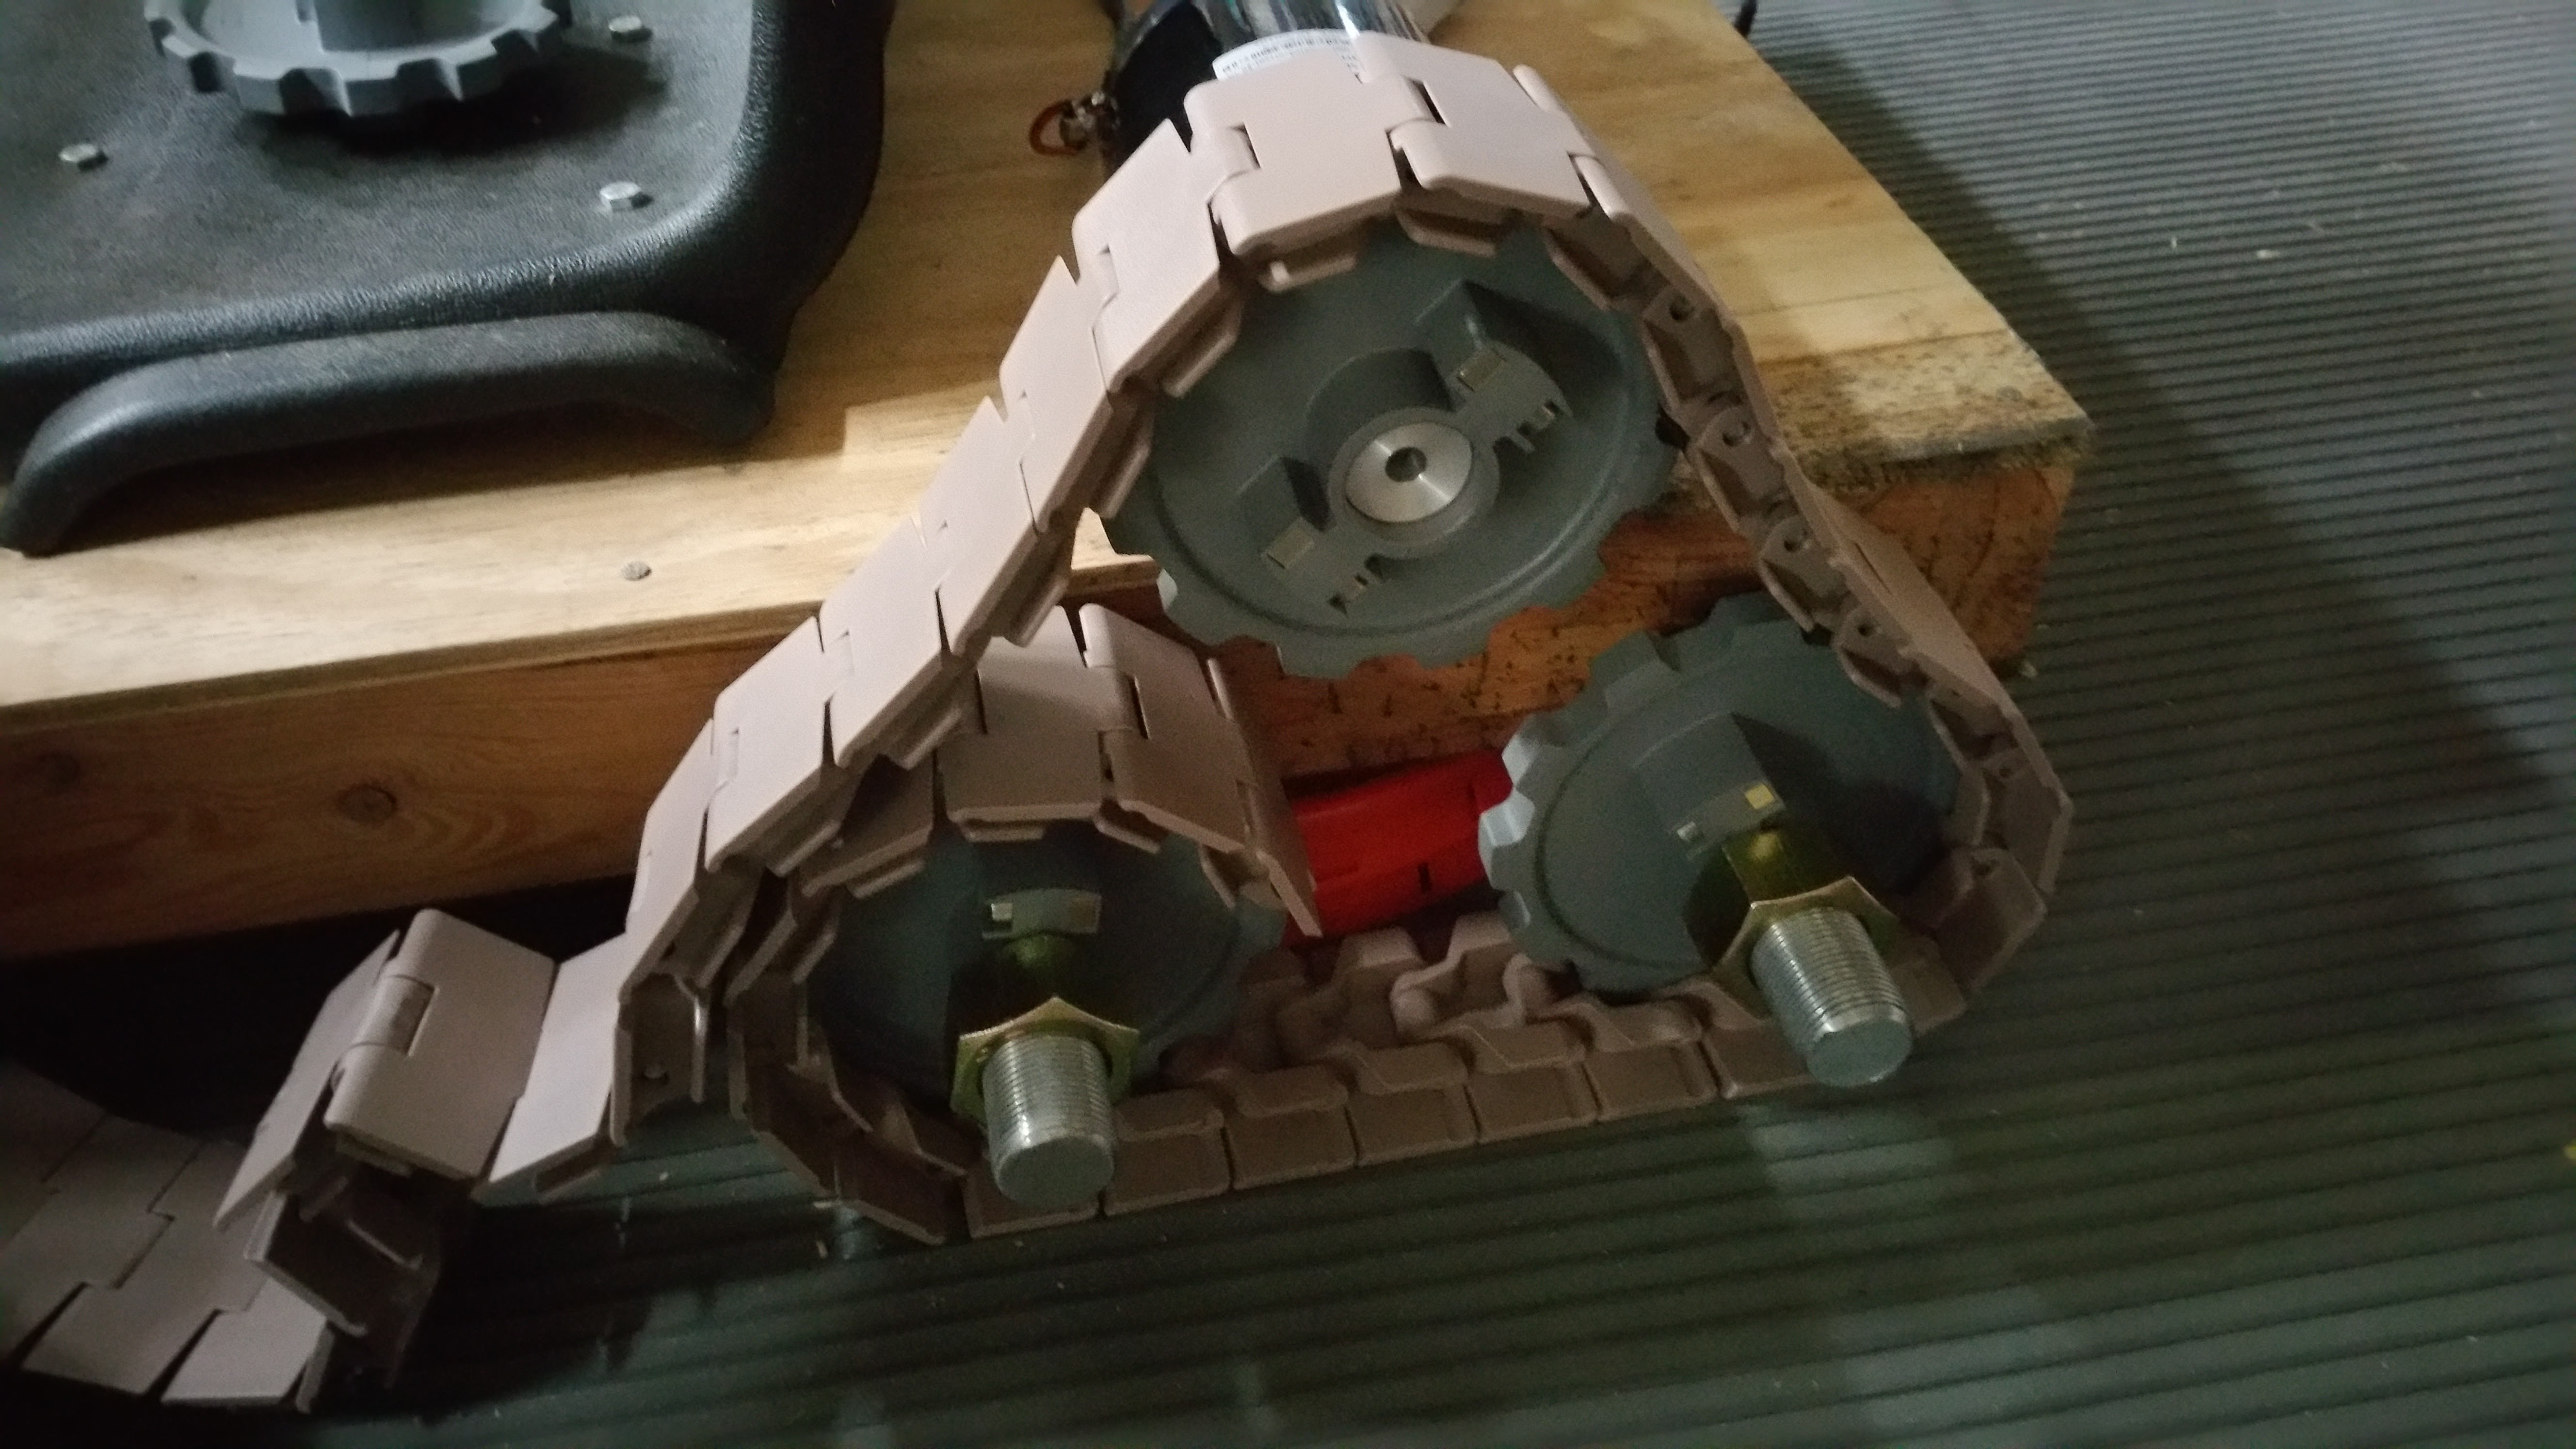
Update: It's all done! In the end I had to device a track tension/sprung bogie system to keep track tension. Used a BMX bike shock, some pieces of angle and a small piece of square tubing. Works like a charm. The is underpowered though. I might convert it to gasoline engine power just because I can put a 6.5hp motor that ways 30lbs in place of the 80lbs of motor and batteries and get triple the power. Very happy with the outcome. I had a 100lb kid ride it just fine, but a 200lb adult is too much for the 2.5hp I can get out of the electric motors.

20170312_172657.mp4

Running the Tank safely, no on board operator

MPEG-4 Video - 15.77 MB - 03/13/2017 at 00:56

Download

20170312_131527.mp4

Manual push test of the track system

MPEG-4 Video - 5.87 MB - 03/13/2017 at 00:56

Download

JPEG Image - 4.99 MB - 03/13/2017 at 00:56

Preview
Download

JPEG Image - 4.95 MB - 03/13/2017 at 00:56

Preview
Download

JPEG Image - 3.22 MB - 03/13/2017 at 00:56

Preview
Download

View all 17 files

  • 2 × King pins and steering elements You need to decide what you want here. I am using standard go kart steering horns to go with my old wheels
  • 1 × Steering wheel and shaft
  • 2 × Tie rods to finish your steering
  • 1 × Misc Fastners, nuts, bolts
  • 1 × IntraLox Tracks and Sprockets Based on length and desired ground clearance

View all 11 components

  • It's finally DONE! Well, for now!

    samern03/13/2017 at 01:07 0 comments

    Phew. All done and ready for the Maker Faire. And it runs and runs great! In the end, I learned:

    1) My choice for track works well in one direction only. Going in reverse throws a track

    2) 2.5HP is not enough

    3) I over engineered it in the effort to make it 'Heavy Duty'. I should have stuck to a metal body

    4) I would use straight through axles for the road wheels. I have 16 pillow block bearings there. Each weights close to 3lbs. I could do fine with axles and 8 bearings instead.

    5) The lexan sprung bogie is not strong enough for heavy duty work. I have to switch to metal

    6) Electric is not the way to go for something this heavy. The motors are way too heavy and the 8 batteries are killer in terms of weight.

    But...I love it!

  • How does it look?

    samern04/26/2016 at 12:41 0 comments

    Ok, it really still looks like a Go Kart, but we are not far away now. My next step is to complete the wiring and run the track. Once done, I will ride it around a bit before I convert to full tank.

  • Test Fit the Drive/Track System

    samern04/26/2016 at 12:36 0 comments

    Time to test locate the motor and install the drive sprocket. Notice the metal cylinder in the drive sprocket. A set screw is being used to secure it to the motor shaft. As you can see, it's pretty simple to do this, it's also pretty simple to replicate this architecture up front and make it a a 4 point tracked system (hybrid) or full tank, by just extending the track all the way to the front and adding more wheels. When I go full tank, I will want to raise the ground clearance.

  • Install the Axles and Test Fit the Idlers/Road Wheels

    samern04/26/2016 at 12:33 0 comments

    I originally wanted to put in suspension, but for now that is not going to work. Instead, if I go full tank, I will look at a bungee-cord based torsion bar suspension mechanism I have come up with based on what I have seen on some older aircraft. At that point I would probably need to double up on the tracks. For now, though, the idler sprockets are also the road wheels. Bonus: with differential power, I will be able to steer the tank with throttle controls alone and they motors have electrical braking.

  • Axle Holes

    samern04/26/2016 at 12:29 0 comments

    I found that I had to force the large threaded rod axles in very gingerly. I didn't want to wreck the wooden frame. I also realized I should cover the wooden frame in fiberglass when I was done. I made sure that the distance between the 2 rear axles was short, because I didn't want to add 'guide teeth' or something similar to the plastic track and I had decided to do a triangular drive system to conserve space. This meant that any flex in the track was constrained by the sprockets.

  • Initial Steps

    samern04/26/2016 at 12:25 0 comments

    Pretty simply, I had originally built my goKart out of metal I bought at Home Depot. The way it worked was that it had one drive wheel (rear right when facing the back of the Kart) and one wheel with a drum brake (rear left).

    The Kart was doing close to 30mph at half throttle, so it was scary. Instead it was converted to use a wooden (heavier) frame. Once the decision was made to convert it to a Half Track, the same decision was made to make it a full tank.

    Steps:

    1) Removed the engine, rear axle and rear wheels

    2) Measured and inserted a pair of 1.25" threaded rods, 36" long each

    3) Cut a set of metal cylinders to fit the bore of 2 drive sprockets (from InterLox), which in turn fit the shafts of a pair of electric motors

View all 6 project logs

  • 1
    Step 1

    See the log for the how to. I'd rather post the steps up there.

View all instructions

Enjoy this project?

Share

Discussions

Similar Projects

Does this project spark your interest?

Become a member to follow this project and never miss any updates