 Douglas Miller
To run a test with what I have on hand while waiting for the good stuff to get here, I followed a suggestion from another HackADay member (Thanks, Peter Walsh!) and ran out and grabbed some rubber cement. Why? Because if thinned a bit it might act similar to how the real goodies might act. That gives me a shot at giving it a test immediately, and get to practice on how to actually run the thing.
I made three mixtures. One was thinned at a 10 to 1 ratio (by volume), one at 15 to 1 and the last at 20 to 1.
For all of these tests I set the table at 140mm from the tip of the emitter.
I started by trying to find the best feed rate, and by the time it was done I had settled on 15 mm/hour for all the tests.
I started each one with voltage set at 18kV, then moved it up to 23kV, and finally at 28kV.
The lower two ratios I had trouble with. They tended to dry too fast, and obstructed the emitter. Nevertheless, I got a decent amount of strings being pulled from the emitter and landing (mostly) on the plate. I didn't observe a Taylor cone from either of them, but it would have been a problem seeing one if it was there, due to the globs of junk that stuck for a while, finally flew off, and then reformed.
The last ratio was the best. Having more solvent seemed to be the key. The strings pulled nicely and broke off nicely without junking up the nozzle, but were fairly dry when they landed. Not to say they were perfect, but I was well satisfied with the way they turned out.
I tried to get more video of the runs, but it's not all that easy of thing to do. The strings, particularly on the highest ratio runs, were thin. And I mean THIN. Average thickness was about the thickness of a human hair (0.004 inch, or .1016mm, Google tells me), but some I'd put at one third that thickness. They also grew long on the 23kV setting. The higher 28kV seemed to pull them off too fast for them to grow long, so I observed a thin mat of tiny strings on the plate at the end.
I don't have a way to actually measure the strings right now, but I'm going to have to look into changing that!
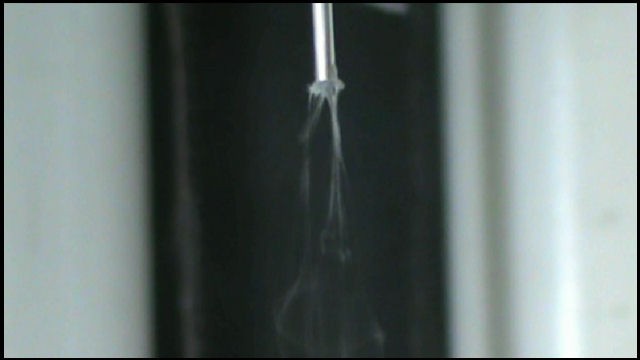
In the last photo of the series below a careful observer might notice a hint of blue. That's a coronal discharge when at the very end I cranked it up to 32kV.
What did I learn?
1: Well, how to actually USE the machine. You never know what will be awkward, hard to reach, or just a pain until you do a run from setup to final product.
2: How to make adjustments on the fly, depending on what's actually happening in the chamber.
3: I learned I need to do a bit more work on the voltage multiplier. At about 29kV I was getting a leak between the two input terminals. These are the terminals that come from the flyback transformer and into the multiplier. On closer examination it was inside the container, above the level of the mineral oil. I had put some liquid electrical tape on those parts, but not enough. I'll need to fix that before I do another run.
Now, I know this is not what the machine is for, just to make tiny strings of rubber cement. But what it did do was take me through all the steps needed to make a run with the real stuff. I found very little I would change on the machine. It worked well. Well enough that as soon as the high voltage multiplier is fixed, I'm ready to try it out on the stuff that matters.
All in all, a good day.
This was typical on the thinner runs:
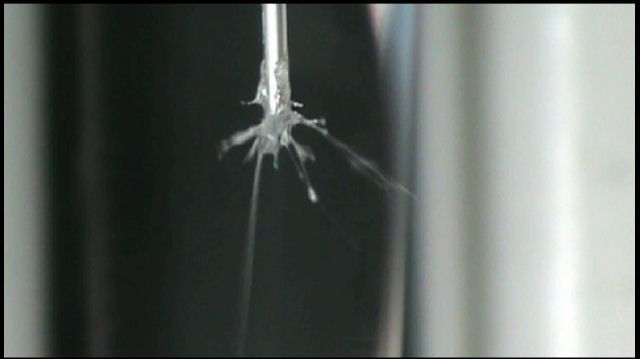
Getting there. Still some build up, but the strings flying off were so thin, I can't get a photo of them. Yes, what you see are only the thicker ones. This was with the 15 to 1 ratio.
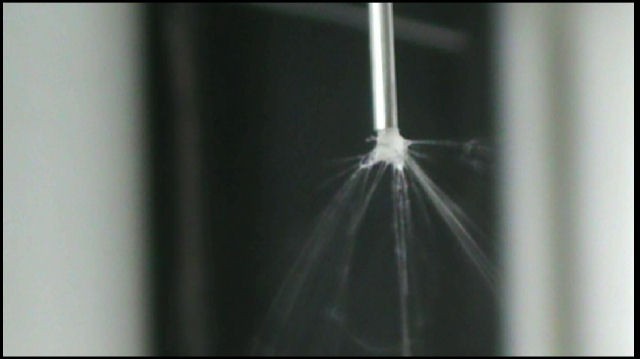
20 to 1 ratio, 23 kV:
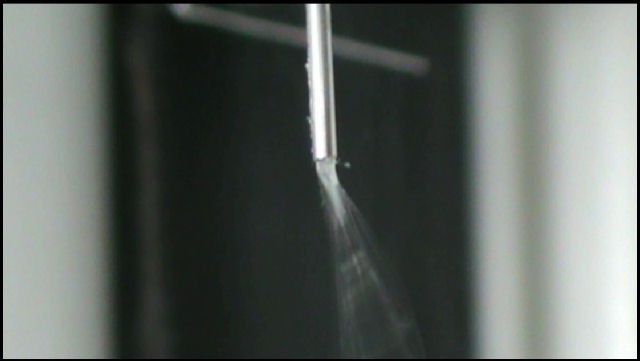
Notice the blue streak? Coronal discharge at 28kV. It came and went, following the longer threads down to the plate.

No, those are not scratches on the plate. They are tiny fibers forming a mat.
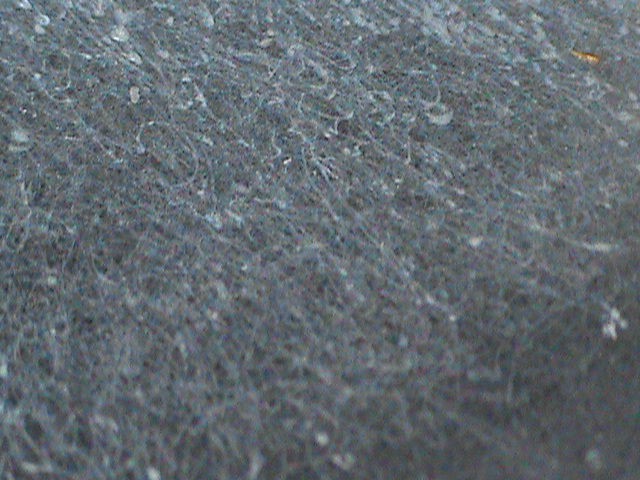
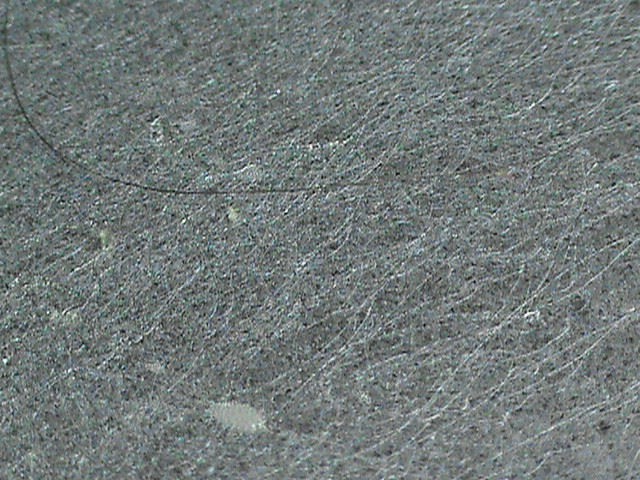
Same for this one. All the white streaks are fibers. The black one is a piece of my hair, to give you perspective on the strings actual sizes. I hope the hair helps you, it gave it's all for this project, and I don't have a lot of black ones left! Lol.
My notes as I made each run:

Discussions
Become a Hackaday.io Member
Create an account to leave a comment. Already have an account? Log In.