 borazslo
I fell in love with the sound of a grandfather's clock. But it was too expensive for me. And that clock has no alarm and snooze option. And it knows nothing about my emails or text messages.
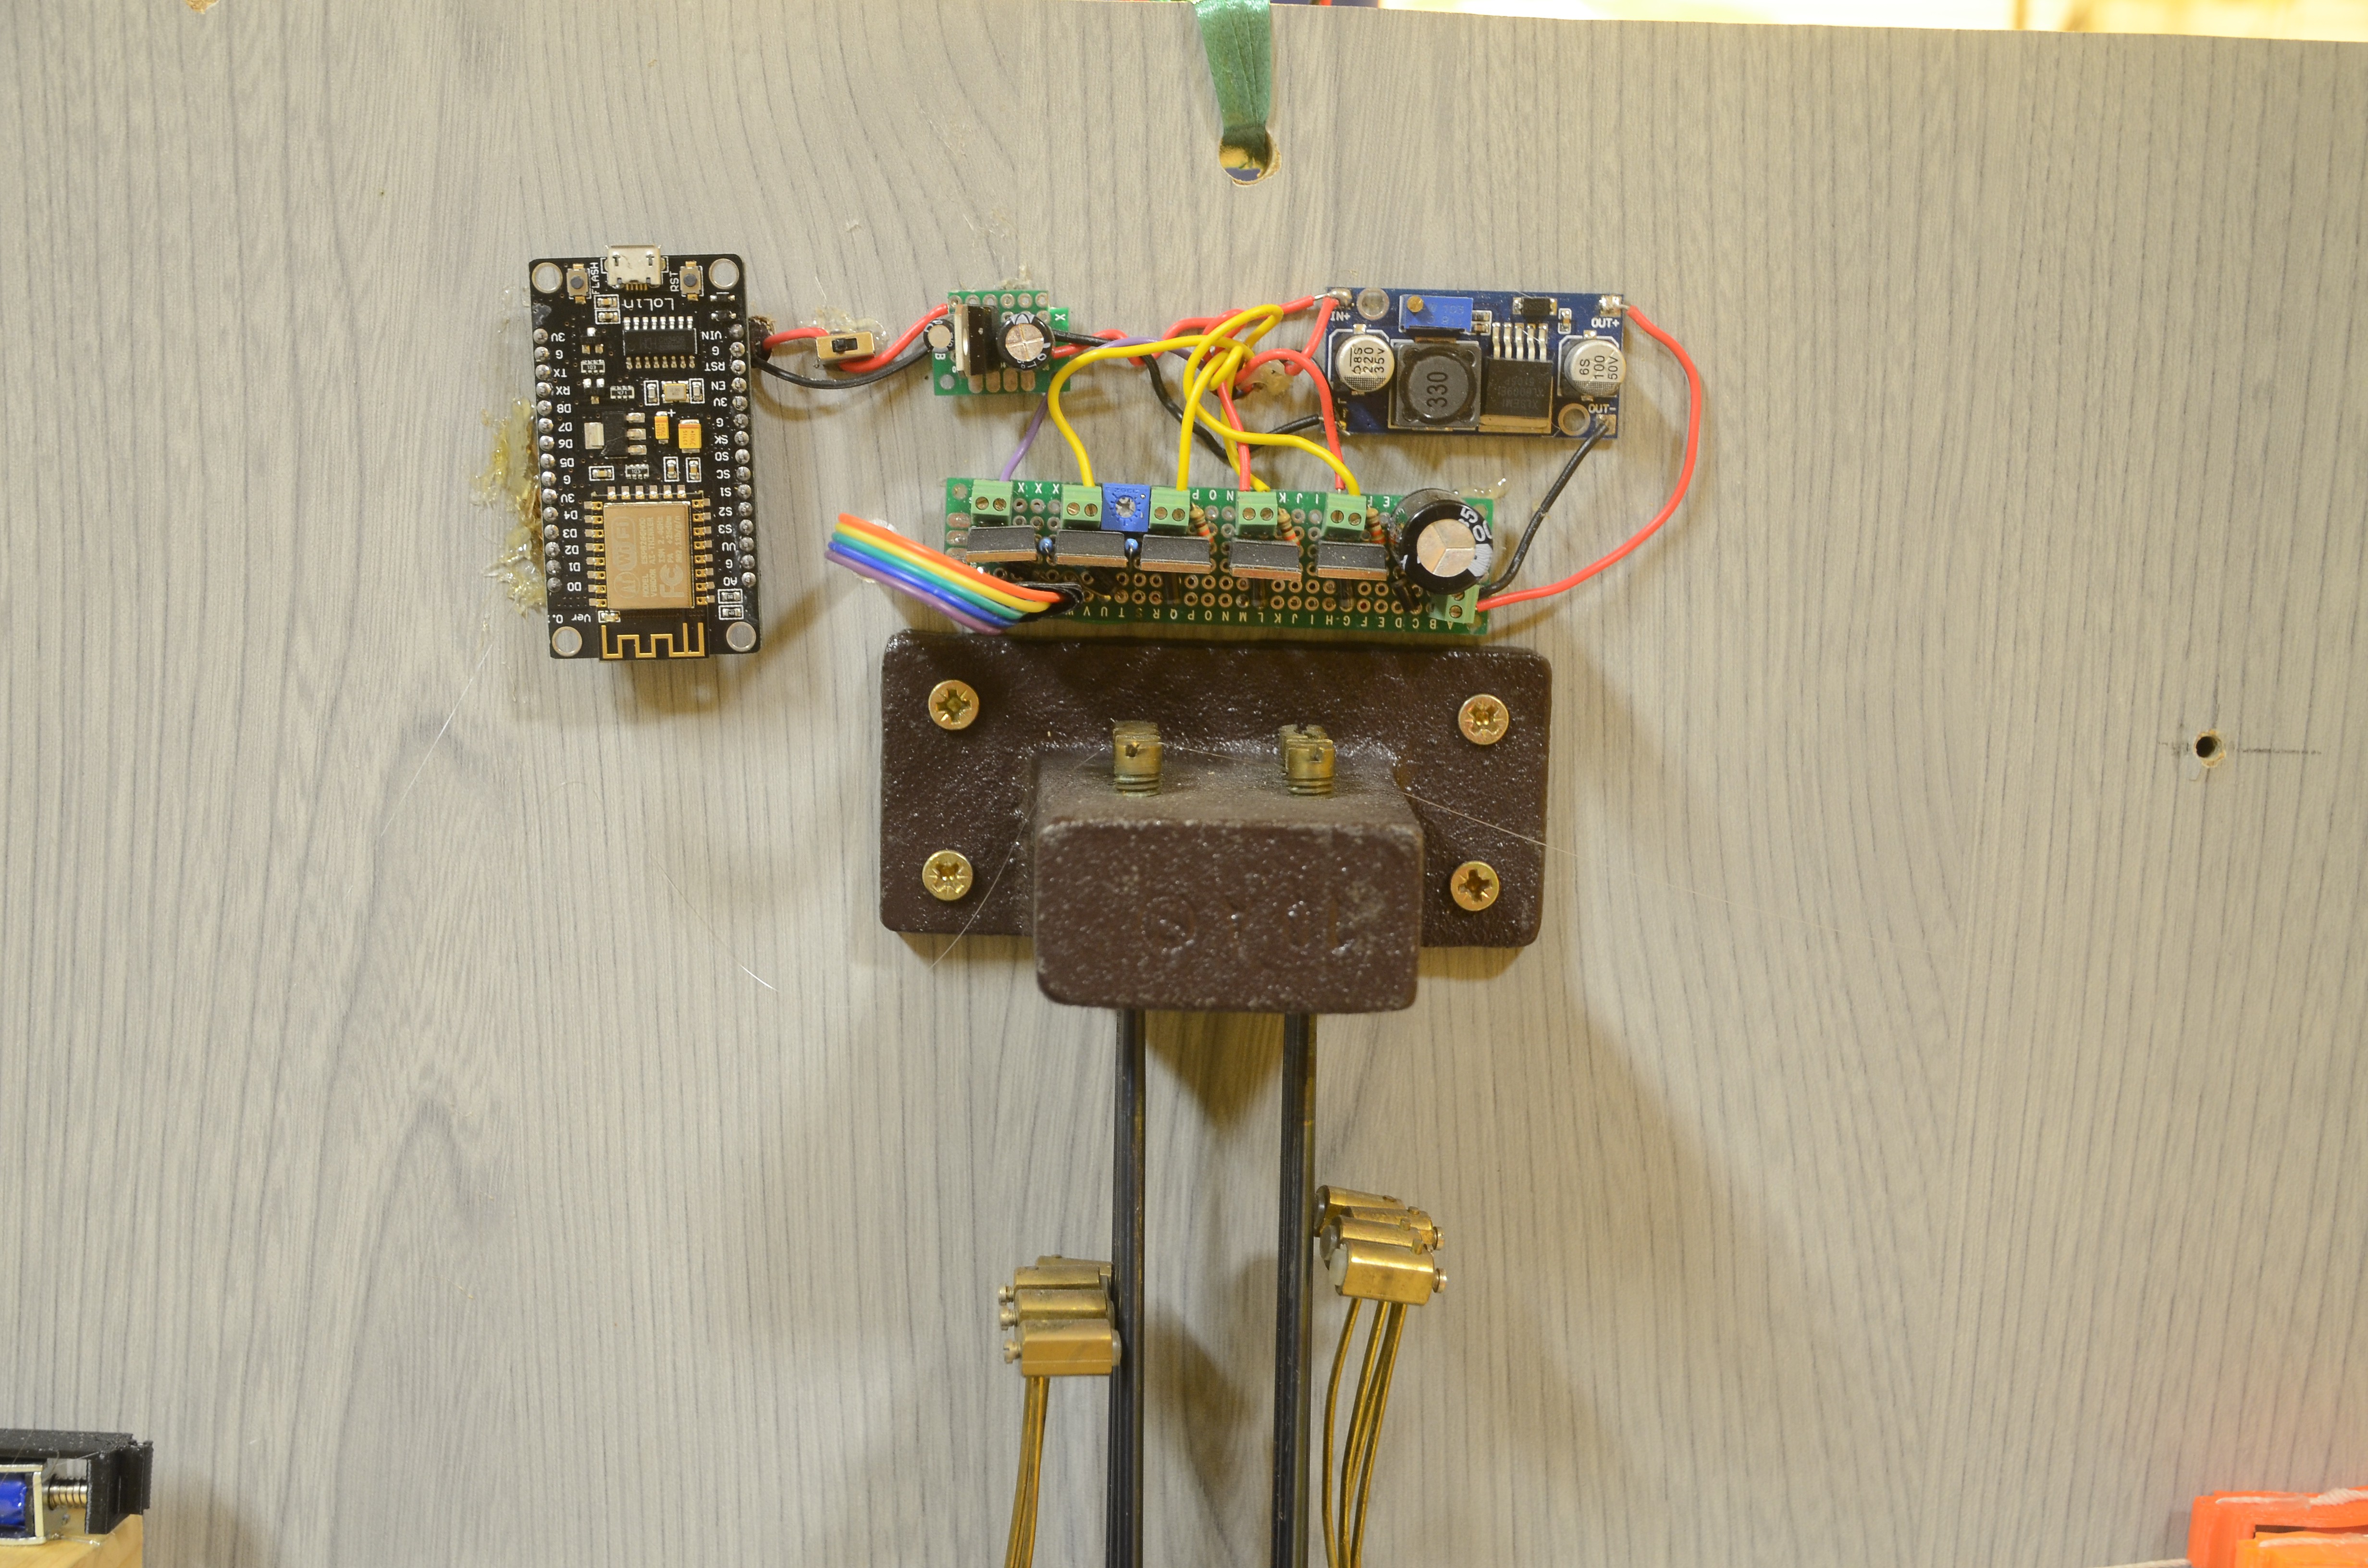
So I bought the mechanism of a used grandfather's clock on. It has a simple structure: The chime rods tinkle, when the hammers hit, when the solenoids pull in, when the Raspberry Pi sets voltage on the GPIOs, when the IFTTT webpage calls the Raspberry Pi's web server, when I receive an important email.
The clock is working now, but it has some issues. So let's see what I have done already:
- Mechanics (and fine tuning).
- Circuit, and problems with the power sources
- OS and Softwares
- Python code v0.2, and some small updates at v0.2.2
- (More coming soon.)
Special thanks to the Hatch (the makerspace of the Watertown Free Public Library) for the space, equipment, knowledge, and suggestions.
 Hardware
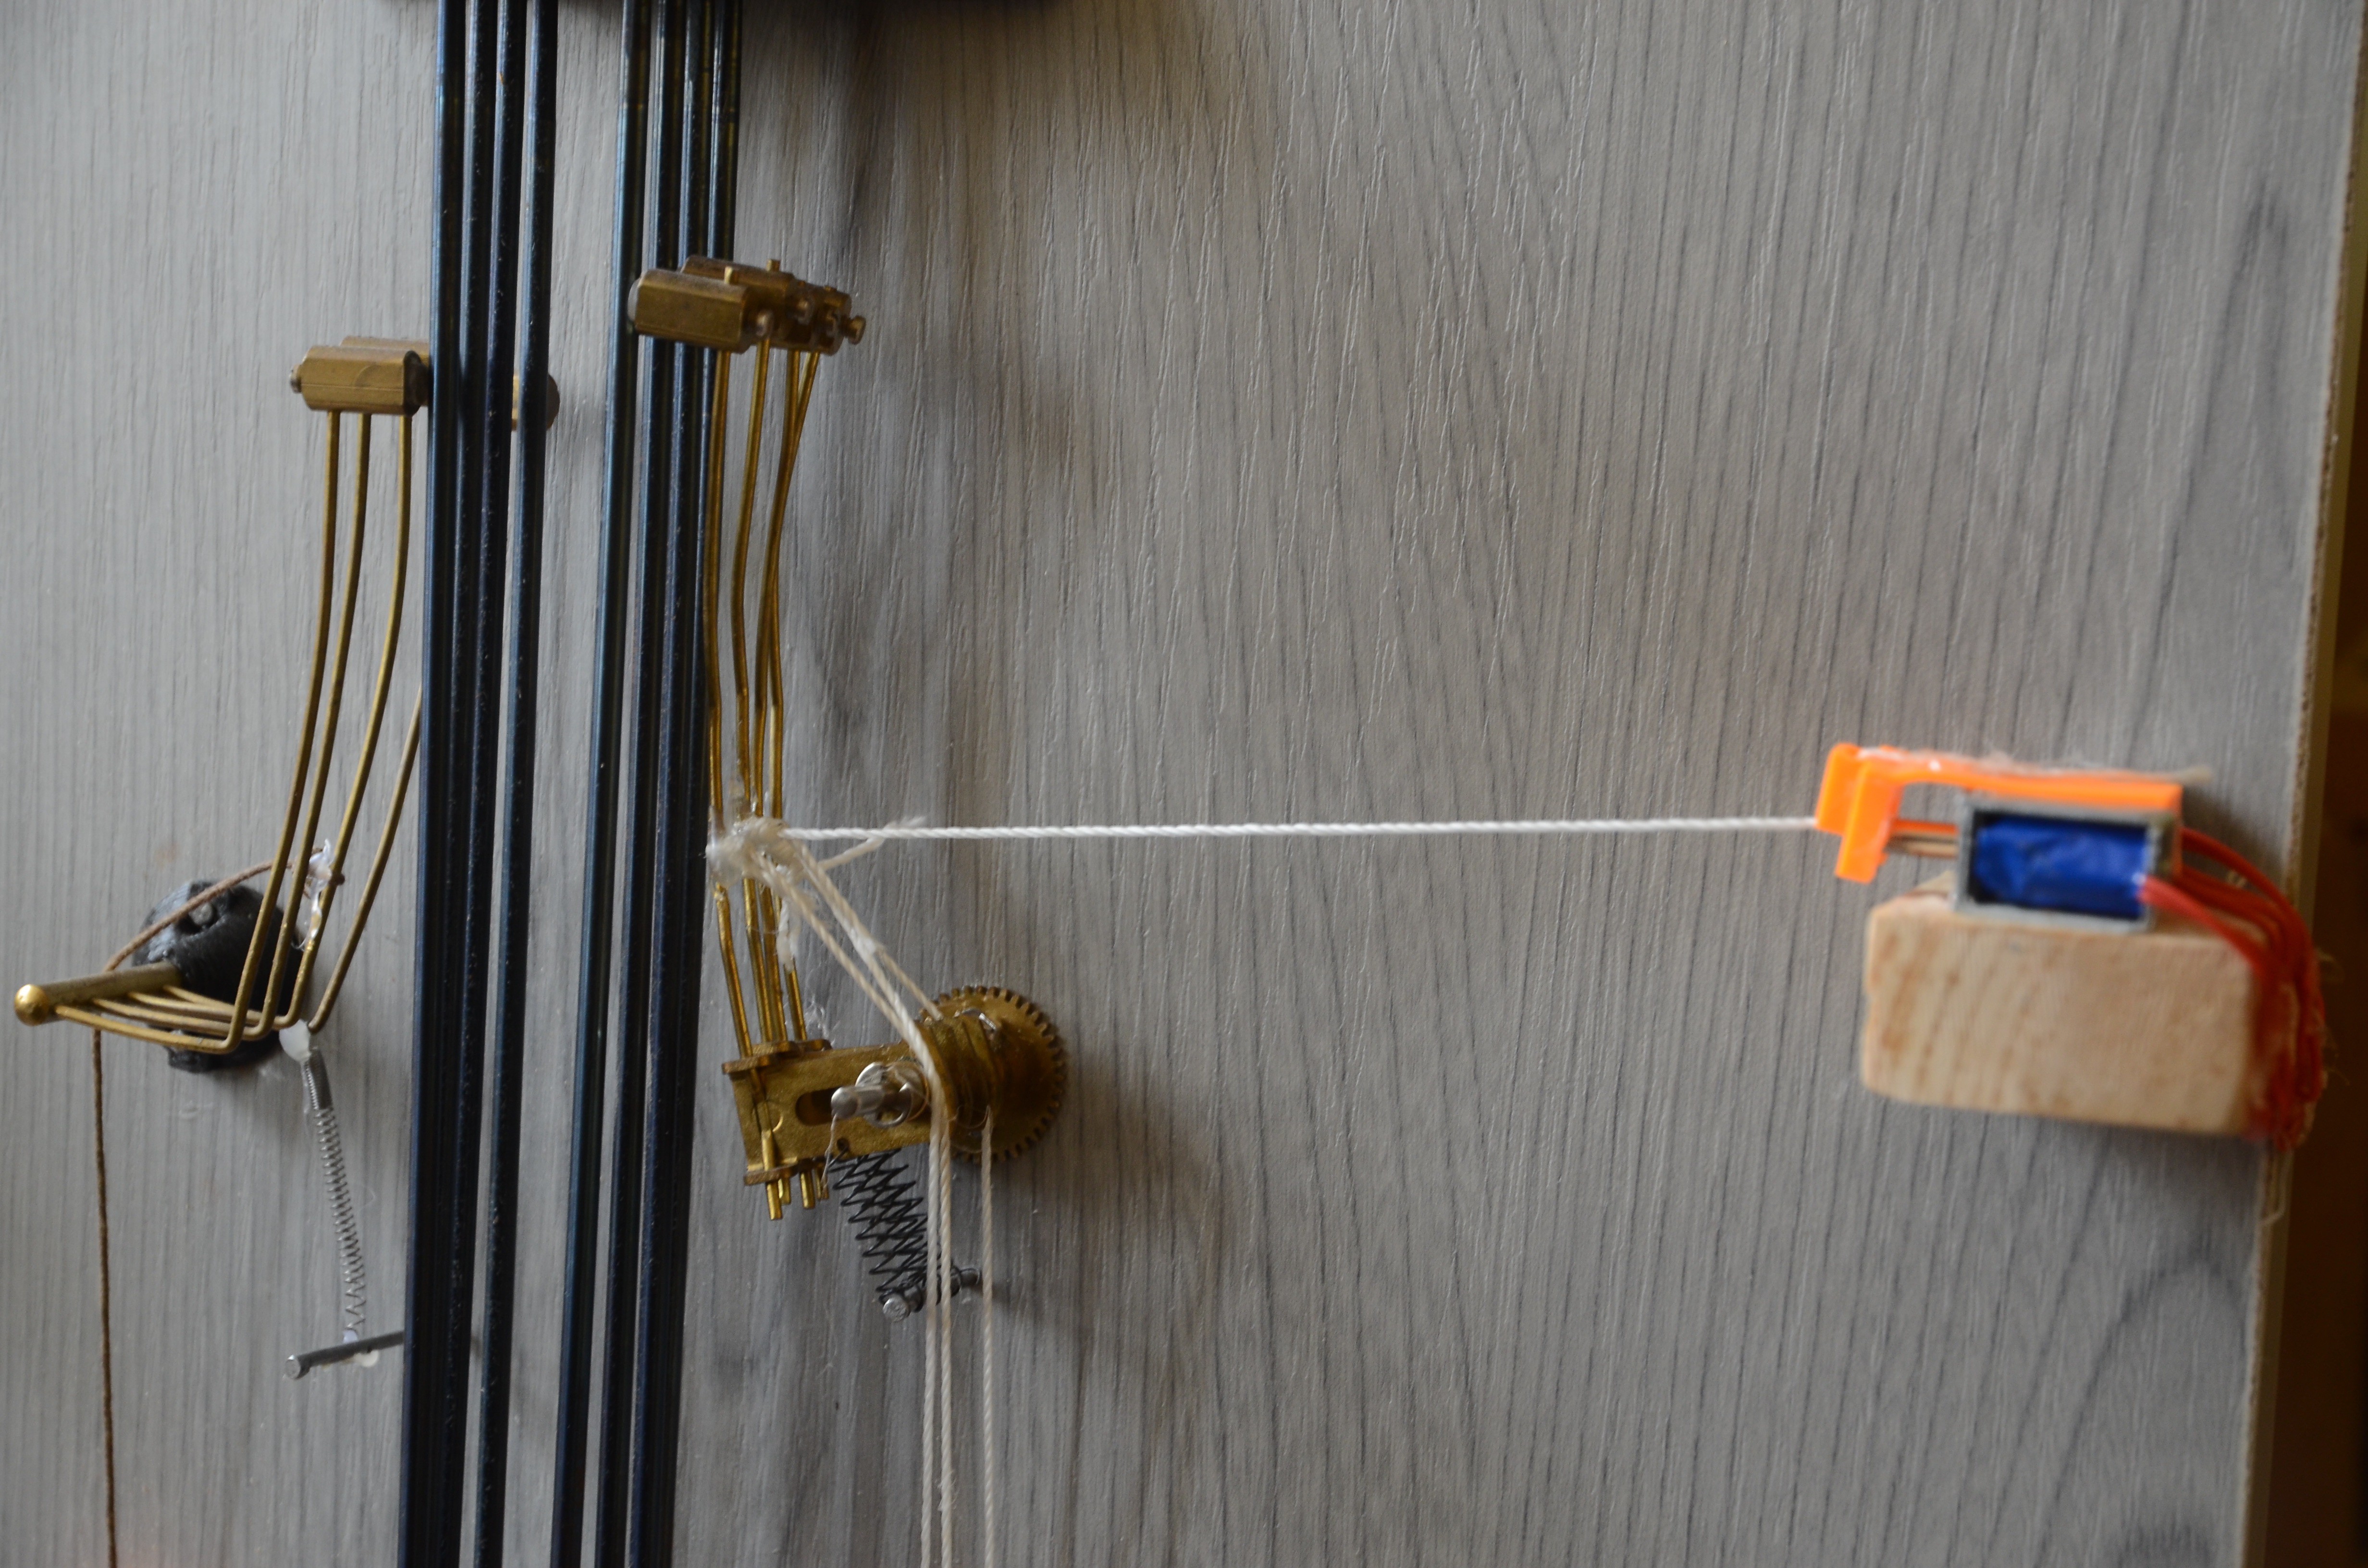
 Some of the GPIO-s of the RPi
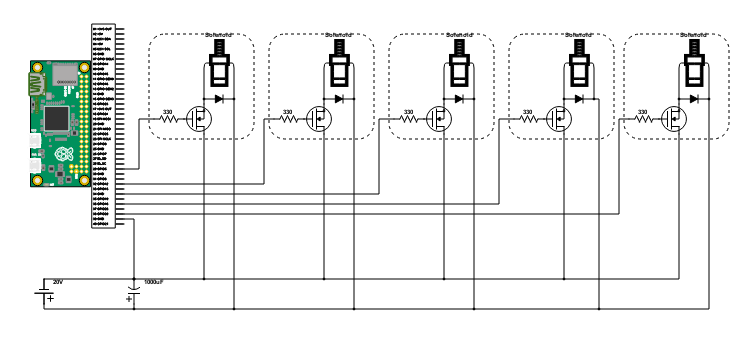


 Andrew Lee
 Norbert Heinz
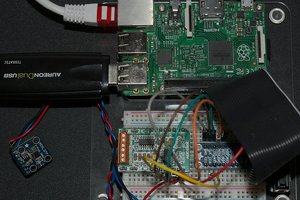
 Jeremy
 TM
TM
Excellent ! and so fun :-)