Close
0%
0%

VR Training Feedback

For the TVCOG VR Hackathon my teammates and I decided to create a haptic feedback system to help with task training.

Similar projects worth following
When learning a new skill there's a lot to balance. Babies are AMAZING they generally figure out a series of coordinated muscle movements in under a year that makes them mobile and able to grasp things. These actions are generally learned by observance, repetition and feedback. The feedback comes in the form of verbal encouragement that they probably can't really understand yet, as well as physical feedback as they learn their balance.

For the TVCOG VR Hackathon my teammates and I decided to create a haptic feedback system to help with task training. We'll be using Google Cardboard as our VR display. Initial system will use an Adafruit Feather bluetooth, 9dof sensors and cellphone vibration motors.

A more trivial example... I 'play' golf. I use quotes because I'm really bad at it. Despite a lot of improvement from working with a trainer, when I'm not working with them I don't get immediate feedback about my swing. The other problem is that with most skills that require muscle memory external feedback has to be processed through the conscious brain and my brain often gets in the way. I think too much, and react too slowly.

So what I'm really looking for is a way to provide immediate feedback when performing an action in a way that eliminates some of the conscious brain processing that slows down physical learning. The feedback should be visual, but it should also be physical so that I can develop my unconscious reactions more quickly.

What it does

Simulate an action in VR and provide immediate visual and physical feedback as I perform an action.

How we built it

In order to provide visual feedback an arm model was developed in Unity for Google Cardboard. The arm is programmed to move through a series of angles to perform an action. Eventually this would be recorded by an expert level skilled person.

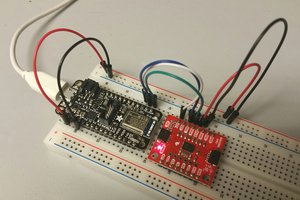
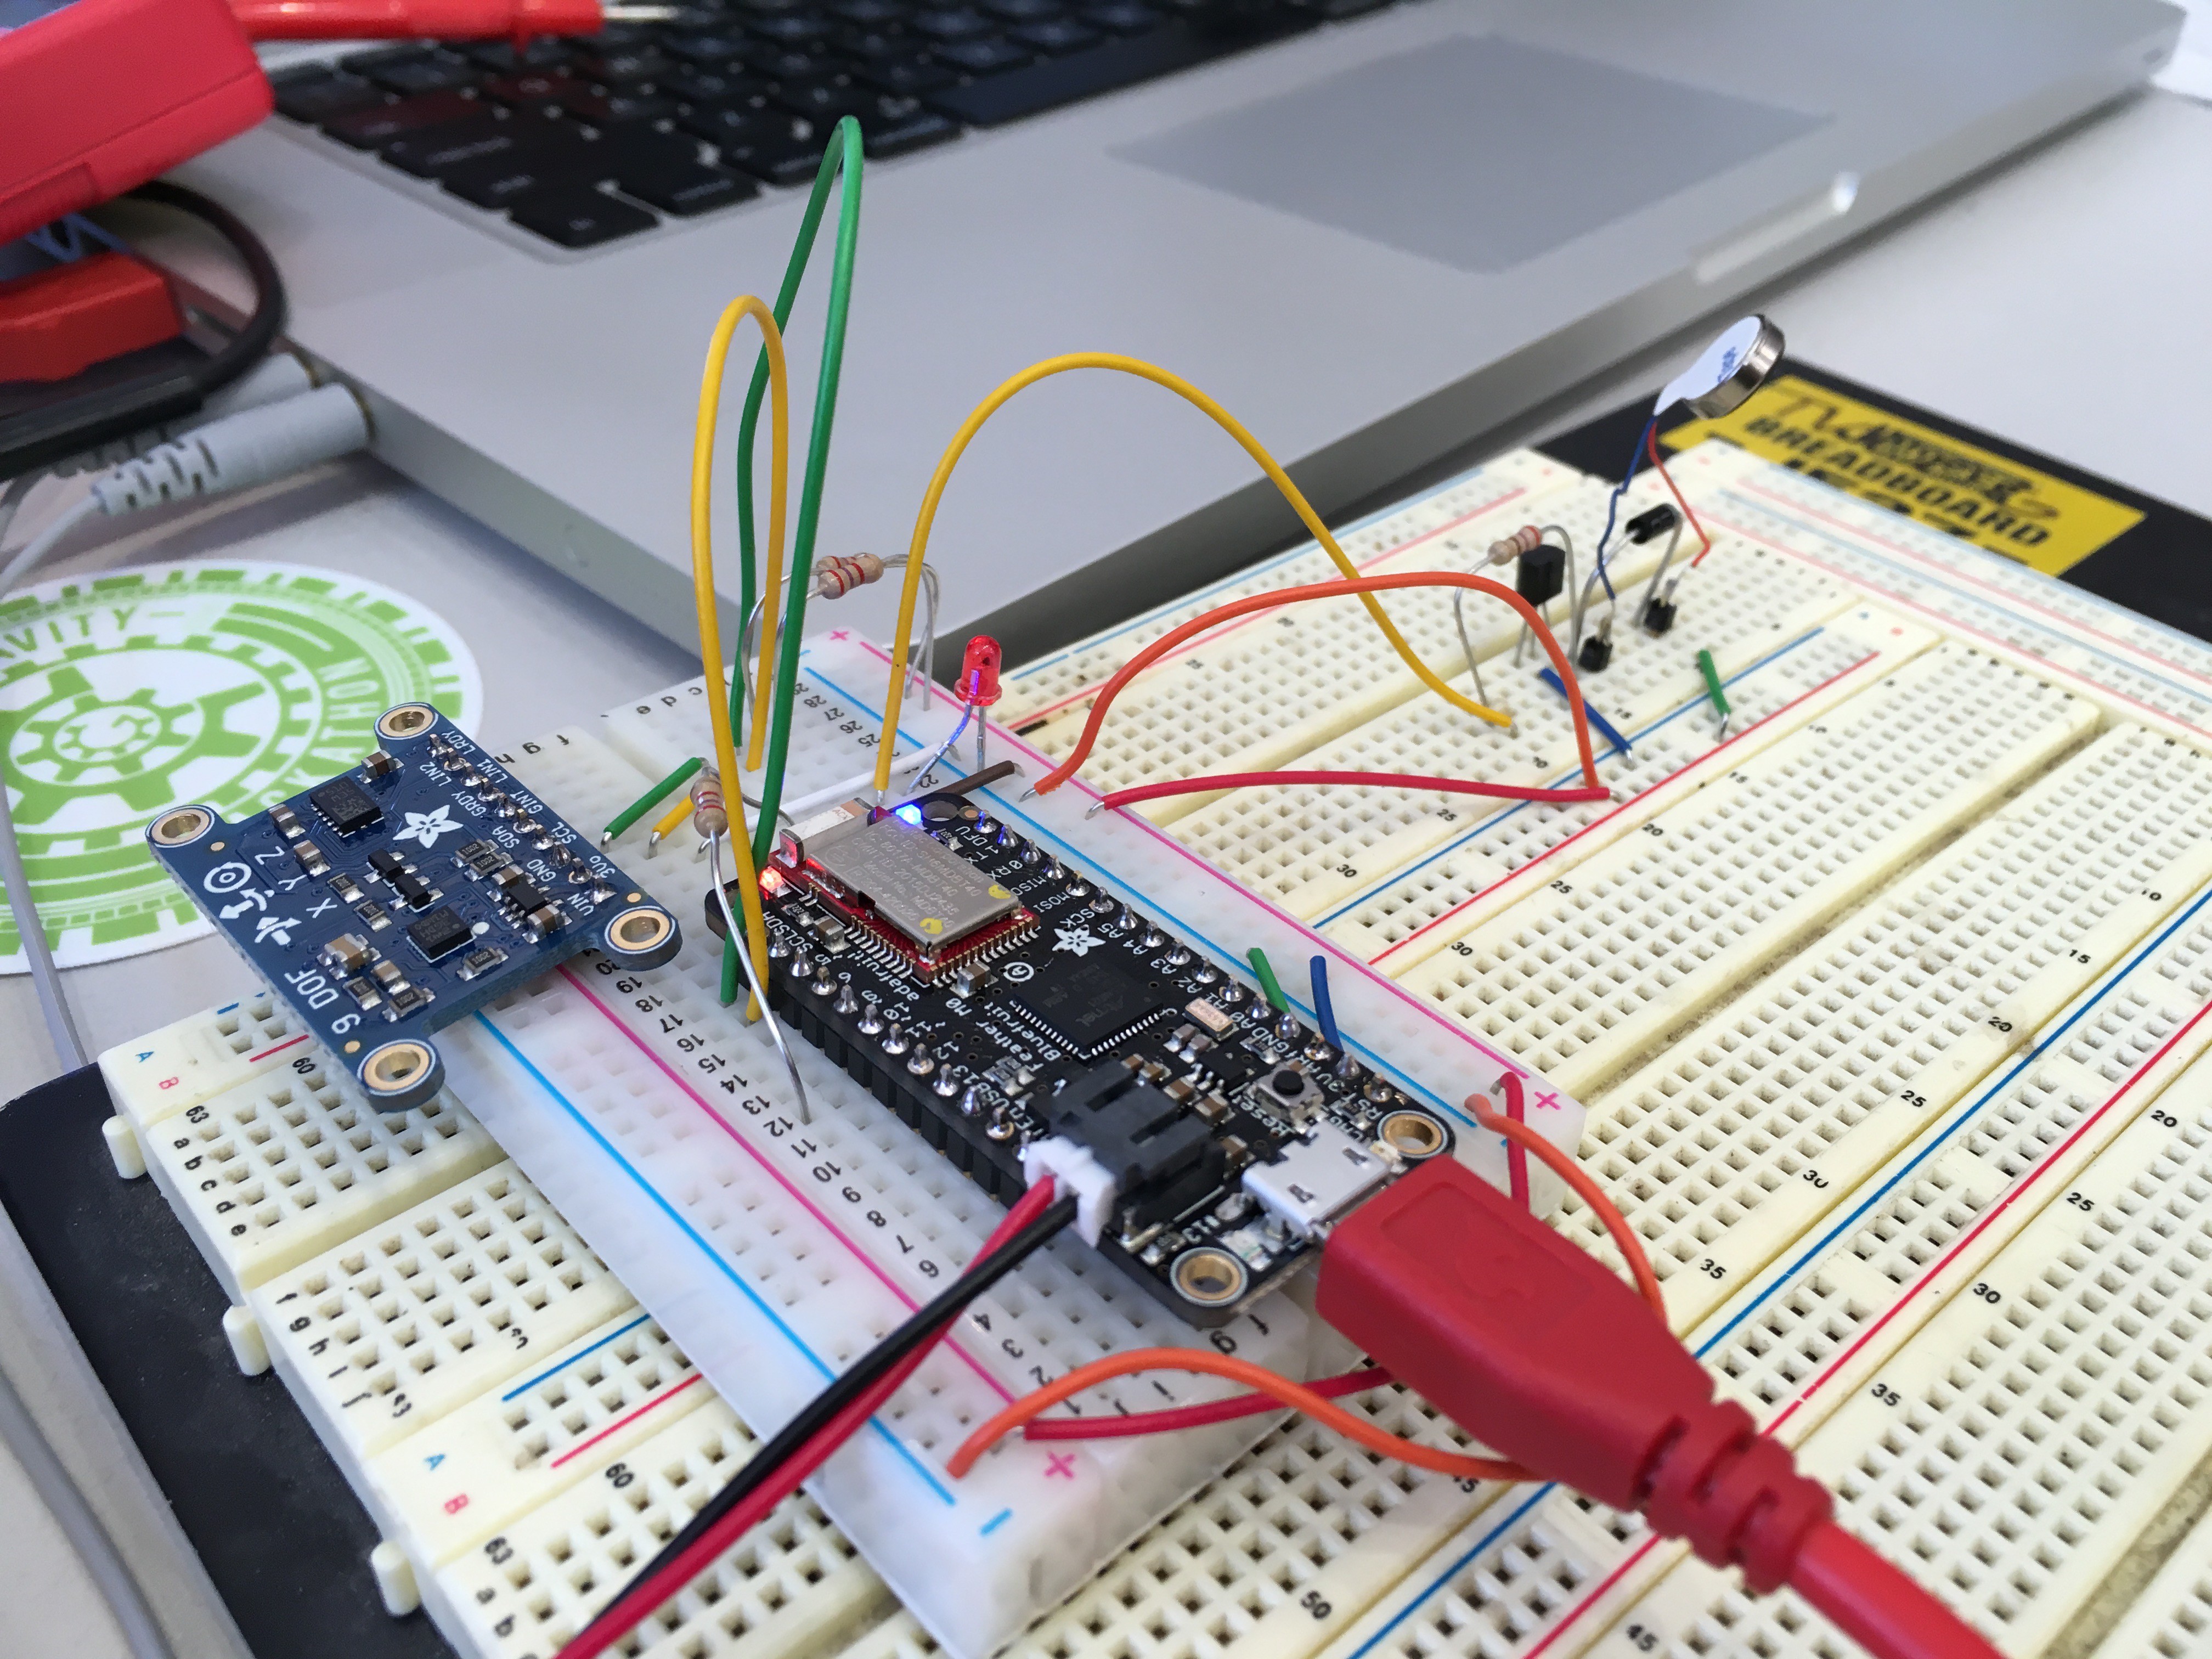
To provide the actual positions of the trainee 3 - 9 degree of freedom sensors are mounted on the users arm that can calculate the arm's angles relative to compass directions.

Physical feedback is via small vibration motors mounted to the arms aligned with the axis of the accelerometers. Ideally each axis would have at least 6 motors.

There are 2 communications protocols we had to implement. The first is i2c between the 9dof sensor and an Arduino microprocessor. The second communication protocol was bluetooth low energy which takes the information from the Arduino and sends it to an iPhone 5s mounted running Google Cardboard.

Challenges we ran into

Both of us were new to most of the technologies we were using although we're both programs. Particularly challenging was configuring the bluetooth module to communicate with the iPhone. Bluetooth is configured via commands that have been available since the first modems were released in the 70's, and the documentation is not very clear.

Another issue was with I2C. Each device on the I2C bus has to have a unique address and the sensors I bought did not have reconfigurable addresses. In order to get over this limitation one can add an intermediary microprocessor that has a programmable I2C address.

Accomplishments that we're proud of

  • We learned a lot!
  • Wireless bidirectional communications between the Arduino and iPhone
  • Communications via i2c between the sensor and the Arduino
  • Created a tiny motor driver for the vibration motors
  • Modeled and 3d printed a holder for the Arduino module
  • Unity modeling of a multi-axis arm with feedback

What we learned

Providing immediate feedback via some type of physical feedback really makes VR feel much more realistic. Even just a slight buzz caused a noticeable difference to the experience. This technology is hard to get started with, but overall not that difficult. Except for the bluetooth communications there's a lot of documentation out there to help you get started.

  • Ready for action

    Matt Barth05/05/2016 at 00:32 0 comments

    The arm position code is now scaled to support all of the different joints. The arduino I have sort of fell apart, so I am looking forward to the next meeting with Jeff to test with a working arduino.

    I removed the neck, resized, and repositioned the arm to make it more lifelike through the google cardboard. Although the arm can cause vibrations based on angles, I added the ability to also cause vibrations when it collides with objects. The only object in the scene currently is the block that shows connectivity, but I have tested it with a arm movement test script I wrote and triggers are being called appropriately to cause vibrations. I have support to trigger both front and back vibrations depending on the position of the collision on the limb, which will be cool when we eventually have multiple arduino vibrators devices for each limb.

    The viewport from the cardboard is tricky. I added a floor with a wood texture so that the arm doesn't seem completely in space, but the scale of the arm is a bit off. The shadow from the arm looks much to small on the floor. I am going to have to tweak it much more. I thought it would be cool to create a pagoda training room around the player. Maybe we could make a fruit ninja game for people to play once we get this working! Ninja training ftw!

  • Status and Next Steps

    Matt Barth04/19/2016 at 19:55 0 comments

    As of today we have the Unity app connecting and parsing bluetooth data from the Arduino. It has support for storing angles of the complete arm, but is only using feedback from one sensor to rotate the angle of the 3d arm in virtual space. We also have been able to send a message to the Arduino to trigger a vibration. The next couple steps for the Unity application are to send vibrations when the arm collides with objects and to start using the scaling structure for multiple sensors. From there I will go about repositioning the arm so that it extends from a location and at a length that makes sense from the perspective of the user wearing the google cardboard. Right now the arm is suspended in space in front of the user for debugging purposes.

  • Getting the hardware going

    jpcutler04/16/2016 at 23:29 0 comments

    I've broken down the hardware aspect of the project into a few steps.

    1. HelloWorld (blink LED 13) on the Adafruit Feather Bluetooth LE - complete
    2. Communicate via i2c with the9dof IMU via i2c - complete
    3. Create a circuit to drive the vibration motors - complete
    4. Communicate with an iPhone via bluetooth - complete
    5. Relay data from 2 to the iPhone via bluetooth - in progress

    As far as the software goes Matt is working on connecting with and receiving data via bluetooth in Unity 3d. We couldn't setup the Bluetooth module as a keyboard since we needed bi-directional communications. Instead we setup the module as a BLE server and the phone as a client. In order to send angular data we have to use at least a 2 byte package (360 degrees). We're going to have the overall calculations done on the device and have it send back whether the motors should be on or off.

View all 3 project logs

Enjoy this project?

Share

Discussions

Similar Projects

Does this project spark your interest?

Become a member to follow this project and never miss any updates