 codersilver
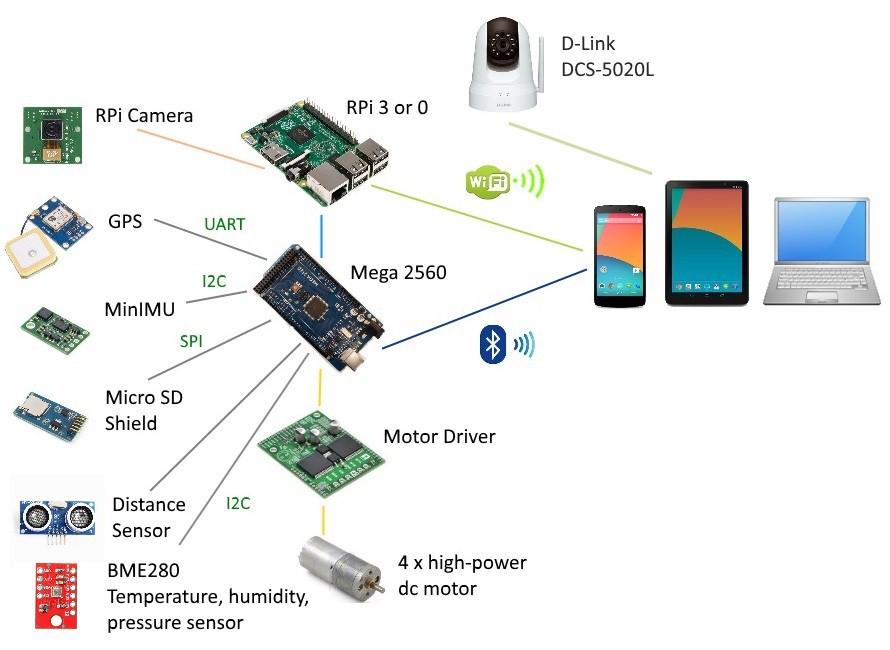
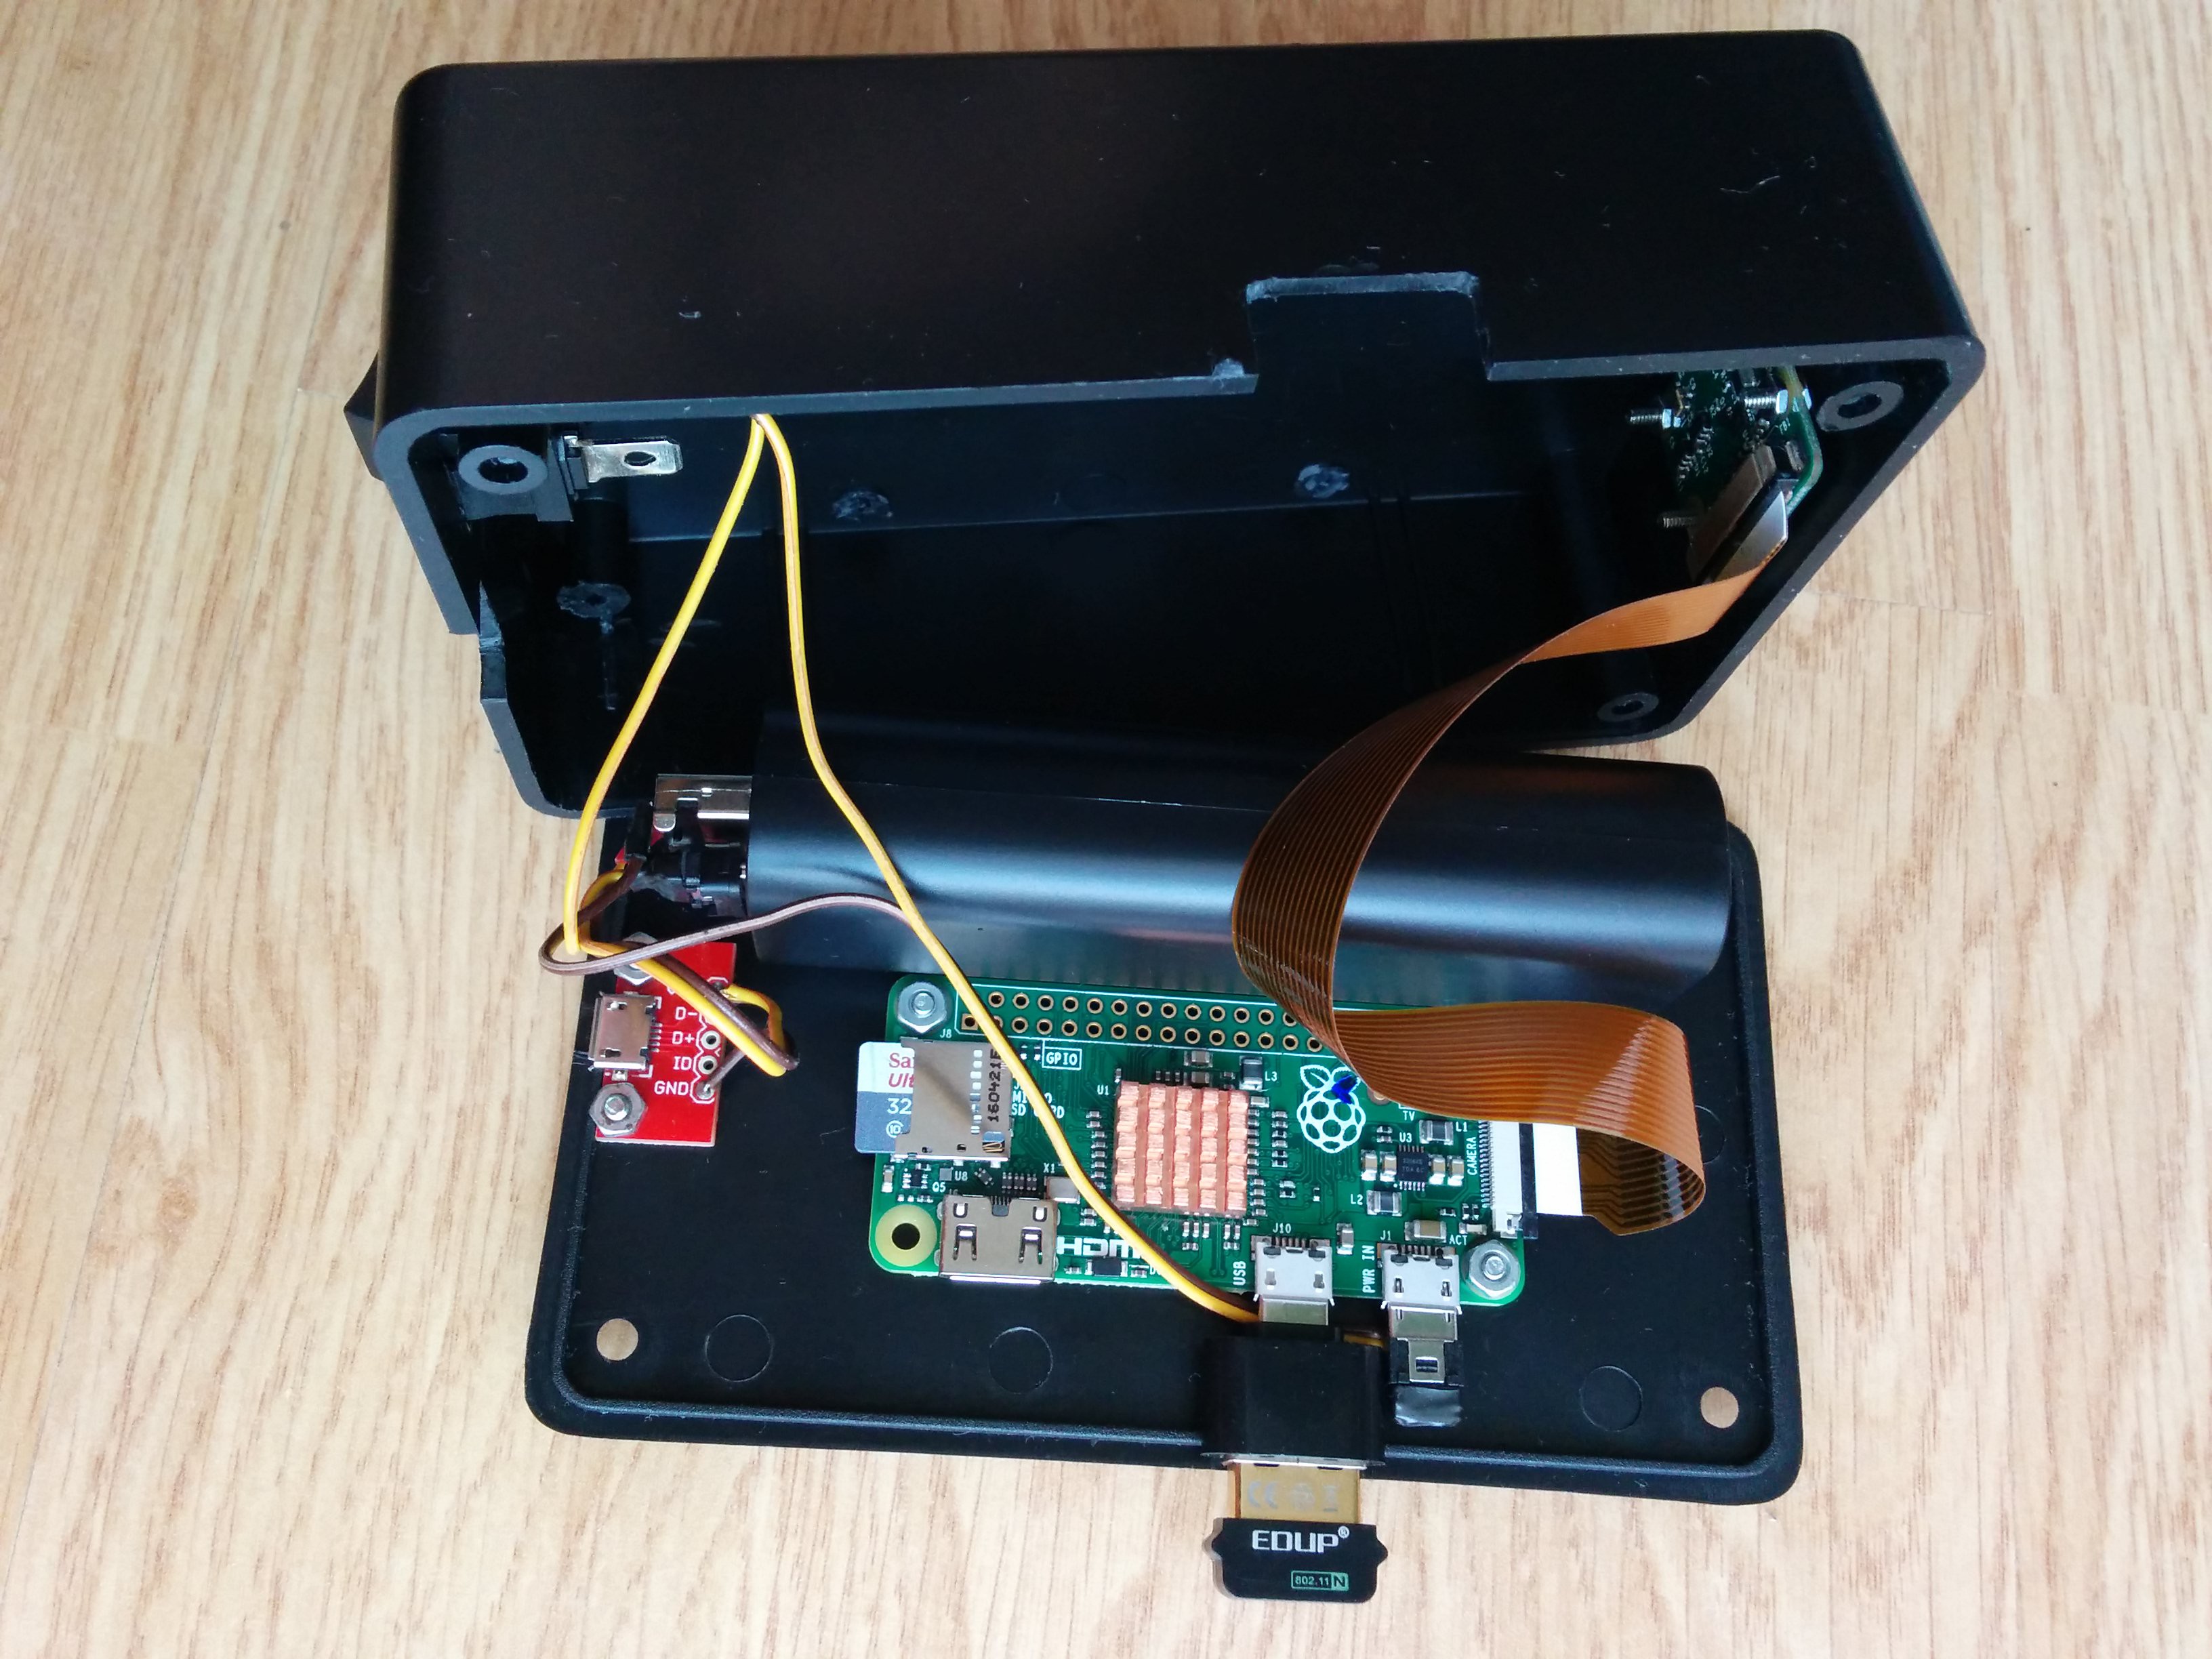
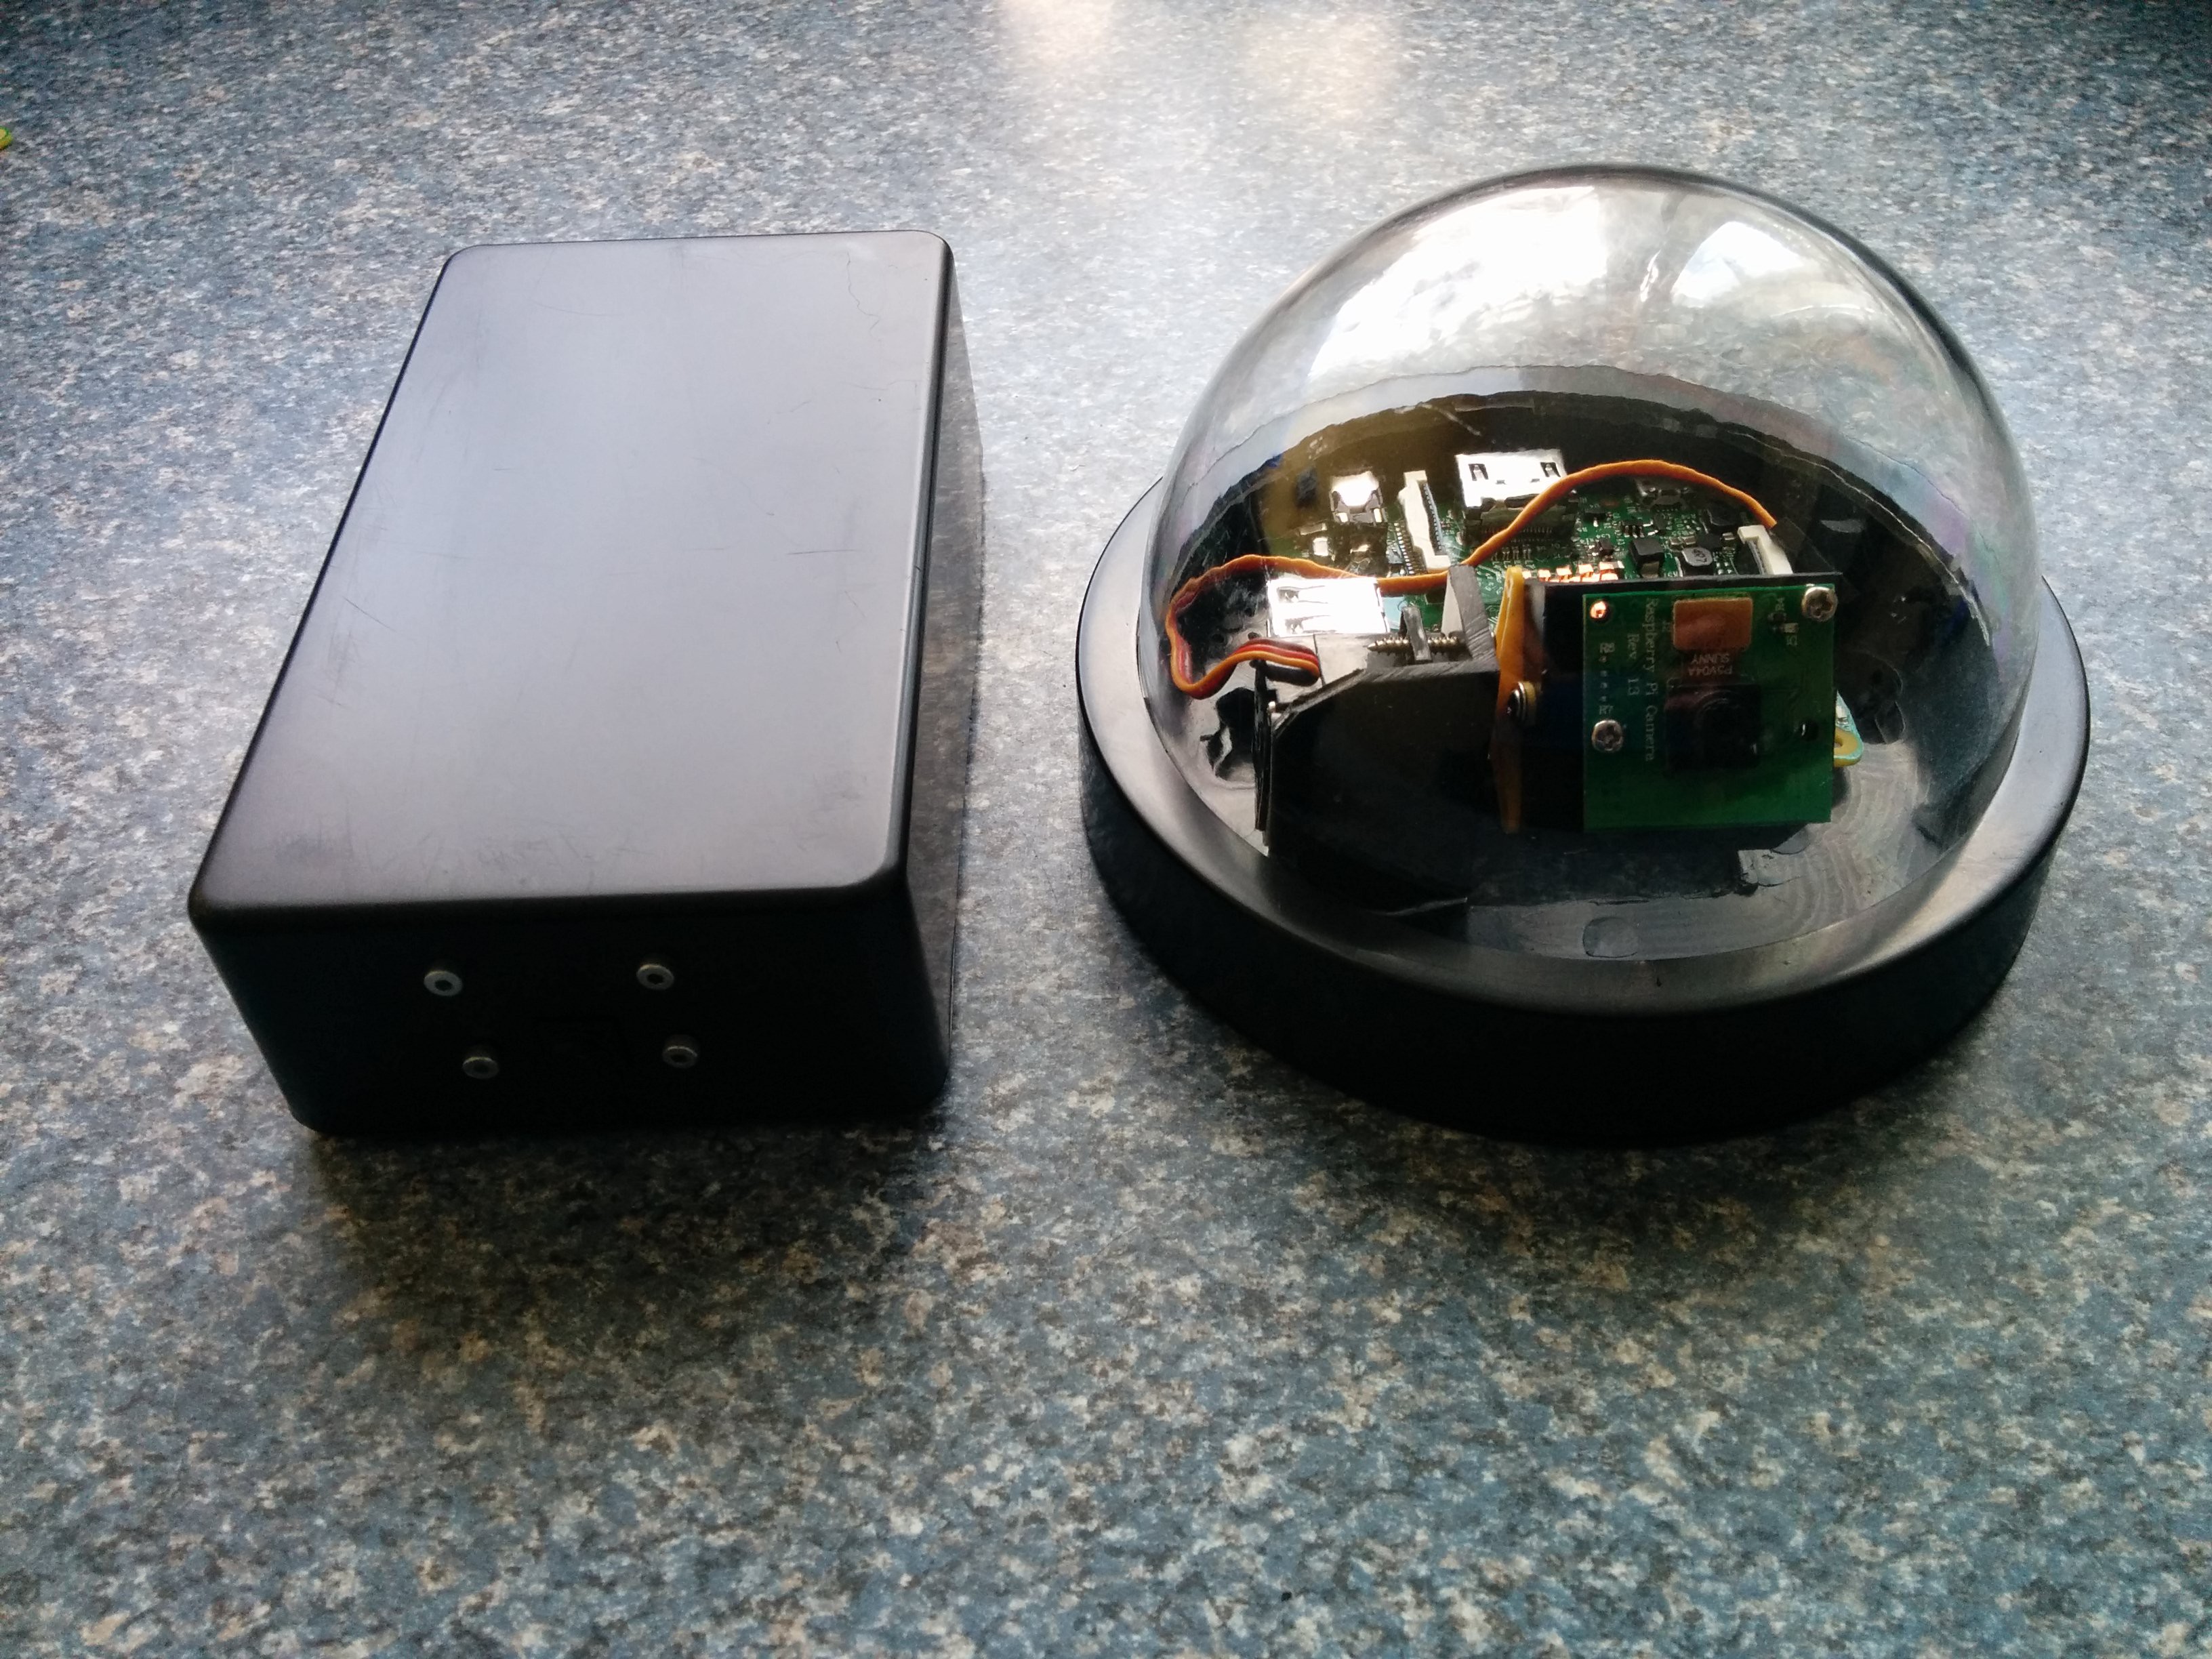
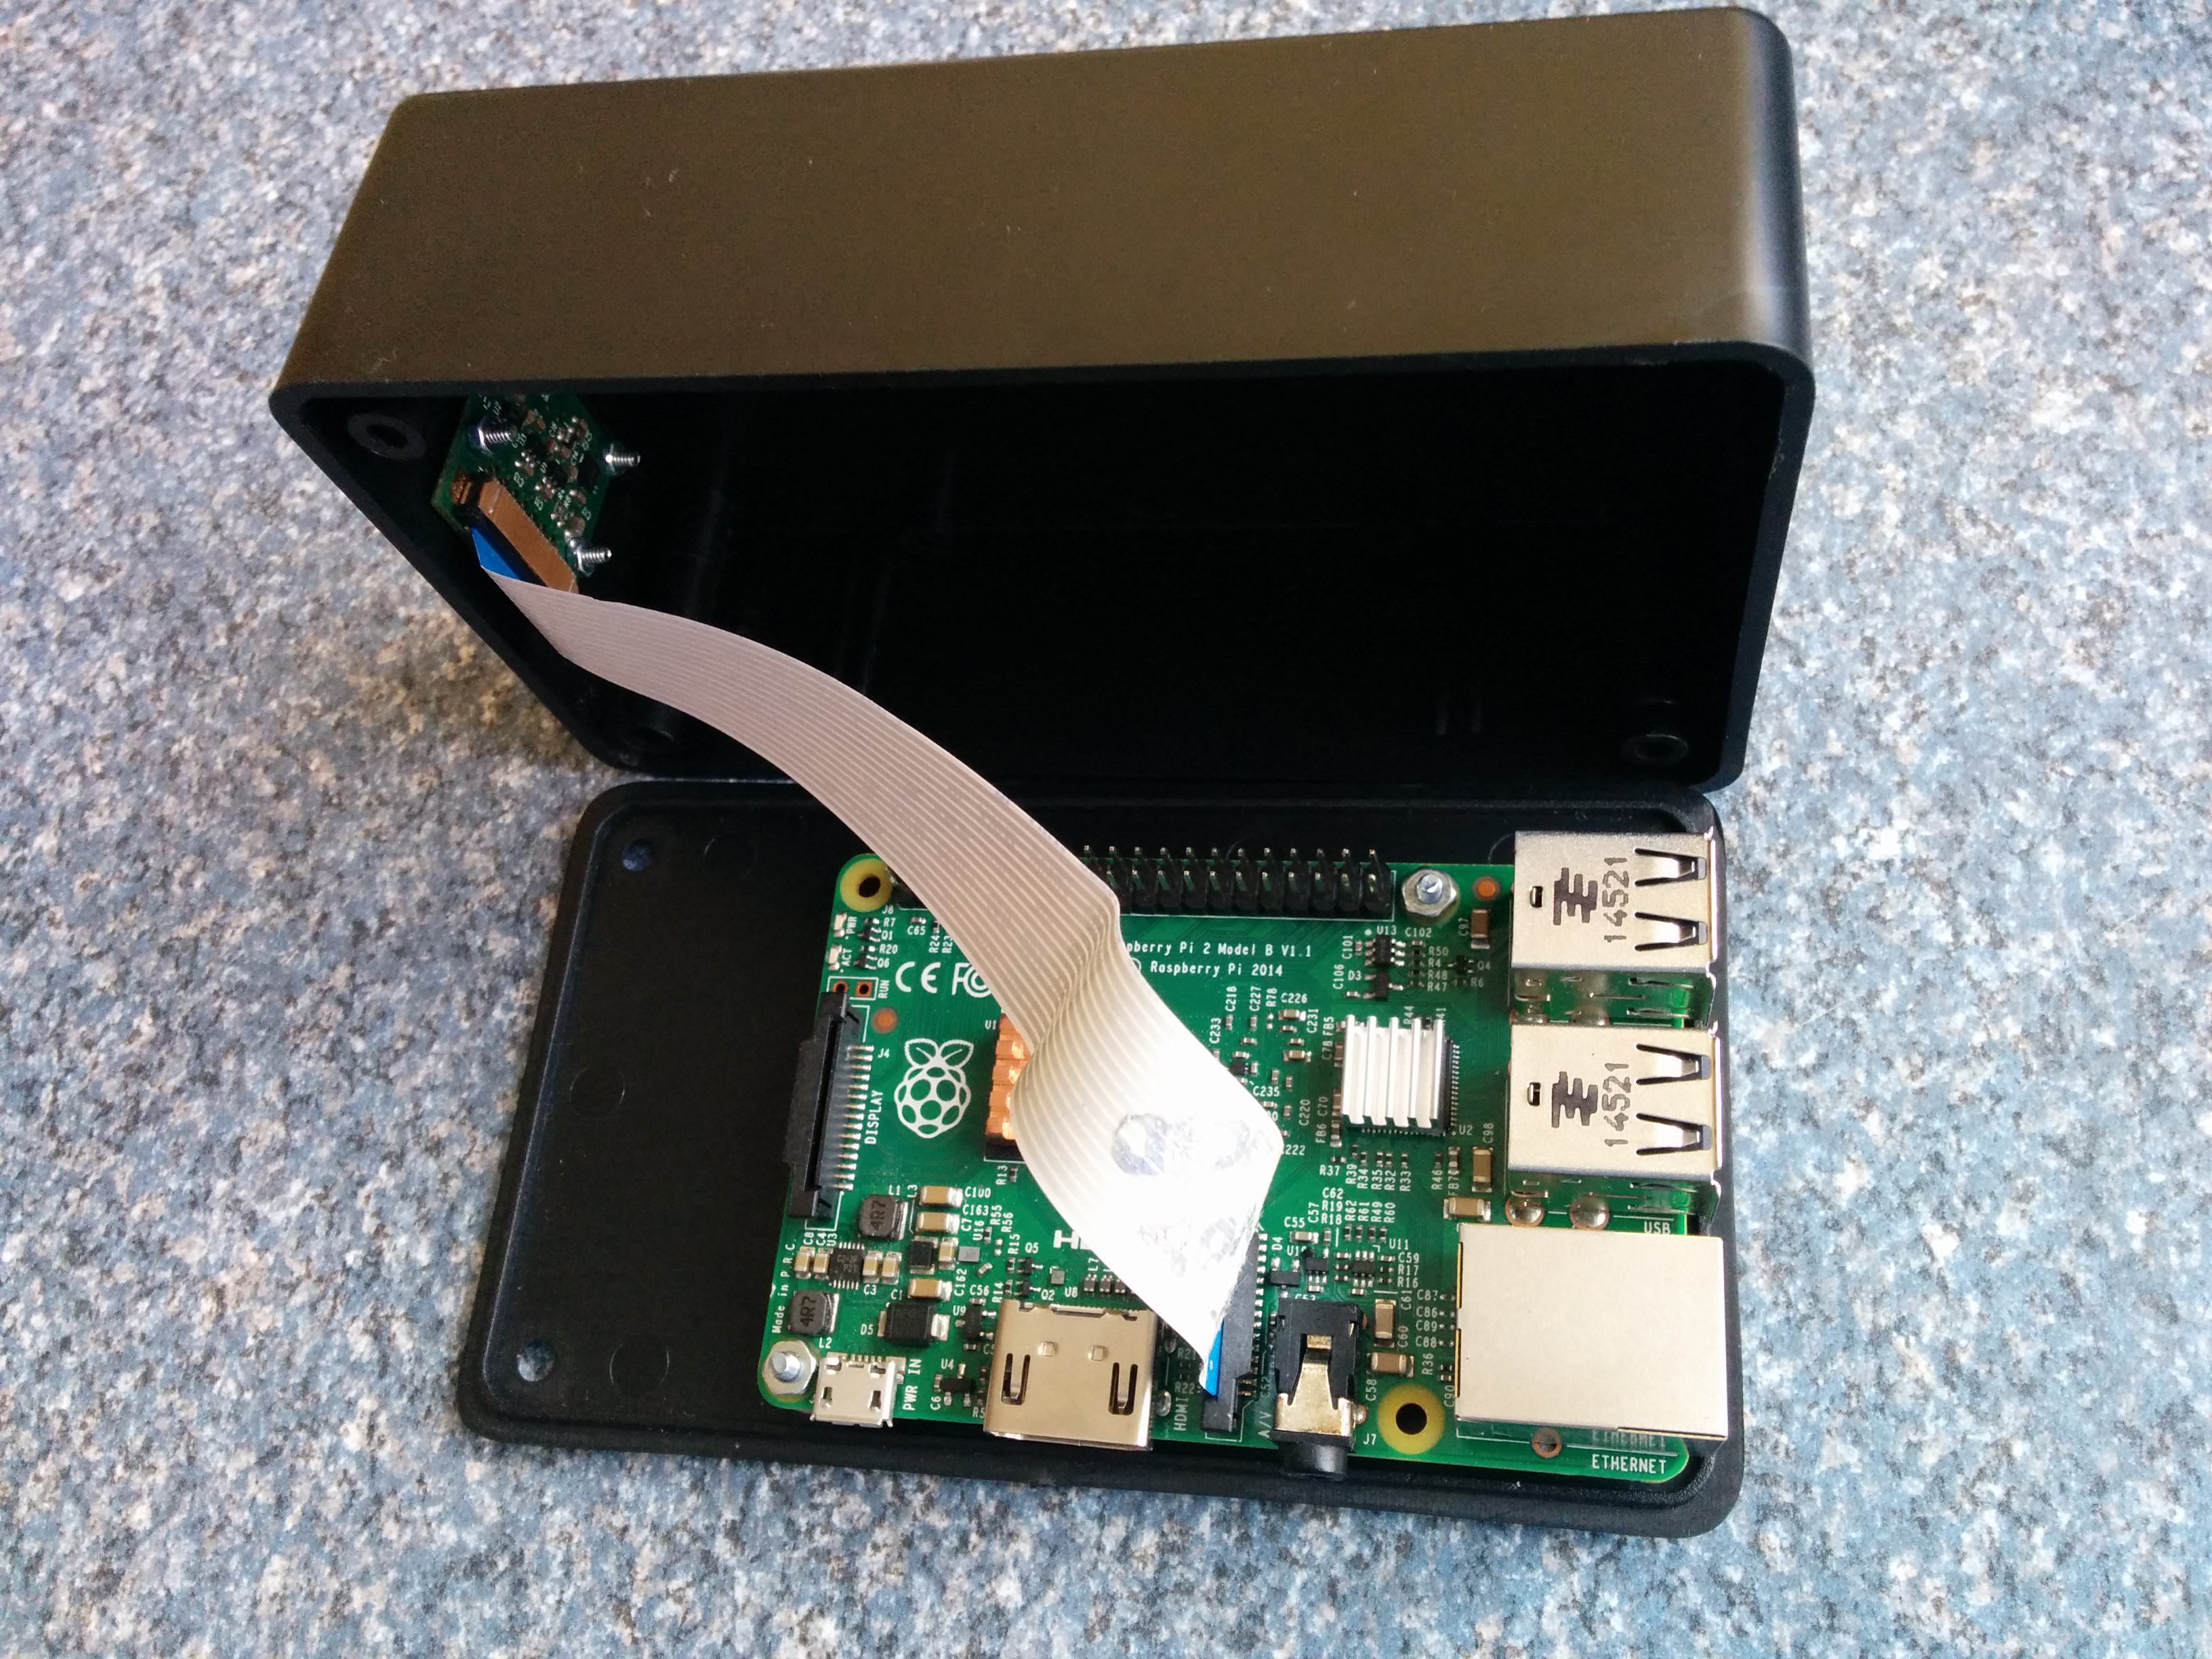
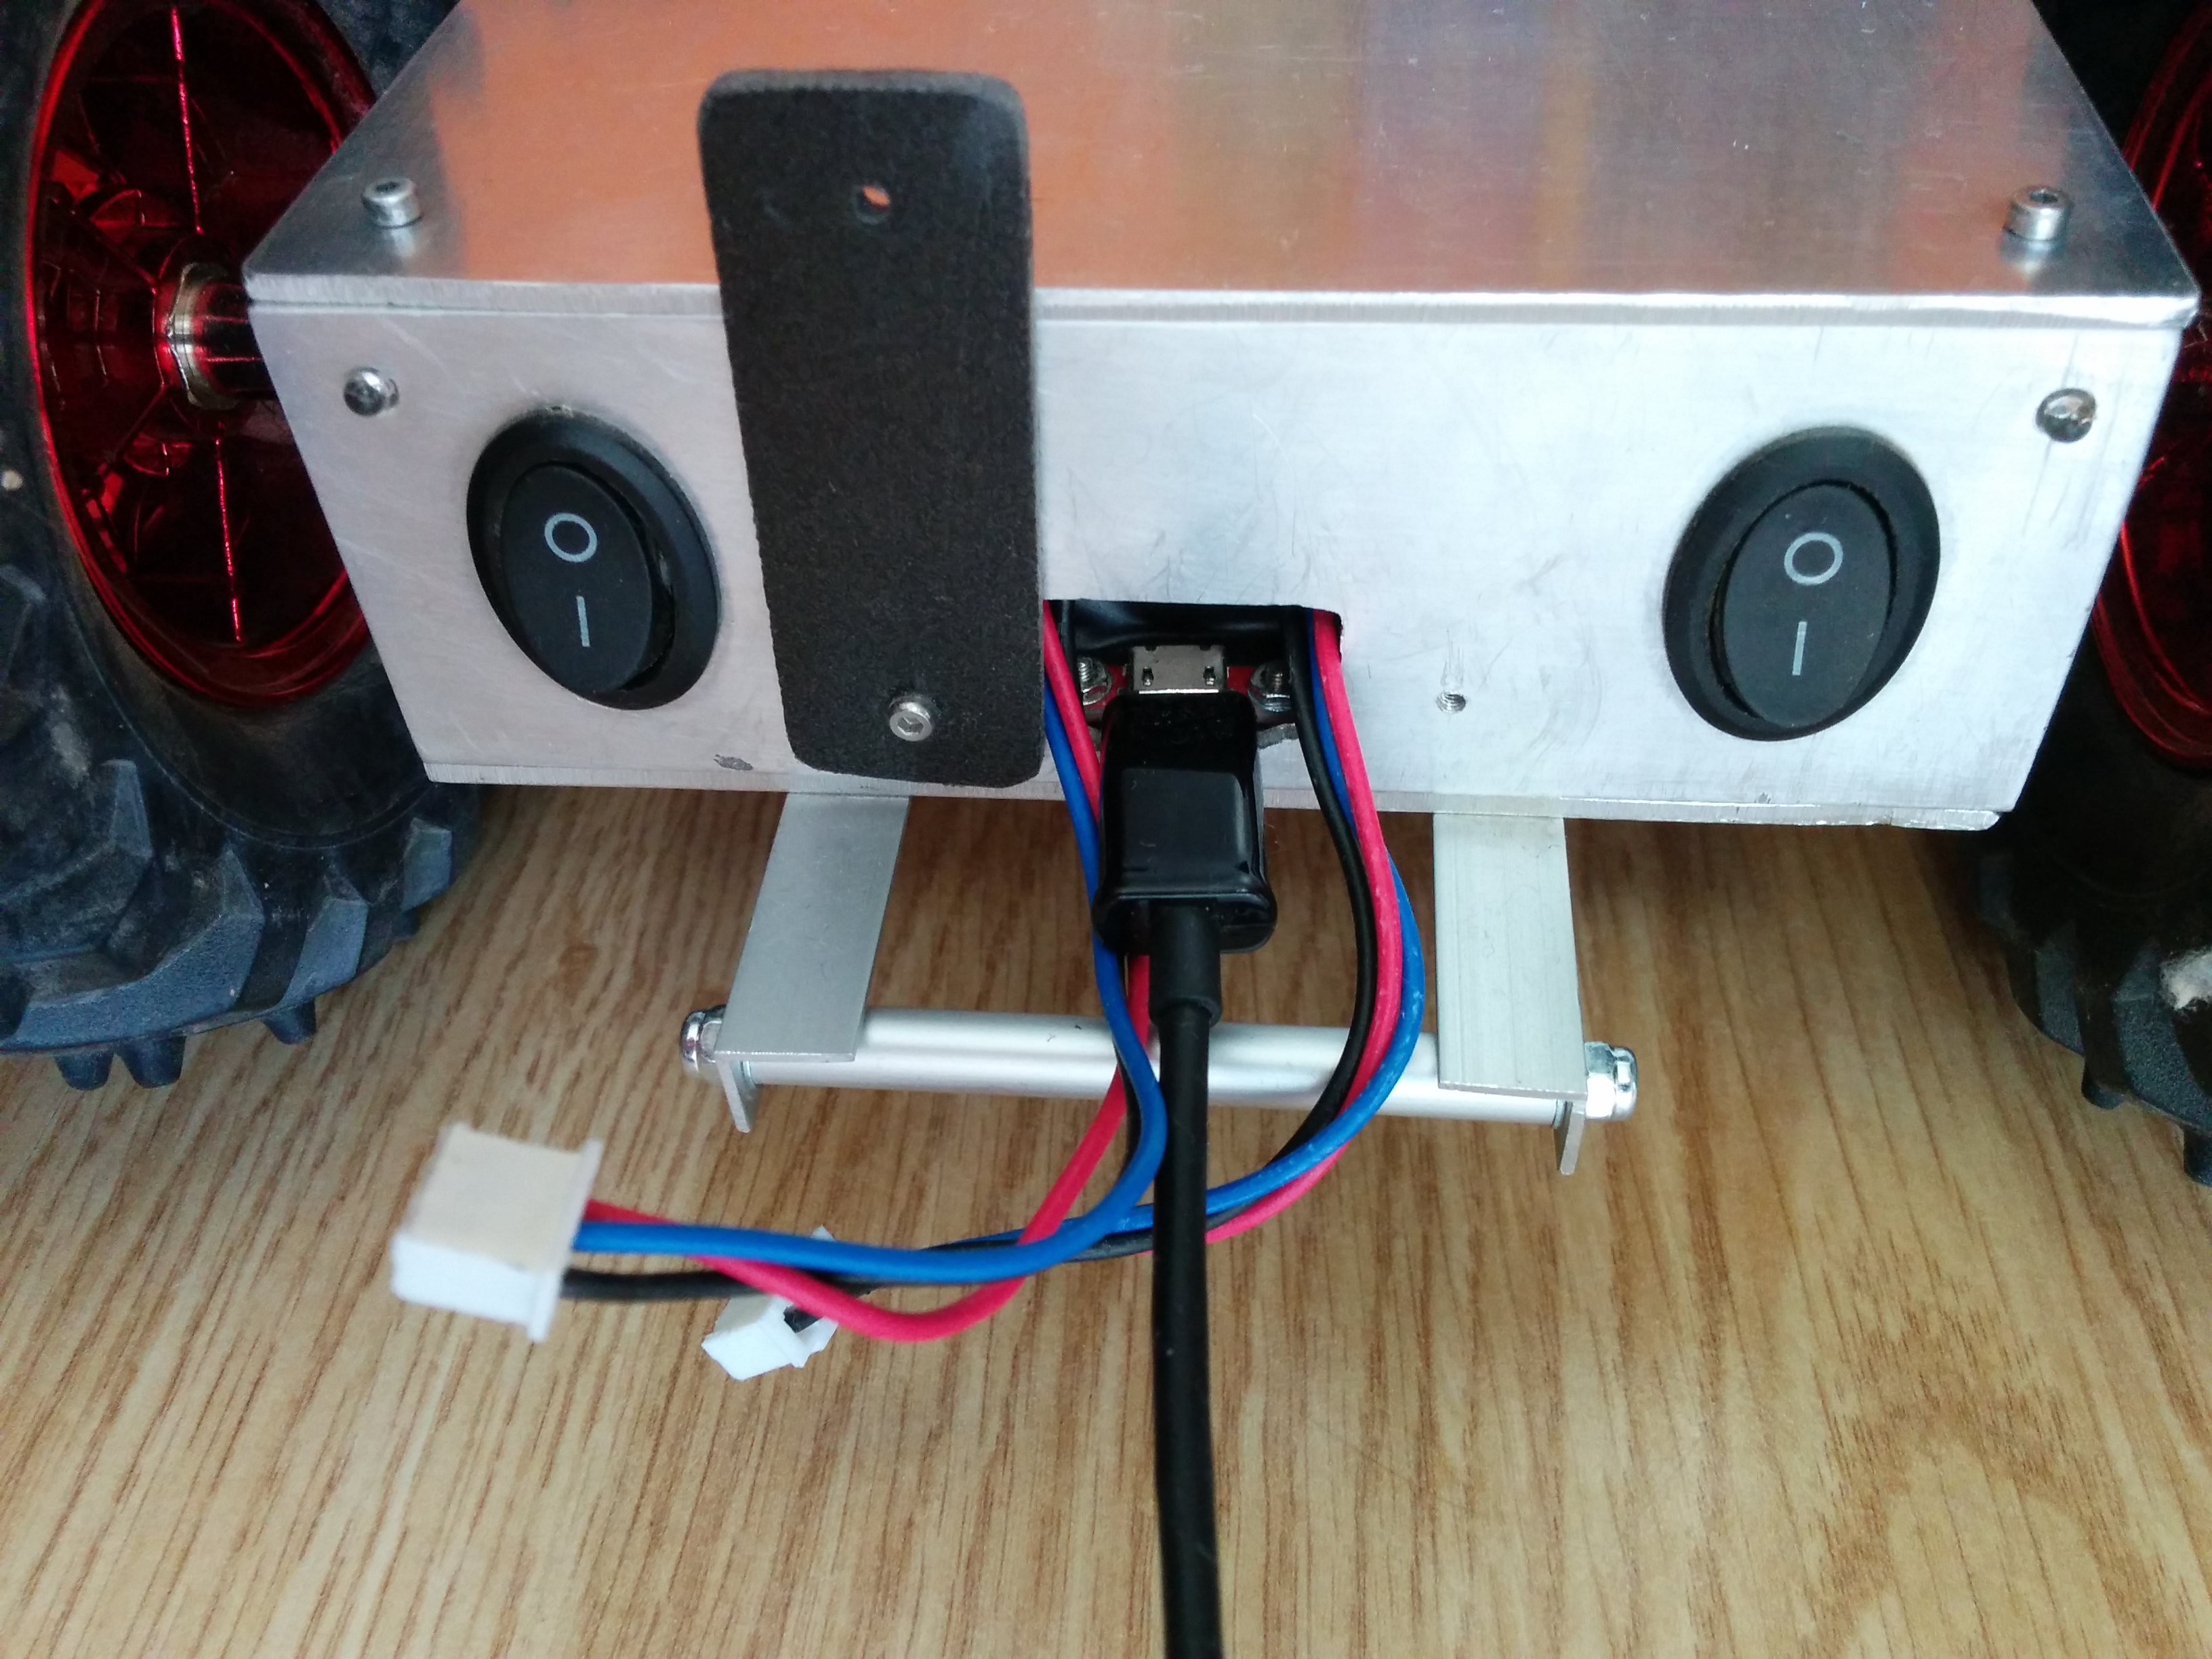
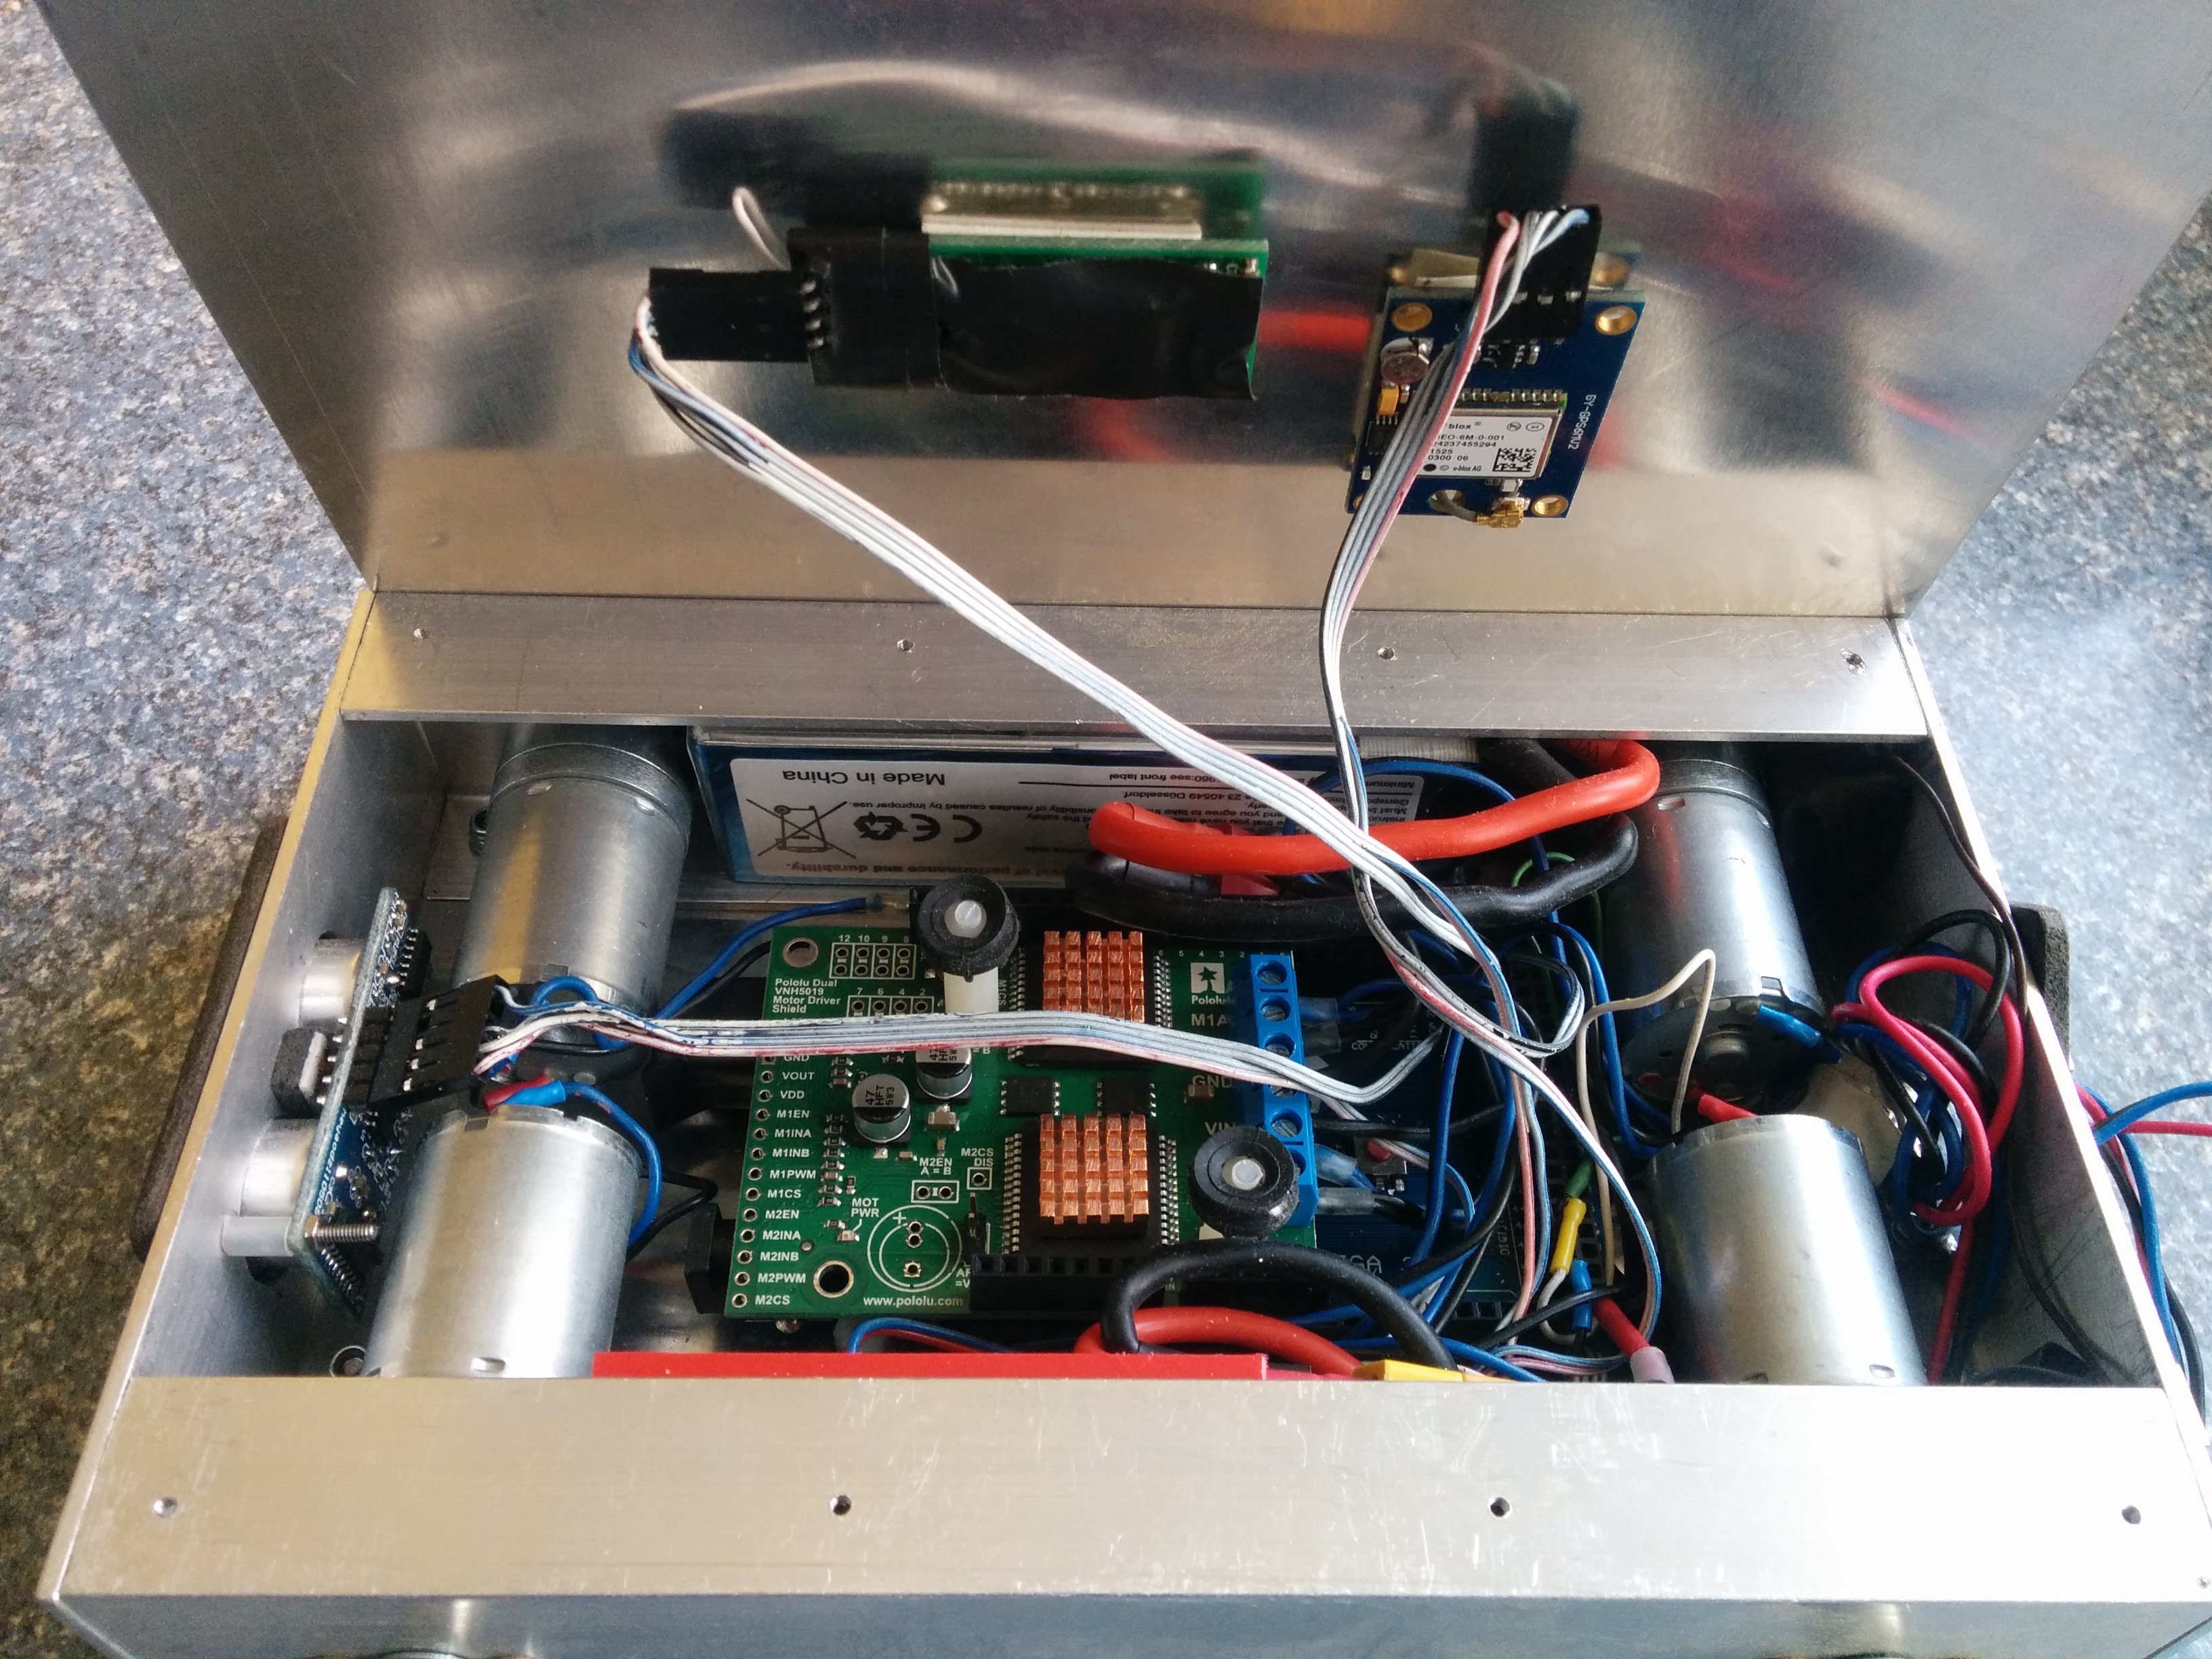
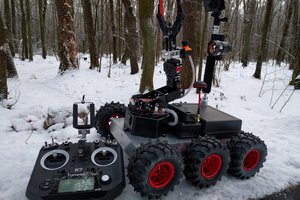
he following flowchart shows the connections between the modules of the project. The individual electronic modules are connected via different interfaces i.e.: UART, I2C, SPI. The robot can be controlled wirelessly via bluetooth from your smartphone, tablet or computer. The view from the camera is sent over the wifi network to a device with a web browser (smartphone, PC, etc.).
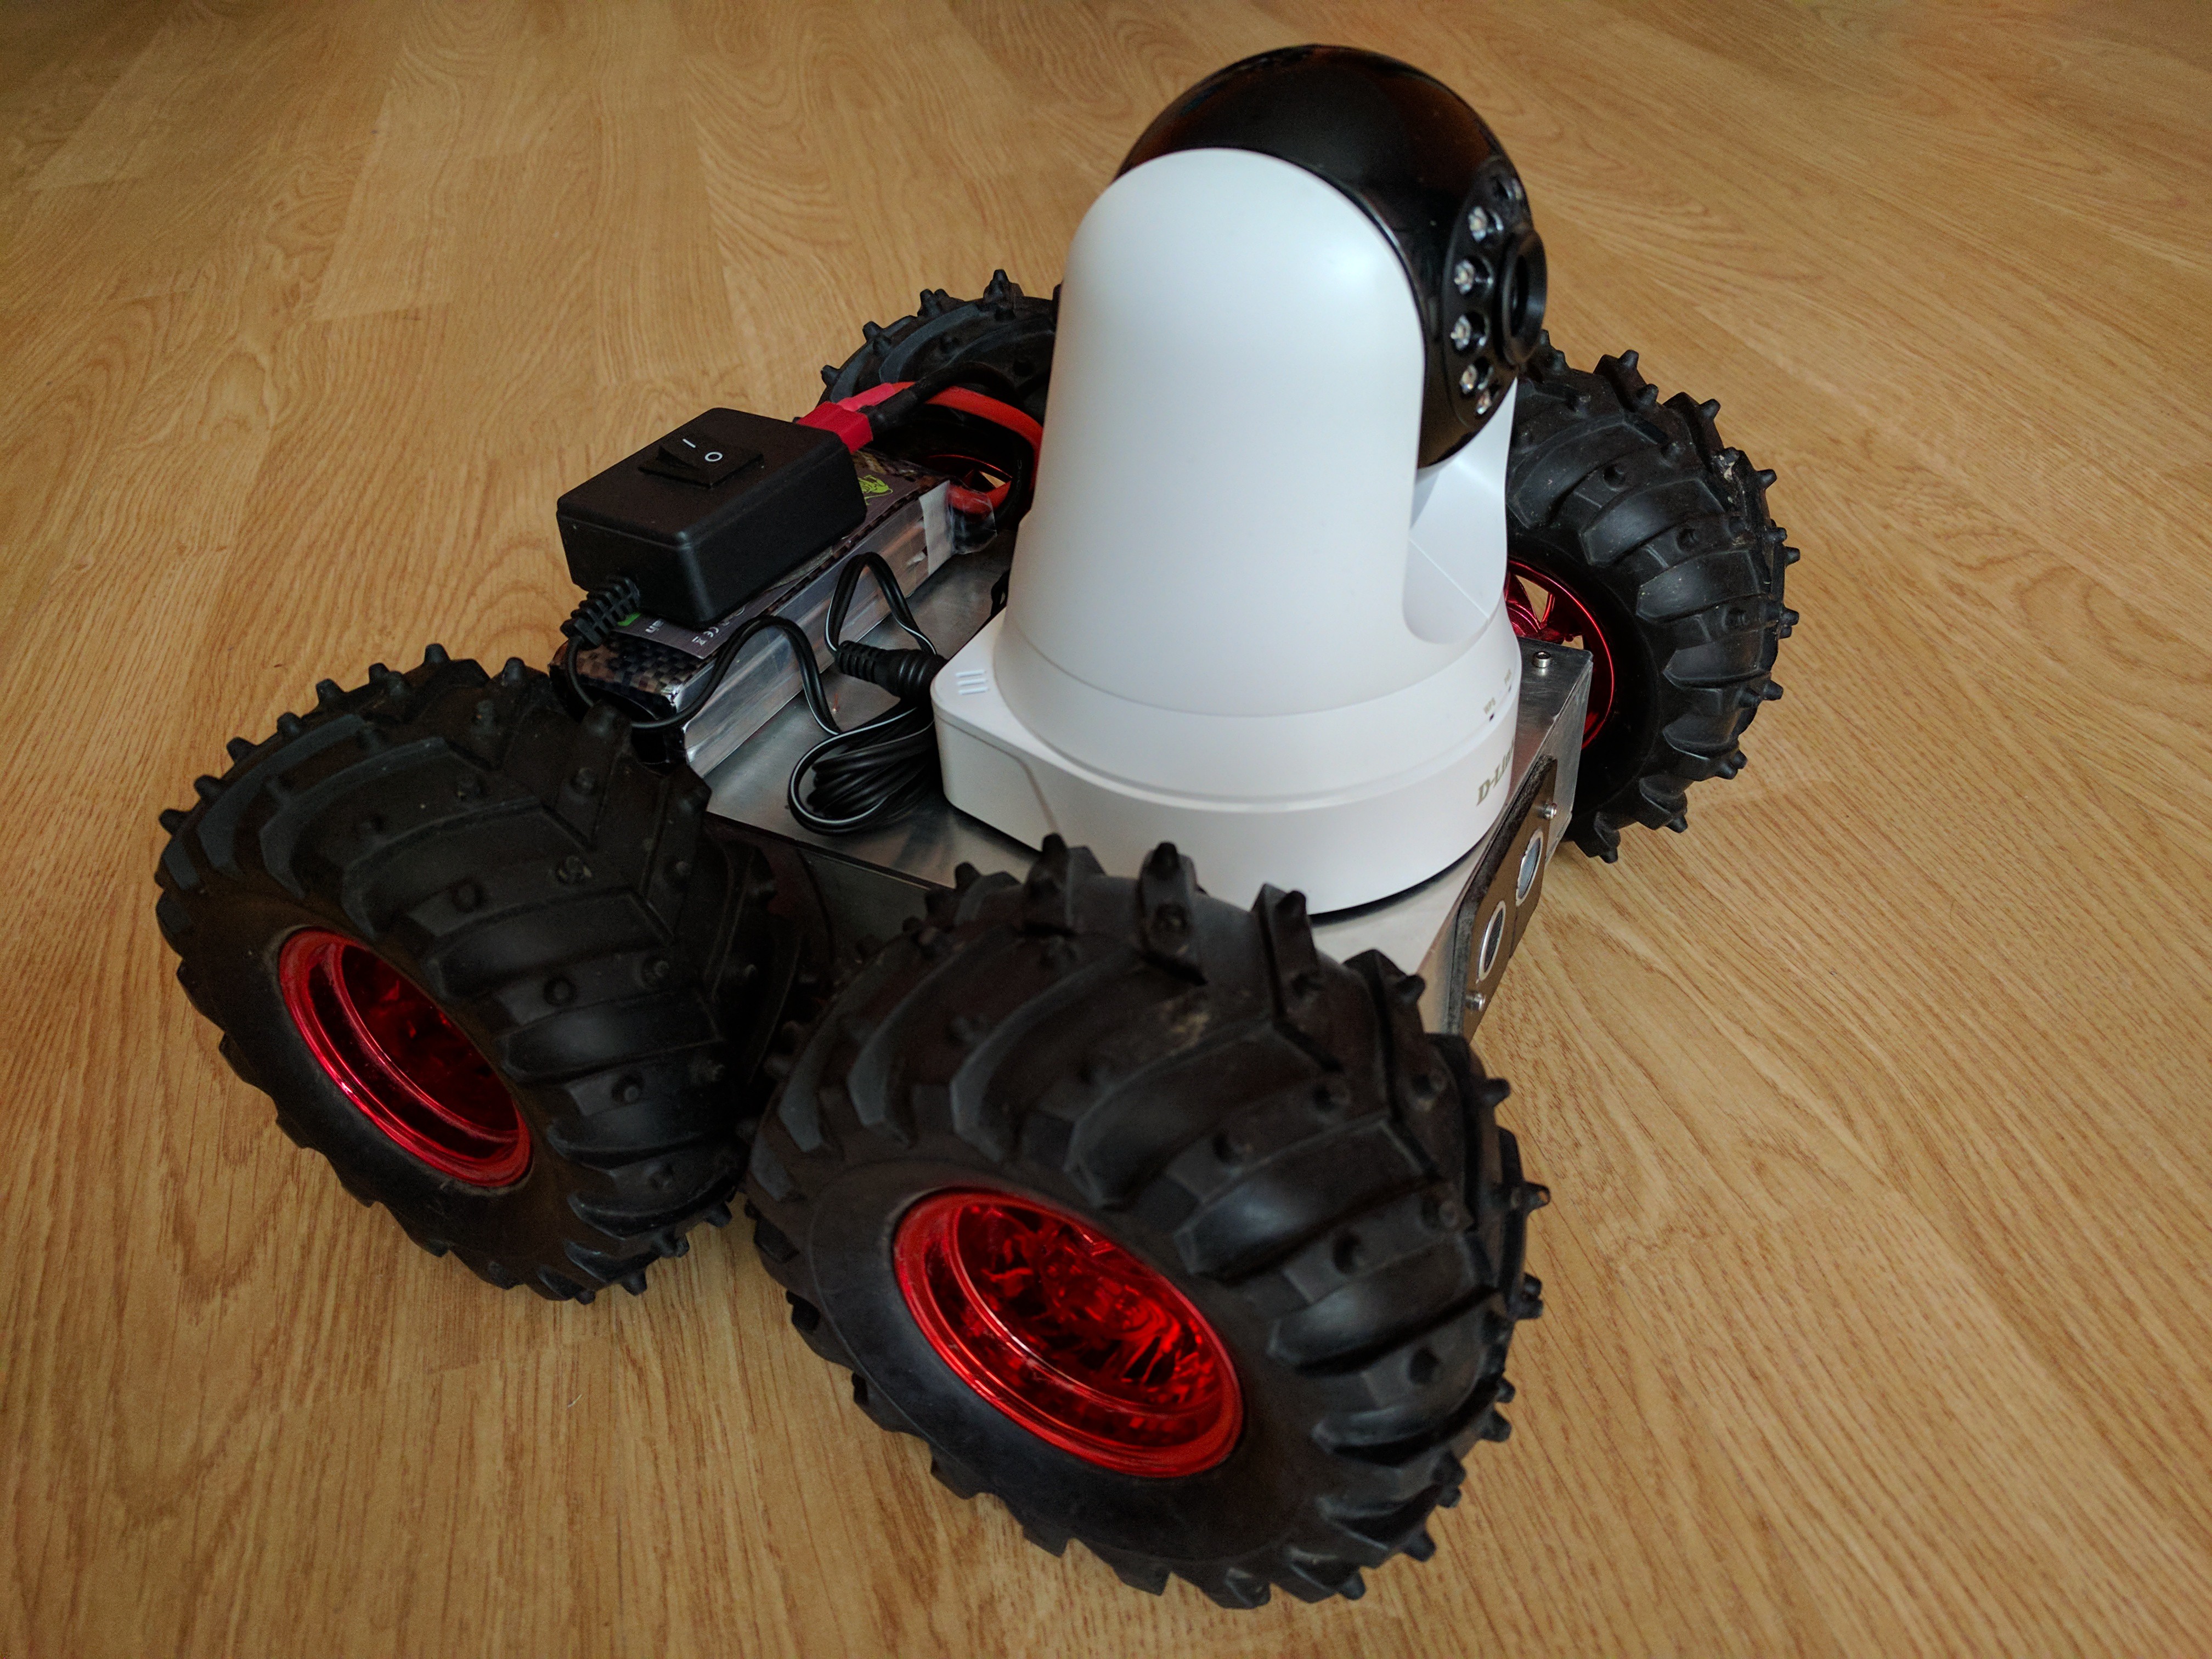
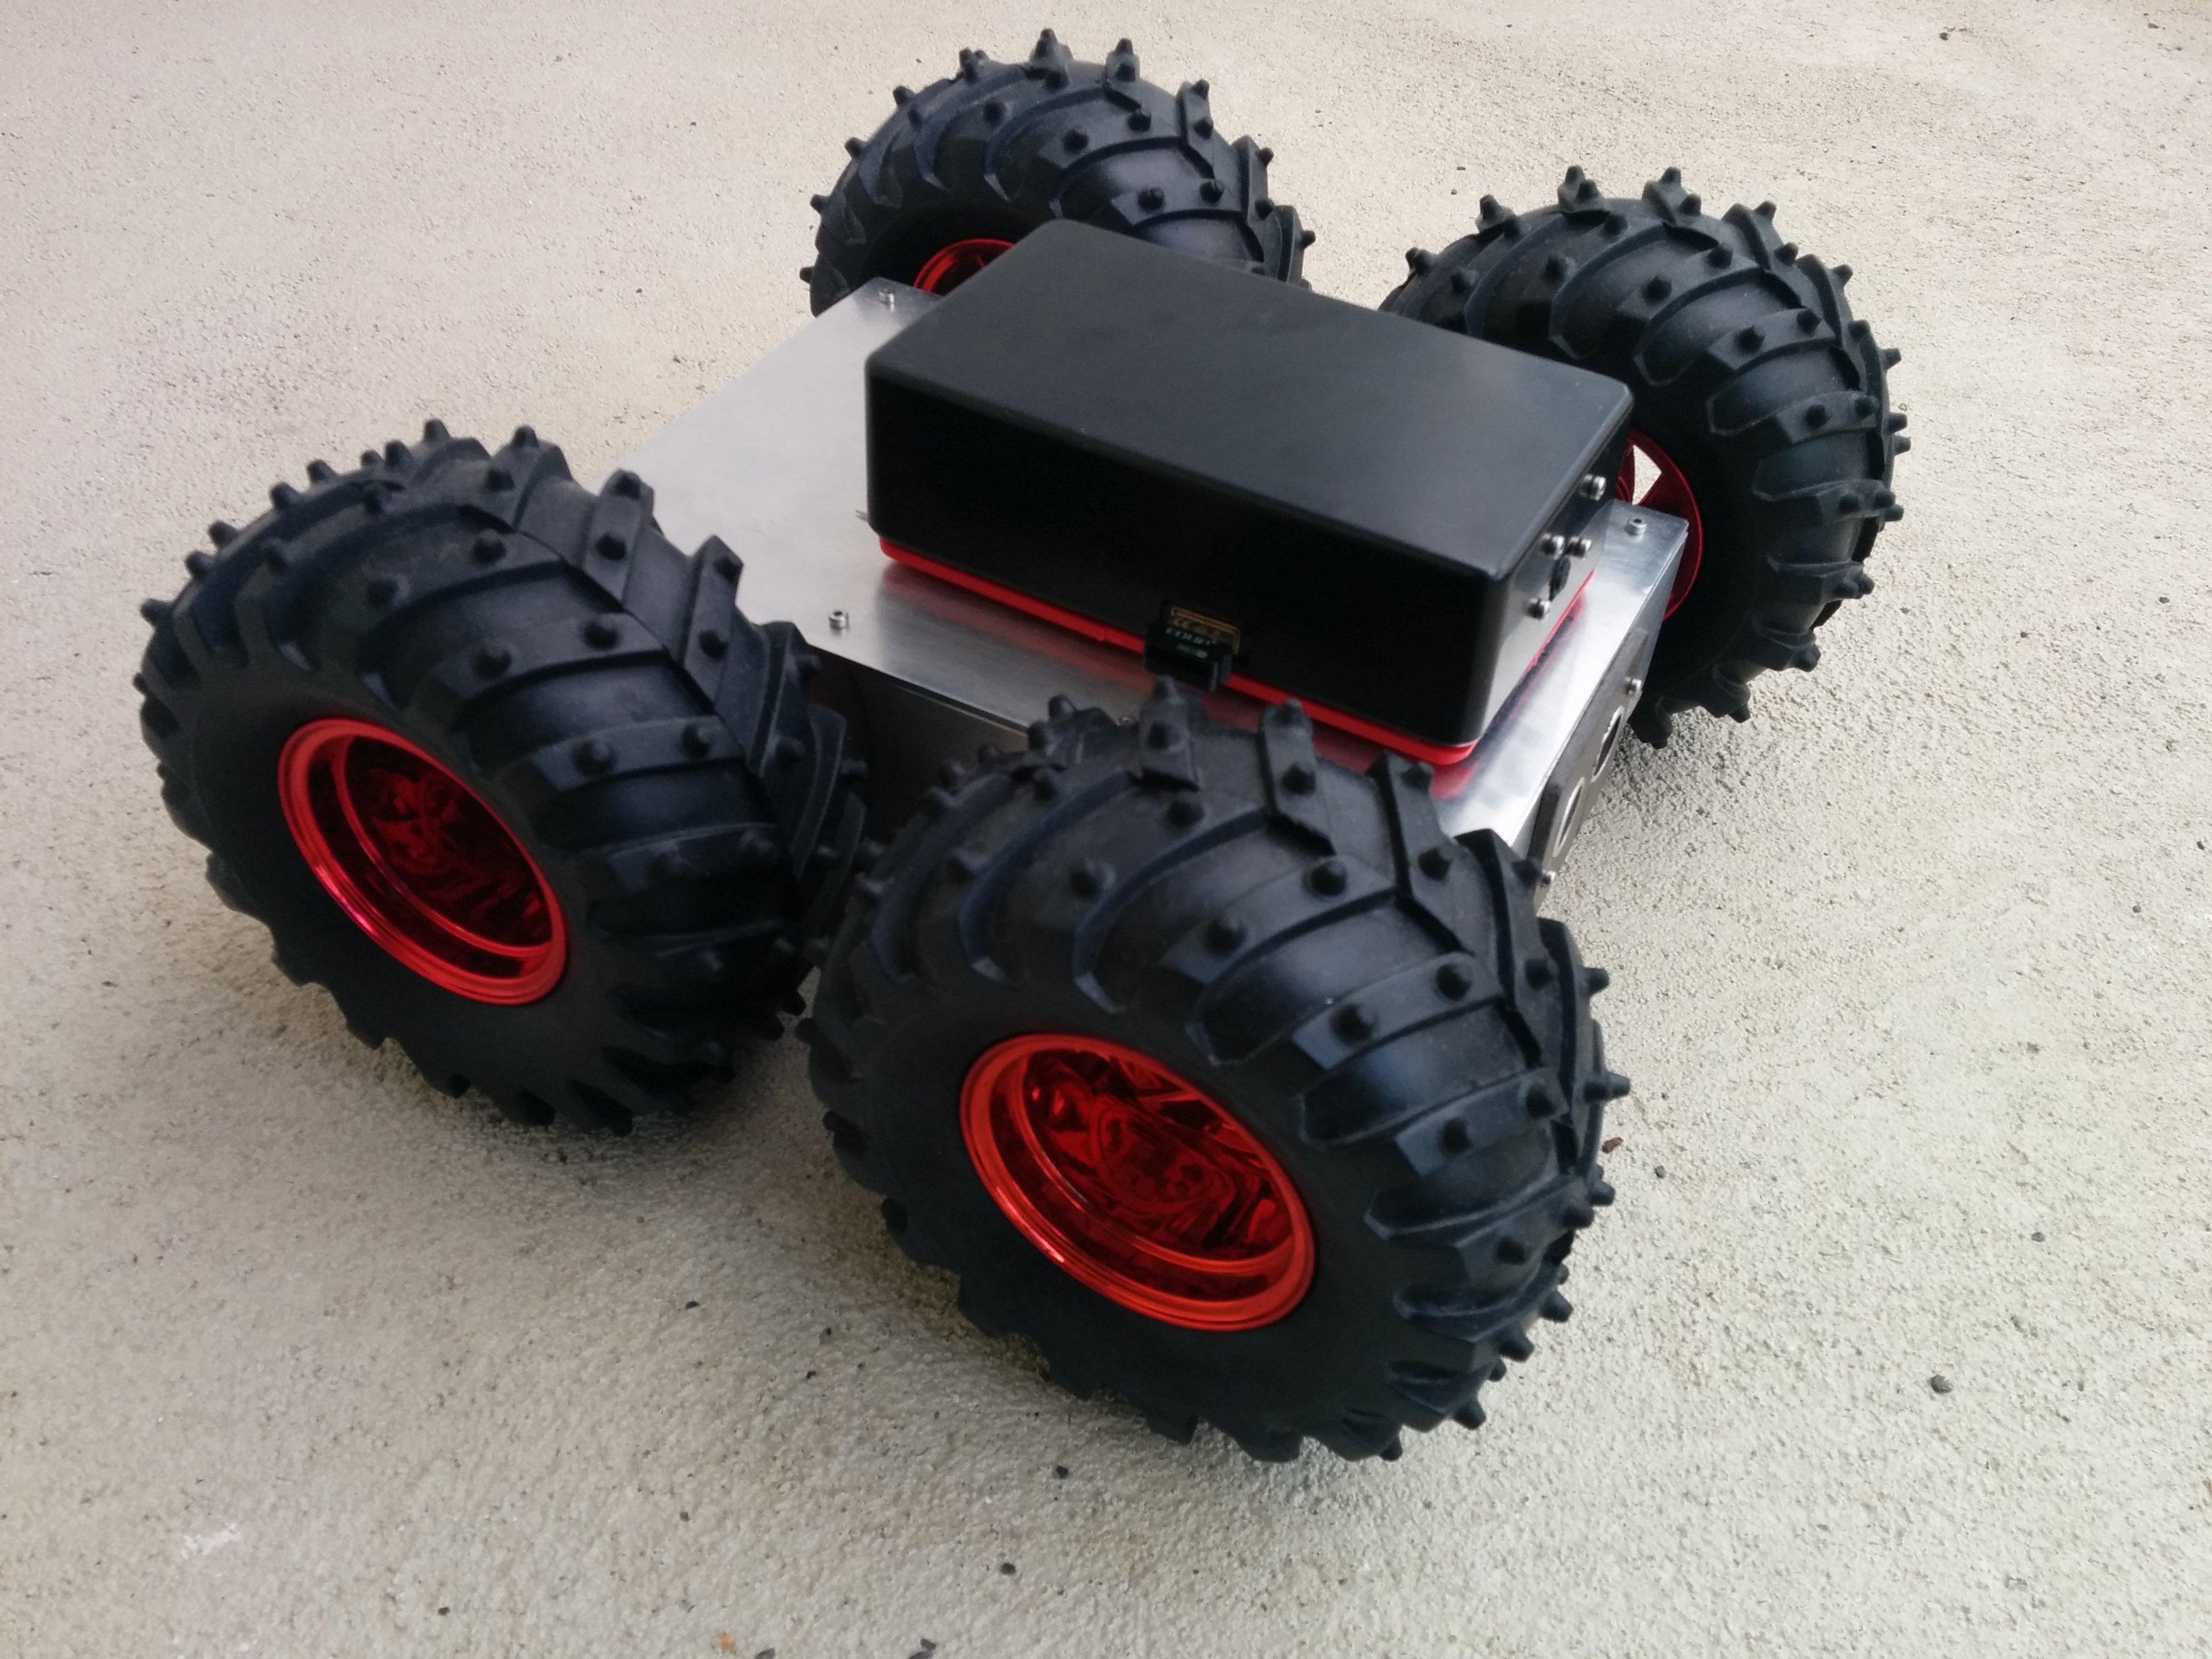
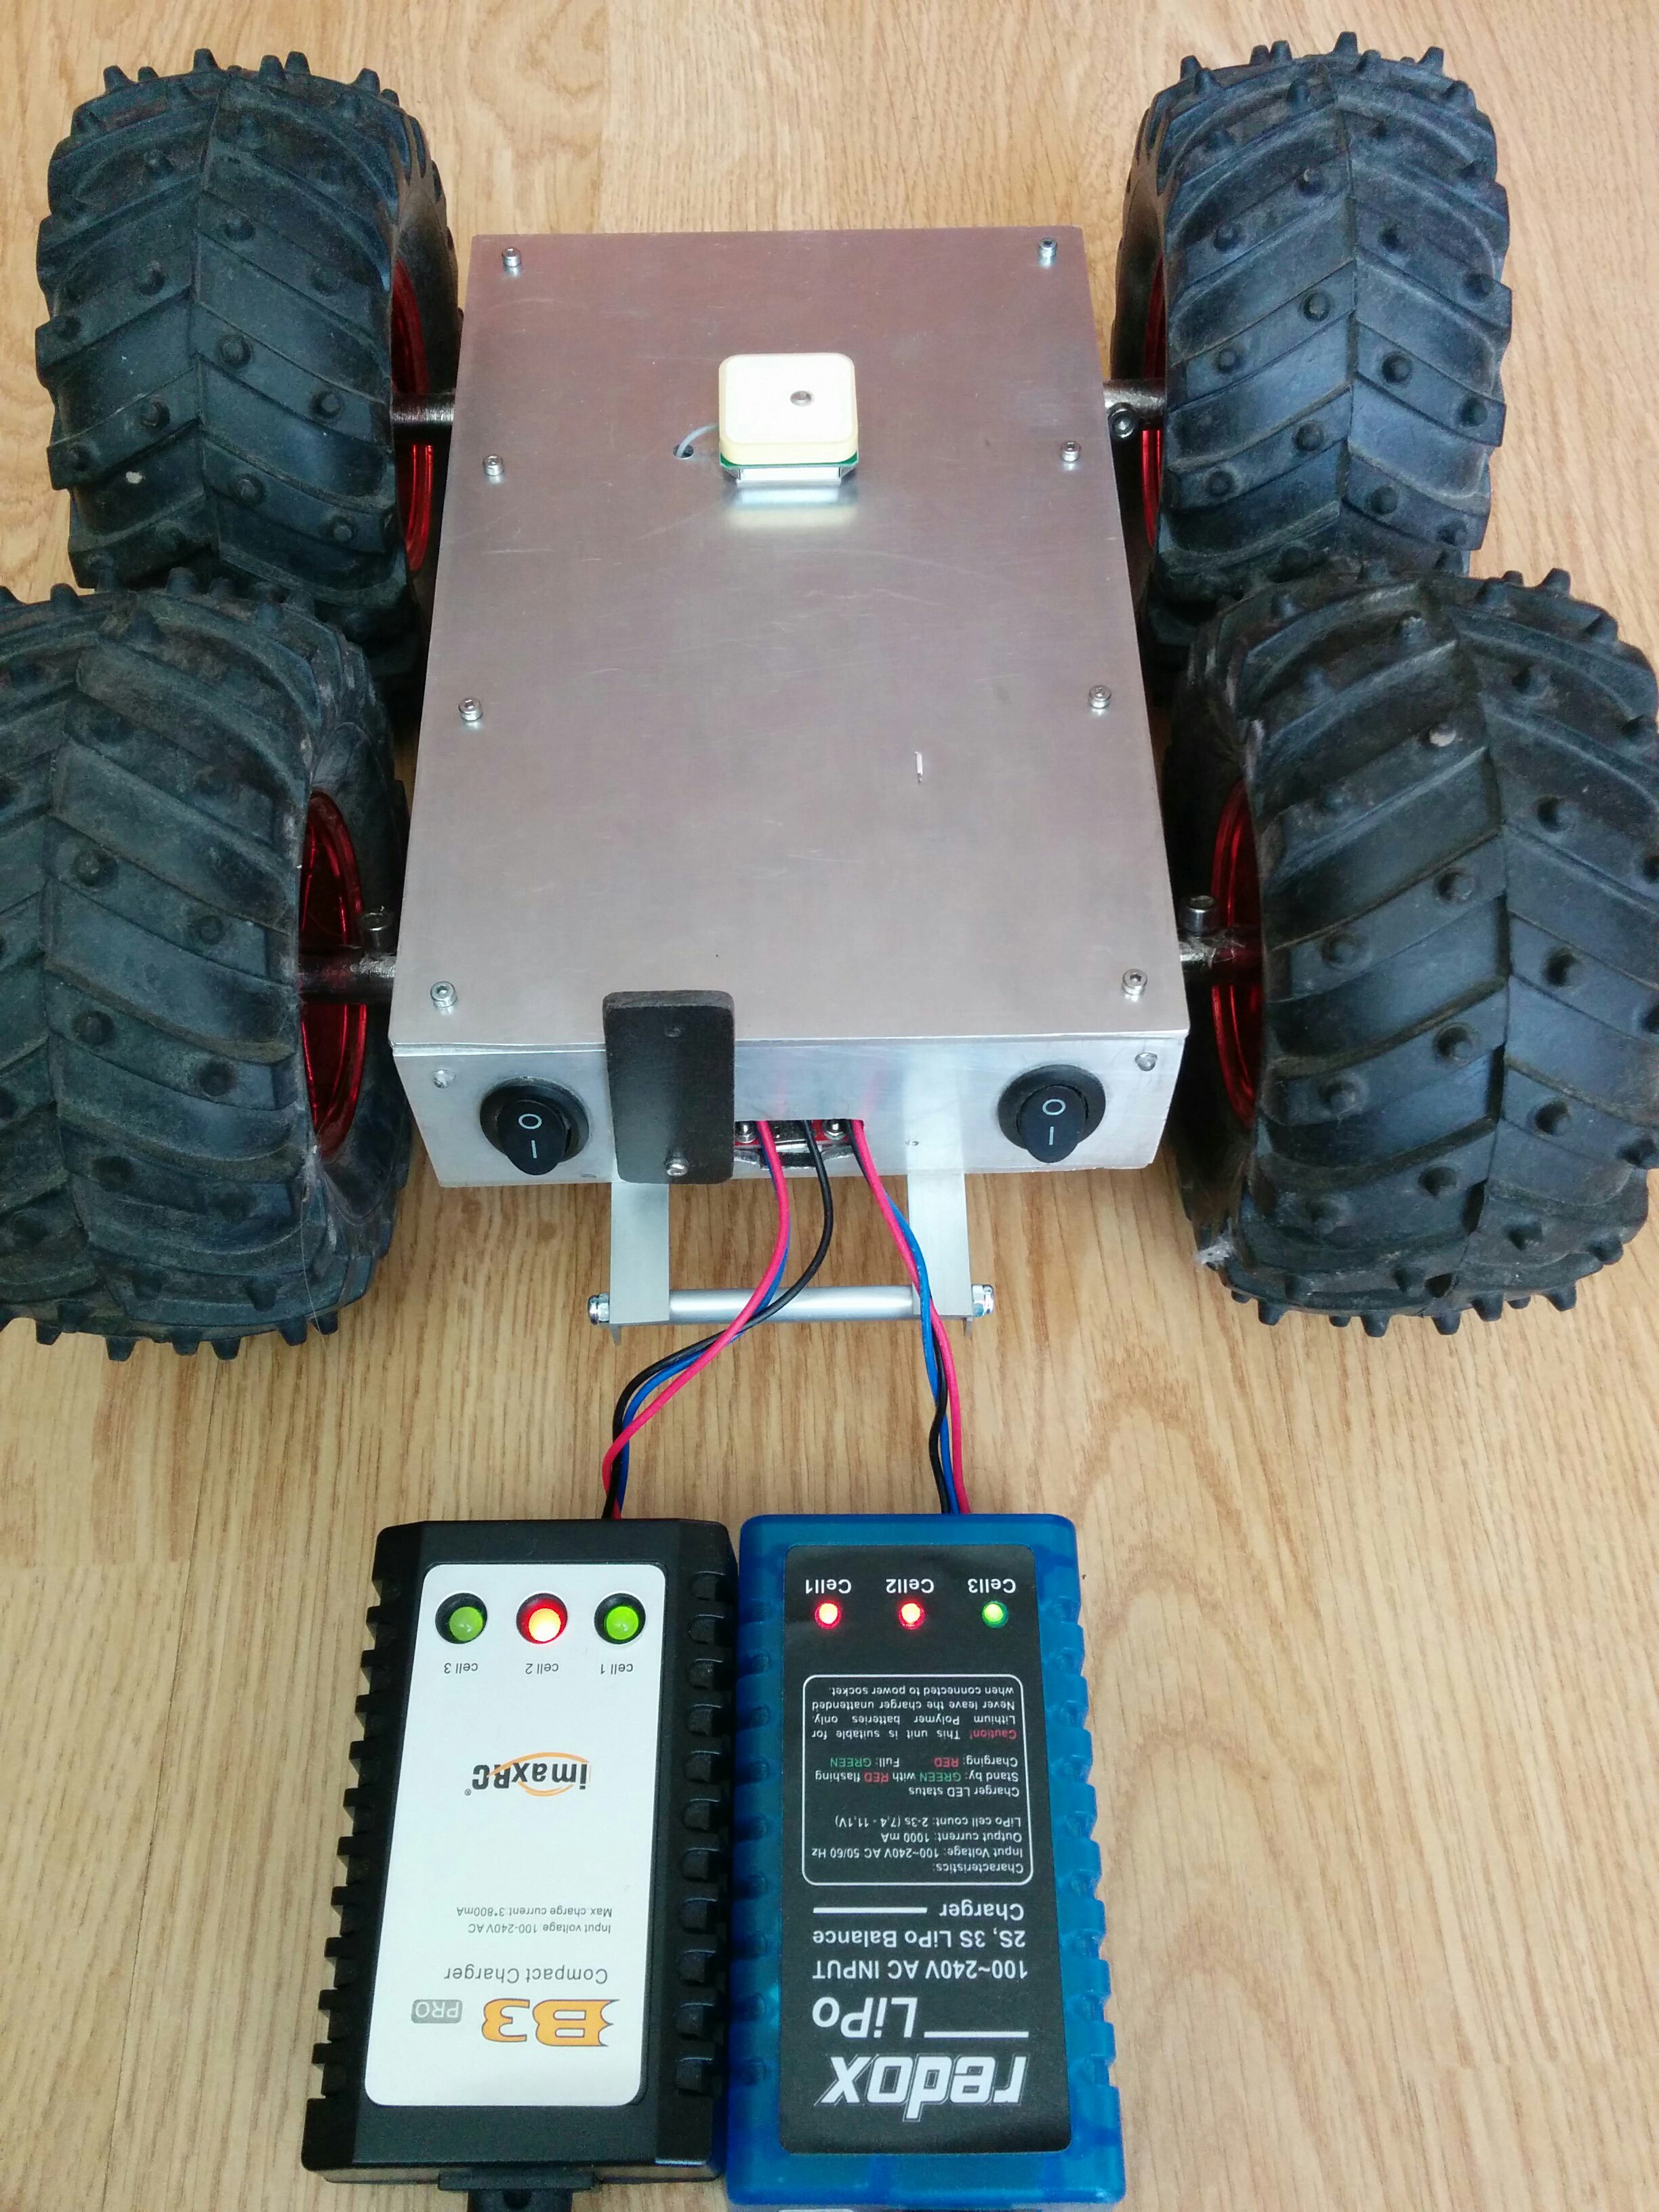
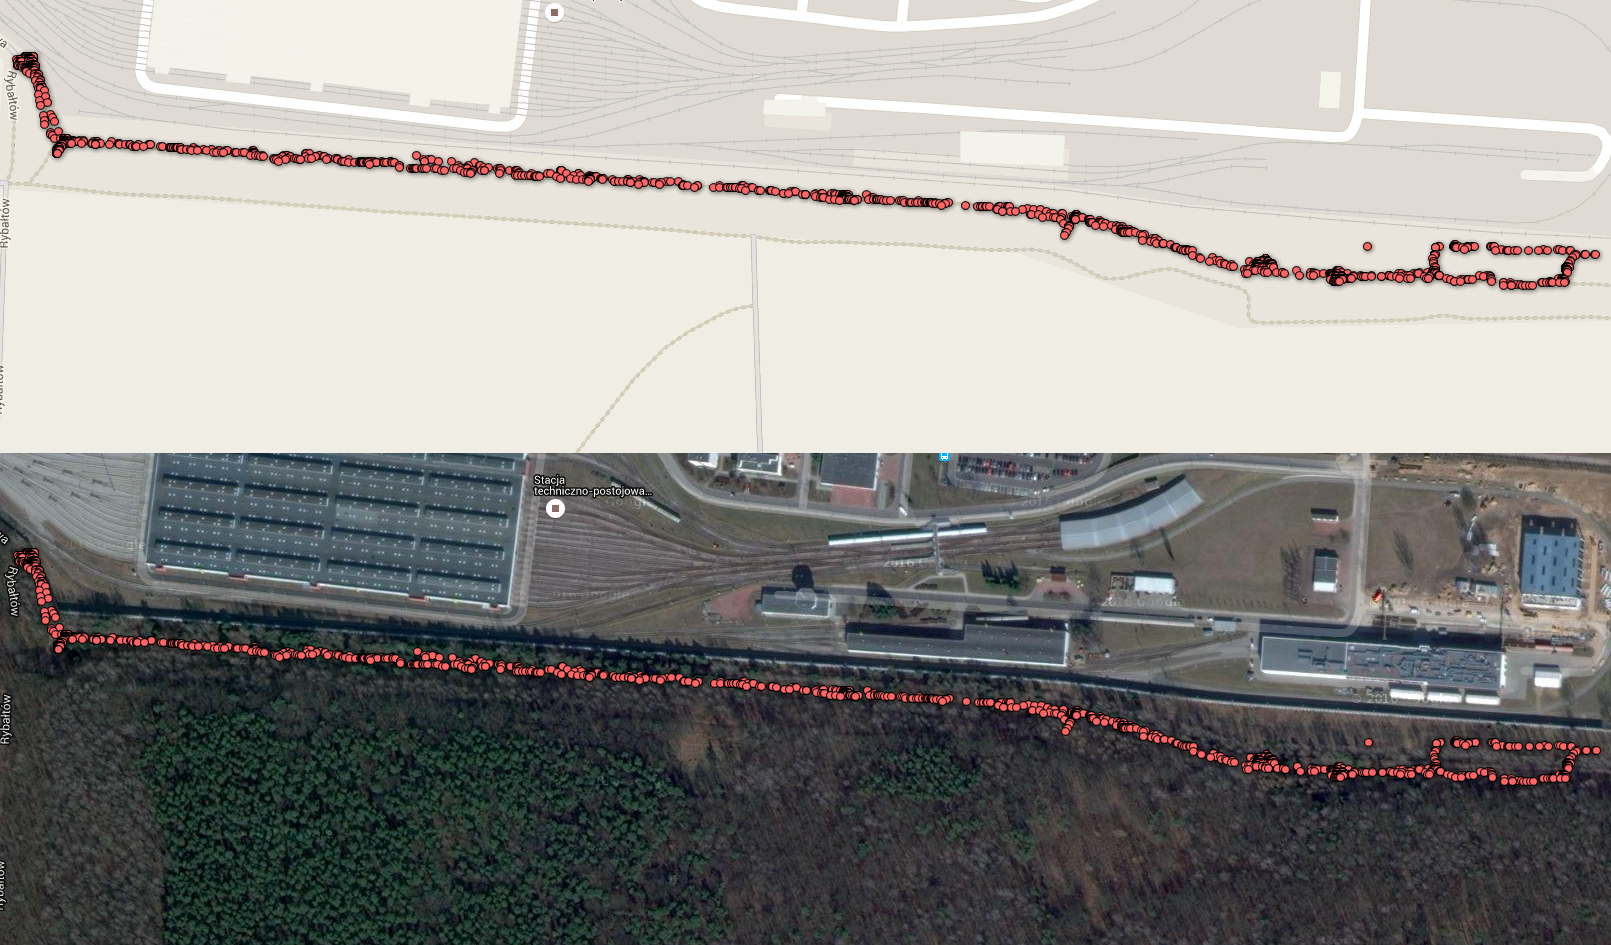
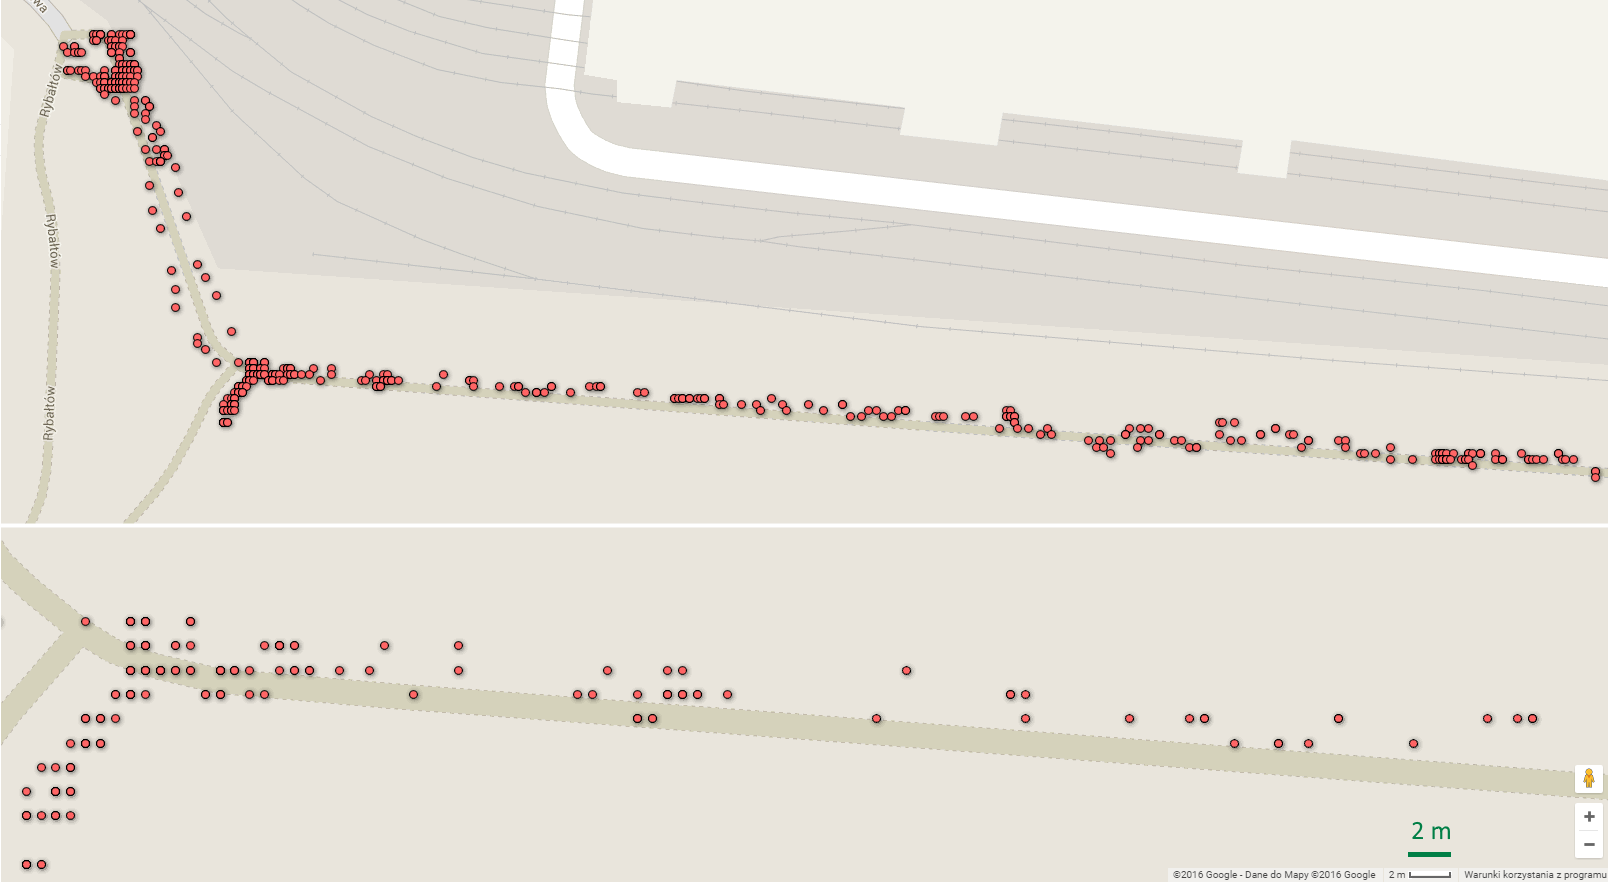
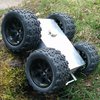
This mobile robot has been designed to operate in rough terrain. So far I've done two tests shown in the following videos. The robot is controlled from smartphone via bluetooth (here is a link to Google play Android app).
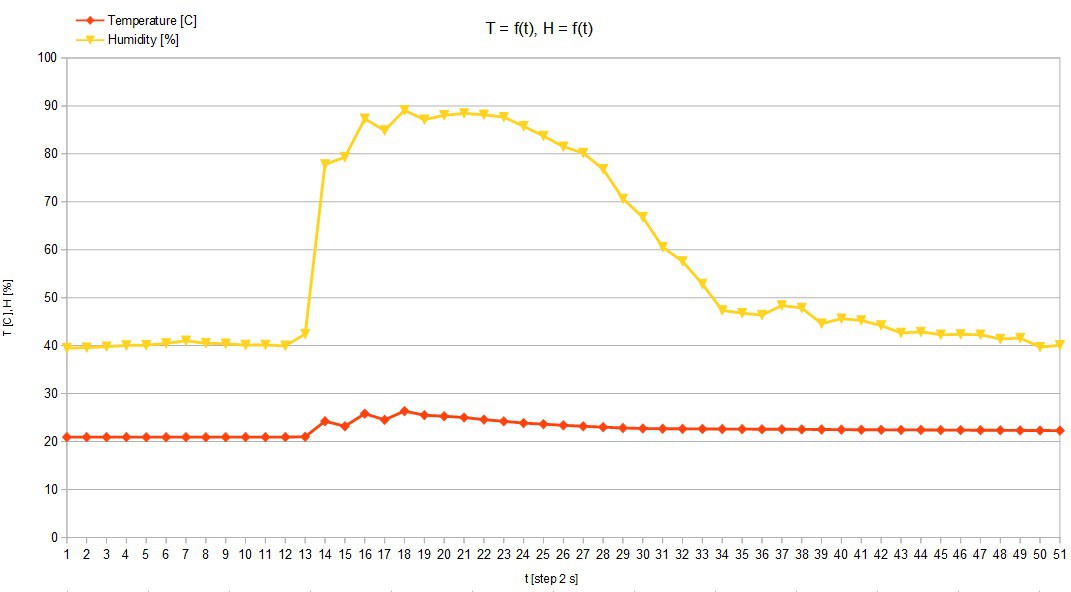
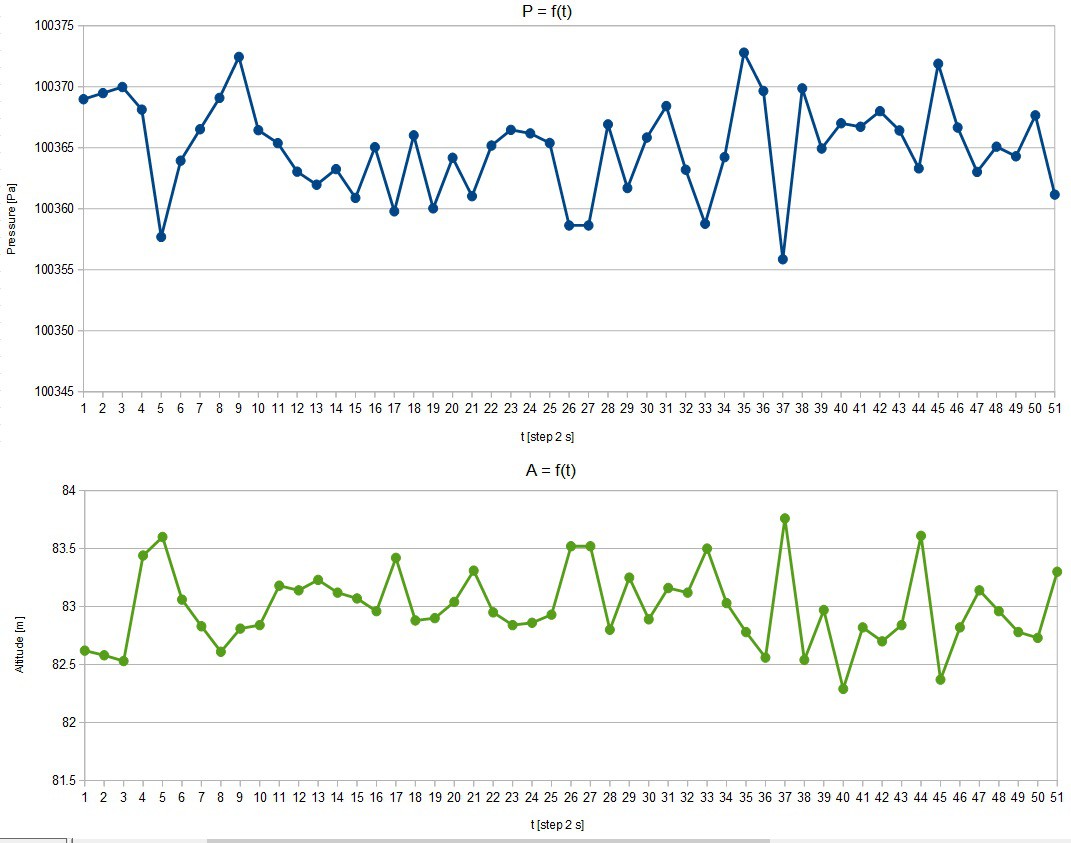
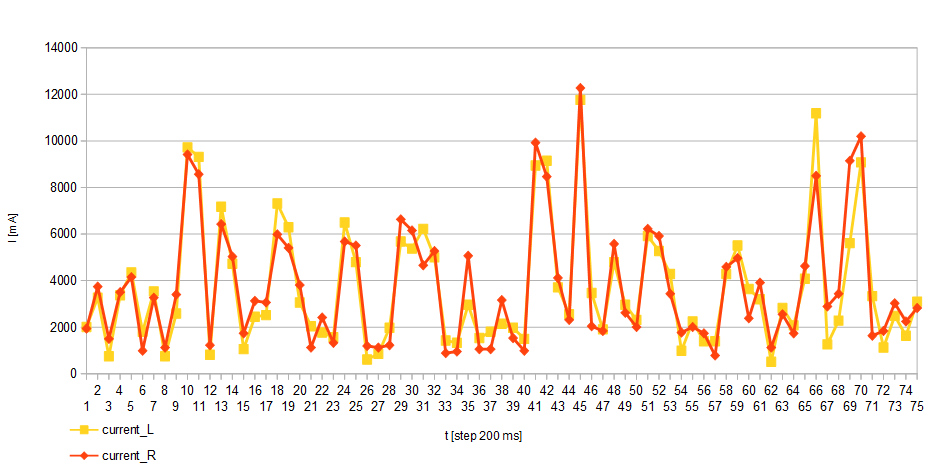
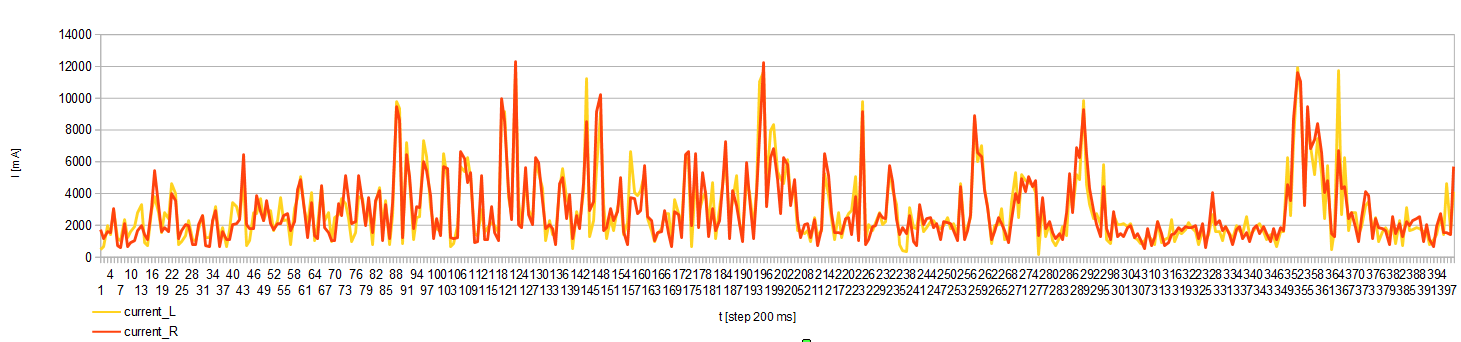
On the first video robot moves at full speed fitted with Dagu wild thumper wheels 120x60mm. The second video shows the tests with reduced speed to about 70 percent of the maximum value (tests with other wheels). The measurement data from the GPS and motors load control system were stored on the SD card during both tests. Follow this project if you want to be kept informed about new posts.


 Mike Rigsby
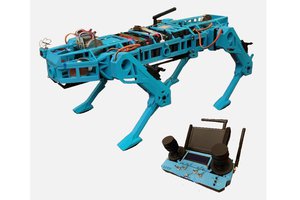
 Limenitis Reducta
 Norbert Heinz
Hi
Nice to meet you after viewing your profile i am Jacinda, from (jakarta) indonesia,
i have a project discussion with you please email me on: (jacinda.seiler@yahoo.com)