 Steve Schuler
Follow me on Twitter: @SteveSchuler20 and right here on Hackaday: KRA5H.
My table top photography studio is really a few simple items that nearly anyone can scrounge together:
A cutting mat. Mine is lighter in color than the ones you often see (mine is actually a very pale green and others usually a darker green). The measuring grid gives viewers a sense of scale.

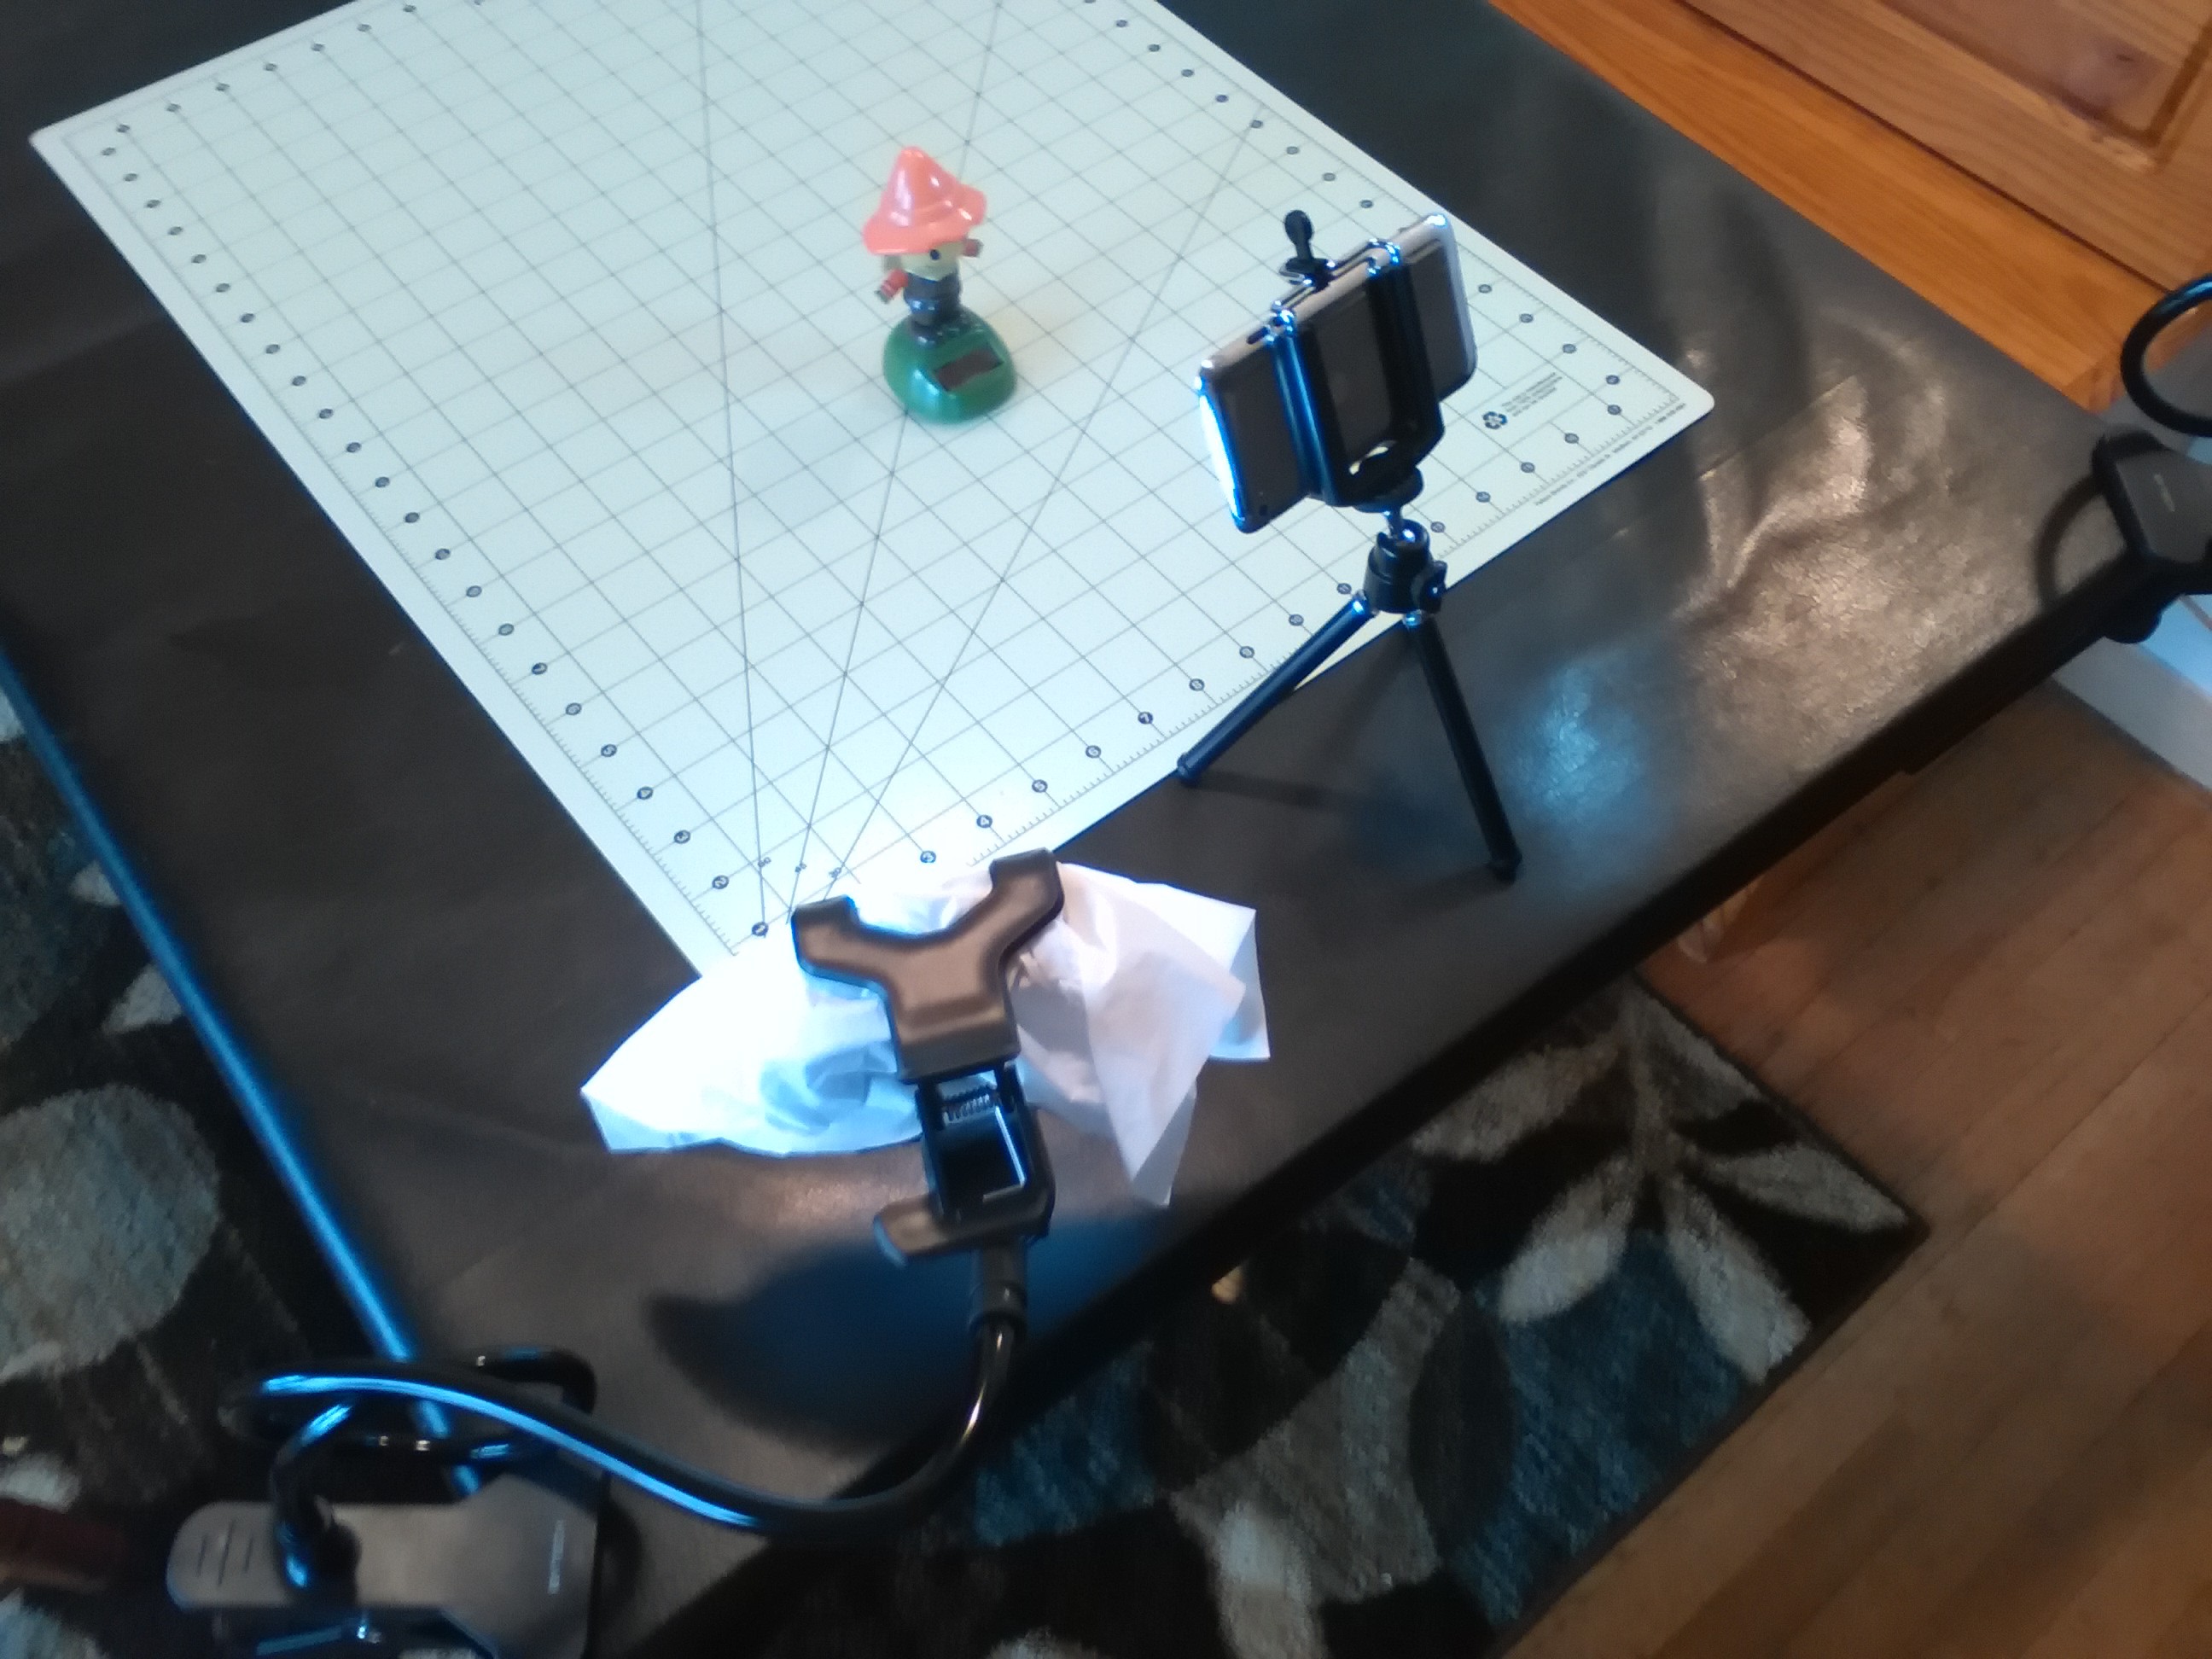
A universal flex phone mount, LED lights, and tissue to cover the LED lights to diffuse the light:

My table is near a large window for lighting and I have two 100 watt bulbs in an overhead fixture. I can use the flex phone mount with the LED lights and tissue to get rid of unwanted shadows. I cover the LED lights with the tissue to diffuse the light from the LED lights. Then I mount them on flex mounts, clamp them to the table, and switch the LED lights on. Thus I can move them around to illuminate what I'm photographing to soften or remove shadows from the overhead light or the light from the window. Here's a sample setup:
Here's a sample picture:
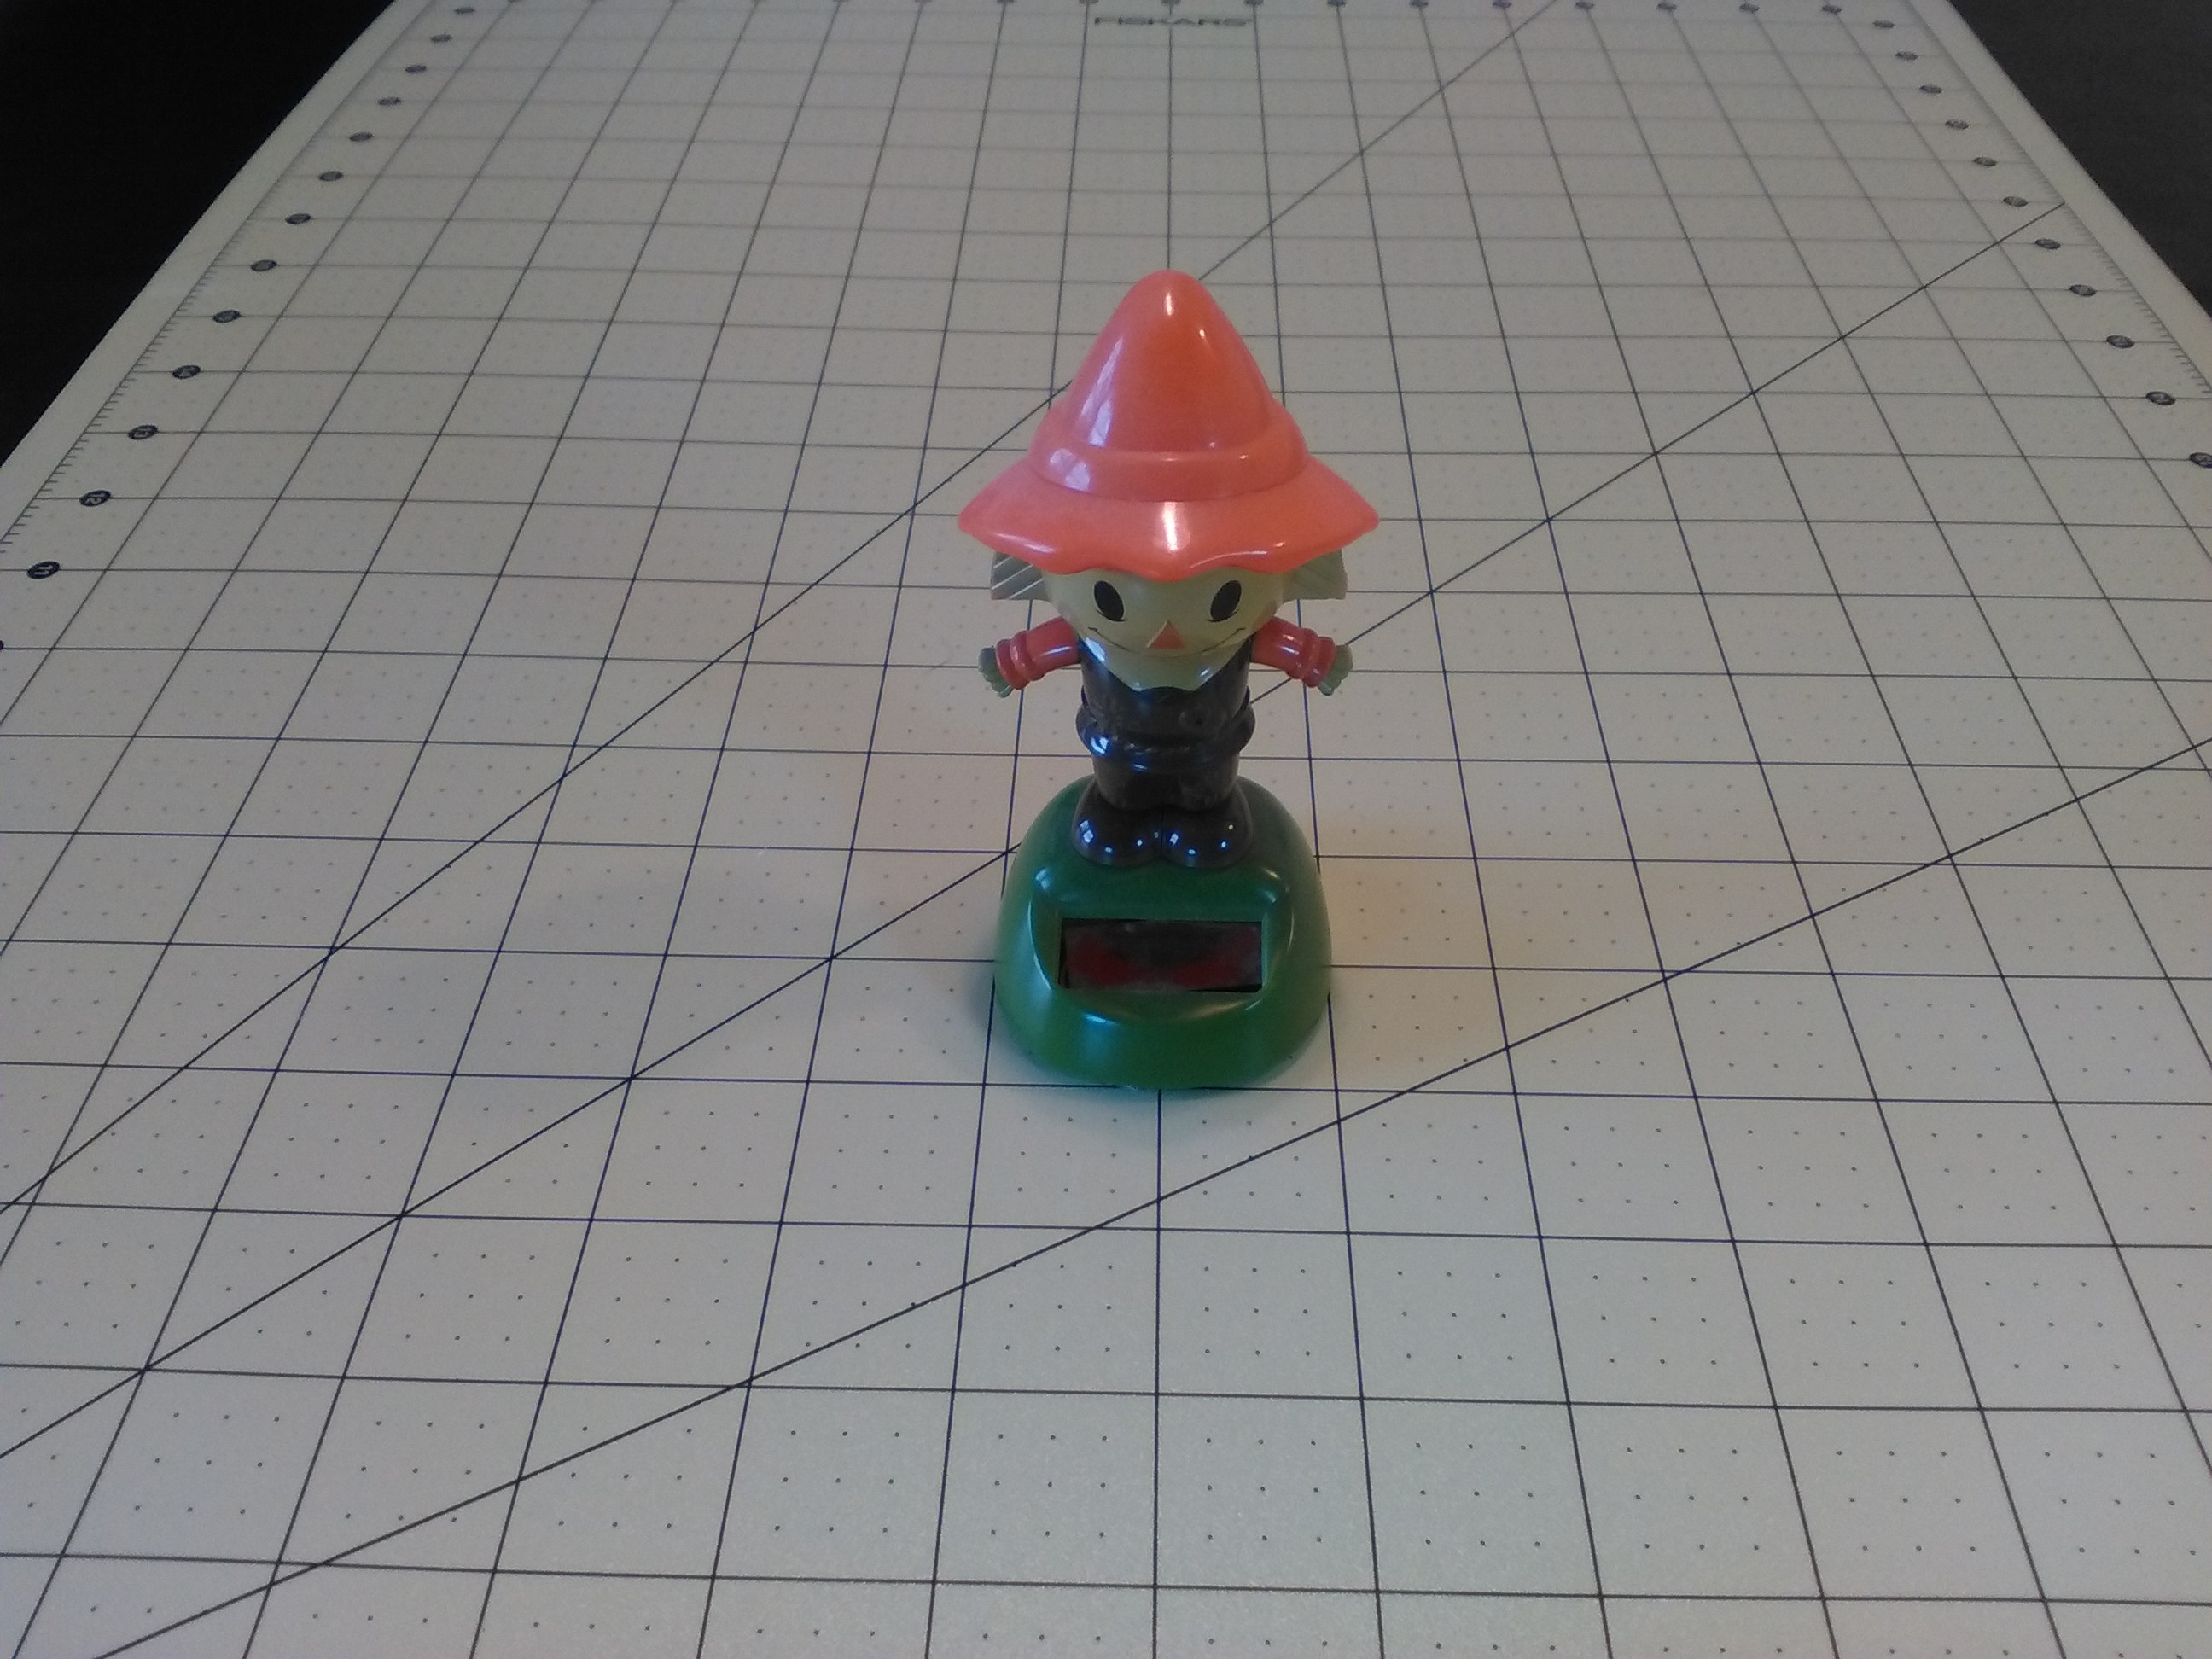
If you look at the scarecrow you can see the reflection of the light from the window and the reflection from the overhead light, but the shadows from both have been softened by the two front LED Lights.
When I document a build with photographs, I usually use bullseye composition, but you can experiment with photo composition. The leading lines in this bullseye composition are really just a bonus from the cutting mat.
MACRO PHOTOGRAPHY
Macro photography, according to Wikipedia, "is extreme close-up photography, usually of very small subjects, in which the size of the subject in the photograph is greater than life size." (https://en.wikipedia.org/wiki/Macro_photography) The following is a sample photograph of a United States penny:
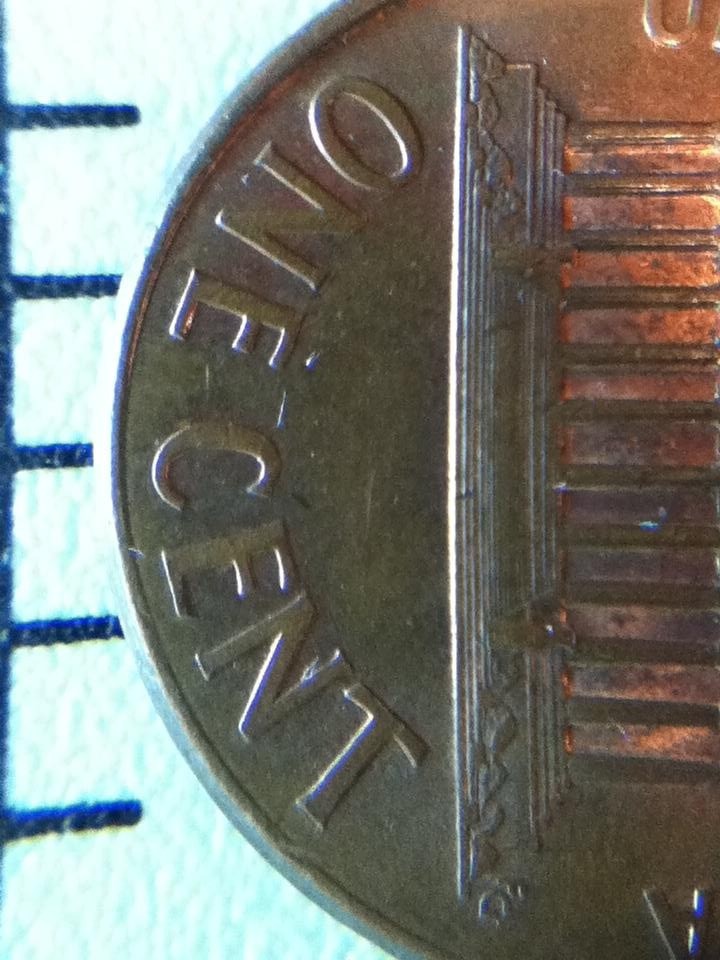
My macro lens came with the Mel Science Chemistry Set. See my review here.

Drawstring bag, clip for mobile device, macro lens, wide angle lens, lens cap

The following photo is how I set up my iPod to get the shot of the penny. I simply placed the iPod on a book that was thick enough to bring the penny in focus. Lighting is also necessary for this old iPod (4th gen). I positioned the LED light covered with tissue to illuminate the penny.

MICROGRAPHS
A micrograph, according to wikipedia, "is a photograph or digital image taken through a microscope or similar device to show a magnified image of an item. This is opposed to a macrographic image, which is at a scale that is visible to the naked eye." (https://en.wikipedia.org/wiki/Micrograph)

I shot the above micrograph of a hair follicle with my iPod using a DIY microscope that I built using the lens from a CD-ROM drive. See the build instructions here.

The following hair follicle micrograph was made with the Foldscope:


You can read my review of the Foldscope here. As far as I can tell, there are no more Foldscopes available. I've sent an email inquiring if they can still be ordered but have yet to receive a response as of this writing. I'll post an update if I get any news from the folks at Foldscope.
A couple micrographs shot with cell phone camera with the Foldscope:

Neuron motor cell sample

Bone sample
The LED light for the Foldscope was too bright for the iPod touch so I inserted two polarized filters from a broken handheld game between the light and the sample slide:

Here's a couple of micrographs I shot with the polarized filters on the iPod:

Bee wing

Feather

Bee leg
SMALL PARTS STUDIO

I so rarely get to use K'nex in a project. So I built a small "infinity wall" structure with K'nex. If you've got a table next to a wall and good lighting, you can just prop up your paper background against the wall (you may need to tape the paper to the wall).


Sorry folks. I think my camera was suffering a stroke when I tried to get this shot. I reset the focus a bunch of times and this the best of five different shots. Gah! Anyhoo, I think you get the picture. No pun intended. Well, ok, pun intended.


 Sander van de Bor
 Alain Mauer
 Alex Rich
You present some really simple good ideas. My photos are usually very poor so I need to step up my game a lot :-)