 Kayser-Sosa
I recently got into brewing my own beer and as I found bottling took a lot of time and space, so I expanded into kegging. I loved having my own beer on tap, but a problem soon arose. I would be pouring a beer and all of the sudden the keg would sputter and be empty. I had no clue, as I wasn't keeping track in any way. So I began my search.
Searching the internet I found a few solutions, but most of these were for large breweries and bars, too expensive for my tiny home brew setup. A bit more searching I discovered Adafruit's Keg-Bot <https://learn.adafruit.com/adafruit-keg-bot/raspberry-pi-code>. The issue with their setup was I had 3 taps and they only had the one with other features I wasn't fond of.
So I set out to modify their code to meet my needs. I was looking to display the beer info and amount left in the keg for each keg I had. Later on I decided to add the temperature.
With the help of a few friends and lots of trial and error, I got the code working, mostly how I wanted. For those python and linux people in the know, I'm sure the code and steps I did can be done in other faster ways, feel free to leave comments here letting me know of ways to make the code better.
I then set out to test and implement everything. I started with a Raspberry Pi Model B+ and found an old Model B laying around, so I figured I would use that instead, no wiring differences. I also attempted to wire in a second temperature sensor for the draft tower versus the actual kegerator, but was unable to get it working. I worked from Adafruit's example again <https://learn.adafruit.com/adafruits-raspberry-pi-lesson-11-ds18b20-temperature-sensing/overview>.
I finally found the time and got everything hooked up, make sure the flow meters are facing the correct direction or you can fry them. Found that out the hard way.
I had done some more research and found measuring the weight of the kegs might be a better idea. That might be in my future, but this works for now. I'm not looking for exacts, just want to get an idea when the beer will run out so I can plan on making more.
Sorry about the pictures, I forgot to take some as I was installing the hardware, so I took a few after the fact.
If there are any questions, feel free to add them to the comments which I will attempt to check once a month.
My code: https://github.com/KayserSosa/KS-KegBerry.git
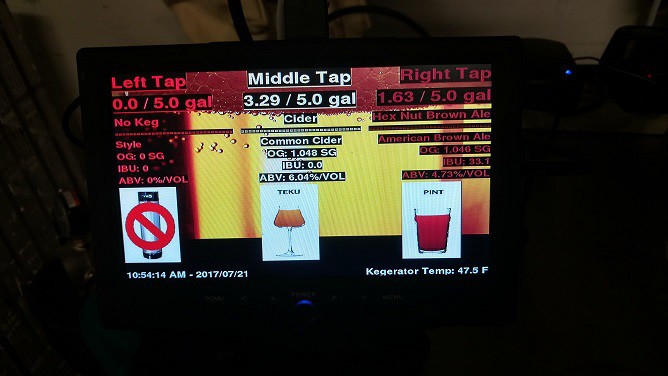
Screen display
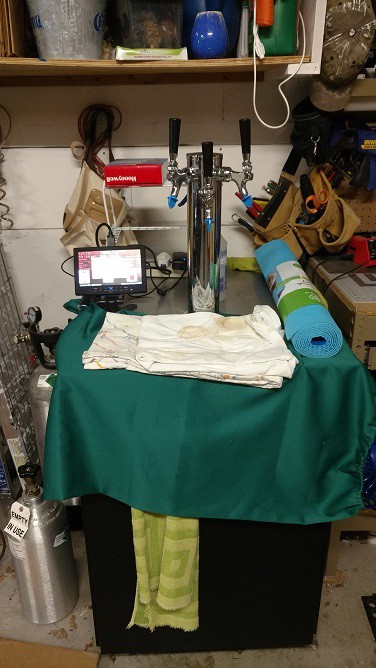
Monitor and Raspberry Pi on kegerator
Some of the files will need to be updated as kegs are changed out.
Connect to the Raspberry Pi via SSH, I recomend using WinSCP and copy the beerinfo.py and flowMeterValues.txt to your desktop so you can edit them. I recommend using Notepad++ to edit the files.
beeryinfo.py - This is the file you update to list the details for each beer.
- scroll to the bottom under the Beer 1, Beer 2, and Beer 3 sections.
- enter in the information as you like between the quotation marks, be sure to leave the quotation marks in
- save and close the file
flowMeterValues.txt - This is the file you update to note the amount of beer in the kegs initially.
- top number is the left tap
- middle number is the middle tap
- bottom number is the right tap
- for a new full 5 gallon corney keg change the value of the corresponding tap to 5.0, do not change the others
Connect back to the Raspberry Pi via SSH and copy the files in the exact same locations they were pulled from overwriting the existing file.
If the Raspberry Pi freezes, simply restart it. I also keep the monitor powered off when not in use.
REST OF INSTRUCTIONS
For whatever reason, I'm not being allowed to edit the instructions so here are the remaining steps.
======================
Connect Electronics
======================
Plan out the locations of the Raspberry Pi, monitor, and all of the sensors, so you can get an idea of the amount of wire and wire wrap needed.
Since my kegerator is in my garage I added heat syncs and a fan to the case of the Raspberry Pi to help keep it cool. I did not have a case setup for the fan so I had to cut a hole to allow the fan. I wired the fan into the 5 V and Ground right along side the sensors.
I mounted the Raspberry Pi on the VESA mounts of the monitor and placed the monitor on top of my kegerator close to the edge.
I cut the GPIO Cable and wired everything to that, so I could easily disconnect the Raspberry Pi, if needed. I also cut the original flow meter senors cables and soldered a new connector on so I could disconnect them easily too.
Connect all the wires to the locations listed in the earlier steps.
======================
Connect Hardware
======================
Cut the beer lines and put the flow meters in line using parts that best suit your beer line sizes. Make sure the flow meters are facing the correct direction, they have an arrow pointing in the direction of flow.
I used stainless MFL tail pieces, but was unable to find nuts to screw them on securely. Searching around, I found that 1/2" stainless faucet water supply lines cut faucet fit, so I got 3 of the 1/2" to 1/2" ones and cut the nuts off of the ends. Each end also had a rubber washer that I used as well. The nuts were not quite wide enough for the tail pieces so I used my dremel and a stone bit to bore out the opening a bit wider. The tail piece was put into the nut with the washer at the back of it and teflon tap was used and the nut was screwed onto the flow meter. The tail piece wrapped in teflon tap was then screwed into the swivel barbs of the beer line.
<picture would be here>
======================
Final Test
======================
Attach some test kegs filled with water or disposable beer to each of the connections and verify that everything is working. When satisfied, attach your regular kegs and enjoy.