So this log isn't going to be just a description of my progress, though I will have posts that keep you up to date on where I'm at with my build. It's also going to include information about some basic decisions you have to make before starting your own build, and also explanations of why I've made the choices I did in designing and constructing my system (spoiler alert: making lots of mistakes helps refine your design). If you have questions about specific design choices, or if you think I should be doing things a better way, don't hesitate to post in the comments.
So, roughly speaking, there are three basic components to the system:
Controller/power supply - This system turns the LEDs on and off, and fires the camera shutter in sync with the lights to create a set of photos with multiple lighting angles that get processed into RTI datasets. The controller I've designed is universal, meaning that it will be the same regardless of how large a dome you build, and how you ultimately decide to mount the dome.
RTI Dome - This is the active part of the system. It has lights on the inside that the controller turns on and off, it has a hole in the top that the camera looks through; the object you want to image sits inside the dome, directly under the camera.
Stand - This is just a way to mount the dome to make swapping objects in and out easier. Its design will depend on the size of the dome, and how you want to handle placing objects inside for imaging.
Here's a photo of my first dome, stand , and controller (after multiple rebuilds).
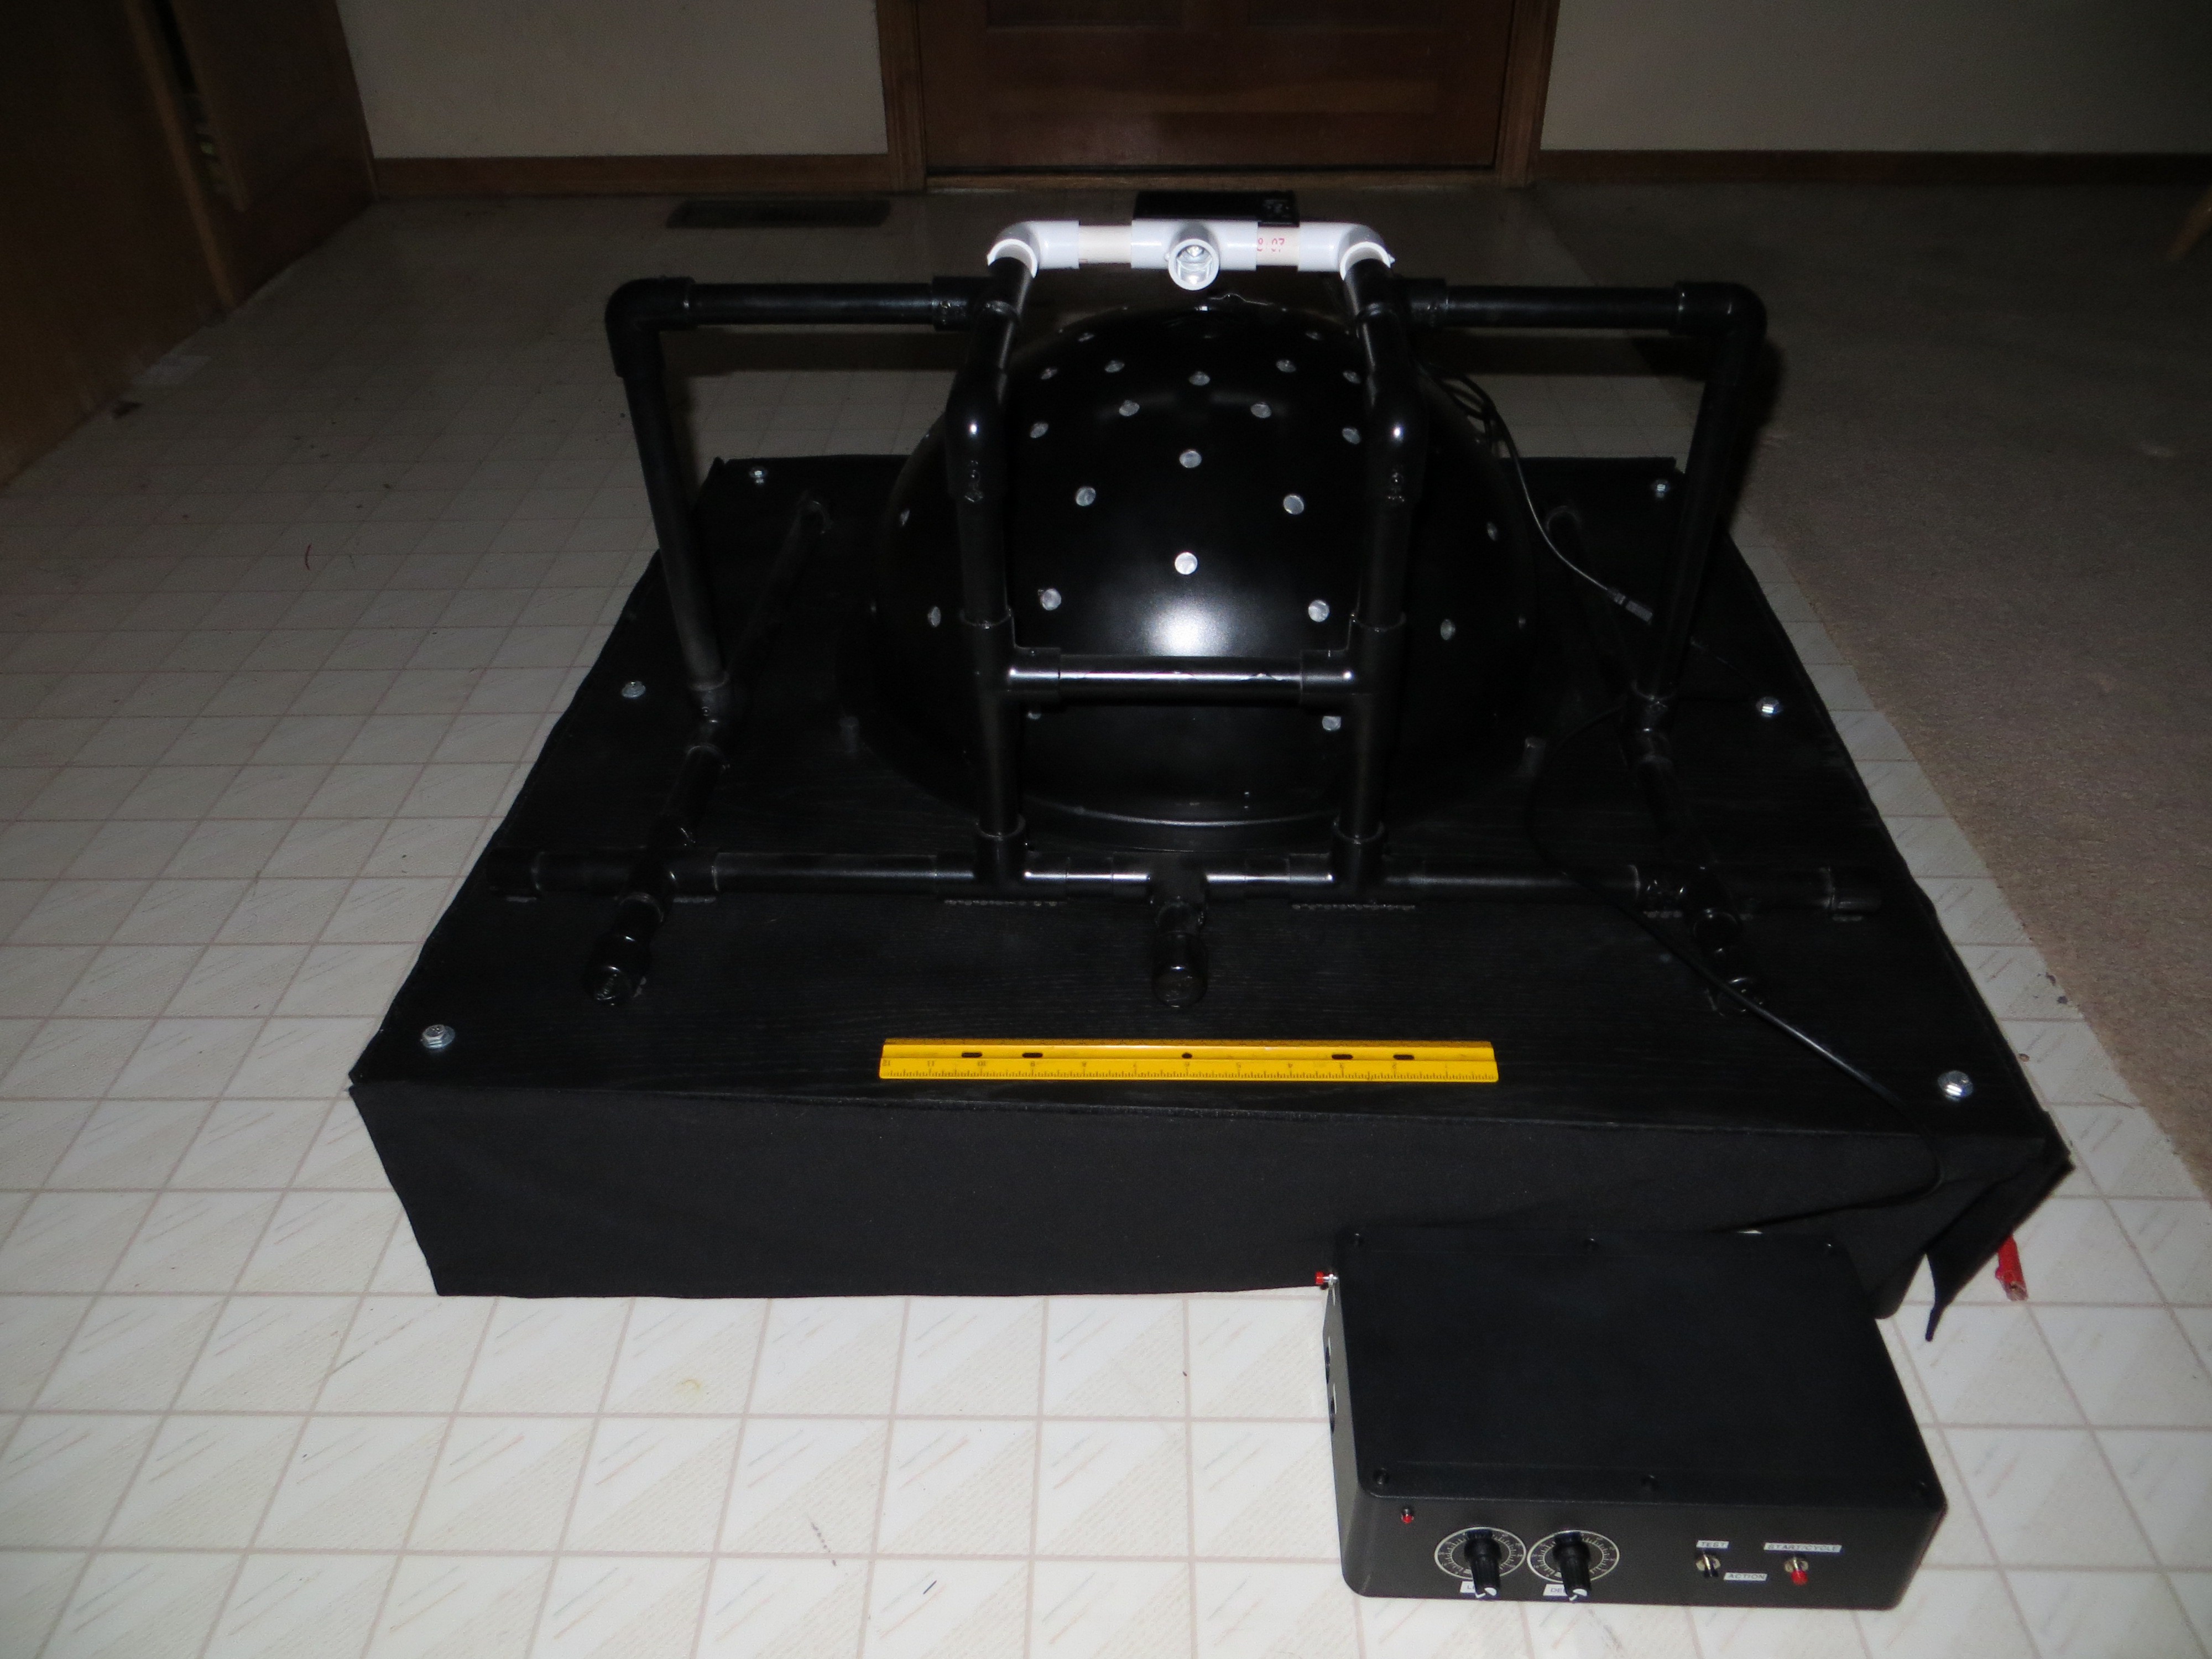
The 18"-diameter dome is sitting on top of a raised platform, so that I can slide samples in and out on top of a lab jack sitting directly underneath the center of the dome. The odd structure on top, with black and white piping, is a camera stand made out of PVC pipe, to hold the camera above a hole in the top of the dome; I've since come up with several better options. And the controller/power supply is sitting at the foot of the stand; two cables from the dome plug into the controller.
And here's my most recent dome, a smaller 12" dome that's fully portable and battery operated, along with the stand and controller, in a nicely-scenic setting:
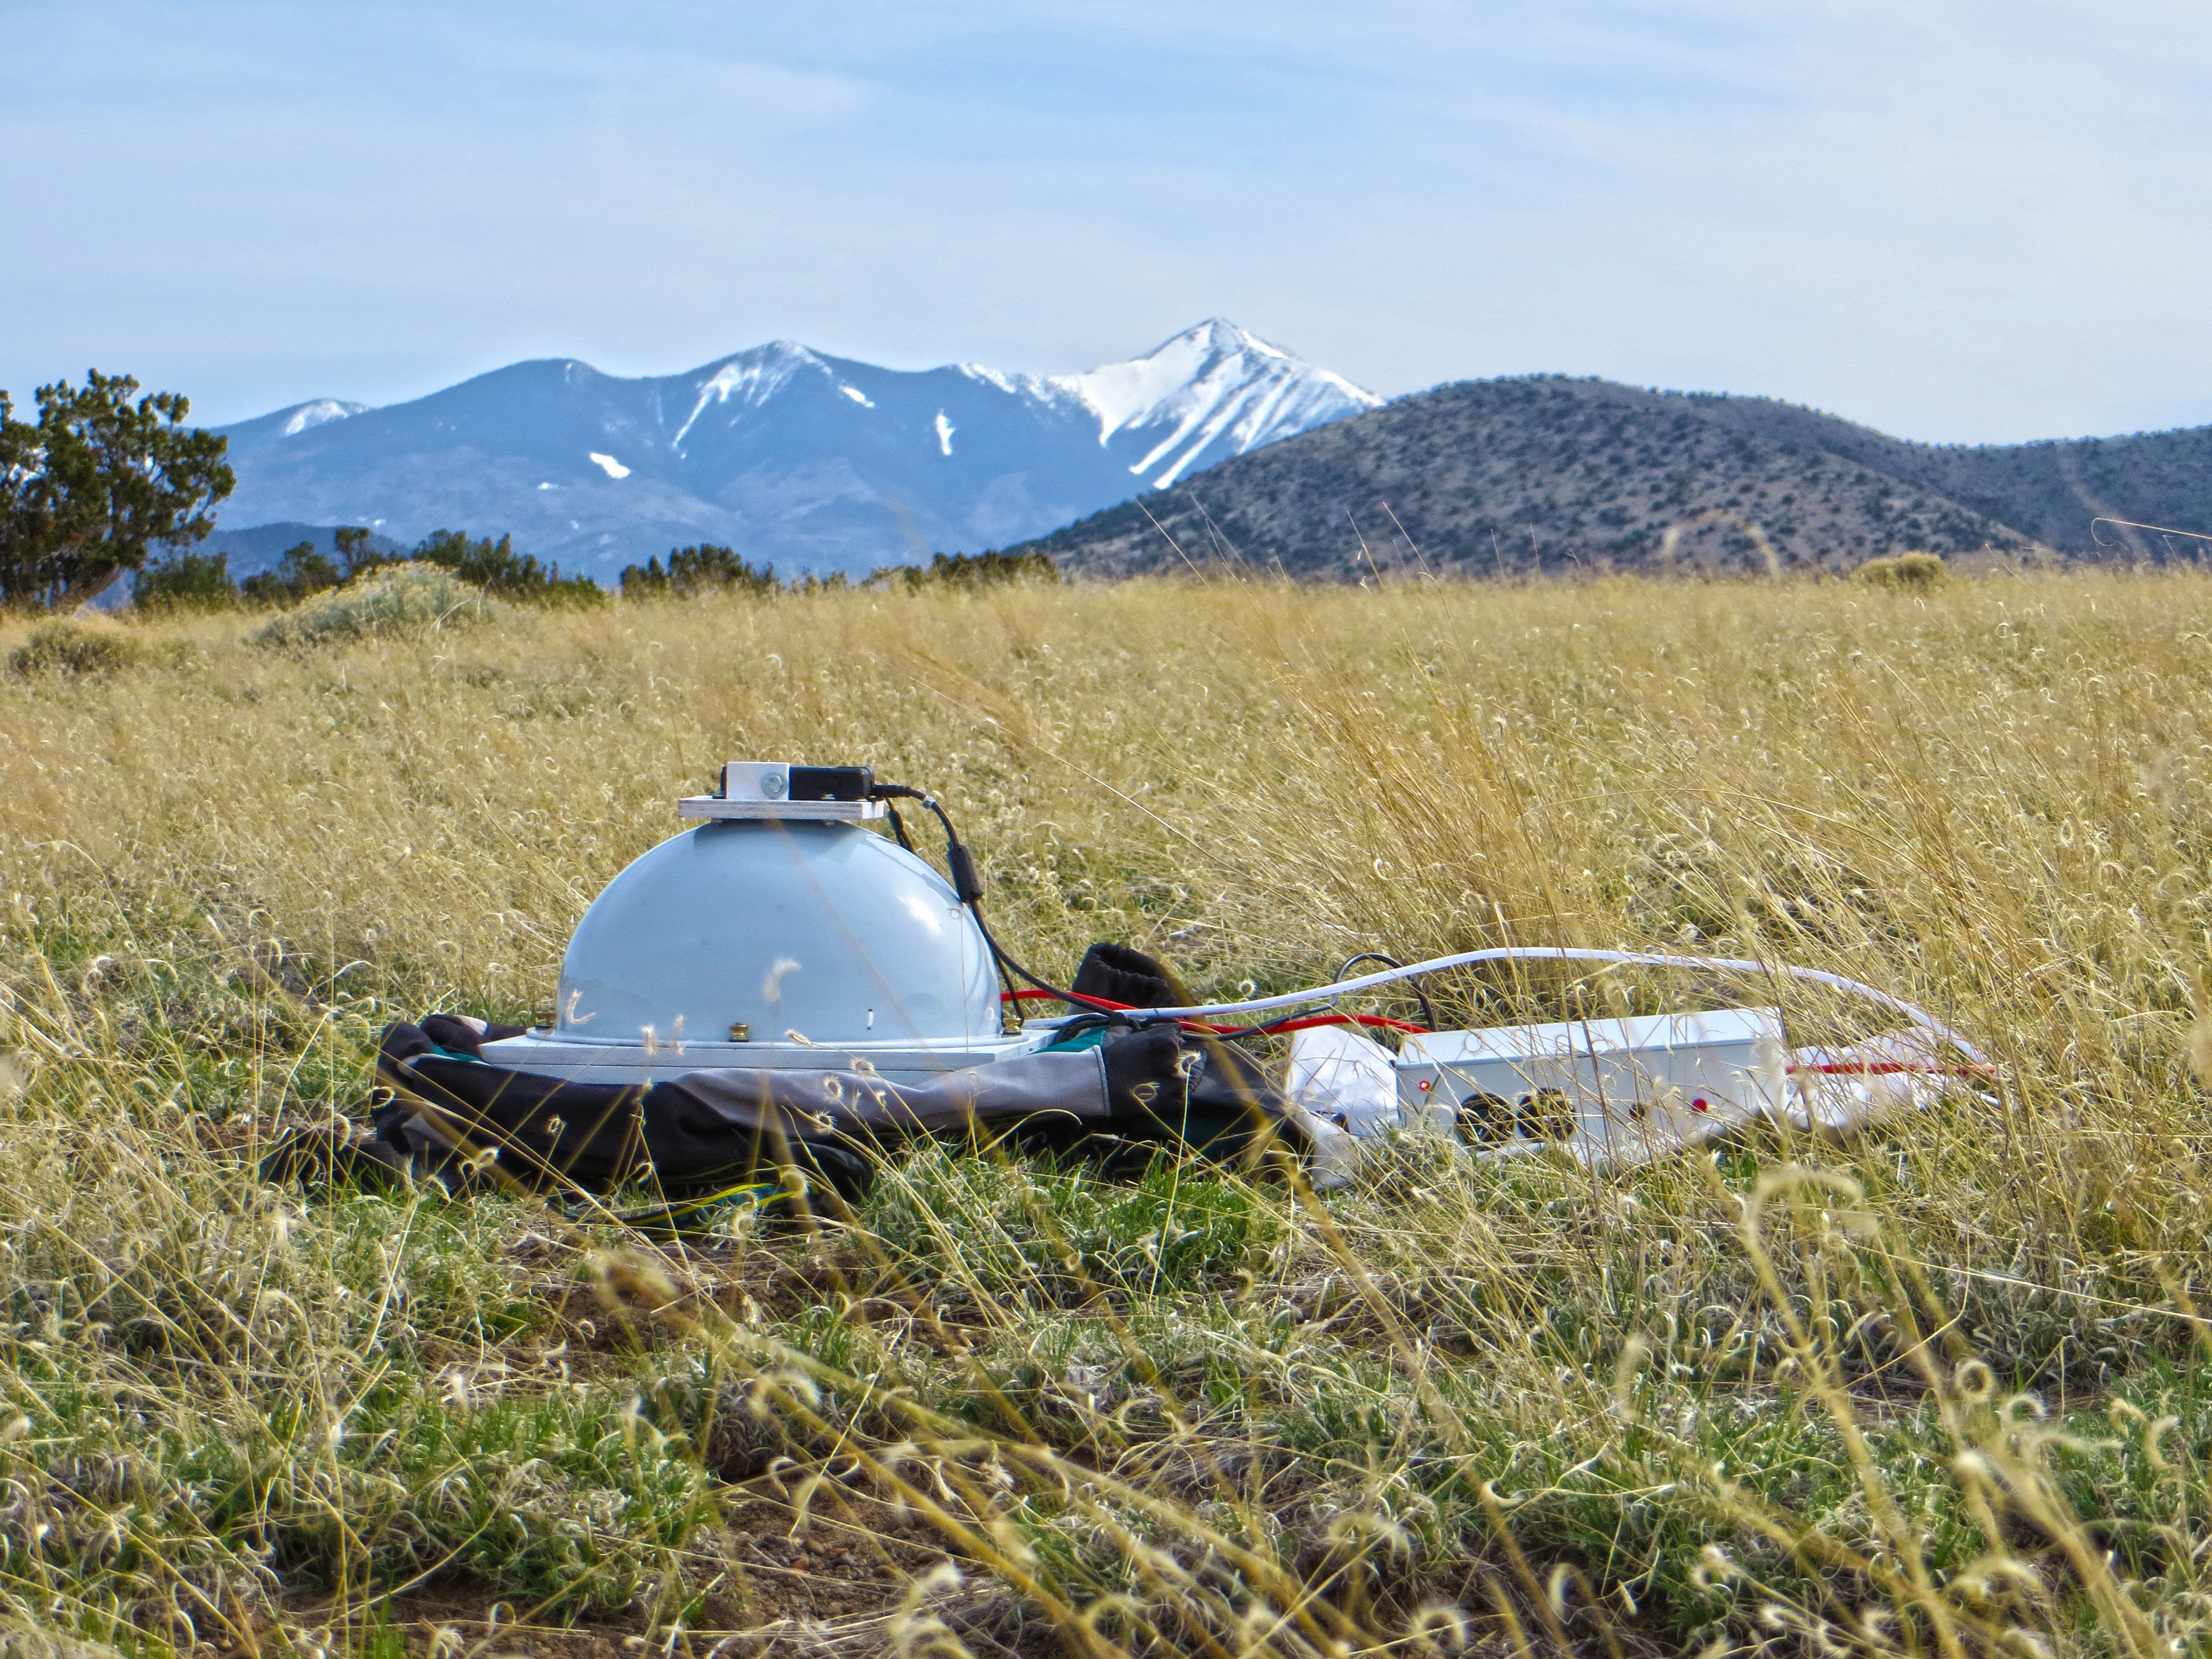
In this design, the dome is on a hinged board that lifts up to allow you to place the object inside. And yes, it is fully functional out there - you can run any dome controller off a battery pack with 9-12V DC, as long as it has the proper jack.
And here's a short video that shows the action going on inside, lights at different angle positions on the inside of the dome going on and off, and the camera pointed at the object you want to image (though in this case, the camera was not firing):
So, the controller design is set, and there are no choices you have to make about it. The stand will depend on the size and use of the dome. The dome, and more specifically the size of the dome, is the big decision you'll have to make, and that will depend on what you plan to use the dome for. And that's a topic for the next log.
Discussions
Become a Hackaday.io Member
Create an account to leave a comment. Already have an account? Log In.