robweber
Overview
I created this as an attempt to document my progress on a personal home automation system modeled after the Jarvis AI in the Iron Man films. My goal in doing this wasn't so much I wanted to talk with a computer as I wanted a system to automate tasks and respond automatically to inputs. Of course this also meant finding a way to blend speech recognition and synthesis as well since a home butler should really communicate at a human level, and not through a bunch of apps.
This page is pretty sparse now but I'm going to start collecting some videos, images, and descriptions of the various parts of the project. Expect a few high level overviews and then I'll deep dive on some of the ideas and methodologies.
Core System
The core system consists of 3 basic features. The first is the server software. This is a Java based application that runs the core Stark system. Using the Hazelcast java library the goal is to make the Stark server framework distributed, with modules that can run in multiple environments and communicate with each other. In theory this is already possible, but in practice has not been attempted yet. Upon loading, the server creates the various modules that are written by extending the StarkModule java class. These modules are what actually add any sort of interaction to the system.
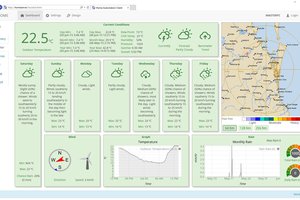
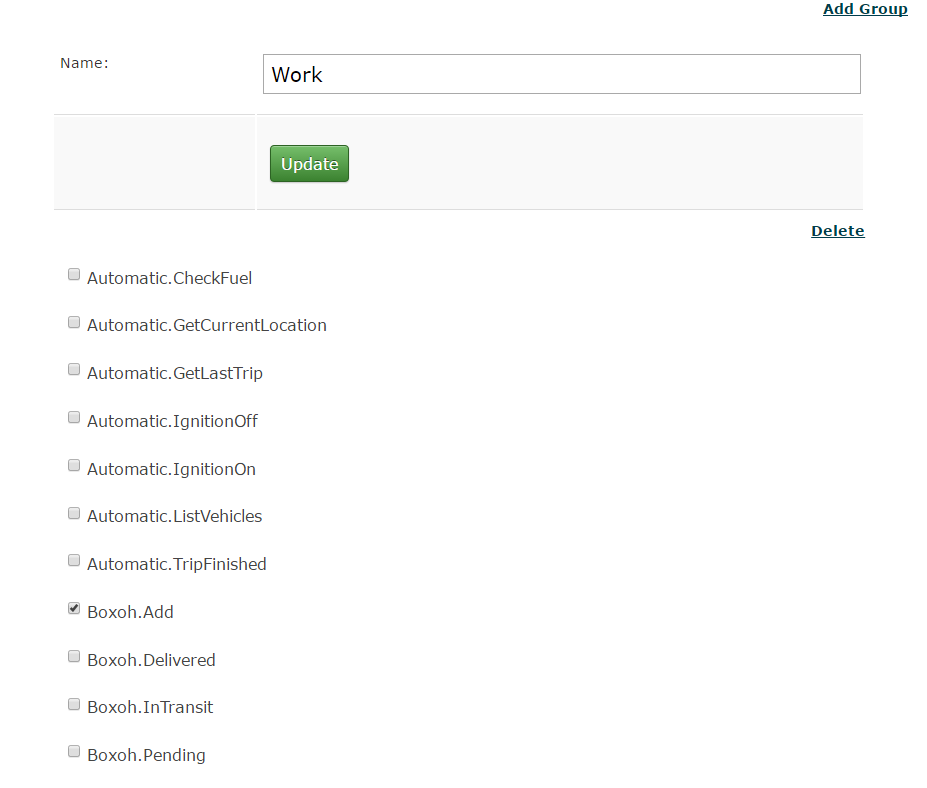
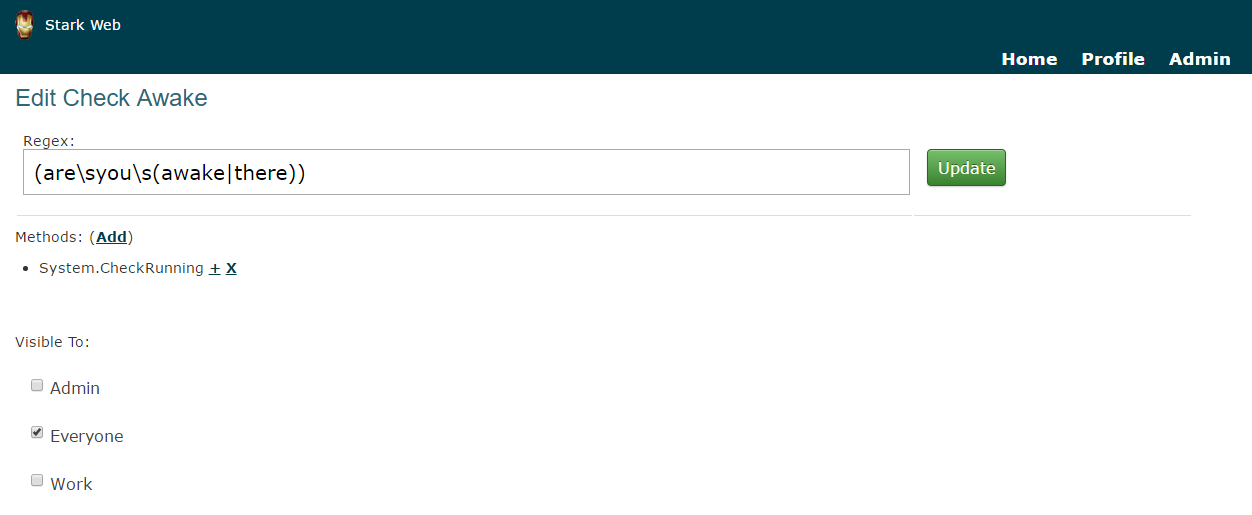
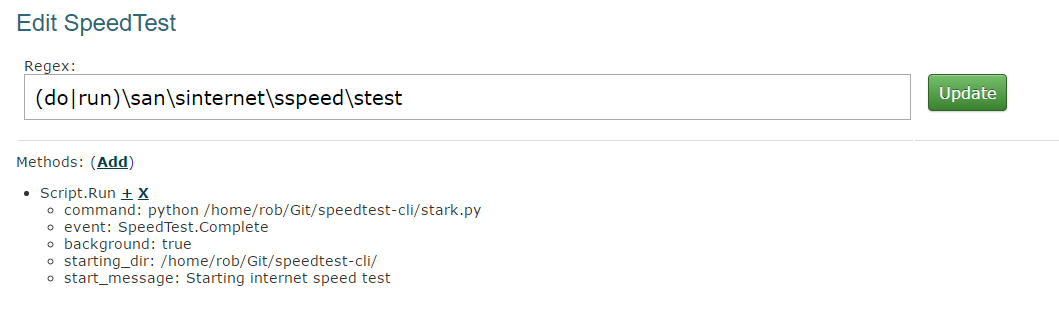
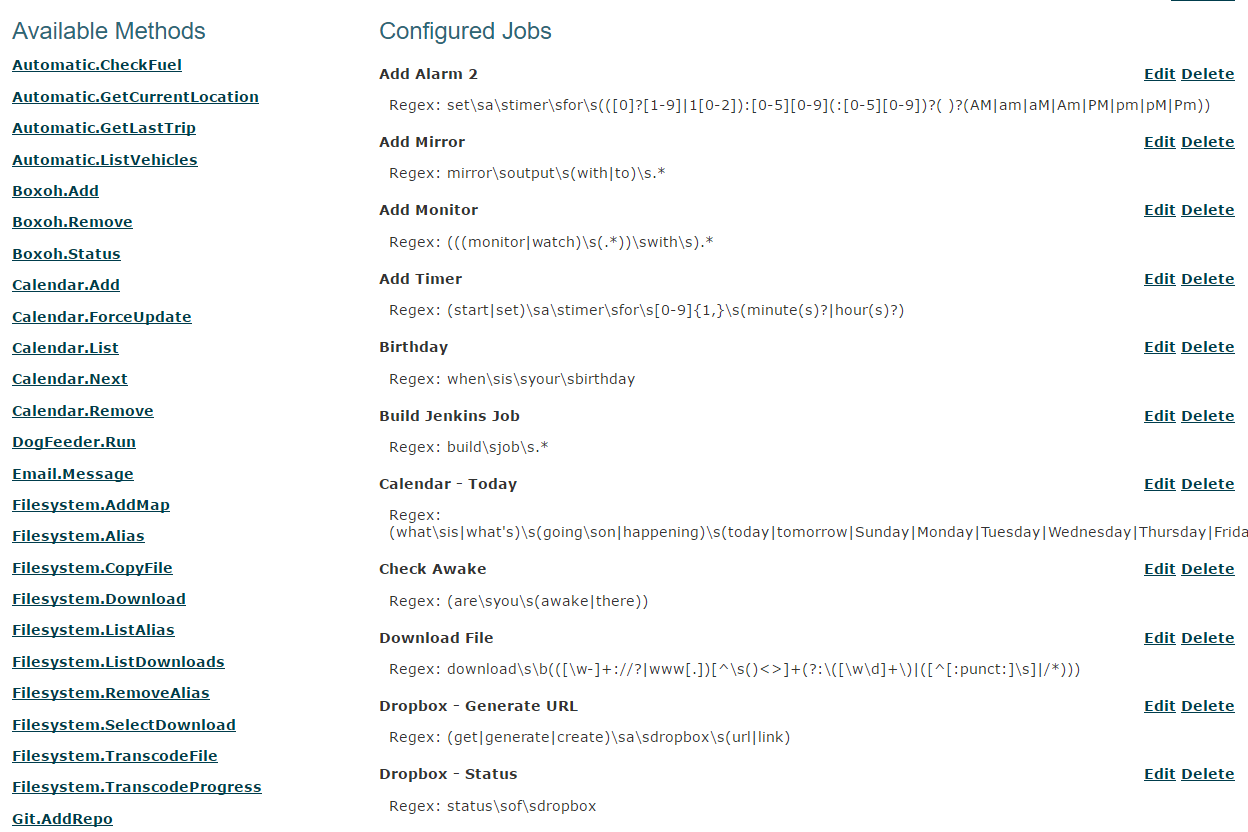
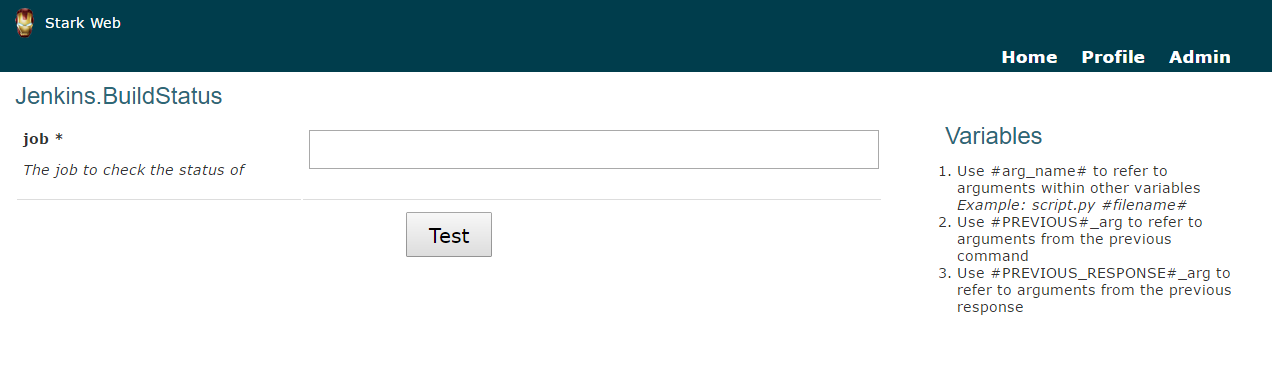
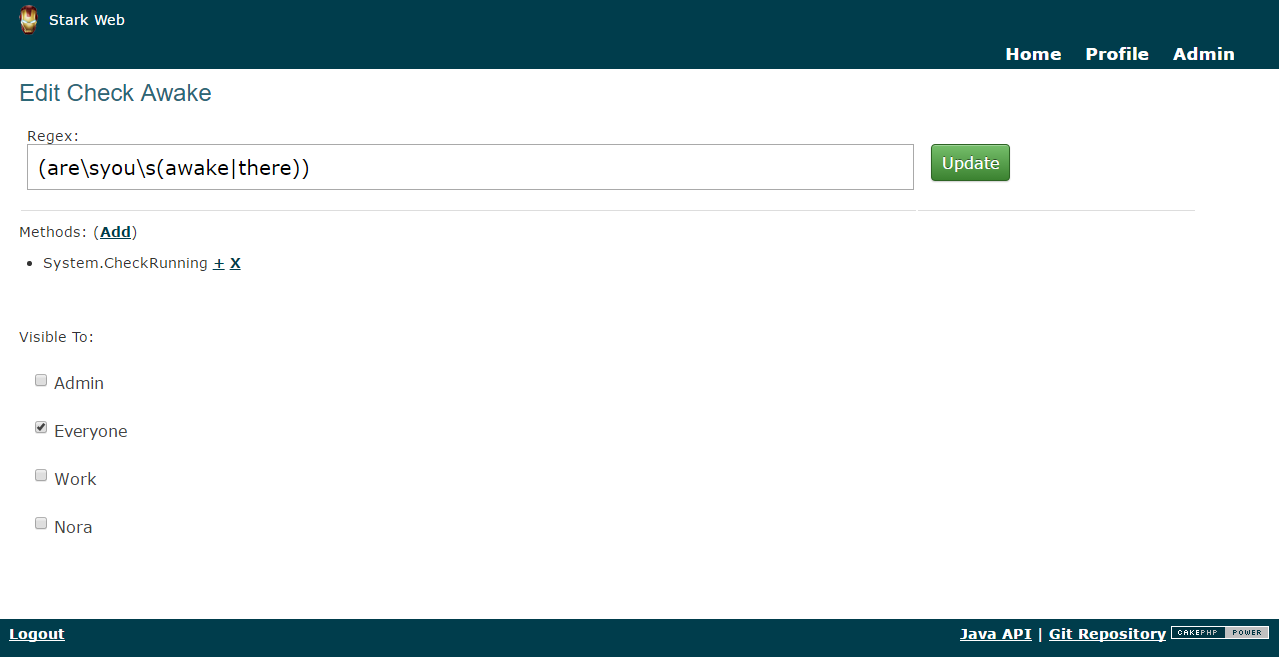
The second component is a simple web frontend. While the ultimate goal of the system is to interact via text or voice commands, there is some more complex setup that is just easier with a basic web interface. This is stuff like user setup, triggers, schedules, etc. This is where any kind of third party integration is also setup. Especially useful where you have a situation that requires Oauth2 or similar hook for making calls in to a remote framework or system.
The last component are what I call Stark Clients. These are outside systems that connect and interact with the server on behalf of a user. I've written helper libraries in a variety of formats (Java, PHP, Python, Bash). The goal of a client is to connect to Stark and issue commands, or relay events. As an example, the Stark Bash client is a small Bash script that you can alias on your command prompt. At the CLI typing something like:
stark are you there
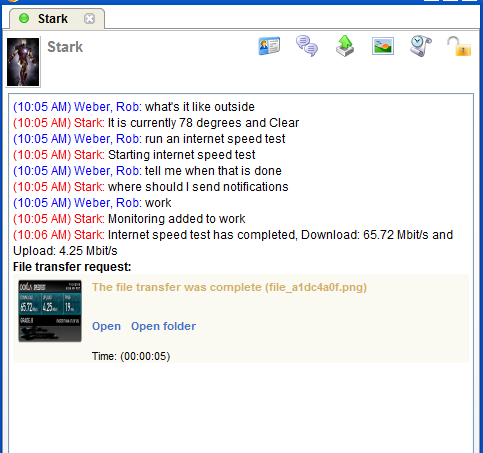
Sends the command to the server and returns the response. A more elaborate client is the Stark Windows client, which runs in the system tray. This client can actually play voice events through your speakers, or record voice via a microphone and execute commands via speech recognition (thanks to Google Speech API). These clients function off a combination of technologies such as JSON HTTP requests for commands and things like Websockets for events.
Integrations
I refer to the integration points as Modules within the context of the framework. Here is a list of the ones completed so far. Obviously some are more complete than others; for instance the GitHub integration basically is a web hook for receiving commit and issue notifications while the OctoPrint integration actually allows for control of the printer and notifications when events happen. In future log posts I'll try and go through each of the modules at some point.
- Automatic (https://www.automatic.com)
- Boxoh (http://www.boxoh.com/)
- Dog Feeder
- File System
- Forecast.io (http://forecast.io)
- GitHub (https://github.com/)
- GitLab (https://gitlab.com)
- Icinga (https://www.icinga.org/)
- Jenkins (https://jenkins.io/)
- Minecraft via Spigot (https://www.spigotmc.org/)
- Nest (https://nest.com/)
- Network Tools
- Octoprint http://octoprint.org/
- Pushover https://pushover.net/
- RSS Reader
- Scripts (execute arbitrary system script)
- SmartThings https://www.smartthings.com/
- XMPP via Smack http://www.igniterealtime.org/projects/smack/index.jsp
- Todo.txt http://todotxt.com/
- Twilio https://www.twilio.com/
- Twitter https://twitter.com/
- Kodi https://kodi.tv/
- iCalendar Reader
Where is the Code?
Good question. In short, I have it in a personal git repo. I'm not opposed to making it available I just haven't done so. Personally...
Read more »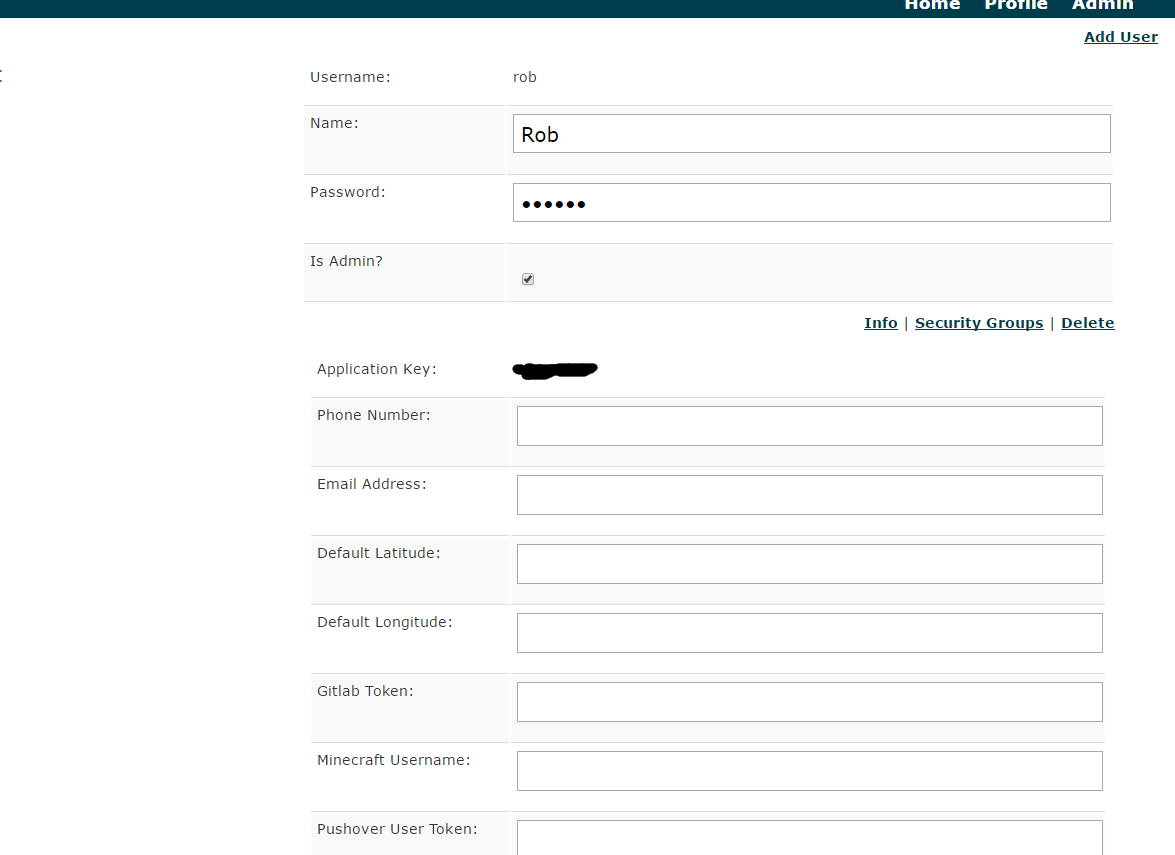


 qquuiinn
 Matt Lagarenne
 KeeZhongPing