 Richard Hogben
To check that everything is working locally in a standard configuration I update the Arduino sketch and connect to the locally running app server.
Startup the local server
From the location of the java server start the server from a terminal and verify the server is running.
In terminal run:
java -jar server-0.18.2-SNAPSHOT.jar
In browser ( remember https in the url):https://YOUR_LOCAL_IP:7443/admin
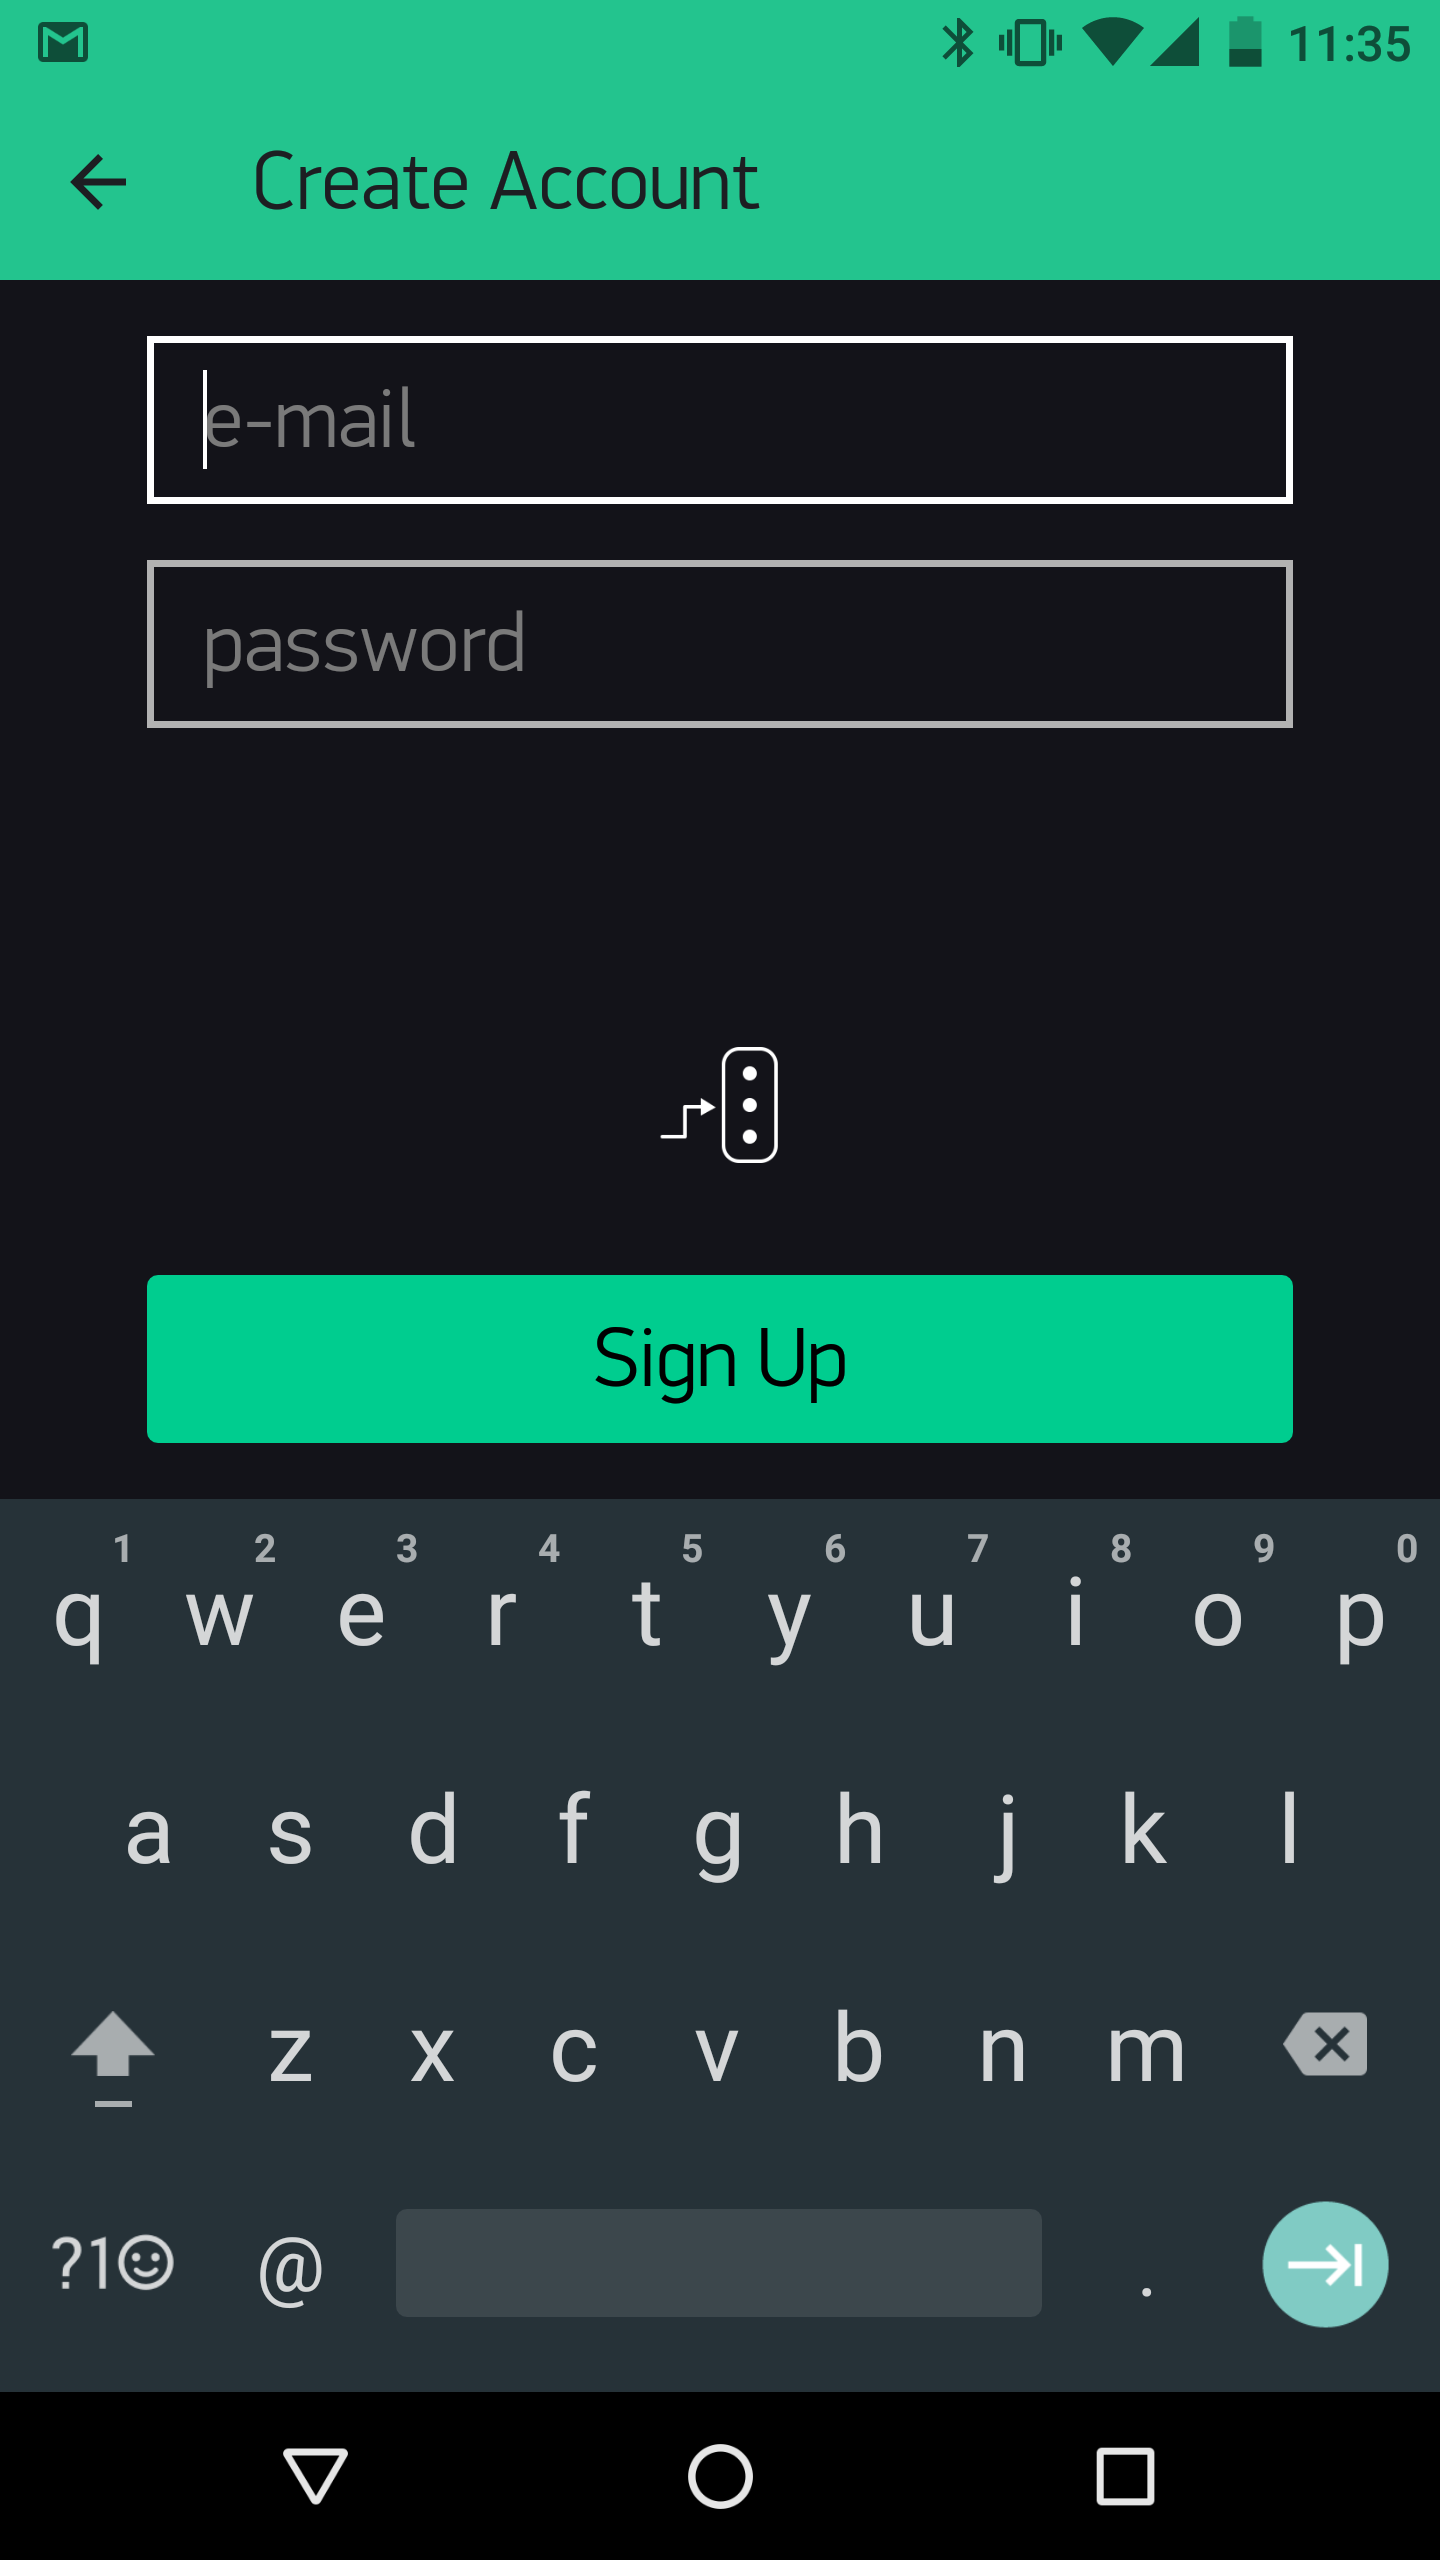
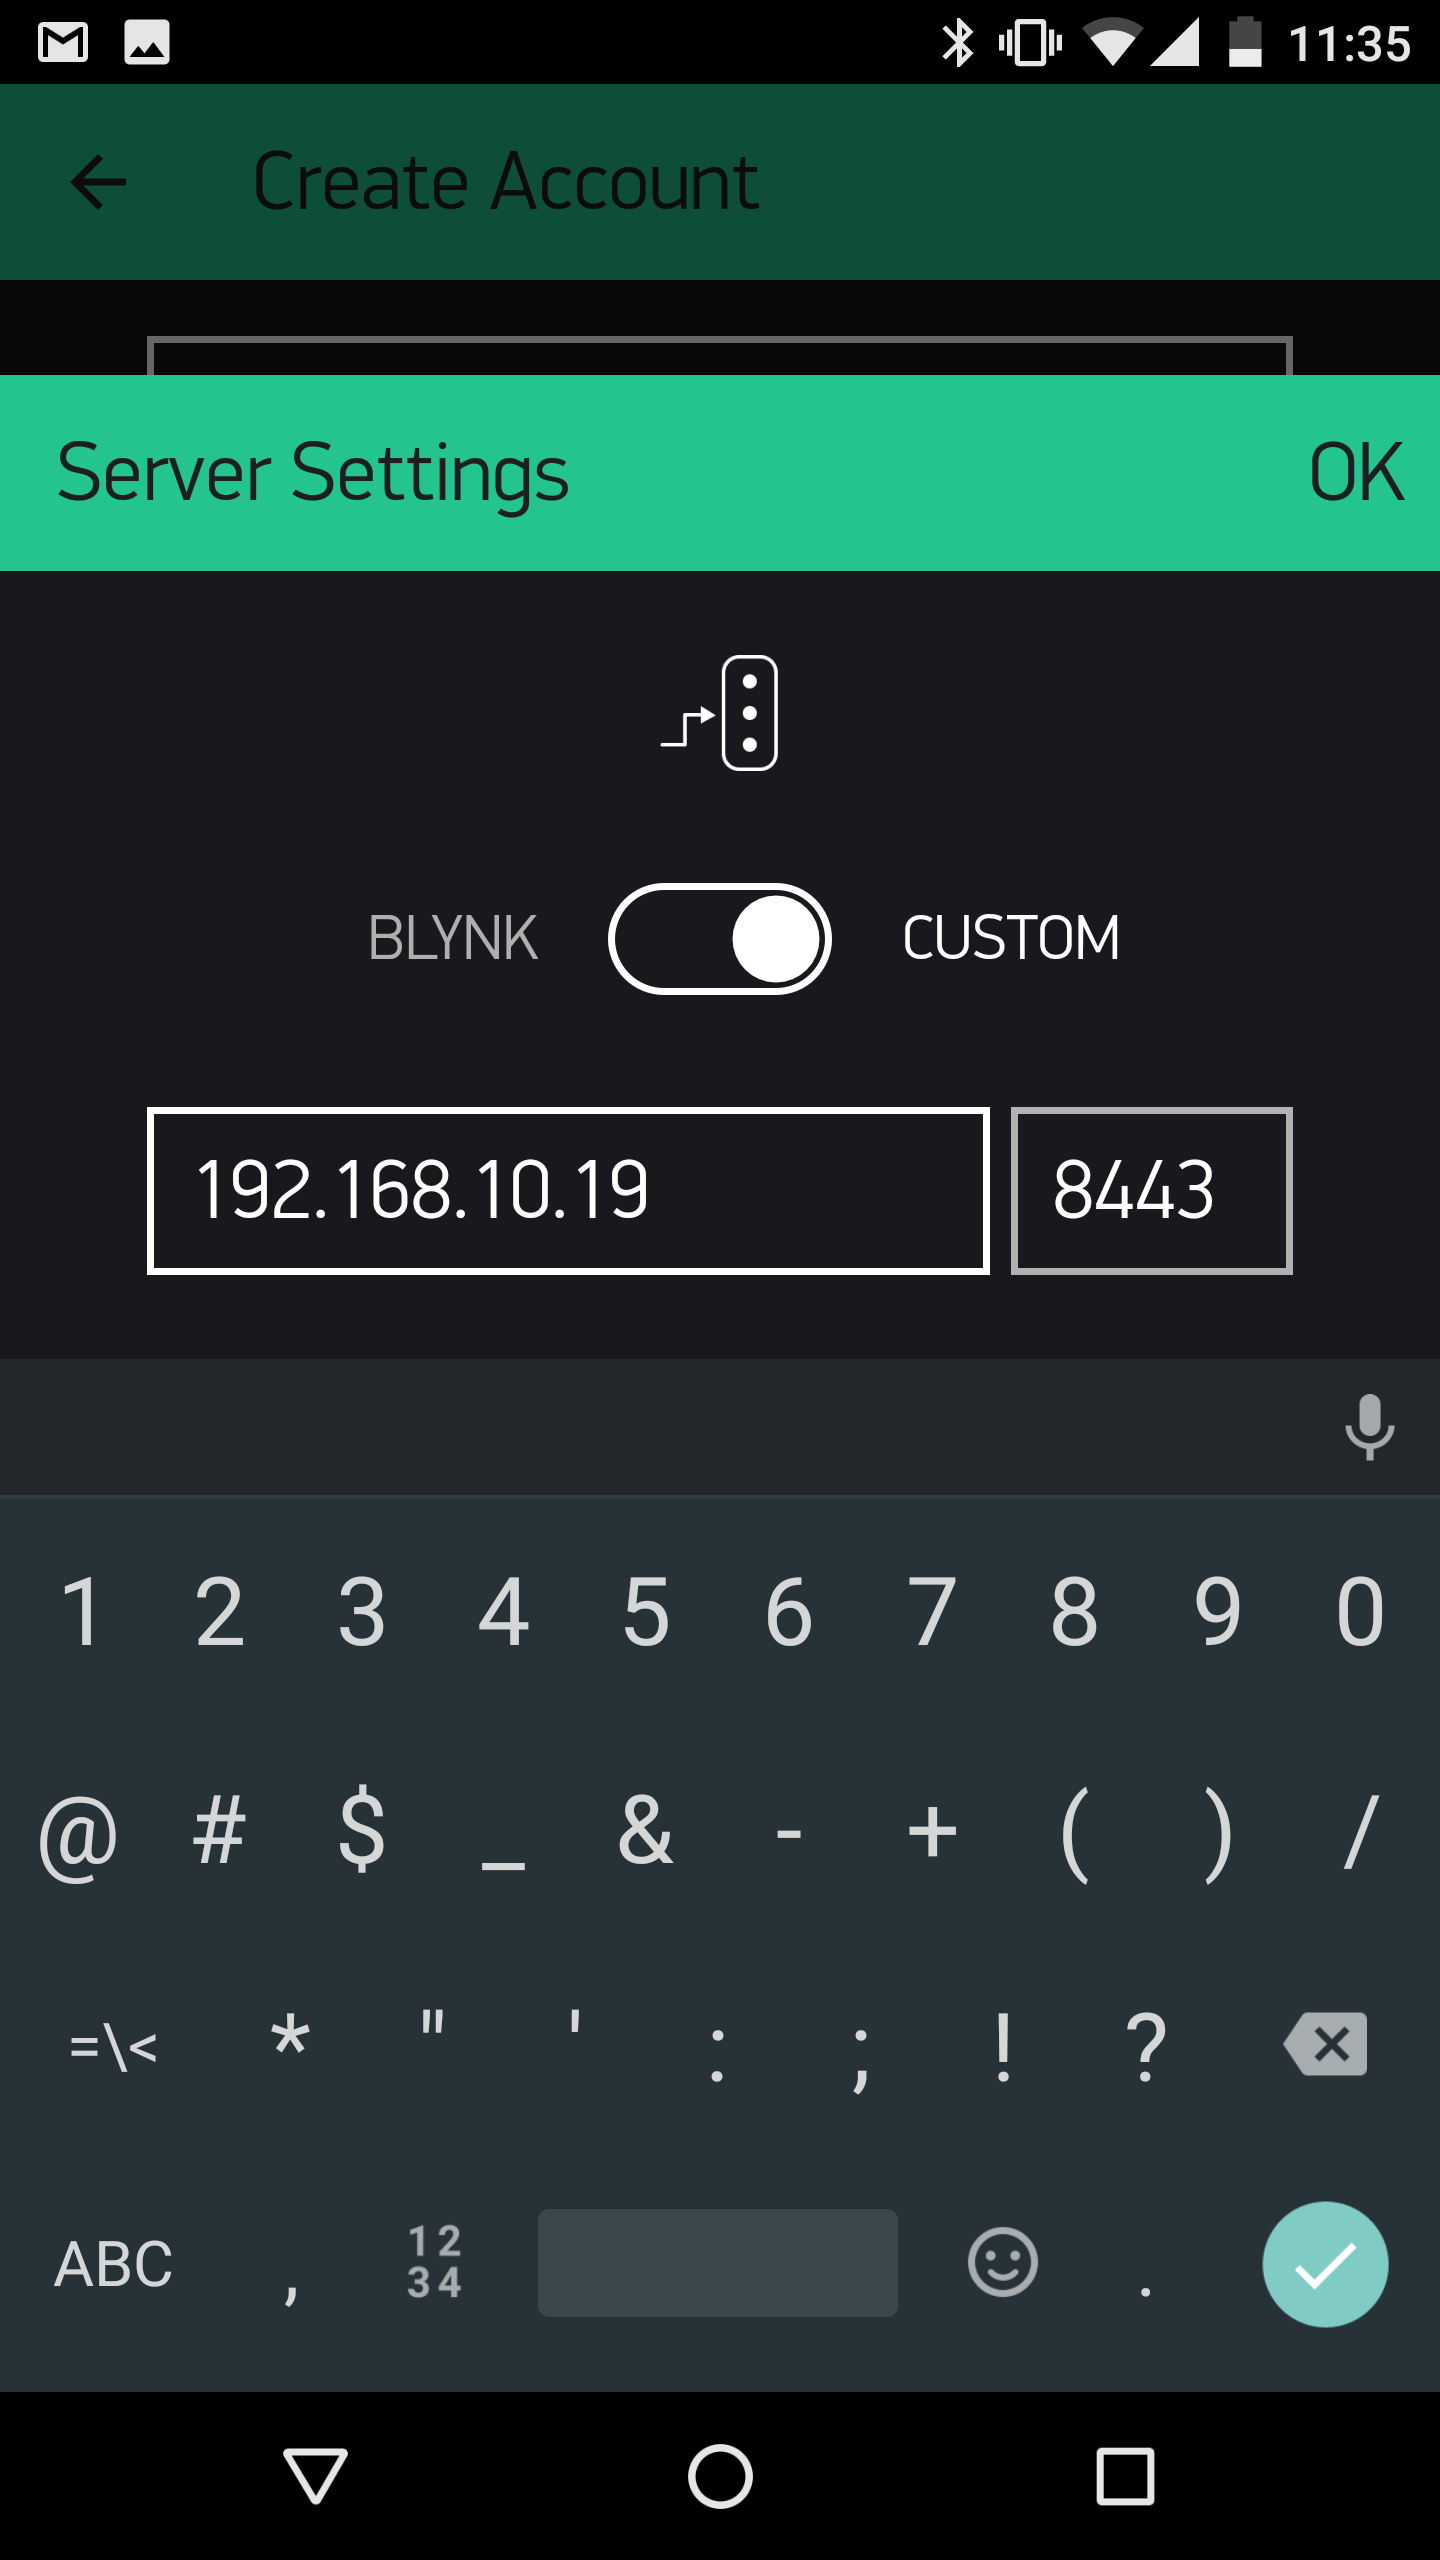
Login to the Blynk app locally and add a new Blynk project
From the login screen click on create new account. This is separate from the Blynk servers so the email and password can be whatever you want.
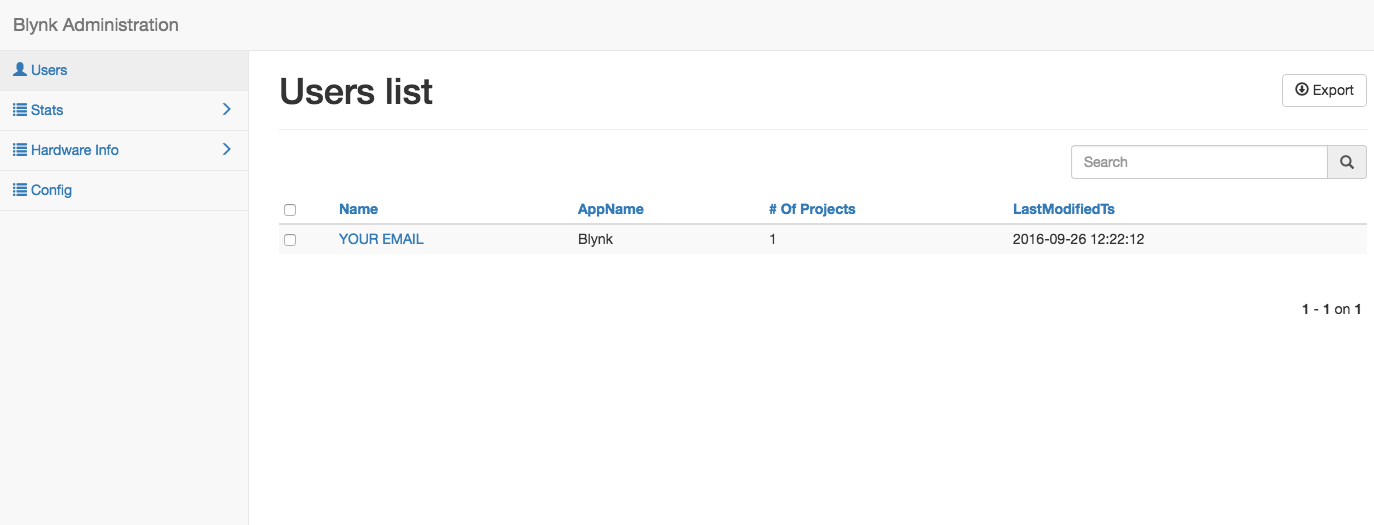
When login is complete check that your new user displays on the local server.
Create another hello world led toggle project in the Blynk app. Note the Auth ID, email won't work but you can tap it to copy and email it to yourself manually
Update the Arduino sketch and upload
The new sketch has an IP address value added in Blynk.begin, this should be the IP of your local Blynk server. Enter you new Auth ID from above. Update this sketch, re verify, and upload, if you need help refer to the ESP8266 and Blynk setup steps.
/**************************************************************
 * Blynk is a platform with iOS and Android apps to control
 * Arduino, Raspberry Pi and the likes over the Internet.
 * You can easily build graphic interfaces for all your
 * projects by simply dragging and dropping widgets.
 *
 *   Downloads, docs, tutorials: http://www.blynk.cc
 *   Blynk community:            http://community.blynk.cc
 *   Social networks:            http://www.fb.com/blynkapp
 *                               http://twitter.com/blynk_app
 *
 * Blynk library is licensed under MIT license
 * This example code is in public domain.
 *
 **************************************************************
 * This example runs directly on ESP8266 chip.
 *
 * You need to install this for ESP8266 development:
 *   https://github.com/esp8266/Arduino
 *
 * Please be sure to select the right ESP8266 module
 * in the Tools -> Board menu!
 *
 * Change WiFi ssid, pass, and Blynk auth token to run :)
 *
 **************************************************************/
#define BLYNK_PRINT Serial    // Comment this out to disable prints and save space
#include
#include
// You should get Auth Token in the Blynk App.
// Go to the Project Settings (nut icon).
char auth[] = "XXXXXXXXXXXXXXXXXXXXXXXX";
// Your WiFi credentials.
// Set password to "" for open networks.
char ssid[] = "XXXXXX";
char pass[] = "XXXXXX";
void setup()
{
  Serial.begin(115200);
  Blynk.begin(auth, ssid, pass, IPAddress(XXX,XXX,XX,XX));
}
void loop()
{
  Blynk.run();
}
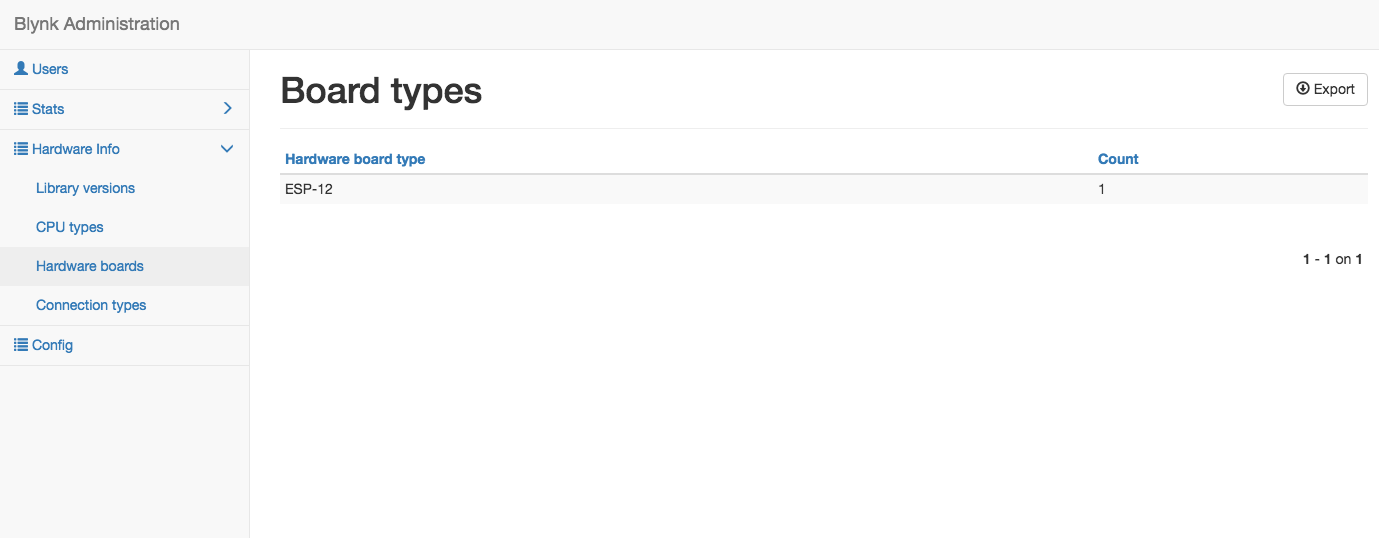
Refresh the server page and navigate to Hardware boards to check that the device has logged in locally.
From the Blynk app run your app and toggle the button, the LED should turn on and off if you used the blink led example linked above. This is all that's needed to test the local server and Arduino hardware. If it works everything is ready for creating a custom Android app.
Discussions
Become a Hackaday.io Member
Create an account to leave a comment. Already have an account? Log In.