 Milad
MiladHello everyone,
As @Ivan explained in previous post, the latest version of code now works with Mouse.h library. So I picked up the LipSync prototype and went through the steps to upload the latest version of code to confirm we get the same results. I documented the process and every step that I went through.
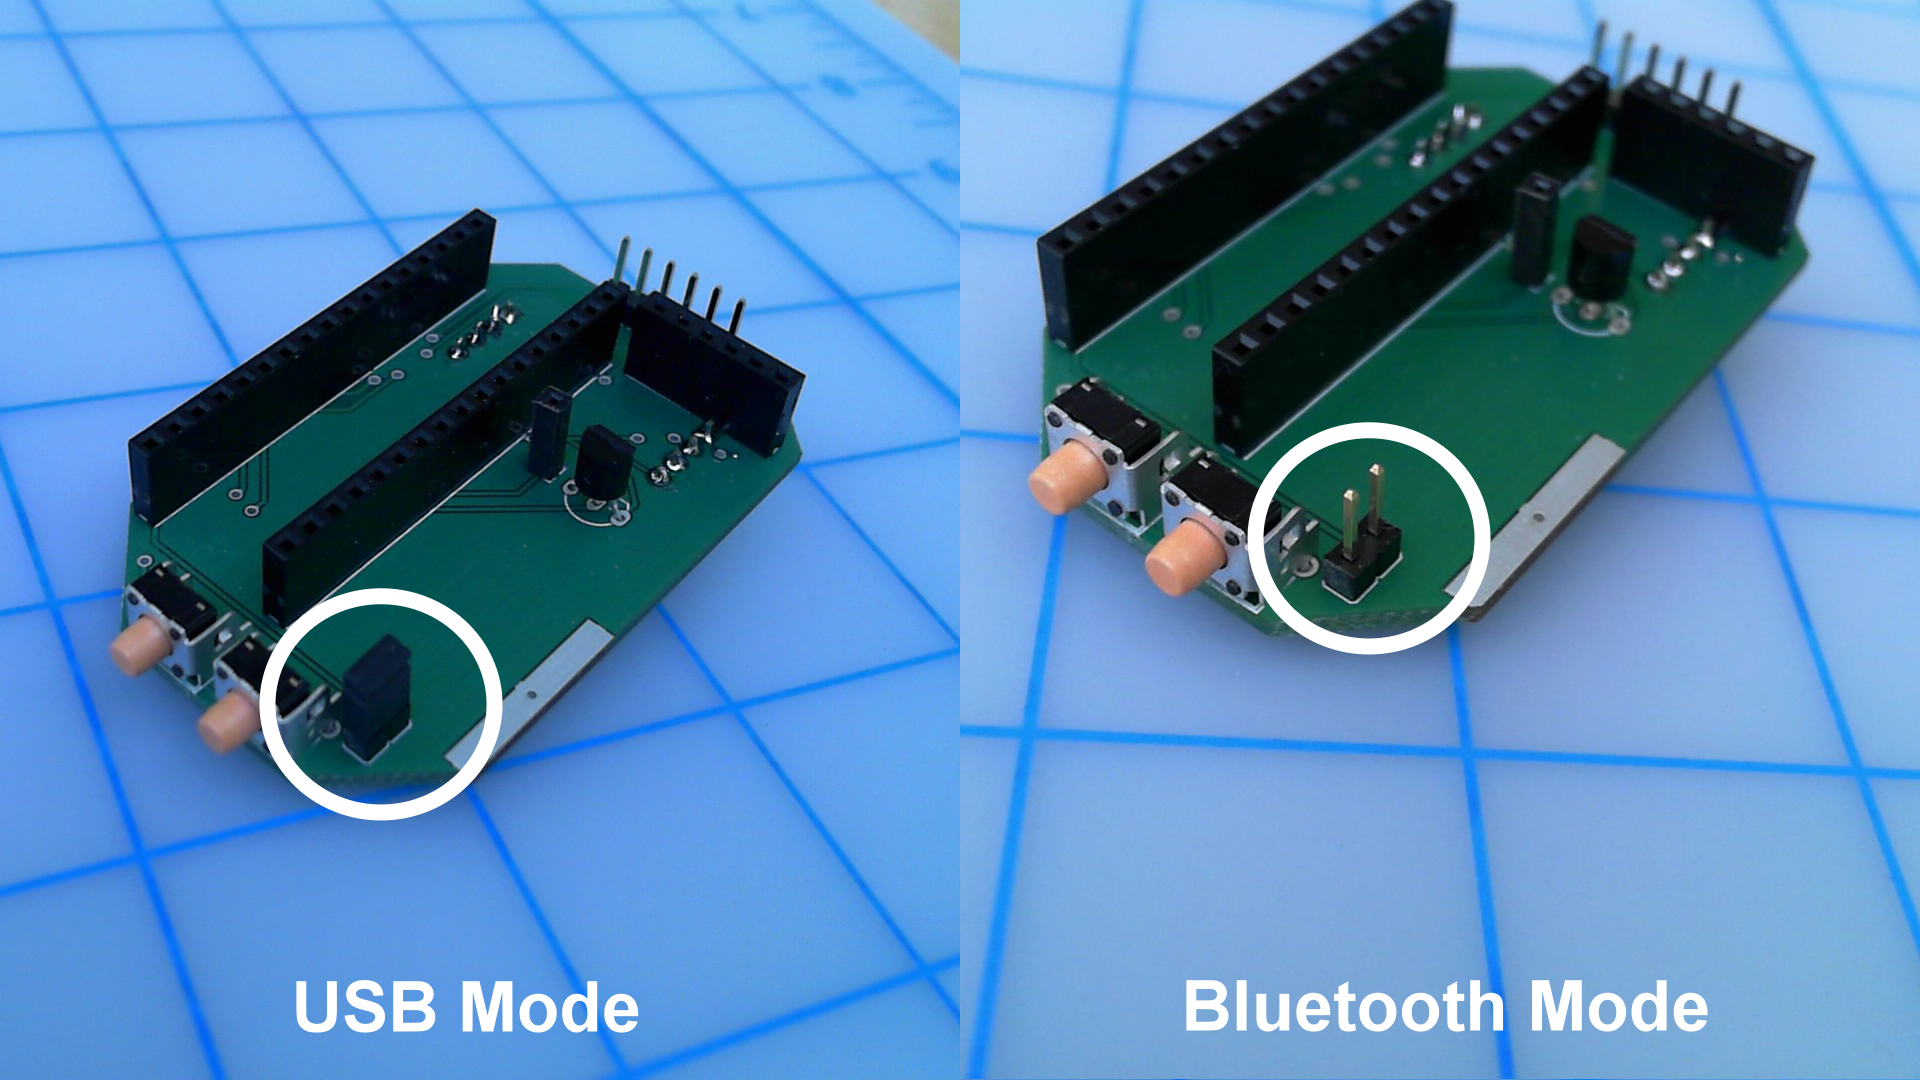
First you need to decide whether you want to use USB or
Bluetooth as a communication method between LipSync and your smartphone. In
order to use LipSync in USB mode you need to place a shunt jumper on the 2 row header connector
near “increase speed control” button and
remove the jumper to use LipSync in Bluetooth mode.
The next step is to download and install the latest version of Arduino IDE from official download page on Arduino website.
Once you have installed the latest version of Arduino IDE then you will need to download the latest version of LipSync code from github which you can find the link on left side of current page. The code can be cloned via any git software or directly by clicking on “Clone or download” button in green and then click on “Download Zip” to save it in your computer.

Once you have downloaded the zip file then you will need to extract the latest version of the code and save it with .ino extension or simply open a new Arduino project and paste the Arduino. Don’t forget to save the Arduino project.Now open the code using Arduino IDE.
The next version of code will be provided in .ino extension format so you can skip this step in the near future.
The next step is to connect Arduino in your LipSync unit to your computer by plugging one end of a micro USB cable to micro USB port of Arduino micro board and other end to the full USB port of your computer. Once the unit is connected then your computer will show a message indicating a device has been successfully identified with its port number. You can find the port number under Ports in Device Manager if you are using a windows computer as well.

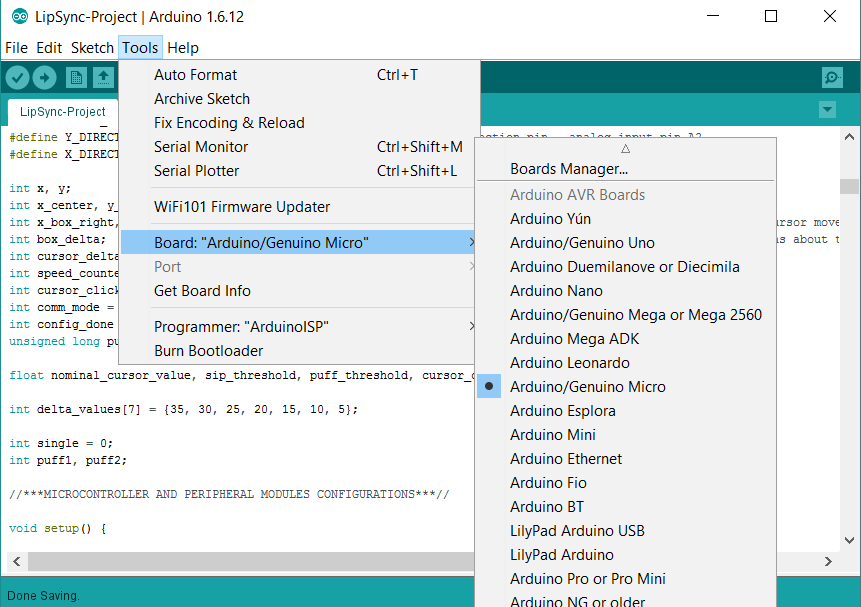
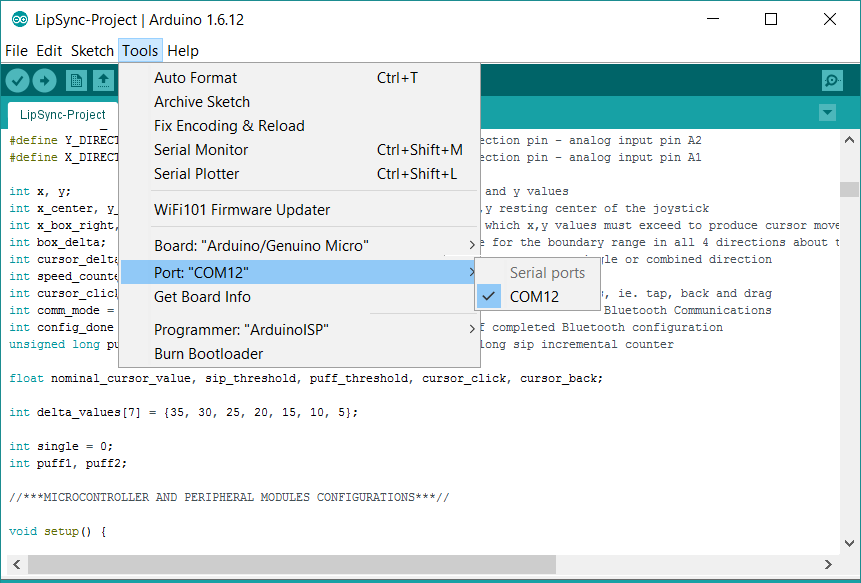
Now you need to click on Tools on top menu of Arduino IDE and
select “Arduino/Genuino Micro” as your board and select the port number.
Once you have selected the correct Board and Port then you
need to verify and upload the code.
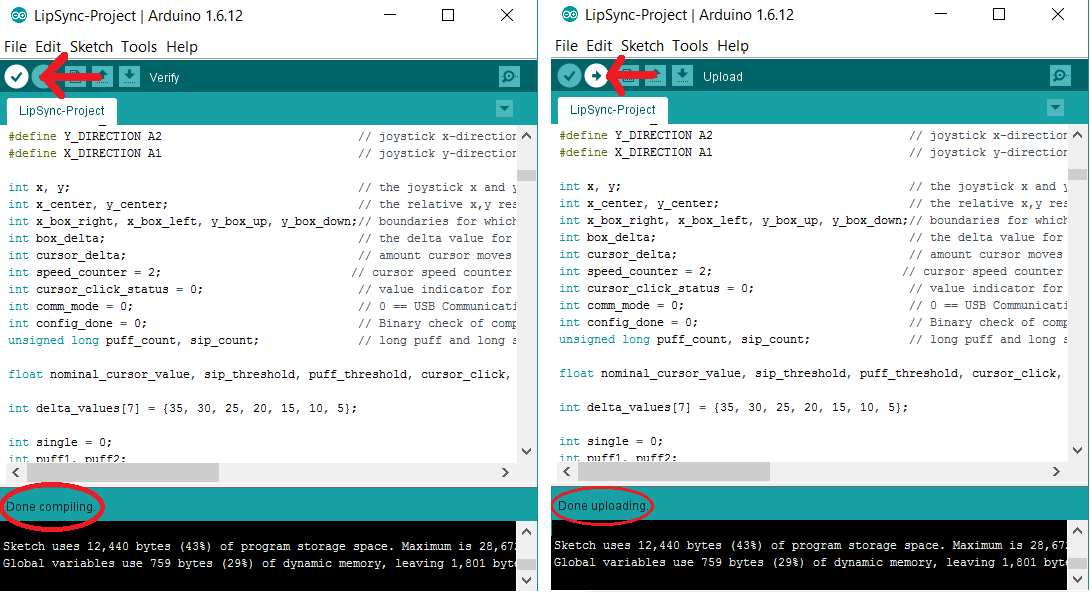
You will receive a “Done uploading” message on bottom of window when you upload the code which means your LipSync unit is flashed with latest version of LipSync code.
Next you need to let the code to initialize and configure the necessary settings for the first time. The led on top of the unit provides some visual feedback during the process.
The led will first confirm the mode that LipSync is currently running. The led will blink 6 times in green if LipSync is in USB mode or 6 times in red if LipSync is in Bluetooth mode. If LipSync is in Bluetooth mode then the red led on Bluetooth module will start to blink at faster rate for 3 seconds and it goes back to normal blinking speed again which indicates the Bluetooth module is configured in HID mode. The Bluetooth configuration is done only once when you upload the code and power the LipSync for the first time.
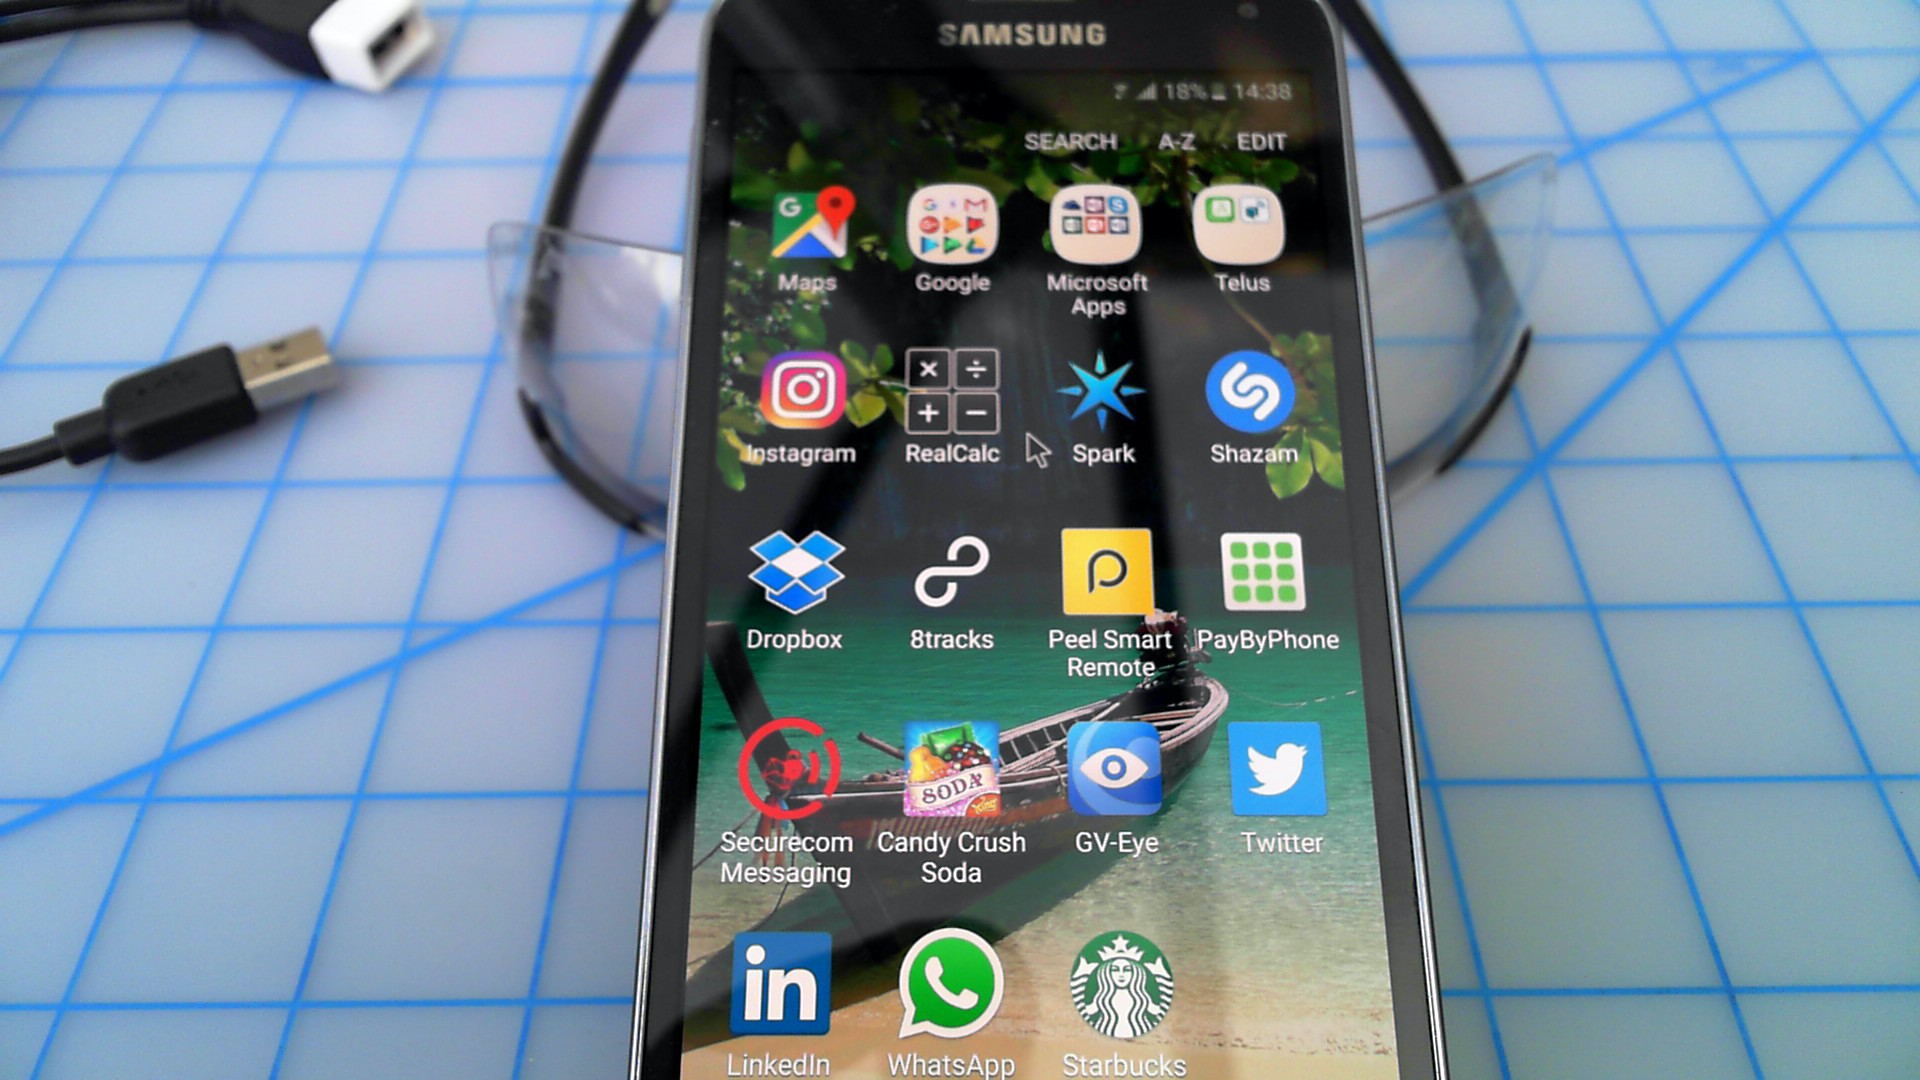
Finally the led blinks in green 3 times which means LipSync is configured and is ready to go. Now you will need a USB On-The-Go splitter cable and a micro USB cable to connect LipSync to your Smartphone in case of USB mode. Once it’s connected then you should be able to see a mouse cursor on the screen of your phone when you move the joystick.
Discussions
Become a Hackaday.io Member
Create an account to leave a comment. Already have an account? Log In.