Close
0%
0%

CNC Laser PCB Maker

X carve Inspired Laser CNC machine which can help Develop quality PCB at home without using expensive photography films and dusty milling.

Similar projects worth following
Inspired From. https://www.youtube.com/watch?v=4SNkzoOvoD8

GOAL : Price less than 300USD of 20K INR

The Main concept is to user Gerber files generated from the CAD software.
This Gerber is converted to G-Code then fed to the machine with grbl controller.
The PCB is already coated with photo resist and the laser only hardens the coating.

First Prototype is developed and the photos will be uploaded soon (within two weeks)

New Design is Inspired From X carve Design which costs Less than first prototype.
Using Aluminium extrusion.

Features:
1. Minimum Track Spacing width : 6 mils or 0.15 mm.
2. Minimum Track width : 6 mils or 0.15 mm.
3. Double Sided NON PTH.
4. Low Weight and low COST.
5. Complete Engraving of the tracks not isolation as milling.

The new design will try to directly incorporate Gerber engraving. hence no hassles
Please Provide your ideas about software and hardware to

Reference 1 : http://reprap.org/wiki/Howto_PCB_from_Eagle

Reference 2 : http://reprap.org/wiki/Plotting

Reference 3 : https://www.inventables.com/technologies/x-carve

Reference 4: http://www.g3gg0.de/wordpress/uncategorized/um2-laser-addon-part-2/ thanks to Simon Merrett

7c624e08-d822-4d8f-a554-90e8b871efed.jpg

After developing photo resist

JPEG Image - 101.17 kB - 09/22/2016 at 14:34

Preview
Download

JPEG Image - 91.51 kB - 09/22/2016 at 14:34

Preview
Download

20160918_213353.jpg

Aluminium Plate with wheel for the X-carriage

JPEG Image - 5.35 MB - 09/18/2016 at 16:11

Preview
Download

20160918_212003.jpg

Frame of aluminium extrusion 2040

JPEG Image - 3.51 MB - 09/18/2016 at 15:54

Preview
Download

20160918_211937.jpg

Got 2040 Aluminium Extrusion from local shop (attached a belt to check the size of required belt)

JPEG Image - 3.44 MB - 09/18/2016 at 15:54

Preview
Download

View all 6 files

  • 3 × Nema 17 Motors
  • 1 × 100mw UV laser
  • 1 × Grbl Controller board
  • 5 × 40x40 Aluminium extrusion 500mm
  • 1 × 5mm Belt and Pulleys

  • Machine assembled

    manjuprasadmbasangi09/22/2016 at 15:17 0 comments

    New Frame design manufactured and assembled (looks a lot like Chinese). Complete aluminium and MS no acrylic or plastic parts

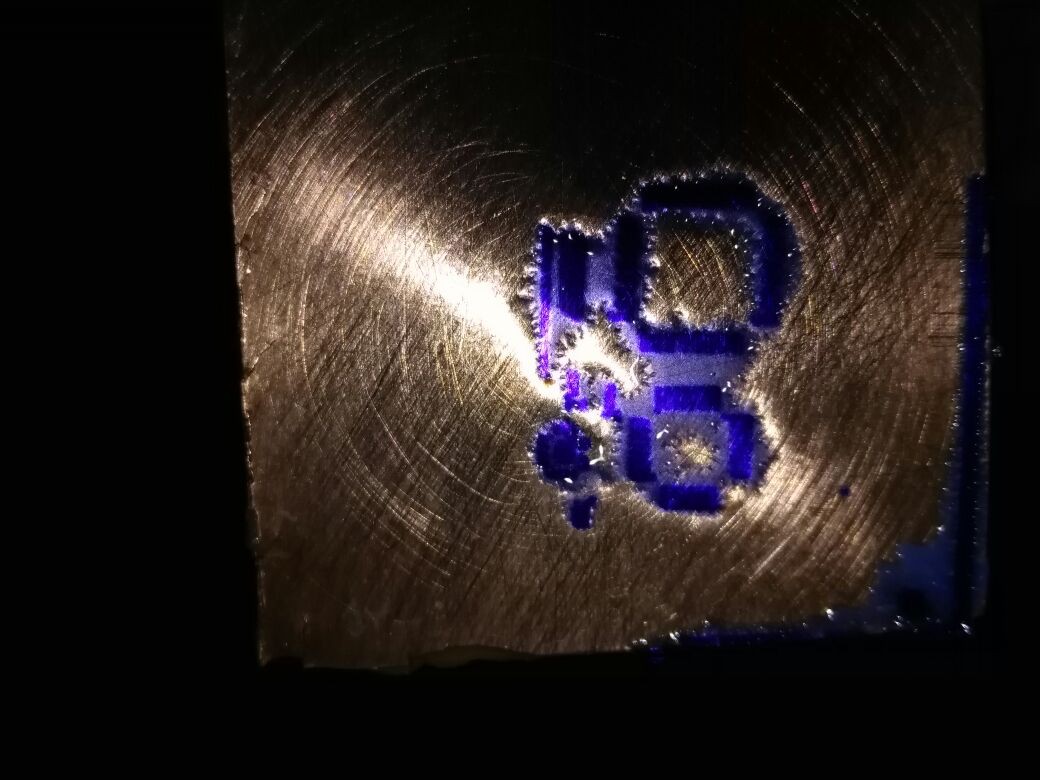
    After Using PLanet CNC
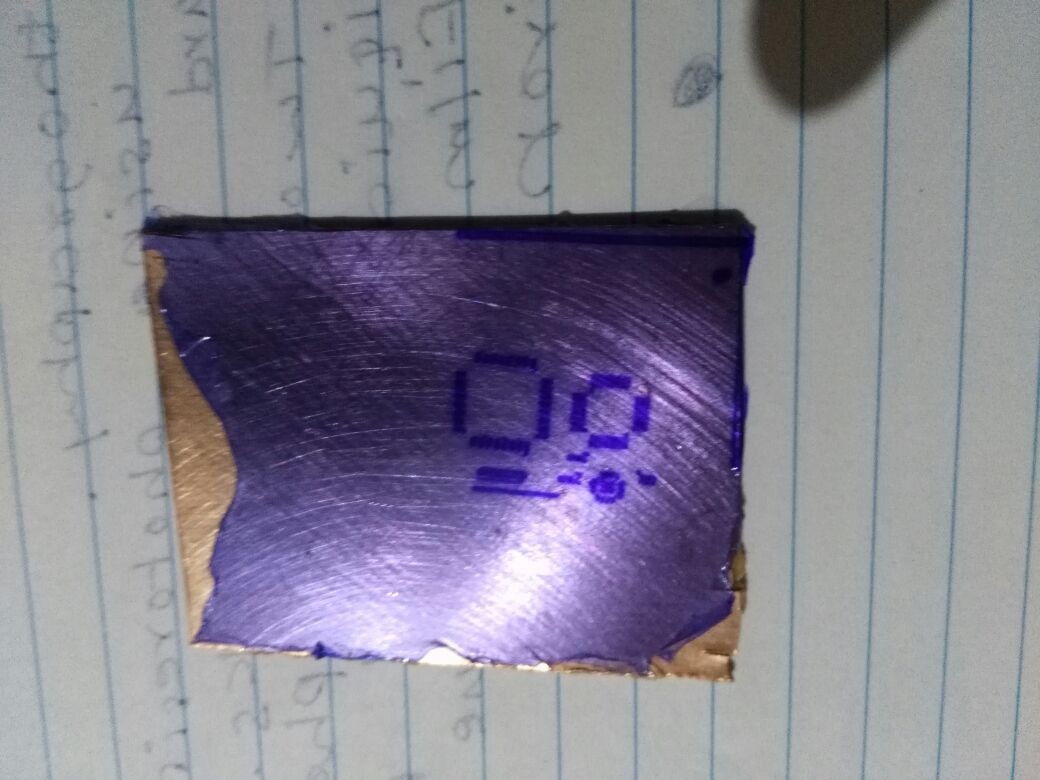
    i used HPGL files for engraving the pcb using laser.

    This is after exposing laser on photo resist

    As you can see, a bit of plastic from the dry flim is melted and cannon be removed (due to high power) and light Bleeding

    Even though the engraving on wood is as below

  • New Design Frame

    manjuprasadmbasangi09/18/2016 at 16:10 0 comments

    The 4040 aluminium has 12mm slot , so it is useless because the slider wheel for the such width is not available. I will try to use it for CNC mill and Develop a new wheel on lathe when i have time
    I bought an 3D printer slider wheel and checked that the wheel fits well in the 6mm slot of 2040 extrusion .


    Created an Aluminium plate for the carriage by using vernier and Drawing board and Drafter ( Didn't had time to search and download the CAD software). This Plate was manufactured by manual method without CNC or Laser Cutter ). Still the quality and accuracy is pretty GOOD.
    Later the CAD work will be done by my Mechanical engineer friend .


  • New Design Completed

    manjuprasadmbasangi09/08/2016 at 15:46 7 comments

    2. 8-9-2016 New Design Completed. will get all the parts Manufactured by next week.

  • Events

    manjuprasadmbasangi09/06/2016 at 07:32 0 comments

    1.
    09-08-2016 Purchase Of Aluminium extrusion 3 meter with Rs. 900/- per meter. And all other accessories like T nuts screws. for total cost of Rs. 4000/-


View all 4 project logs

Enjoy this project?

Share

Discussions

George I Fomitchev wrote 06/25/2017 at 20:41 point

good job, however there is an alternative way for making a PCB: 

  Are you sure? yes | no

lunknowl wrote 11/02/2016 at 16:06 point

hi, can i get the .dxf files of the carriage/gantry plate? thanks

  Are you sure? yes | no

manjuprasadmbasangi wrote 11/02/2016 at 16:11 point

Yes, but i still dont have them with me now , lost HDD with all data, need to wait till i redo all the design,
but these designs depend on the extrusion, no two extrusion are same and there are lot of bugs in design, but the work is progressing nicely ,
i will upload all the data when all the work is complete

  Are you sure? yes | no

Simon Merrett wrote 09/20/2016 at 01:11 point

Found this example which has some interest to people looking at this project: 

  Are you sure? yes | no

manjuprasadmbasangi wrote 09/20/2016 at 03:45 point

Thanks for the video
i have found a better software/hardware solution
1. Use Kicad PCB software and use .plt or hpgl for board files
2. Convert .plt it to g code and send to machine. quality is good.

  Are you sure? yes | no

Conundrum wrote 09/11/2016 at 06:08 point

Also relevant info: I did actually try it with a DIY spin coated board and it *nearly* worked. the problem there was that the UV ink was
far more photosensitive and although it did strip the coating the timing on the developer was impossible to predict due to the unknown
thickness. For my next attempt, used a proper Bungard (tm) board and that worked well enough to etch my name and some thin tracks.
It might be worth mentioning that the UV ink was from a UK seller and was slightly out of date (exp:2015) maybe this made a difference?
The boards were from Maplins and ink looked purple rather than Bungard's off green, maybe possible to add a calibration factor using multiple LEDs and a sensor? (caution: HP may have patented this technology in 1992)

  Are you sure? yes | no

manjuprasadmbasangi wrote 09/11/2016 at 06:41 point

Hi Conundrum u can use a Photo-resist Dry film, this gave me perfect results with 6mils but needs to be coated with an masking tape or paint spray(requires practice and skills ) , i am testing out all other possibilities like using semitransparent polythene, glass etc. . if you have any other idea of avoiding light bleeding due to laser please help.

  Are you sure? yes | no

Conundrum wrote 09/11/2016 at 05:56 point

Marcel's setup was originally intended to etch wood, I am pretty sure his diode is a 220mW unit. I know that he ran into issues with cooling and had to add some additional failsafes to prevent the diode running with the bed stalled as this resulted in all sorts of safety issues. He also later extended the build area using parts from an old Apple Mac scanner (old school heh heh) but those burnished rods are incredibly reliable. I tried it with my photoPCB but never managed to get it to etch quite right due to the power being non adjustable.

If you would like to speak to him I am pretty sure he is in the UK at the moment, google "Body of Light"

  Are you sure? yes | no

manjuprasadmbasangi wrote 09/11/2016 at 06:45 point

Hi i live in india so, can you please provide me link to marcel diy machine page that also also help me in improving my desgn

  Are you sure? yes | no

Conundrum wrote 09/11/2016 at 05:30 point

Had some success with this, Marcel Lenormand built a DIY setup and apart from the well known splash effect a blue 445nm laser seems to work a bit better than a UV 395nm for this reason.

The catch is that cheap single mode single emitter 445nm diodes aren't high power, they top out around 50mW and though 150+mW diodes do exist they are typically multimode or multi-emitter (such as c@s¬o)

  Are you sure? yes | no

manjuprasadmbasangi wrote 09/11/2016 at 05:40 point

i am also using 100mw laser in single mode , i have already build and tested my machine and the result was satisfactory. I will soon post the videos and pic of the working and result.Can you give me link to Marcel Lenormand project?Thank you.

  Are you sure? yes | no

Simon Merrett wrote 09/11/2016 at 05:48 point

Hi Conundrum, thanks for the tip. manjuprasadmbasangi kindly let me join this project and although I'm well behind on laser knowledge, I thought I could add value to the community by clarifying documentation etc.  To this end, would you mind expanding on Marcel's setup? What was he etching/burning  - photosensitive pcb, marker pen on copper, marker pen on photoresist film? What about linear motion and controls? Was the machining strategy to carry out "slicing" passes such as in the video manjuprasadmbasangi says inspired his project or does Marcel's cut round the perimeter of the traces? Thanks in advance if you are able to enrich our understanding any further.

  Are you sure? yes | no

manjuprasadmbasangi wrote 09/11/2016 at 06:36 point

Hi I am going to release all the documentation and tutorials on how to learn and build and use. after i correct all the flaws and mistakes.
Just give me a 1 week time.

  Are you sure? yes | no

Similar Projects

Does this project spark your interest?

Become a member to follow this project and never miss any updates