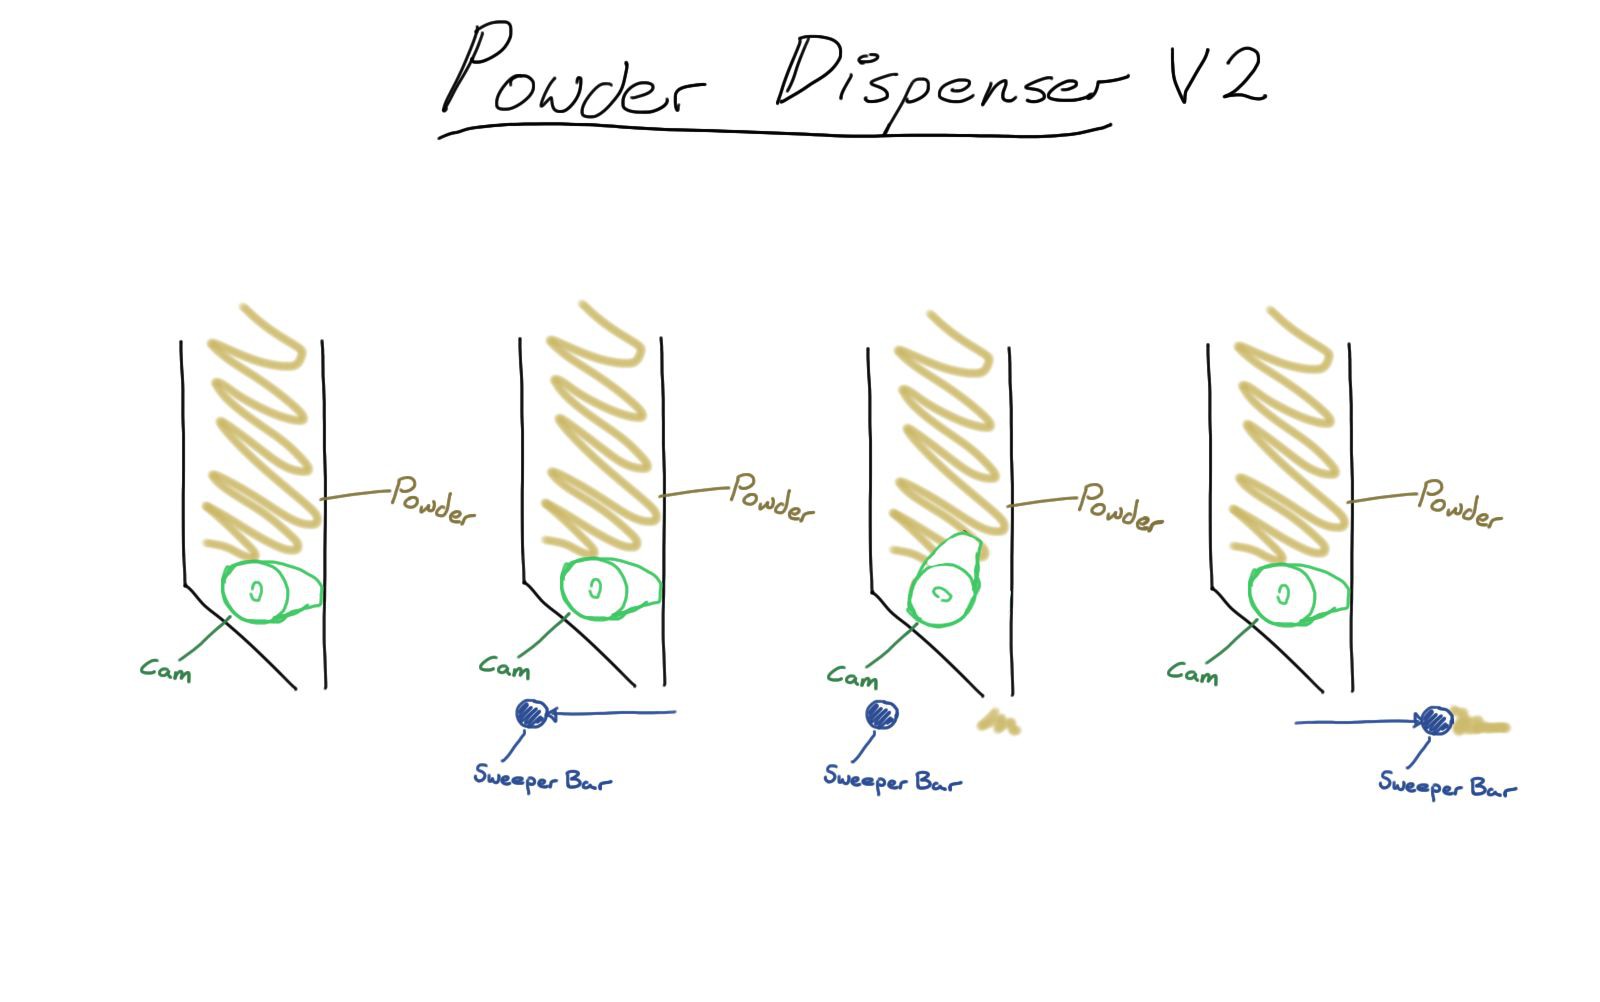
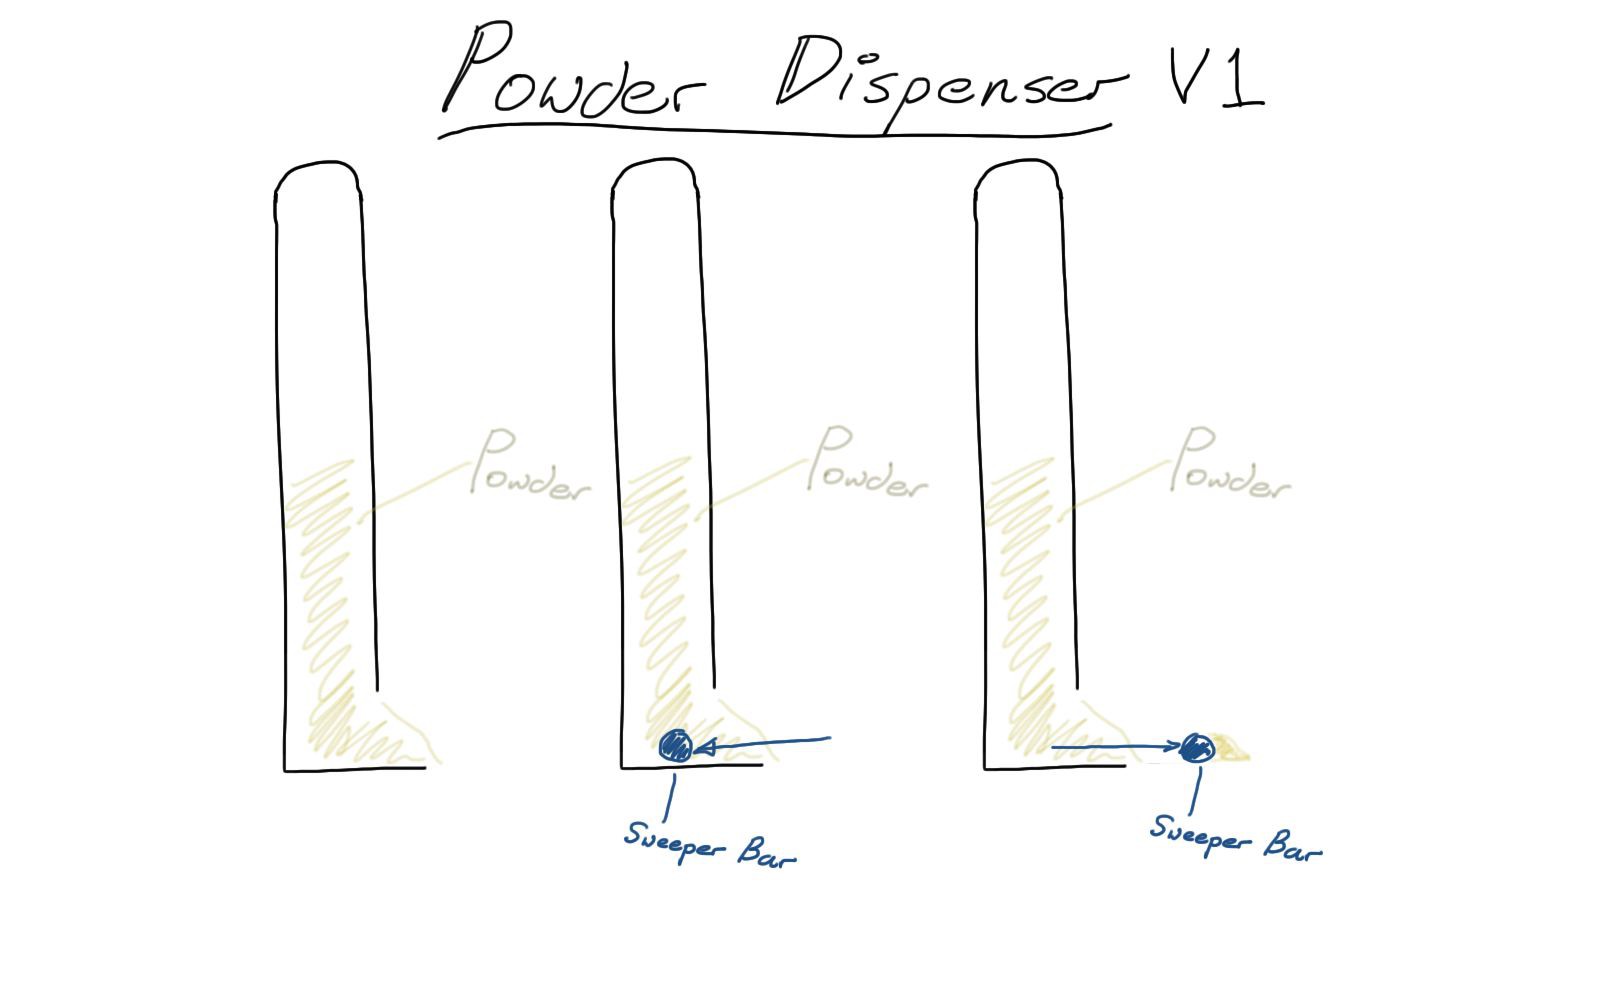
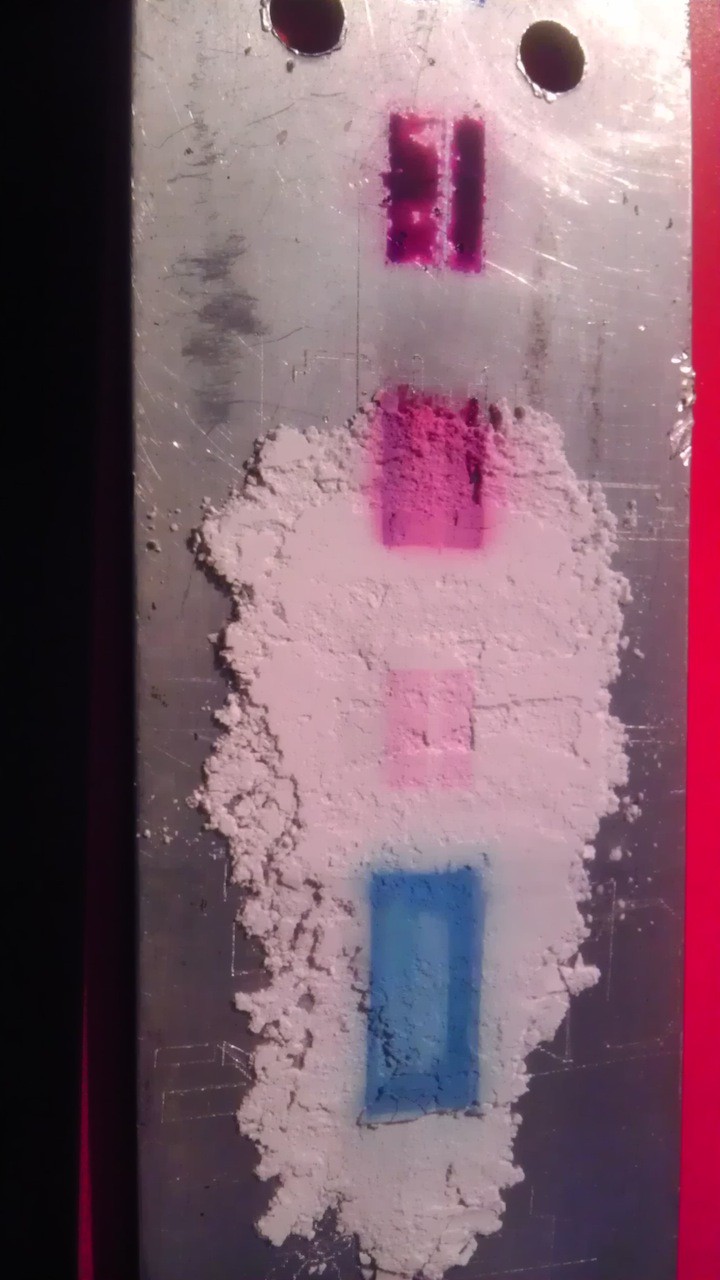
Close
0%
0%

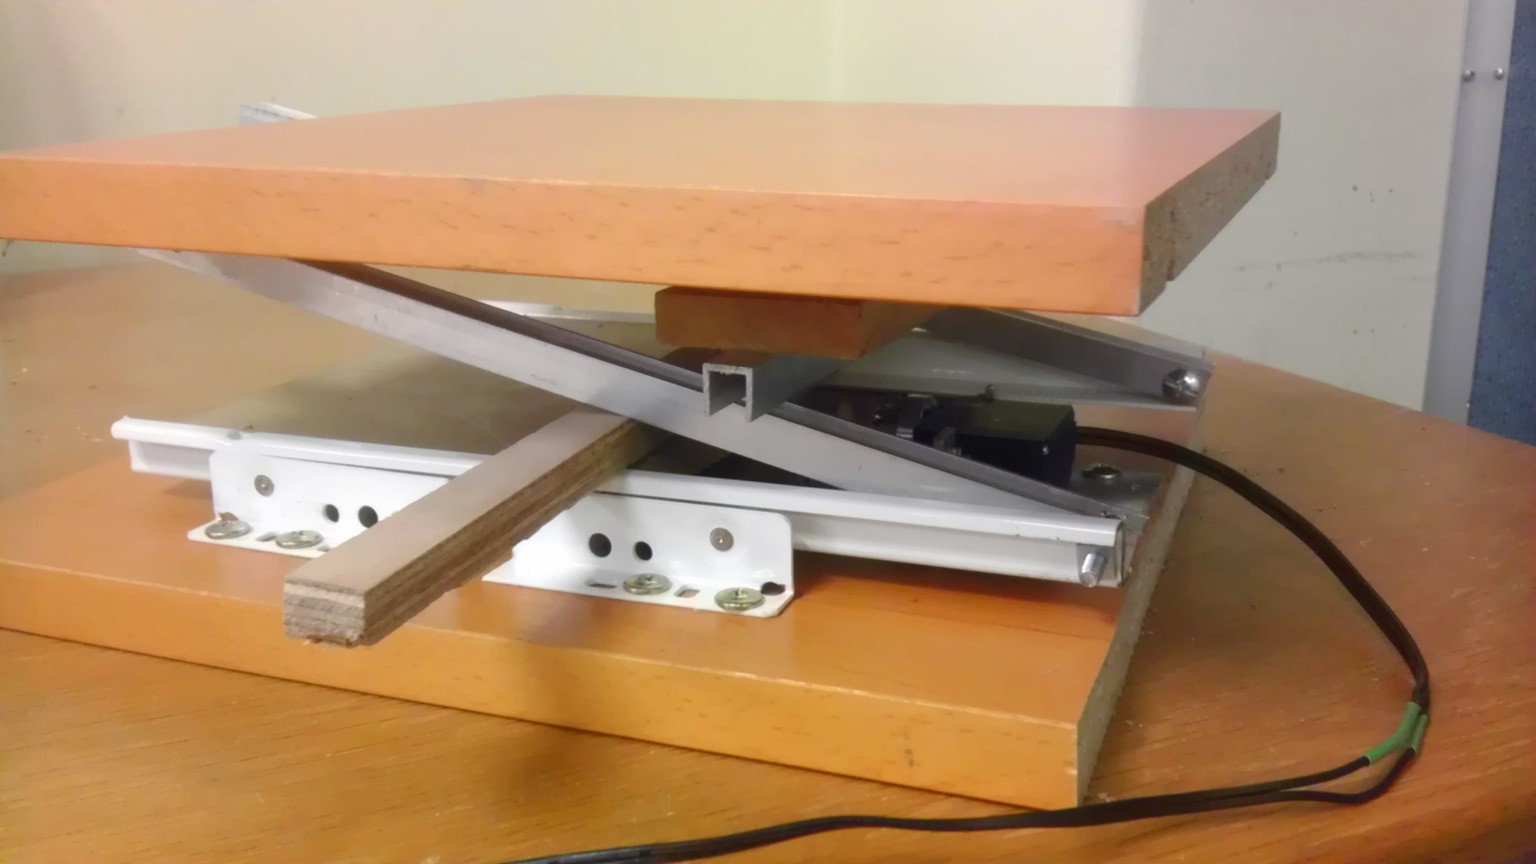
Upcycled Full Color 3D Printer

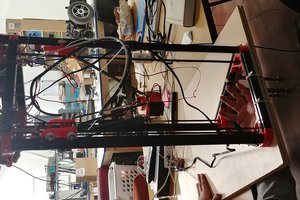
3D color printer from household scraps

Similar projects worth following
The aim is to create a proof of concept full color 3D printer from just a few household scraps and use readily available materials. If it works it could be the bases of a low cost full color 3D printer.

The idea behind this printer is to use layers of plaster and print ink onto it. This should hopefully set the plaster as well as color it.

  • 1 × Linear actuators
  • 1 × powder beds.
  • 1 × Salt
  • 1 × Malt dextrin
  • 1 × Water based ink

View all 7 components

  • RESULTS :)

    JLAM01/04/2015 at 22:44 0 comments

  • Working Dispenser

    JLAM01/04/2015 at 22:26 0 comments

    This design placed a lot less strain on the sweeper bar, allowing more accurate bar placement. It does however add an extra motor and allow a finer control of the amount of powder dispensed.

  • Powder and Dispenser

    JLAM01/04/2015 at 22:11 0 comments

    Powder tried:

    PowderResult
    Plaster + Talcum powderNot enough strength both immediately after print and after setting
    Plaster + sugar + dextrin
    Increase wet strength, but very difficult to spread. Also very messy.
    Salt + dextrinGood wet strength, improved with baking. Easy to spread.

    The final powder is made by baking table salt to dry. Then ground to fine powder with coffee grinder. The powder is mixed at 8:1 with Malt dextrin.

    For the dispenser the first simple design was a simple sheet metal bent into a box. Below is a picture to explain it.

    It is a completely passive system as the sweeper bar is moving. The further back the bar moves, the more powder it will pickup.

    This dispenser place strain on the sweeper bar and hence does not fit into current design.

  • Full Colour 3D Slicer

    JLAM12/29/2014 at 22:07 0 comments

    I had some trouble finding an easy to use full colour to create the images to print, so I hacked up a workflow. It is a bit cumbersome but I aim to tidy it up as a Blender plugin. Here it goes:

    Step 1:

    Create/import a 3D colour model in Blender. It must use UV mapping with a texture and consists of a single mesh.

    Step 2:

    Bake the UV map to vector colour. The plugin is currently disabled by default (so will need to be enabled). It might help to also sub-divide the mesh before, for higher resolution.

    Step 3:

    Create a thin box that cover the XY area of the model and ~0.01 in the Z axis.

    Step 4:

    Add a Boolean Intersection modifier to the box with the model as the object to intersect.

    Step 5:

    With the box selected run in the python console:

    for i in range(1,numSlices):bpy.ops.export_mesh.ply(filepath="OUTPUT_FOLDER/%06d.ply"%i);bpy.ops.transform.translate(value=(0,0,zShiftPerSlice));
    There are a few variables in there that are just replaced with constants.

    This should create a large number of *.ply files in the selected directory. And if all imported to mesh lab should look like:

    Step 6:

    Using libply and openCV convert the *.ply to images to print.

    I will upload the code to github at some stage once I take out he hacks and name everything in a sensible manner.

    The resulting generated files are printed to a standard printer that this build currently emulates.

  • Spreader and Material

    JLAM12/16/2014 at 22:25 0 comments

    Finally found some time to work on the printer. The main addition has been the spreader beam and recipe for print material which I'm testing from the reprap wiki. The beam is an old printer axle held in with some wire. An optical encoder has been added to the bed drive motor. And all the electronics have been redone to use a dsPIC30F3012. Next thing to do is finish the control loops and the state machine to run the whole system and then fiddle with material and binder fluids.


  • New print table and material

    JLAM08/03/2014 at 11:37 0 comments

    Finally managed to complete a new compact Z-axis. It's not very impressive with only 15mm of movement. But it is capable of extremely fine increments. It is essentially a wedge design with a lead screw moving the wedge. It might have been more productive to use multiple vertical lead screws but it was too mechanically challenging to spin all the lead screws at once.

    I have also tested multiple variation of the print material. The base is still plaster of paris. The main additive that I found that reduced binder and improved strength was talc powder (baby powder). I also tried to add glycerine to the water binder and no effect was observed on the plaster mixture. The glycerine is now used as a viscosity control for the ink as I have noticed pure water based ink was too runny and had issues with the printhead. 

    Hopfully I should be able to do some prints soon.

  • First Print

    JLAM07/16/2014 at 23:07 0 comments

    It's only a single line, single layer test but it's printing. The paper sensor was replaced with a pic12f675 monitoring the paper feed encoder. So it's as easy as clicking print.

    Now time to work on the layering and multi-line. I'm considering making the lines overlap and correct for it in software, as this will allow more ink to be transferred to the powder.

  • Broken.

    JLAM07/06/2014 at 10:48 0 comments

    Managed to break a nice 6 row epson printhead as I was trying to unclog it. Found a few HP printers which are well under way to being fooled into printing on to flat surfaces. I have to print sequence worked out and is in the process of replacing encoders and switches with a uC. I'm not able to remove the scanner head as it stops the printer from working. So untill there is more time there is just a stray scanner attached to the printer. The good thing about cheap HP printers are that they use minimal sensors making it much easier to fool. Currently I only have 3 pins I have to emulate and a motor drive input. 

  • Ideas

    JLAM07/04/2014 at 16:08 0 comments

    The current idea for the powet bed is two identical square chambers with moving floor. One chamber starts full and one empty, as one is lowered the other is rised and the powder is shifted across. This should create fine layers to work on. This is not a new idea so I hope I can get it to work with plaster. Drawings and photos are to come soon.

    Also currently trying to hack various printers to print onto a rigid flat surface but having a lot more trouble with the printheads clogging. It is also looking to be a bit of effort fooling a mid-range Epson Photo printer to think that it is printing to paper. There seems to be light-sensor on the printhead that will not allow a print unless the paper is there. Also there is an army of switches that need to be activated at the right time to trigger the print. It is almost looking easier to replace the printer electronics with a custom inkjet driver.

View all 9 project logs

Enjoy this project?

Share

Discussions

Steven J Greenfield wrote 05/22/2023 at 22:51 point

Someone was doing this quite a few years ago, he found that Durham's Rock Hard Water Putty worked very well for the powder, both initial setting and later hardening, with a mix of ink and ethanol in the print heads.

  Are you sure? yes | no

Similar Projects

Does this project spark your interest?

Become a member to follow this project and never miss any updates