Close
0%
0%

Antigravity Arm Floats

Wheelchair mounted orthoses to enable someone with very low muscle tone to move her arms without the encumbrances of gravity

Similar projects worth following
These "arm floats" use a rubberband/ spring mechanism to counter the pull of gravity on the user's arms. This is useful for an individual with low enough muscle tone that they have difficulty or are completely unable to lift their arms against the pull of gravity.

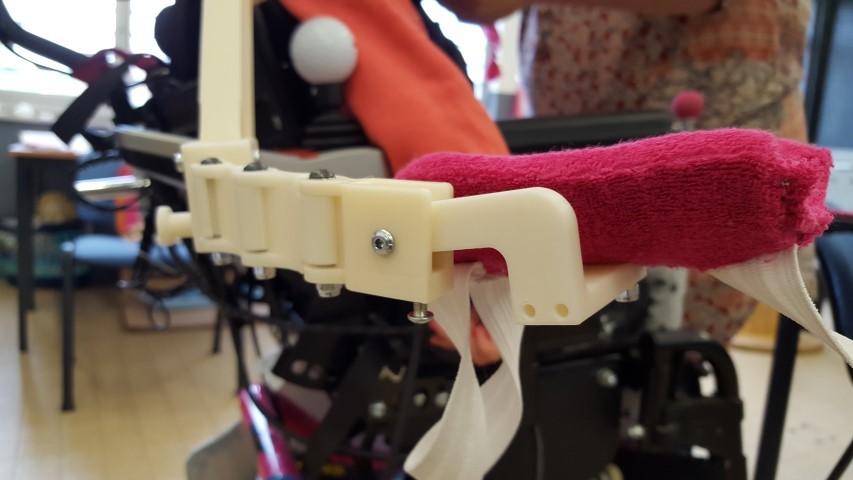
I've been working on this design for the last couple years, refining it as weaknesses show up and making it easier to use. My daughter has used them extensively during that time, testing them out and helping me figure out what areas need improvement. Since she's started using them, her arm control and strength have improved markedly. The changes are visible not only when she's wearing the arm floats, but most importantly, her ability to use her arms is also significantly improved when she's not wearing them.


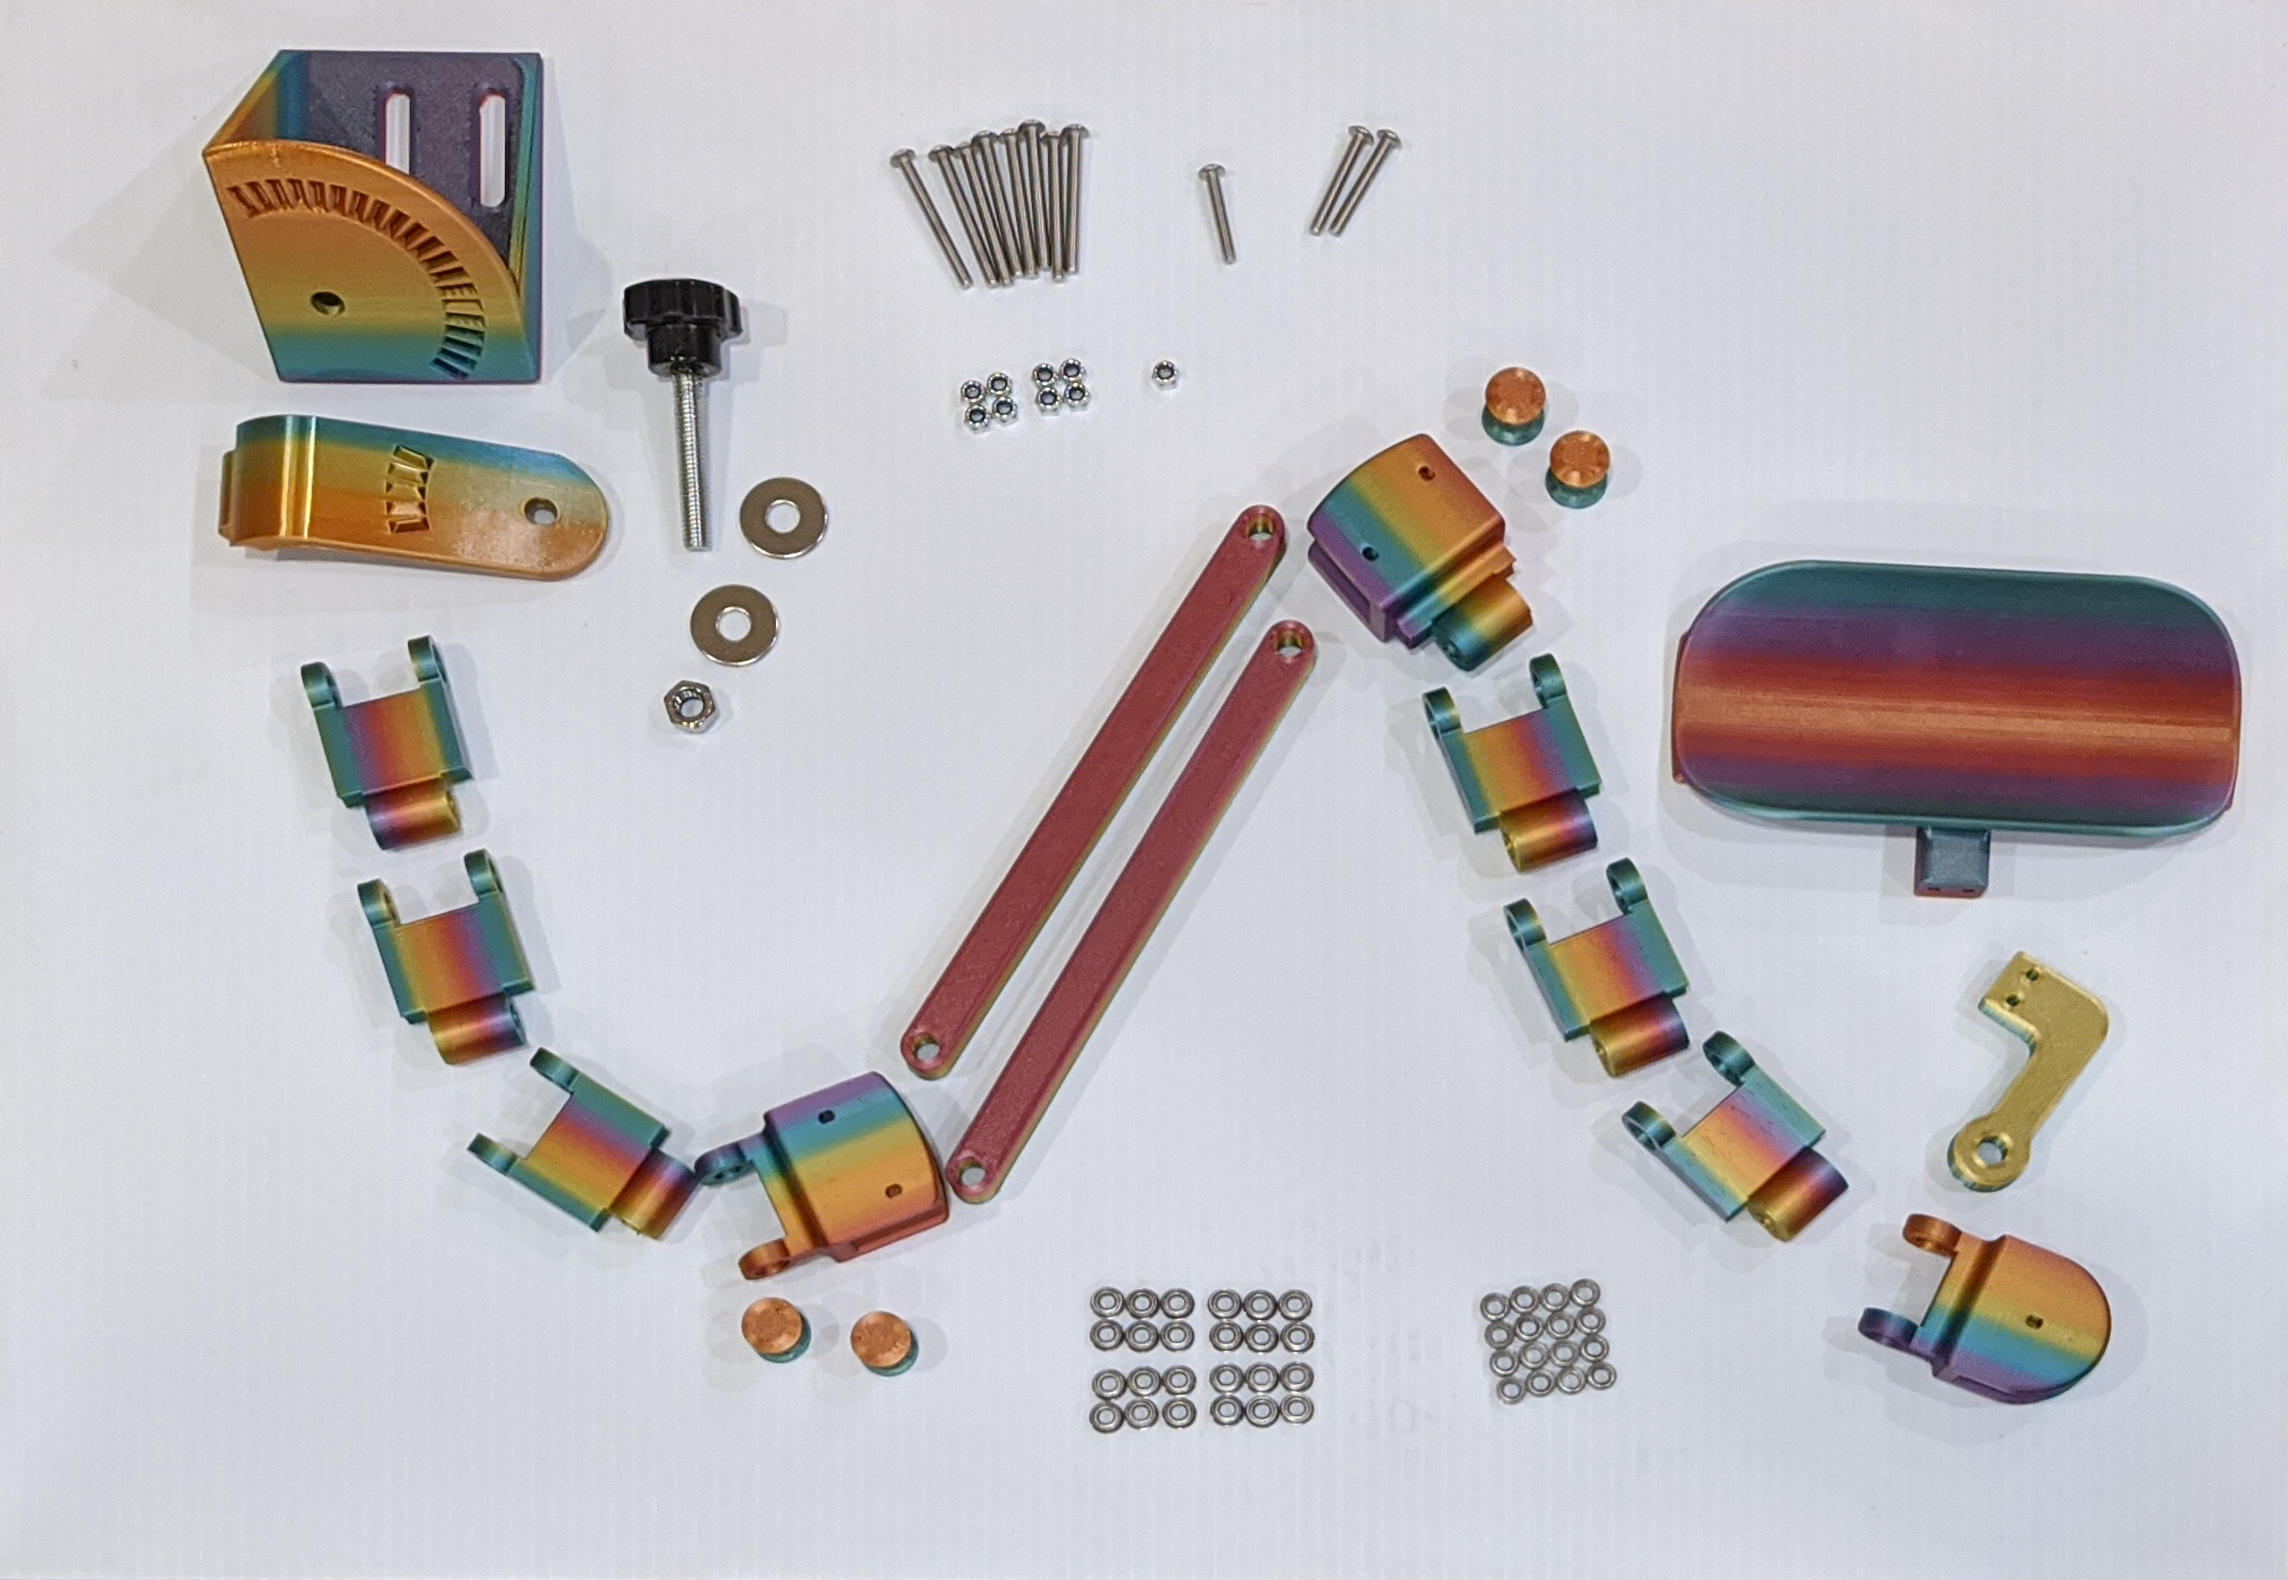
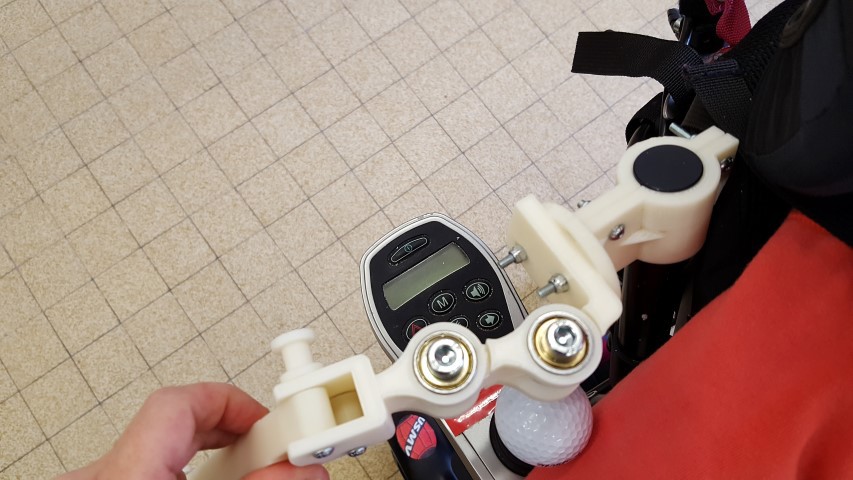
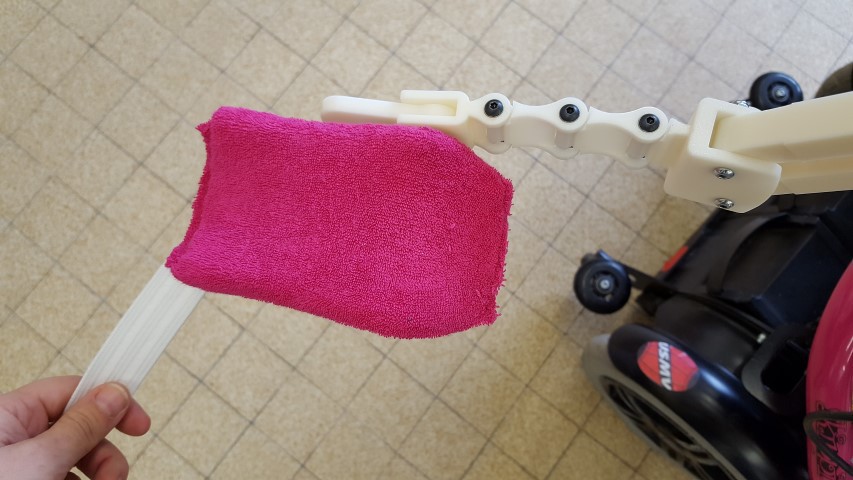
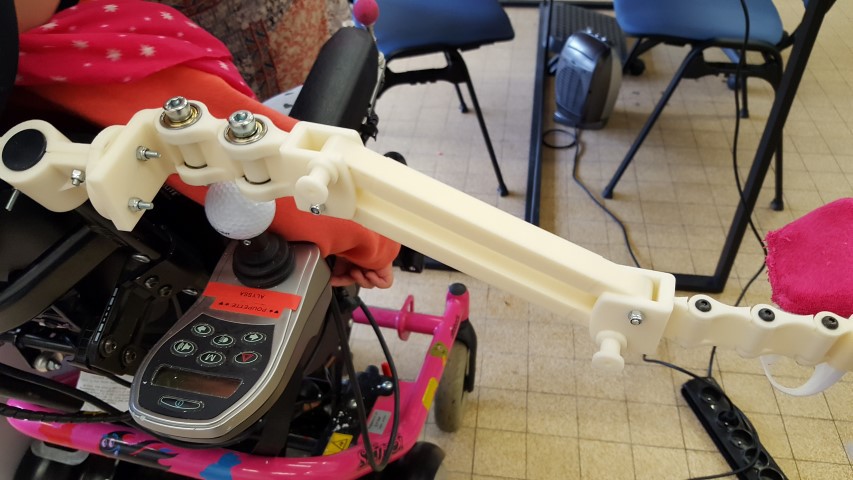
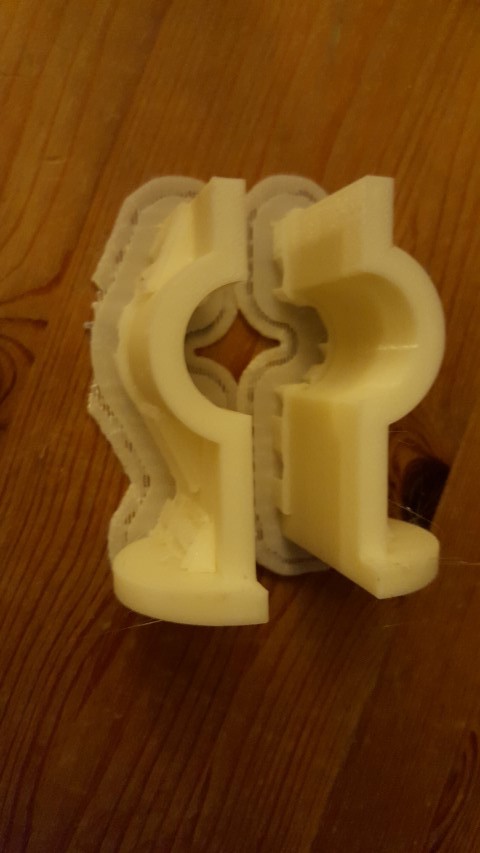
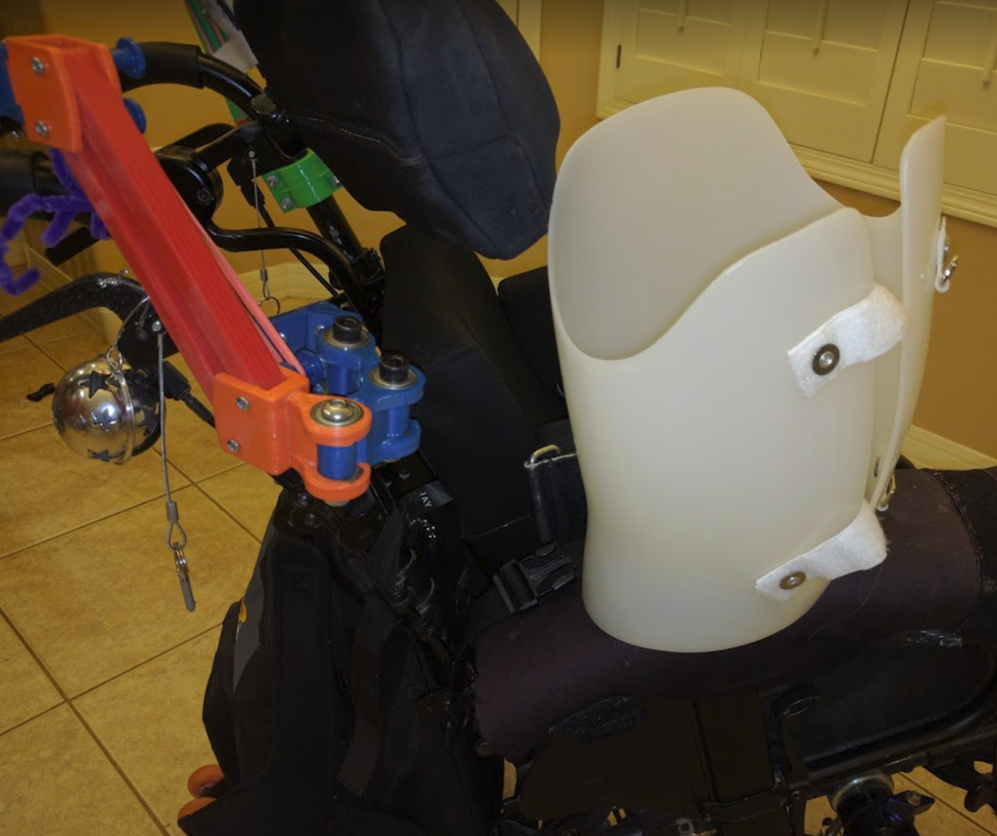
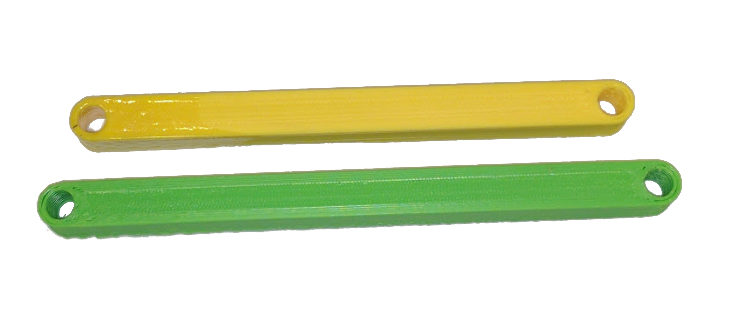
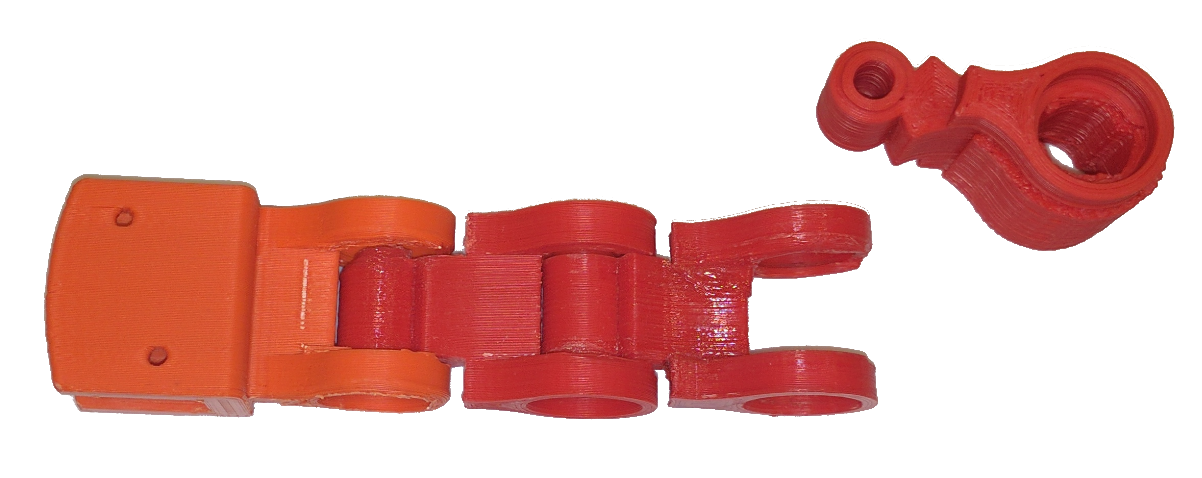
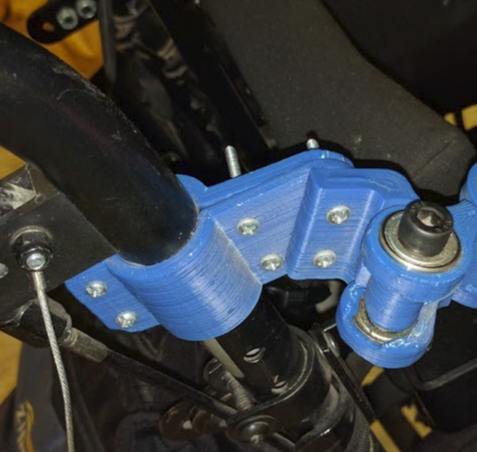
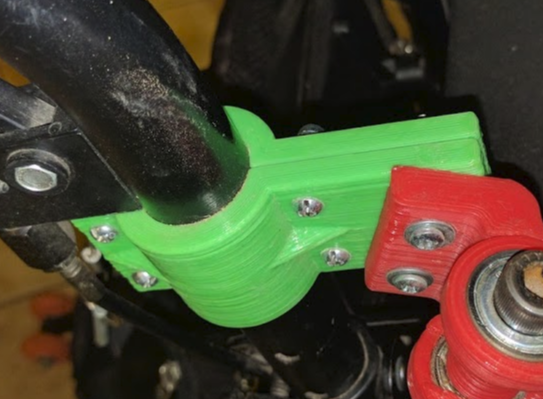
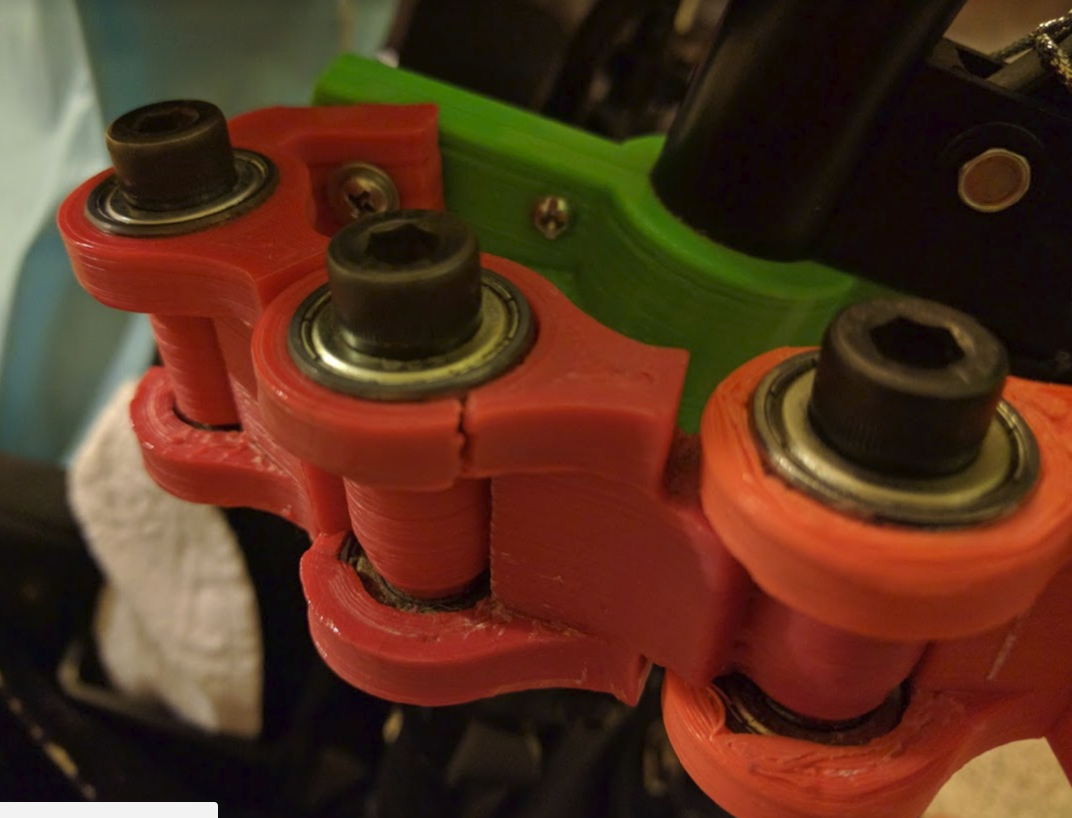
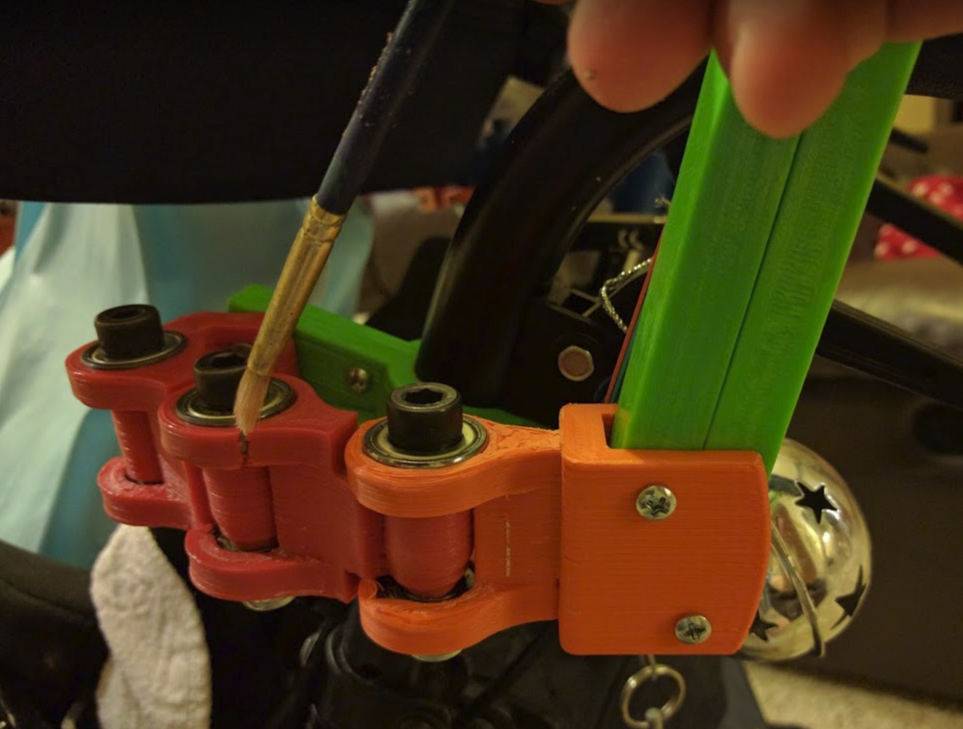
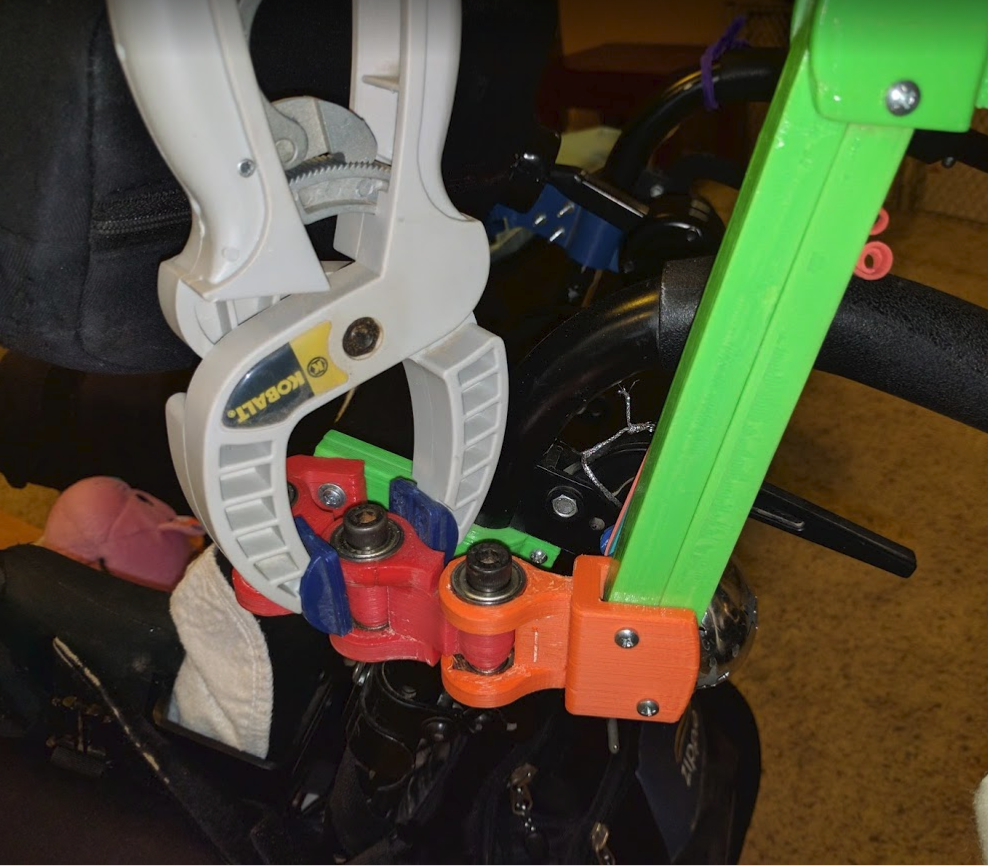
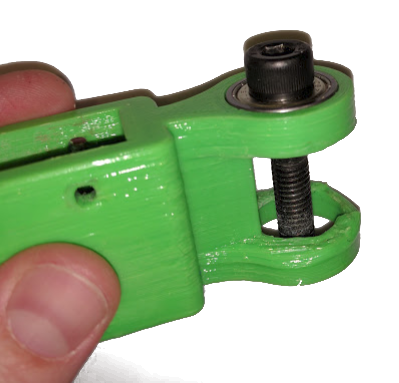
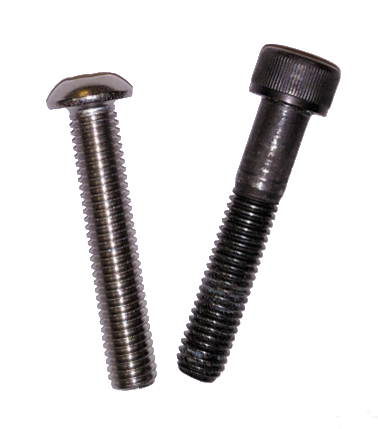
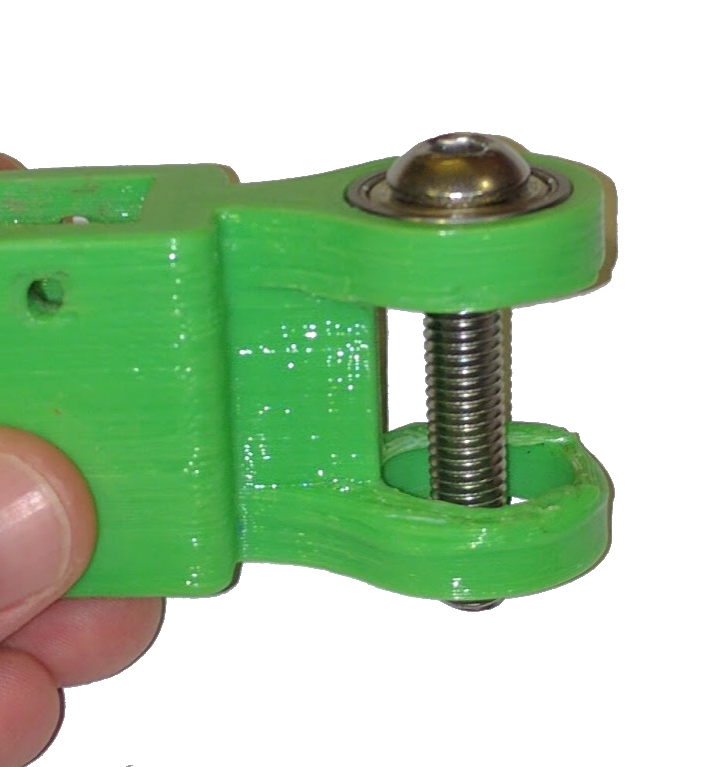
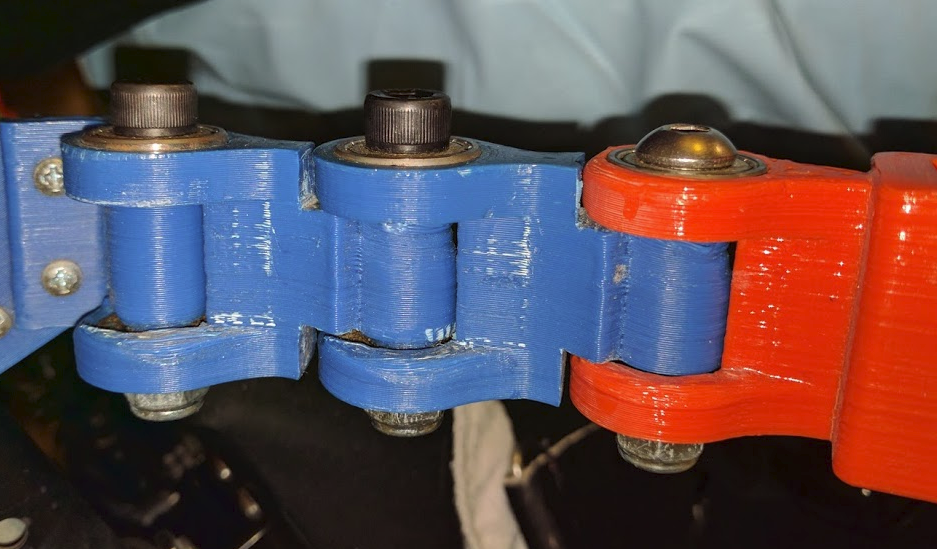
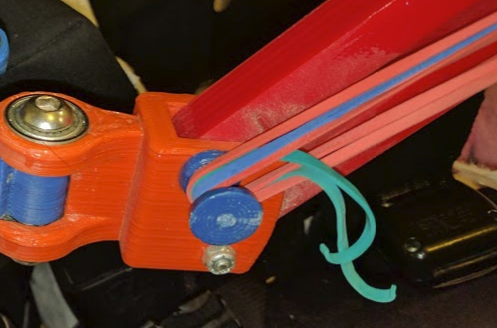
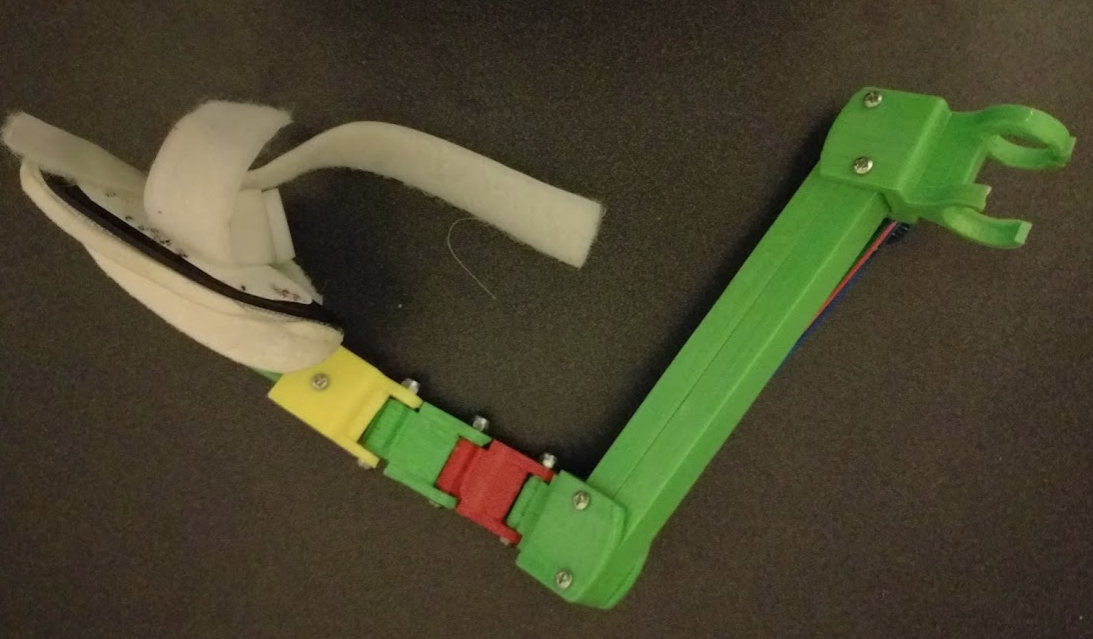
Several years ago, I became aware of orthotic devices for people in wheelchairs that make it easier for them to move their arms by reducing the burden of fighting gravity. My daughter even had the opportunity to trial one such device. It was clear that such a device could help. While my wife was fighting with insurance companies trying to get them to cover such a device (they cost thousands of dollars per arm), I set to designing one from the ground up. I wanted to build something that was easily to manufacture for any hacker with a 3D printer, a few easy to source hardware components, and a little time. The raw materials to build the current model cost somewhere around $50 to build arm floats for both arms. I settled on the novel concept of using a horizontal chain as the mechanism for freedom of motion in the XY plane, and through iterative design cycles, modified the sizing and bend limitations into different parts of the chain.


We use her arm floats frequently, and we've seen a significant improvement in my daughter's ability to use her arms since she started using her arm floats. Not only is she more adept at reaching and interacting with objects while wearing her arm floats, but her gains in strength and control are highly evident even when she's not wearing them.


I'm excited to share this project with the world, and am hopeful that others will be able to benefit as well.

Je suis la deuxième contributrice du projet (depuis la France) et j'ai réalisé en 2017 l'adaptation du projet de Mike pour une enfant de 4 ans. Je suis ravie d'avoir pu faire évoluer le projet de Mike.

BRAS GAUCHE.rar

This rar content left arm stl files (2017 version for Alyssa)

RAR Archive - 1.34 MB - 07/19/2019 at 10:02

Download

Standard Tesselated Geometry - 8.17 MB - 09/17/2016 at 21:54

Download

Standard Tesselated Geometry - 8.46 MB - 09/17/2016 at 21:53

Download

Standard Tesselated Geometry - 6.23 MB - 09/17/2016 at 21:53

Download

Standard Tesselated Geometry - 10.03 MB - 09/17/2016 at 21:53

Download

View all 13 files

  • 2 × PoleMount Mounts the arm floats to a pole on the wheelchair
  • 1 × MountToLargeChainMale
  • 2 × LargeChain_608ZZ
  • 1 × LargeChainToZ_Rod
  • 2 × Z_Rod

View all 20 components

  • Updated Version

    Mike Turvey08/07/2020 at 01:27 0 comments

    As my daughter grew, the existing design just didn't scale as well as I would have liked.  Also, I had printed all of the original pieces on a first generation Printrbot.  It was an awesome piece of equipment at the time, but 3D printers have come a long way since then.  Last Christmas, I decided I'd update the design and give my daughter new arm floats.  And, to get the job done, I decided I really "needed" a new Prusa Mk3s.  Wow, what a difference that printer makes!  I was able to dial in the tolerances on the parts quite a bit.

    The updated design is overall stronger and lighter.  There's less slack in the joints.  The angle is easily adjustable (great for wheelchairs that tilt in space).  

    For anyone interested in making one, feel free to reach out to me-- I love to hear about builds and would be happy to help out with any snags.

    https://www.prusaprinters.org/prints/22203-antigravity-arm-floats-v2

  • Adaptation for young SMA girl in France

    ateliercaladclic07/19/2019 at 09:54 0 comments

    In 2017 I adapt this project for Alyssa. I remake stl files and print them with renforced ABS (I'm a 3d printer).

    Please send me an email  ateliercaladclic[@]yahoo. fr if you need more information or help

  • Silicone Rubber Bands

    Mike Turvey11/07/2016 at 21:17 0 comments

    One of the headaches I mentioned in an earlier log was the rubber bands. Basically, ordinary rubber bands fail rather quickly. I see them start to fail within a month. I recently found some silicone bands that are used for cooking that seem to work really well.

    Unlike other cooking bands I've seen that are really long, these are 2", which is pretty much the same as an ordinary run-of-the-mill rubber band. They are also comparably stretchy, and about 6 of them is the right amount of force for my daughter's arms.

    I'm hopeful they'll last a lot longer since they're silicone. I'll report back on them in a few months.

    Update: After several months, the silicone bands have worked great-- while they are more expensive, they are *much* more durable than regular rubber bands.

  • Customizations

    Mike Turvey10/10/2016 at 11:26 0 comments

    As I've designed and built the arm floats, I've tried to keep in mind not only how well it works for my daughter, but how it would work for someone else. I'd much rather build something that is useful to many rather than something useful to only one.

    One of the things that I've considered frequently is that this is a wheelchair mounted device. But I expect there are many folks with low tone in their arms who would never need or use a wheelchair. How would they be able to benefit?

    Pictured above is a chest and torso brace. I believe it's a polypropylene sheet that's been heated up and molded around a cast. It was made by a professional orthotist. I can envision that the arm floats could be mounted to such a brace fairly easily. Care would have to be taken to ensure that the mounting hardware didn't rub or press against the skin, but that should be fairly simple. In short, it seems that the arm floats could be used by an ambulatory individual with minimal modification.

    The length of the Z-Bars is also a fairly easy thing to modify. I've already modified these once to be longer, and it would be trivial to make other lengths.

    Changing the number of links of chain for either the shoulder or the elbow would be another trivial change to make. Just print an extra part! As my daughter has grown since originally designing this, I'm starting to think that an extra shoulder chain link might be needed.

    And, lastly, since this entire project is open, feel free to modify and use it in any way that you see fit! I'd appreciate hearing from you if you do, but there's no obligation.

  • Bigger and Stronger

    Mike Turvey10/10/2016 at 10:56 0 comments

    If there's been a theme to this project, "Bigger and Stronger" has definitely be it. I was initially crazy with optimism at how strong and rigid the ABS 3D printed parts would be. One example of that is the pole mounts where the arm floats attach to the wheelchair frame.

    This mount worked fairly well. Each side is 3mm thick. That means that when both sides are bolted together, it's 6mm thick. And it's printed with solid infill for maximum strength. And, as it turns out, it flexes a little bit under load. Since this is the point where all of the weight and length of the arm floats attach, any small flexion here is magnified significantly at the far end of the arm floats.

    Here, you can see a side-by-side comparison of the old part (blue) and the new design (pink). The thickness is increased from 3mm to 4mm throughout the part. And ribs have been added to give the part a better grip on the pole.

    Here, you can see a green version of the new design in use on the chair. So far, this new design has proven to be very solid and stable. It's surprising how much benefit came from going from 3mm to 4mm in thickness.

  • Repairs

    Mike Turvey10/10/2016 at 09:55 0 comments

    I print just about everything using ABS. There are a couple reasons. For one, I live in a desert. It gets crazy hot, and I can't count on the thermal stability of PLA. But another, perhaps bigger reason is that ABS is such an easy material to work with. If you make a mistake or something breaks, you can usually fix it instead of having to print an entirely new part. Here's an example of a broken part I was able to fix fairly easily tonight.

    Here, you can see where one of the plastic chain pieces has cracked.

    Applying a small amount of acetone will "melt" the ABS around the crack.

    And a quick clamp to keep everything held together.

    The clamp can come off after a few hours, and after the acetone has a day or so to evaporate, the joint will be as good as new.

  • Restricted Bends

    Mike Turvey10/10/2016 at 06:18 0 comments

    One of the things I've played with a lot is restricting the angles that the joints in the plastic chain can take. For example, here is a piece of chain from the elbow:

    Notice that in the lower left, there is a smaller circle, and then a partial larger circle around it. The larger circle acts as a "stop" to prevent the next link in the chain from turning in that direction. With the stops configured as above, the next piece of chain has a range of motion from either folded back to the right forming a "V" shape, all the way to extended and straight. But it cannot bend any further. A chain made out of links like the one above would readily bend in one direction, but would not flex in the other direction at all.

    Here you can see the stops in action:

    Here are a few more examples of trial pieces:

    The top object is a fairly restricted chain that only allows about 40 degrees of turn in either direction. I initially thought that this would be a good approach for the shoulder joints. By restricting the angle this much, I was hoping that it would prevent any binding of the chain pieces because all curves in the chain would be fairly wide arches. It sounded good in theory, but in practice it was pretty bad. By restricting the movement of the chain, it significantly limited the positions that the chain could be in. And as a result, the rest of the arm floats often couldn't move into the positions that were most natural. It was a quick lesson, and instead of re printing all of the links, you can see in the middle that I took a small saw to the chain pieces and cut off much of the stop, enabling a much greater range of motion. When I redesigned this chain to use a larger bearing, I almost entirely eliminated the stop. While in some circumstances, the chain can somewhat bind, it turns out to be a very rare occurrence, and well worth the tradeoff of the increased freedom of movement.

    The elbow, however is a different situation altogether. All of the chain in the elbow is limited to only bend in one direction. This works well to keep the Z rods away from her upper arm, and doesn't limit freedom of motion at all.

  • Button Head Allen Bolts

    Mike Turvey10/10/2016 at 05:30 0 comments

    One of the things that's bothered me about the hardware on the arm floats is that it doesn't always provide the smoothest edges. The bolts are a good example of this. While it's by no means a rough edge, these bolts stick way up and don't blend in well with the rest of the arm floats. Basically, it's functional, but kinda ugly and does pose a small risk of things bumping/ snagging on it.

    A better option seems to be button head bolts.

    Here you can see it in context:

    This is definitely an upgrade on my backlog. So far, I've only upgraded a couple bolts when I've had broken plastic pieces that have needed repair.

  • Rubber Bands

    Mike Turvey10/10/2016 at 04:34 3 comments

    An ongoing problem I've been running into is that run-of-the-mill rubber bands wear out surprisingly quickly. After a month or so of use, they start breaking down, showing minor cracks, and finally breaking. Stored rubber bands certainly don't break down so quickly (they last for years in my cupboard). I'm guessing that the big difference is light? UV radiation certainly could be attacking them and causing the wear patterns. Perhaps being under constant stress also plays a meaningful role?

    Regardless of the cause, I'd really like to find a better rubber band. I'm thinking that some sort of a silicone band would be ideal. But, the only silicone bands I've been able to find are intended for use in the kitchen, and as such are much too big and pretty expensive. If anyone has a better idea or suggestion, I'm all ears.

  • Broken Arm

    Mike Turvey09/29/2016 at 06:26 0 comments

    Well, here's a good example of the kind of failures I've been seeing lately (i.e. once every couple months) If you look closely at the picture, you can see that the arm float is actually broken in two places, not just one. In addition to where it has completely broken off, the yellow piece is also broken. This is basically the state I found the arm float after my daughter came home from school. Given the double breakage, I strongly suspect that this was subjected to a force much higher than in normal usage. I debate over how much to reinforce against these kinds of issues. On the one hand, I'd like this thing to be near bullet proof. On the other, there will always be a way to break it, given enough force-- is the ROI there to try to make it significantly more robust? Any thoughts?

View all 13 project logs

View all instructions

Enjoy this project?

Share

Discussions

laragni wrote 09/15/2021 at 11:20 point

Hi! I know it has been years since this was posted, but we are a group of occupational therapists working in pediatrics who are starting to use our 3D printer more. We have a patient in mind we would love to print this awesome design for! Thanks!

  Are you sure? yes | no

Dbear wrote 01/25/2019 at 01:09 point

THANK YOU for making this.  I am going to try to adapt it to my girlfriend (37 years old) who has SMA and is losing her ability to lift her arms to eat!  Appreciate your work and time!

  Are you sure? yes | no

ateliercaladclic wrote 07/19/2019 at 10:10 point

Hello, I did it for a young sma girl in 2017, I've just update the project and stl files. Please send me an email if you need help.

  Are you sure? yes | no

whitneysample wrote 12/21/2017 at 15:36 point

Hey Mike, nice work... are you still working on this? ..I'd love to help out where I can... this has been my baby for more years than I care to admit... my previous employer had little interest in doing the right thing in really getting it out to those who need it (and demand was definitely a plenty)... after seeing your work and others I think it's high time to really nurture the maker movement on this one... for what it's worth, I've never been wild about the mechanics of this particular design... i.e. the four bar mechanism... it really doesn't match human kinematics very well... but the powers that be at the time were ridiculously married to the four-bar... just one of many reasons why I left... I am however working on several other gravity balanced methodologies, though they are not quite ready for prime-time just yet... and really not practical for the maker type to build... just yet... (require scanning or imaging tech, for now)...which brings us back to this - four bar design... with a little tweeking (using off the shelf telescoping tubing as axles/bushings for some pivot points worked wonderfully for the lighter/younger children) I think it could be very maker friendly AND useful to a bunch of people (I'm still getting regular requests for builds)... unfortunately, I don't have funding to pursue this full time anymore... so I can only help where time permits... and can't promise anything... but as I said, this has been a passion for me and it's been hard to watch it wallow in disinterest from corporate types only interested in a bottom line profit.... na Zdravi !  happy holidays 

  Are you sure? yes | no

Mike Turvey wrote 03/04/2018 at 21:51 point

Hey Whitneysample, sorry for taking so long to reply.  I must have missed the notification from Hackaday when you first posted.  I sent you a PM.  I'd be excited to work on bringing this type of technology to more folks.  I absolutely see how life changing it can be.

  Are you sure? yes | no

tysenweber wrote 11/28/2017 at 17:35 point

This is a beautiful project.  Do you have an .STL file for the arm mounts or are the sourced separately?  

  Are you sure? yes | no

Mike Turvey wrote 03/04/2018 at 21:54 point

For the trays that the arms rest on, I used some scrap 1/8" thick plastic that I had laying around, heated up and formed around a piece of 2" pipe.  However, ateliercaladclic had the fantastic idea of using shin guards, instead.  While I haven't tried that myself, I would think they would work really well.  

  Are you sure? yes | no

ateliercaladclic wrote 04/09/2018 at 10:10 point

Hello tysenweber. After several month, I finished arms. You can see result on Alyssa website.

 I confirm that shin guards works well. I use Z-ULTRA to print. It have a best resistance like ABS. Please read our article whitch describe our building.

If you need informations please contact me

  Are you sure? yes | no

ateliercaladclic wrote 02/19/2017 at 21:01 point

Hello Mike, I'm really happy to speak with you. Please excuse my bad english.

I'm a 3d printer in France and my friend Laurianne ask me if i'm be able to realise your project.

She has a daughter, Alyssa, which have SMA (spinal muscular atrophy) type 2. So I hope to help her with 3d printing.

I work on the project until 1 week. I try to begin with the right arm. So I printed some of items and ordered some bolts and bearings. My friend write an article on Alyssa website www.alyssa63.net. The name of the project is ABBA (beautiful antigravitational arm float - Alyssa Beau Bras Antigravitationnel in french ;)

If you want sharing on my process, you can write me I give you my email on your private discussion. I try to send you a private message but you are not online.

Your project is beautiful and I'm very happy to try to make it.

Pascale

  Are you sure? yes | no

ateliercaladclic wrote 02/16/2017 at 14:43 point

Hello! I'm going to print your project.

Thank you for sharing ;)

  Are you sure? yes | no

Mike Turvey wrote 02/16/2017 at 18:12 point

Hey ateliercaladclic, that's great!  Are you building it for someone in particular?  I'd be very interested in hearing about how your build progresses.  Feel free to post any questions here or send me a private message.

  Are you sure? yes | no

Similar Projects

Does this project spark your interest?

Become a member to follow this project and never miss any updates