 Sugapes
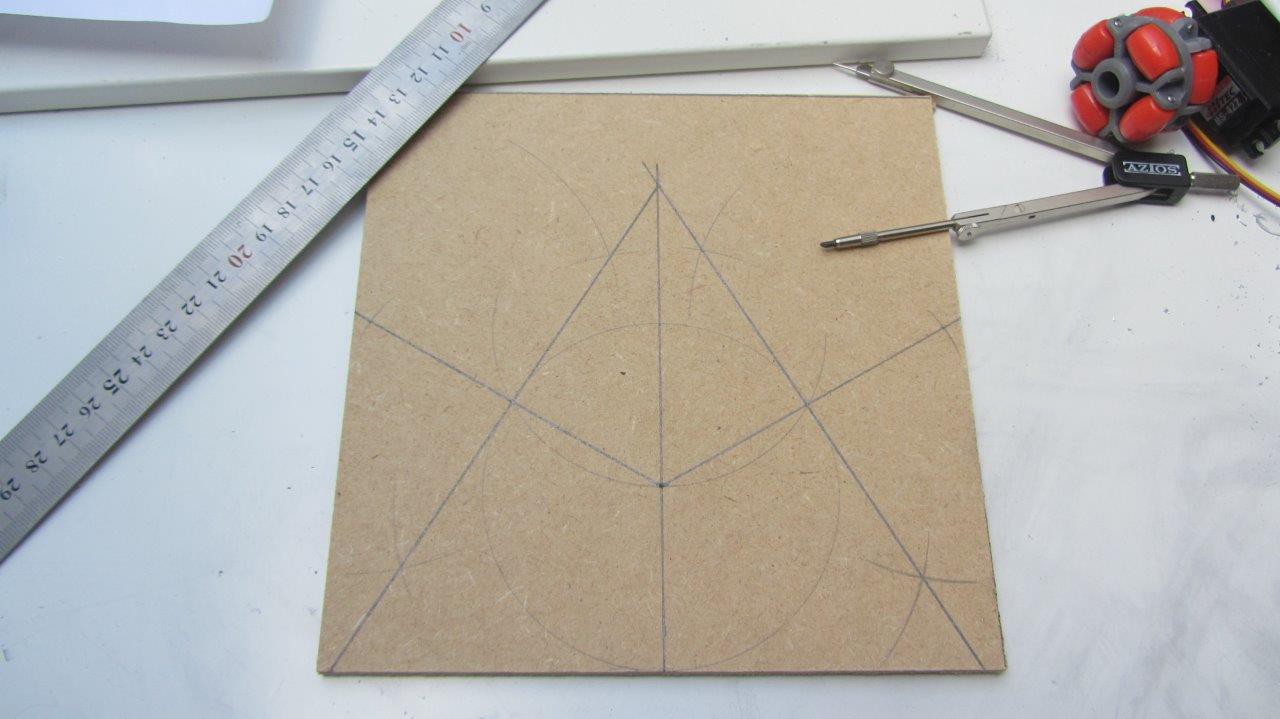
I woke up last Sunday morning needing to draw 120 degrees angles, so I embarked on a quest to find a protractor around my house. Of course none could be found. I even went through my kids school stuff but apparently a protractor is not part of the required school material for 8 year olds... Go figure!
Then a faint recollection of my youth popped into my mind of me splitting a circle into 6 parts (almost the same!) on the school's black board using a giant compass and ruler... We sure did know how to have fun back then!
I was filled with joy because a compass is actually part of my hacking tools (but not a protractor) so I created the beautiful peace of art below that would serve as the basis for my holonomic drive system.
A quick break for some STEM outreach: For any young hackers possibly reading this, please do pay attention to those geometry classes... It might actually save you a perfect hacking (Sun)day in the future!
The other big advantage of having a very limited tool set to work with, is that you also get a very nice workout with all that manual sawing that needs to be done. Working on the metal parts is where you burn the most calories. Who said hacking is a sedentary activity? (Probably no one!)
At the end this is what I had to show off. I am specially proud of those crooked edges, but that is what you get when you saw things literally over the knee. This is just to show how not to do things, clamping things down when sawing really makes it easier (as I recall it from my youth as well). A vice is already in the shopping list however!
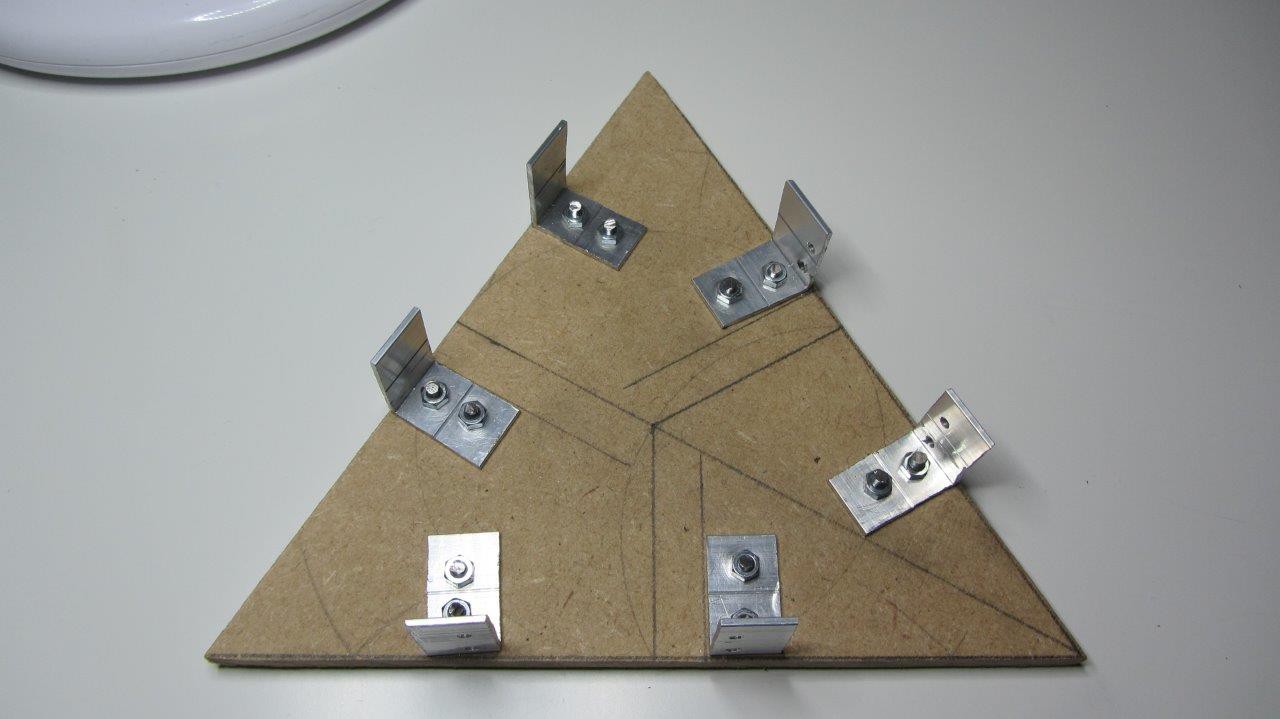
In the end it didn't turn out too bad... Luckily the screw holes had a little play, so I could compensate a little the small(ish) imperfections of the build. The servos ended up attached to the board rock solid, and the shafts seem to be in the correct alignment as well.
The moral of the story: pay attention of the errors you are introducing along the way, then to compensate them just create more errors in the opposite direction. In the end it might turn out OK!
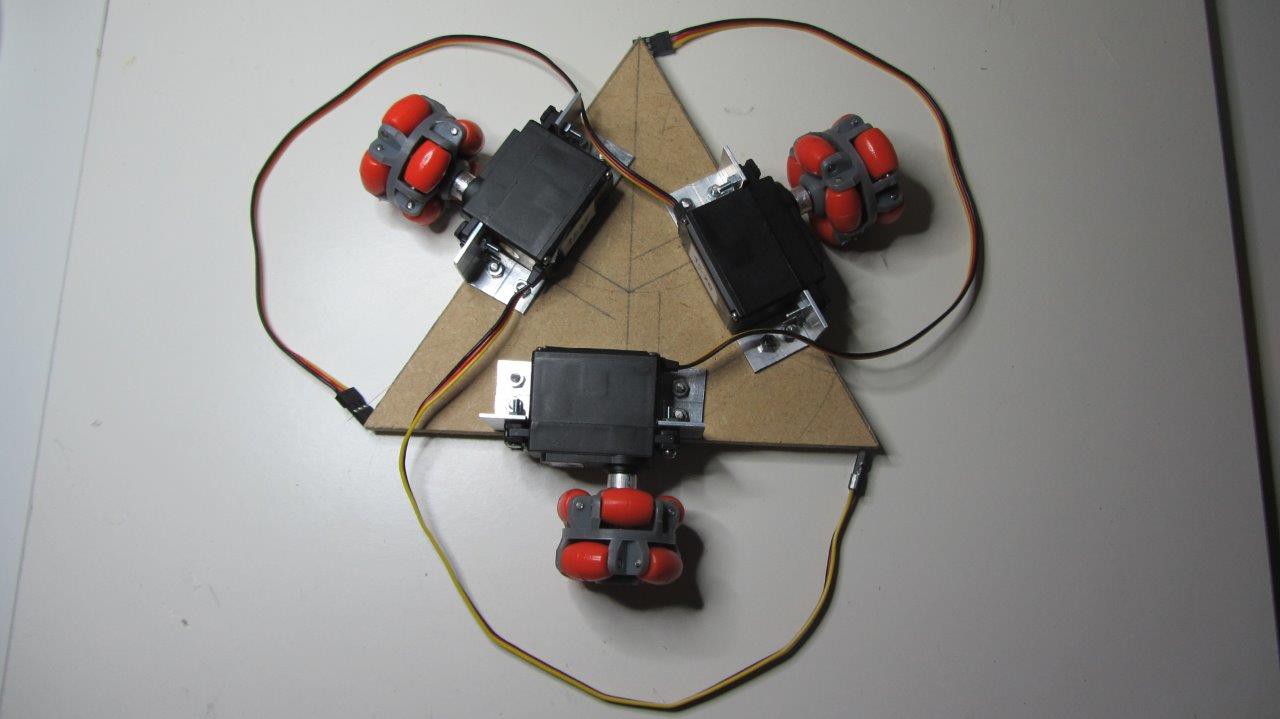
That's it for the time being. At least now I can get things moving (pun intended)!
Discussions
Become a Hackaday.io Member
Create an account to leave a comment. Already have an account? Log In.