Project Goals:
- Reliable, cloud-based reporting of mouse waste
- Tolerance for different room lighting conditions under a typical 24 hour circadian cycle
- Does not disrupt circadian cycle of mice
- Battery Powered
- Easy to use and easy to set up
Constraints:
- Ability to mount the device inside the cage including...
- Power
- Clear, unobstructed view of bedding
- Enough distance so mice cant access/damage hardware
- Lighter colored bedding (ideally lighter colored wood chip style)
- Not suitable for light-sensitive mice/experiments
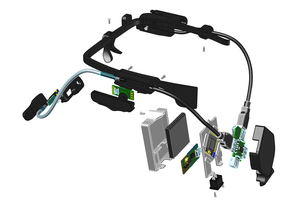
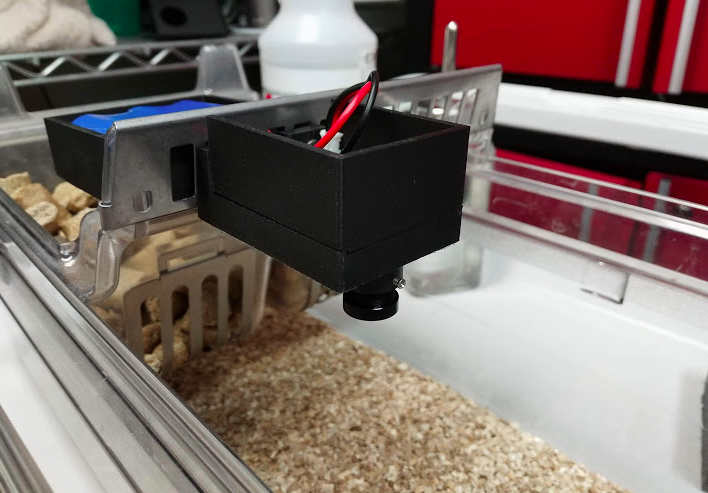
Hardware:
The MIOS Cage Cam is currently designed for Allentown NexGen Cages although the hardware likely can be retrofitted to other cages. The device attaches to the food hopper of the cage using a set of magnets. The prototype unit uses a 5V wired power adapter however the final system will use a battery. The device is connected to a Particle Photon or MIOS Environmental and Activity Monitoring Device that is set up to stream data to the MIOS Cloud via the Blynk. Once the device is mounted, powered on, and connected to the MIOS ecosystem, the device will begin to report mouse waste counts to the MIOS Cloud.
Methods:
The MIOS Cage Cam acquires and processes images using an OpenMV Cam M7 microcontroller. The OpenMV Cam M7 features a programmable LED that is used for constant illumination across different lighting conditions. However, before any images are acquired with LED illumination, a test image is always acquired without illumination and is processed to determine if the room's circadean cycle is in its night period. Once the device verifies the room is in its daytime portion of the circadean cycle, an image is acquired with brief LED illumination. Waste pellets are segmented in the image using a combination of thresholds and filters. A value is formed based on the number of detected pellets and is then transmitted to a Particle Photon via I2C or SPI connection and then to the MIOS cloud via Blynk. The data is then available live via the MIOS App.
Funding and terms:
This project was funded by the NIH Intramural Research Program (NIDDK and CIT).
This project is released under the terms of the Creative Commons - Attribution - ShareAlike 3.0 license:
human readable: https://creativecommons.org/licenses/by-sa/3.0/
legal wording: https://creativecommons.org/licenses/by-sa/3.0/legalcode
MÍOS was conceived by a team of researchers at the National Institutes of Health (NIH) and Food and Drug Administration (FDA), and all app development was done by Blynk. While MÍOS devices and designs are open-source and free, Blynk is a "freemium" service and some features cost money to use. 100% of this money supports the business operations of Blynk. NIH, FDA, and members of the MÍOS team receive no royalties or payments from Blynk.
 rdmyldrmr
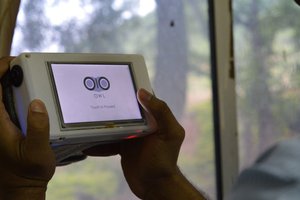

 Makeroni Labs