 amr.mostaafaa
GPS or Global Positioning System is a satellite-based radio navigation system which allows you to get your location and guide you through other locations through a well recognized and predefined map like Google maps, and in the world of Arduino, this is accomplished by the Arduino GPS Shield.
The GPS knows your location through the latitude and longitude values of your location which specifies where exactly are you from the world and we are going to use these two measurements to calculate the distance between your current location and the desired destination using the GPS shield on 1Sheeld in a quick and funny Arduino GPS Shield Tutorial.
Let’s talk about the idea behind this Arduino GPS Shield Tutorial ...
Idea:
In the Arduino GPS Shield Tutorial, we are going to use the GPS Shield from 1Sheeld via its companion Android/iOS App to get the current location.
We achieve this by telling the App (by using the voice recognition shield), both the latitude and longitude of the desired location we want to reach and the Arduino will calculate the direct distance between the 2 locations in km unit (by using the GPS shield) and tells you (by using the text-to-speech shield) what is the distance.
Getting started:
If this is your first time to deal with 1Sheeld or you want to learn more about it, I recommend checking this quick and easy getting started tutorial.
Now, after you've become a little bit familiar with 1Sheeld, let's start!
Step 1: Hardware components:
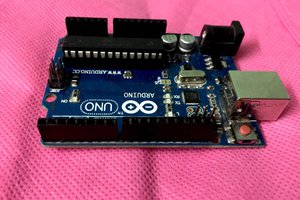
- Arduino Uno.
- 1Sheeld+ board.
- Arduino USB cable or 9-12v battery.
- Android/iOS phone with 1Sheeld App installed on it.
Step 2: Software components:
Step 3: Connection and Schematic:
- Plug the 1Sheeld board into your Arduino as this:

- Switch the 1Sheeld power to operate on 5v (Not the 3.3v):

- 1Sheeld have 2 modes: Uploading mode and Operating mode. You can switch between them using the switch close to the Digital pins and is called “UART SWITCH” on 1Sheeld and “SERIAL SWITCH” on 1Sheeld+.
Firstly, you slide the switch towards the “SWITCH” notation which turns the 1Sheeld board into the Uploading mode to let you upload the Arduino code.

Secondly, after you finish uploading the code, slide the switch towards the “UART” notation (or “SERIAL” at 1Sheeld+ board) which turns the 1Sheeld board into the Operating mode to communicate with your smartphone 1Sheeld App.

- Connect the Arduino via your PC using Arduino USB cable.
Code:
I would recommend checking the Arduino GPS Shield documentation to know more about the Arduino GPS Shield functionalities and how to use them.
Now, switch the 1Sheeld board to the Uploading mode, upload this code:
/*
  Arduino GPS Shield Tutorial: Distance Calculator

  This project shows an application on 1Sheeld's GPS shield.

  By using this project, you can calculate the distance
  between your current location and the desired destination
  by using Accelerometer shield from 1Sheeld.

  OPTIONAL:
  To reduce the library compiled size and limit its memory usage, you
  can specify which shields you want to include in your sketch by
  defining CUSTOM_SETTINGS and the shields respective INCLUDE_ define.
*/

/* Include required shields */
#define CUSTOM_SETTINGS
#define INCLUDE_VOICE_RECOGNIZER_SHIELD
#define INCLUDE_TEXT_TO_SPEECH_SHIELD
#define INCLUDE_GPS_SHIELD
#define INCLUDE_TERMINAL_SHIELD

/* Include 1Sheeld library. */
#include <OneSheeld.h>

/* Variable to save number of voice commands received */
int counter = 0;

/* Char array to hold the voice recognized latitude */
char *voiceinput_latitude_char;

/* Char array to hold the voice recognized longitude...
Read more »
 ensafatef

 Maria Carlina Hernandez