Close
0%
0%

Face Controlled Santa's Shop Window Display

Standing on the sidewalk, your smile or facial position controls elements of a "behind the glass" animated window display.

Similar projects worth following
276 views
0 followers
For grumpy people, a stand alone picture frame (that returns a smile) encourages a happier outlook for the day.

For my initial project, facial expression (smile, no smile) and facial position (you must be below a certain height) allows interactive control of Santa's Shop by pedestrians outside the shop window. The Google AIY vision kit--in its default mode--provides the feedback to make this happen.

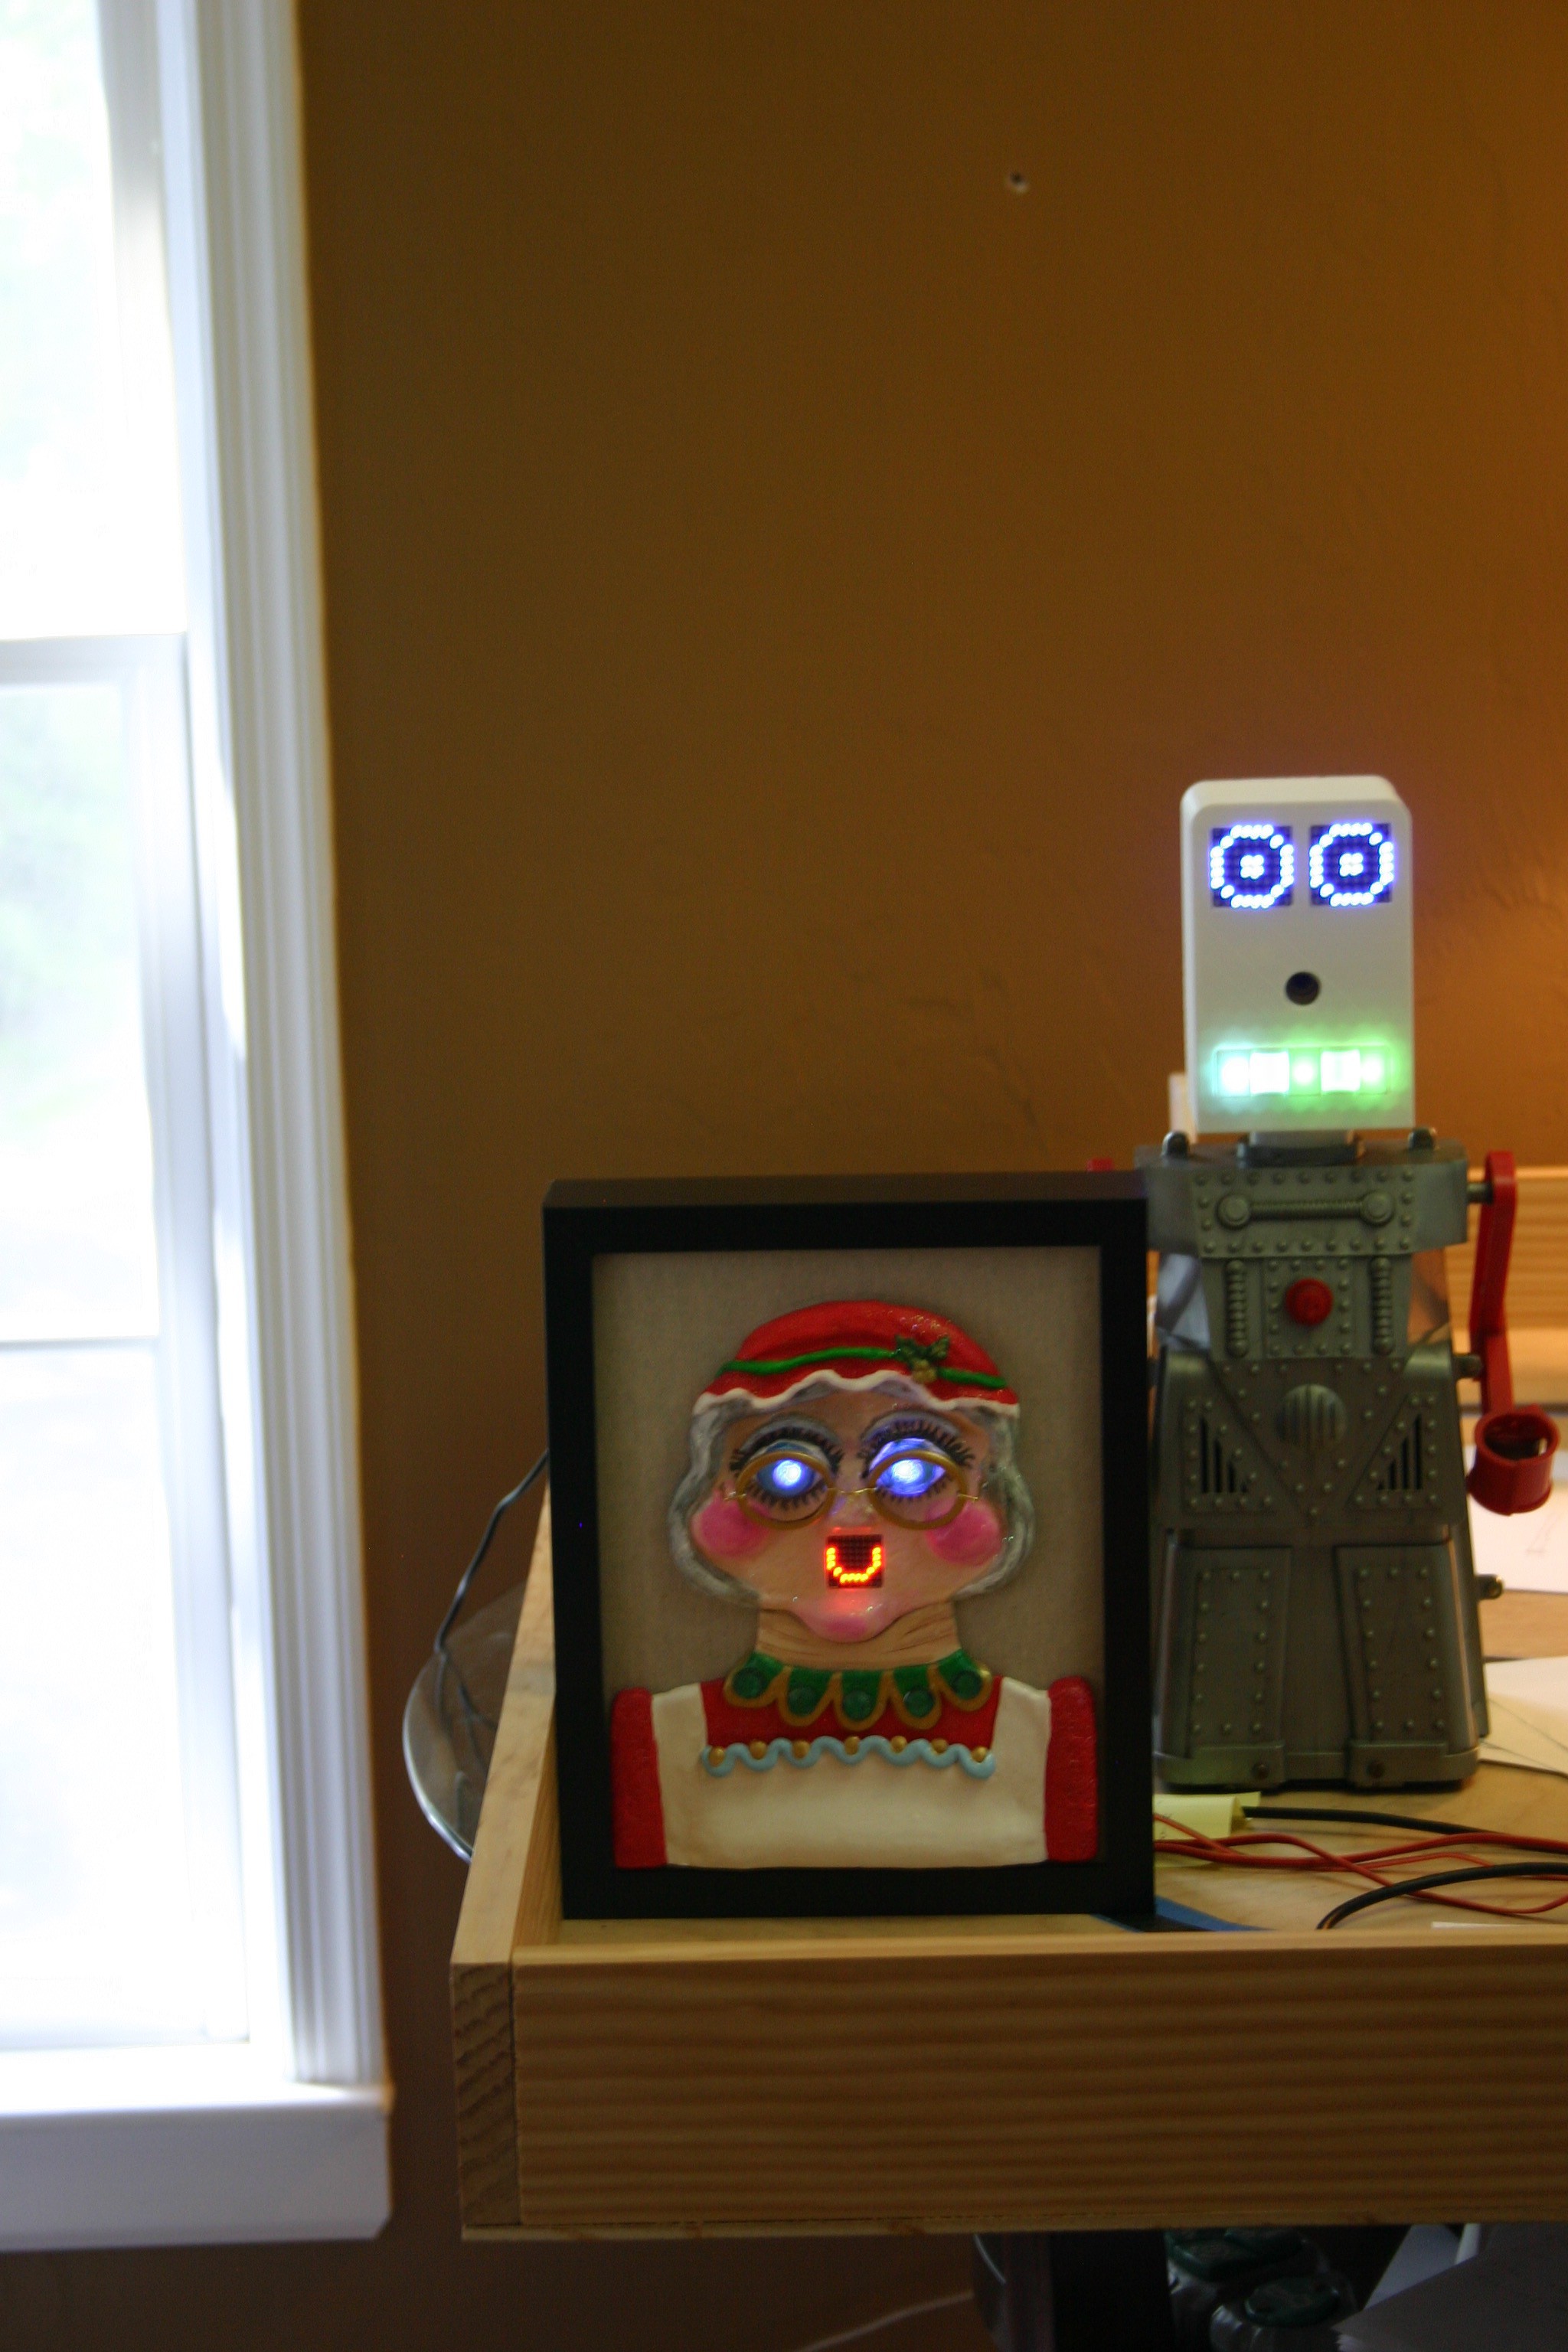
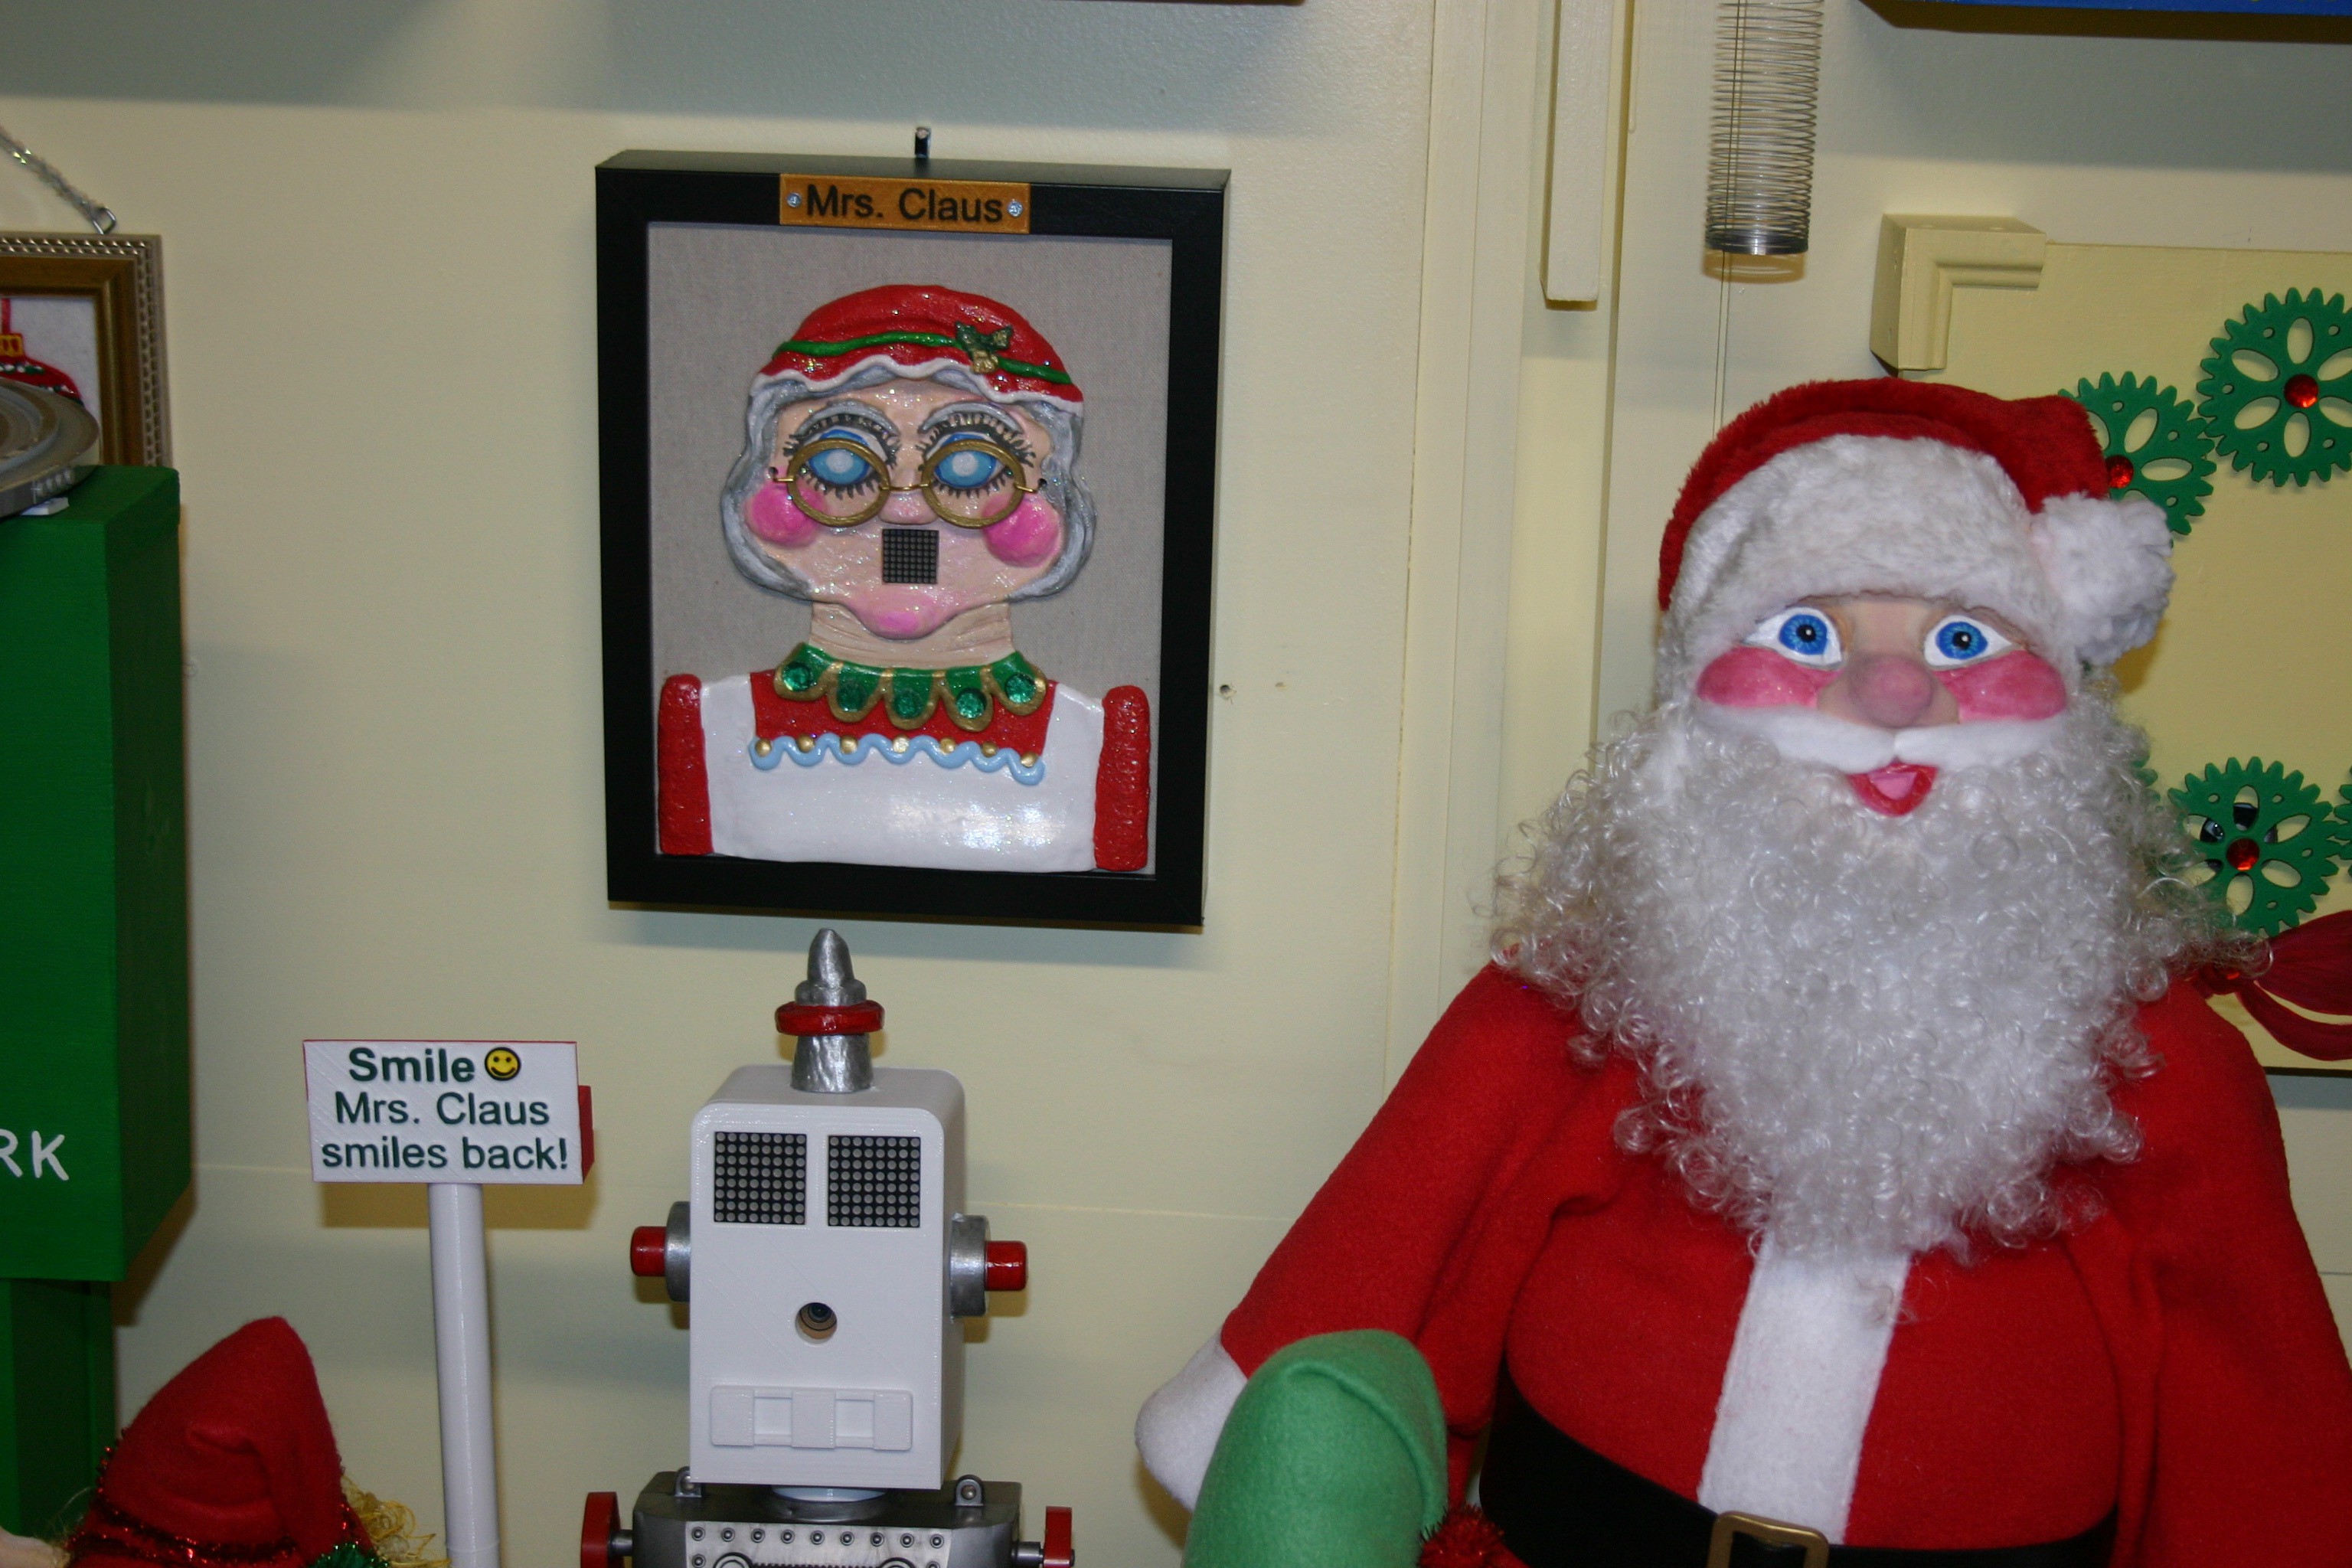
When I tested "smiling Mrs. Claus" for a few days in my workshop, I found myself virtually unable to pass her "picture" without smiling.

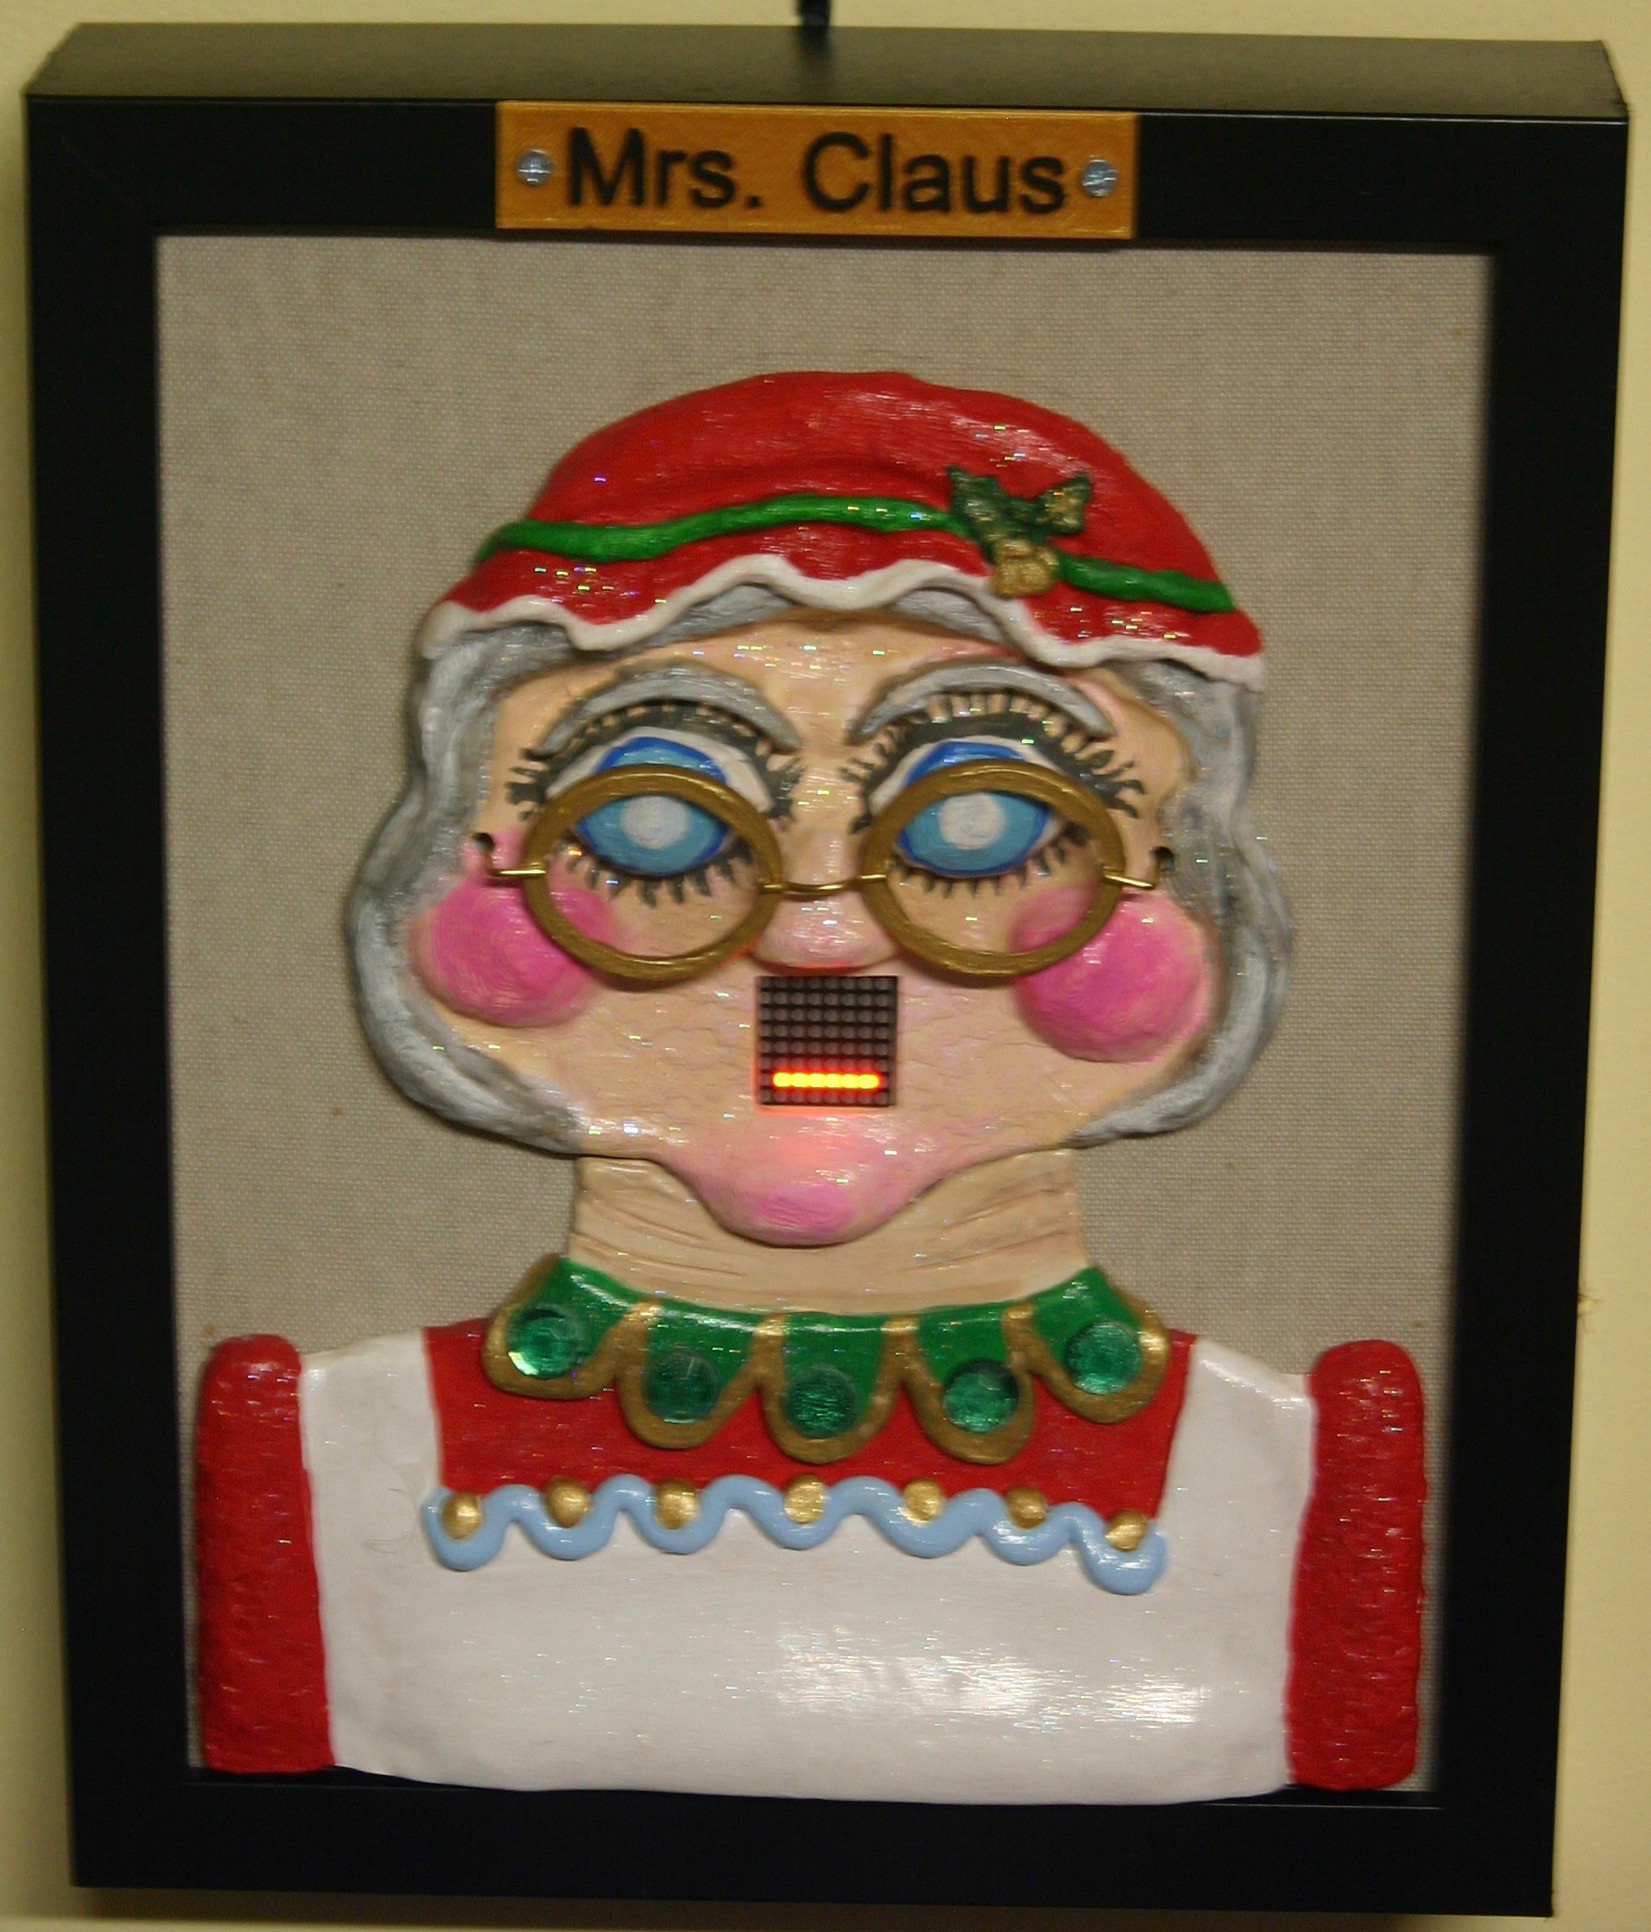
Whether it was the returned smile or the magic of "expression control," it just works.

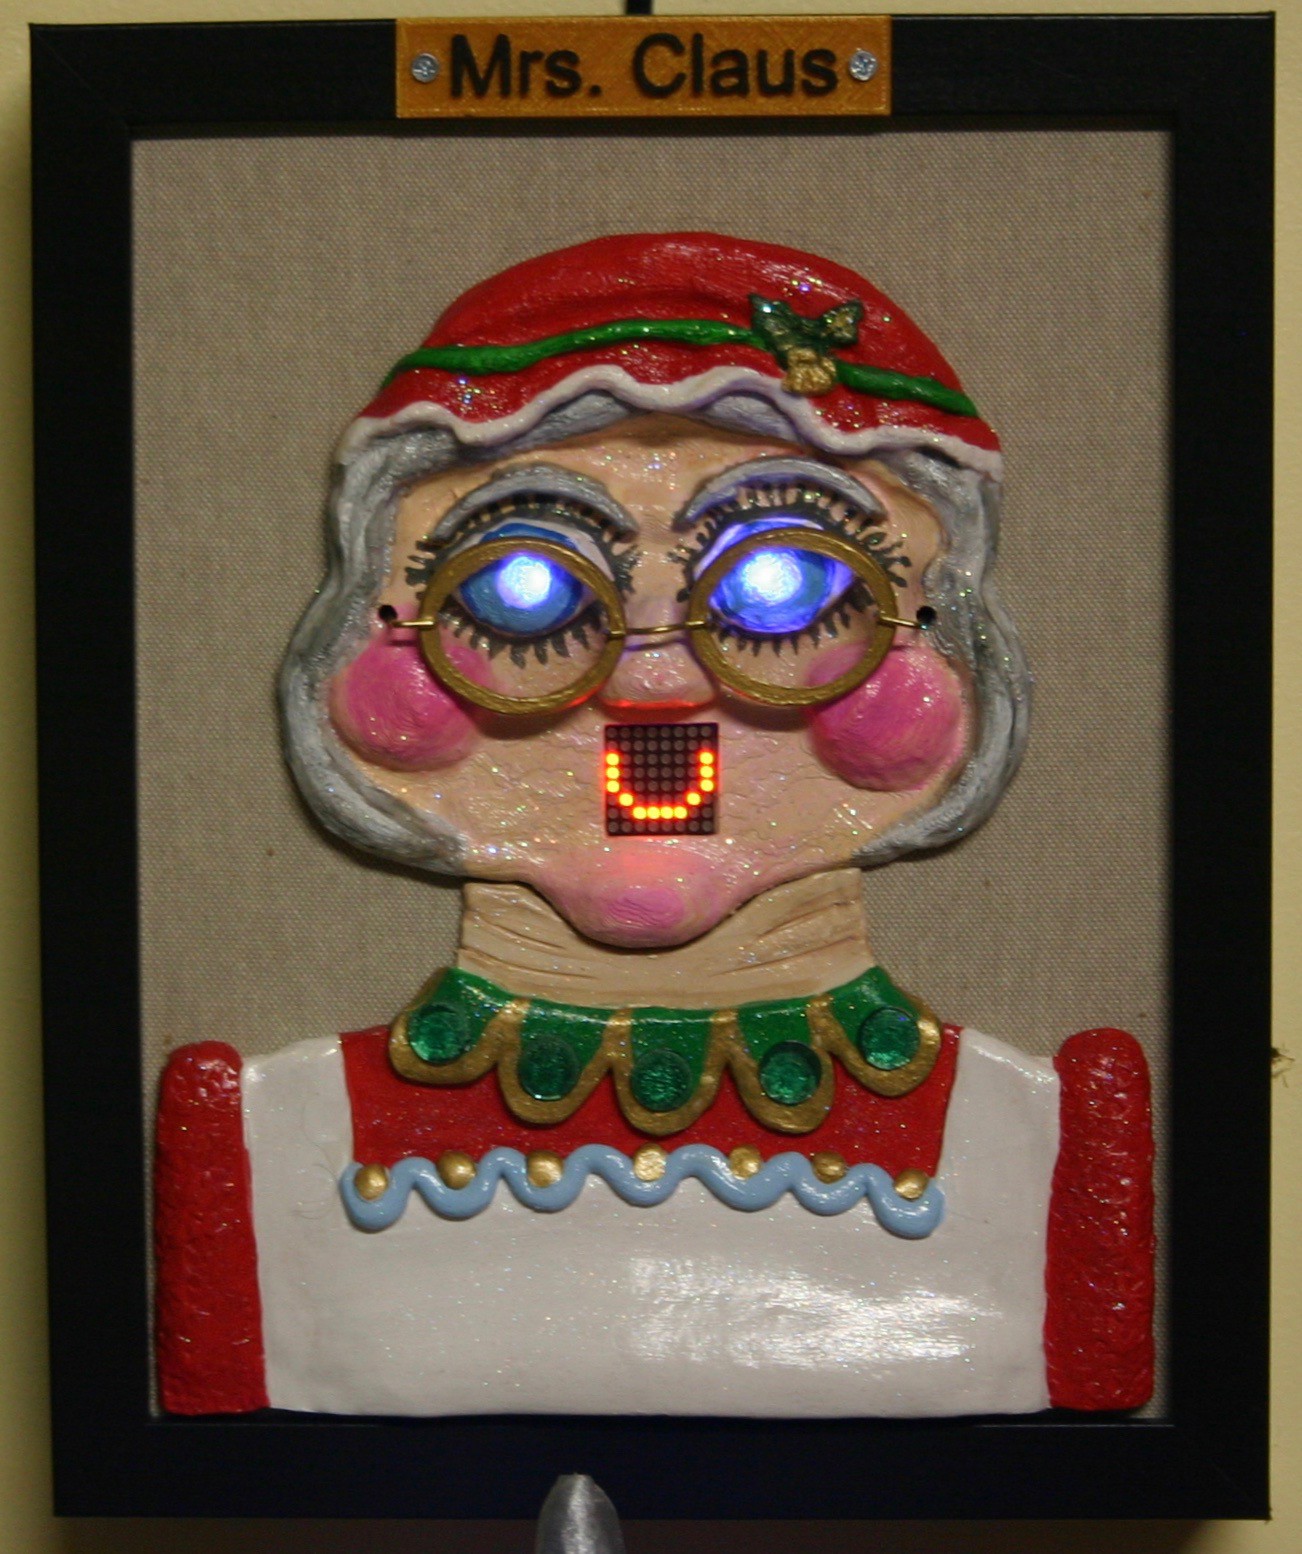
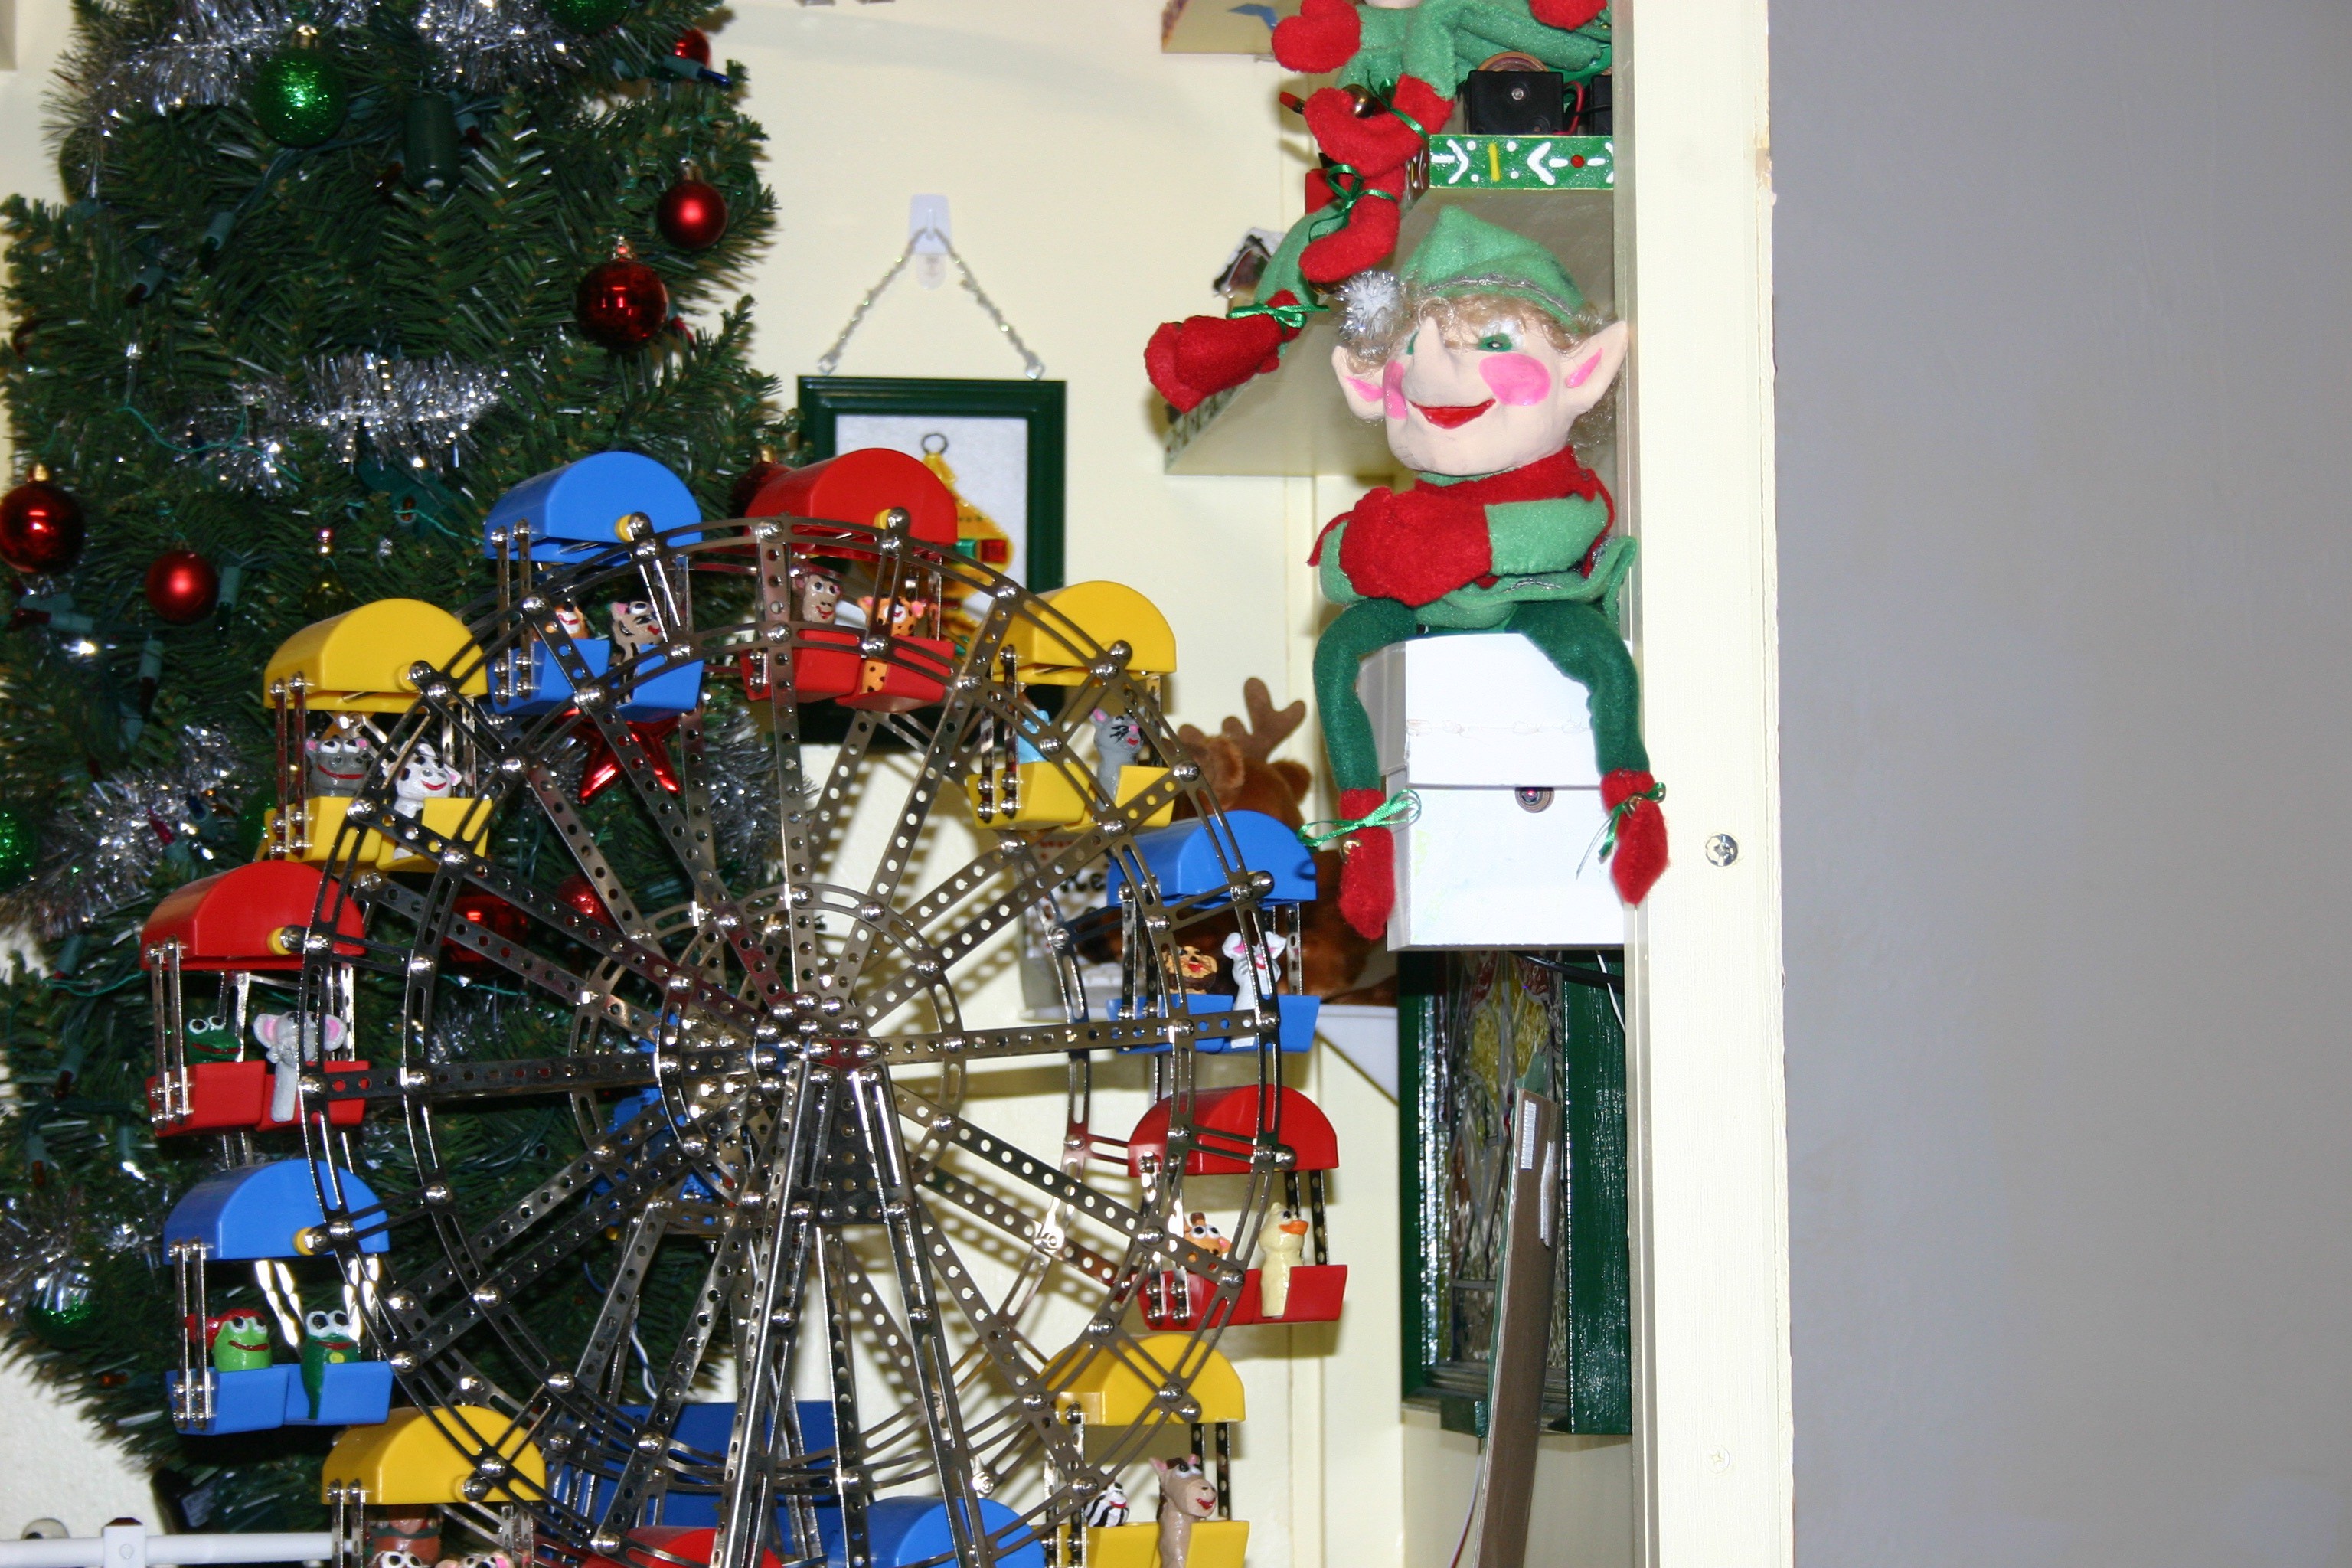
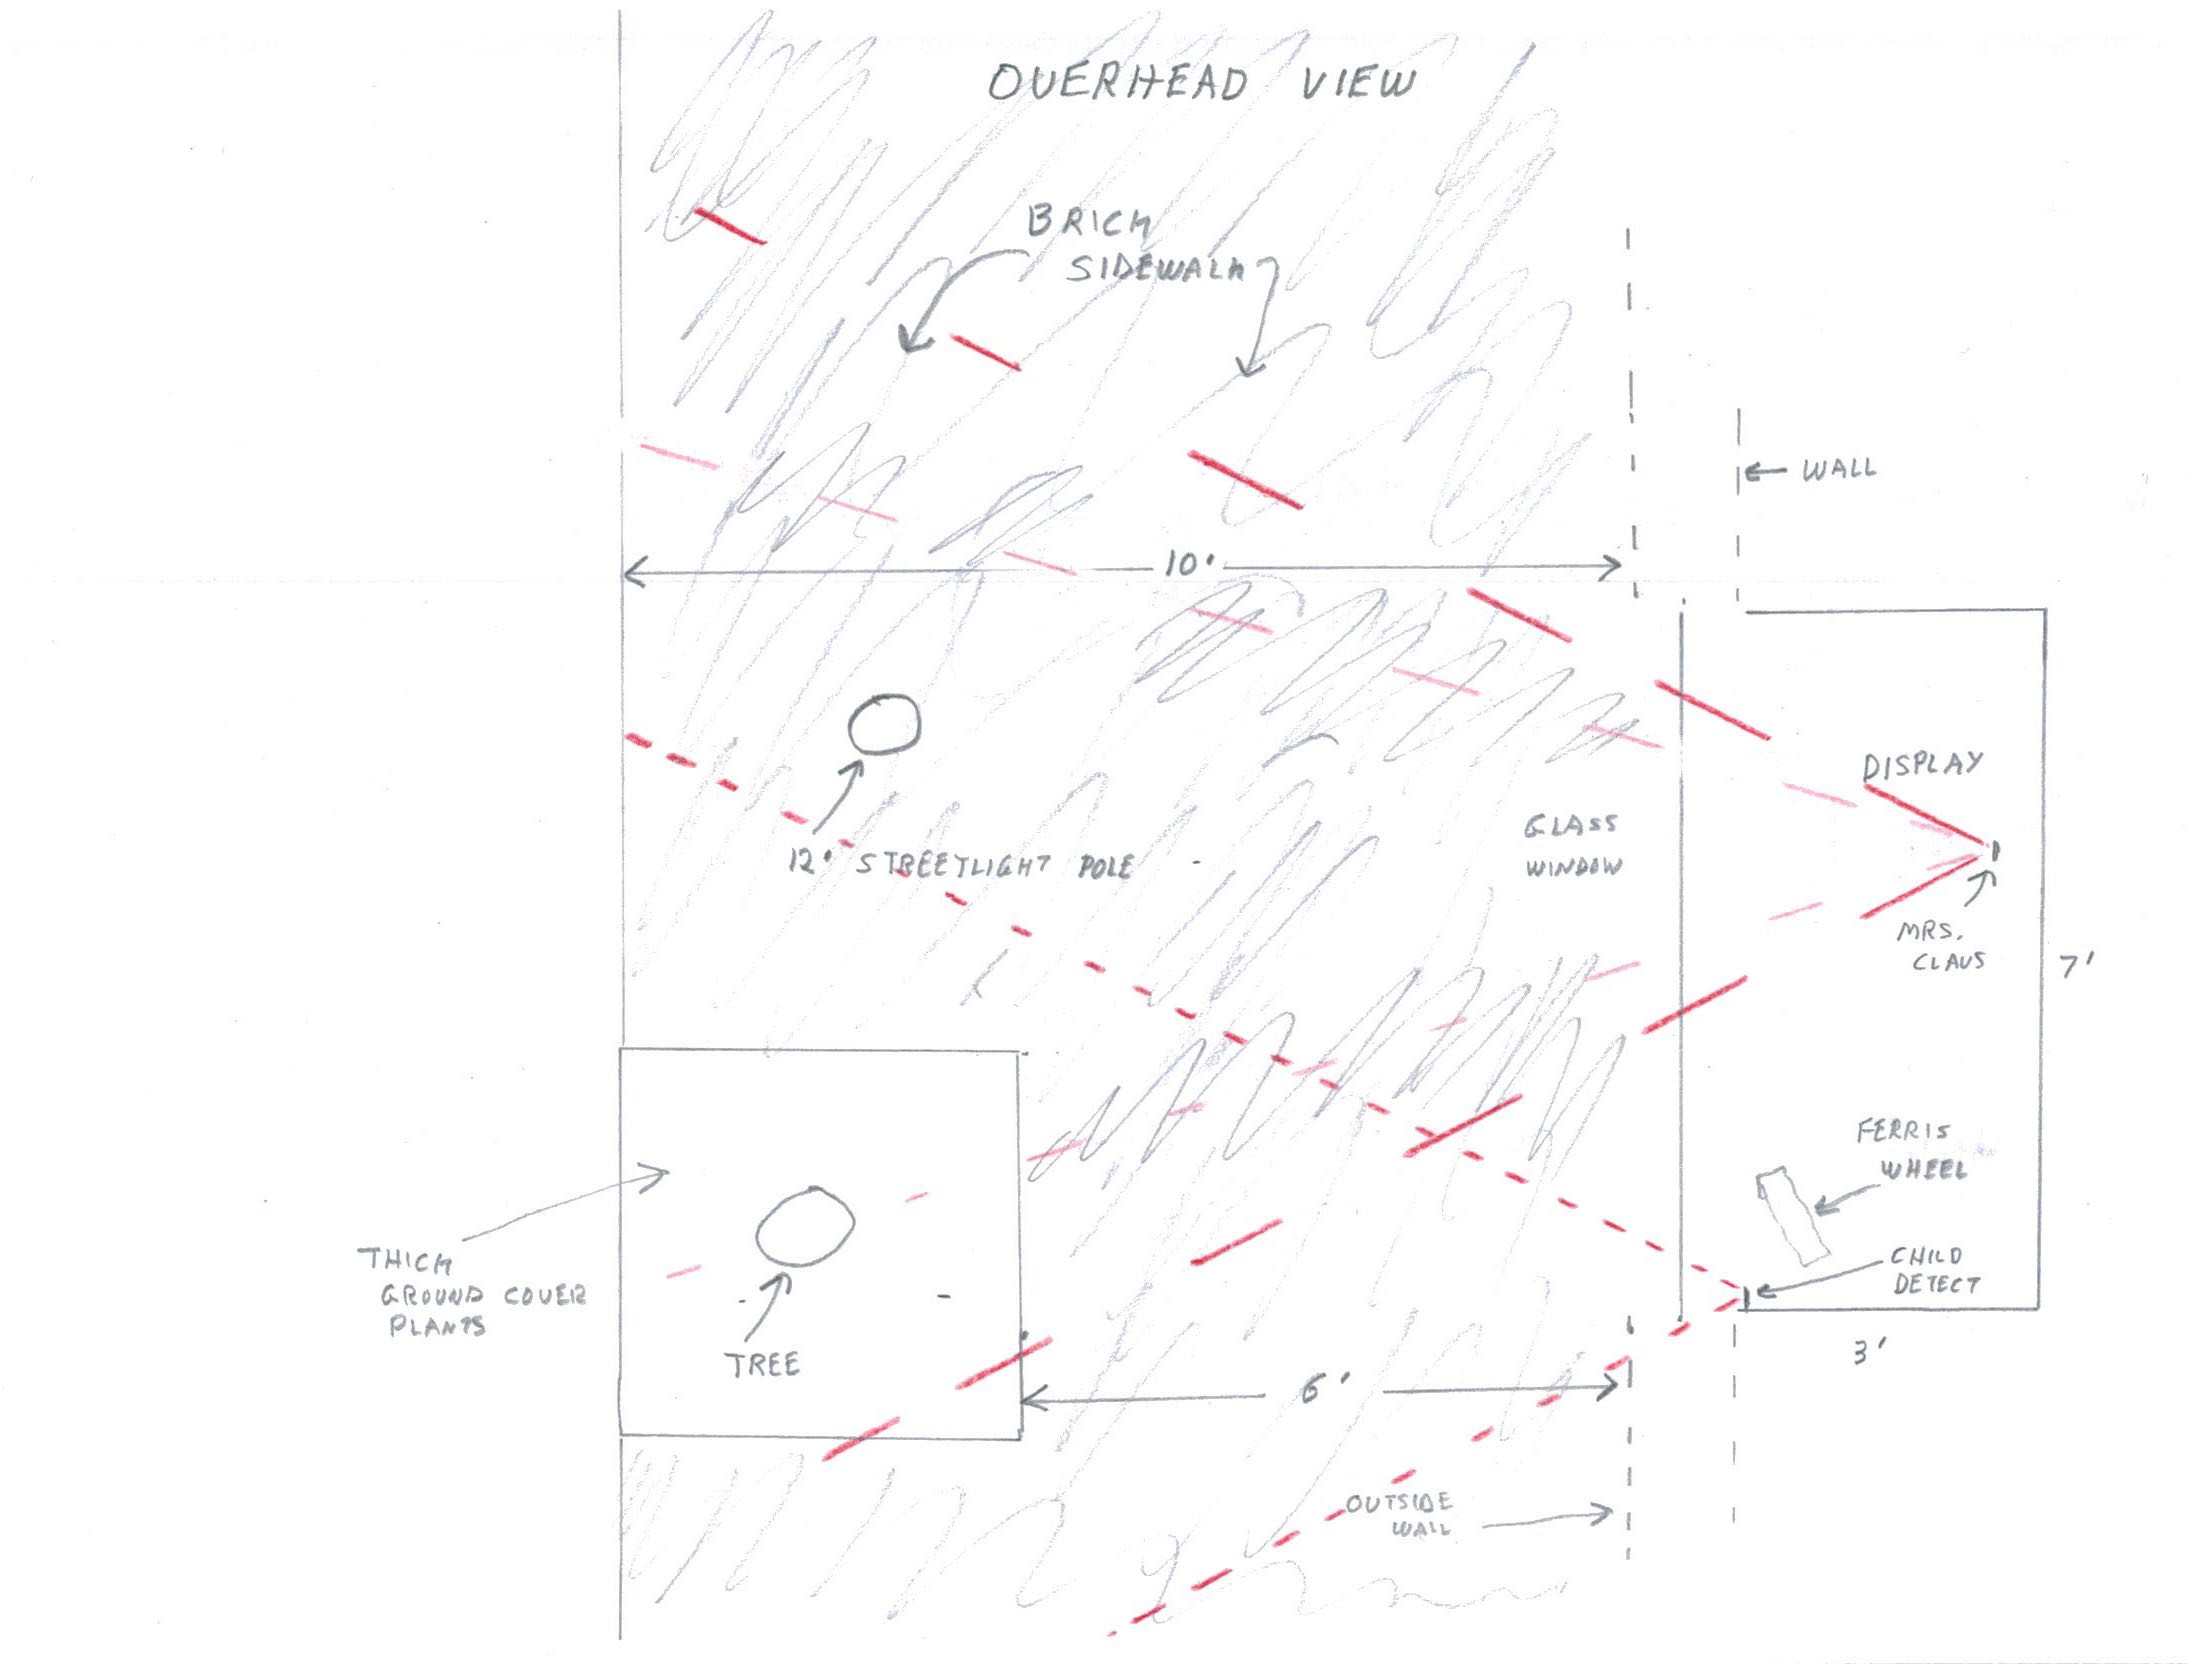
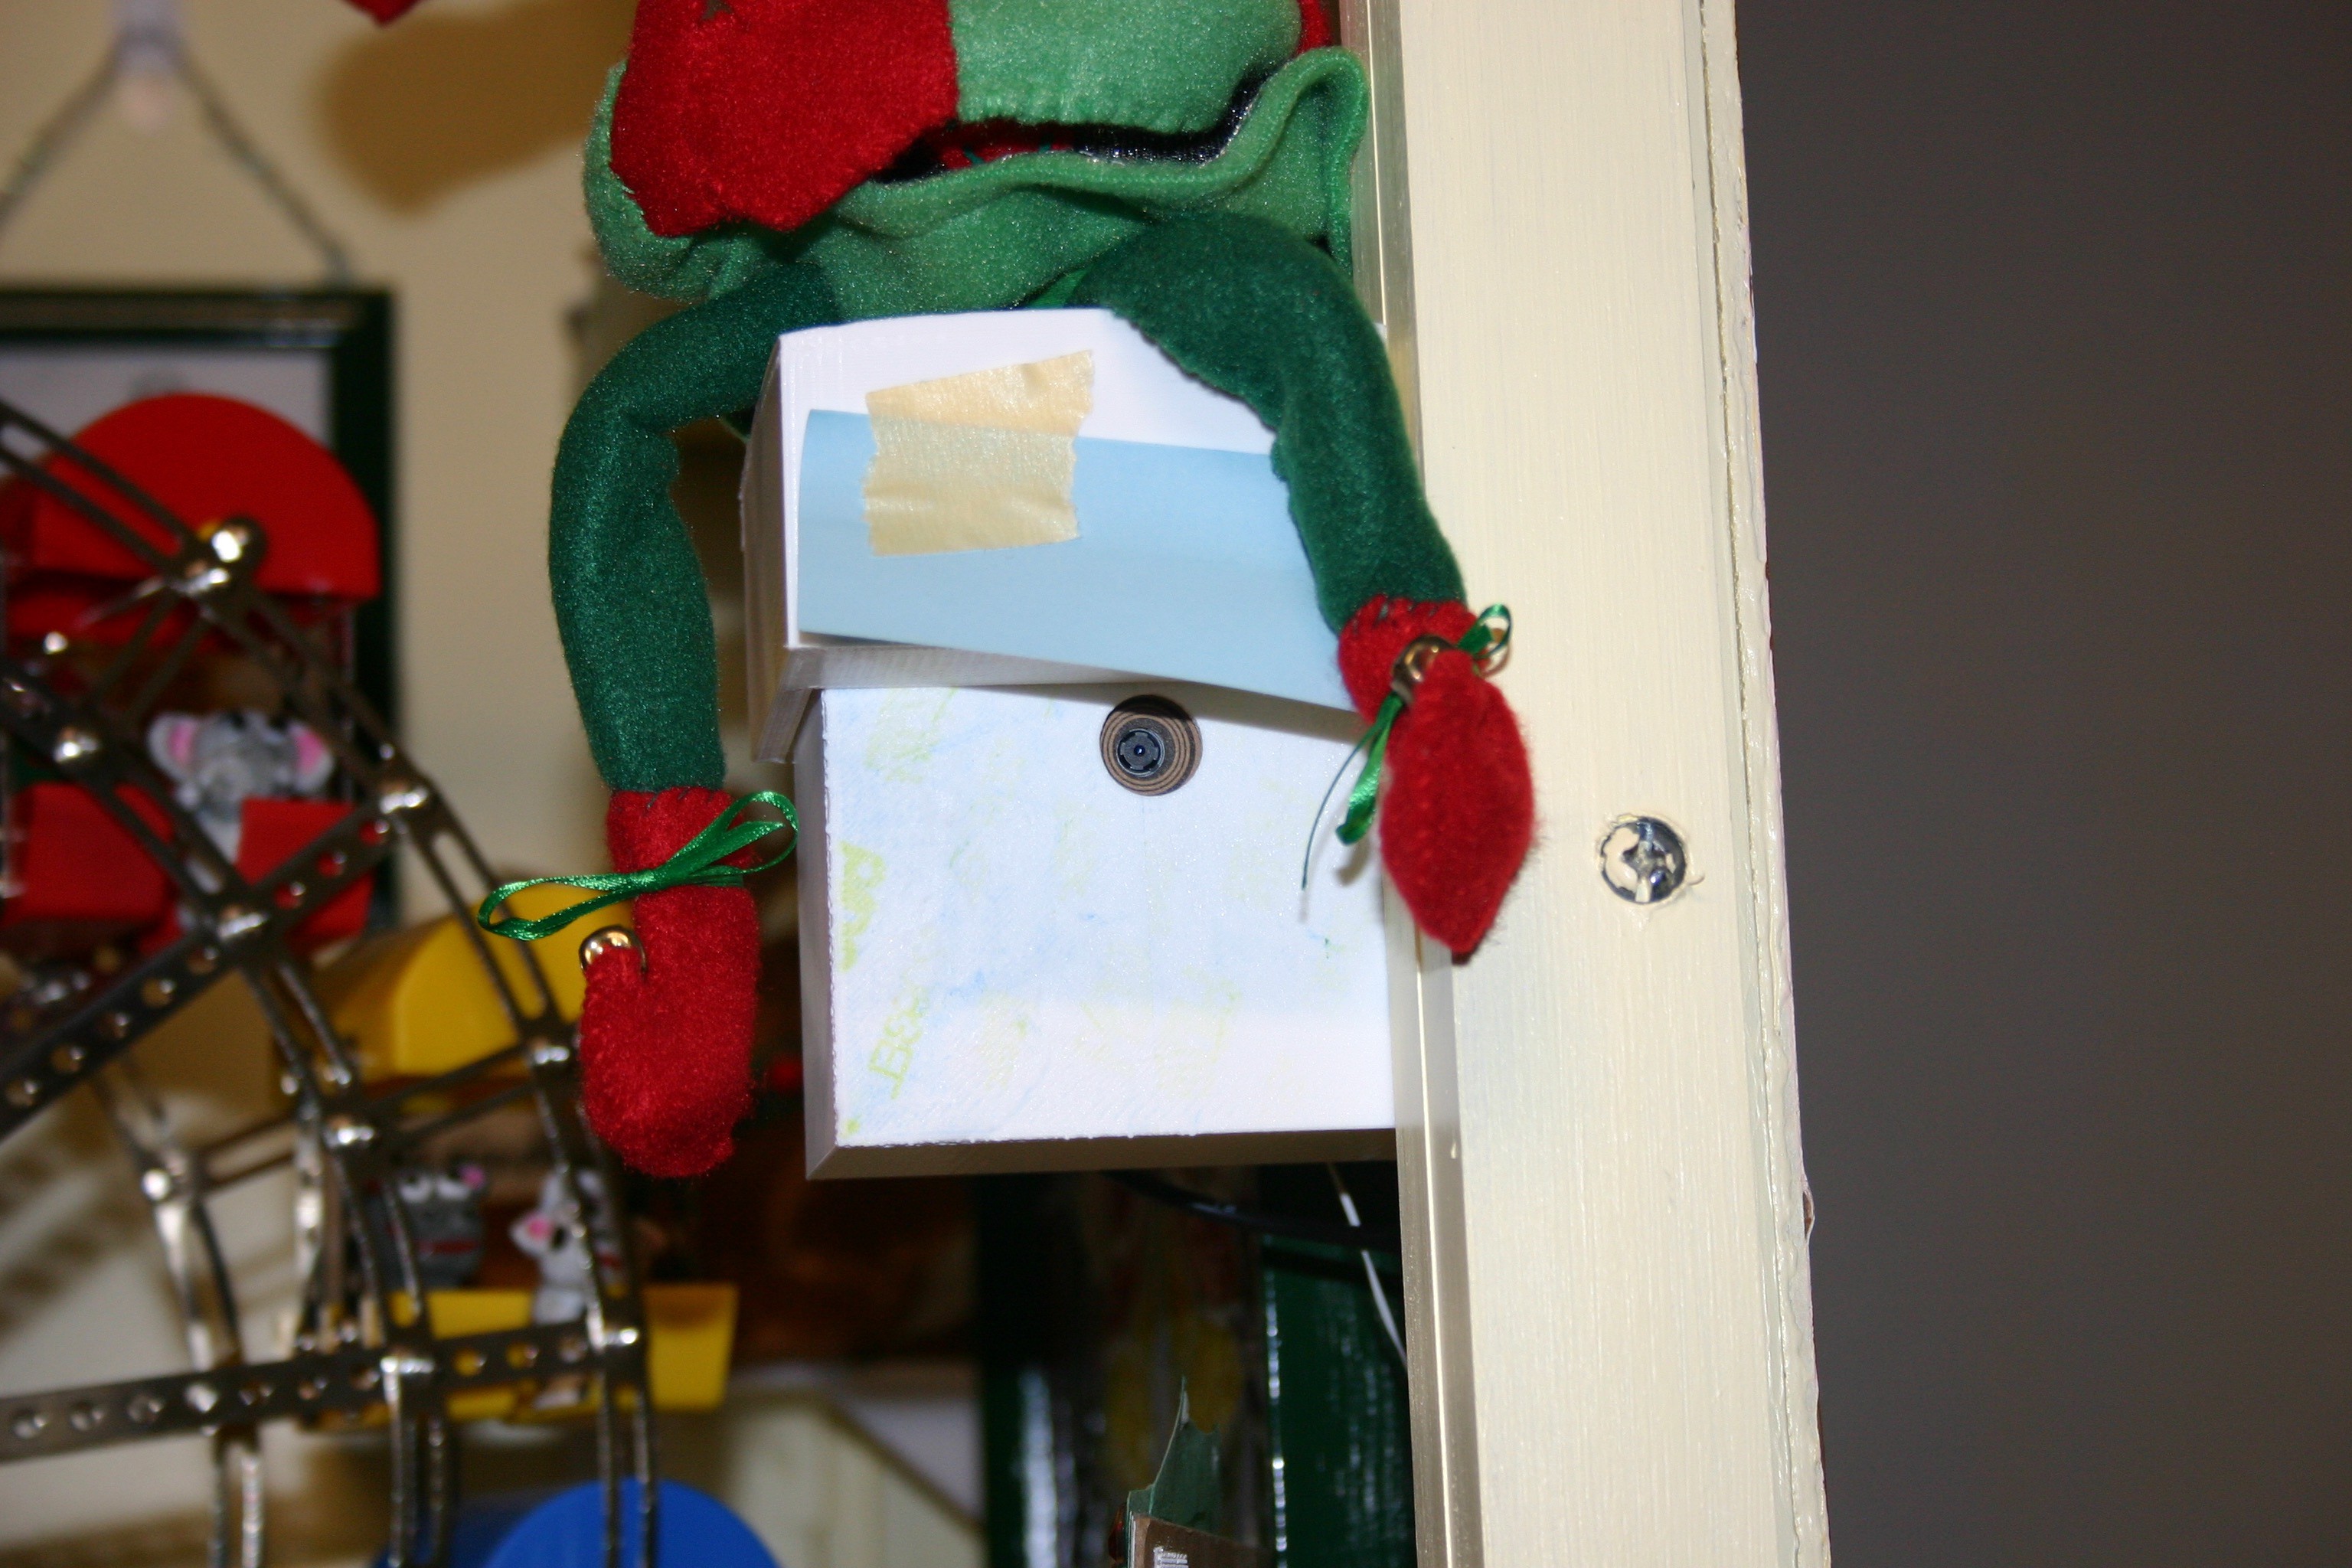
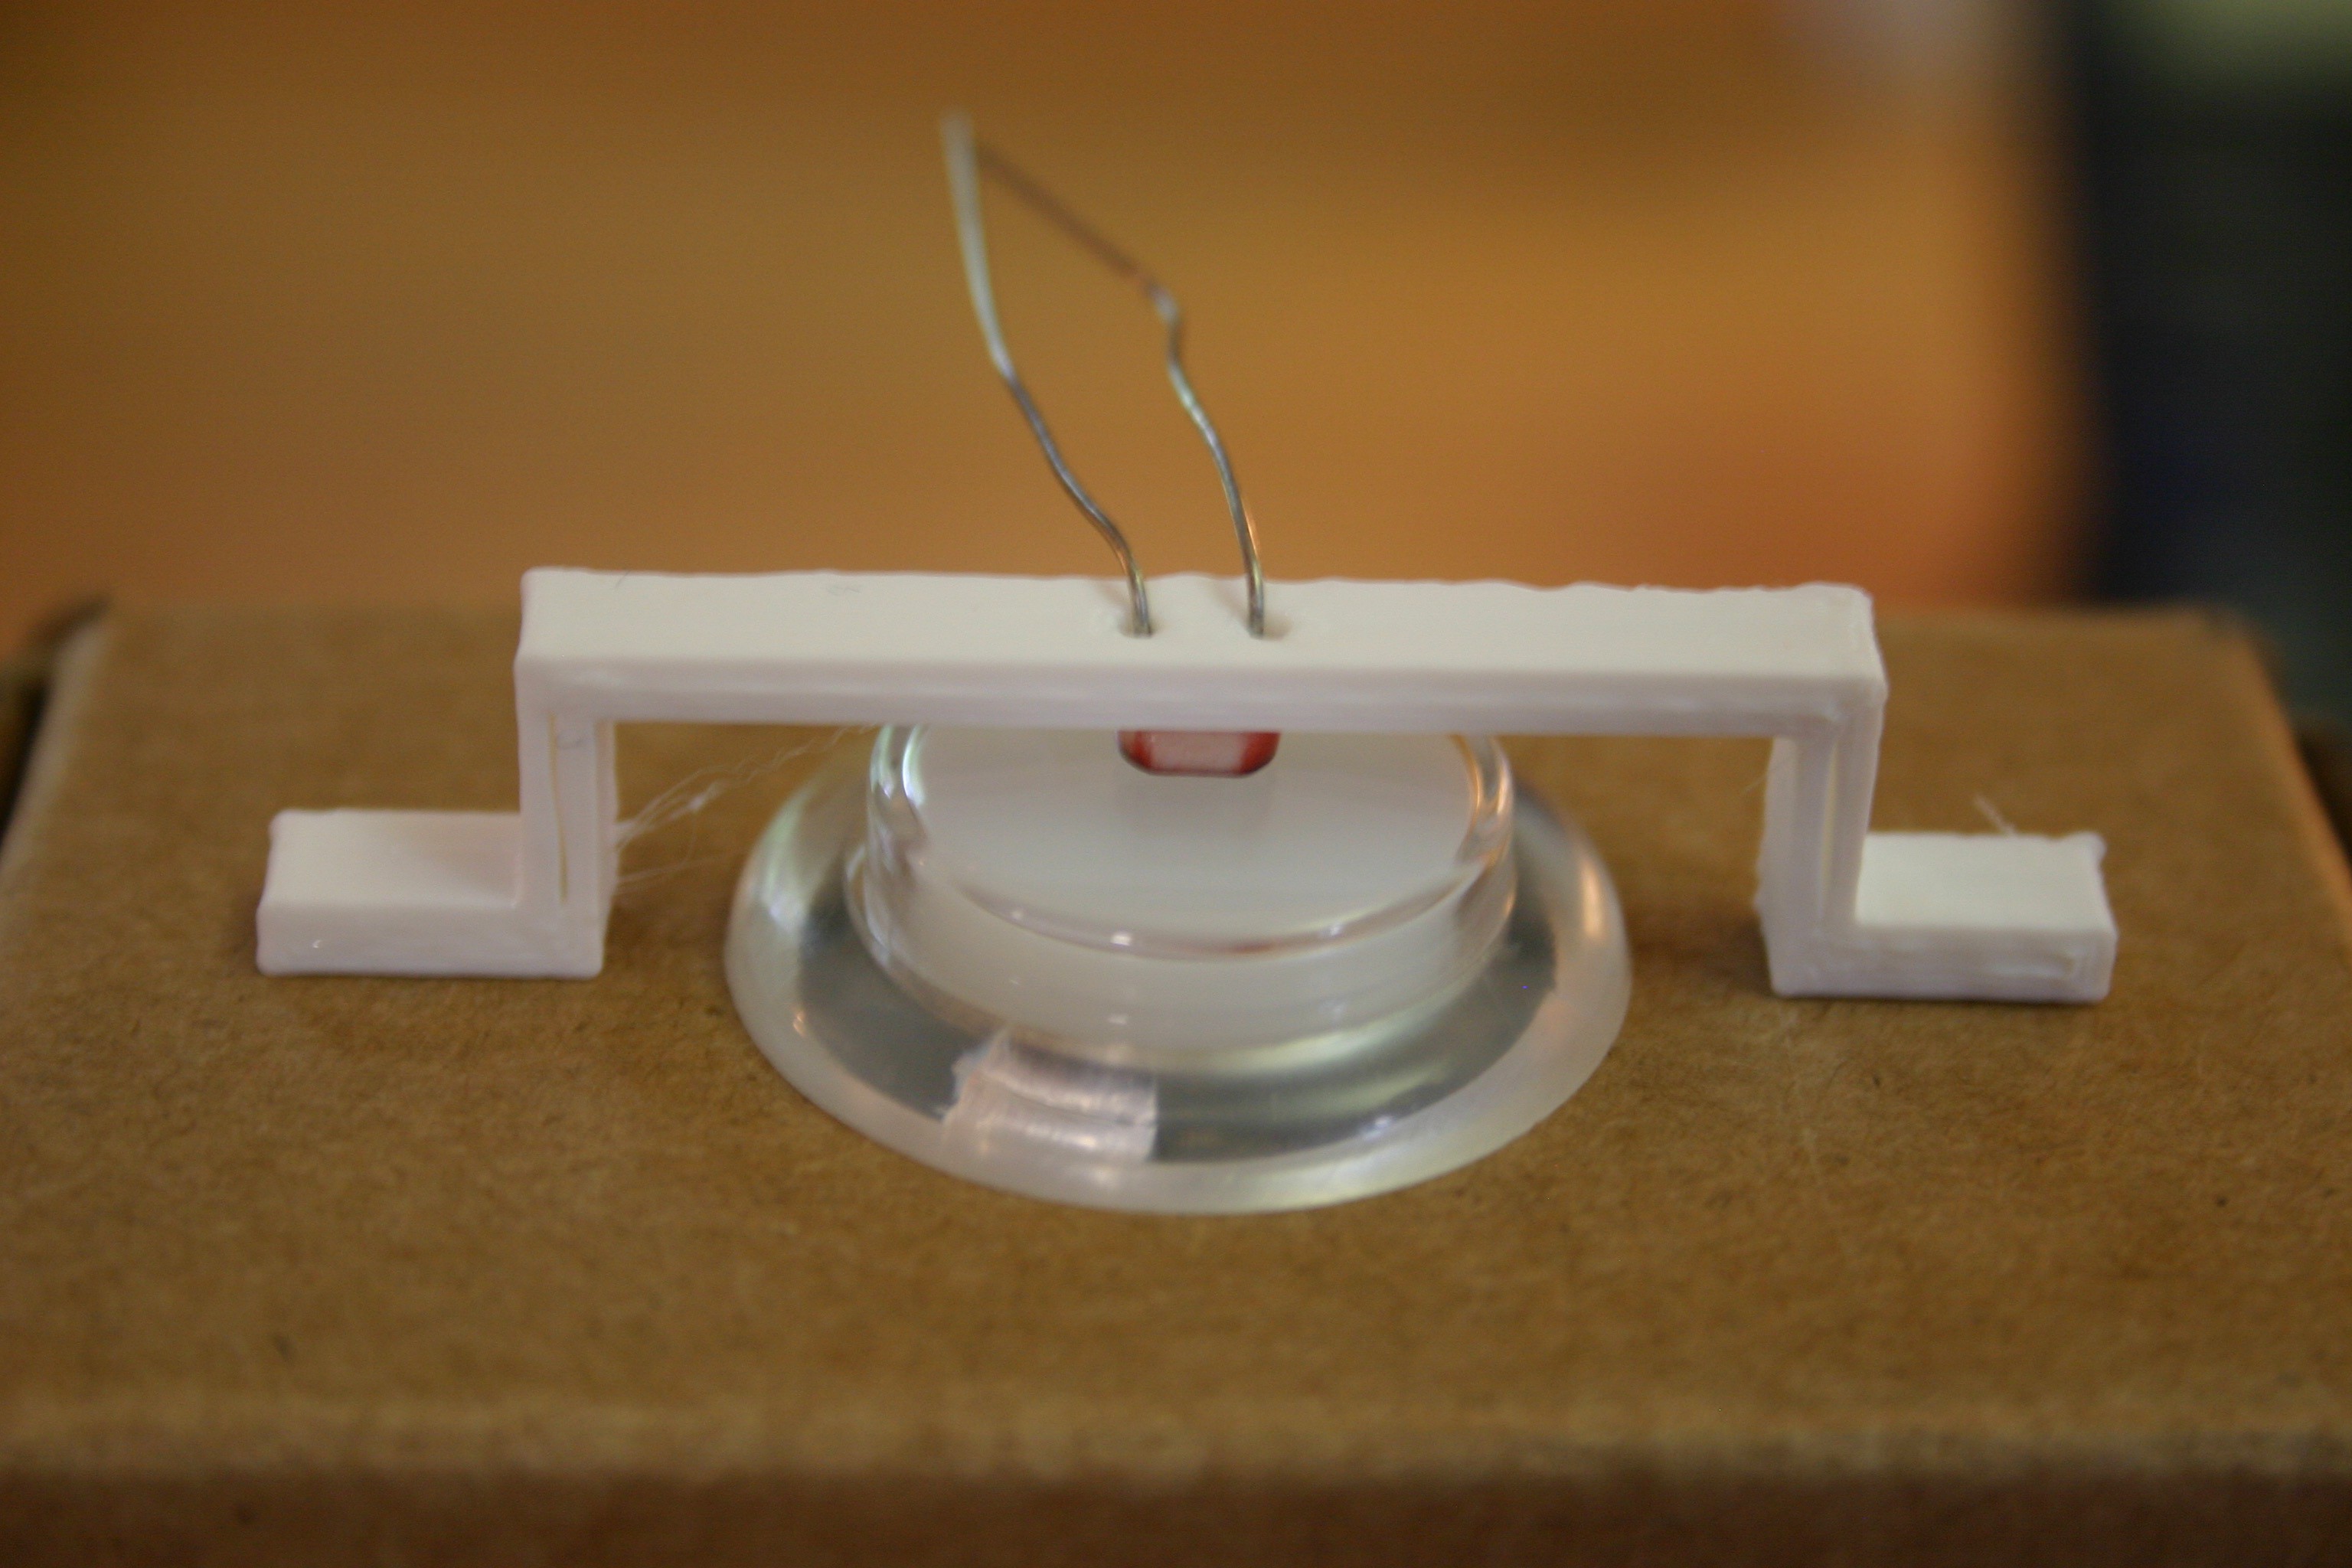
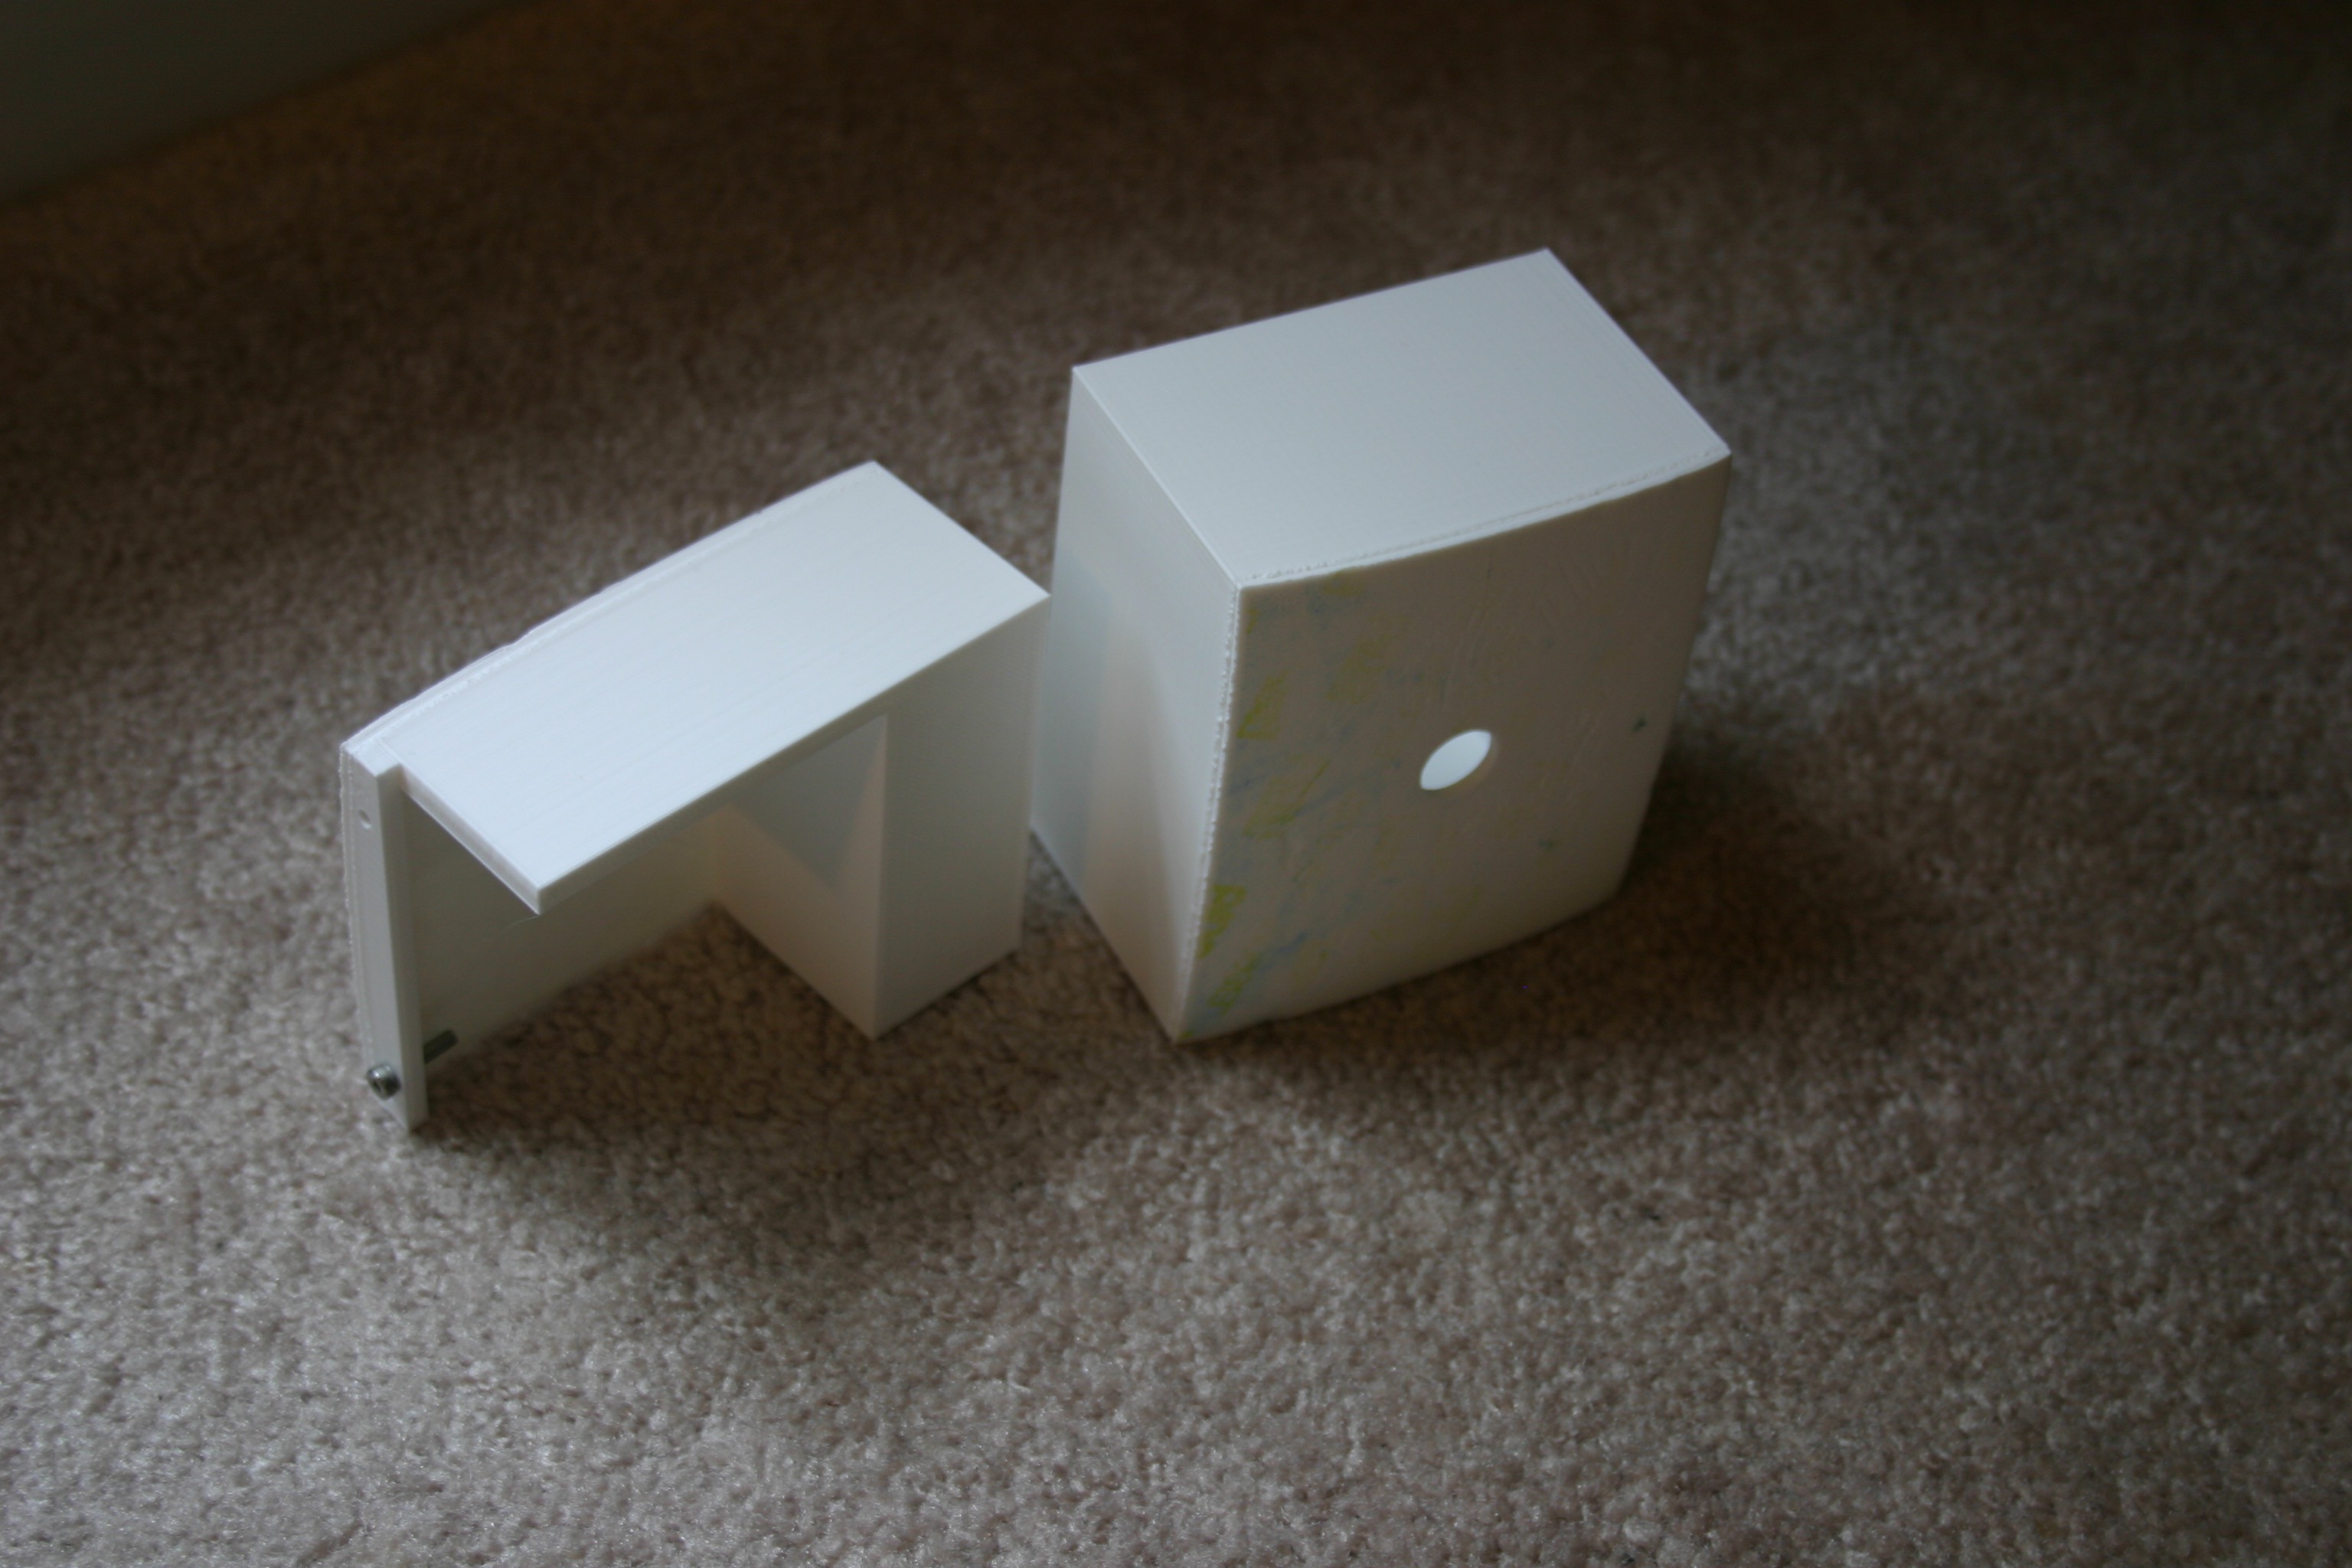
For this year's version of Santa's Shop (an animated "behind the glass" Christmas display window) interactive controls are provided for the viewers. 

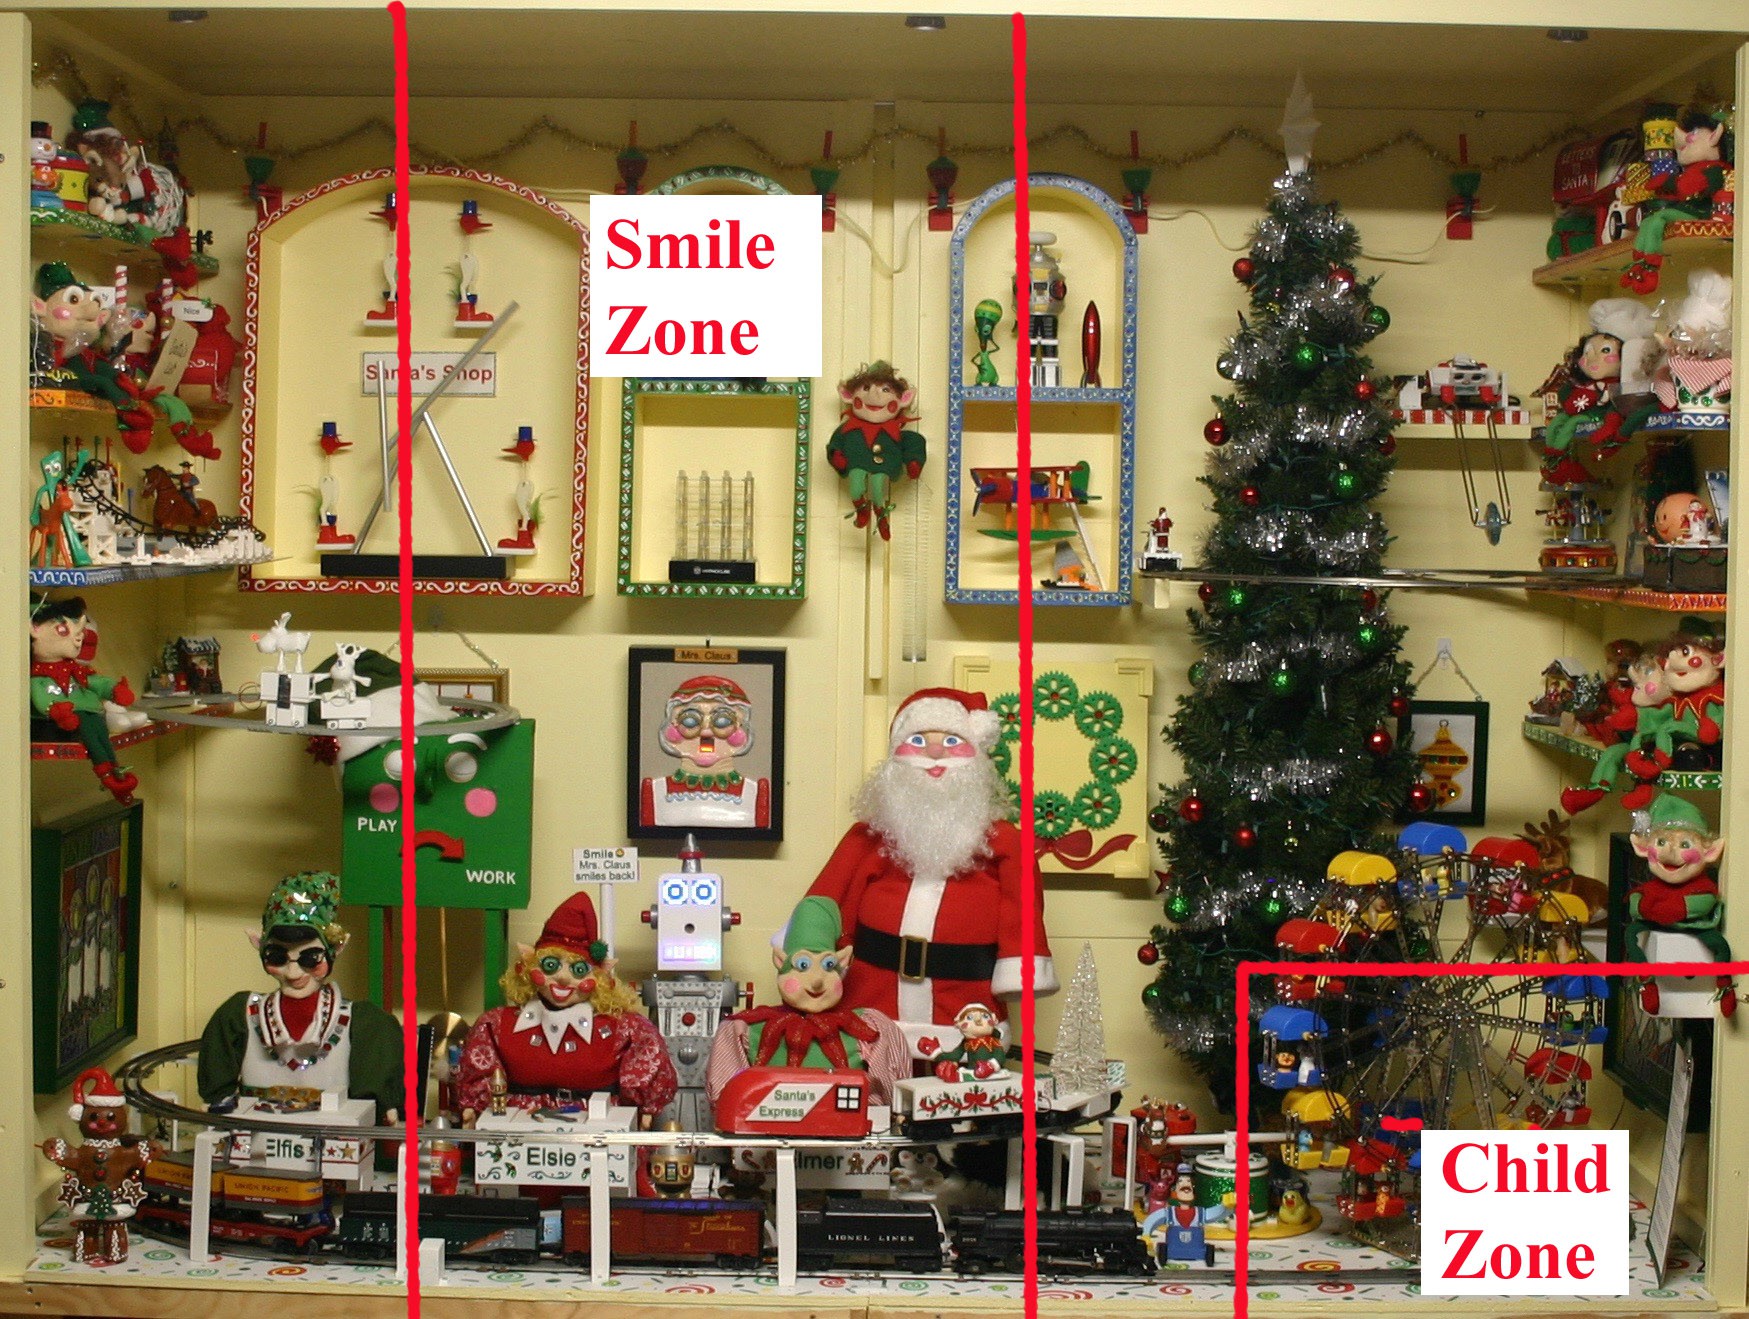
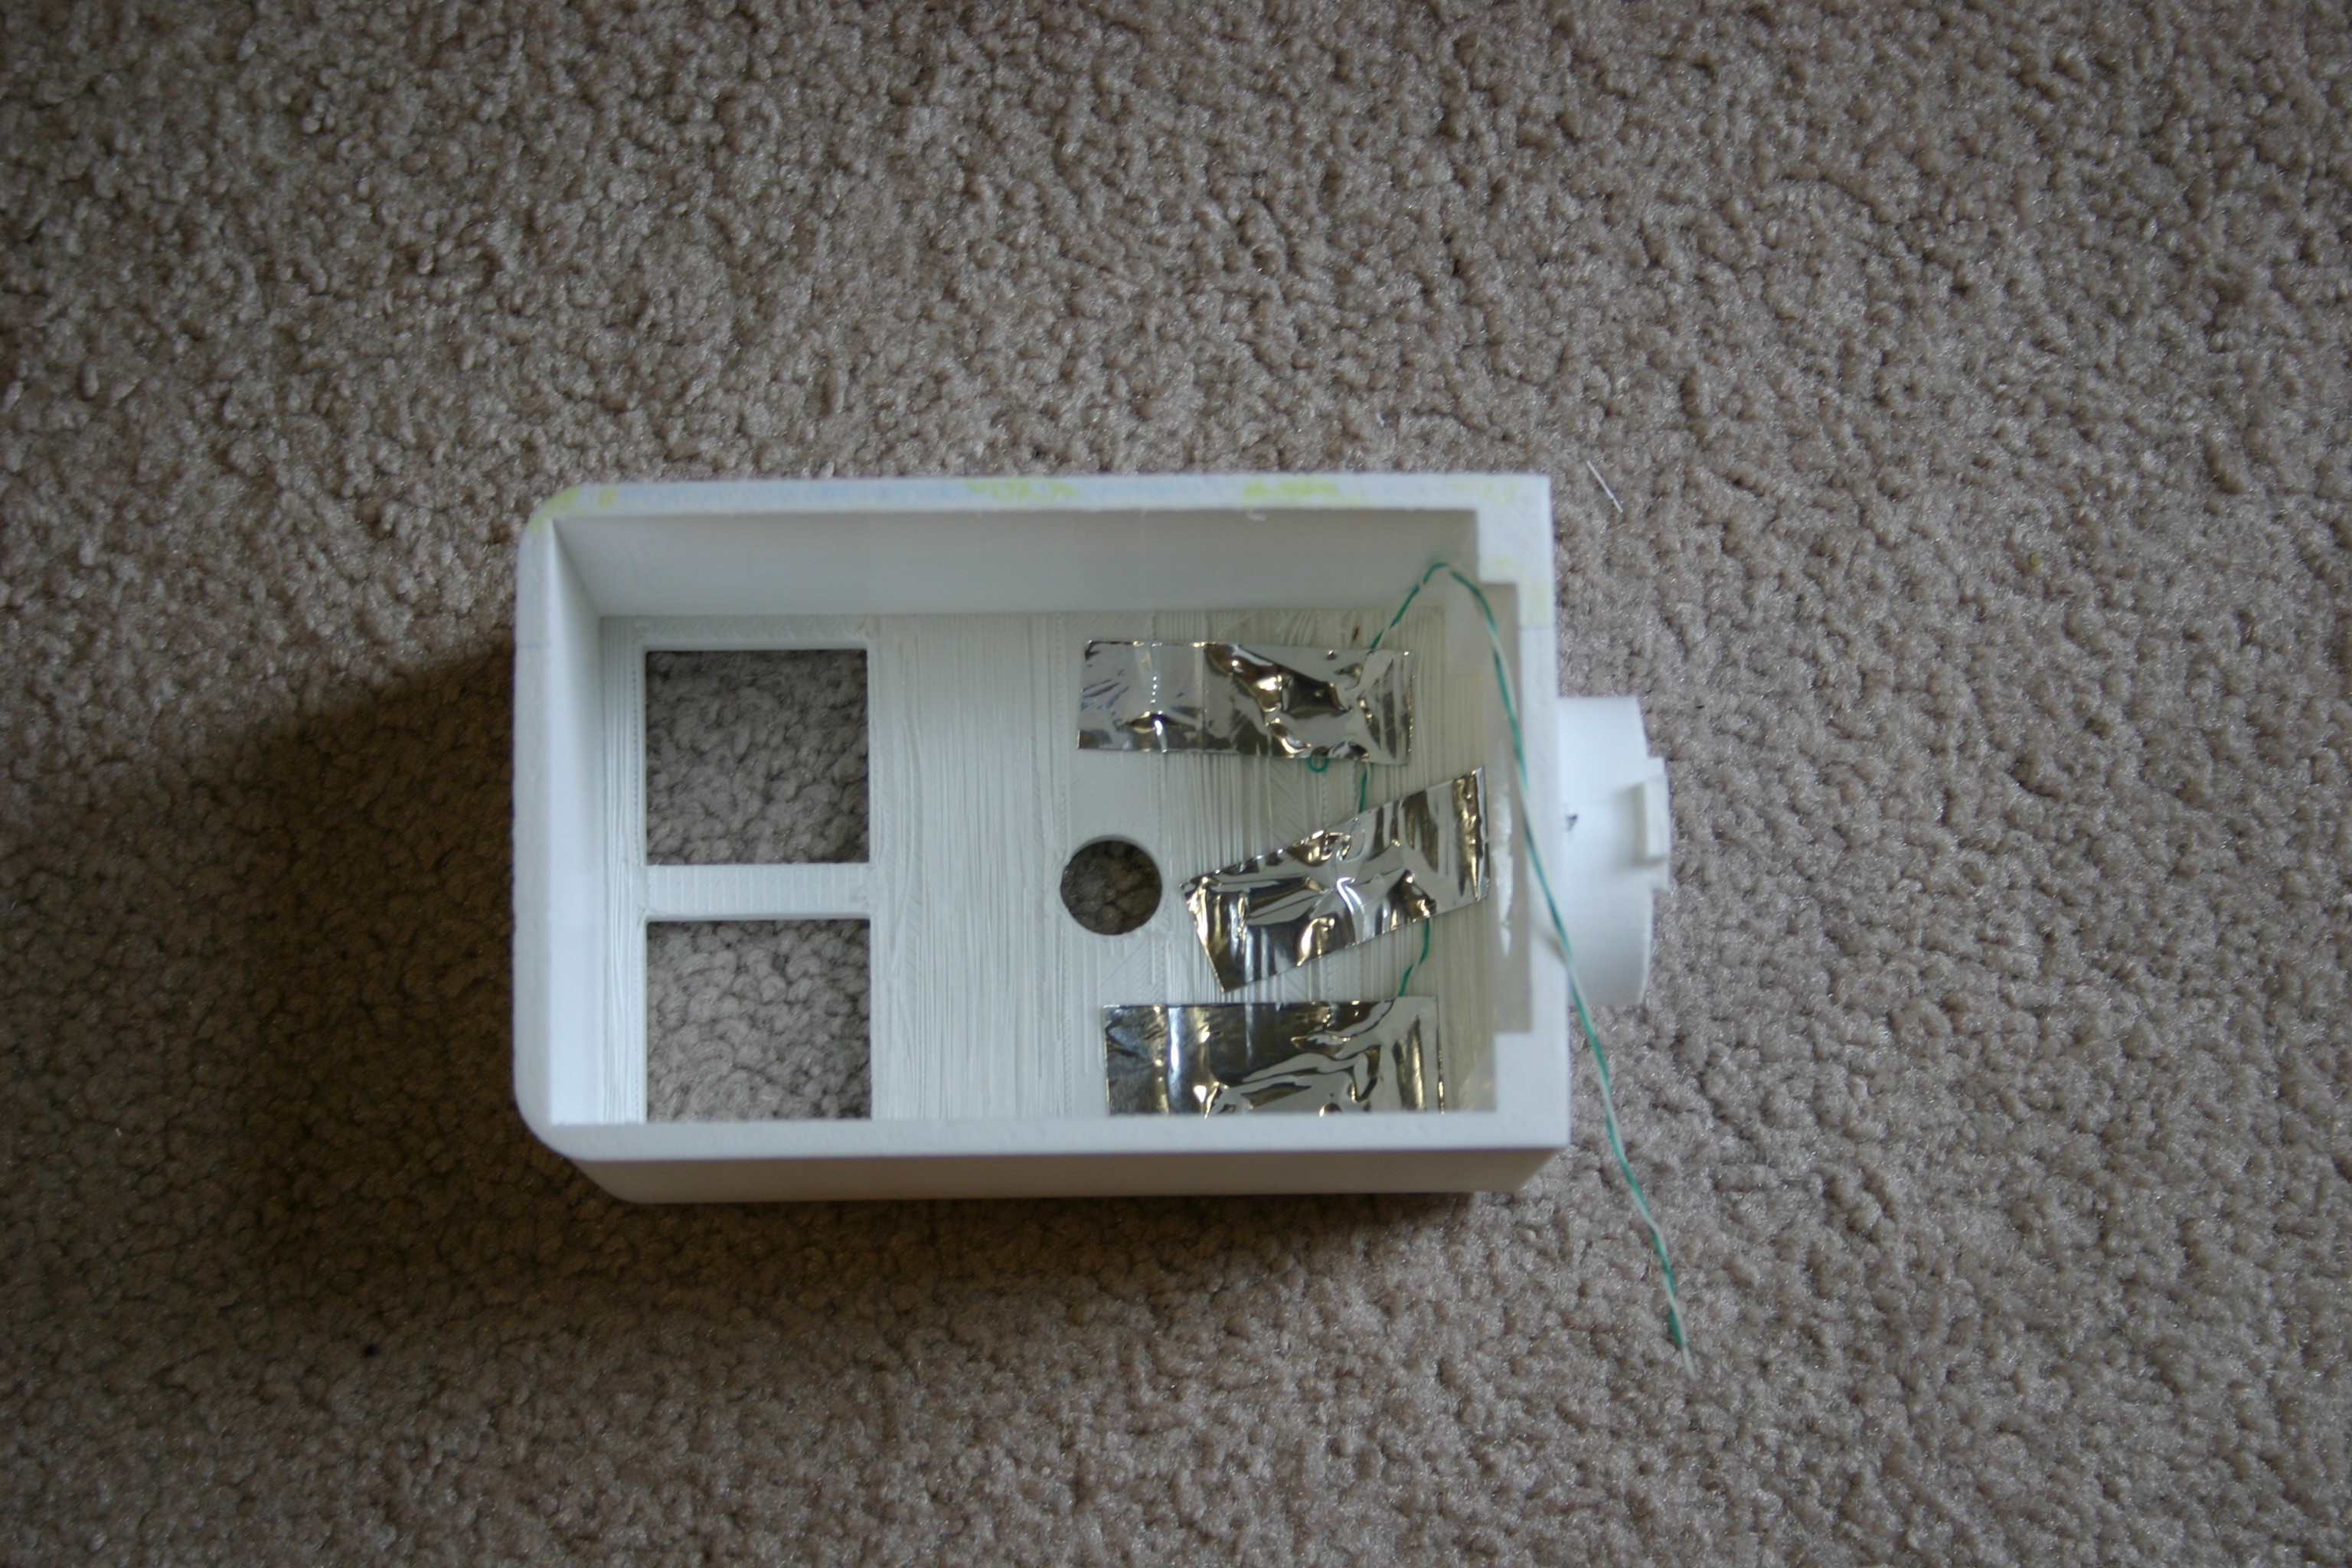
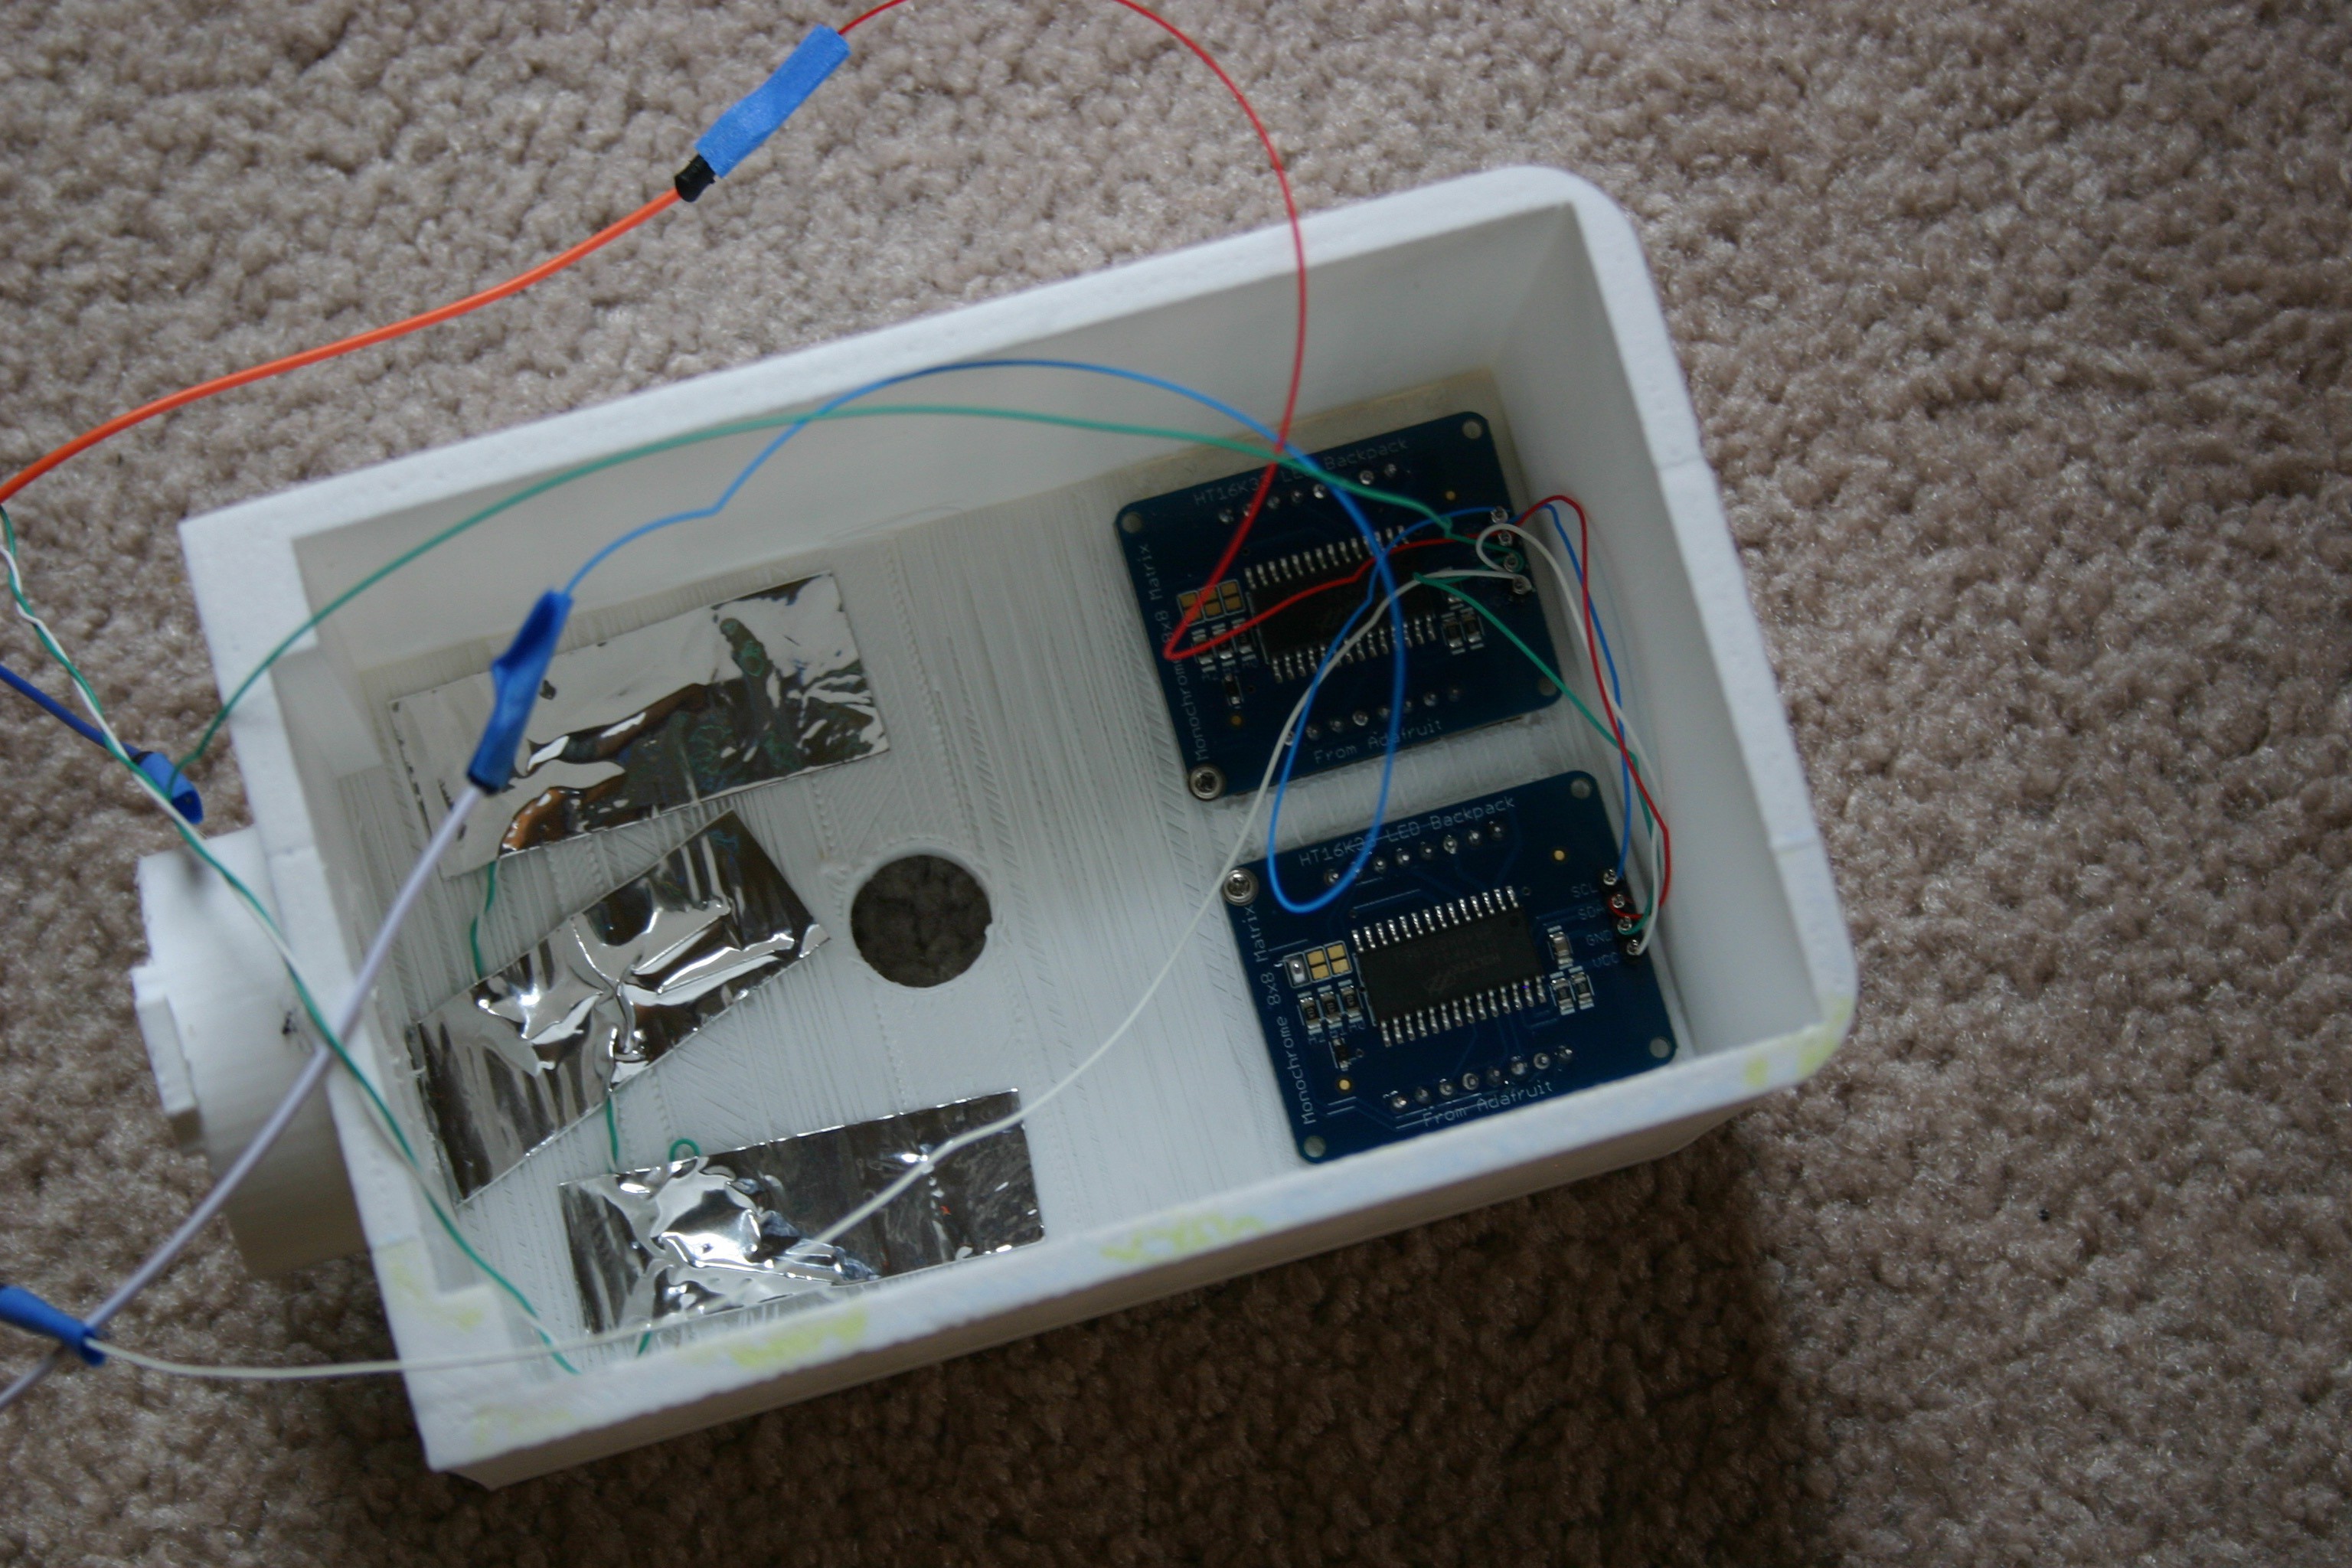
To make Mrs. Claus smile, you just have to stand more or less in front of her--within 15 feet (actually 10 feet, unless you like to stand in traffic) and smile.

Santa will turn his head to face you, point and start the ferris wheel--if you are a child standing in the child zone facing the ferris wheel (an adult bending down into the "child zone" will work too).

f3d - 48.52 kB - 07/19/2018 at 20:45

Download

Standard Tesselated Geometry - 1.06 kB - 07/19/2018 at 20:45

Download

f3d - 63.23 kB - 07/17/2018 at 17:34

Download

Standard Tesselated Geometry - 15.51 kB - 07/17/2018 at 17:34

Download

ino - 959.00 bytes - 07/17/2018 at 17:31

Download

View all 19 files

  • 2 × Google AIY Vision kit
  • 3 × Arduino Uno
  • 2 × Adafruit 8 x 8 blue led matrix
  • 1 × Adafruit 8 x 8 mini red led matrix
  • 2 × blue led

View all 7 components

  • Enhancing the Blinder

    Mike Rigsby07/19/2018 at 20:52 0 comments

    I needed something more permanent than a sheet of paper to tweak the blinder's upward vision, so I 3d printed an enhanced shield.

    I taped this in place using masking tape to see if it worked as I desired.

    It worked great--so I melted it into place using a soldering iron.

    With the elf sitting on the box, the camera lens is only visible if your head is not more than 42 inches from the ground.

  • Managing Vision in the Real World

    Mike Rigsby07/18/2018 at 19:28 0 comments

    The display will operate evenings in December, from 5:30 P.M. until 9 P.M. Light outside on the sidewalk will vary from bright dusk to artificial illumination only. Viewers on the sidewalk will be lit by a post top street light and display illumination shining through the store window.

    Here is a sketch of the situation.

    In a normally lit room, the AIY vision camera can detect a face as much as 20 feet from the camera. This distance decreases as the level of lighting decreases. My first attempt at a "blinder" for the child zone works to about six feet from the window, but adults can be detected standing at 8 feet (possible if they are standing by the tree, but not in the street). I taped a sticky paper to the "blinder" and adjusted it to increase the adult cutoff distance. Essentially, if you can see the lens, it can see you.

    I'll need to modify the blinder.

  • Child Detector

    Mike Rigsby07/17/2018 at 17:24 0 comments

    I wanted to create a "child zone" that would be activated by kids.

    The "Child Zone" is active whenever a face is detected (no smile necessary), but the face must be not more than 46 inches from the ground and the face must be facing the AIY camera. 

    A 3d printed "U shape" bracket holds the photoresistor above the Google AIY vision kit's lamp. The bracket can be taped to the AIY cardboard box.

    The 3d printed housing for the AIY kit involves a box with a hole to hold the kit and a "blinder shelf" that limits the camera's upward visibility while providing a seat for a decorative elf.

    The box is mounted to the wall using a wood screw, then the AIY kit is placed inside.

    The seat/blinder is placed on top of the box (a 3 mm screw on the back can be used to tighten the seat), then an elf is place atop the platform.

    For "smiling Mrs. Claus" there is a sign that says "Smile :) Mrs. Claus Smiles Back." My current thinking is that the child zone will be unmarked--a discovery area. It should be fun to see if "word gets around" that there is a hidden activation zone.

  • Mrs. Claus Smiling

    Mike Rigsby07/16/2018 at 18:36 0 comments

    "Mrs. Claus Smiling" is an easy to build interactive piece--you smile at her, she smiles back, even through a glass window. The Google AIY vision kit does the hard work.

    When you assemble the Google AIY vision kit, the default software is a "joy detector." If you stand in front of the camera (up to 20 feet in decent lighting), the kit will detect a smile. The light on top of the kit is off when no faces are seen, blue when a face is detected and yellow when a smile is detected.  A photoresistor placed on top of this light yields 5.4K with no face, 1.4K with a face detected and .5K with a smile detected. Your values will vary depending on the photoresistor and ambient lighting. I recommend enclosing the AIY detector in a box so that external lighting will not be a factor.

    Here's the schematic for the system.

    Mrs. Claus started as a drawing created by my wife, Annelle.

    The head was formed in polymer clay, 3d scanned on a Makerbot Replicator, then imported into Tinkercad. In Tinkercad, a square hole was created for the mouth and two holes bored through for they eyeglasses. On the back side, two "led size' indentations were bored behind the eyes--to allow her beautiful blue eyes to show when she smiles.

    A shadowbox was acquired from Amazon.com and a hole cut in the mounting fiberboard.

    Her painted head was glued to the front of the fiberboard while eyes and mouth were duct taped to the rear. The collar and dress for Mrs. Claus were fashioned using polymer clay, then baked, painted and glued to the front.

    The robot head which houses the AIY camera system was fashioned to look similar to "Robert the Robot's Head." Robert the Robot was a toy robot from the 1955 era.

    The nose houses the camera. Adafruit 8 x 8 blue 1.2" matrix squares were used for the eyes. Connecting multiple eyes (left and right) to the same I2C bus merely requires soldering a small jumper on the back of the matrix square, instructions here.  The large head is formed using two pieces and they were melted together using a soldering iron.

    Three color changing leds--slow change--were inserted in the mouth area and held in place using duct tape.

    The eyes were then added.

    The AIY kit was placed inside the head and wires routed through the neck and robot body. The system in the display looks like this.

    Here she is in operation.

View all 4 project logs

Enjoy this project?

Share

Discussions

Similar Projects

Does this project spark your interest?

Become a member to follow this project and never miss any updates