 fereshteh
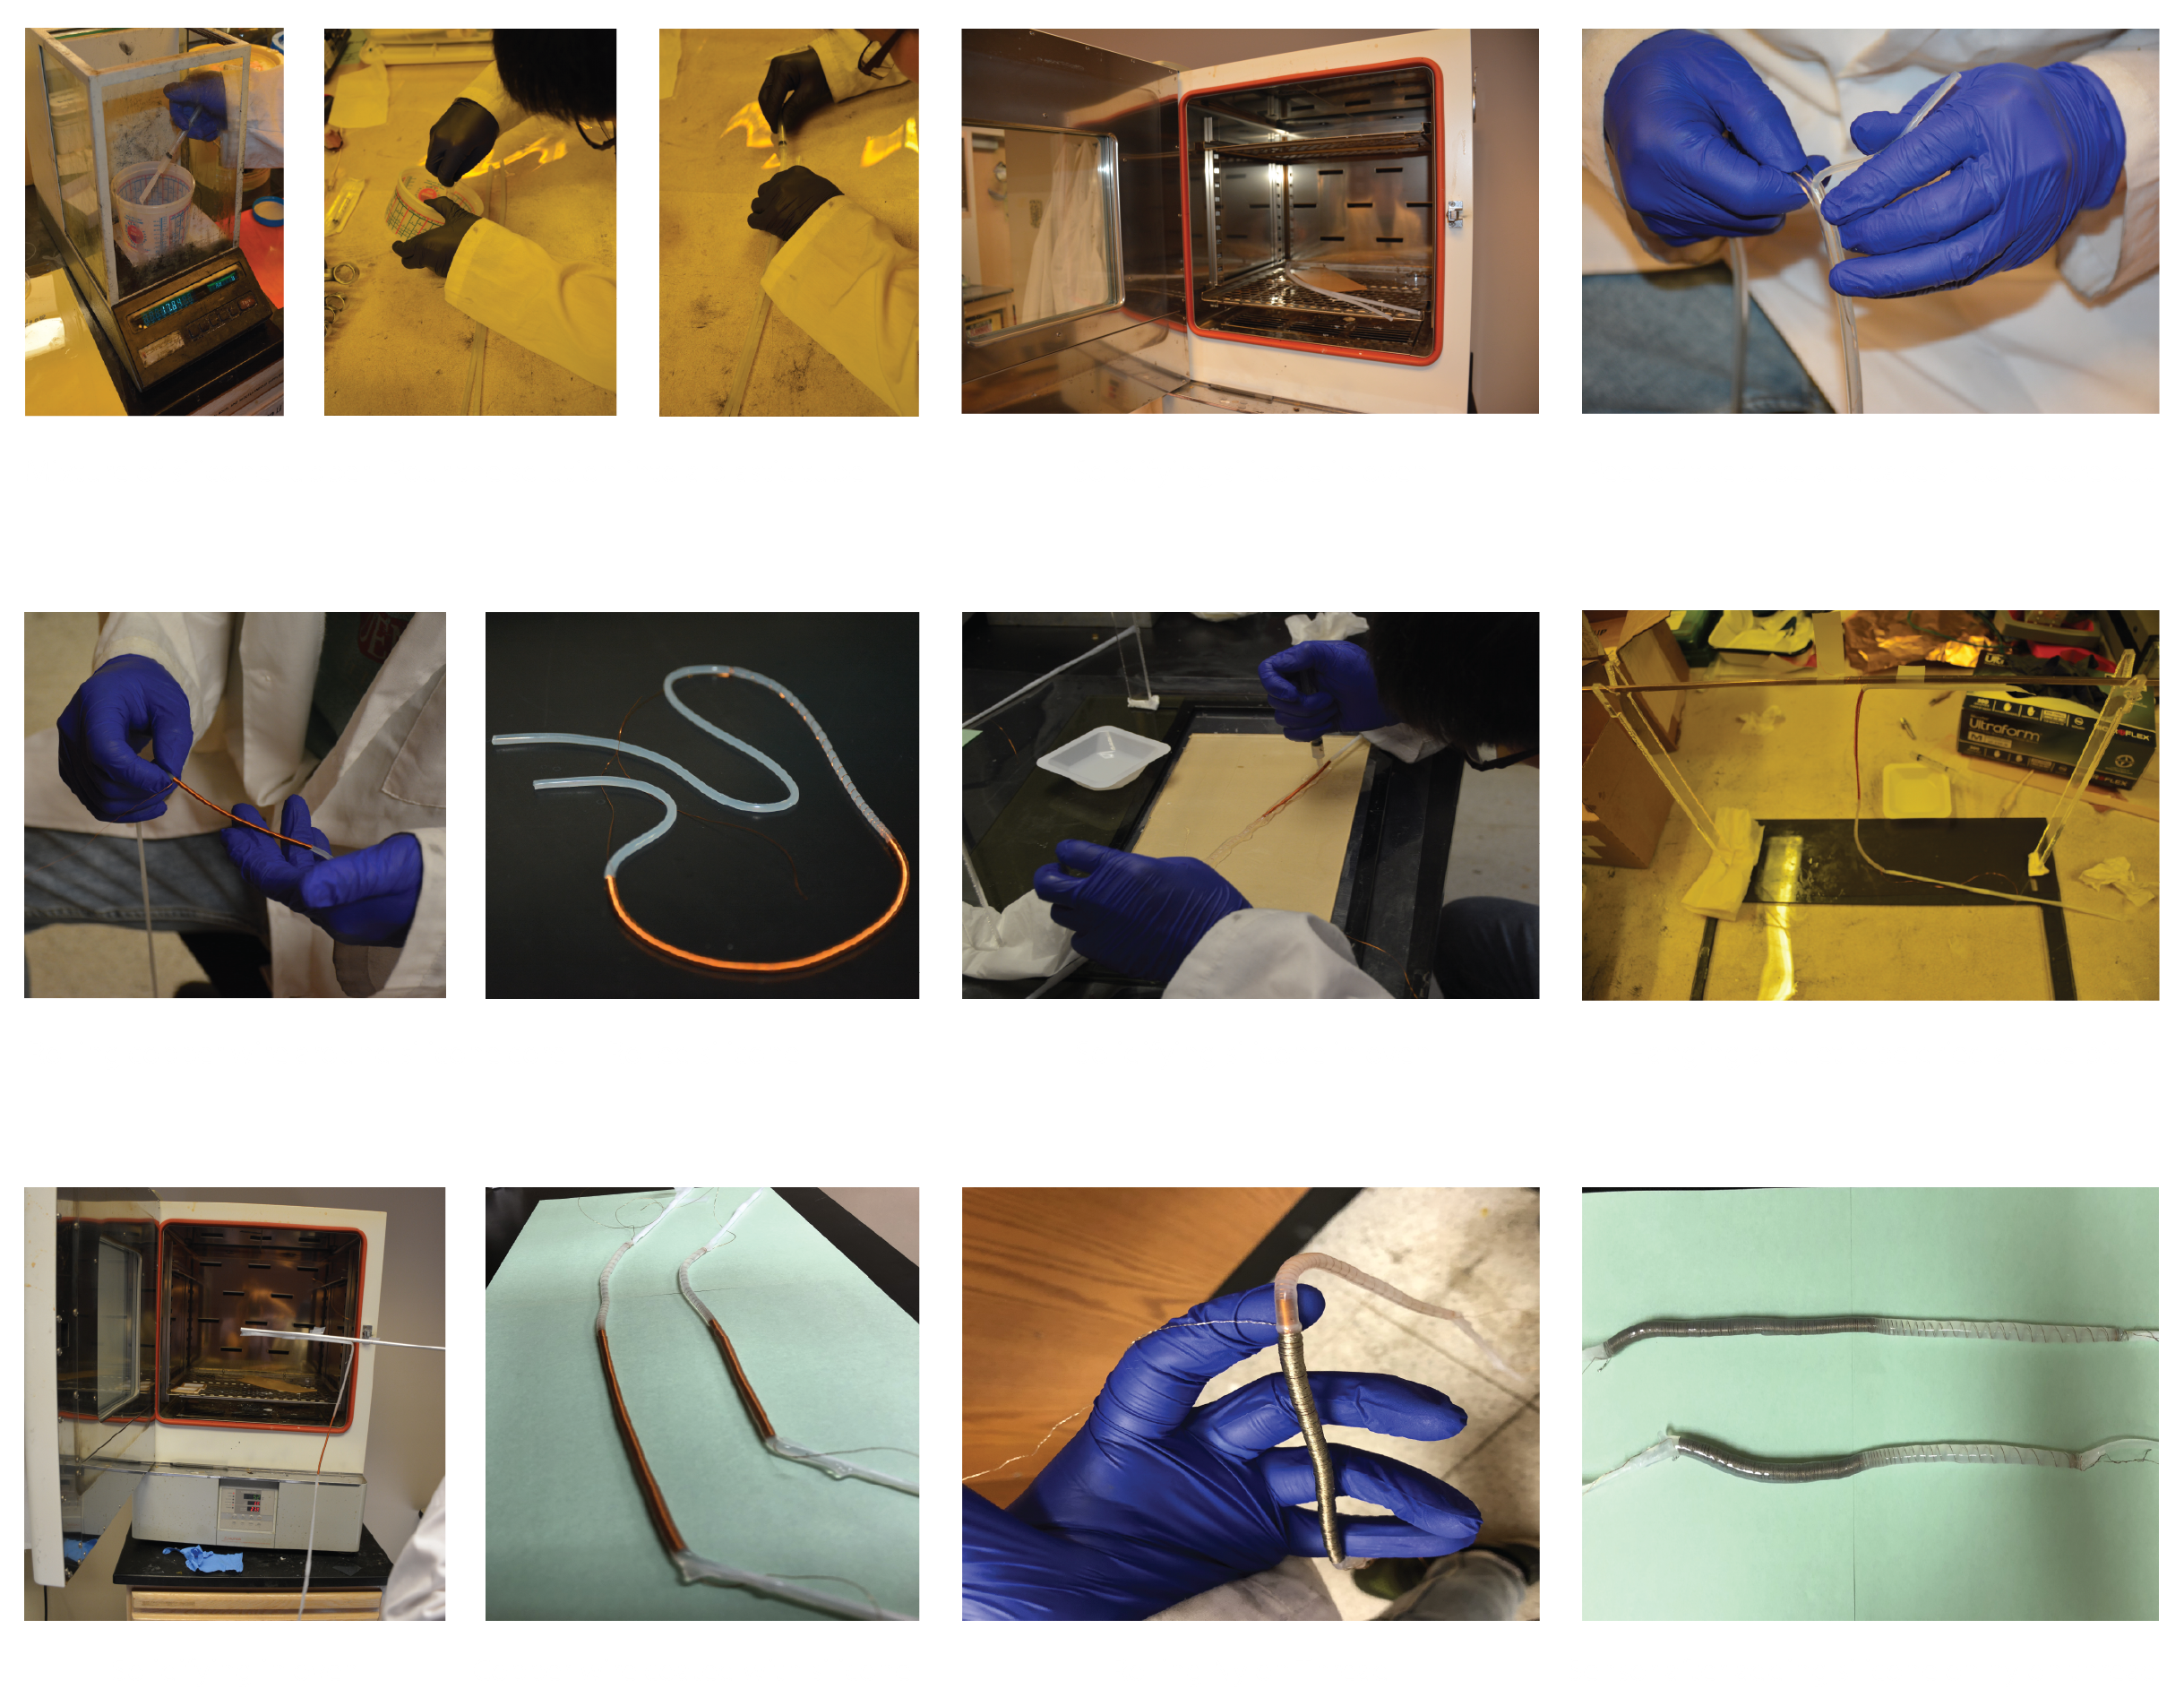
Step 1 - Silicone rubber as dielectric material:
For the proper stiffness, silicone rubber and Polydimethylsiloxane(PDMS) were mixed. We have chosen low-cost commercial materials to allow users for manual fabrication in any environment even out of lab environment. Commercial silicone rubber and PDMS have two parts, a base (B) and a curing (C) agent. For the silicone rubber, these two parts are mixed in 1:1 weight ratio and stirred for 3 minutes. For PDMS, the two parts are mixed in 10:1 weight ratio (B:C) and stirred for 5 minutes. Then, both solutions are mixed in a 4:1 weight ratio (silicone:PDMS) and stirred for 3 minutes.
Step 2 - Inner core tube:
The prepared solution in step 1 is poured into a plastic tube. The length and thickness of core layer is up to your project. In our final optimized model, we made such silicone core layer with 2.5 mm thickness and 30 cm length. Silicone got solidified in an oven at 60 °C for 5 minutes. It also, can be cured in room temperature in 4 hours. At this stage we peeled the plastic tube, resulting in a solid pure tube-shape silicone rubber.
Step 3 - Winding Copper thread around core layer:
A commercially available conductive Polyvinyl Alcohol (PVA) coated Copper wire with 0.17 mm diameter was tightly wound spirally around the core silicone rubber. Such spiral winding should be dense enough to provide maximum contact area between each single turn of conductive thread around the dielectric material.
Step 4 - Encapsulating the wound copper wire with silicone rubber:
We laid down the assembly on a flat surface and used a syringe to apply the prepared silicone solution in step 1 over the entire surface of prepared assembly in step 3. This structure was then hung vertically for five minutes and then cured for five minutes in an oven at 60°C.
Step 5: Winding Nylon thread around assembly:
A commercially-available silver-coated nylon yarn with 0.18mm diameter is used as the outer electrode. It was also tightly wound around the whole assembly. The fabrication process is similar to step 3.
Step 6 - Encapsulate the whole assembly with silicone rubber solution:
We repeated step 4 to coat the entire assembly with silicone rubber solution. The final prototype has 4.5 mm thickness and 30 cm length.
We repeated step 4 to coat the entire assembly with silicone rubber solution. The final prototype has 4.5 mm thickness and 30 cm length.
Discussions
Become a Hackaday.io Member
Create an account to leave a comment. Already have an account? Log In.