 Fluxly
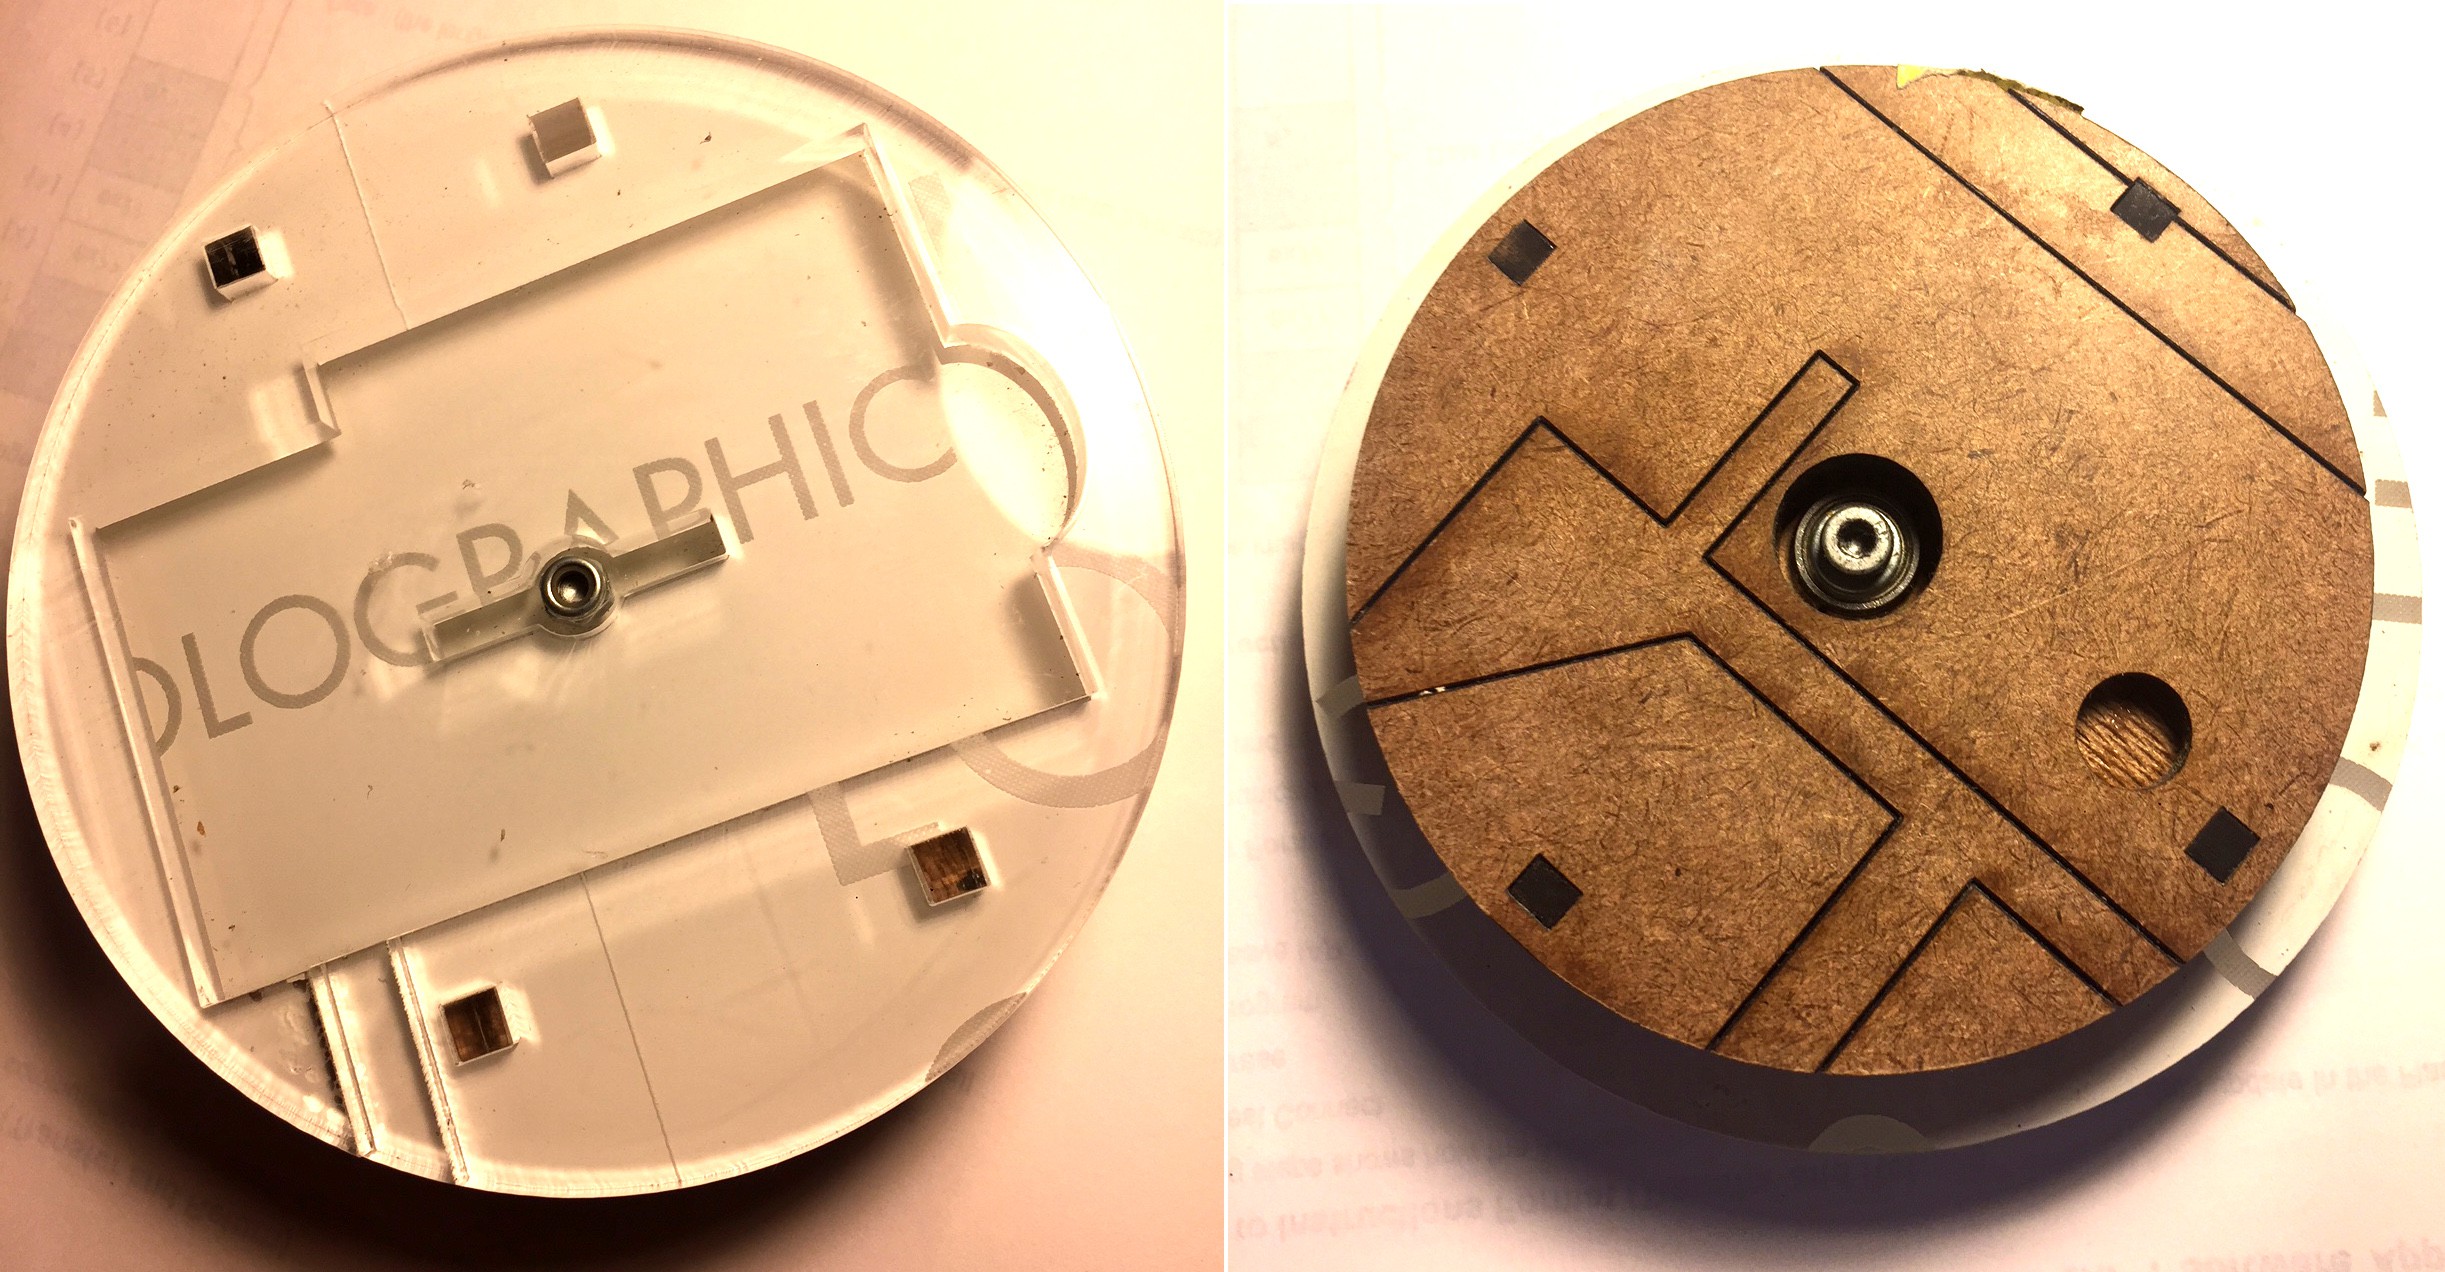
The first step in making the Fluxly controller was to make a jig that would allow the microcontroller to spin. I laser cut a couple of acryliccircles with a cutout and a masonite base to hold the ESP32 module and a battery. A skate bearing is press fit in the center.
The sensor is a MPU9250 gyro/accelerometer. It has to be centered on the circle so it sits on top of the ESP32 module. I'm using a module that I made called the Fluxamasynth-32; it has an additional sound-making chip on board that I'm not using here.
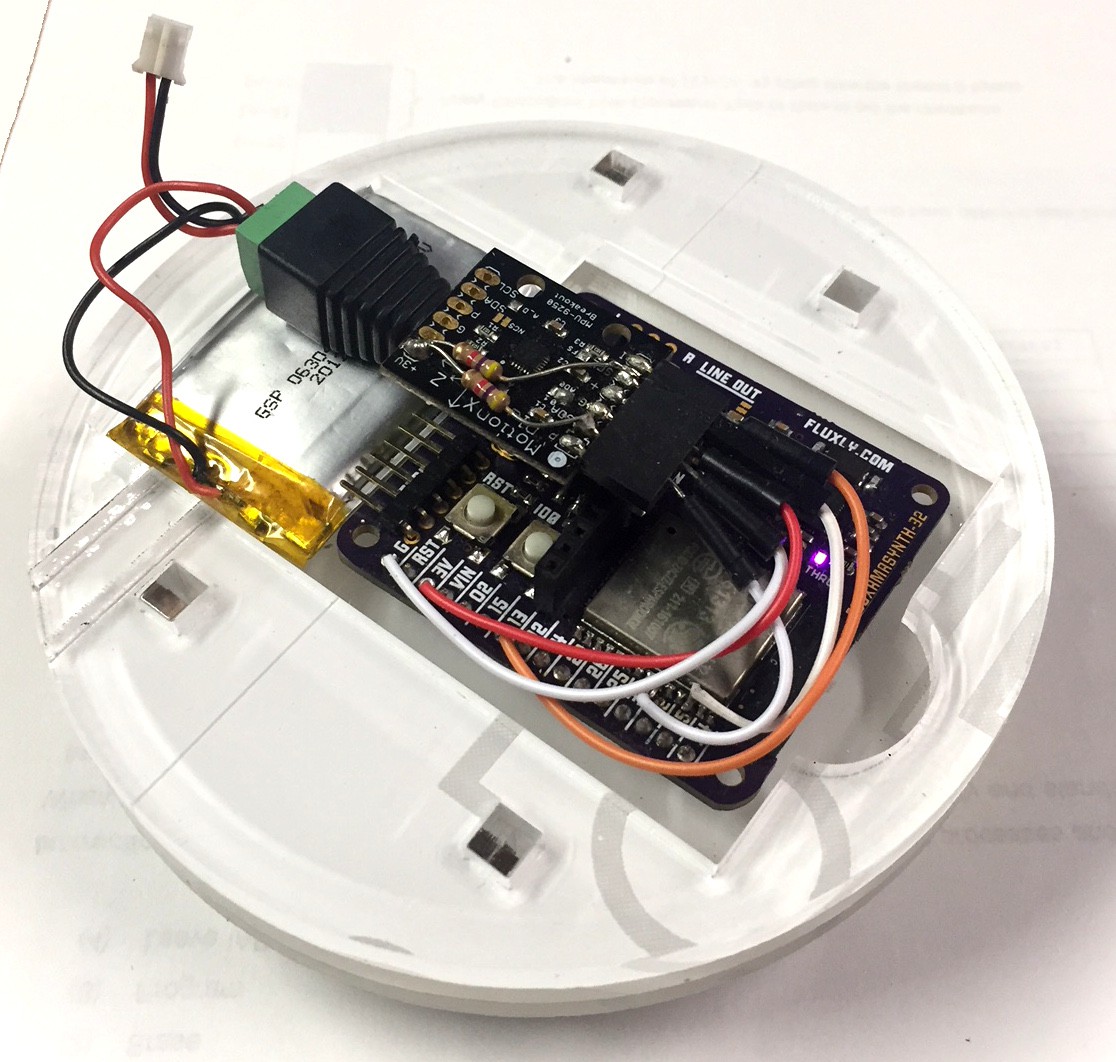
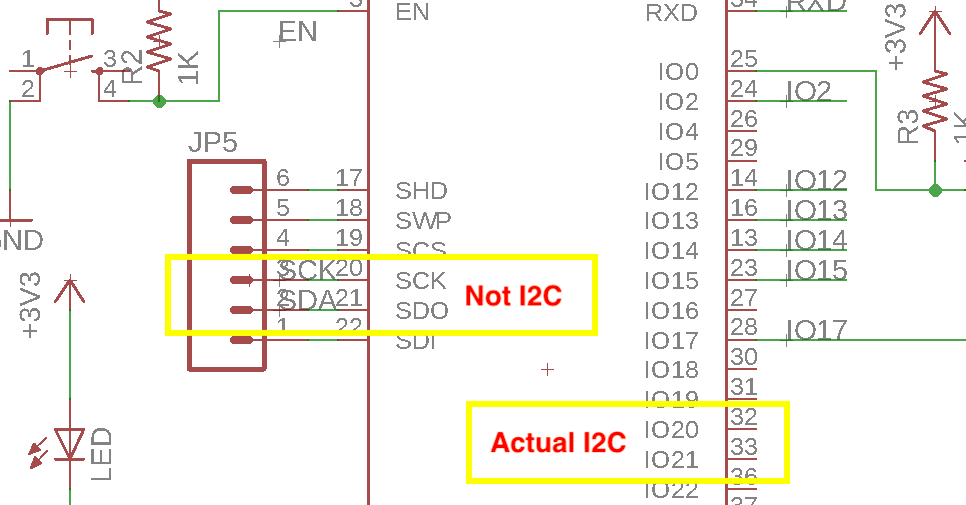
Unfortunately the EAGLE part I was using for the ESP32 module had the I2C lines marked incorrectly (I may have drawn it!) so I pulled the wrong pins out to the header. Instead I used prototyping wire soldered directly to the pins on the module.
Here's what it looks like spinning:
Once I had the microcontroller spinning, the next step was to get the ESP module talking to the Pure Data patch running on the computer. I decided to use Wifi rather than Bluetooth, since Pure Data is well equipped to handle messages over the network. I set up a router running OpenWRT as an access point, which each Fluxum will connect to. The laptop running the patch will also connect to the router.
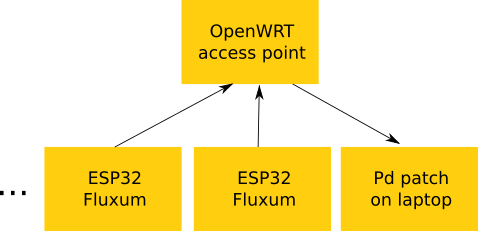
The idea is to broadcast UDP packets over wifi, using a simple 6 byte protocol: fluxum_id, command, data1, data2, data3, data4. I started with the Arduino example code that comes with the Wifi library and modified to send 6 bytes with random data, just to get them talking.
 #include <WiFi.h>
#include <WiFiUdp.h>

// WiFi network name and password:
const char * networkName = "dd-wrt";
const char * networkPswd = "**********";

byte packetBuffer[ 6];

byte command = 1;
byte id = 2;

//IP address to send UDP data to:
// either use the ip address of the server or
// a network broadcast address
const char * udpAddress = "192.168.1.255";    // broadcast
const int udpPort = 3001;

//Are we currently connected?
boolean connected = false;

//The udp library class
WiFiUDP udp;

void setup(){
  // Initilize hardware serial:
  Serial.begin(115200);

  //Connect to the WiFi network
  connectToWiFi(networkName, networkPswd);
}

void loop(){
  if (connected){
    //Send a packet
    udp.beginPacket(udpAddress,udpPort);
    packetBuffer[0] = id;
    packetBuffer[1] = command;
    packetBuffer[2] = random(255);
    packetBuffer[3] = random(255);
    packetBuffer[4] = random(255);
    packetBuffer[5] = random(255);
    udp.write(packetBuffer, 6);
    udp.endPacket();
  }
  delay(30);
}

void connectToWiFi(const char * ssid, const char * pwd){
  Serial.println("Connecting to WiFi network: " + String(ssid));

  WiFi.disconnect(true);
  WiFi.onEvent(WiFiEvent);
  WiFi.begin(ssid, pwd);
  Serial.println("Waiting for WIFI connection...");
}

void WiFiEvent(WiFiEvent_t event){
    switch(event) {
      case SYSTEM_EVENT_STA_GOT_IP:
          Serial.print("WiFi connected! IP address: ");
          Serial.println(WiFi.localIP());
          udp.begin(WiFi.localIP(),udpPort);
          connected = true;
          break;
      case SYSTEM_EVENT_STA_DISCONNECTED:
          Serial.println("WiFi lost connection");
          connected = false;
          break;
    }
}
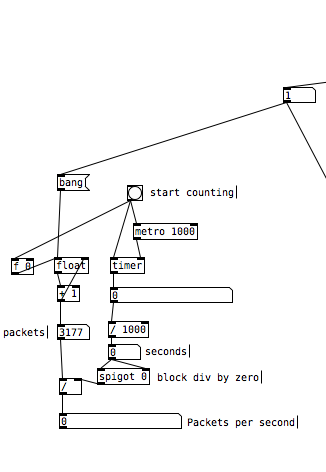
On the Pure Data side, the netreceive object listens for data on a particular port, 3001 in this case. It receives 5 bytes and the list object splits them into individual outlets. The id byte routes the data to a particular input, command is as yet unused, and the 4 data bytes get added back together. Here's the netreceive patch added to the YakShaver engine:

There's a packet counter at the lower left that calculates how many packets per second are coming in. The goal is to reach 60 packets per second (currently around 30).
Next step is to add the gyro sensor.
Discussions
Become a Hackaday.io Member
Create an account to leave a comment. Already have an account? Log In.
anyone simple example of a schema and a code switch midi button for patch change control to build a fluxmasynth
Are you sure? yes | no