 Thane Hunt
The robot has 3 main systems: Frame, muscles and valves and pump, and control.
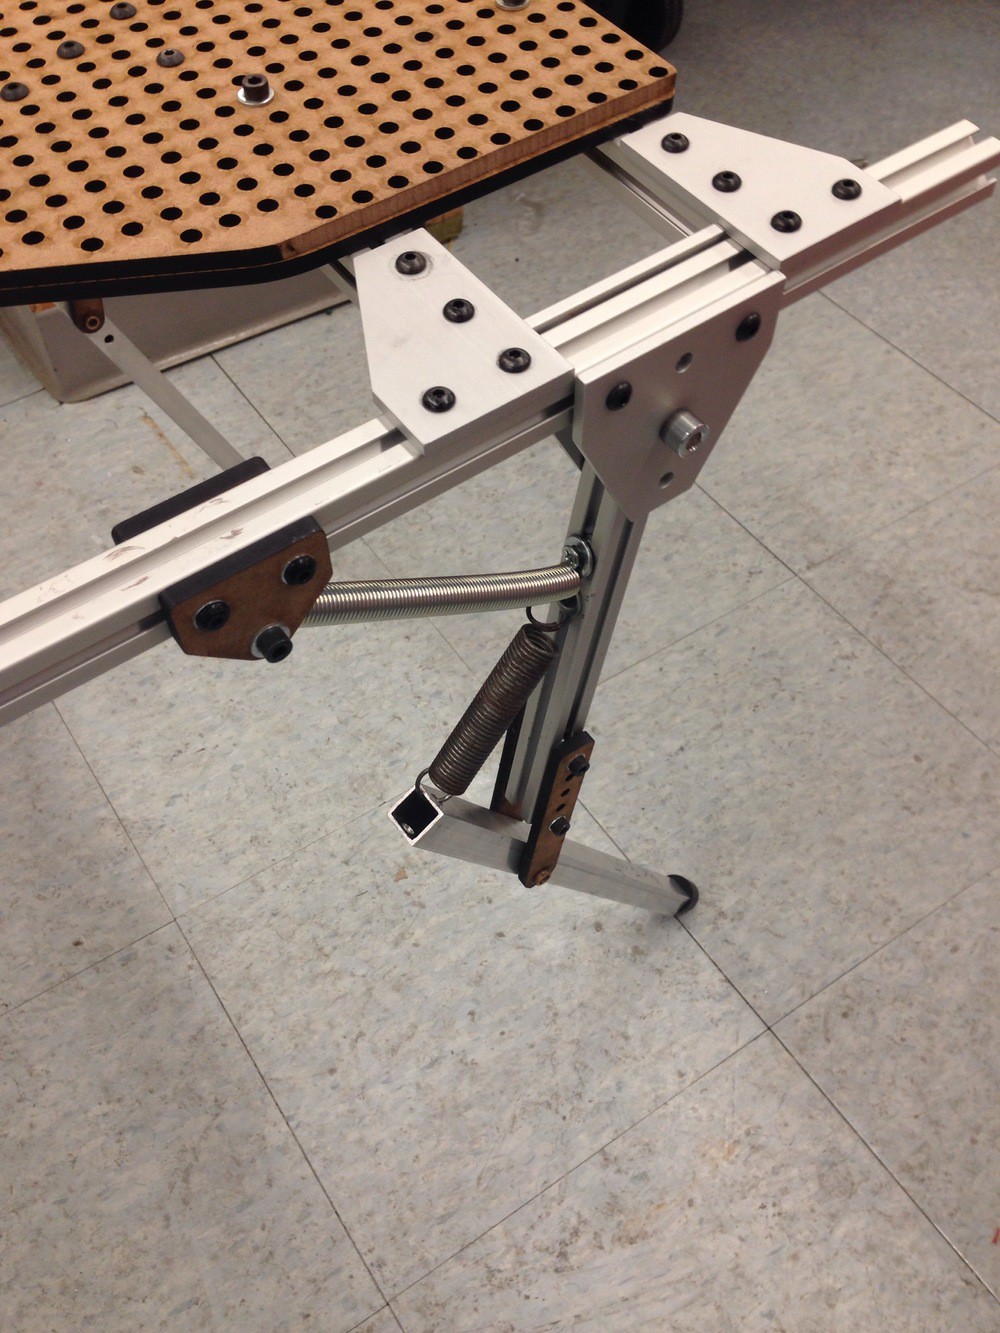
FRAME
The frame of the robot was constructed using laser cut MDF, custom aluminum hardware, and various 80/20 components. Essentially, the frame is little more than a simplistic skeleton, with four pivot joints (knees) actuated using powerful fluidic muscles, and four passive (non-powered) but spring-loaded joints at the hips. The feet are just little hard rubber furniture feet. The picture below gives a good sense of the basic building blocks of this robot. Note that in the image below, no muscles are attached.
The video below shows a cool time-lapse we did of re-configuring the robot for different experiments. As you can see, with fairly minimal effort we can totally change the anatomical rations of the robot.
MUSCLES, VALVES, AND PUMP
The muscles that move the robot are fairly straight-forward - a muscle is just a thick-walled latex tube with a fabric sheath around it. For example, an 8" long muscle is made by taking an 8" length of 3/8" wall-thickness latex tube and capping it at one end using a normal PVC cap fitting available at any hardware store. Next, a 12" length of fabric tube is made by cutting out a 12" x (Pi*latex tube diameter) piece of strong parachute fabric and sewing it down the long-side. The latex tube is then inserted into the fabric tube, such that each end of the latex tube is just sticking out of the ends of the fabric tube. The result is a very bunched-up, wrinkly fabric sheathing around a latex tube. Remember how we capped one side of the latex tube, and not the other? If we now introduce around 100 psi (don't do this without proper safety measures) into the latex tube, it will try to expand like a balloon in all directions. The fabric sheathing won't allow this to happen. It will prevent any RADIAL expansion (the latex tube diameter can't increase) but it will allow LONGITUDINAL expansion (the wrinkles in the fabric can stretch out!) of the muscle.
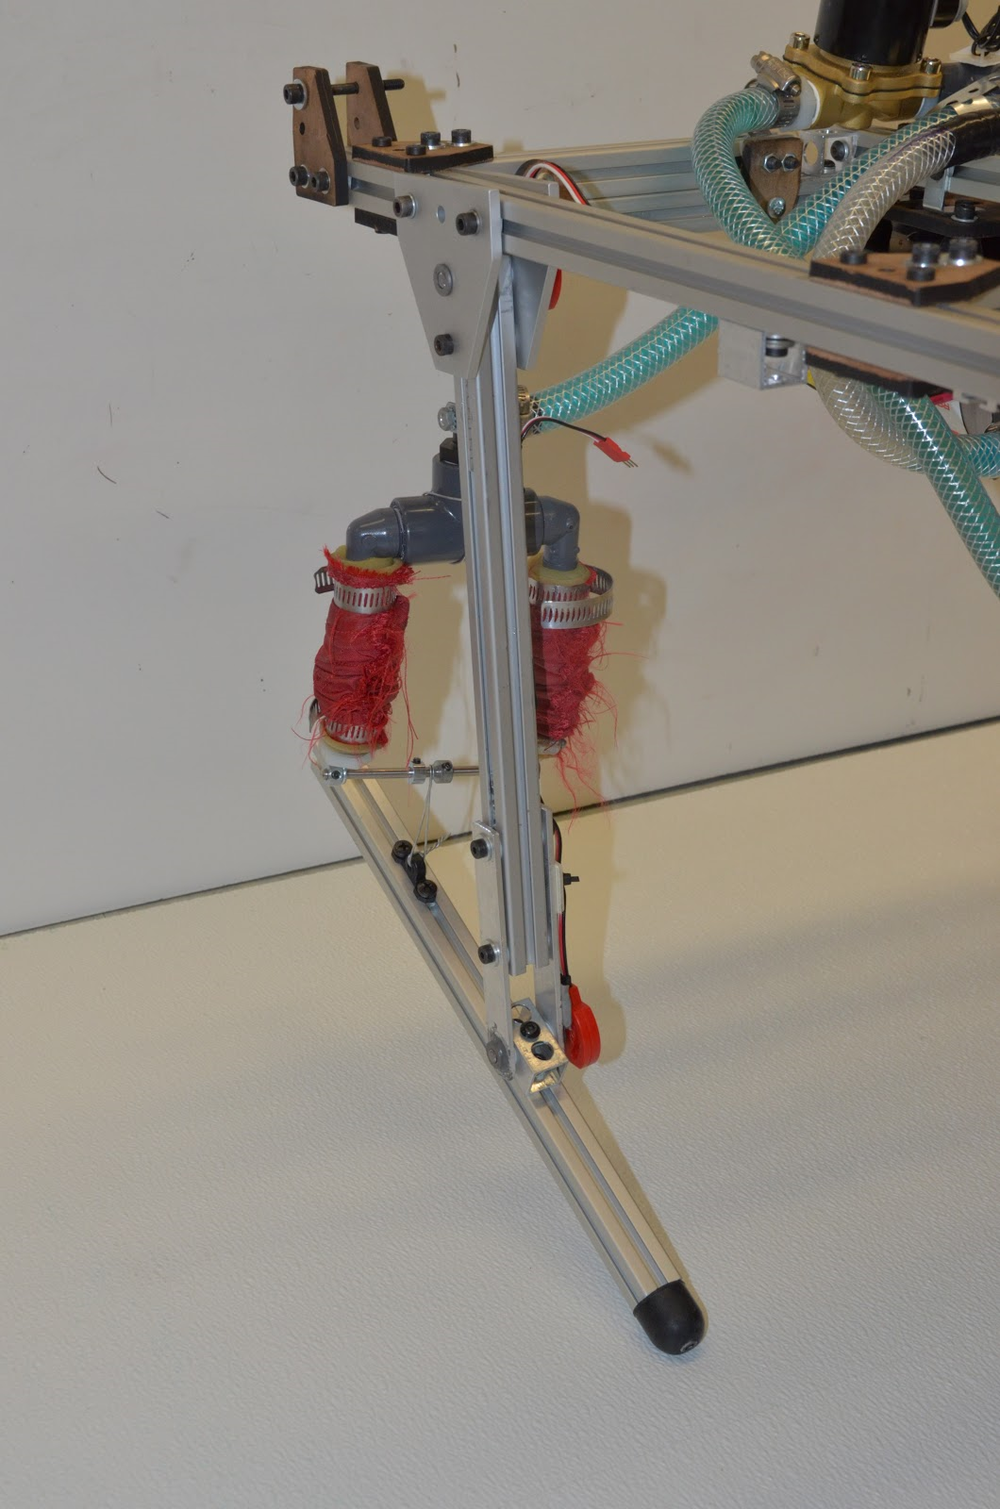
Below is a great picture depicting one iteration of the robot's legs. Here, we were experimenting with using two shorter muscles in parallel. It looks cool, but we later moved on to using a single, larger muscle per leg.
So now we have this muscle that gets longer when pressurized, so what? Well, there is a reason that it takes 100 PSI to elongate the muscle. To make the muscle get longer, it must stretch the latex. That latex is very, very strong. An average person can't make a 12" length of of 3/8" wall-thickness latex tube stretch even 1". The pressure stretches that tube as much as 6".....but that stretch only lasts as long as the tube stays pressurized. The instant the pressure is allowed to leave the muscle (valve open) the latex springs back explosively, creating hundreds of pounds of force. This force can be used for good, if the muscles are securely attached to a mechanically-sound place on a robot leg.
The robot has four legs, and so we gave it four muscles. Each muscle needs to be filled with pressure, and then have that pressure released. We decided to stay simple and use singlie-acting valves. You can buy fancy valves that can both introduce and remove pressure....but that wasn't in the budget. So four muscles, and two valves per muscle gives us a total of 8 valves. To have control over each leg individually was super cool, but we were too heavy. We eventually realized that if the robot's leg motions were symmetrical (i.e. the front two legs do the same thing, and the rear legs do the same thing) then we can eliminate half of the valves. The final design achieve a simple bounding gait using only four valves. One pair of valves controlled the front legs, and the other pair controlled the rear legs.
This actually worked very well. If I could go back, I'd buy lower-weight valves and put in all eight. This would allow me to control the relative motion of the two front legs which might allow the robot to be able turn or even deal with uneven terrain.
We went back and forth with...
Read more »

 EK
EK
 Michael Roybal
 davidatfsg
 Cirmall
Great concept! Any plans to make it untethered?