For the second prototype, the goals were to add two more Adafruit Trellis modules to expand the button count to 64, place the prototype in an enclosure, and to write up code to test different layouts for selecting different music keys for the mapping of the notes on the controller. The three layouts we wanted to test were a circle of fifths-style layout, an isomorphic layout, and a piano-style layout.
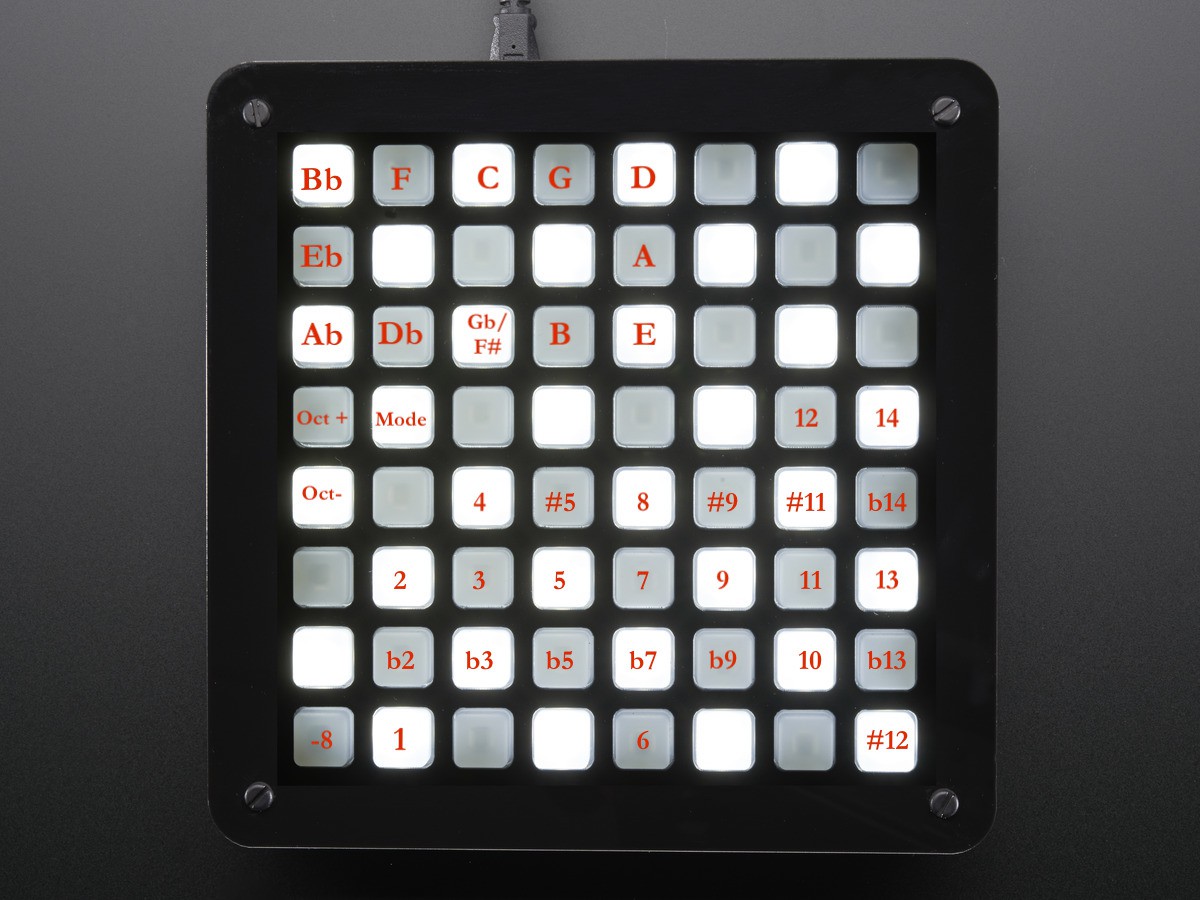
Image 1. Circle of Fifths-Style Layout.
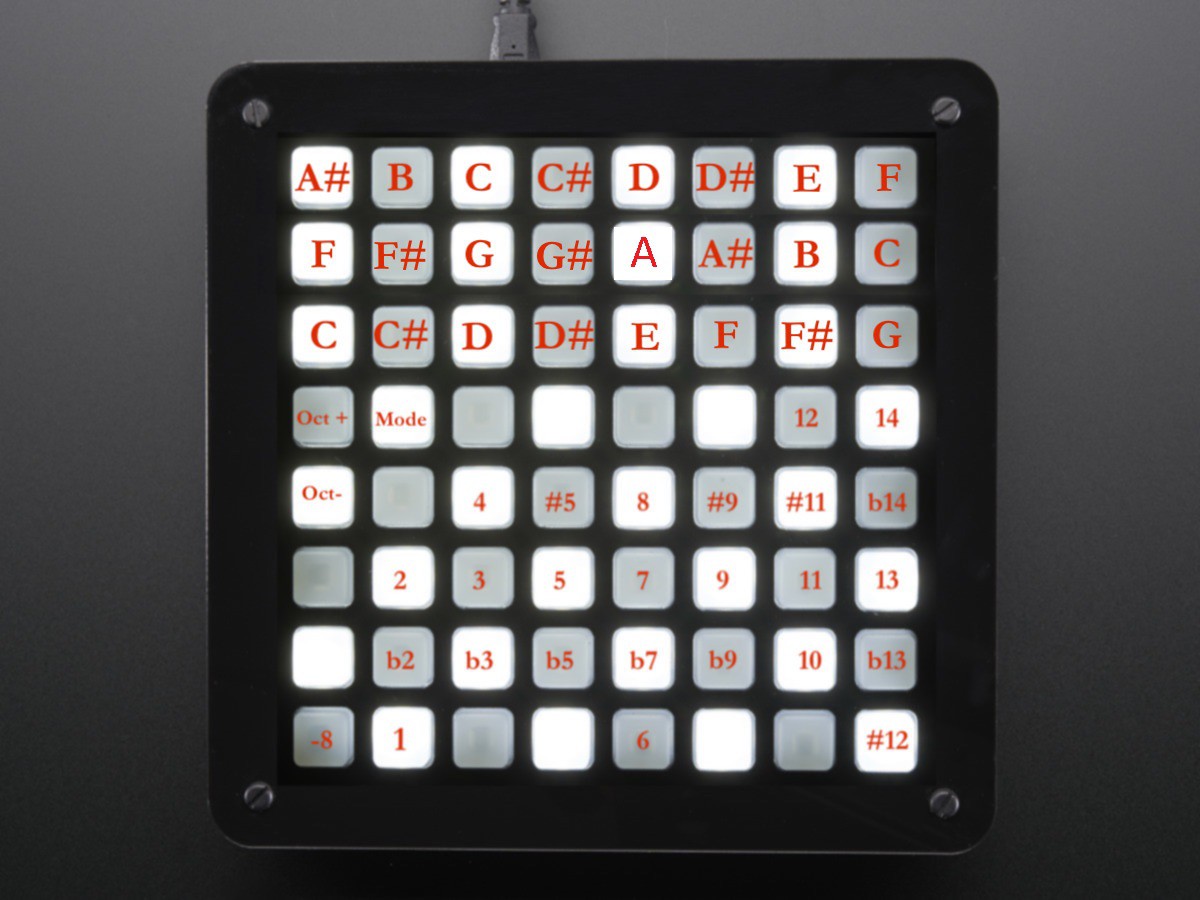
Image 2. Isomorphic Layout.

Image 3. Piano-Style Layout.
As shown in images 1-3, the top portion of the controller changes with each layout while the bottom portion remains the same. The top portion is the key selector for determining which notes the bottom buttons represent. If the key of C is selected, note 1 is C, note 3 is E, note 5 is G, etc. The button for selecting the key selector layout is the "Mode" button, and "Oct +" and "Oct -" raise and lower the octave for all the notes.
The build began with soldering the Trellis modules together:
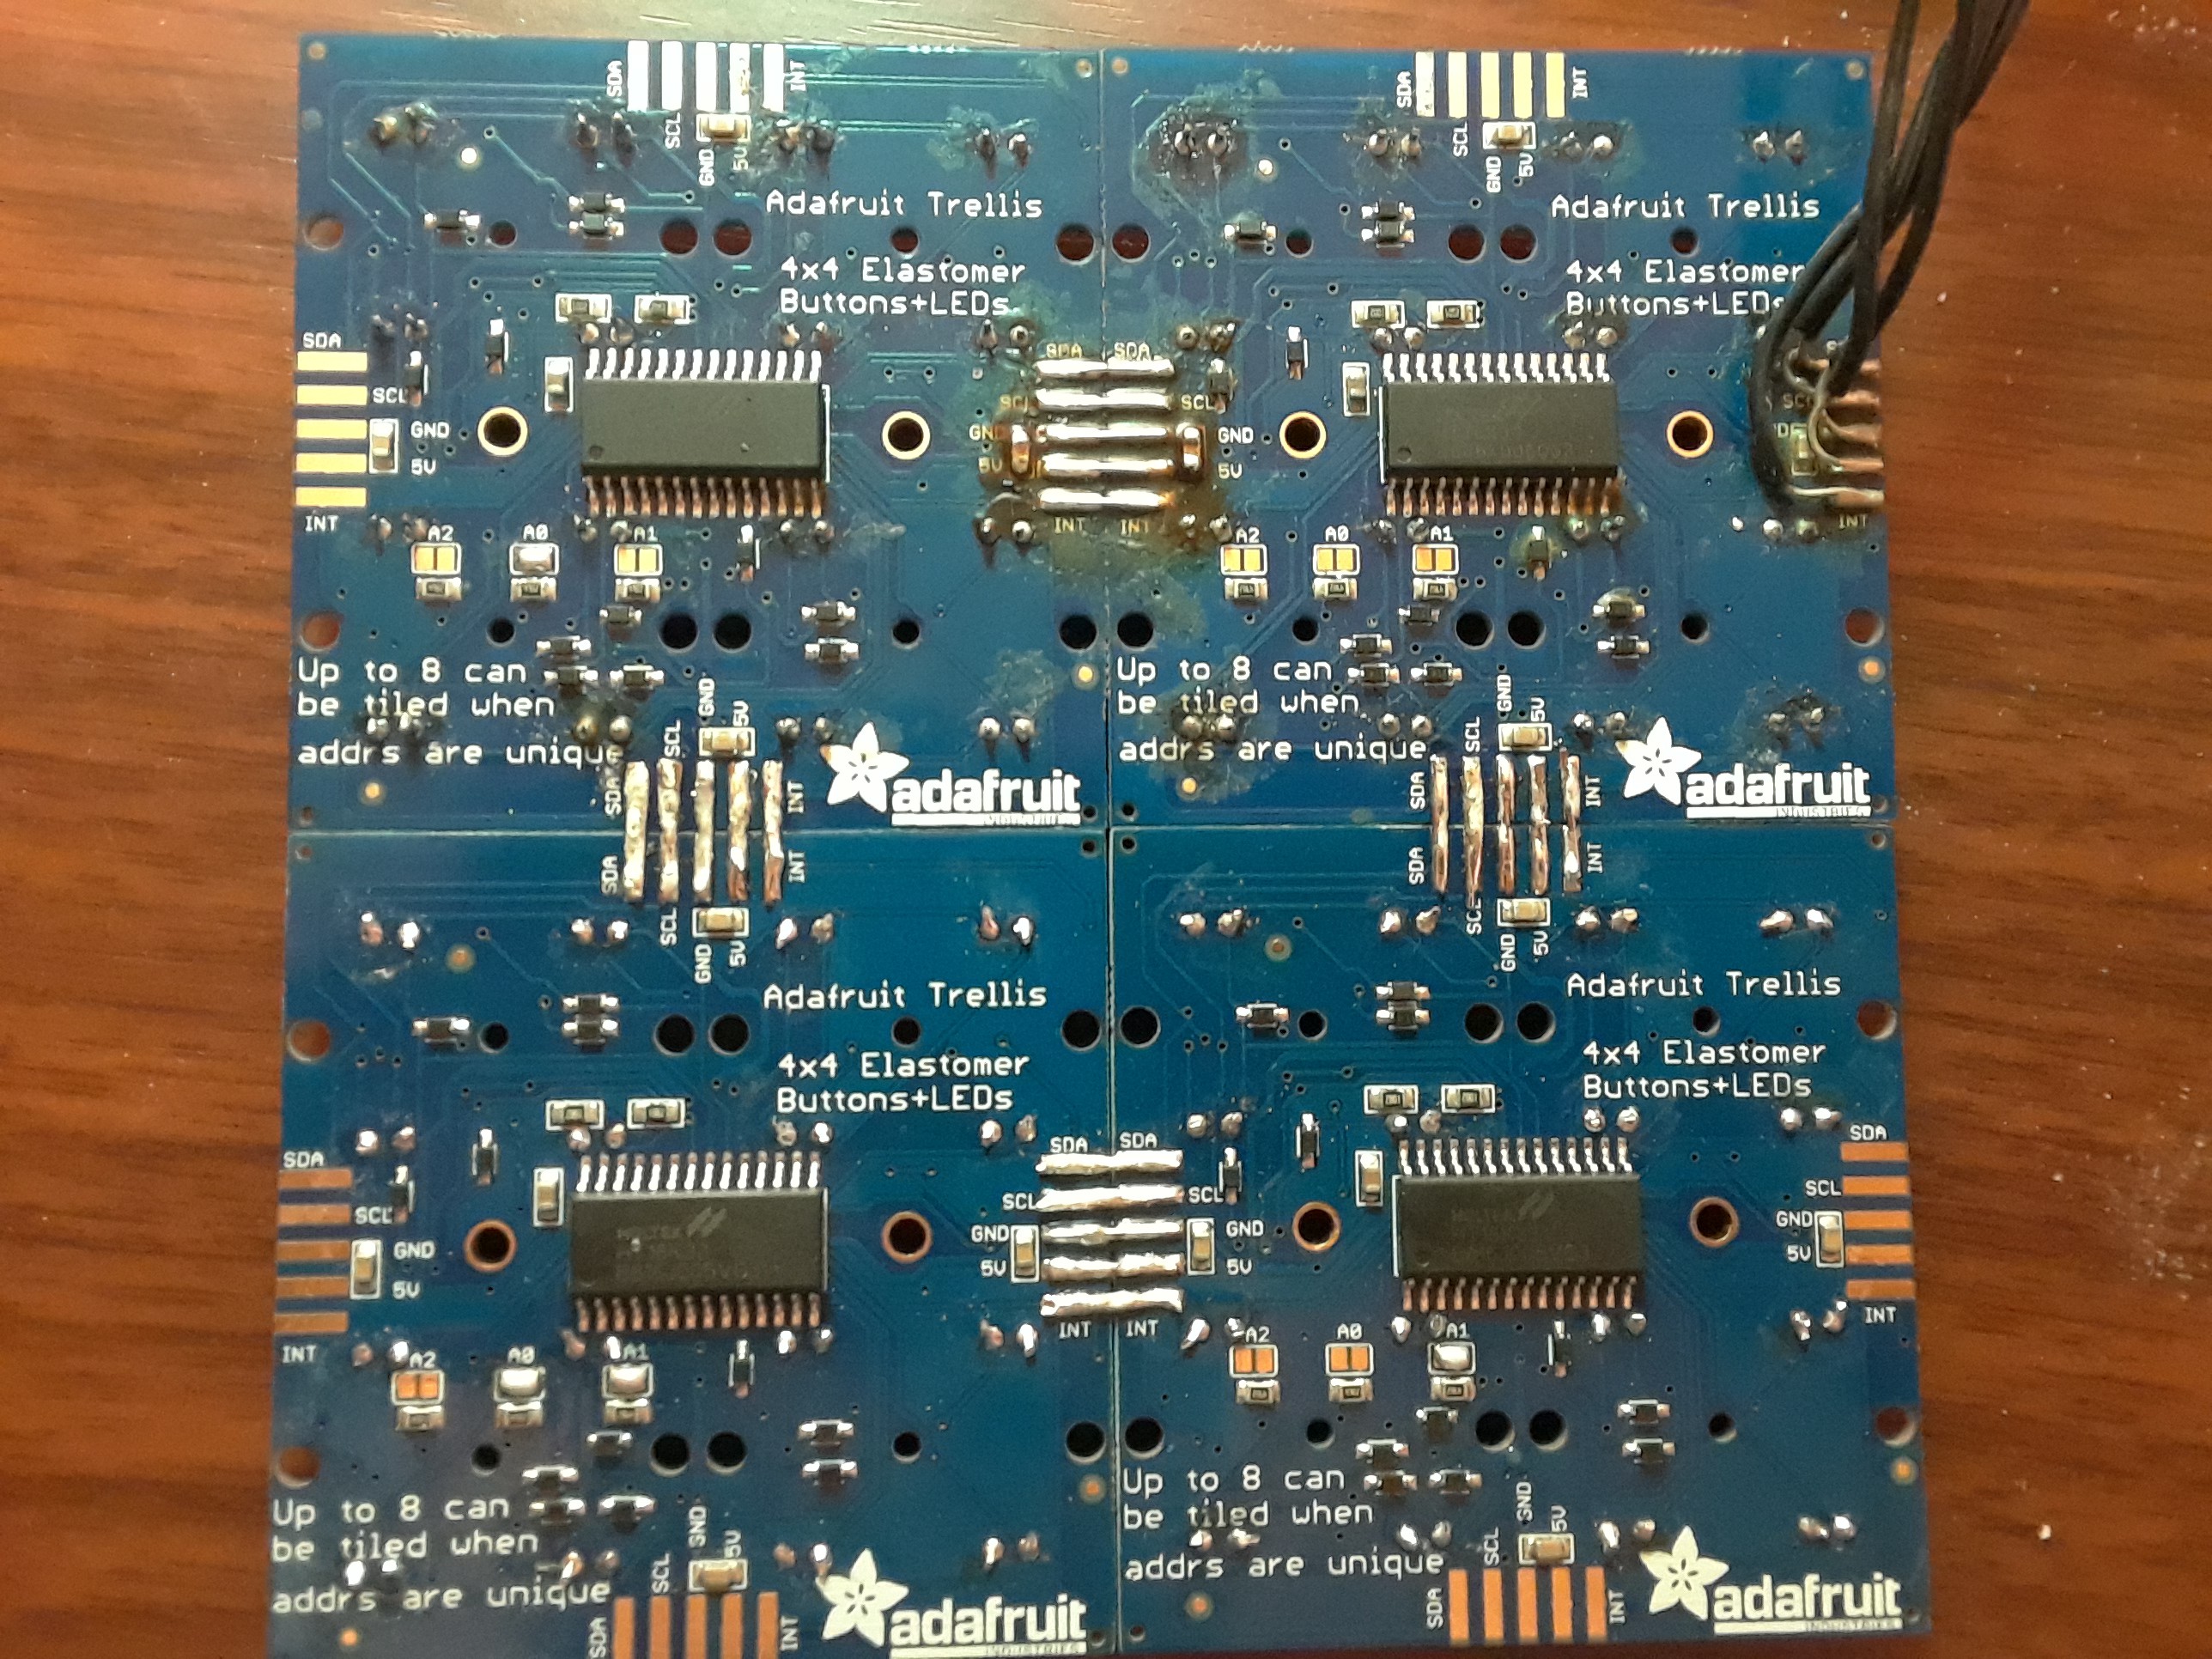
Image 4. The 4 Adafruit Trellis Modules Soldered Together. Copper wire was used to reinforce the connections between the modules.
In order to fit the Arduino Leonardo in the enclosure, the headers, the ISP connector, and the DC jack were removed. However, disaster struck when all of the copper pads where the headers were soldered to the board lifted off. In order to remedy this, the connections between the Trellis modules and the Arduino were made at different points on the board. The +5VDC connection was made to a capacitor on the Arduino, the GND connection was made to one of the solder points where the DC jack used to be, and the SCL and SDA connections were made by scraping off some of the solder mask on the vias and using some magnet wire I had lying around. So, much for a nice-looking Arduino board. It was determined that it would be better to not try to squeeze the Arduino board into the enclosure because the spacing was very tight and it wasn't really necessary for a prototype.
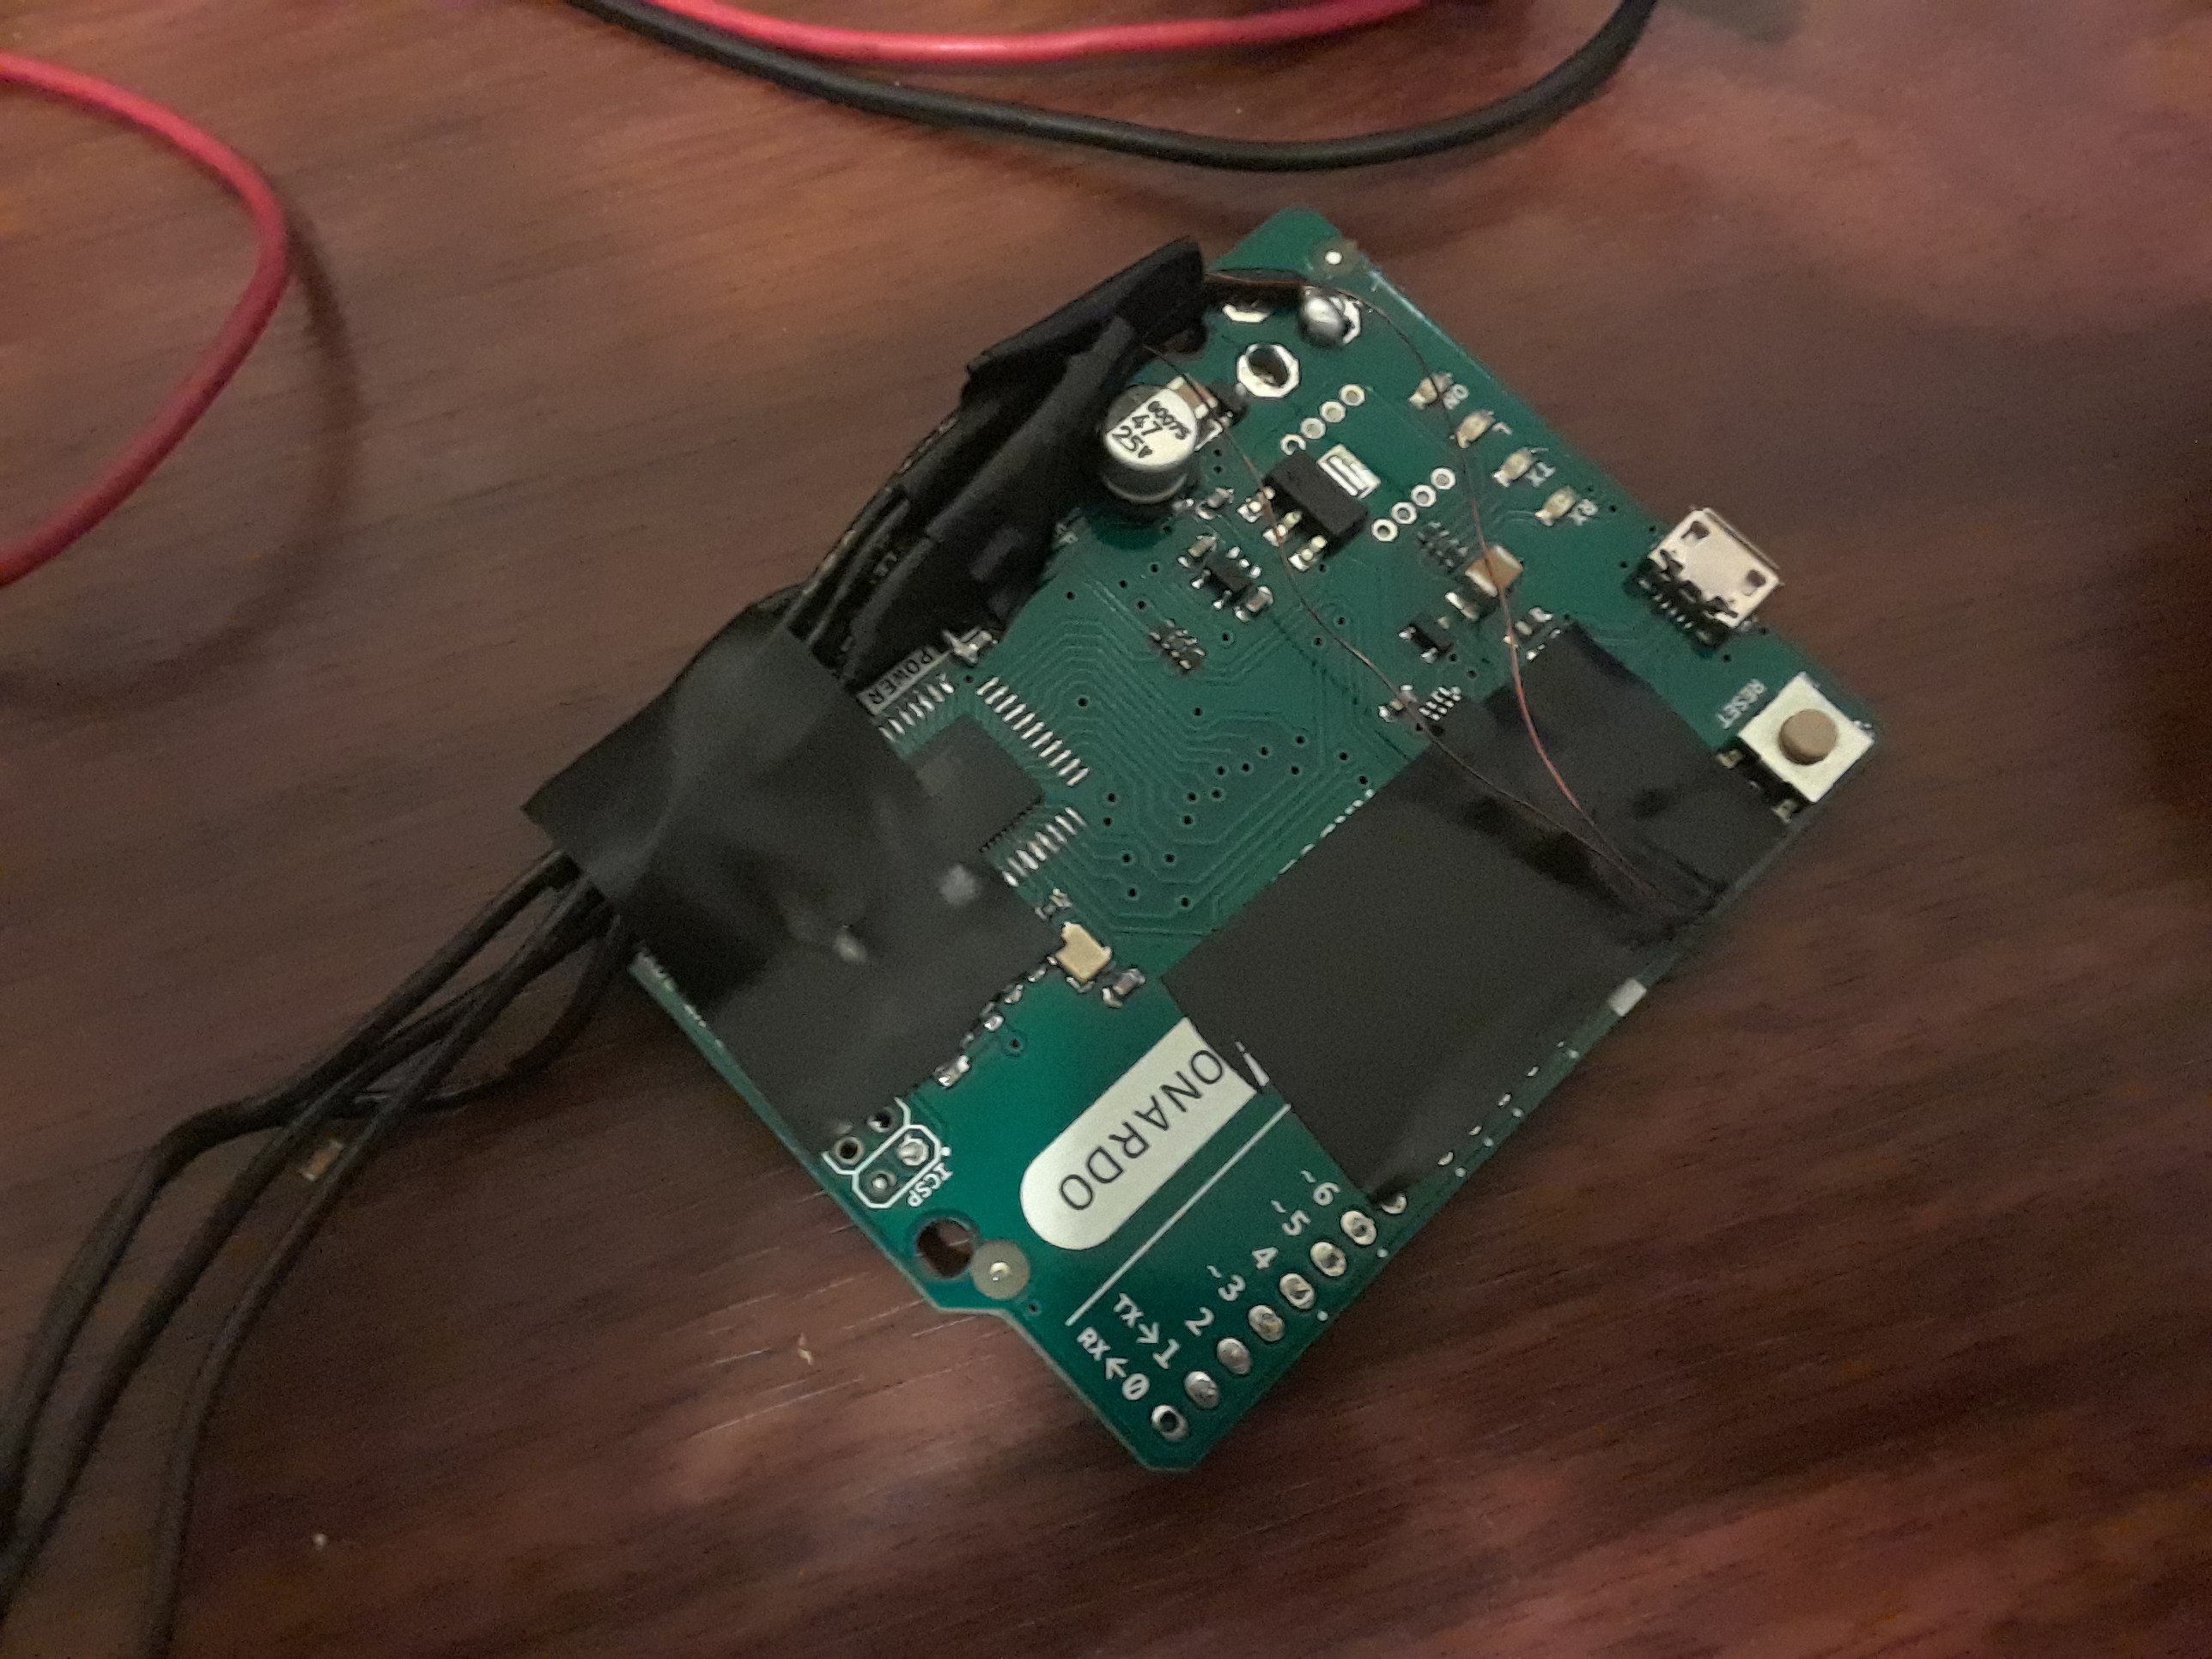
Image 5. The Salvaged Arduino Leonardo Board. Isn't it beautiful?
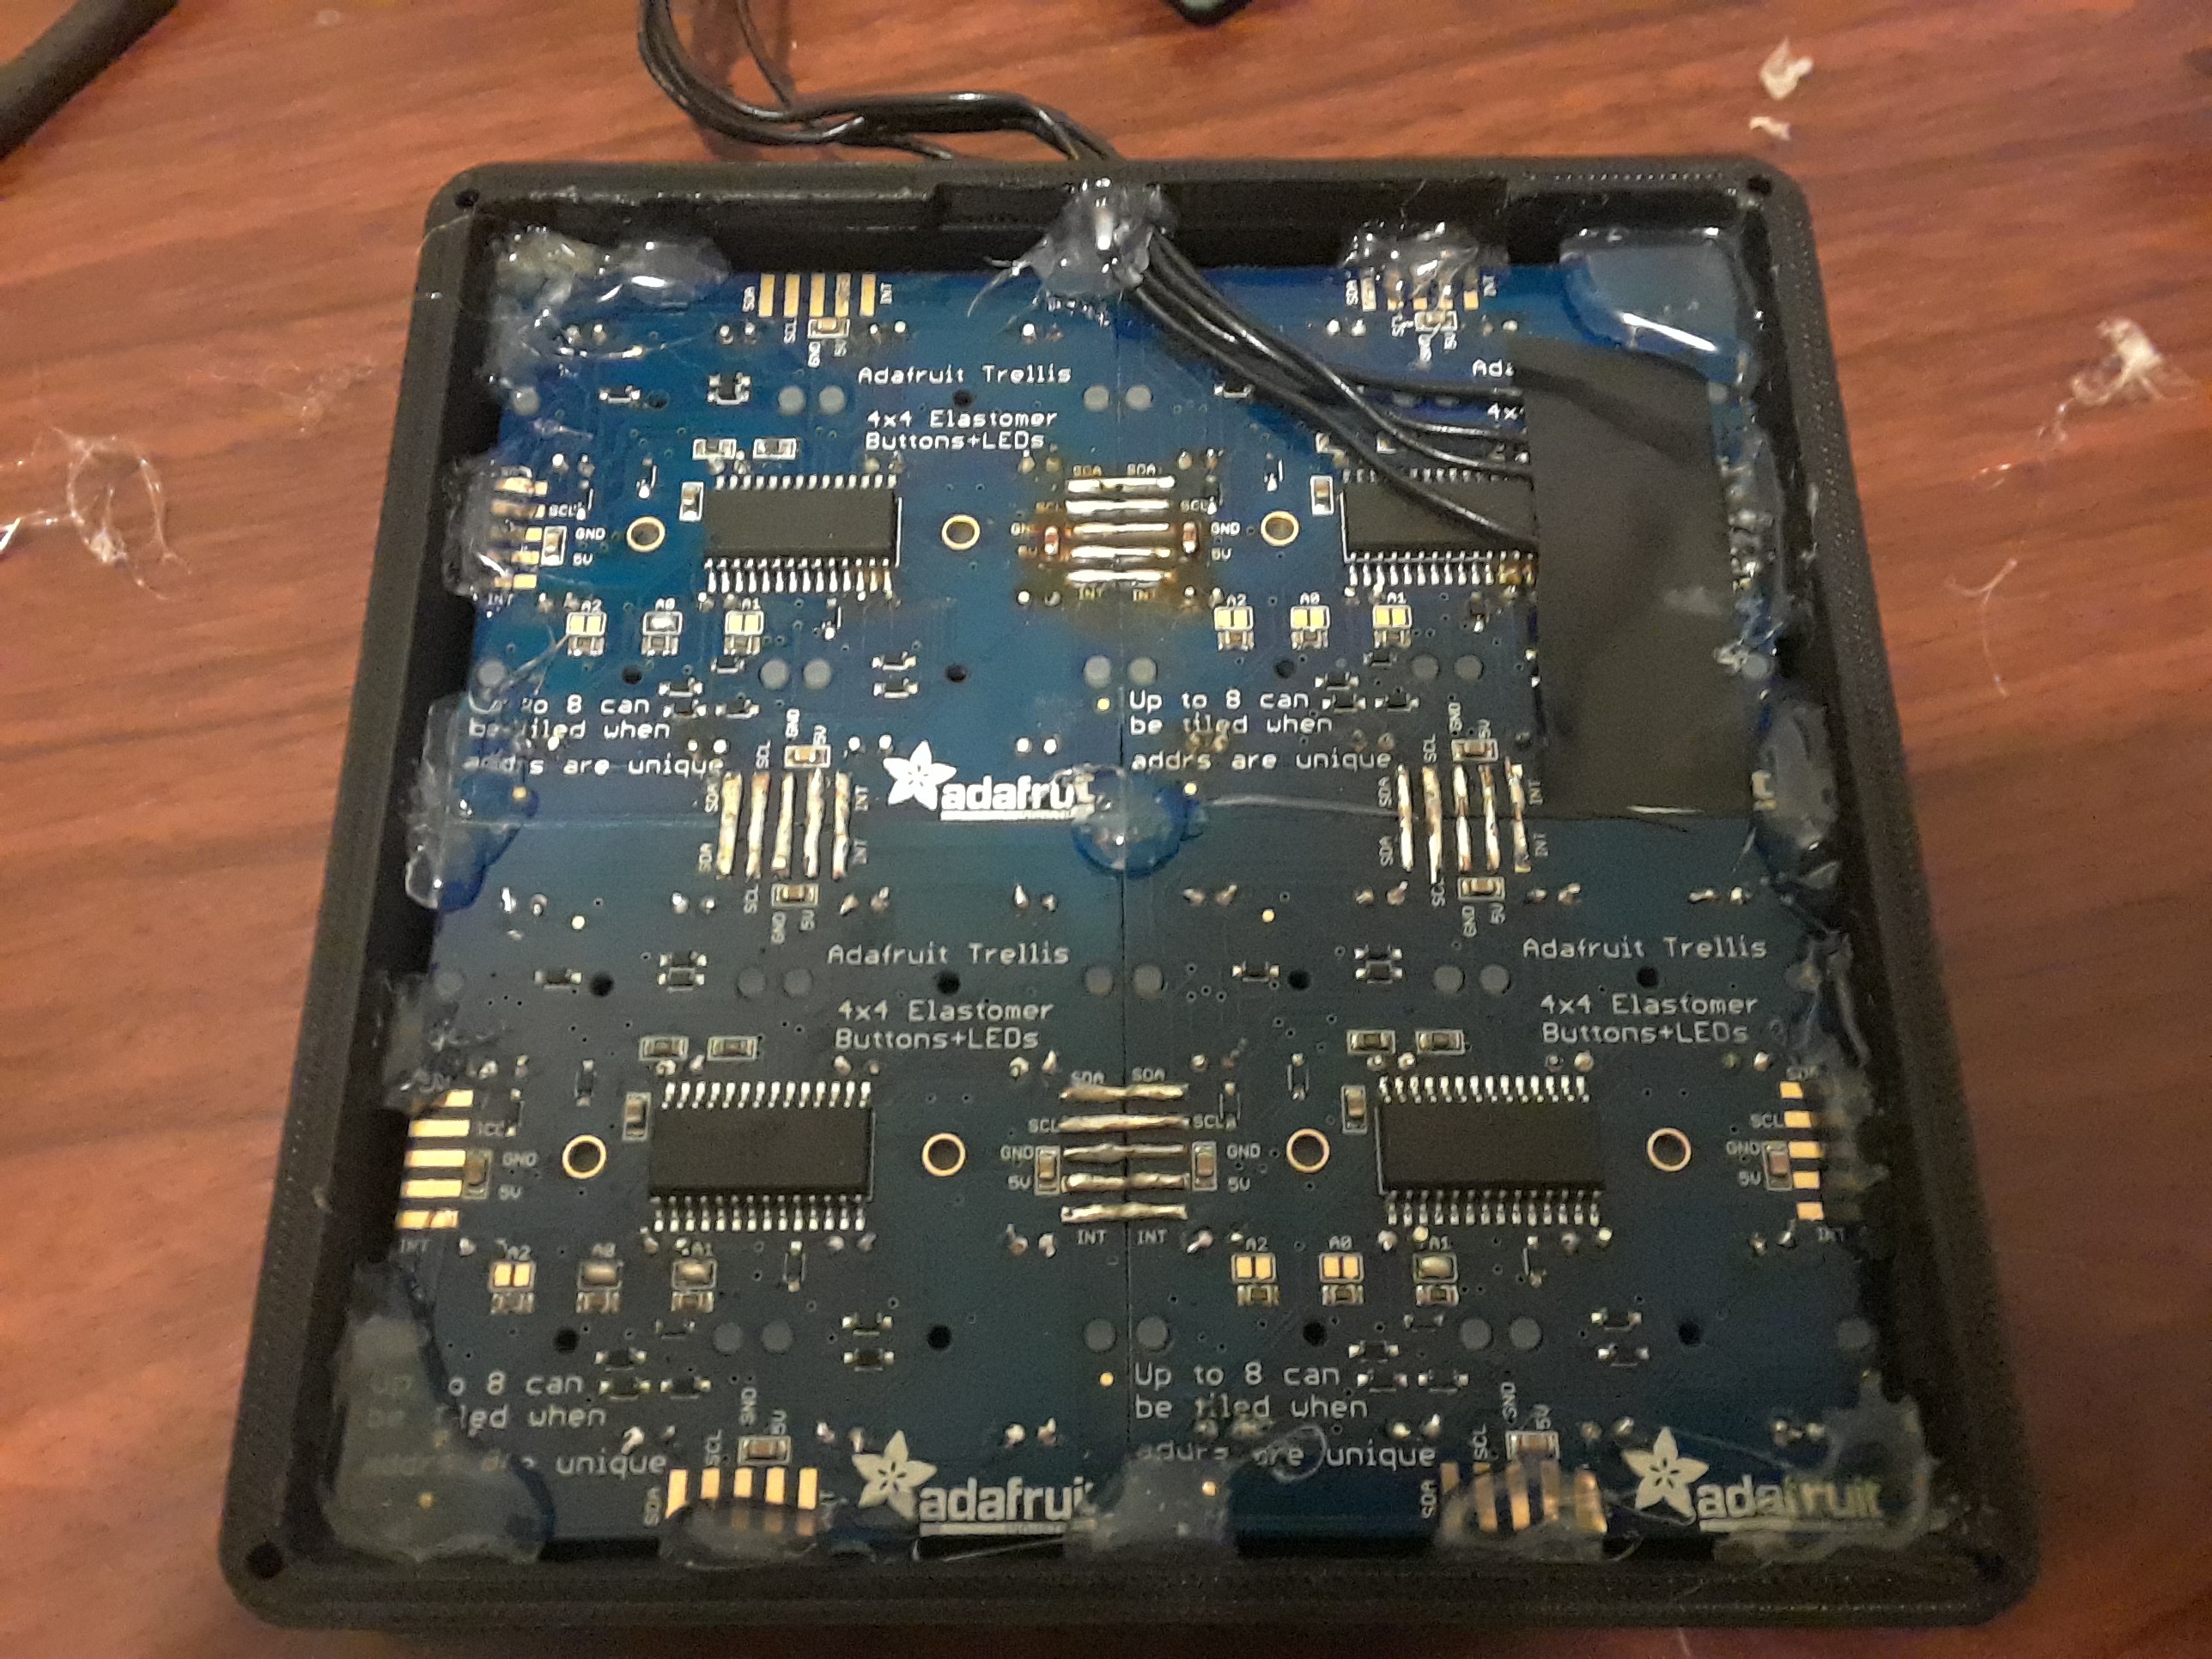
Image 6. The Trellis Modules Hot-Glued to the Enclosure. The hot glue ended up being sturdy enough for testing, but some additional support underneath the boards will be necessary for more extreme jam sessions.
After battling with the hardware assembly, it was time to write up the code for the prototype. The code will be uploaded shortly, but to summarize, I used the libraries released by Adafruit for indexing the buttons on the Trellis and for driving the LEDs. The microcontroller constantly scans all of the buttons on the board and checks if a button was pressed or released. The index of which button was pressed/released is used in a giant switch-case statement to determine the action for each button. There are separate switch-case statements for each layout of the keys on a button press and a separate one for a button release. The "Mode" button changes a variable that determines which switch-case statement to use. With the way that MIDI works, a specific note is turned on by sending a pitch value to the PC (the velocity value for each note is set to max because this board does not have force sensing). In order to turn a note off, the same pitch value must be sent to the PC. So, I had to hold the current pitch value for each button in an array in the event that the user changes the note mapping while still holding down a button to play a note. That way, it is guaranteed that the correct pitch value is sent to the PC to turn the note off when the user releases the button. To determine the pitch value for each note, a formula is used based off the root note and the current octave. Here is a link to a website that lists the MIDI pitch values for different notes in different octaves: https://musescore.org/en/plugin-development/note-pitch-values. If the controller is set to the key of C in the 4th octave, the root note pitch value is 60. The 3rd note, E, is root note + 4. The 5th note, G, is root note + 7. If the octave is changed, the pitch value for the root note is incremented/decremented by 12. All-in-all, latency isn't terrible with this scheme, but there is always room for optimization.
Discussions
Become a Hackaday.io Member
Create an account to leave a comment. Already have an account? Log In.