 iSax
iSaxThe UV Part
As a fellow raver I wanted to include some UV light and fluorescent paint. This puzzle is as follows:
1. A UV light turns on as soon as Level 6 is completed.
2. The player sees that there are some patterns that is visible only under UV light.
3. The player must realize that the UV light is detachable from the wall, it's hanging there with magnets.
4. By using the UV light as a torch you can see all the different hidden symbols and find the right ones to place 5 magnets.
5. Once all the magnets are in the correct spot it is done!
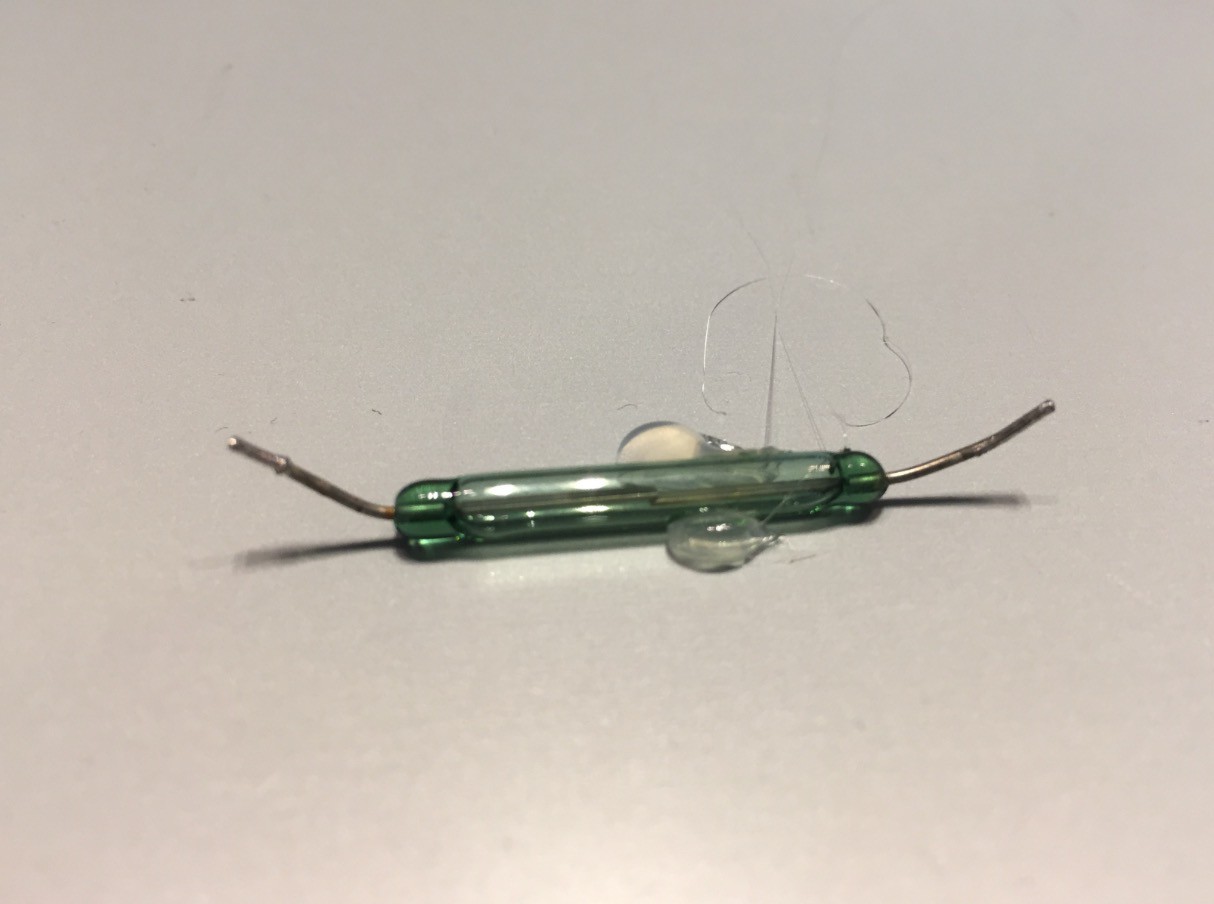
First I had to find a way to make a magnet engage an electric signal. I've previously worked with hall sensors and though that they would be the way to go but I found something way simpler. The reed switch. So I ordered 100 pcs of desoldered pieces from ebay. One of them was put behind a steel sheet and I connected a led via the reed switch and managed to turn it on with a magnet.

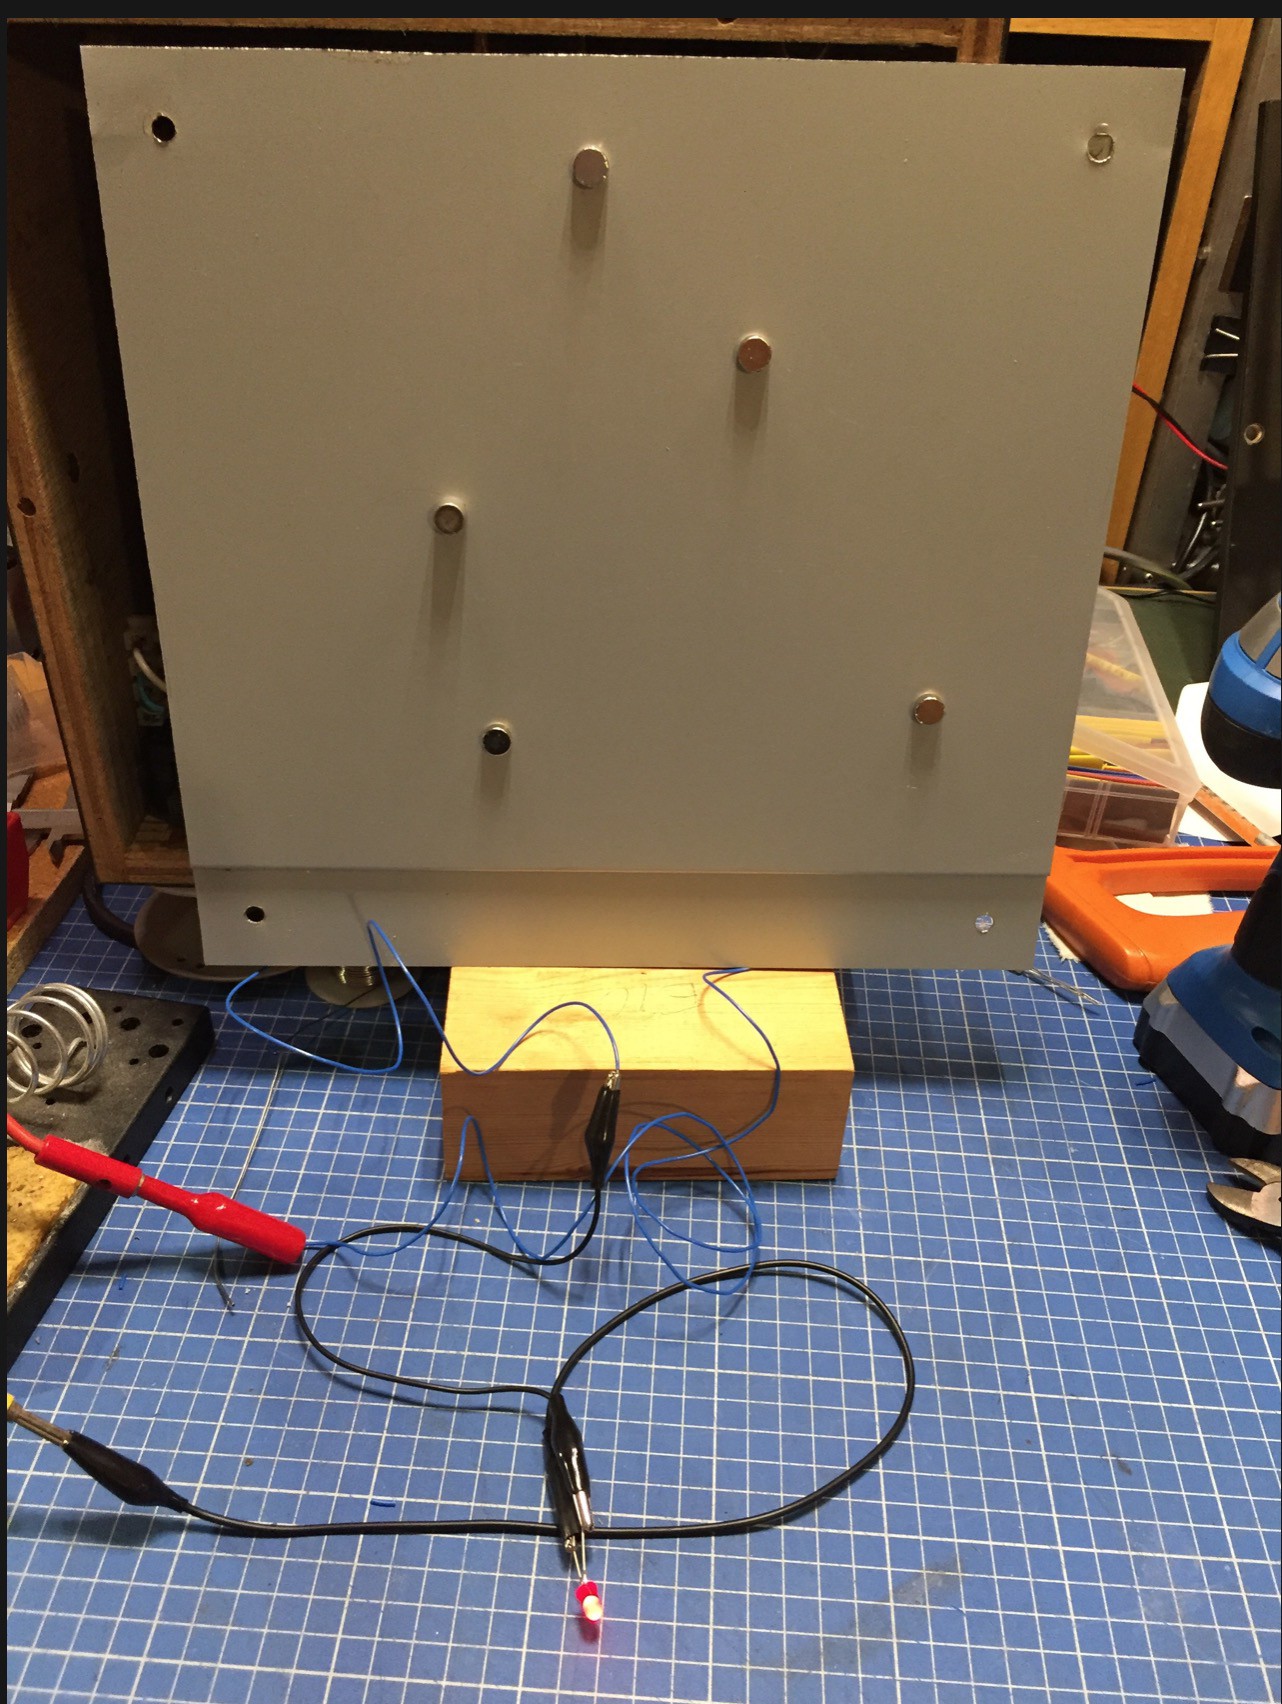
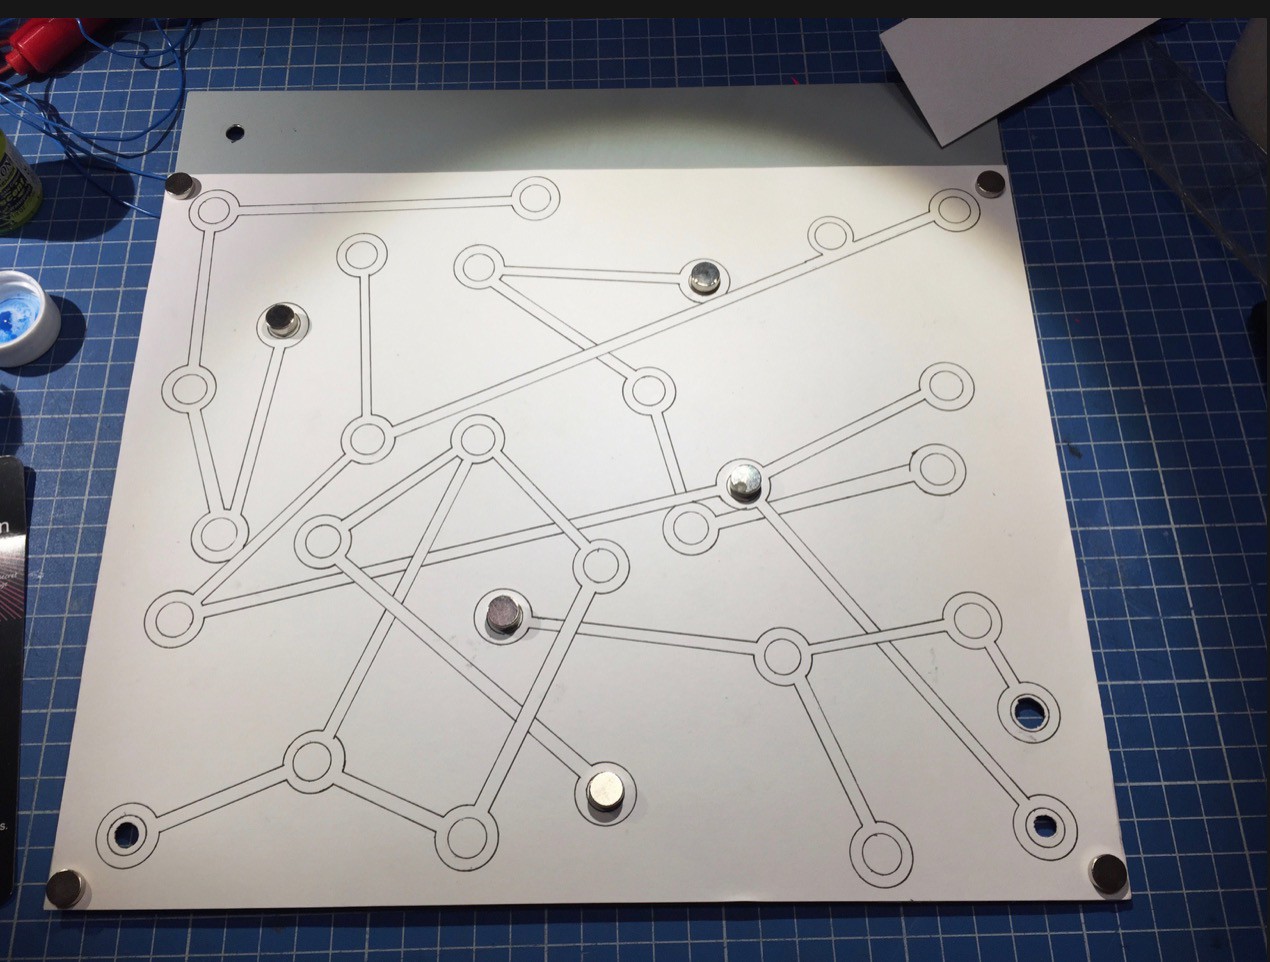
Happy with the test I mounted five reed switches to the back of this plate with metal epoxy. And the led turns on only when all five magnets are in the right place.

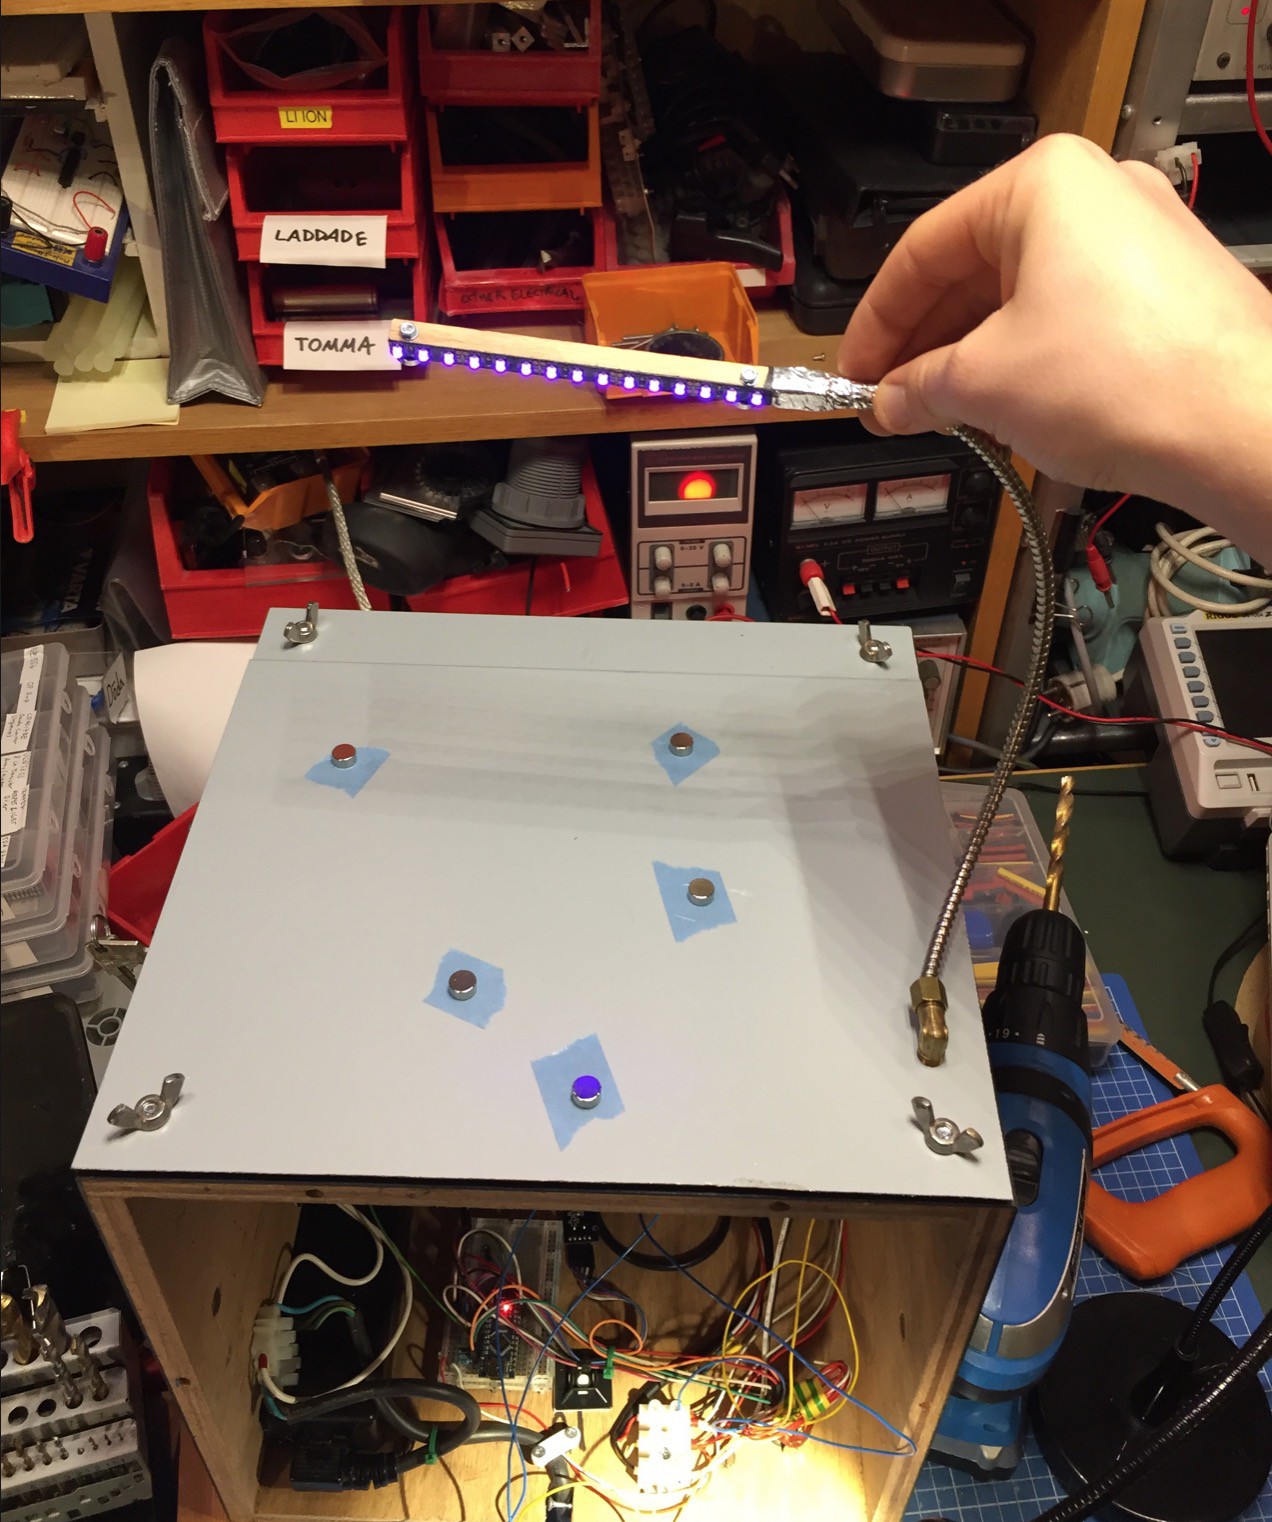
Now I needed to create the UV setup with clues. First I did the lamp. I took a piece of UV LED strip and glues it onto a piece of wood.

I then dragged the wires through a metal wire tube and mounted it to the plate with some piping parts. The two screws running through the wood are holding magnets and these magnets are strong enough to hold the light onto the plate. The plate was also mounted to the one side of the box with wing nuts (just because I like to looks of them)
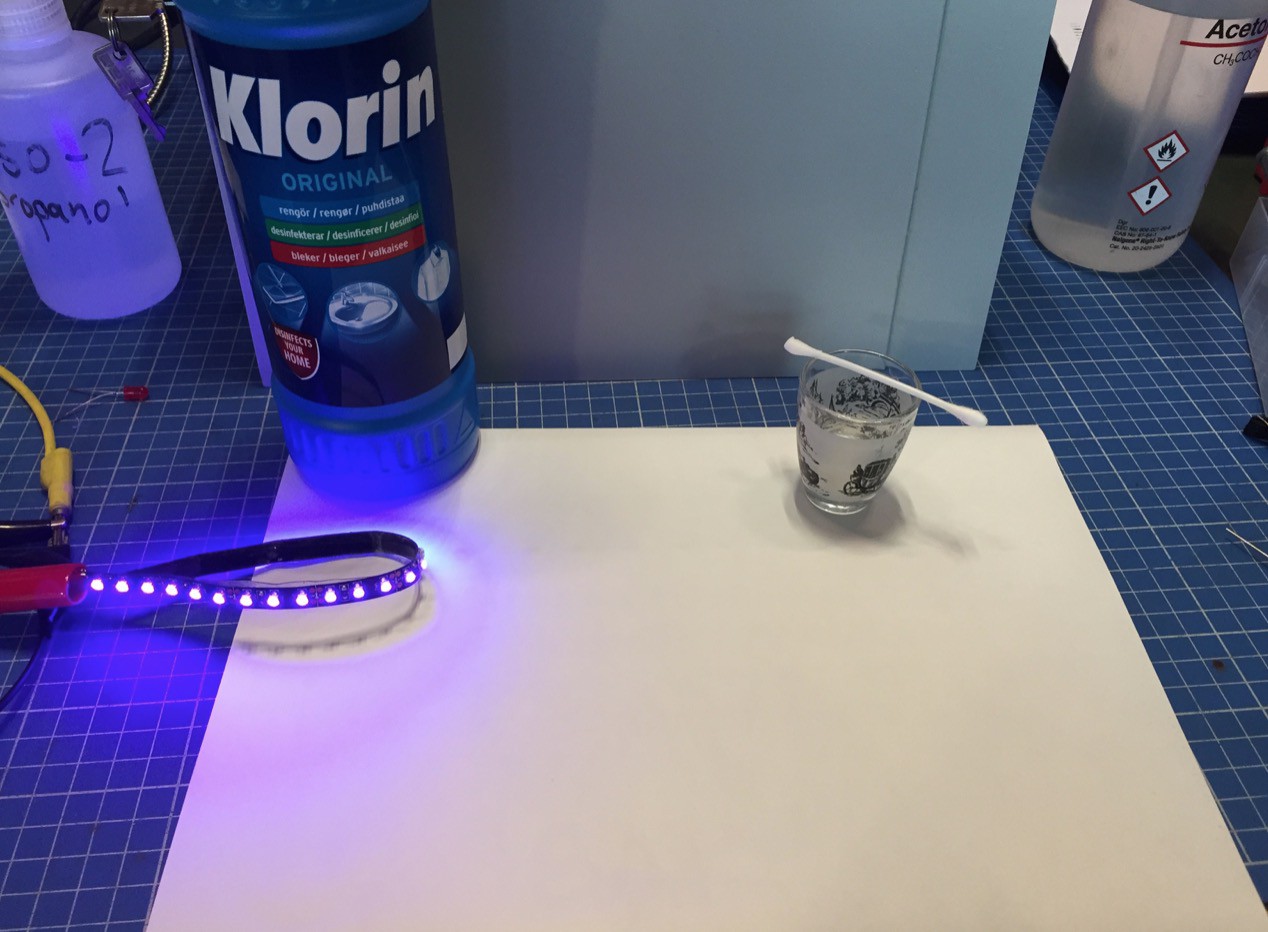
Then the next step was to paint. I though about how to do this using canvas or a printer or whatever but I settled with using high quality paper covered with transparent packing tape for protection. I also needed to find a UV reactive "magic paint". After some research I found a method to do this using bleach. In Sweden where I live I believe the heavy environmental regulation has limited the options found in the supermarket because the product I found did not work. There are two options to make UV reactive inc: 1. Make the inc extra reactive to UV so that it shines stronger that the white paper when shined upon or 2. Make the inc absorb UV so that it goes black/dark. With this in mind I though sunscreen might work but no, that was also a failure.
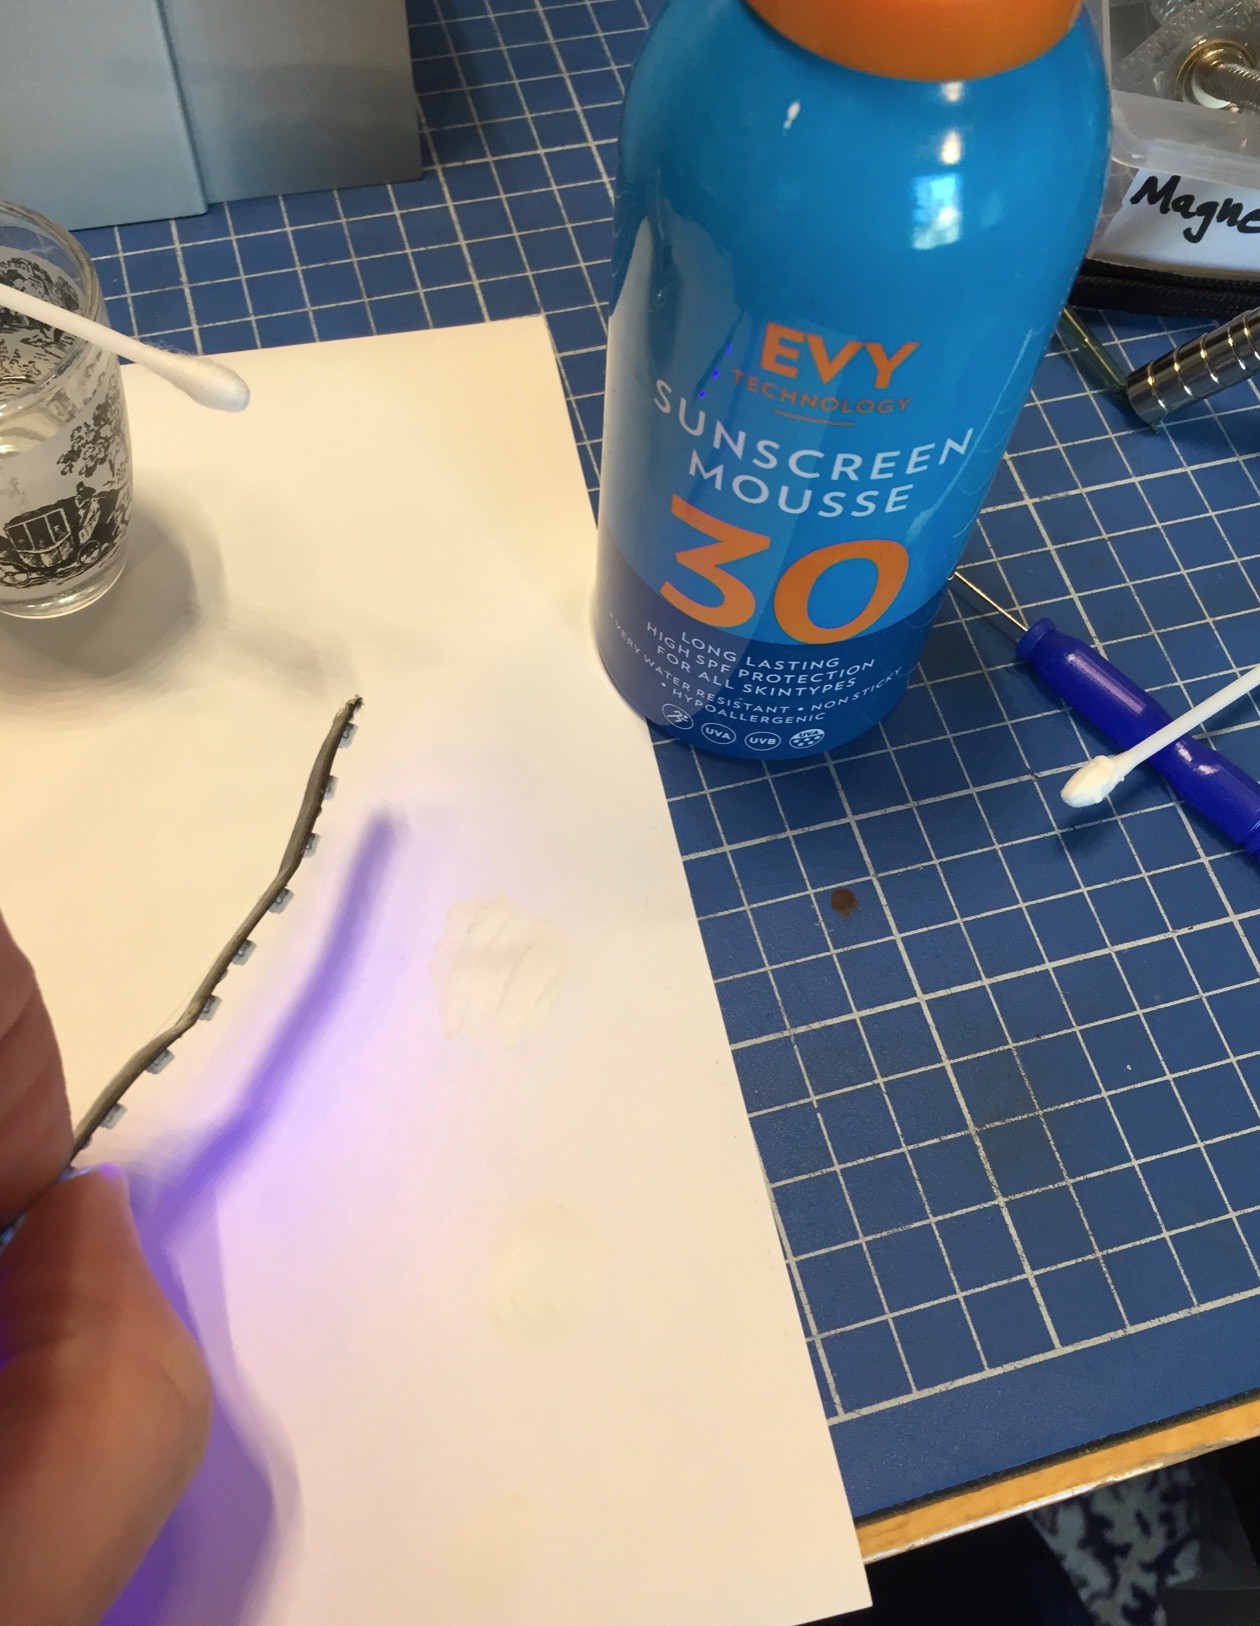
FAIL!
I decided to settle to commercial solutions and went to the store to buy a "magic-inc-pen". I did however already have fluorescent paint in my workshop, purchased at a full moon party in Thailand. Yay! I proceeded with painting a decorative pattern with these color on a paper. In all the circles there will be magic-inc and you'll have to find the right symbols somewhere, yet to be decided.
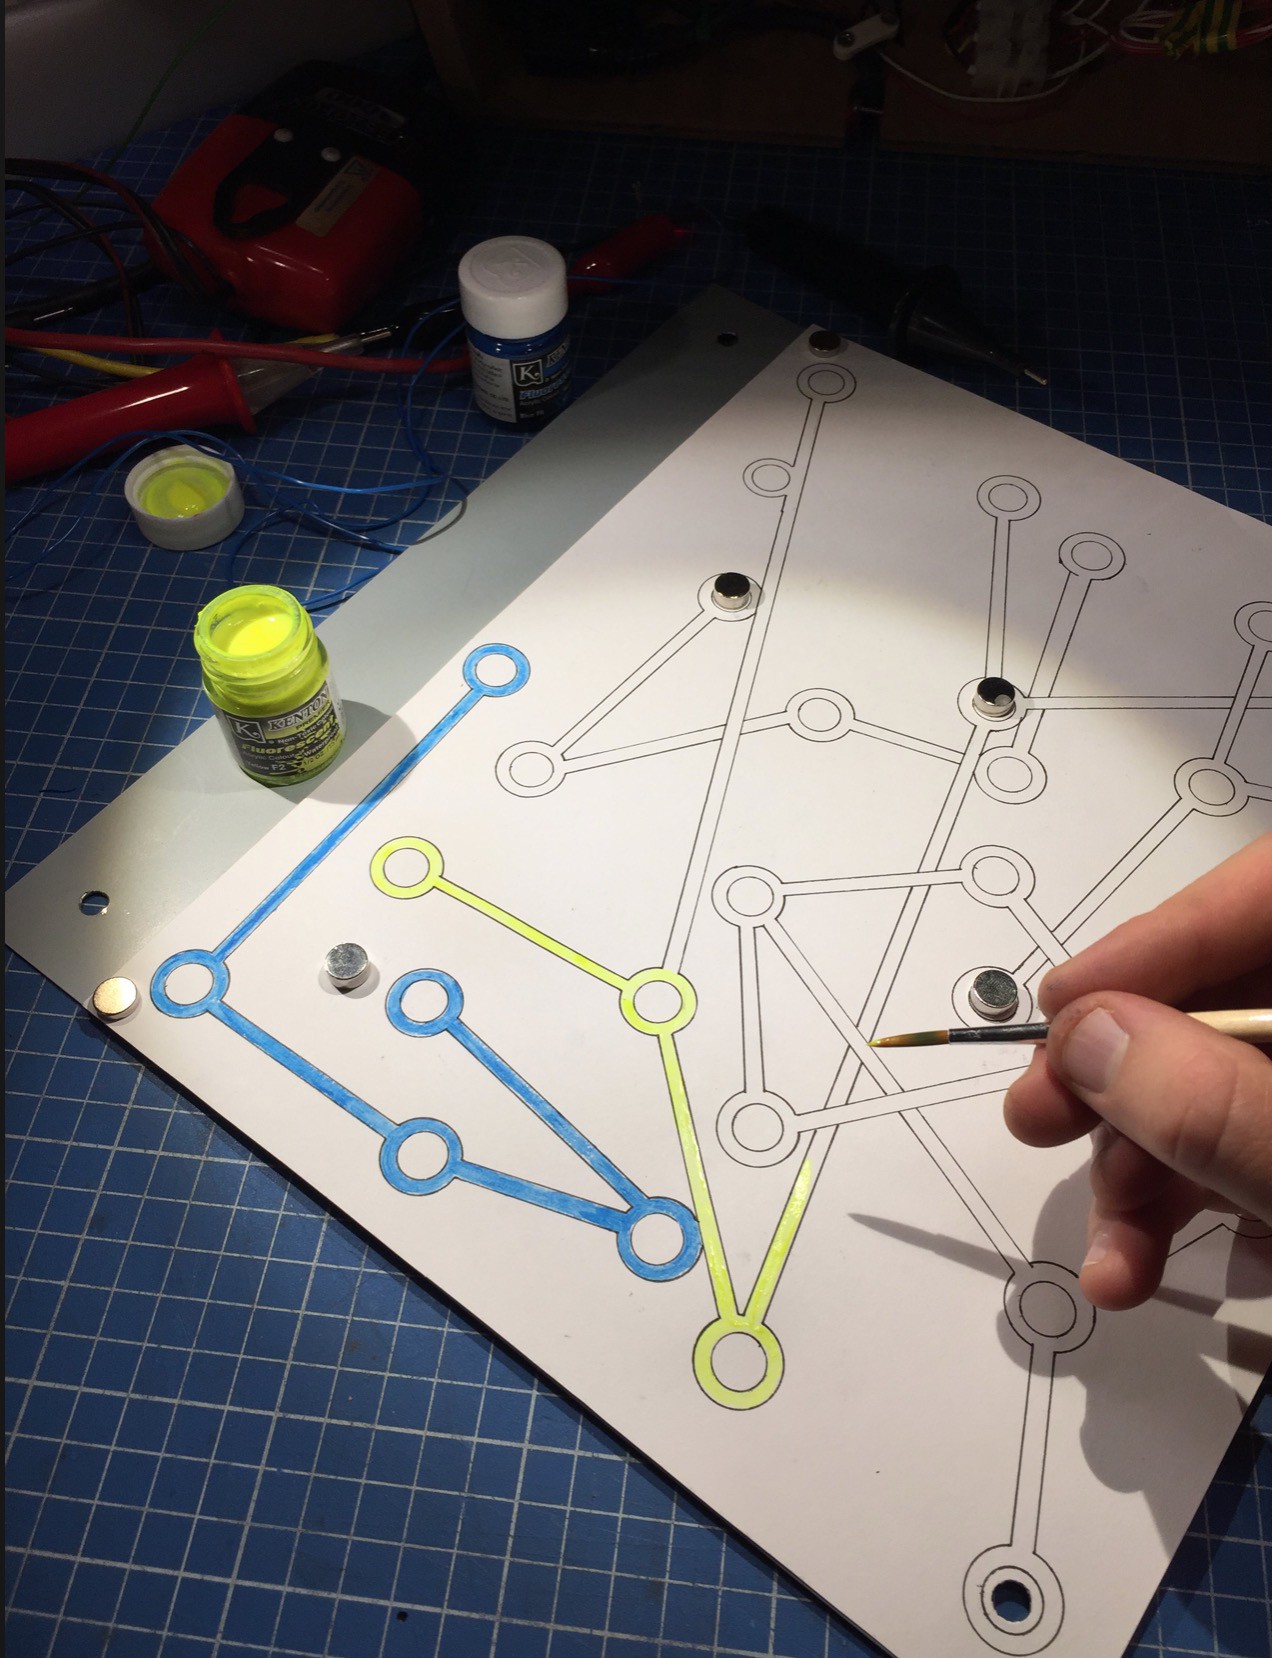

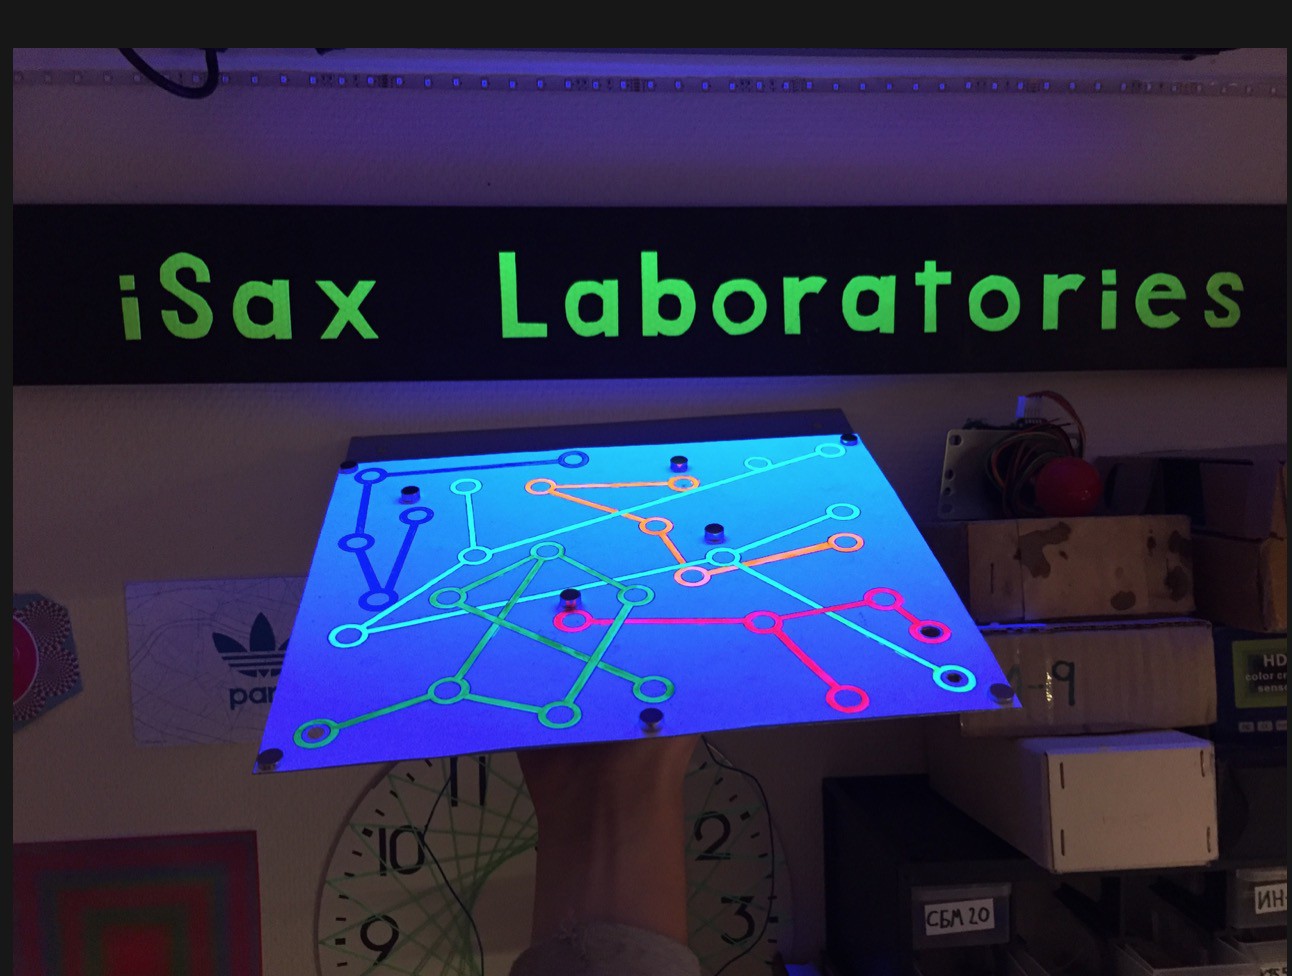
In all these circles I then painted symbols and tried it out.
Where you get the clues
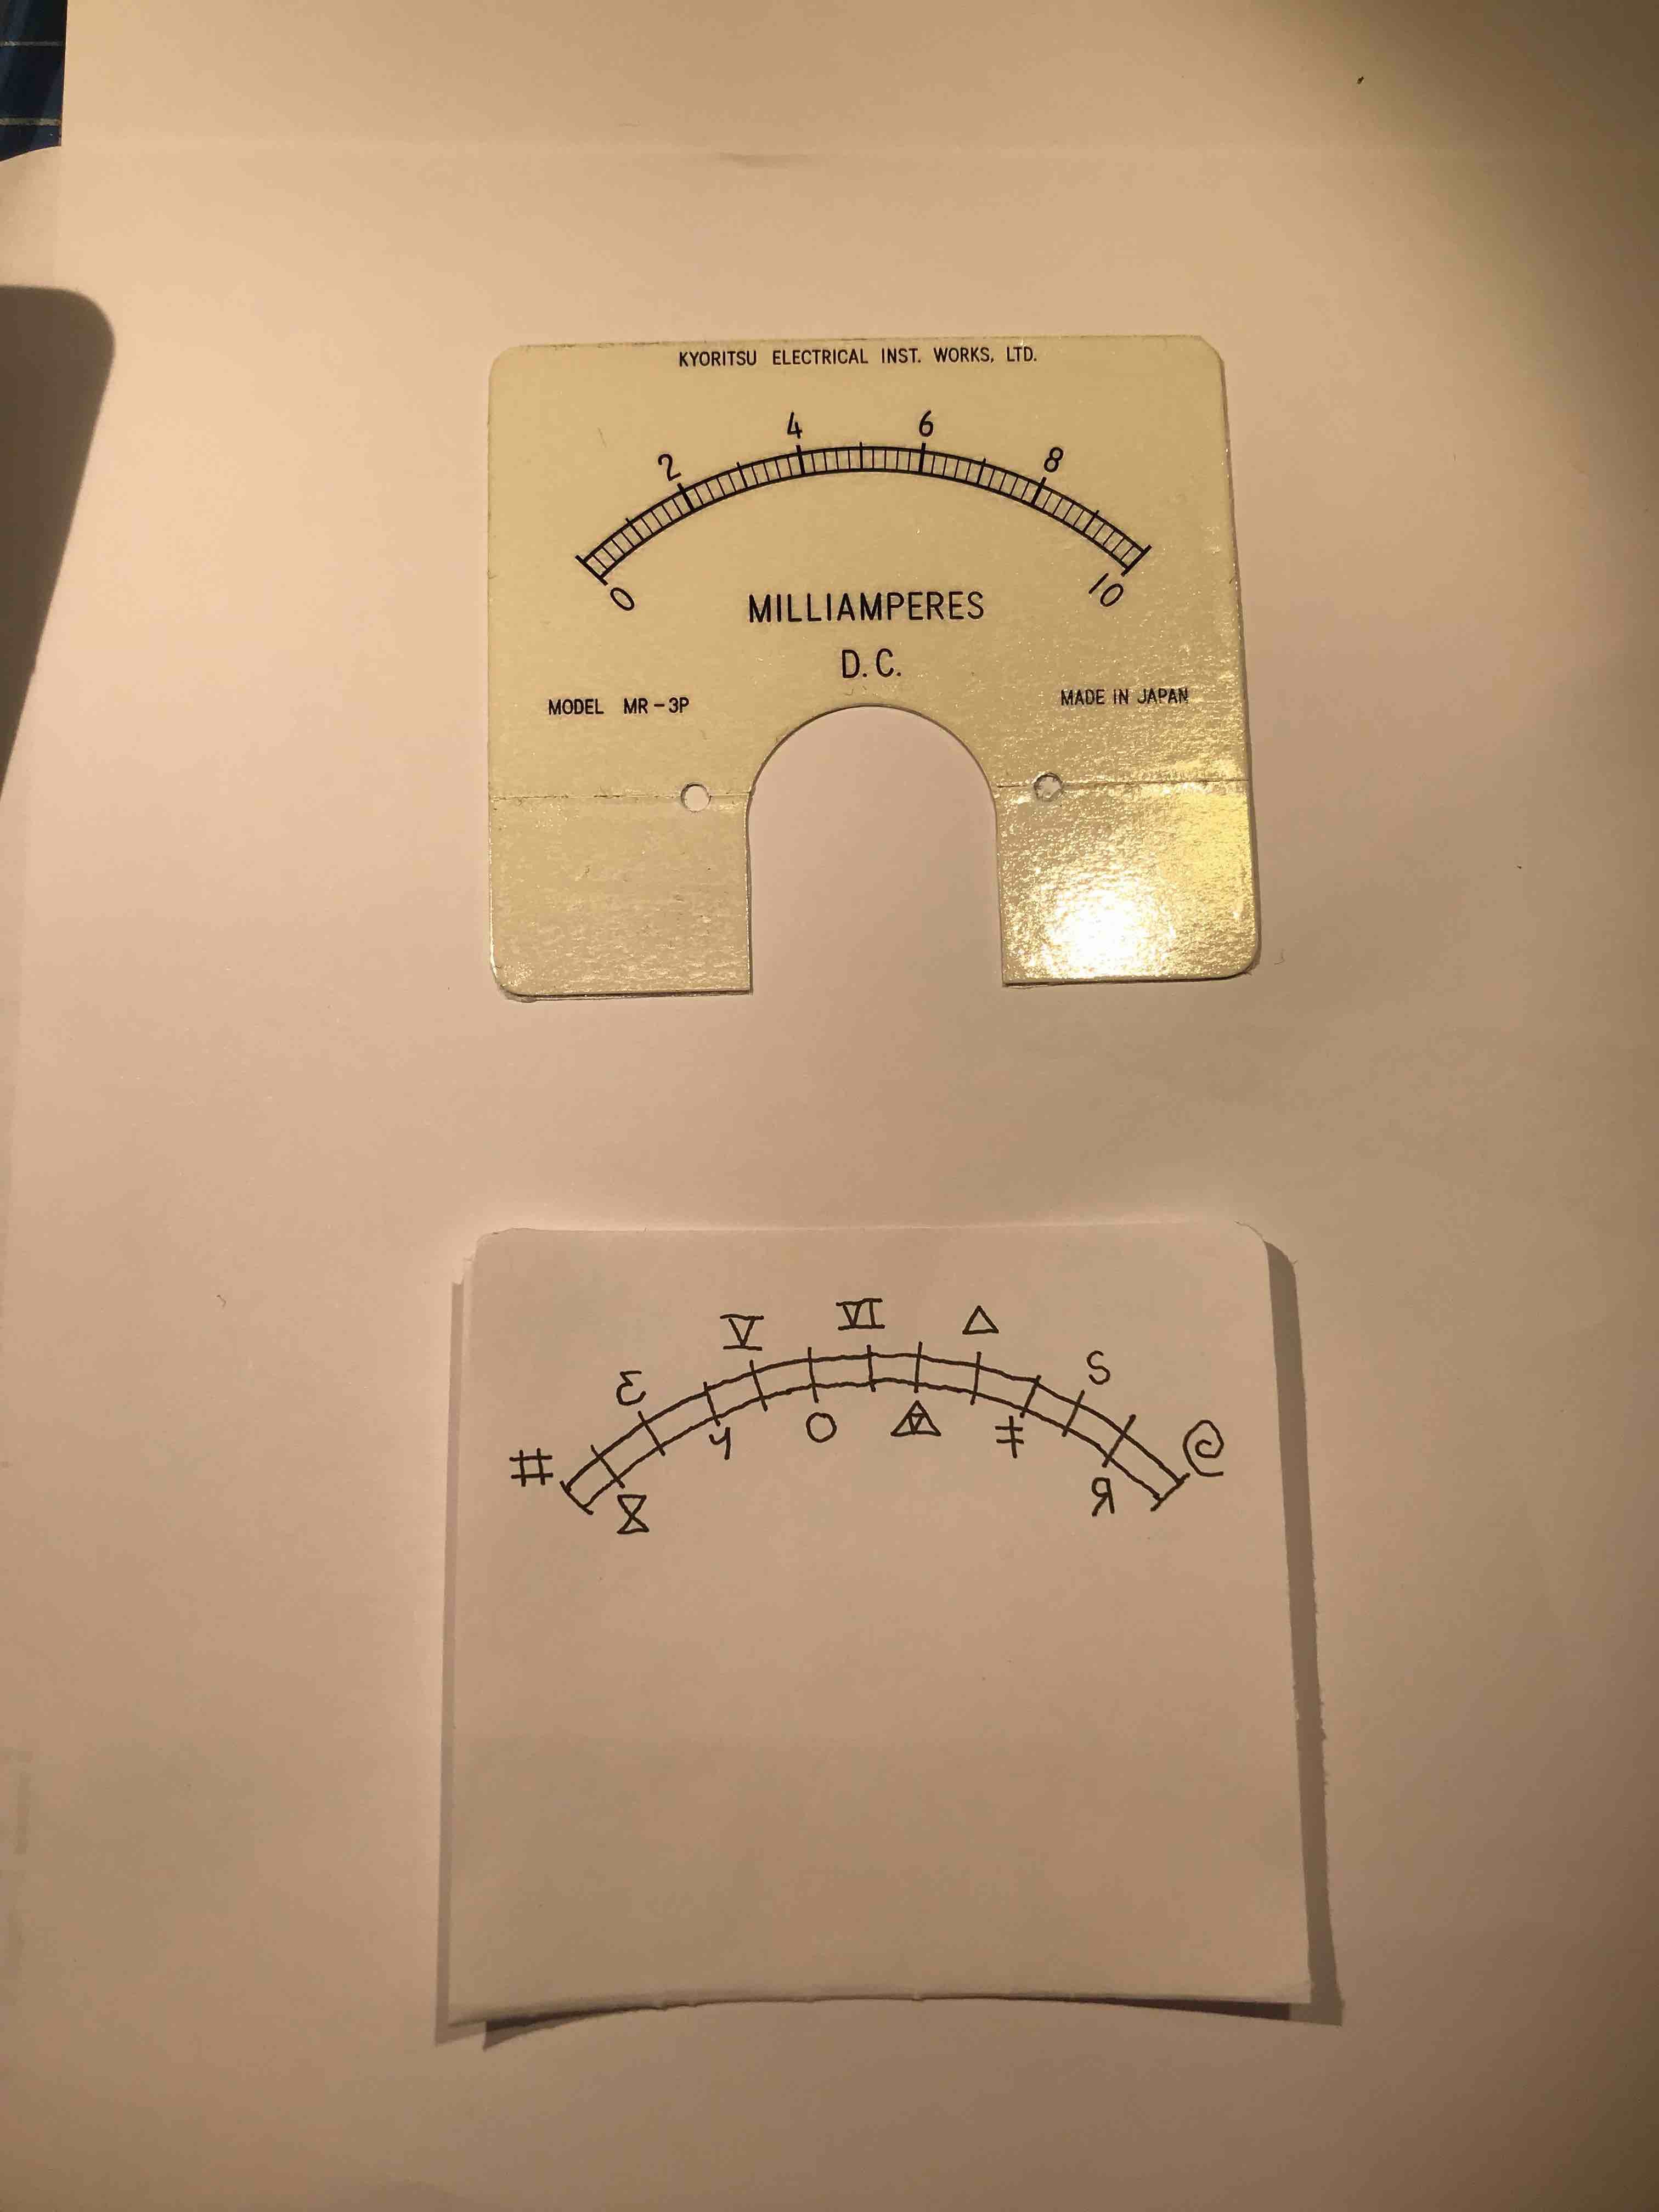
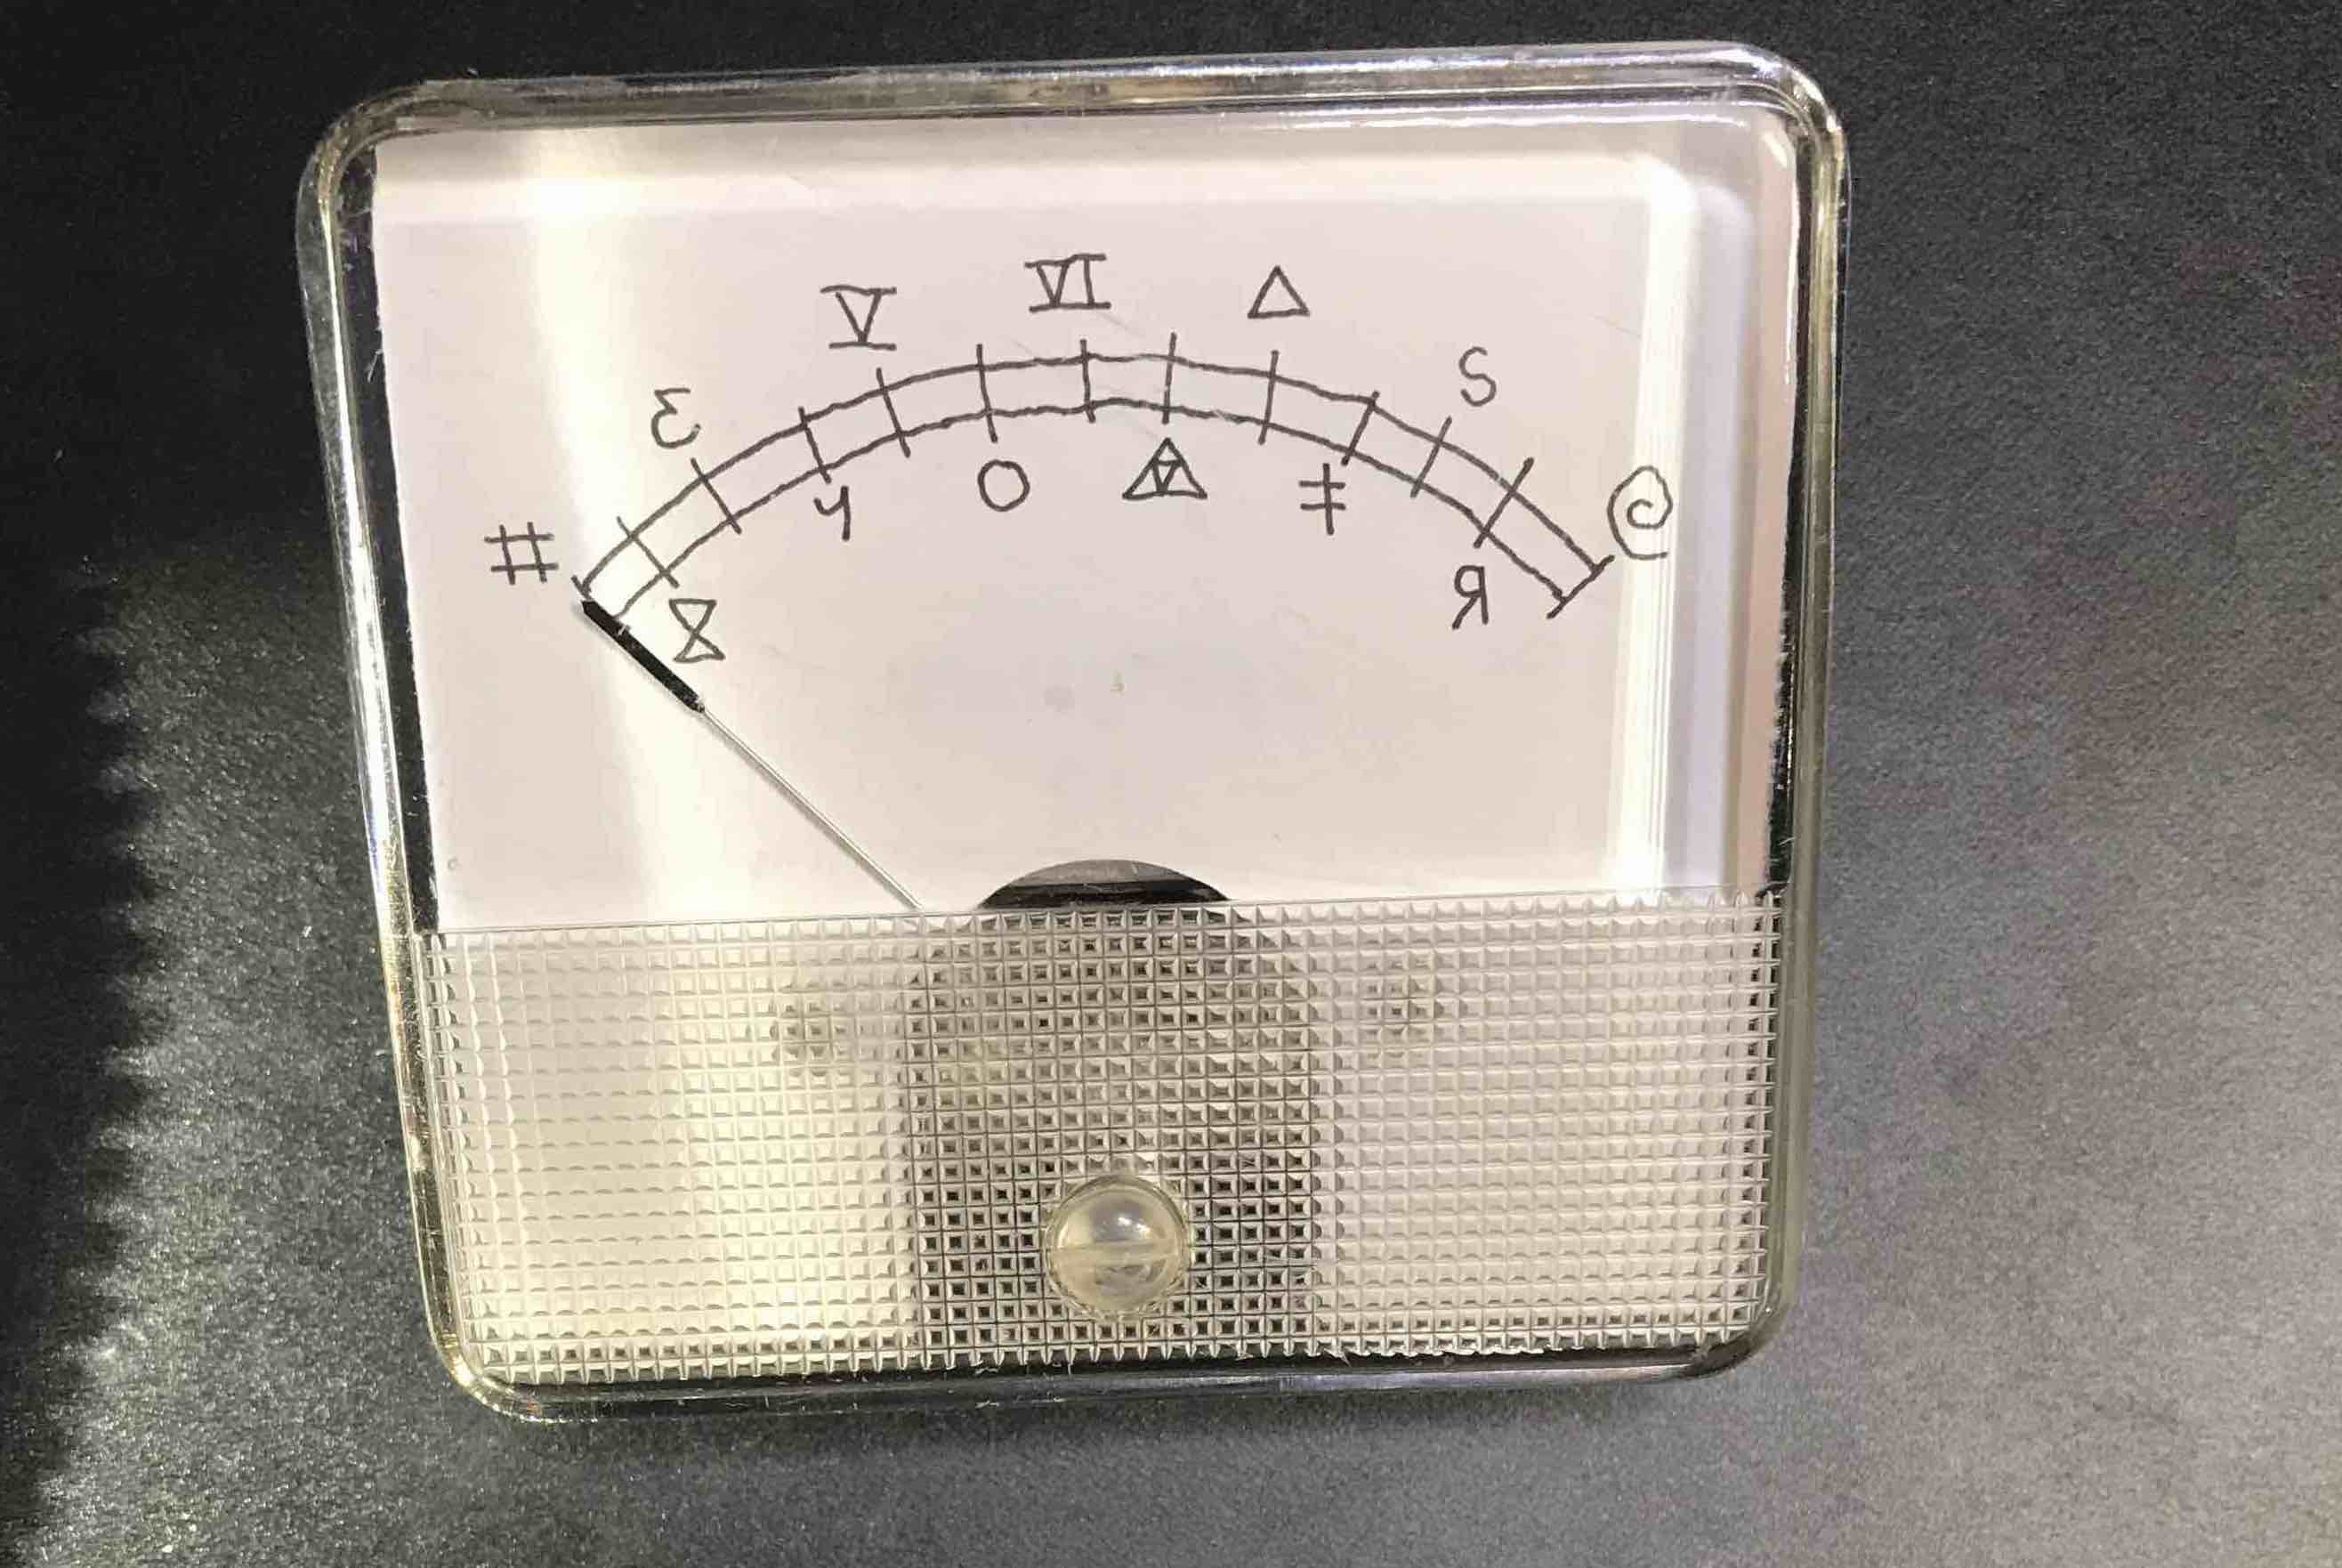
This post is a bit backwards but as the second part I'll explain how you get the clues to this puzzle. I came up with it after I built the UV part. And I wanted to use an analog meter.
I found an old one in my parts bin going up to 10mA. I put the meter in series with a resistor and this way I could control the current with analogWrite and therefor control the needle. I also made the panel with my own symbols corresponding to the ones on the UV plate.
The meeter moves between the 5 symbols in a random pattern. The currents is controlled by shifting the voltage in increments of 5*1/256 Volts. This creates a smooth movement.

The moving meter:
Discussions
Become a Hackaday.io Member
Create an account to leave a comment. Already have an account? Log In.