 Moritz Wenzel
First i built the mold for the concrete where the threaded sockets and placeholder-pipes are mounted to, i used 19mm melamine chipboard. Here at my place you can get the parts cut to size in the hardware store for ~15$/m².
QTY | Edge A | Edge B |
|---|---|---|
| 1 | 308mm | 788mm |
| 1 | 750mm | 200mm |
| 1 | 308mm | 200mm |
| 1 | 179mm | 200mm |
| 1 | 94mm | 200mm |
| 1 | 104mm | 200mm |
| 1 | 487mm | 200mm |
| 1 | 169mm | 200mm |
| 1 | 195mm | 200mm |
| 2 | 100mm | 200mm |
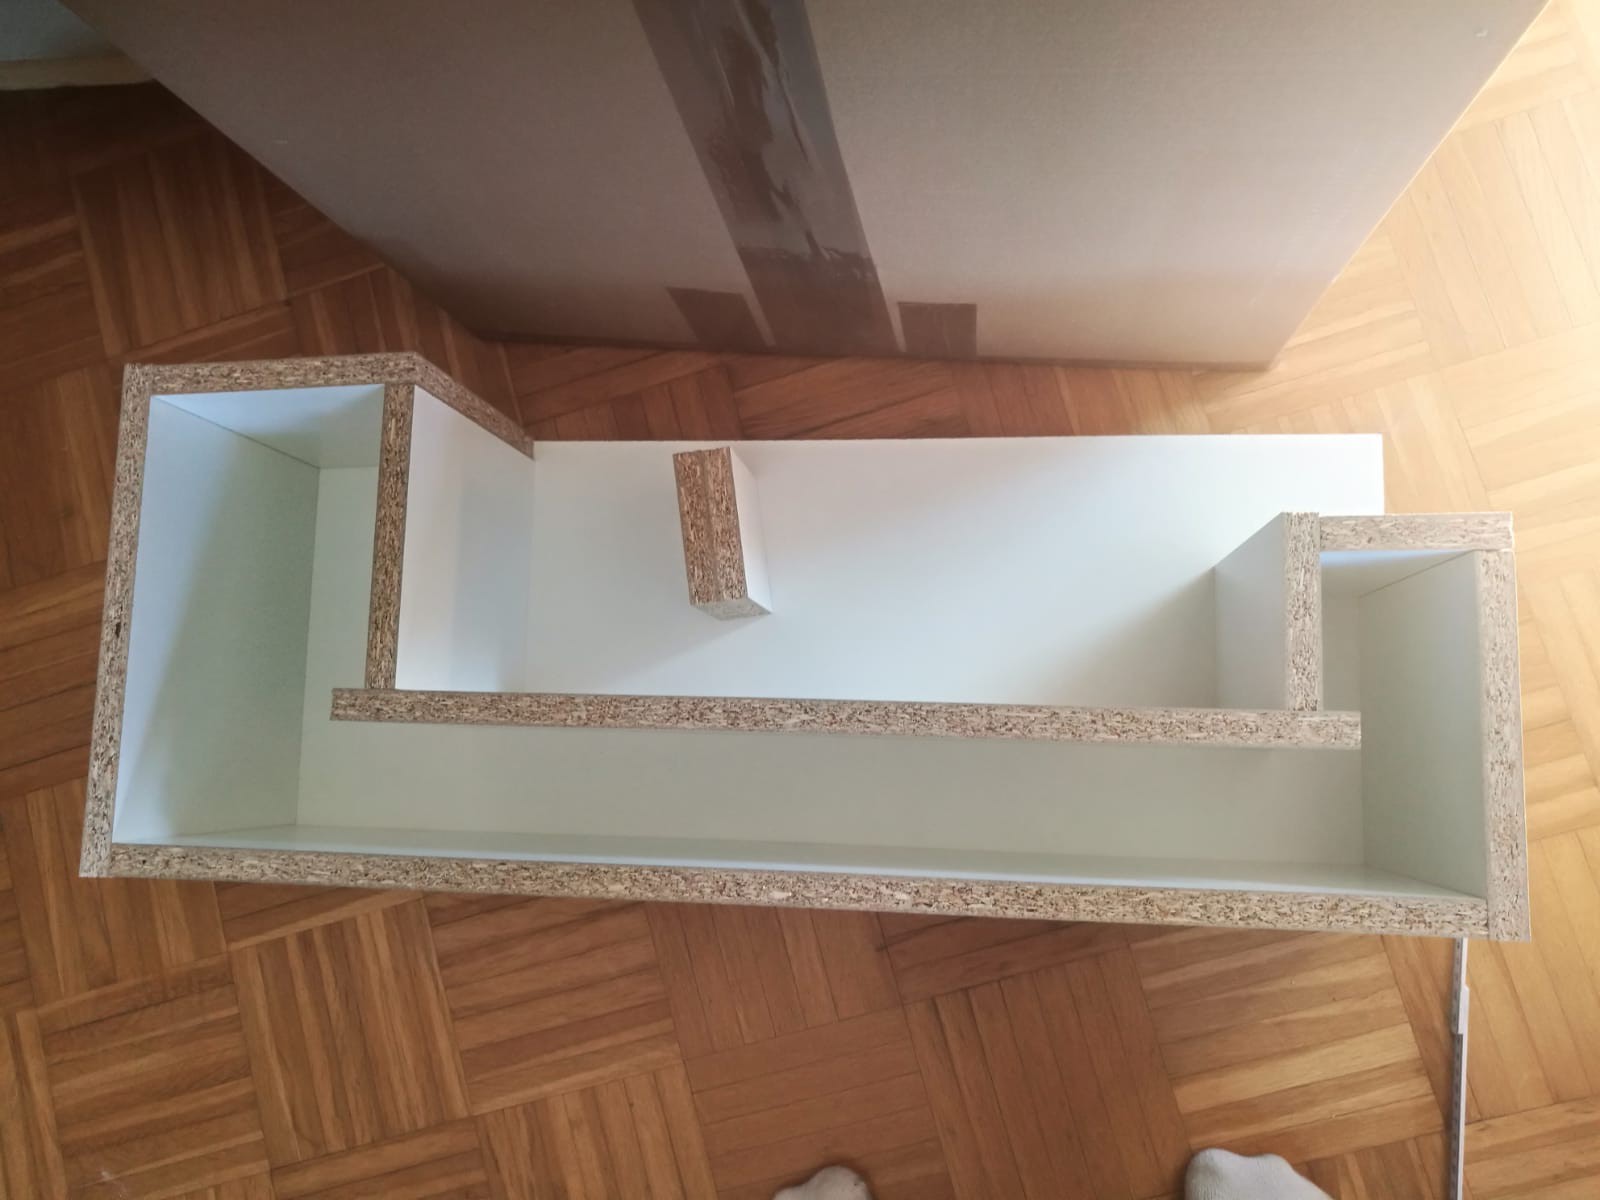
Unfortunately i made a mistake first and cut one board too long, in the list above the value is of course corrected, but after that you should(n't) end up with something like that (The horizontal mid upper board should actually fit between the two vertical boards not below them):
The Files for drilling the Holes and placing the two 100mm * 100mm Boards can be found in the Files section.
Well, after drilling all the holes you can start with screwing together everything, but make sure everything ist flush and 90°, so nothing leaks out later and you don't have to correct a huge misalignment in the concrete block, which will safe you a lot of work lather, take your time here. And don't use woodglue or anything like that here, we want to be able to take the mold apart later to get the lathe-block out easily.
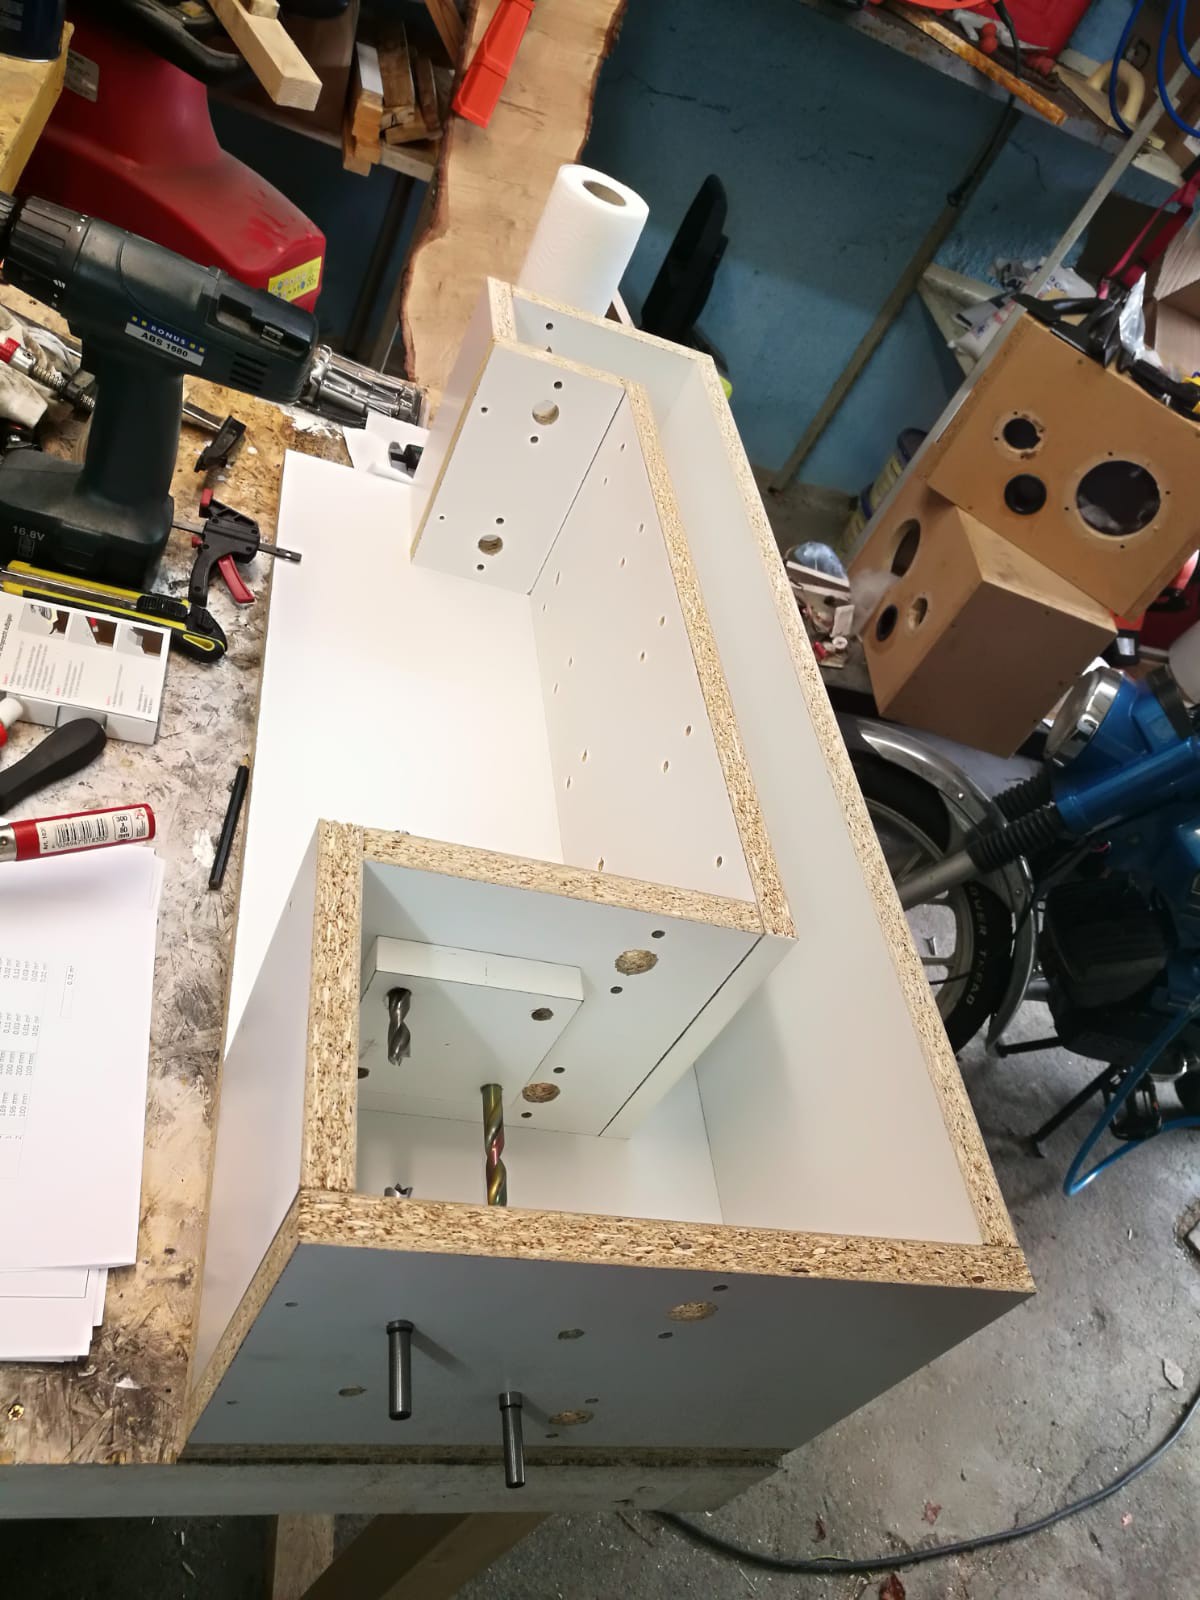
(The board i talked about above is still not correct on this picture in case you are wondering). The Drills held in Place the smaller boards while screwing them to the outer boards. since they must be accuratly positioned.
Well, seems like the mold itself is done! :-)
Discussions
Become a Hackaday.io Member
Create an account to leave a comment. Already have an account? Log In.