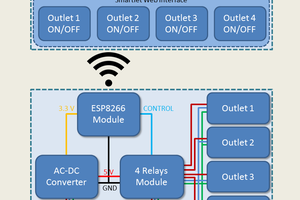
Power for the board
On the bottom corner of the psu pcb there is a connector that powers the front panel. The voltage is around 10VDC so this is ideal to power the control board.
Existing fan
The existing fan is rated at 24V. The fan varies its speed depending on the power being supplied from the psu but in its default configuration it runs constantly when power is being supplied from the psu. This is both un-necessary and as the fan isn't a particularly quiet one, noisy.
The fan with the new fan control runs at maximum 10VDC which seems adequate for the psu ventilation. It might be worth changing the fan for a 12V model if you intend to use much power from the PSU.
Variable speed fan
The fan from the control board is run using the PWM output from the ESP8266. This allows thresholds to be set for the fan speed. There are 3 settings that change depending on the temperature difference between the switch on temperature and the actual temperature.
Fan override
From the PSU Fan status page you can force the fan to run at 100% speed by clicking on 'Manual'. Clicking on 'Auto' will return control to the fan control.
 Michele Perla
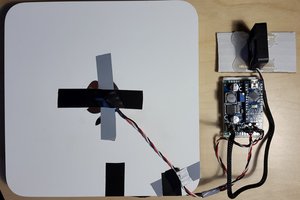
 Martin W. Kirst
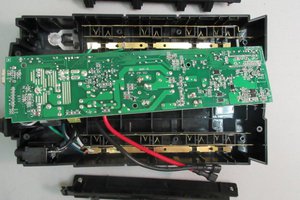
 Kenji Larsen
 Owen
Owen