Close
0%
0%

Teensy Thumb Keyboard

Handheld tactile switch keyboard for Teensy 3.2 compatible boards.

Public Chat
Similar projects worth following
This is a breakout PCB in the shape of a thumb keyboard for the Teensy 3.2. It should also work for similarly shaped boards like such as the Teensy-LC, Butterfly STM32L433 or Dragonfly STM32L476/96.

I wanted a small tactile keyboard with a comfortable layout that could be used in any handheld based project. BASIC game console, graphing calculator, PDA, Raspberry Pi PocketCHIP replacement, etc.

Features

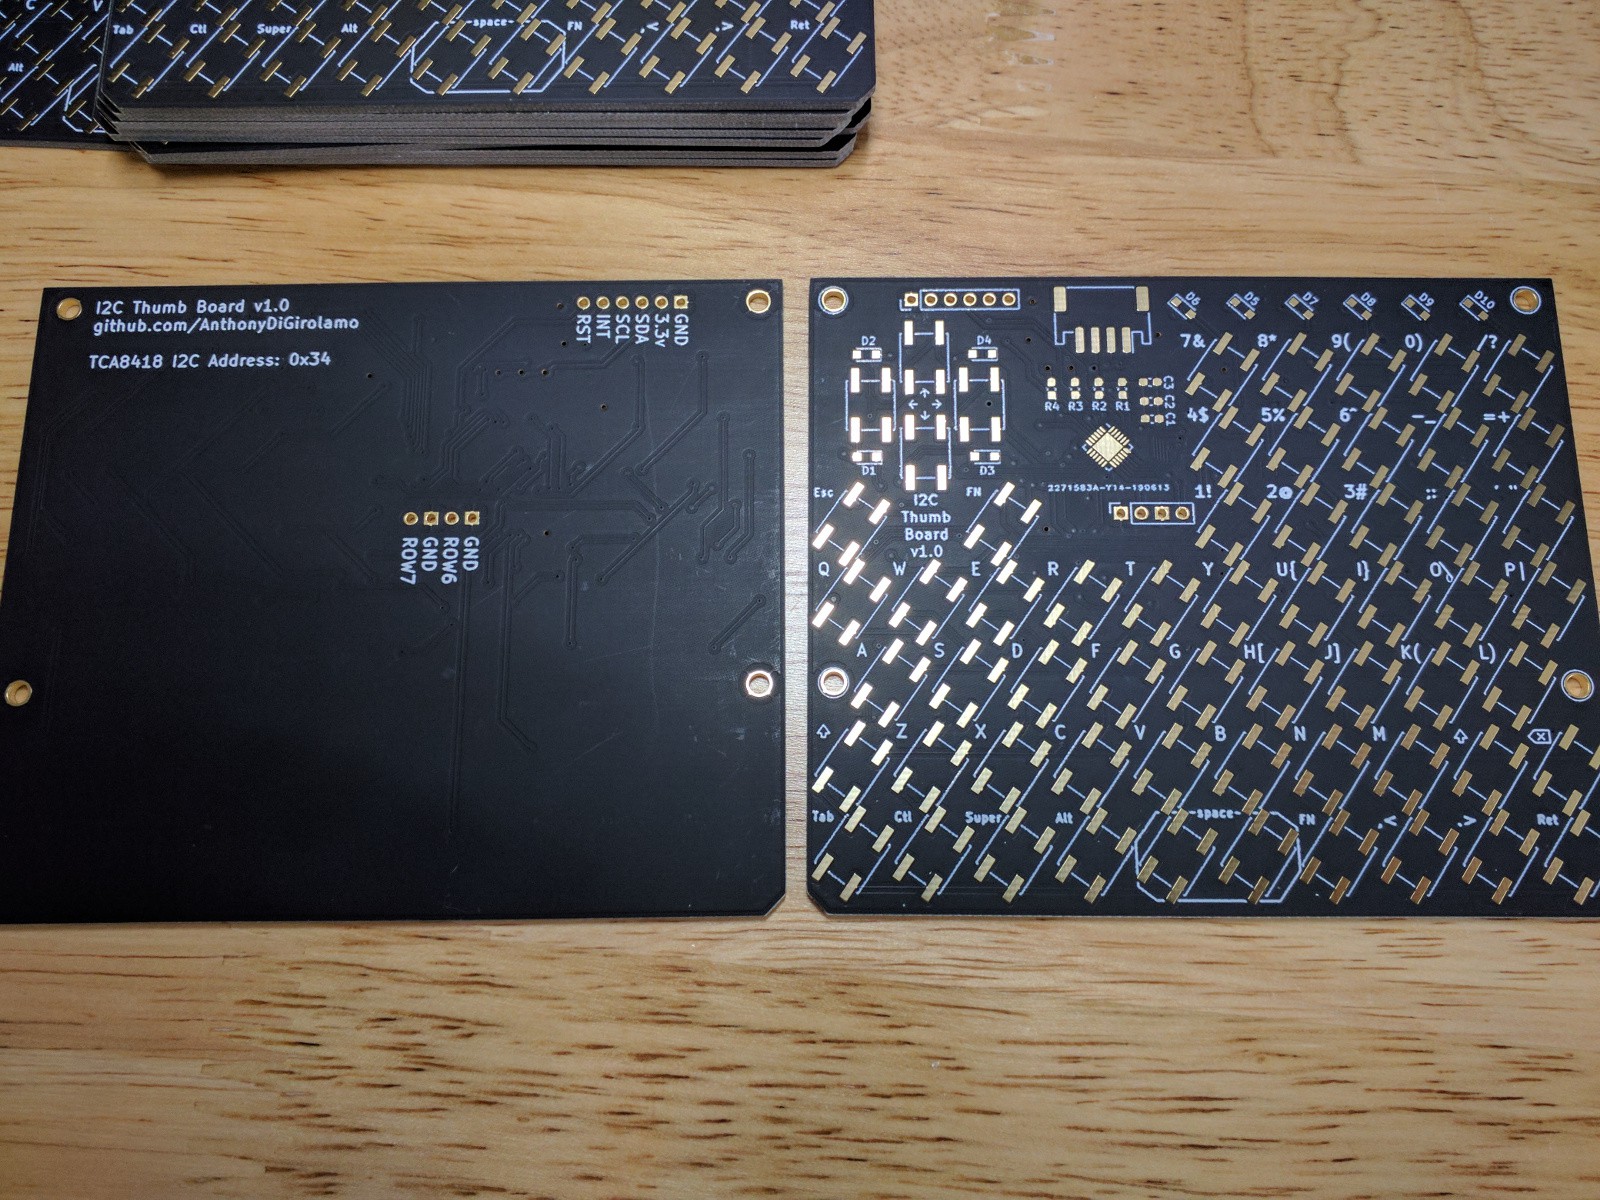
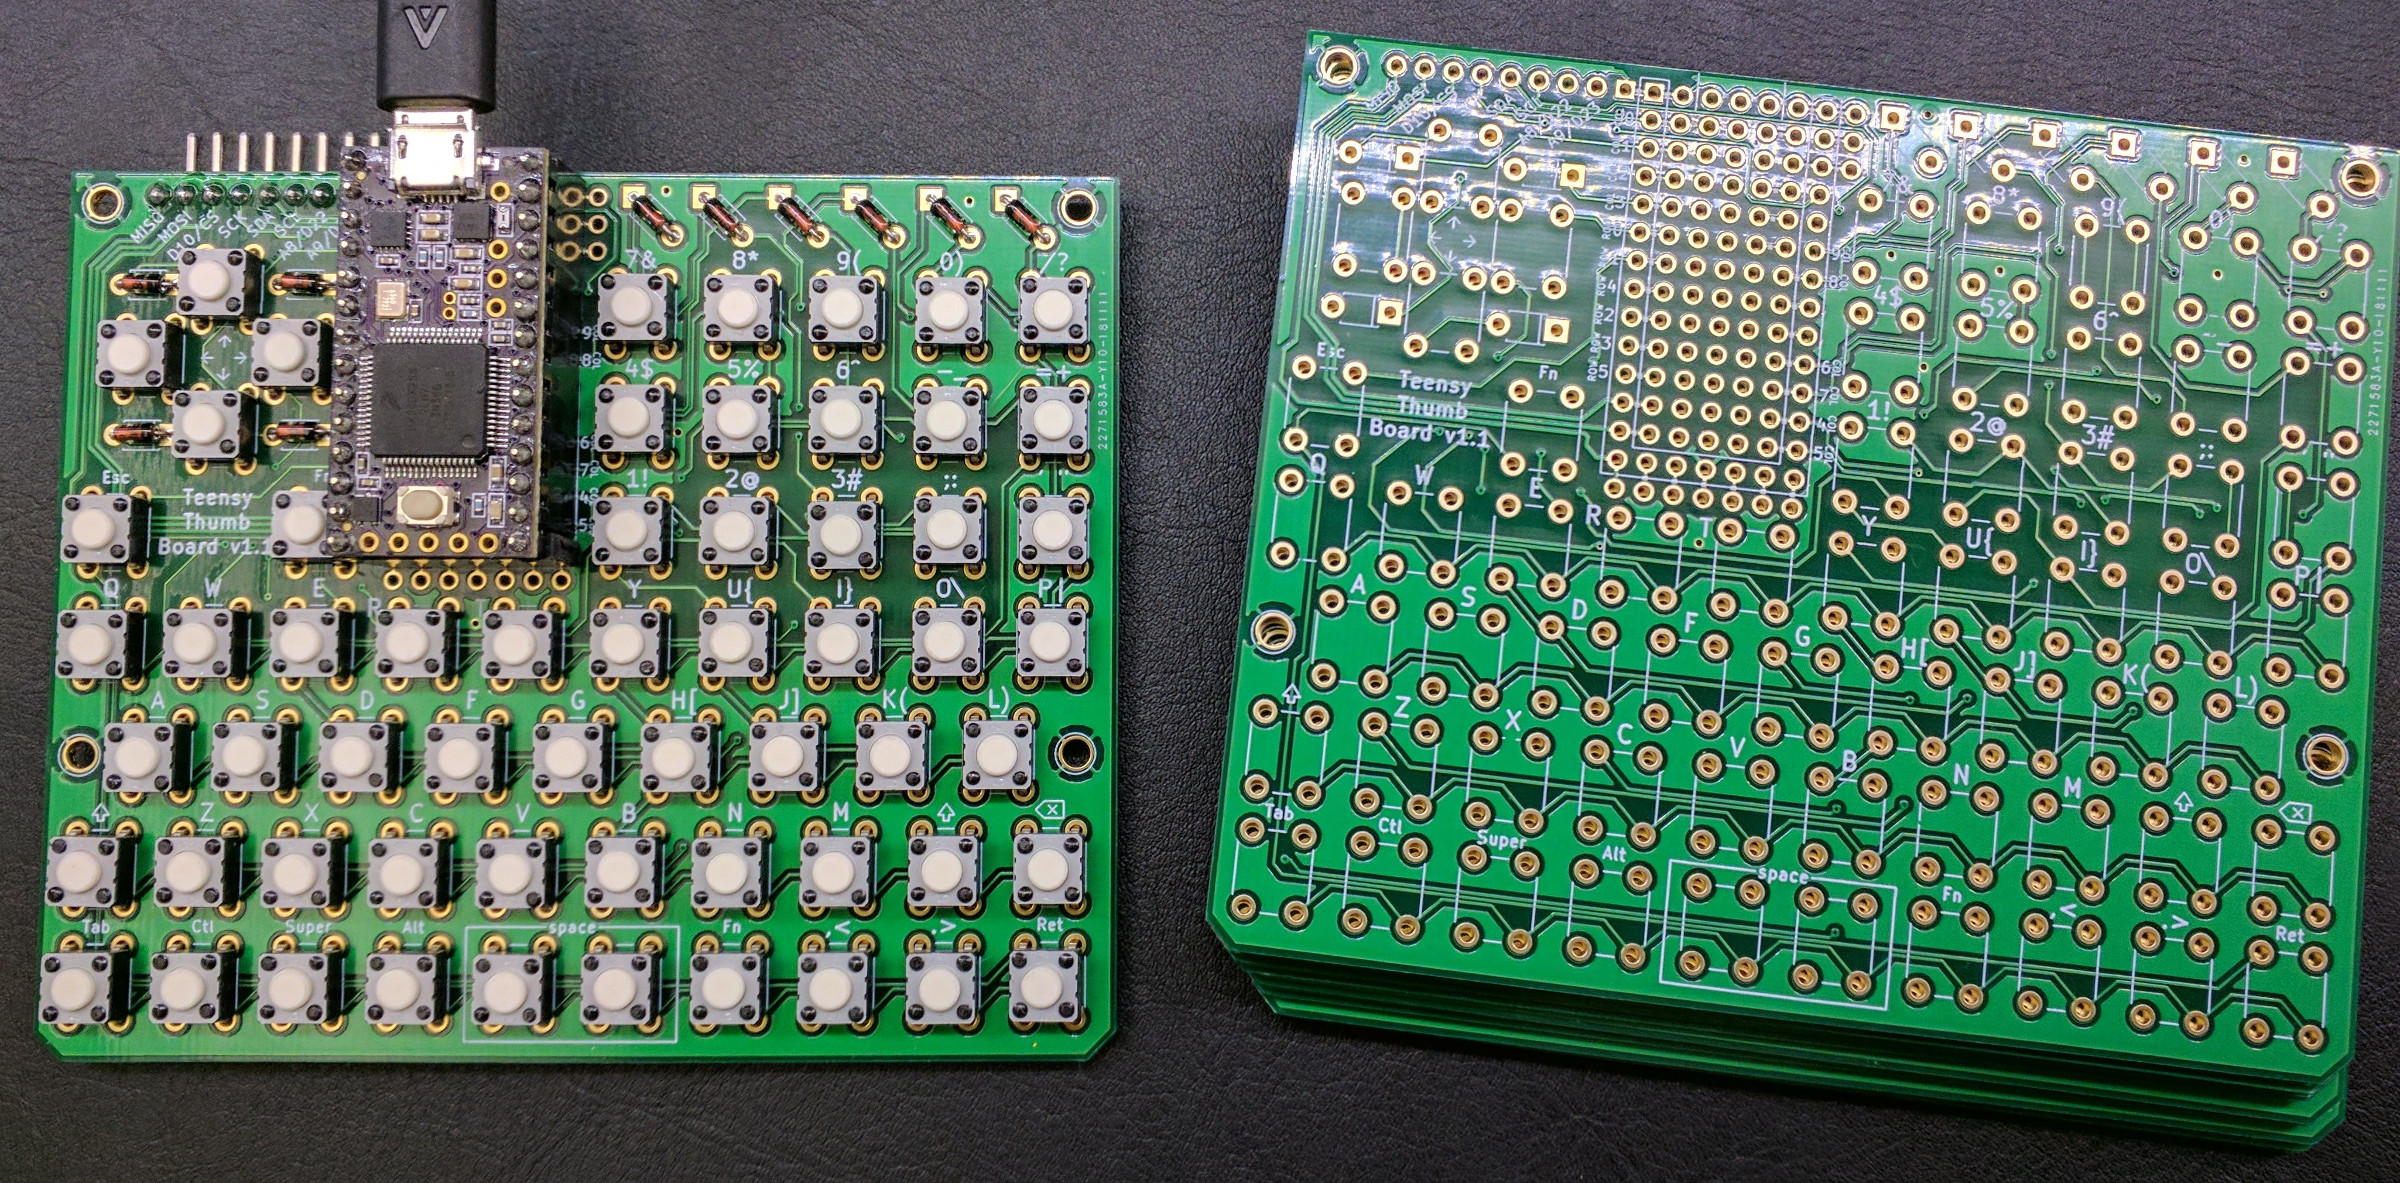
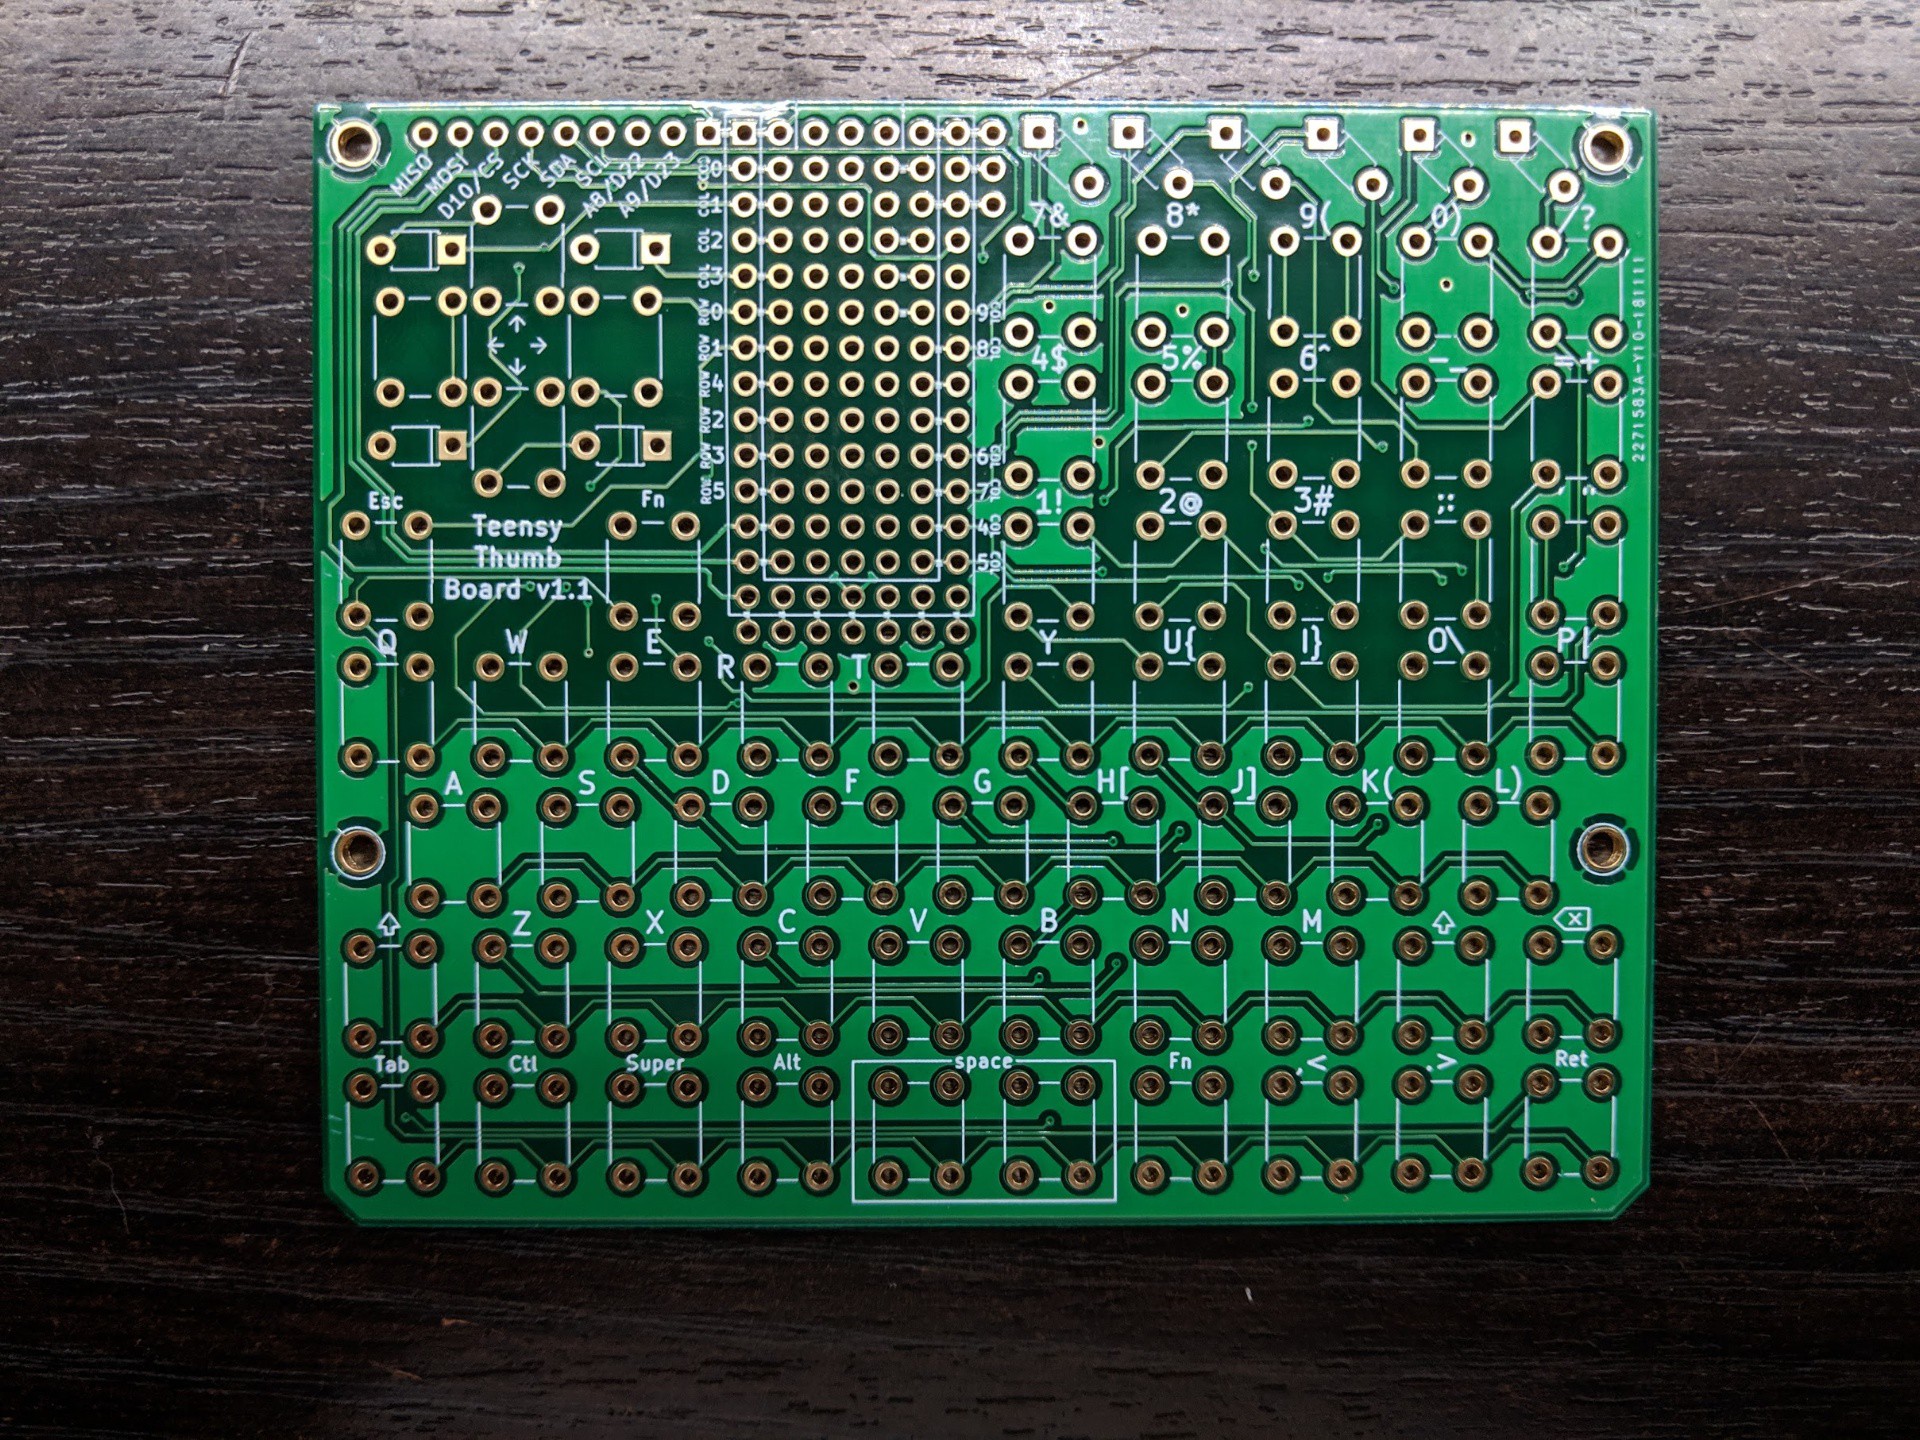
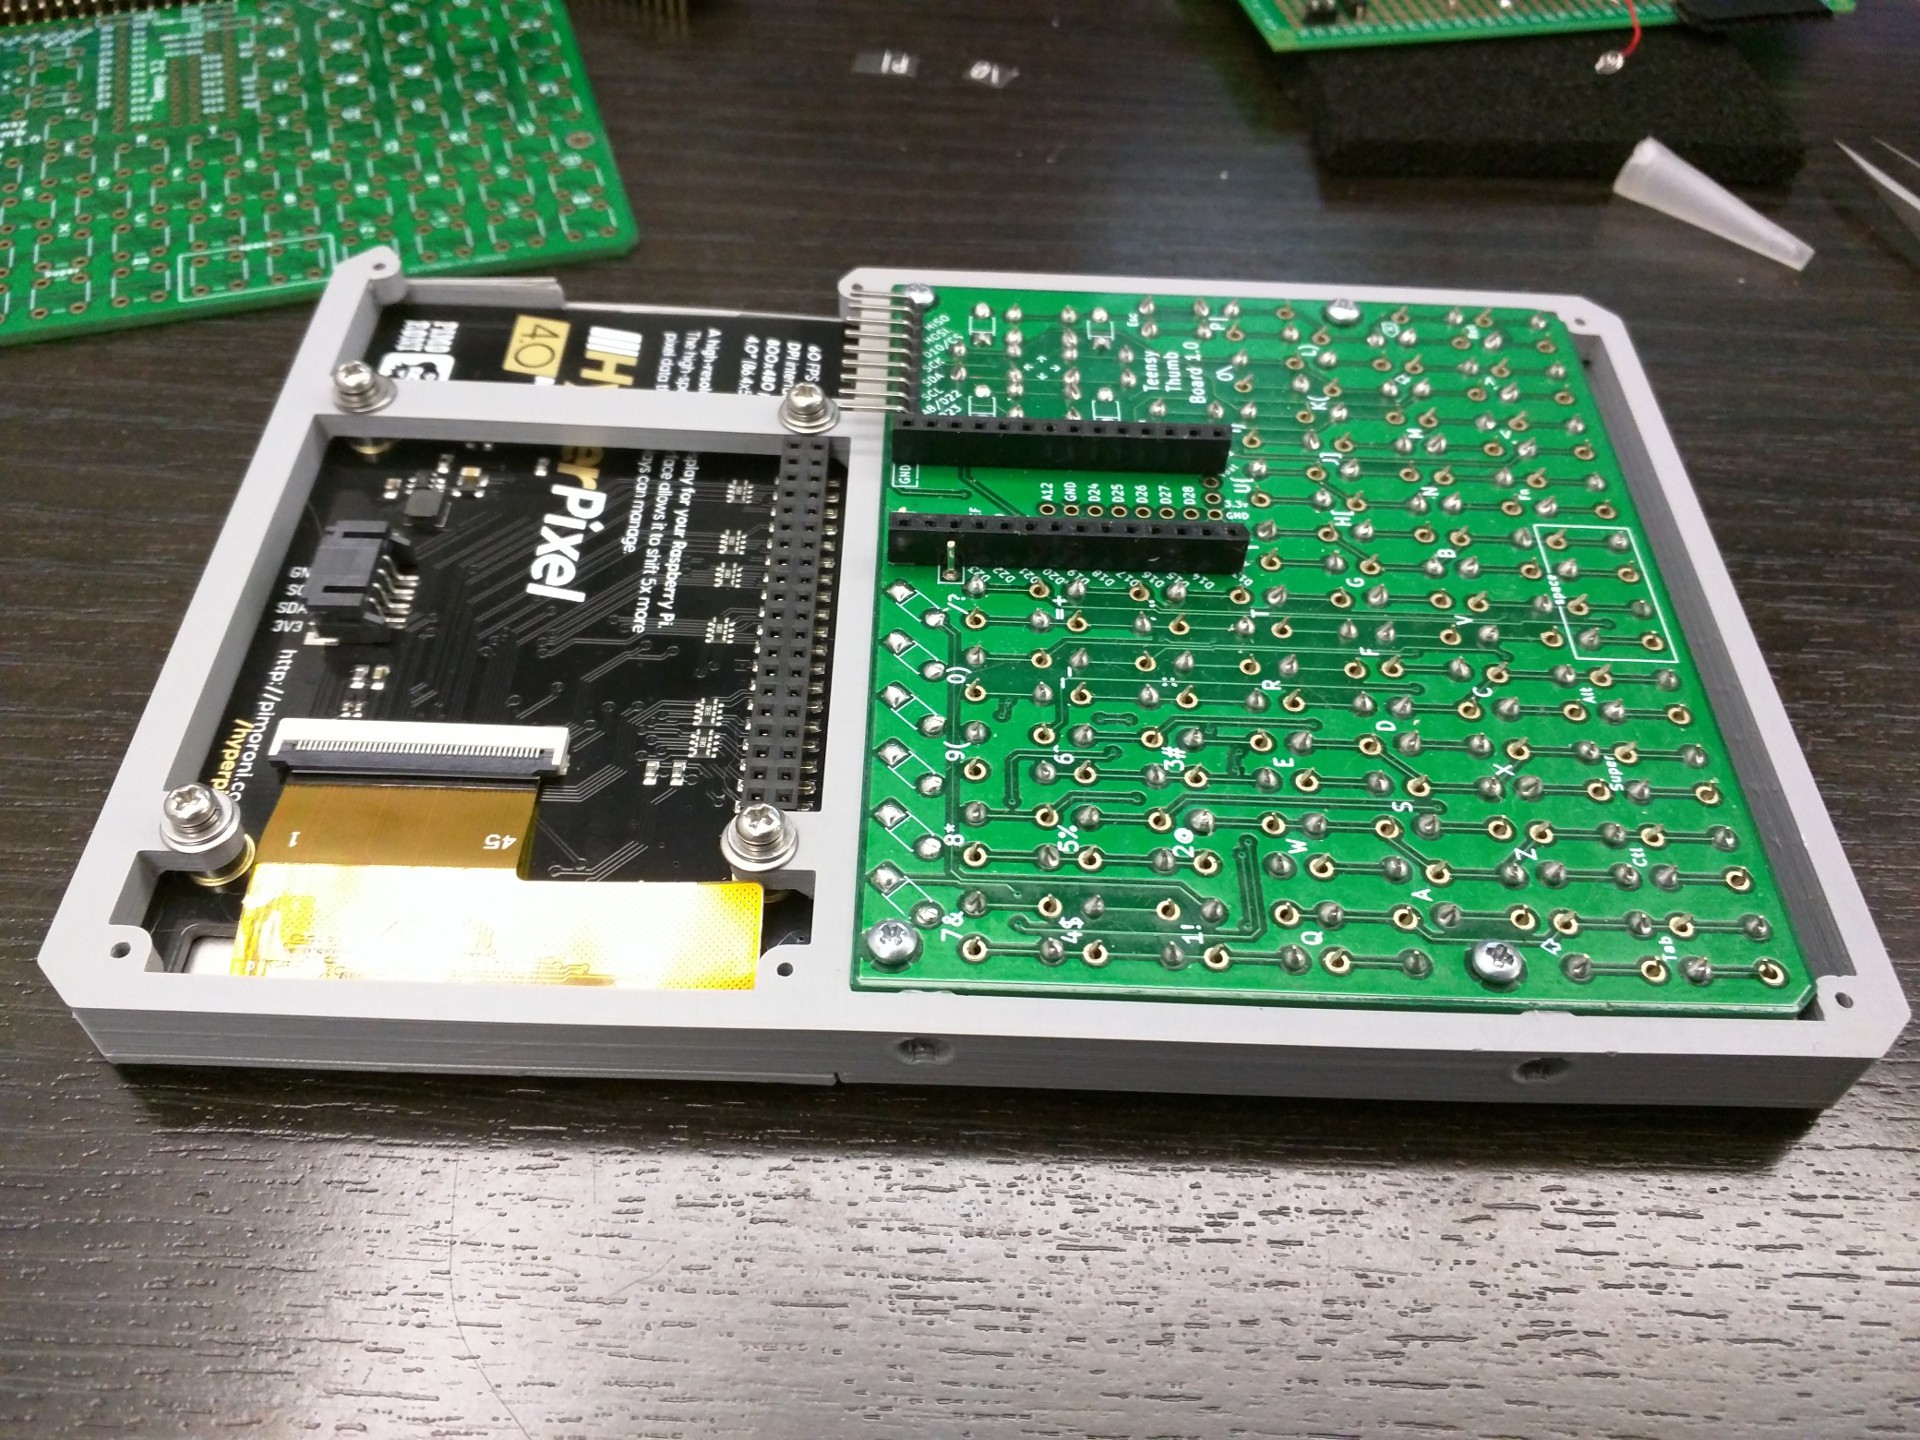
  • Beginner friendly through hole soldering.
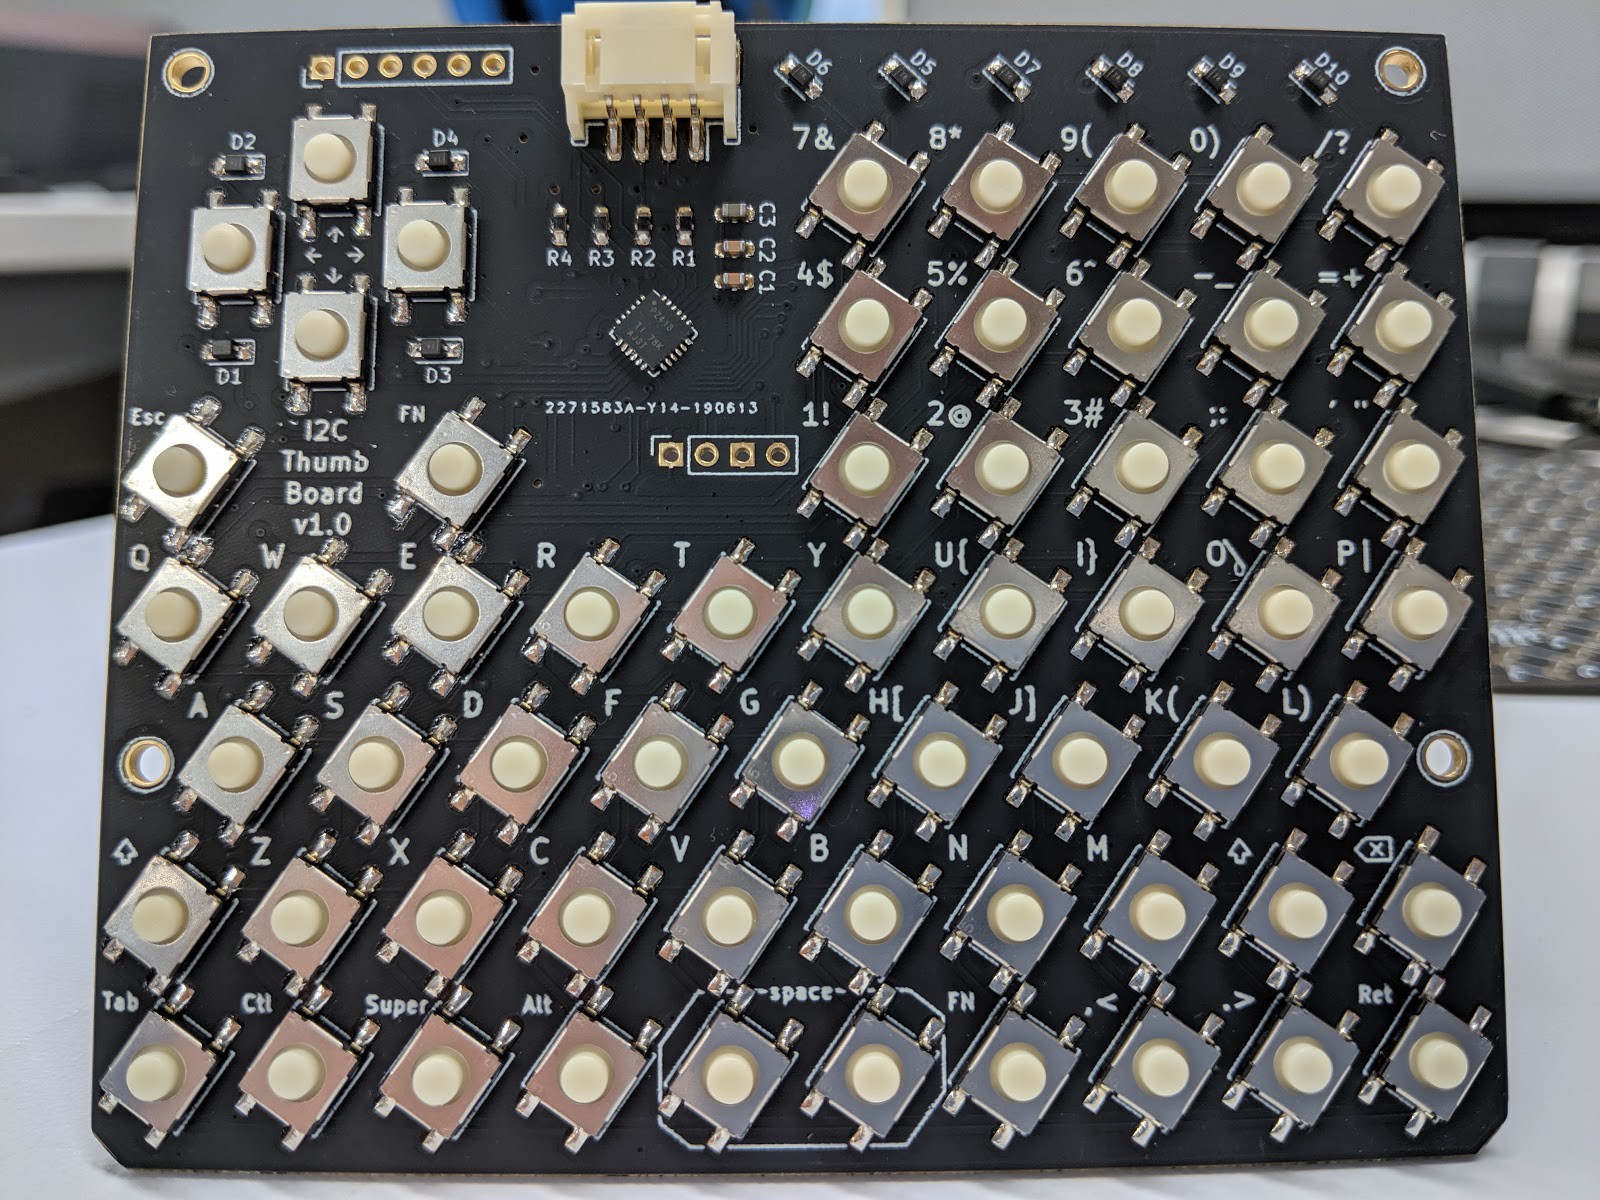
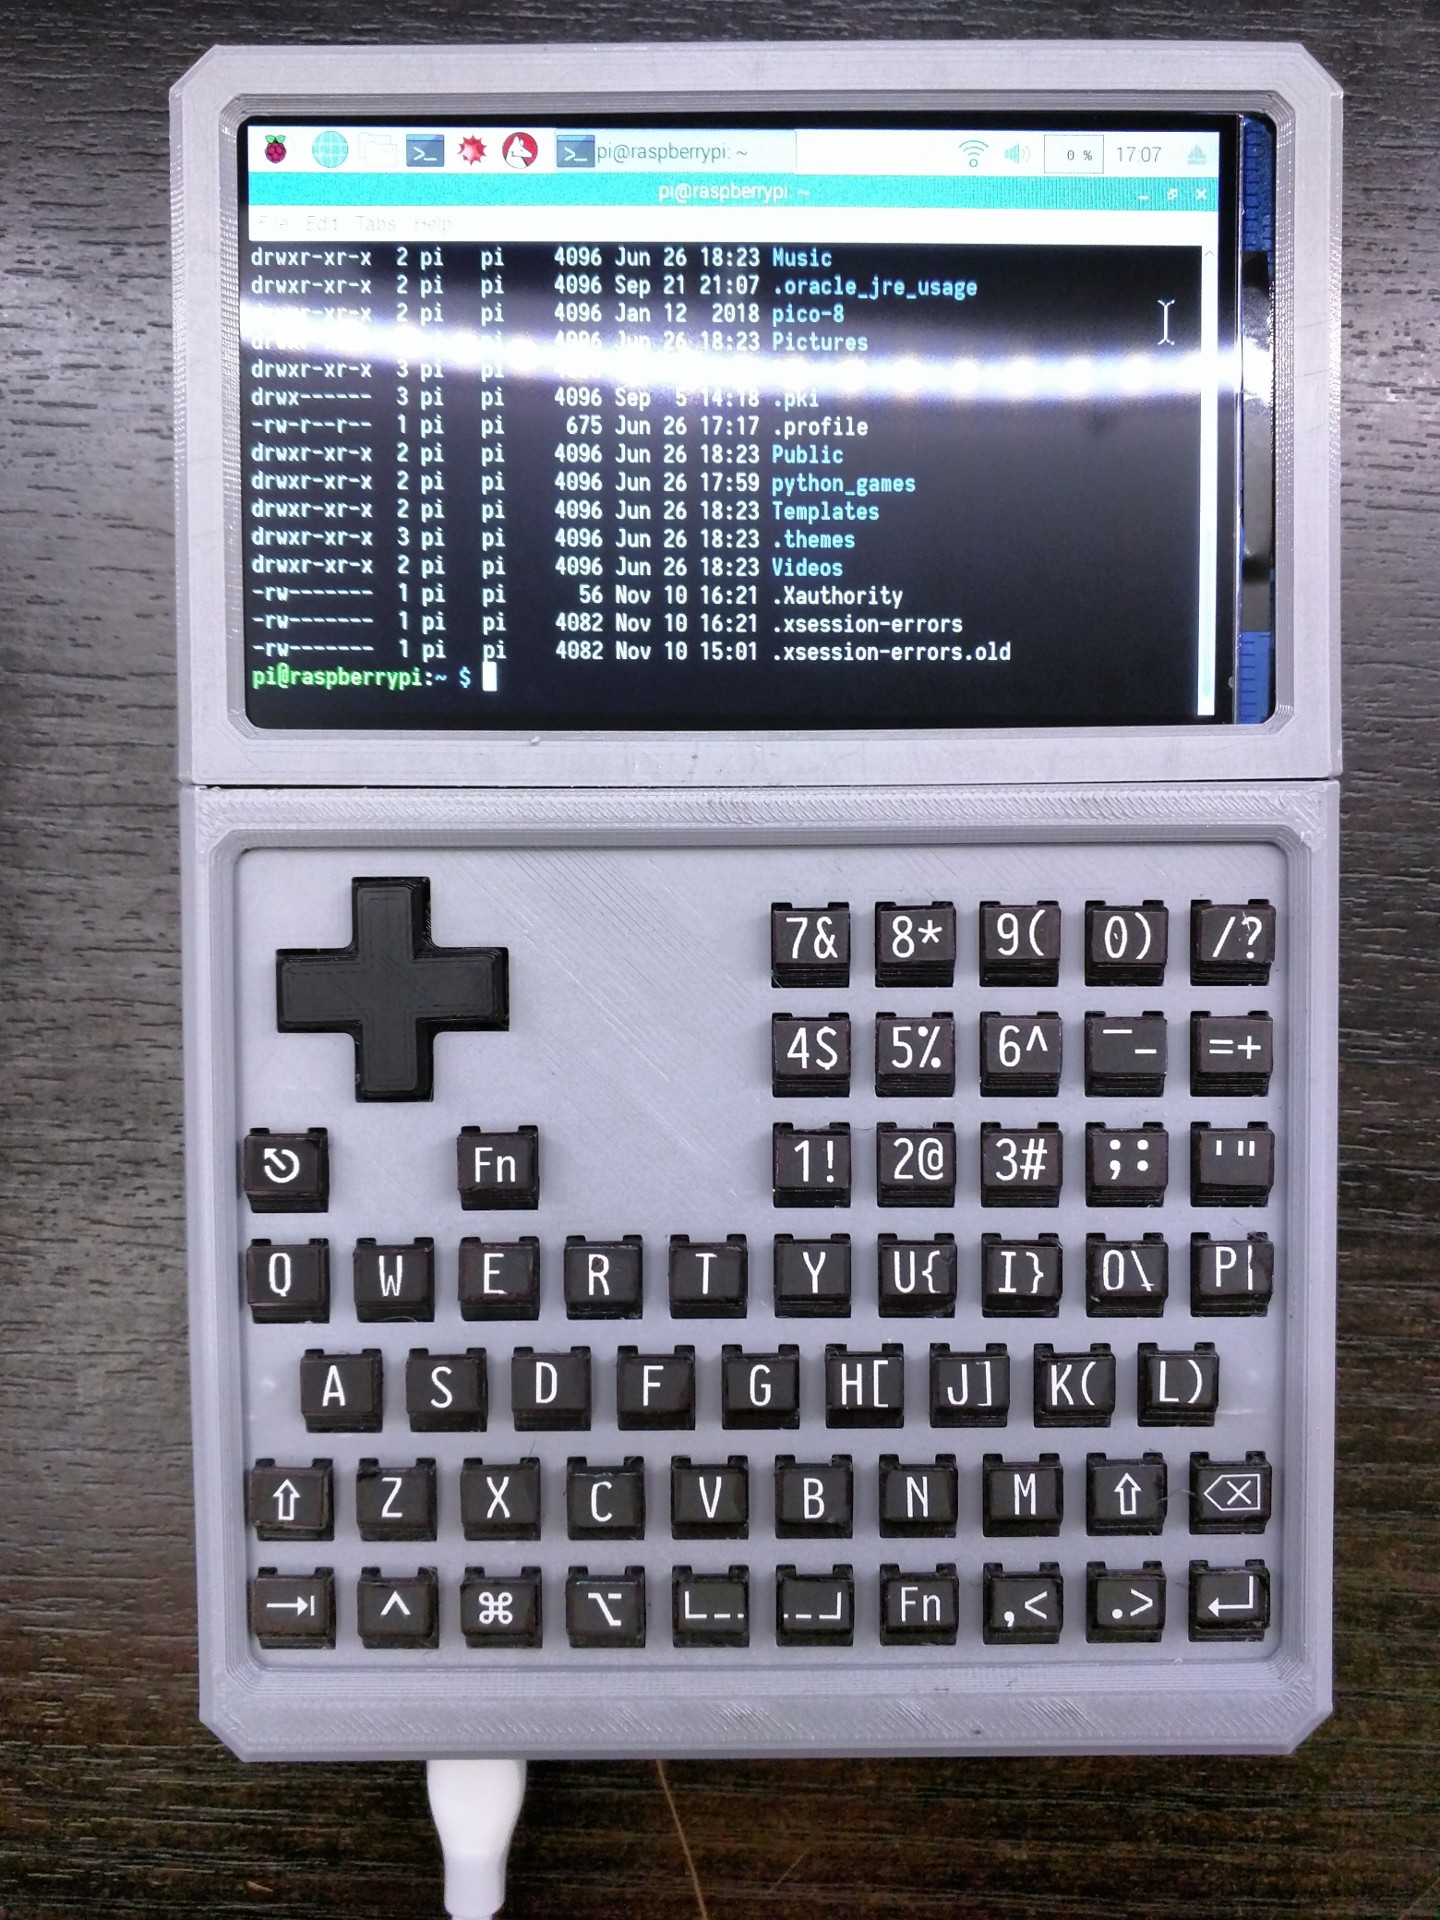
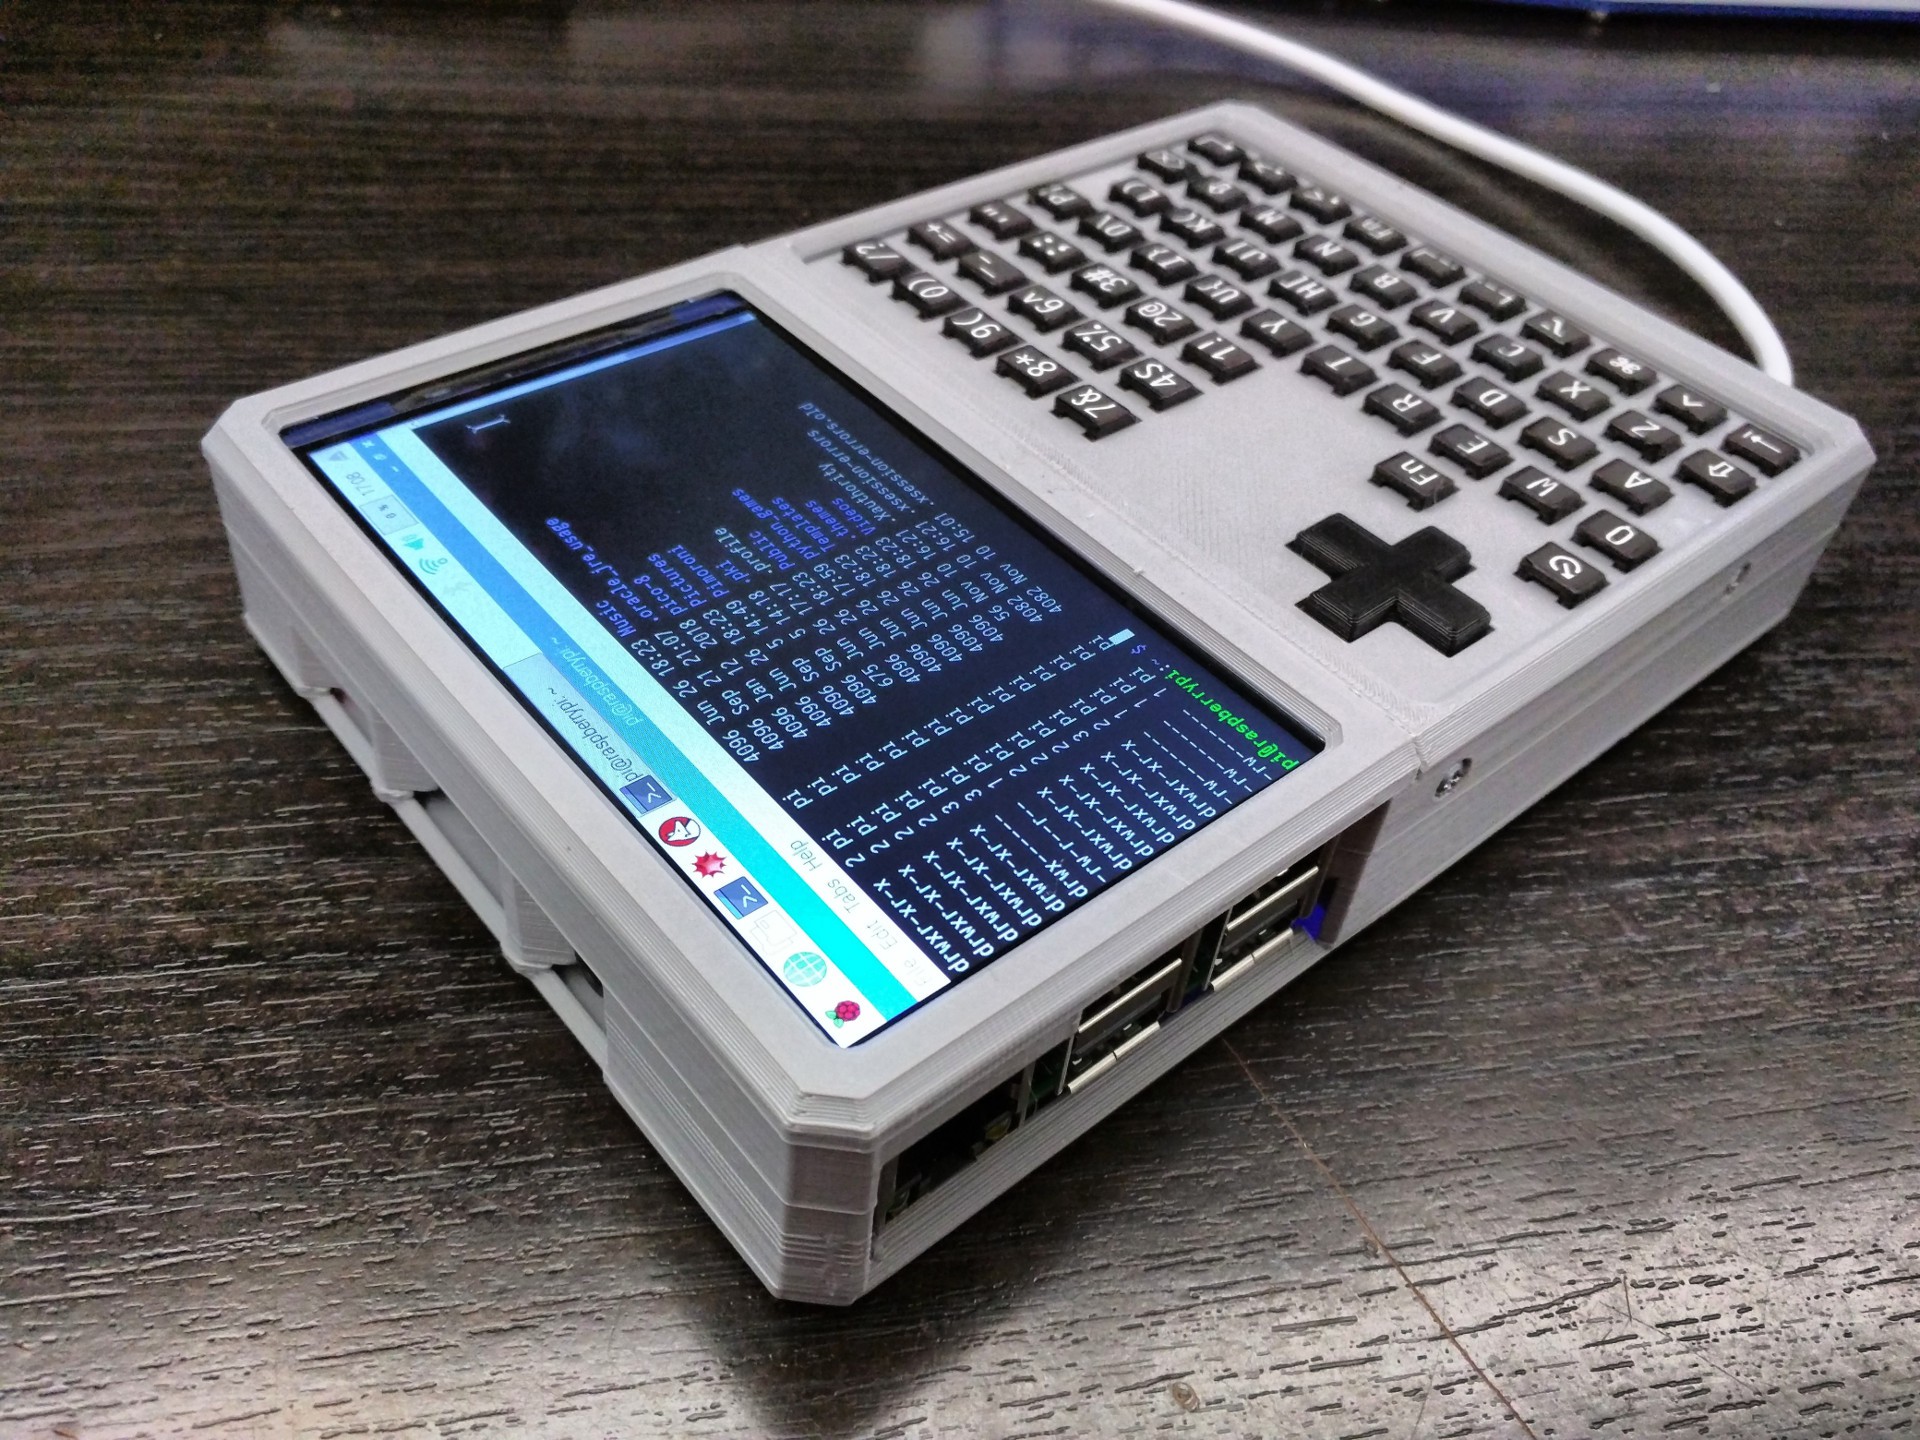
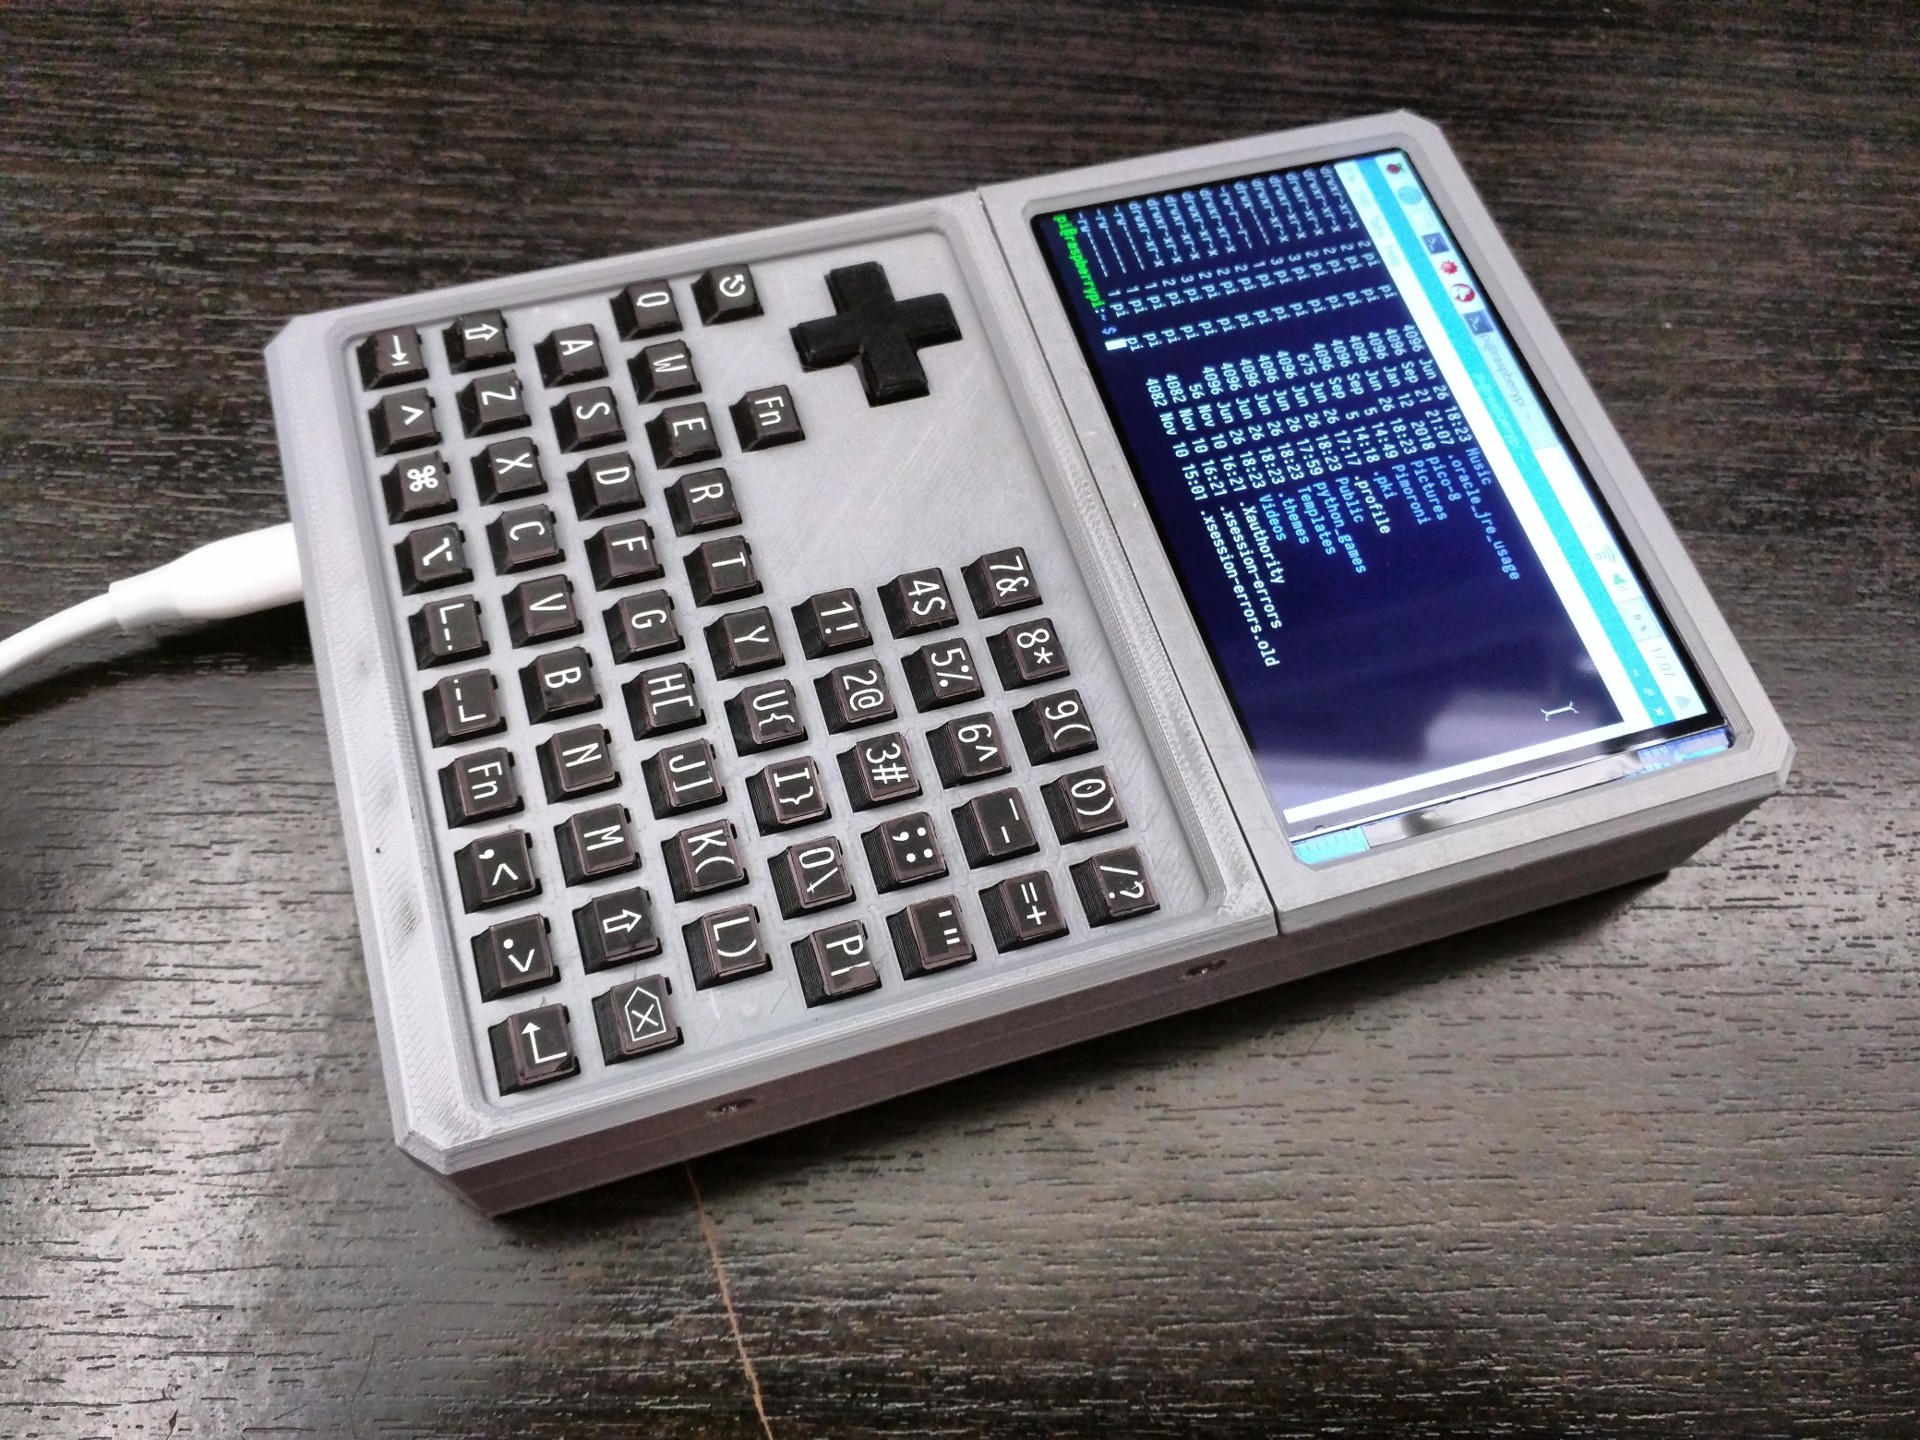
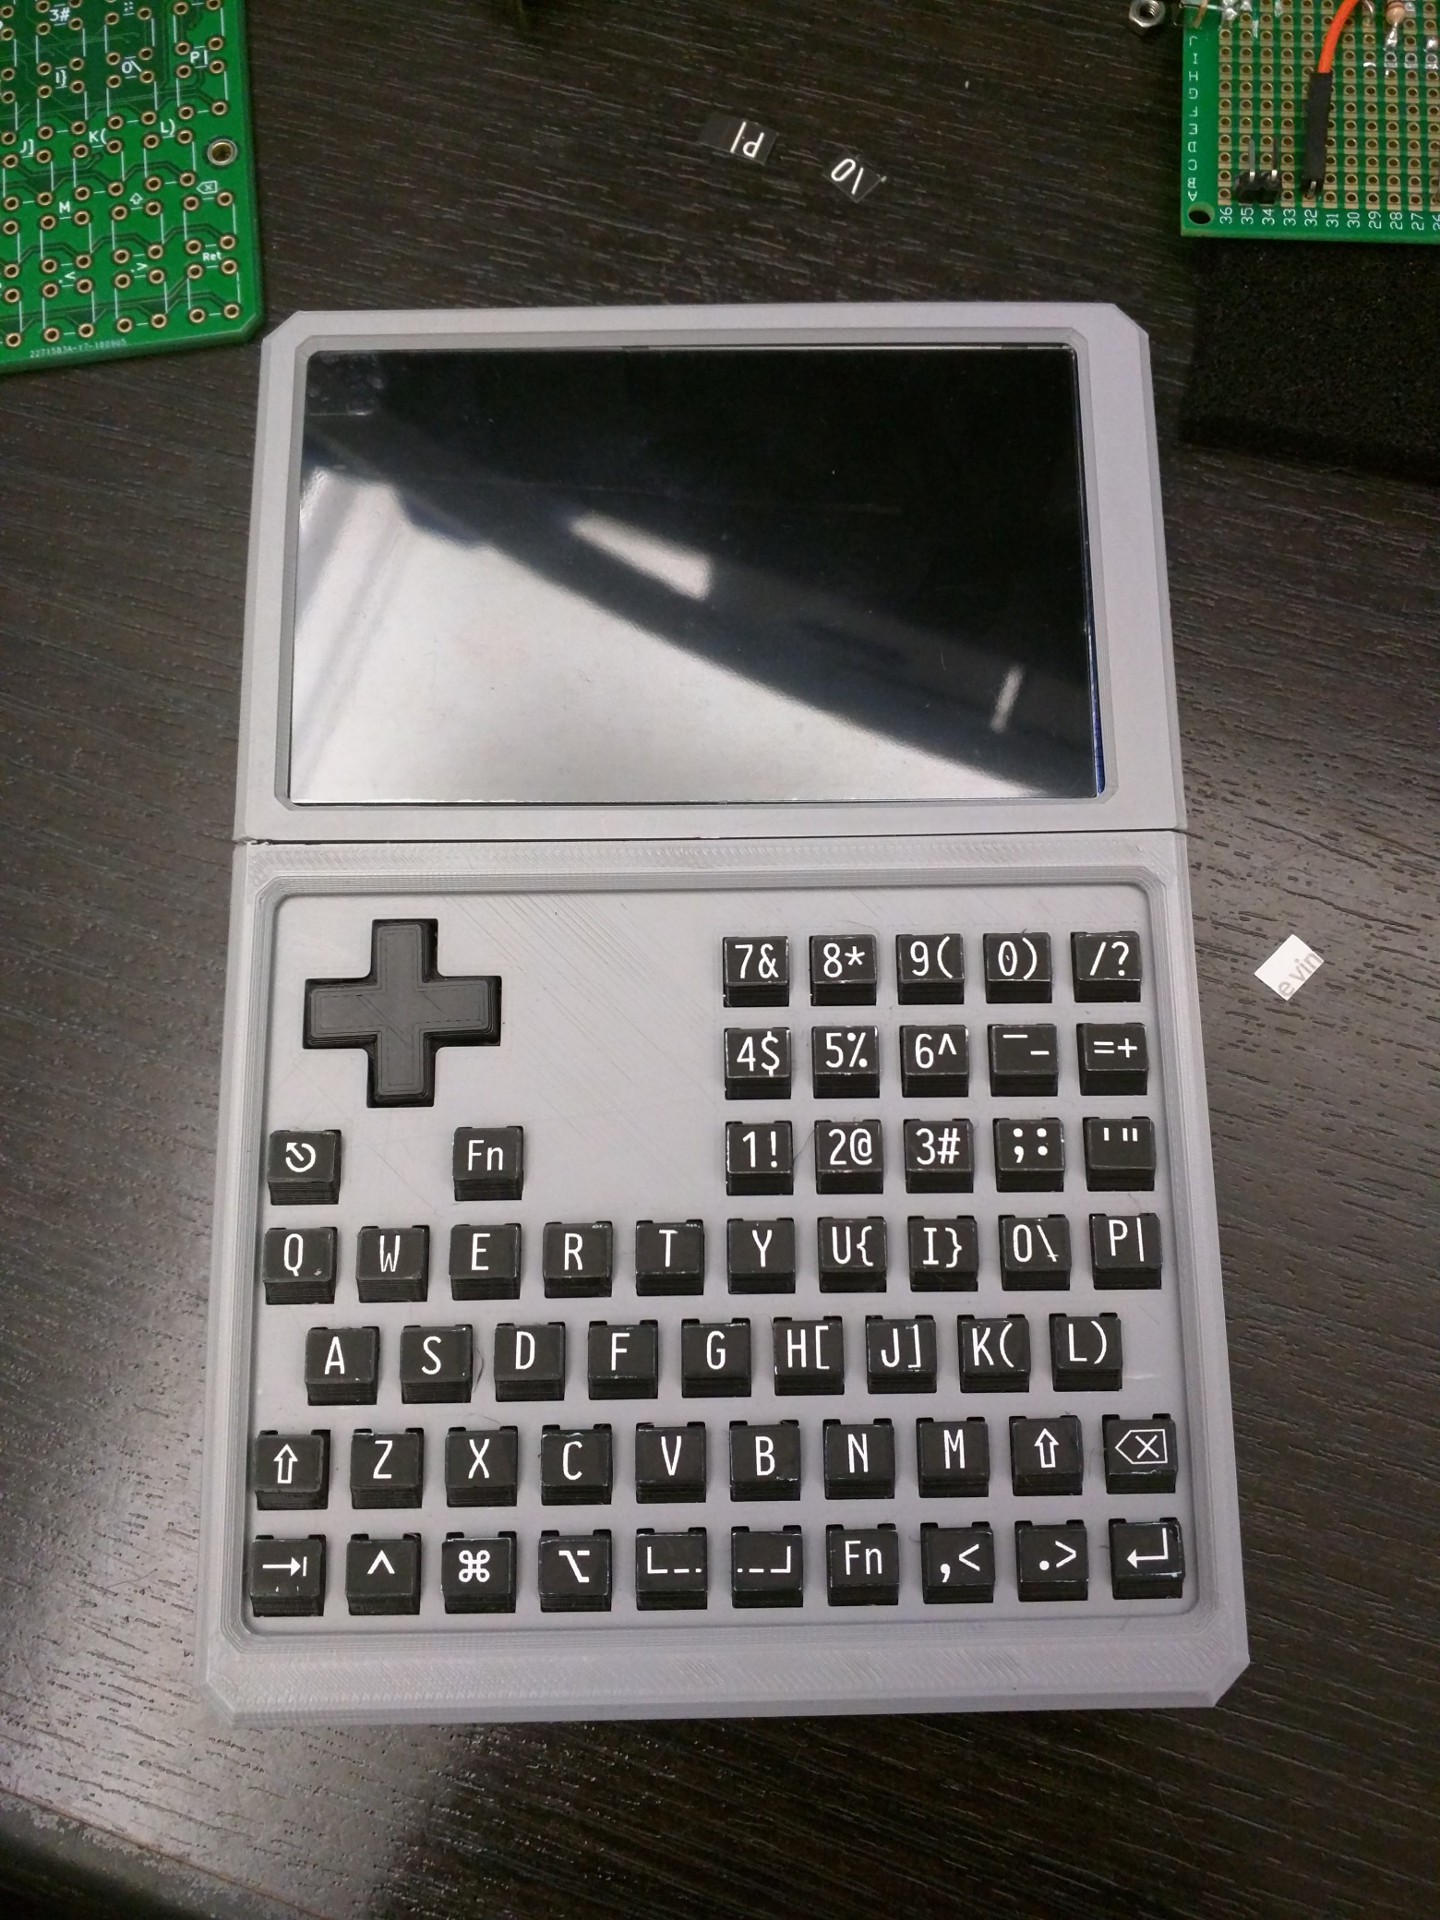
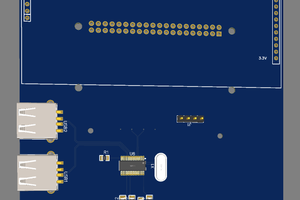
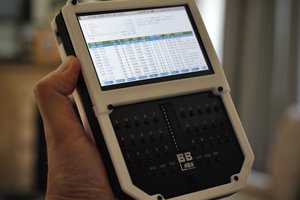
  • 60 keys arranged in a familiar qwerty layout with number keys arranged in a numpad.
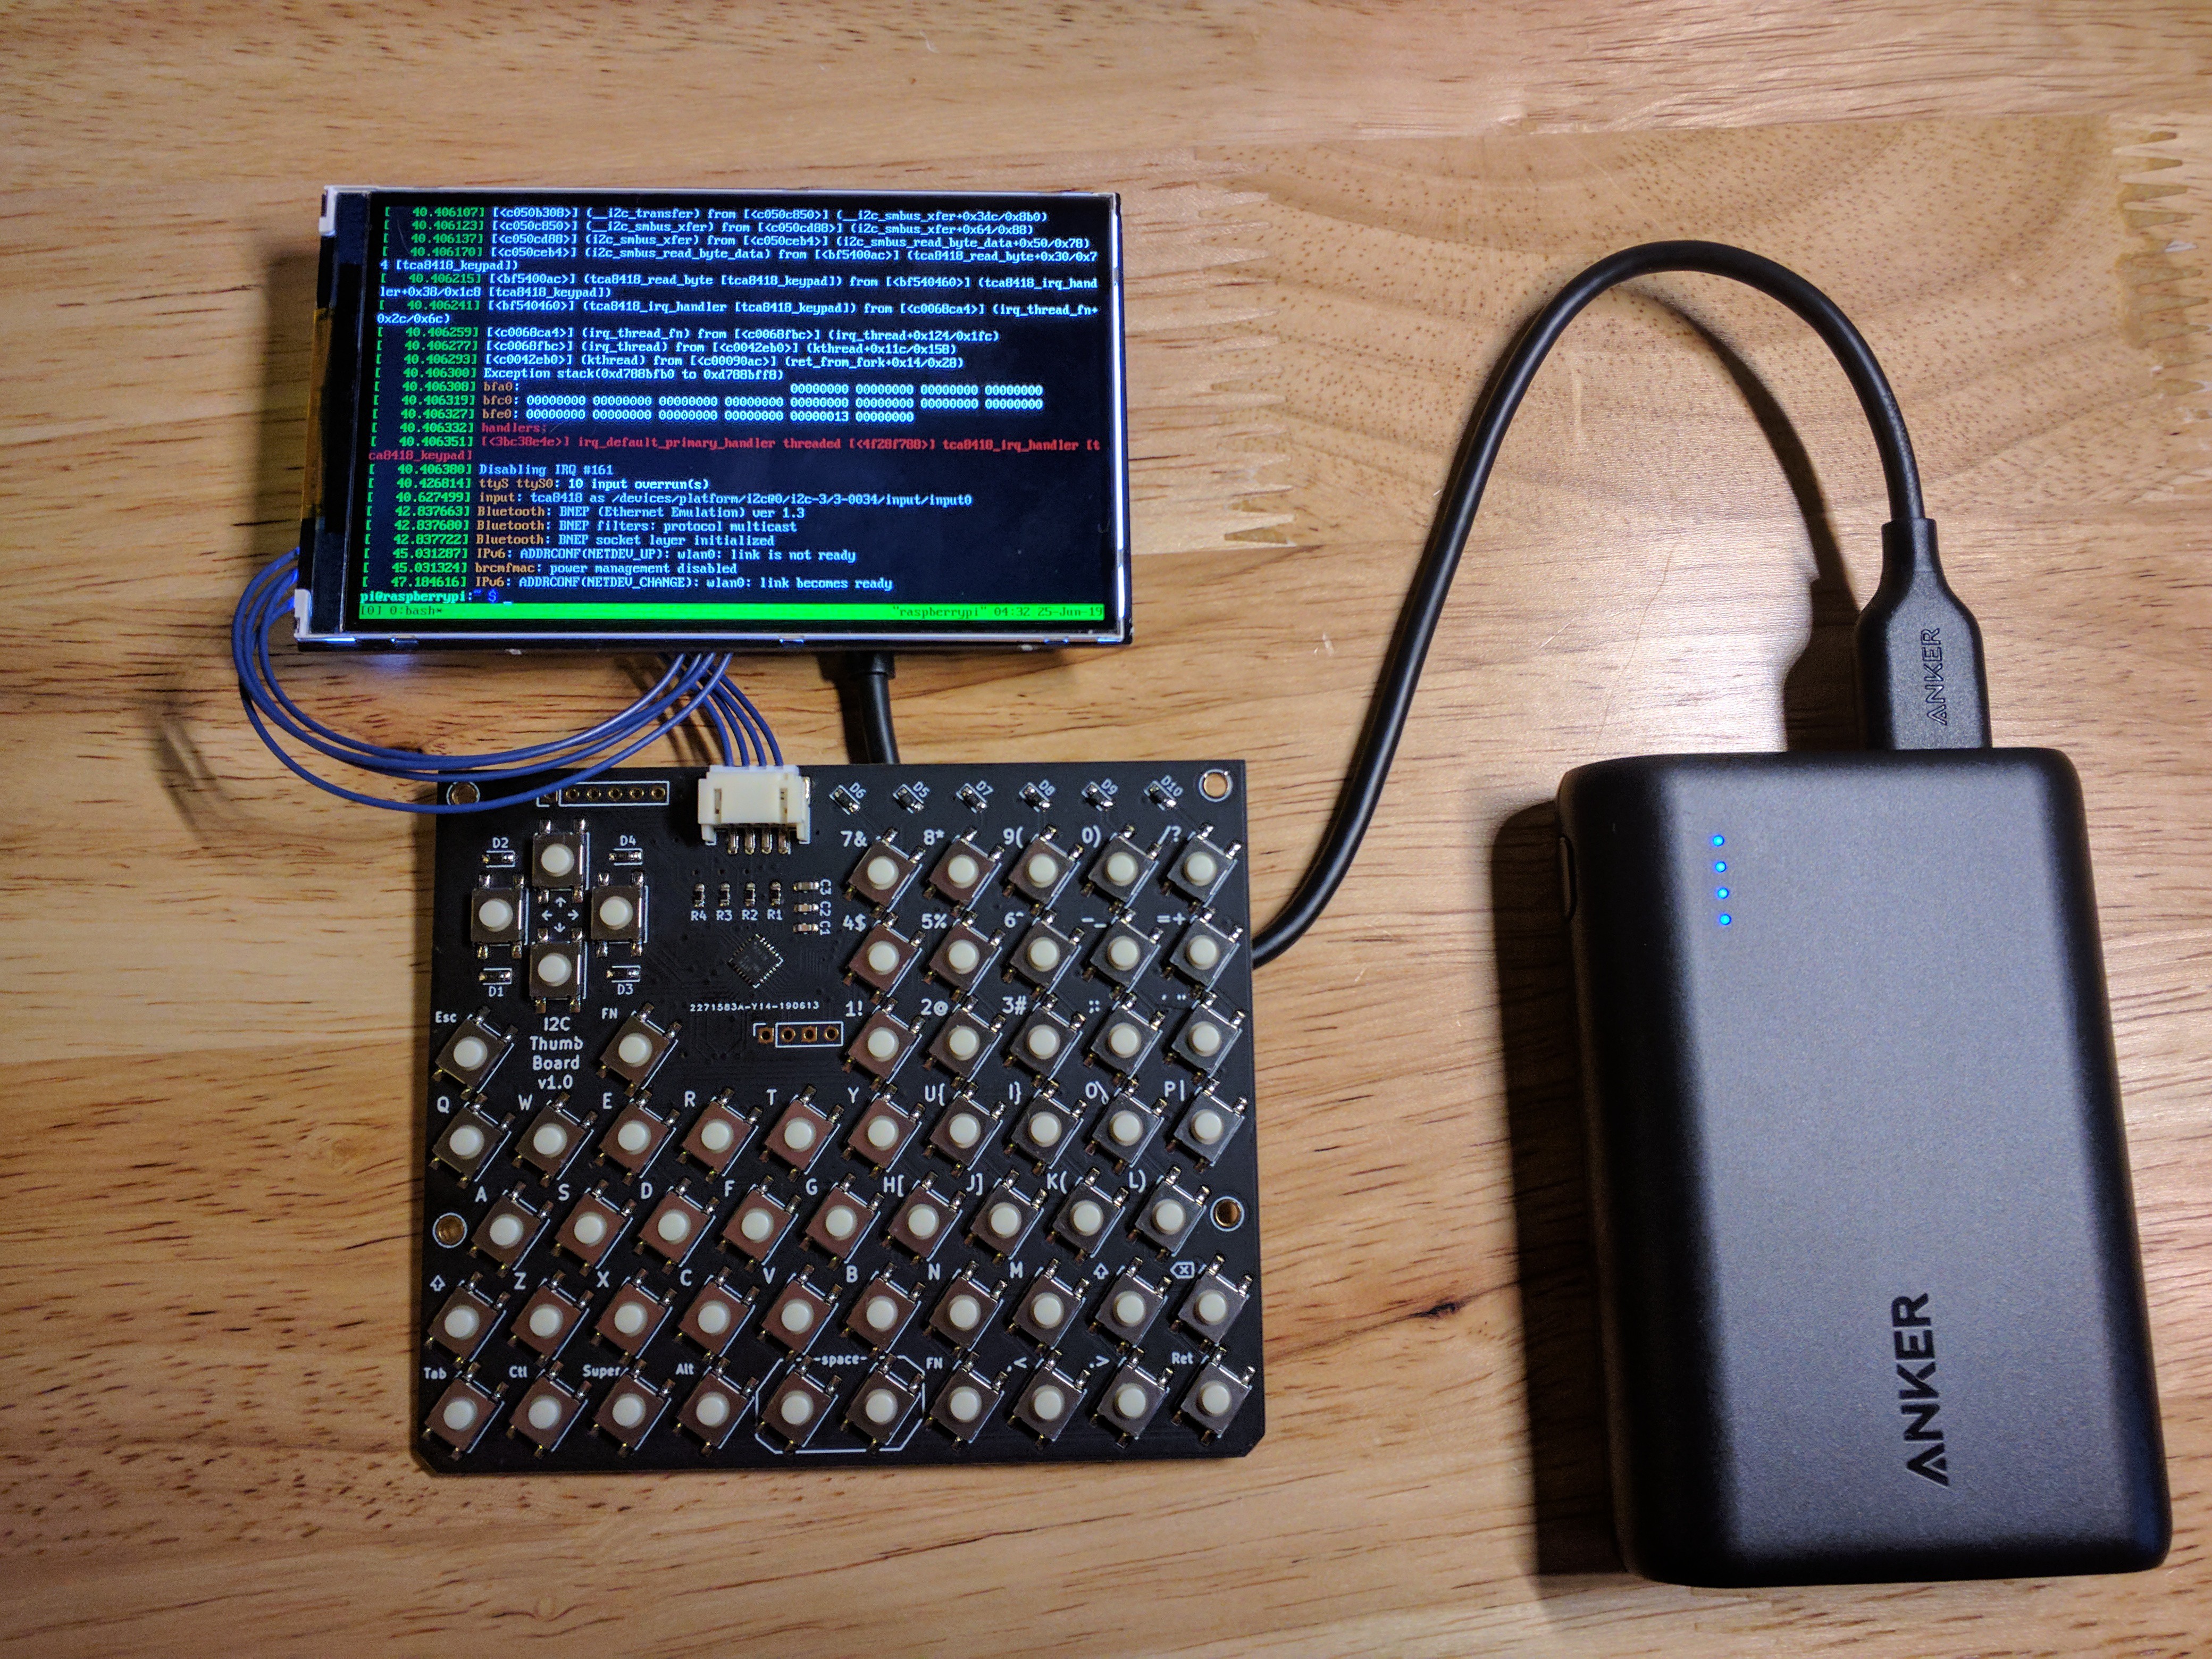
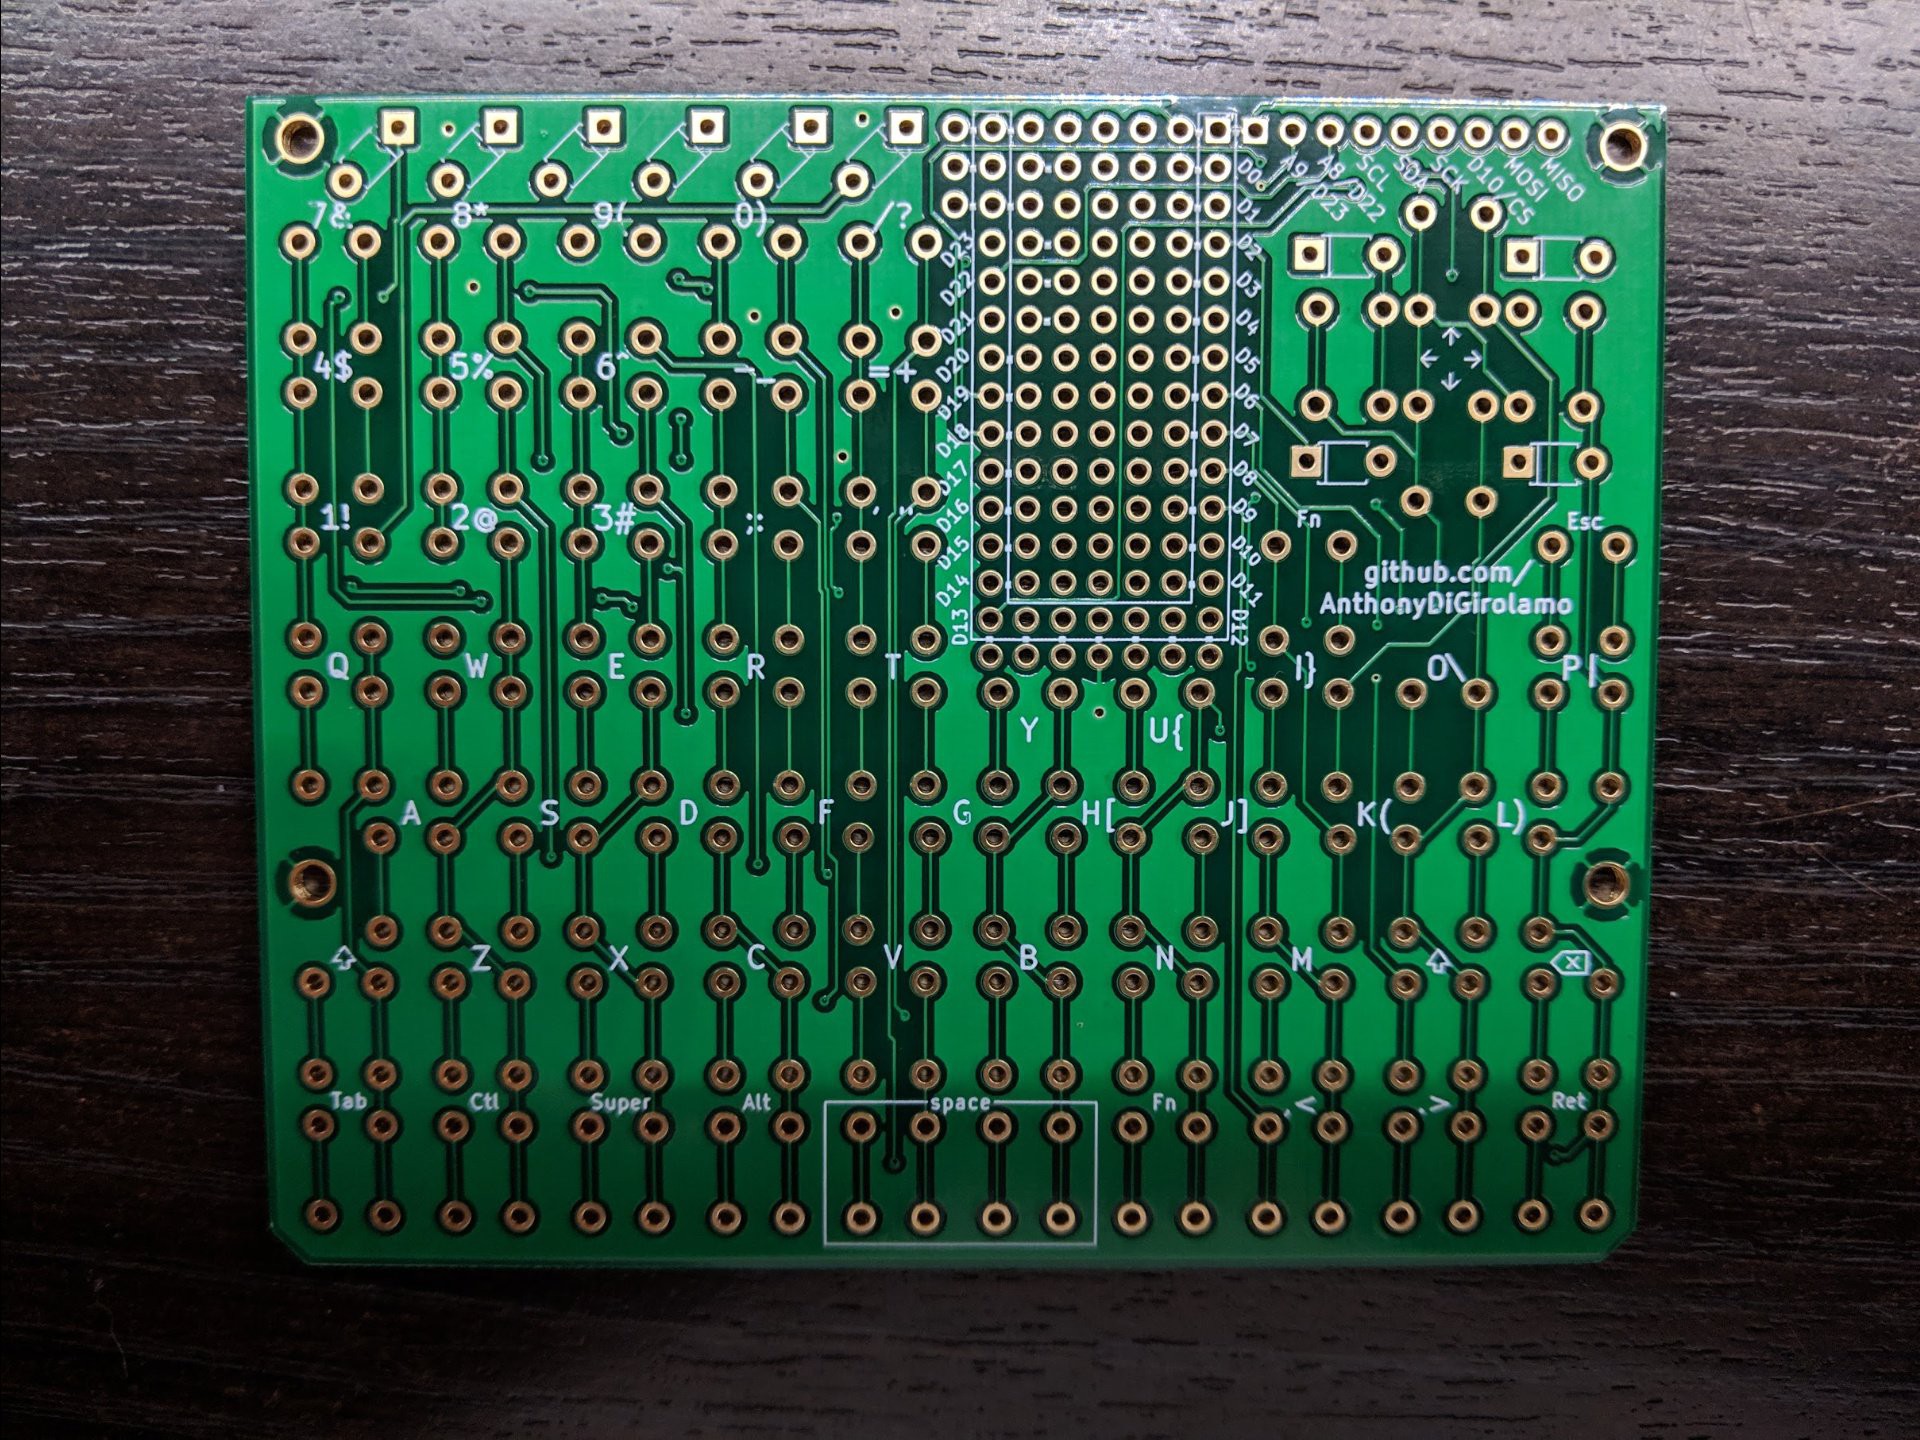
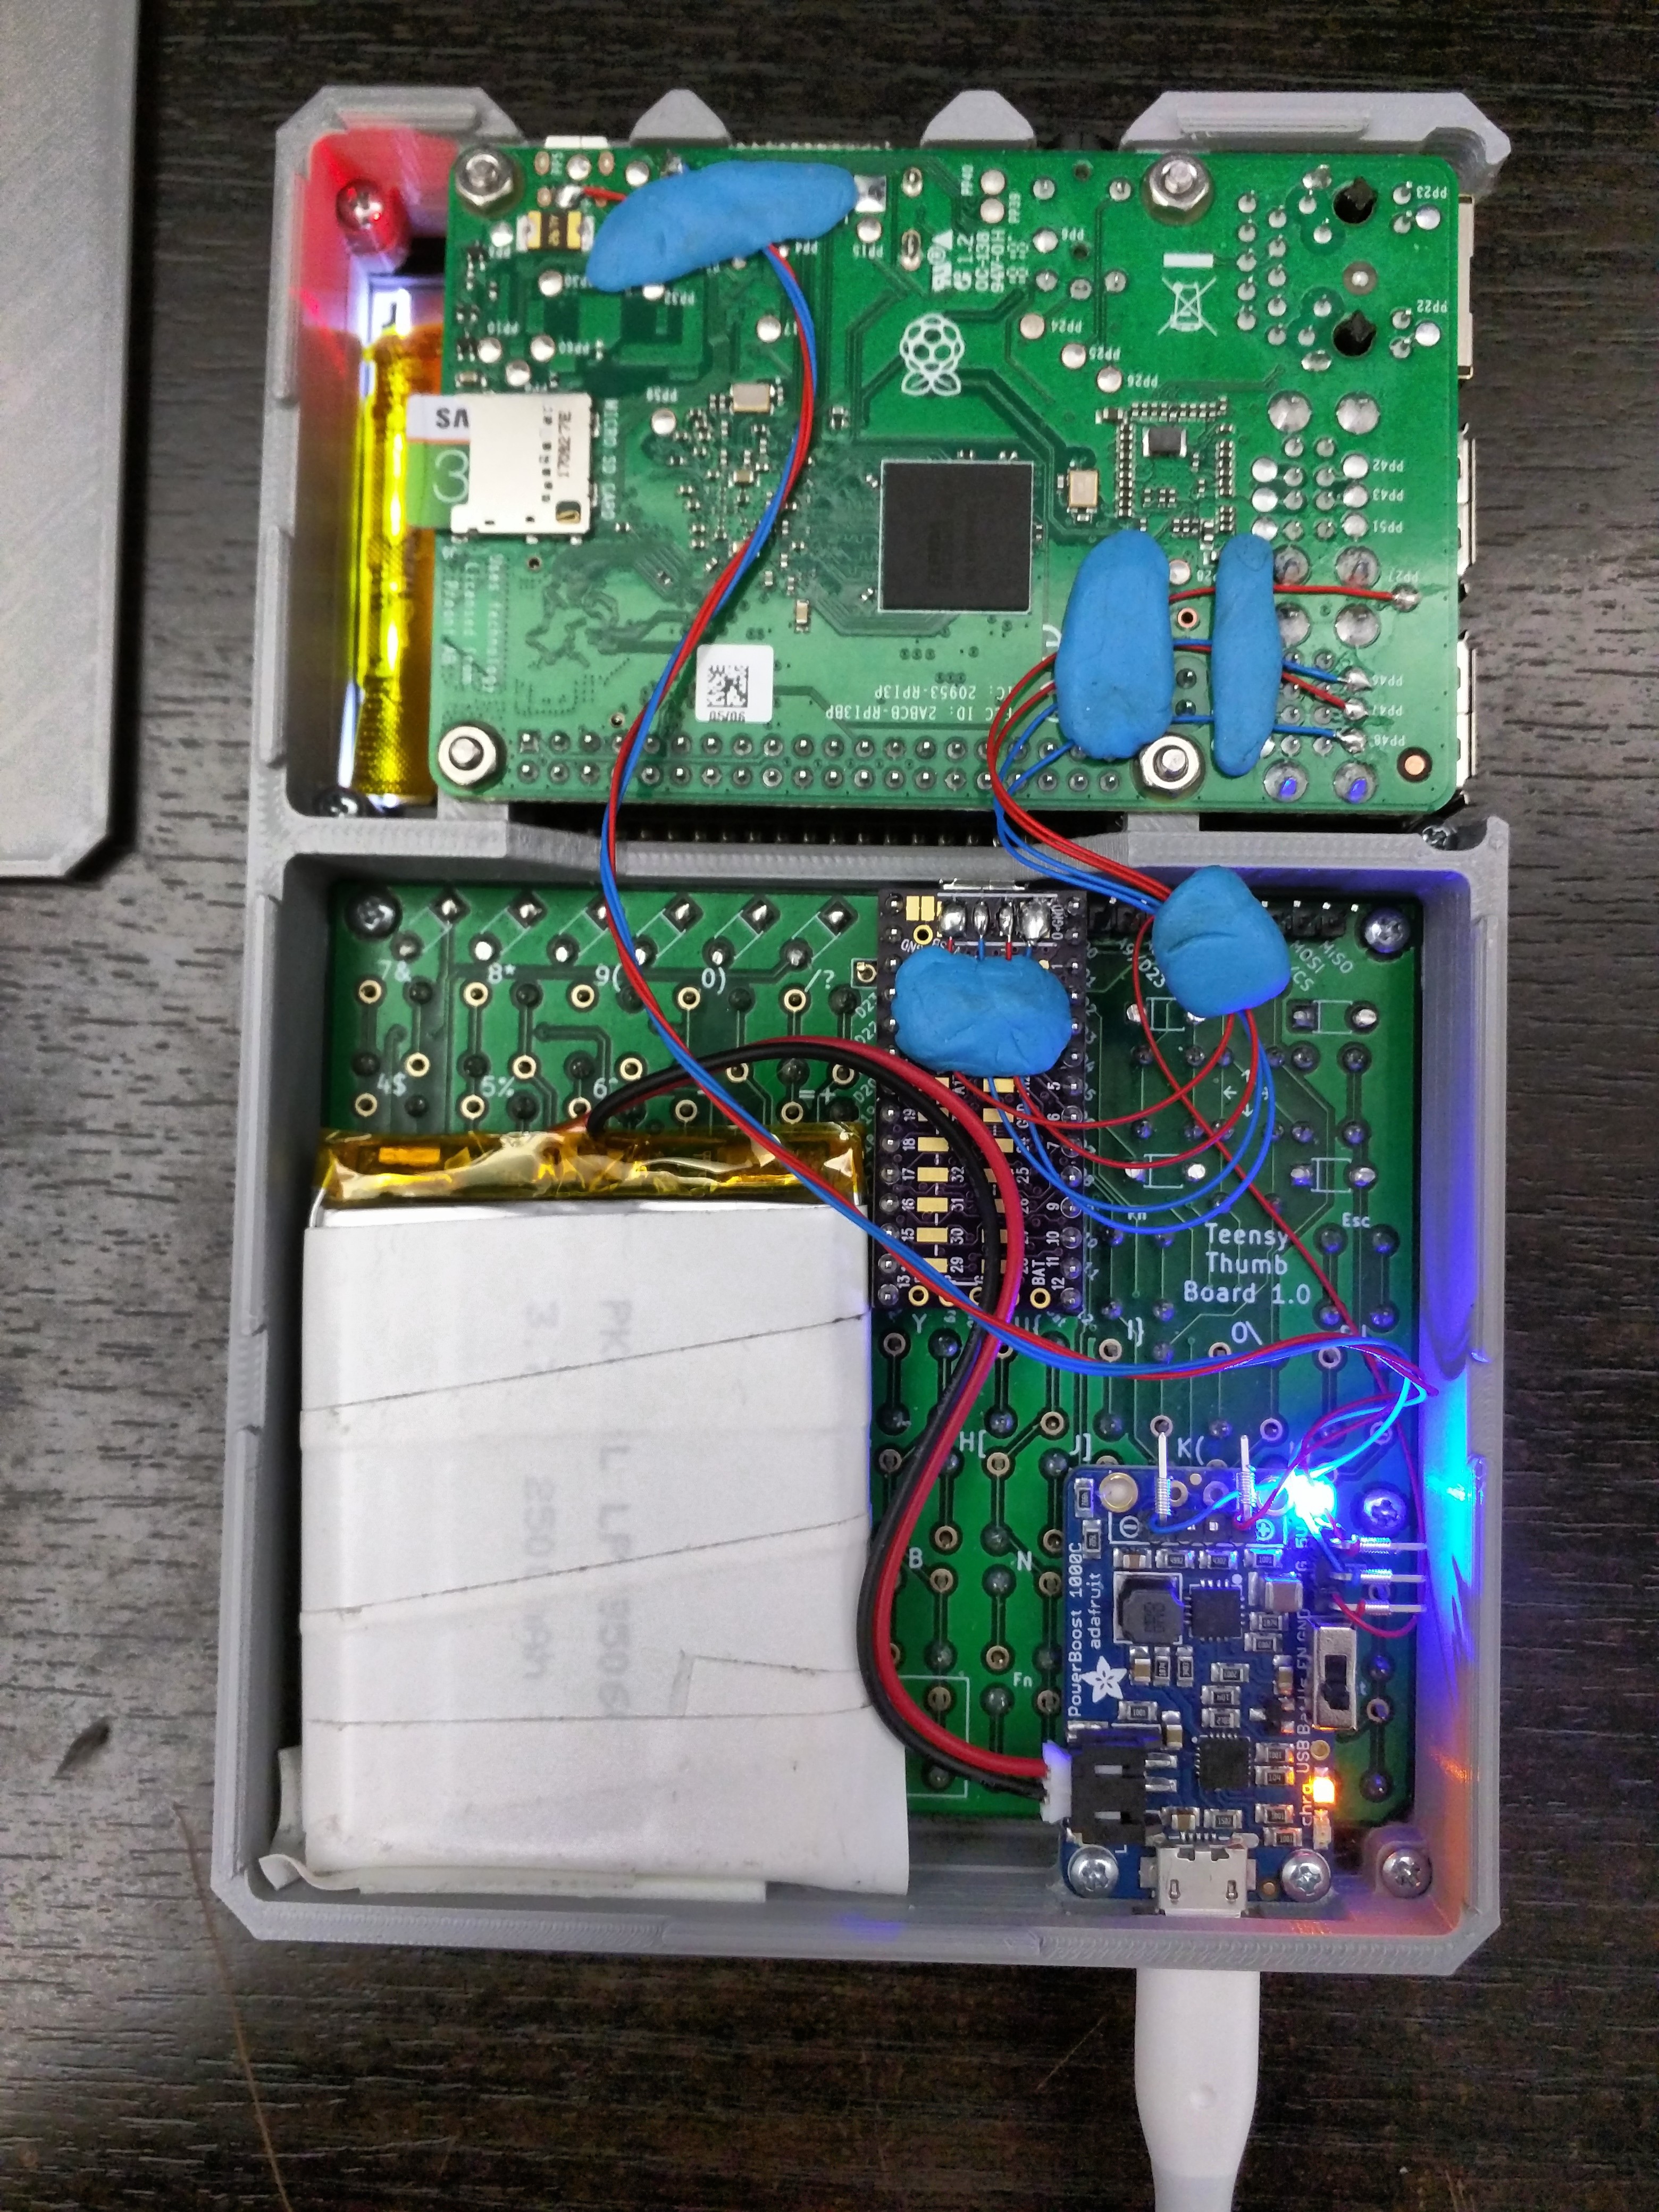
  • SPI, I2C, and 2 additional GPIOs broken out. Aside from these pins all others are used to read the key matrix.
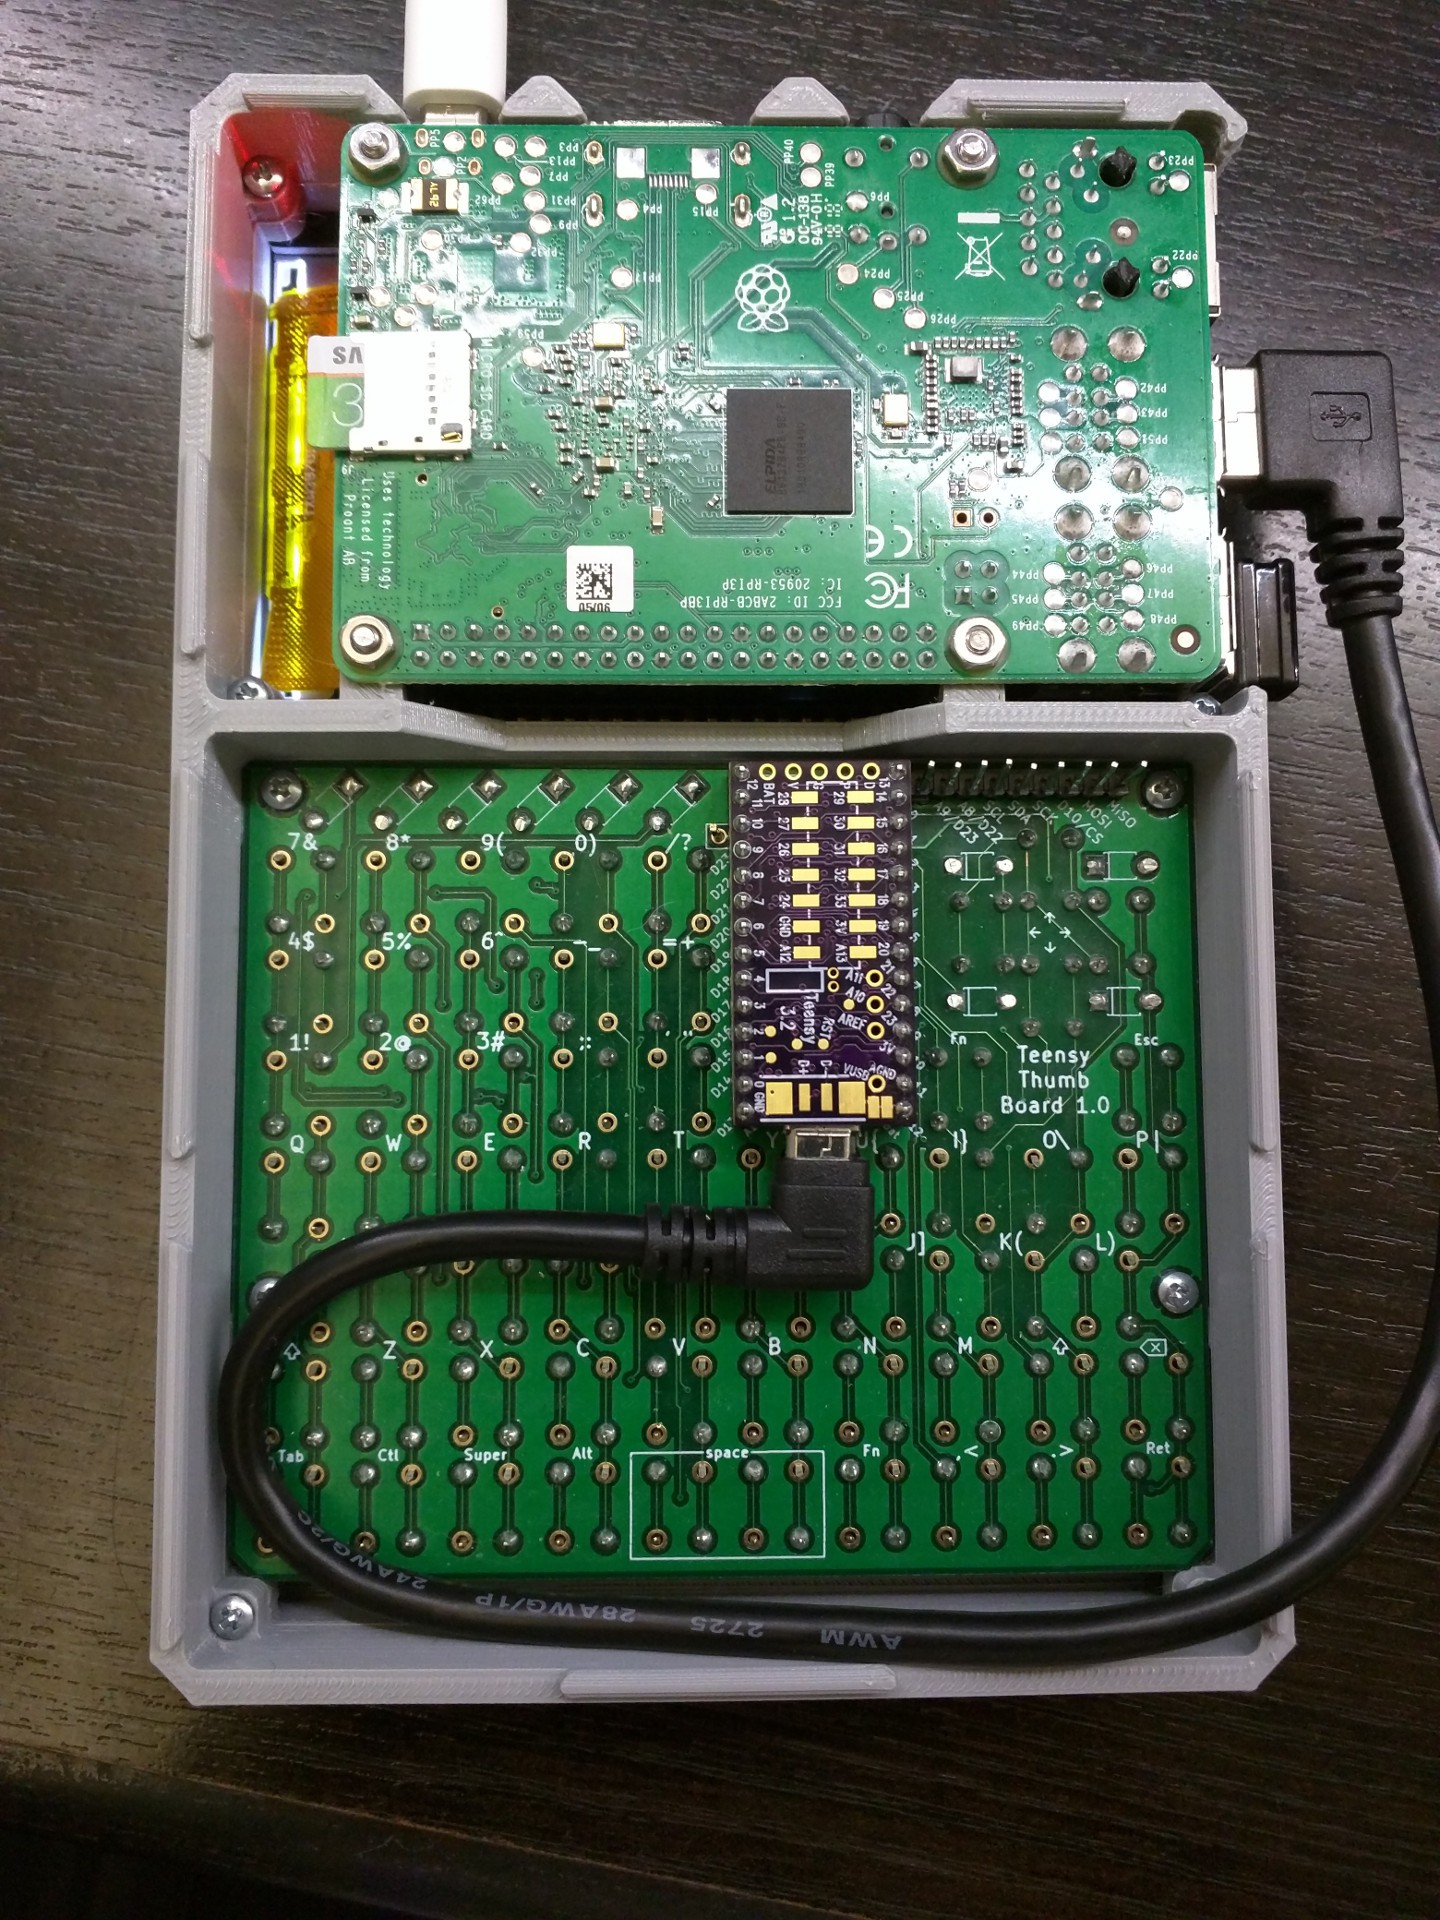
  • Teensy can be rotated with the micro USB facing up or down. Breakout pins will only work as expected with USB facing up.

I sell on Tindie

PCBs are available on Tindie:

KiCad PCB files, Fusion360 model links, STLs and example Arduino keyboard firmware sketch available at:

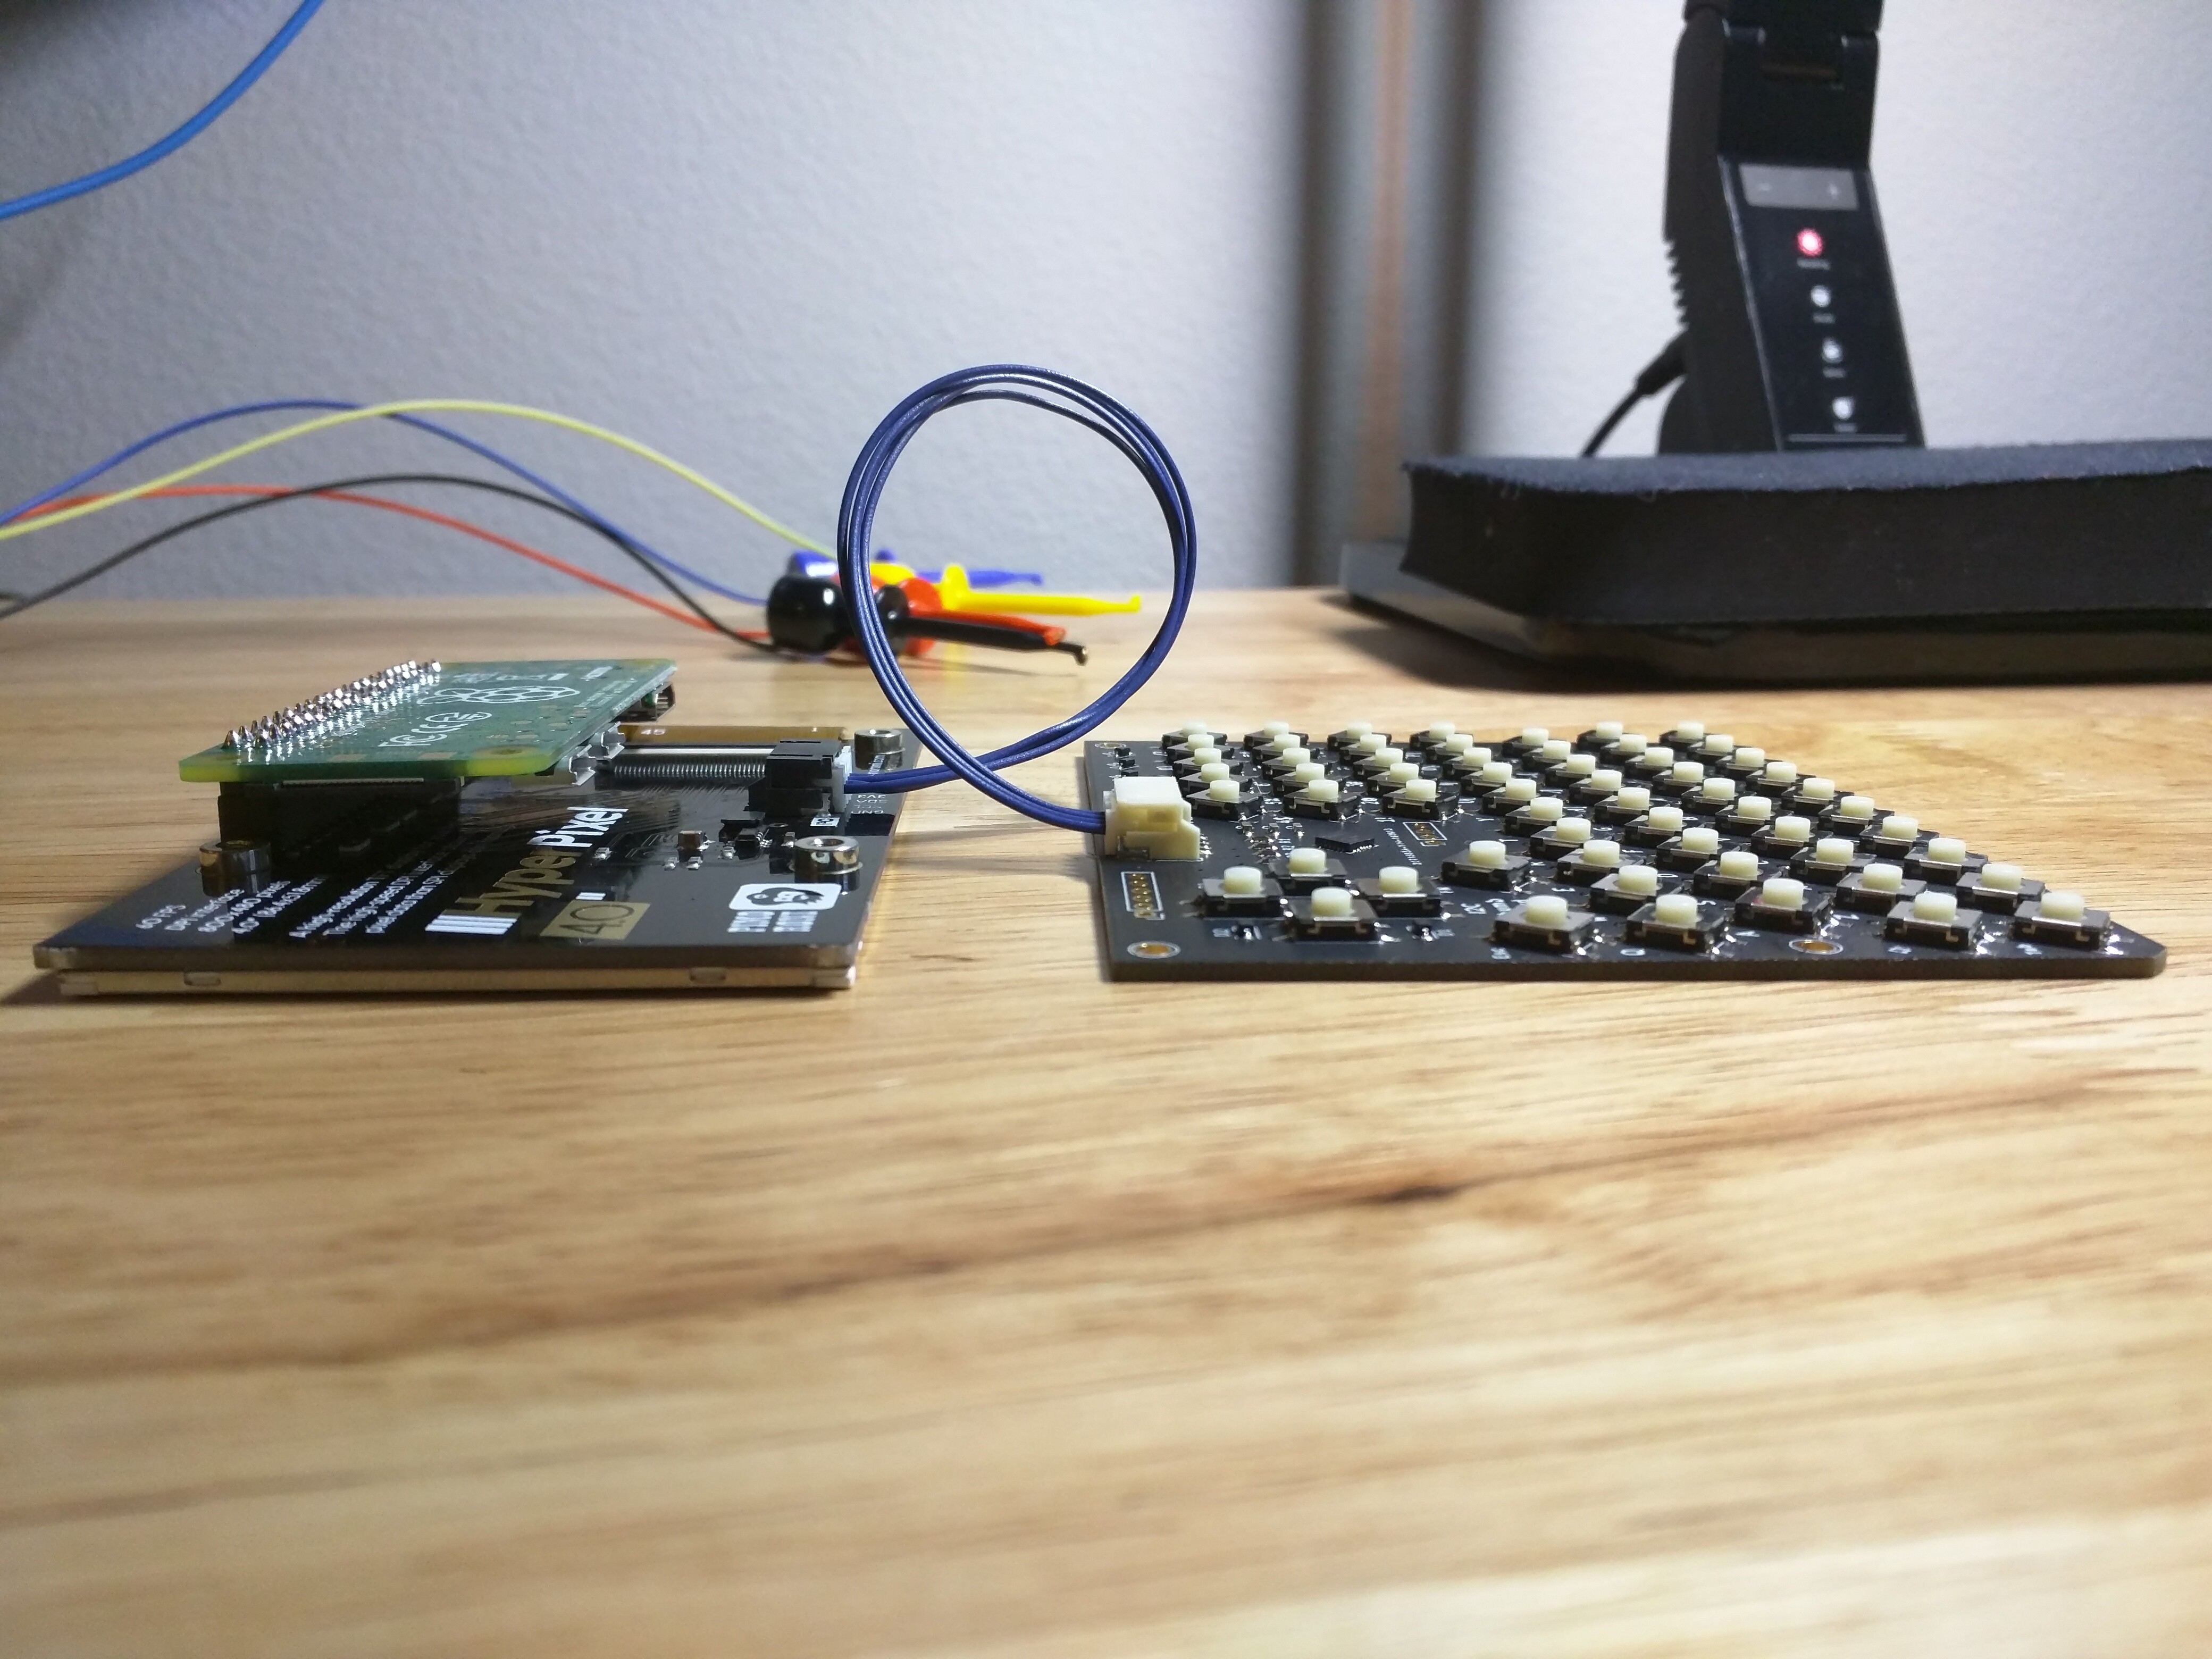
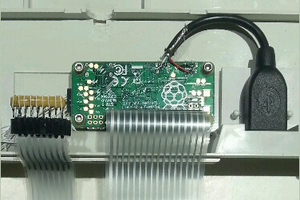
Thingiverse entry for the HyperPixel 4 & Raspberry Pi 3 B+ Handheld proof of concept:

Various Keyboard Inspiration Links:

Earlier version of the key faceplate:

View all 14 project logs

Enjoy this project?

Share

Discussions

nrwest wrote 06/20/2021 at 22:37 point

This is a great project - I love that you have got it working with a Pi Zero and a Hyperpixel screen, this is exactly what I had in mind for another project. Is there anything you would do differently, if you were to design another version? What about backlighting? I'm thinking I'll use these soft-touch switches from Adafruit: https://www.adafruit.com/product/4183 but that's just personal preference.

Thanks again for sharing!

  Are you sure? yes | no

Anthony DiGirolamo wrote 06/21/2021 at 18:53 point

Those soft touch ones look great! They will fit the through hole board for sure which uses 6mm buttons.

Haven't thought much about backlighting. I think you'd need surface mount LEDs to make it work. Probably more spacing between the buttons too. Would be challenging to make a faceplate / case with shine thru key legends.

  Are you sure? yes | no

nrwest wrote 06/21/2021 at 22:26 point

Hm, now that I look further on Digikey, I see that illuminated tactile switches are A Thing. Buying 60 of them would get expensive though! This might be the push I need to make my "goldilocks handheld computer" a clamshell design... that way, with some strategic silkscreen and plating on the PCB, the light bleeding from the  screen might illuminate the keys...

  Are you sure? yes | no

rahmanshaber wrote 07/03/2020 at 07:12 point

What if you use a arduino nano and use i2c to emulate the keys?
will it require you to compile the kernel?
I don't want to do kernel stuff in mu project.

  Are you sure? yes | no

ward wrote 10/10/2019 at 03:03 point

Really great work! I would like to know where is the right button and left button of the mouse?

  Are you sure? yes | no

Chris wrote 03/09/2019 at 02:40 point

Is there a tutorial to put this firmware on teensy?

  Are you sure? yes | no

Vitaly wrote 02/09/2019 at 07:28 point

Awesome, I was looking to design one for a compact Raspberry Pi hand-held computer when I found yours. Just soldered it, working well. Thank you!

  Are you sure? yes | no

fabian wrote 01/11/2019 at 19:06 point

I prefer big keyboard with good keys, look at universal keybooard https://klawiatura.wordpress.com/

  Are you sure? yes | no

Arya wrote 01/08/2019 at 12:41 point

1N4148 are not Zener diodes, do fix - people might and will get confused =)

  Are you sure? yes | no

Anthony DiGirolamo wrote 01/08/2019 at 16:18 point

you're right! Thx for the catch

  Are you sure? yes | no

David Boucher wrote 11/20/2018 at 17:28 point

This looks really good. I've been thinking about something like this for a project I've got in mind but I hadn't come up with a good way to make the key caps. How well do the labels on the keys stand up to use?

  Are you sure? yes | no

Anthony DiGirolamo wrote 11/30/2018 at 03:15 point

No problems so far but I didn't put too much effort into the labels. They are just inkjet printed avery labels. A layer of clear nail polish would probably help preserve them longer.

  Are you sure? yes | no

Mike wrote 11/20/2018 at 00:44 point

This is awesome! Very clean!

I've been trying to do something exactly like this myself, but keep getting snagged. The keyboard has stopped the entire project until I figure it out. I'm inexperienced with PCB design, and haven't been able to come up with something that feels good and stays compact. I'd love to grab one of your spare PCBs, or figure out how to get one printed using the files you provided. I think I already have every part you listed here, except for the side switch. 

Cheers!

  Are you sure? yes | no

Anthony DiGirolamo wrote 11/20/2018 at 06:41 point

Thanks! I'll let you know when I have the boards on Tindie. Probably at the end of  Nov / early Dec.

If you can't wait you can upload the kicad_pcb file https://github.com/AnthonyDiGirolamo/teensy-thumb-keyboard/blob/master/hardware/v1.1/teensythumbboard.kicad_pcb

to https://oshpark.com

or the gerber.zip file https://github.com/AnthonyDiGirolamo/teensy-thumb-keyboard/blob/master/hardware/v1.1/plots/gerbers.zip
to another board service like https://jlcpcb.com/quote

The settings I'd recommend for jlcpcb are:

Layers: 2

Thickness: 1.6

Surface finish: LeadFree HASL-RoHs or ENIG-RoHs (don't want lead on a board you may be typing on)

Copper weight: 2oz (1oz is probably fine though, the heavier weight copper stands up better to repeated solder and desoldering I think)

Everything else default settings

  Are you sure? yes | no

Anthony DiGirolamo wrote 12/15/2018 at 00:22 point

  Are you sure? yes | no

Starhawk wrote 11/12/2018 at 05:38 point

'Twould be nice to be able to use this with a Pro Micro or other ATMega32u4-based Arduino board... Teensies are excellent, from what I hear -- but they are also very expensive.

  Are you sure? yes | no

Anthony DiGirolamo wrote 11/12/2018 at 06:50 point

I hear ya there. Main reason for choosing the teensy boards is the amazing USB libraries built in. See: https://www.pjrc.com/teensy/td_keyboard.html your code can have Keyboard.print("Hello!") And the teeny will type that into your computer as a USB keyboard. There is a low cost version https://www.pjrc.com/store/teensylc.html that is pin compatible with the footprint I used. If you don't need USB you can use any microcontroller board and wire the column and row pins directly. They are labeled on the silkscreen. A $1.25 blue pill board would probably work without much effort.

  Are you sure? yes | no

Similar Projects

Does this project spark your interest?

Become a member to follow this project and never miss any updates