Using and Arduino UNO, load cell with the HX711.h library, and a stepping motor to control the feeder.
Data will be stored on a SD card.
Hedgehogs in the UK are classed as an endangered species. For this reason I have chosen my final year project to be a hedgehog feeder.
Already have an account? Log in.
To make the experience fit your profile, pick a username and tell us what interests you.
Using and Arduino UNO, load cell with the HX711.h library, and a stepping motor to control the feeder.
Data will be stored on a SD card.
Will neee to do a back log of logs as I’ve been focusing on my final thesis write (which I will upload soon!)
But in the mean time, here’s a video of the test with a hedgehog.
Slowly getting there...
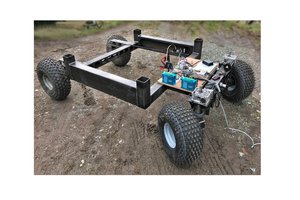
The next stage is to connect some batteries so that hedgehog feeder it portable and does not need to be connected to a laptop.
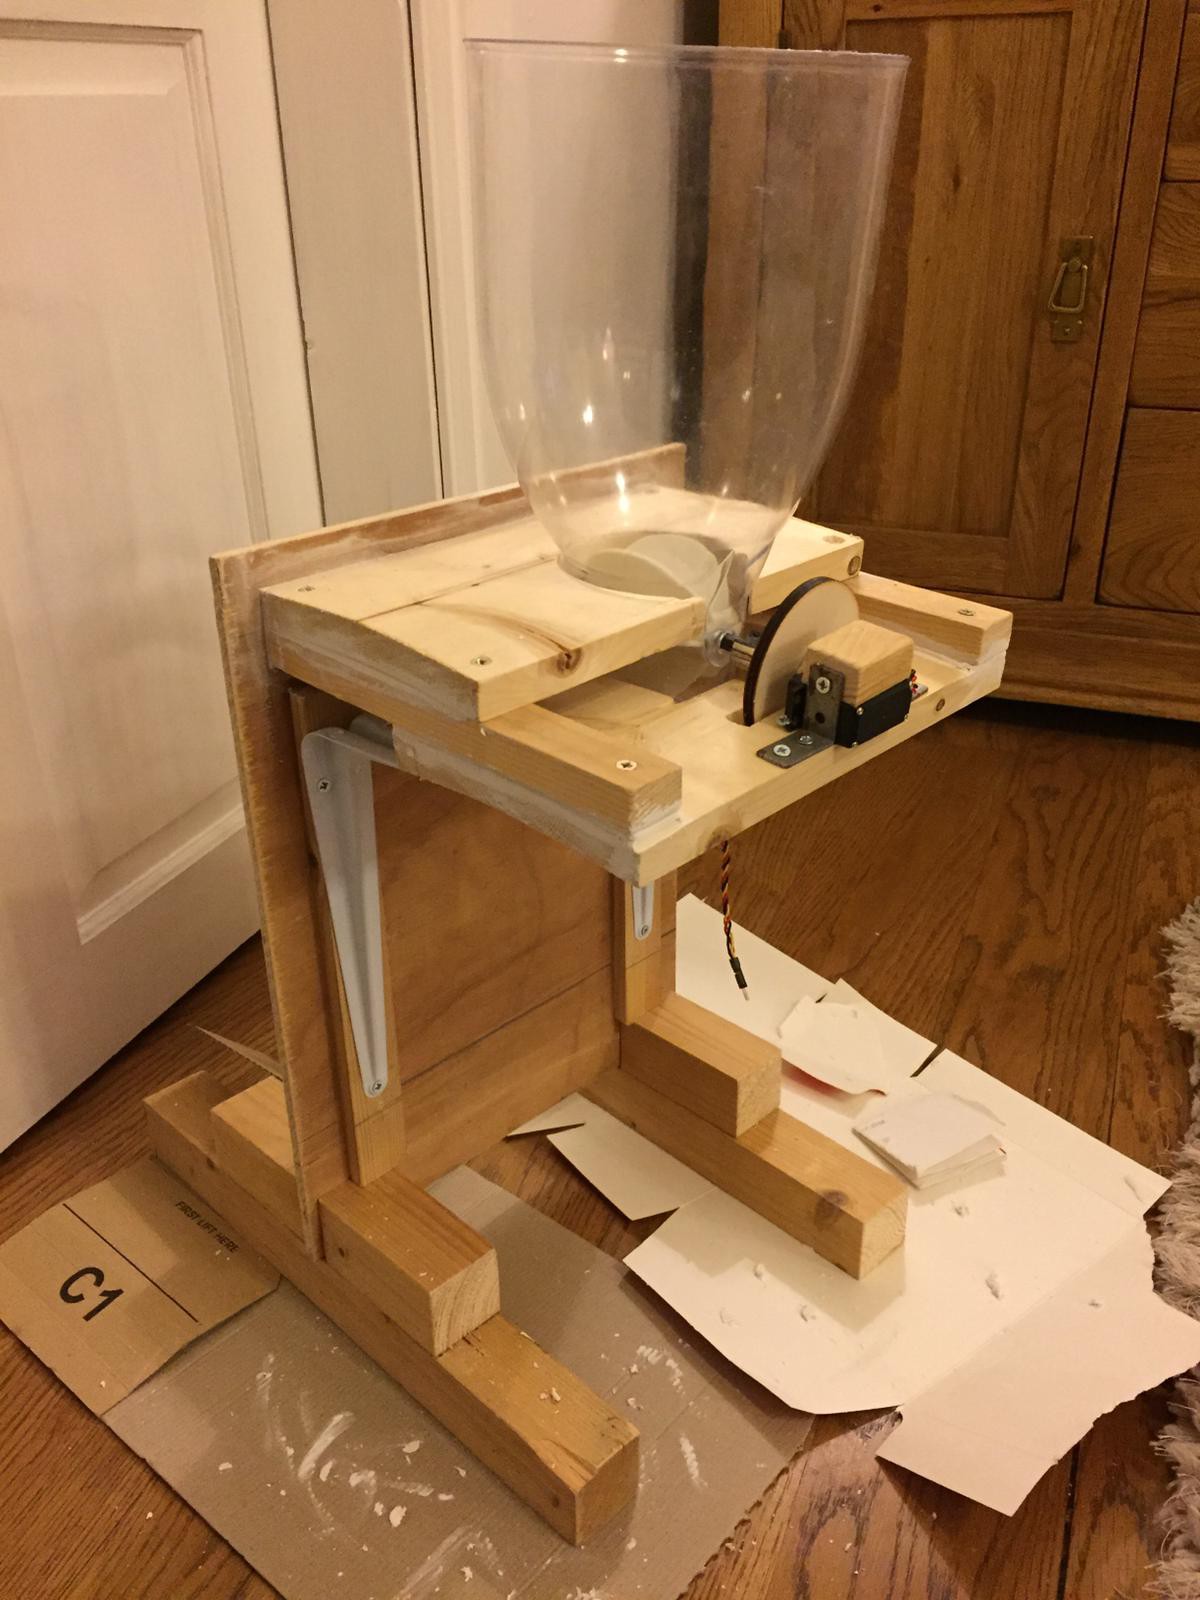
Spent with lovely sunny weekend, making the second prototype.
Will post the build instructions soon and updated picture of the painted feeder!
Looks like even with a four wing paddle, the food is still getting jammed in the paddle wheel.
After looking online, no one else seems to have this issue with similarly dense food...
May try to use a continuous servo motor to turn the paddle? At this point, portion accuracy is not my biggest concern.
So it seems that the food is getting jammed in the cereal dispenser :(
Potential solution: 3D print a paddle wheel with fewer paddles (4 paddles instead of the current 6)
Any other suggestions that doesn't involve changing the entire outlet mechanism, please let me know
So the idea is that, the hedgehog will be weighed and if it falls within a weight limit it will receive some food, However, at the moment, I am using weights that are below the weight limit (so no food should be dispensed) but in fact, food is being dispensed.
I also am struggling to create different weight limits which will determine how much food will be dispensed.
if (scale.get_units()>sensorMin){
    Serial.print("Weight: ");
    Serial.print(scale.get_units(), 3);
    Serial.println(" kg");
    myStepper.setSpeed(30);
    //set RPM at which stepper will rotate when called to step
    Serial.println("stepperclockwise");
    myStepper.step(400);
    hedgehogData.println(scale.get_units(), 3);
    hedgehogData.close();
    Sleepy::loseSomeTime(10000); //instead of delay (10000)
I have tried using code as shown below but it does not make a difference
else if ((scale.get_units()>sensorMid)&&(scale.get_units()<sensorMax)){...
}
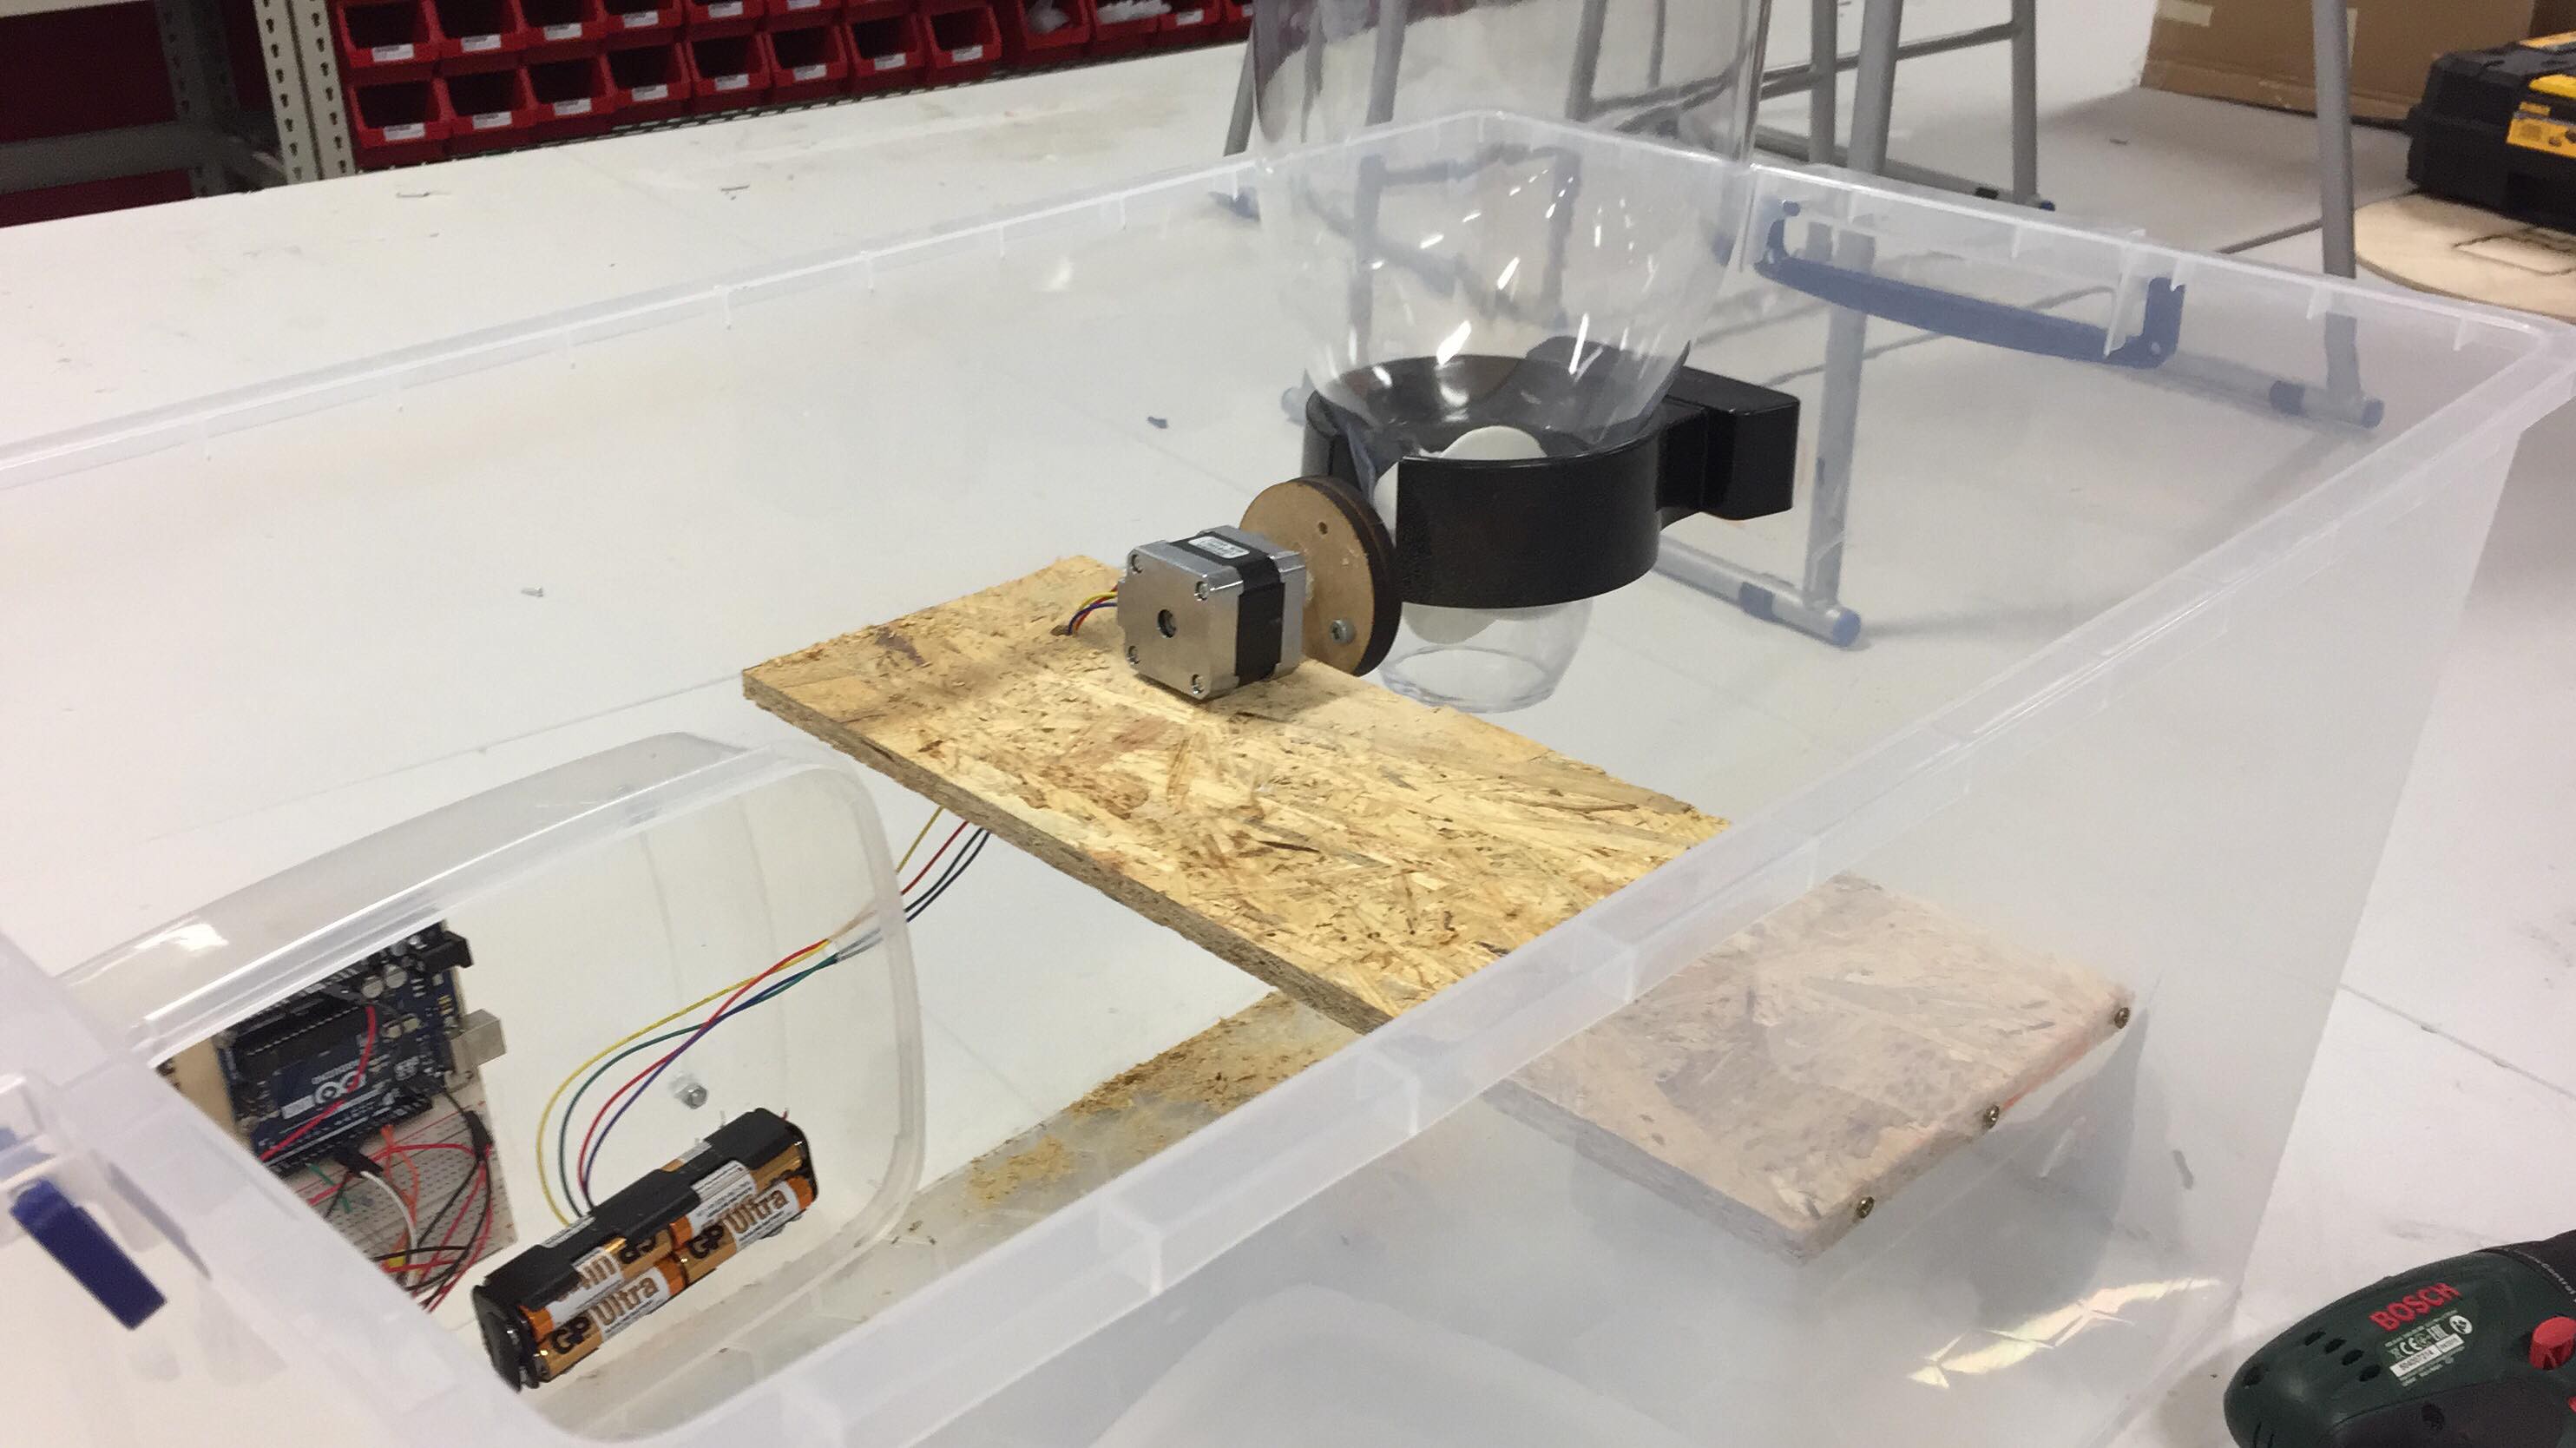
Pretty happy with how the first prototype build has gone.
Some things to note so far:
1) Storage box (85L) is too big. I'm glad I went to big rather than too small as it is easier to build, but the next prototype will be in a much smaller storage box.
2) Paddle in cereal dispenser is not robust enough for Ark Hedgehog food but works fine or finer food, such as meal worms. Manipulation of paddle design is needed. Perhaps a 4 paddle instead of 6.
3) Need to secure stepper motor to shelf more robustly as it vibrates and make a lot of noise, which would scare the hedgehog away.
4) Need to cut a hole in the storage box for entrance to feeder.
5) Need to adapt load cell mount to cater for larger area.
6) Code is currently not working as it should as food is being dispensed at weights lower than 350g.
7) Use of an 'if' statement '&&' in code to create weight ranges does not seem to be working as it should.
8) Need to have a play with delays and how many steps it necessary to give correct portion size.
// load cell
#include "HX711.h"
#define DOUT  6
#define CLK  7
HX711 scale(DOUT, CLK);
float calibration_factor = 387600;

// hedgehog weight limits
int sensorMin = 0.350; // 350g
int sensorMax = 0.750; // 750g
int sensorMid = 0.450; // 450g
const int delayBetweenFeeds = 6e+7; //1 minute

//stepper
#include <Stepper.h>
const int stepsPerRevolution = 200;
Stepper myStepper(stepsPerRevolution, 12, 11); //dirPin = 12, stepPin = 11
int previous = 0;

void setup() {
  Serial.begin(9600);
  //set up load cell
  Serial.println("Press T to tare");
  scale.set_scale(calibration_factor);  //Calibration Factor obtained from first sketch
  scale.tare();             //Reset the scale to 0
}

void loop() {
  //use load cell to weigh
  Serial.print("Weight: ");
  Serial.print(scale.get_units(), 3);  //2 decimal points
  Serial.println(" kg");
  delay(1000);

  //control dispensor with load cell readings and stepper
  if (scale.get_units()>sensorMin){
    Serial.print("Weight: ");
    Serial.print(scale.get_units(), 3);
    Serial.println(" kg");
    myStepper.setSpeed(30); //set RPM at which stepper will rotate when called to step
    Serial.println("stepperclockwise");
    myStepper.step(400);
    delay(10000);
  }

  else {
    myStepper.step(0);
  }
}
This is my code so far.
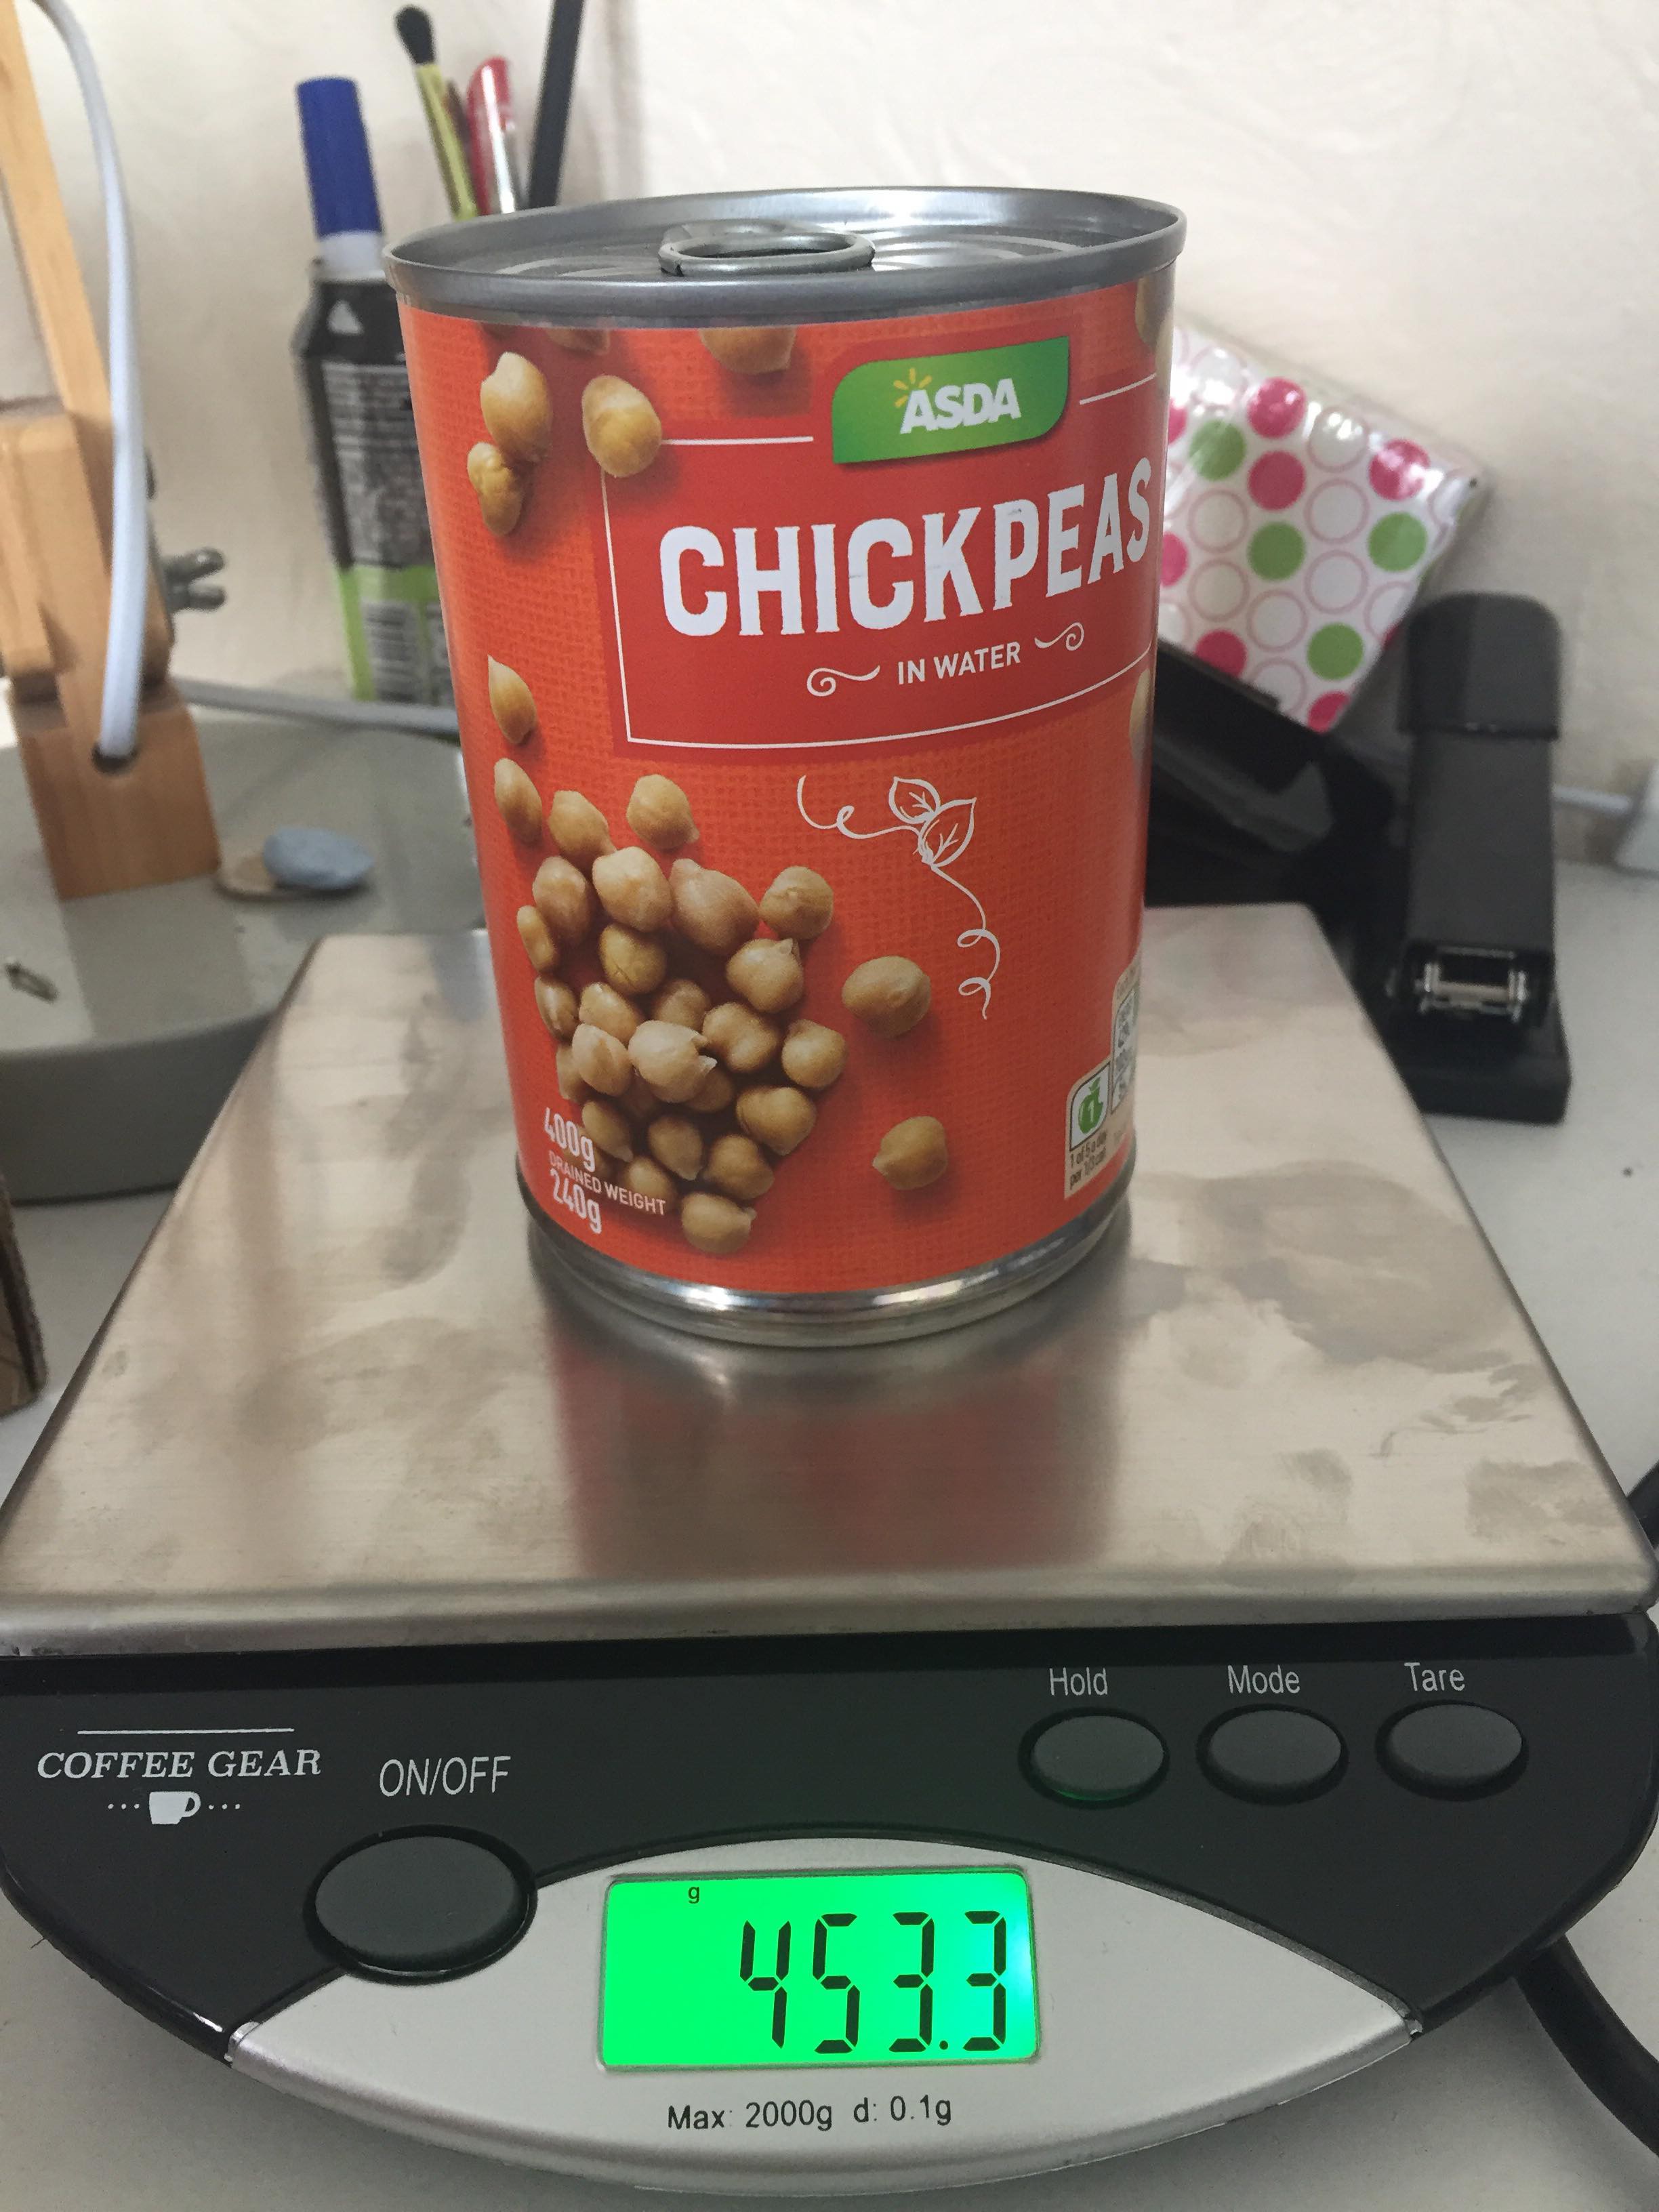
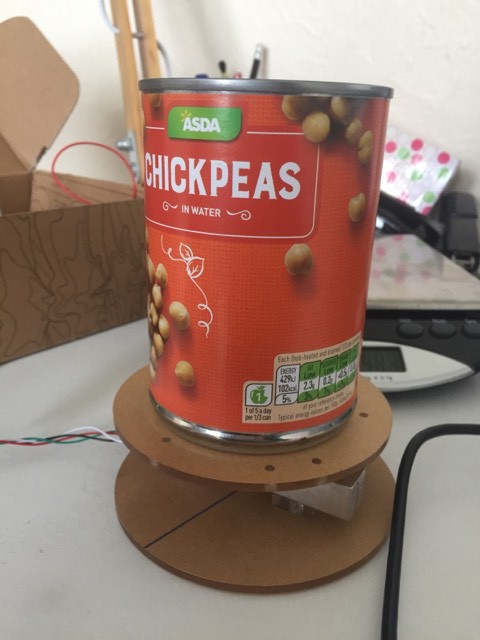
In order to gain a better understanding how accurate my load cell was at measuring weights. Firstly, I found the weight of various items (one example was a can of chickpeas) on a commercial weighing scales as seen below.
I then measured the same item on the load cell and recorded the weight that was displayed on the serial monitor of the Arduino IDE.
This graph will be used in my final report to allow me to comment on the accuracy of the load cells and whether the errors would affect my device.
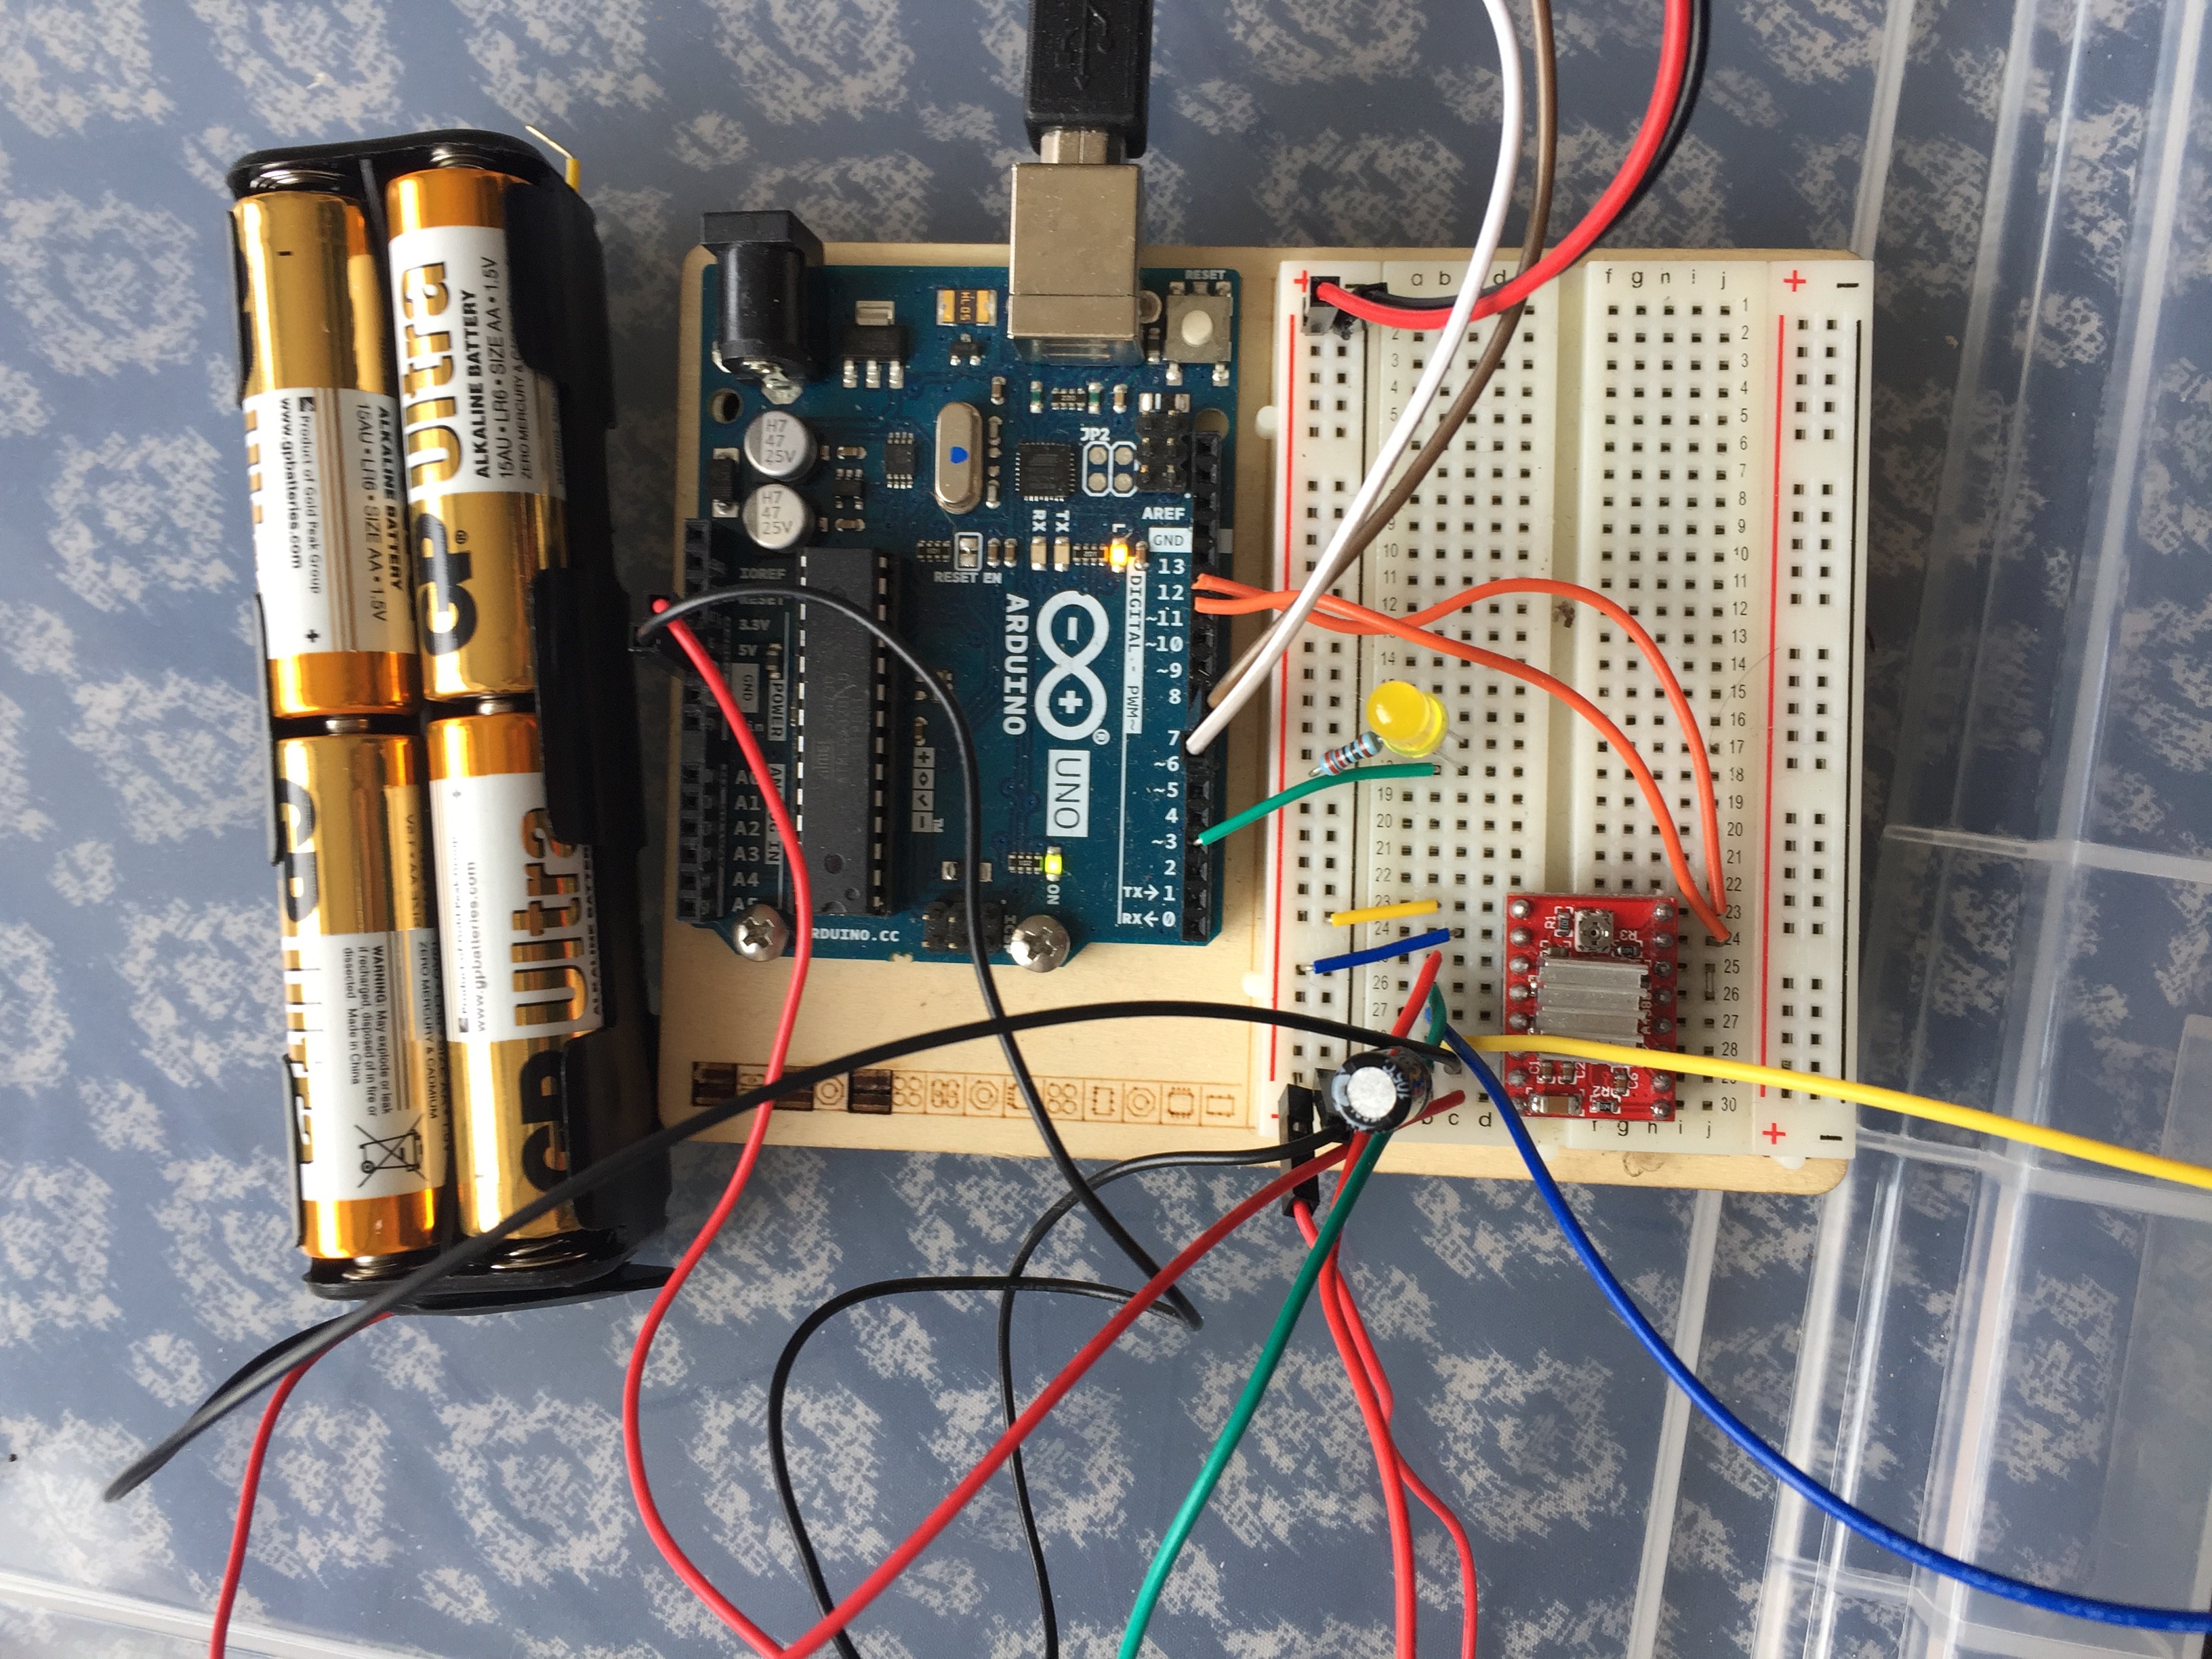
I have been having some issues with getting the stepper motor to turn, turns out a capacitor was the answer on the motor 12V source.
Now I’m flying through it.
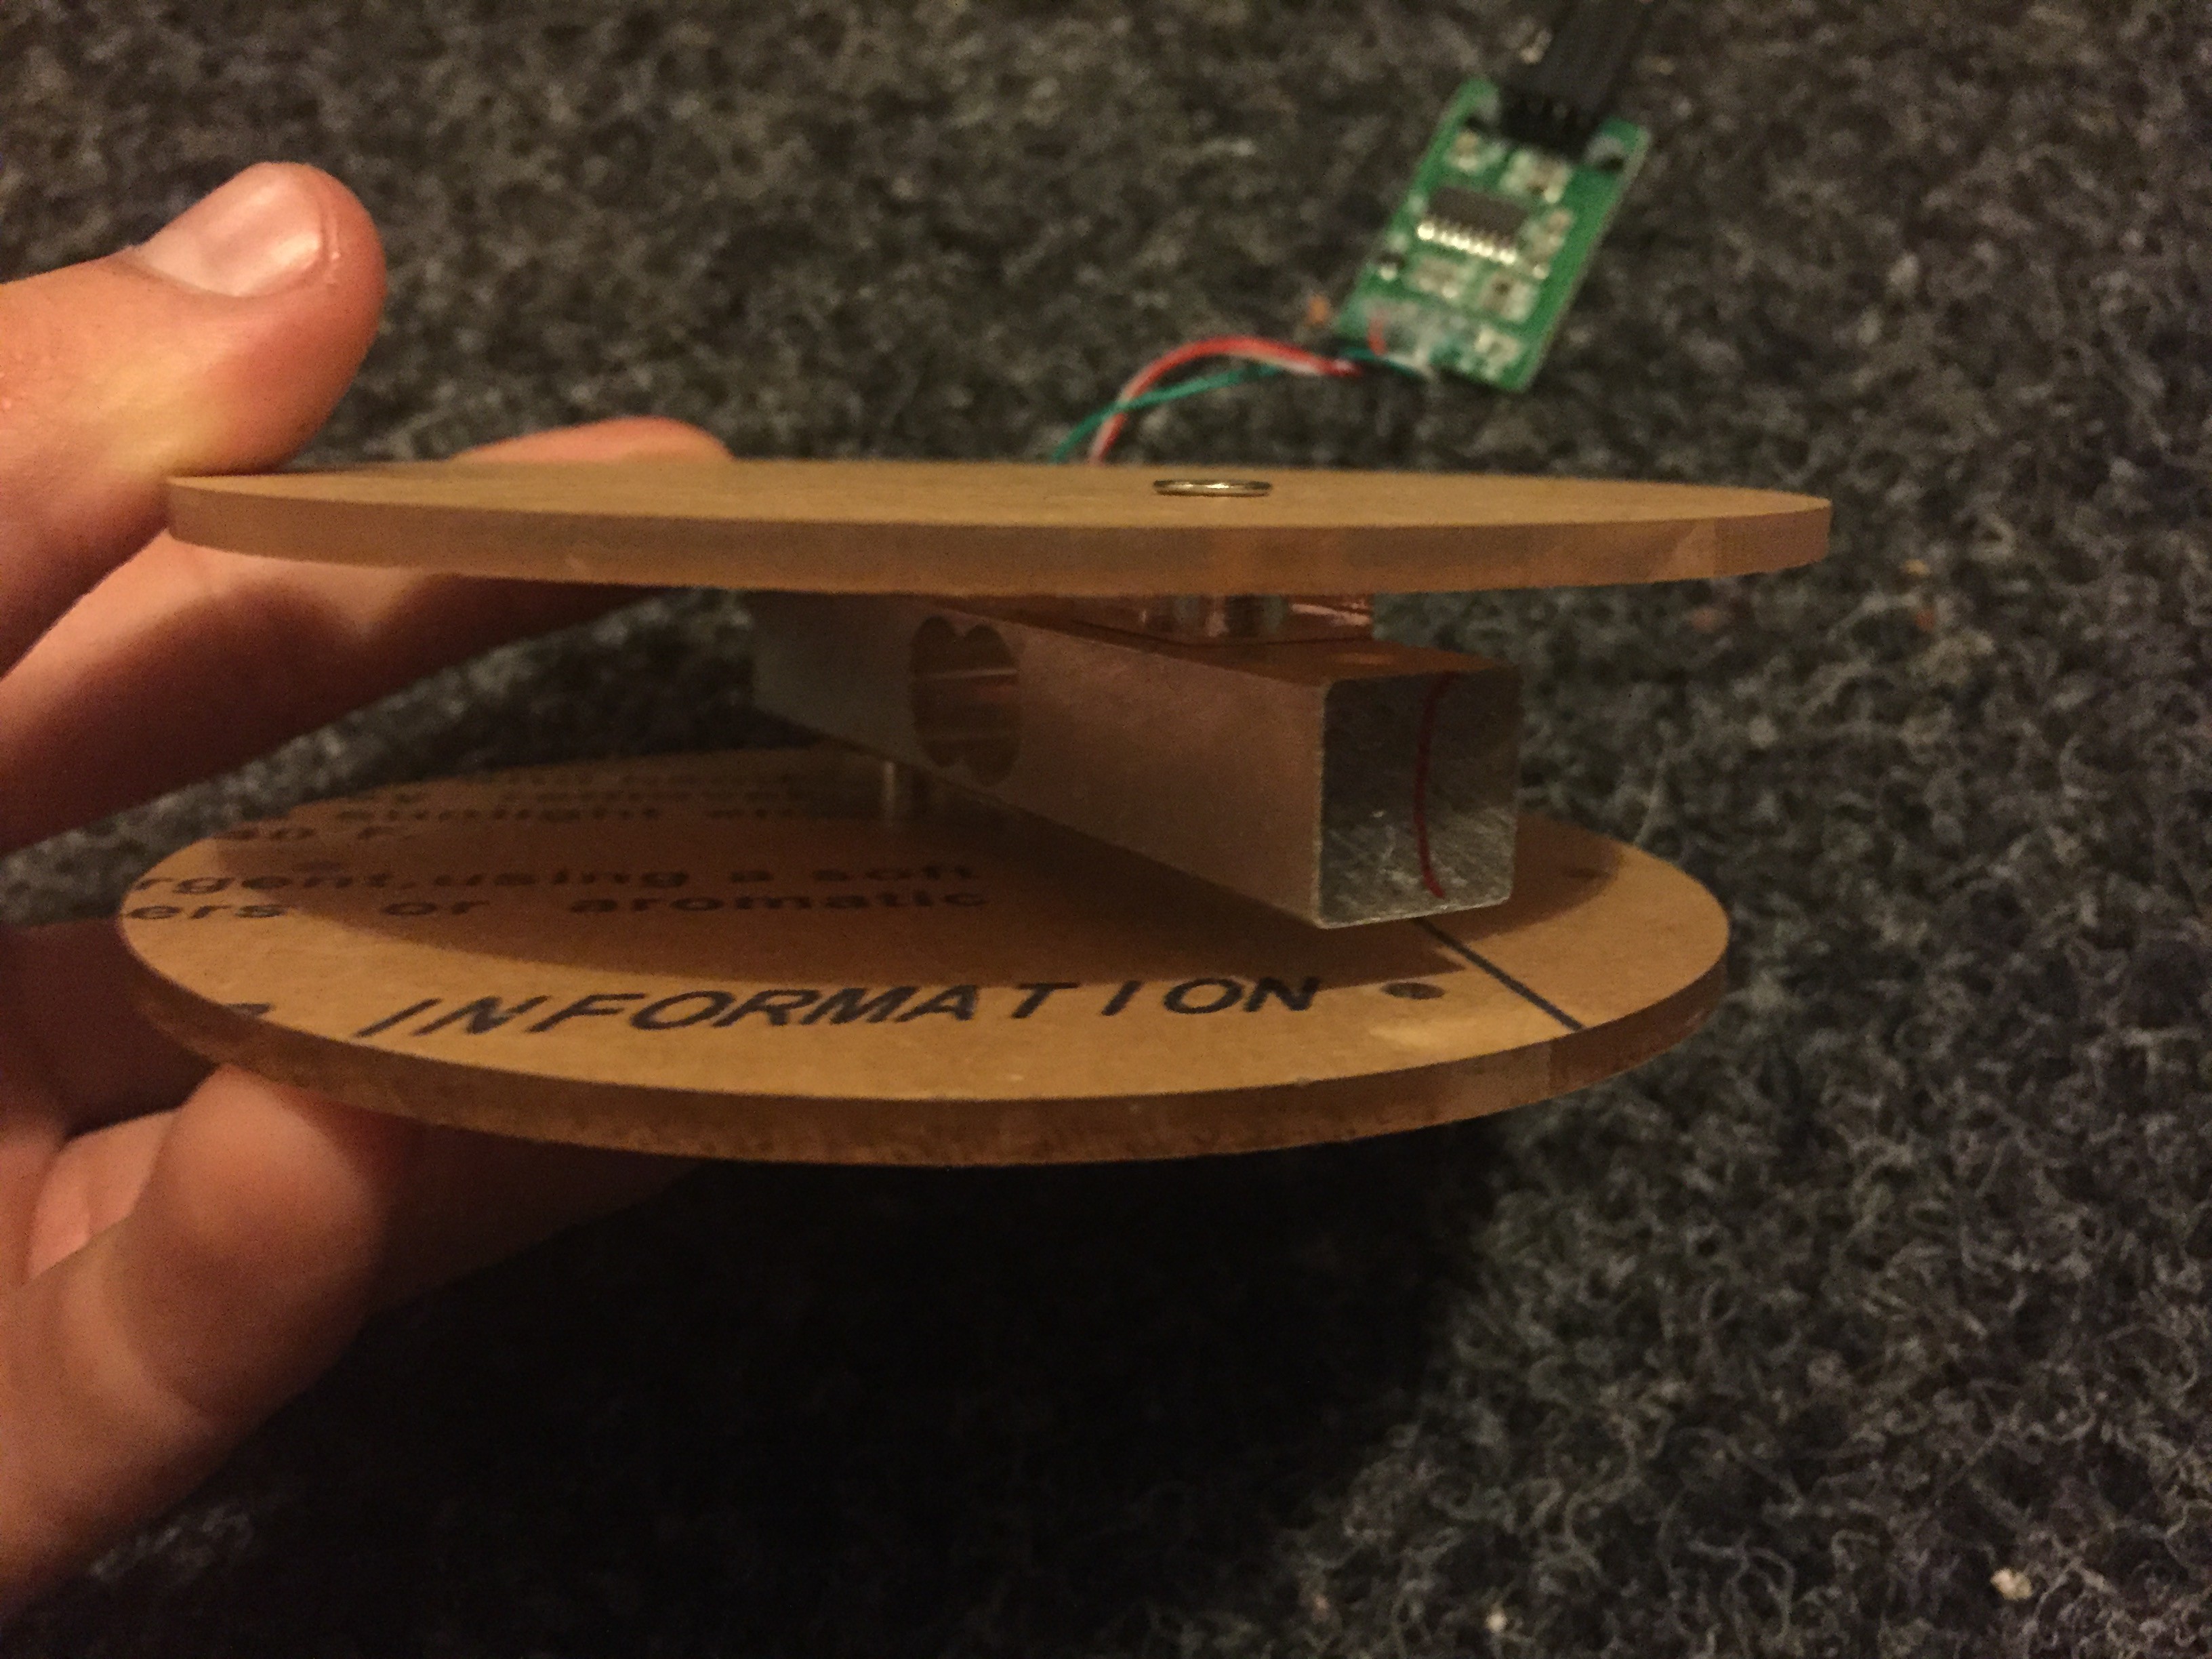
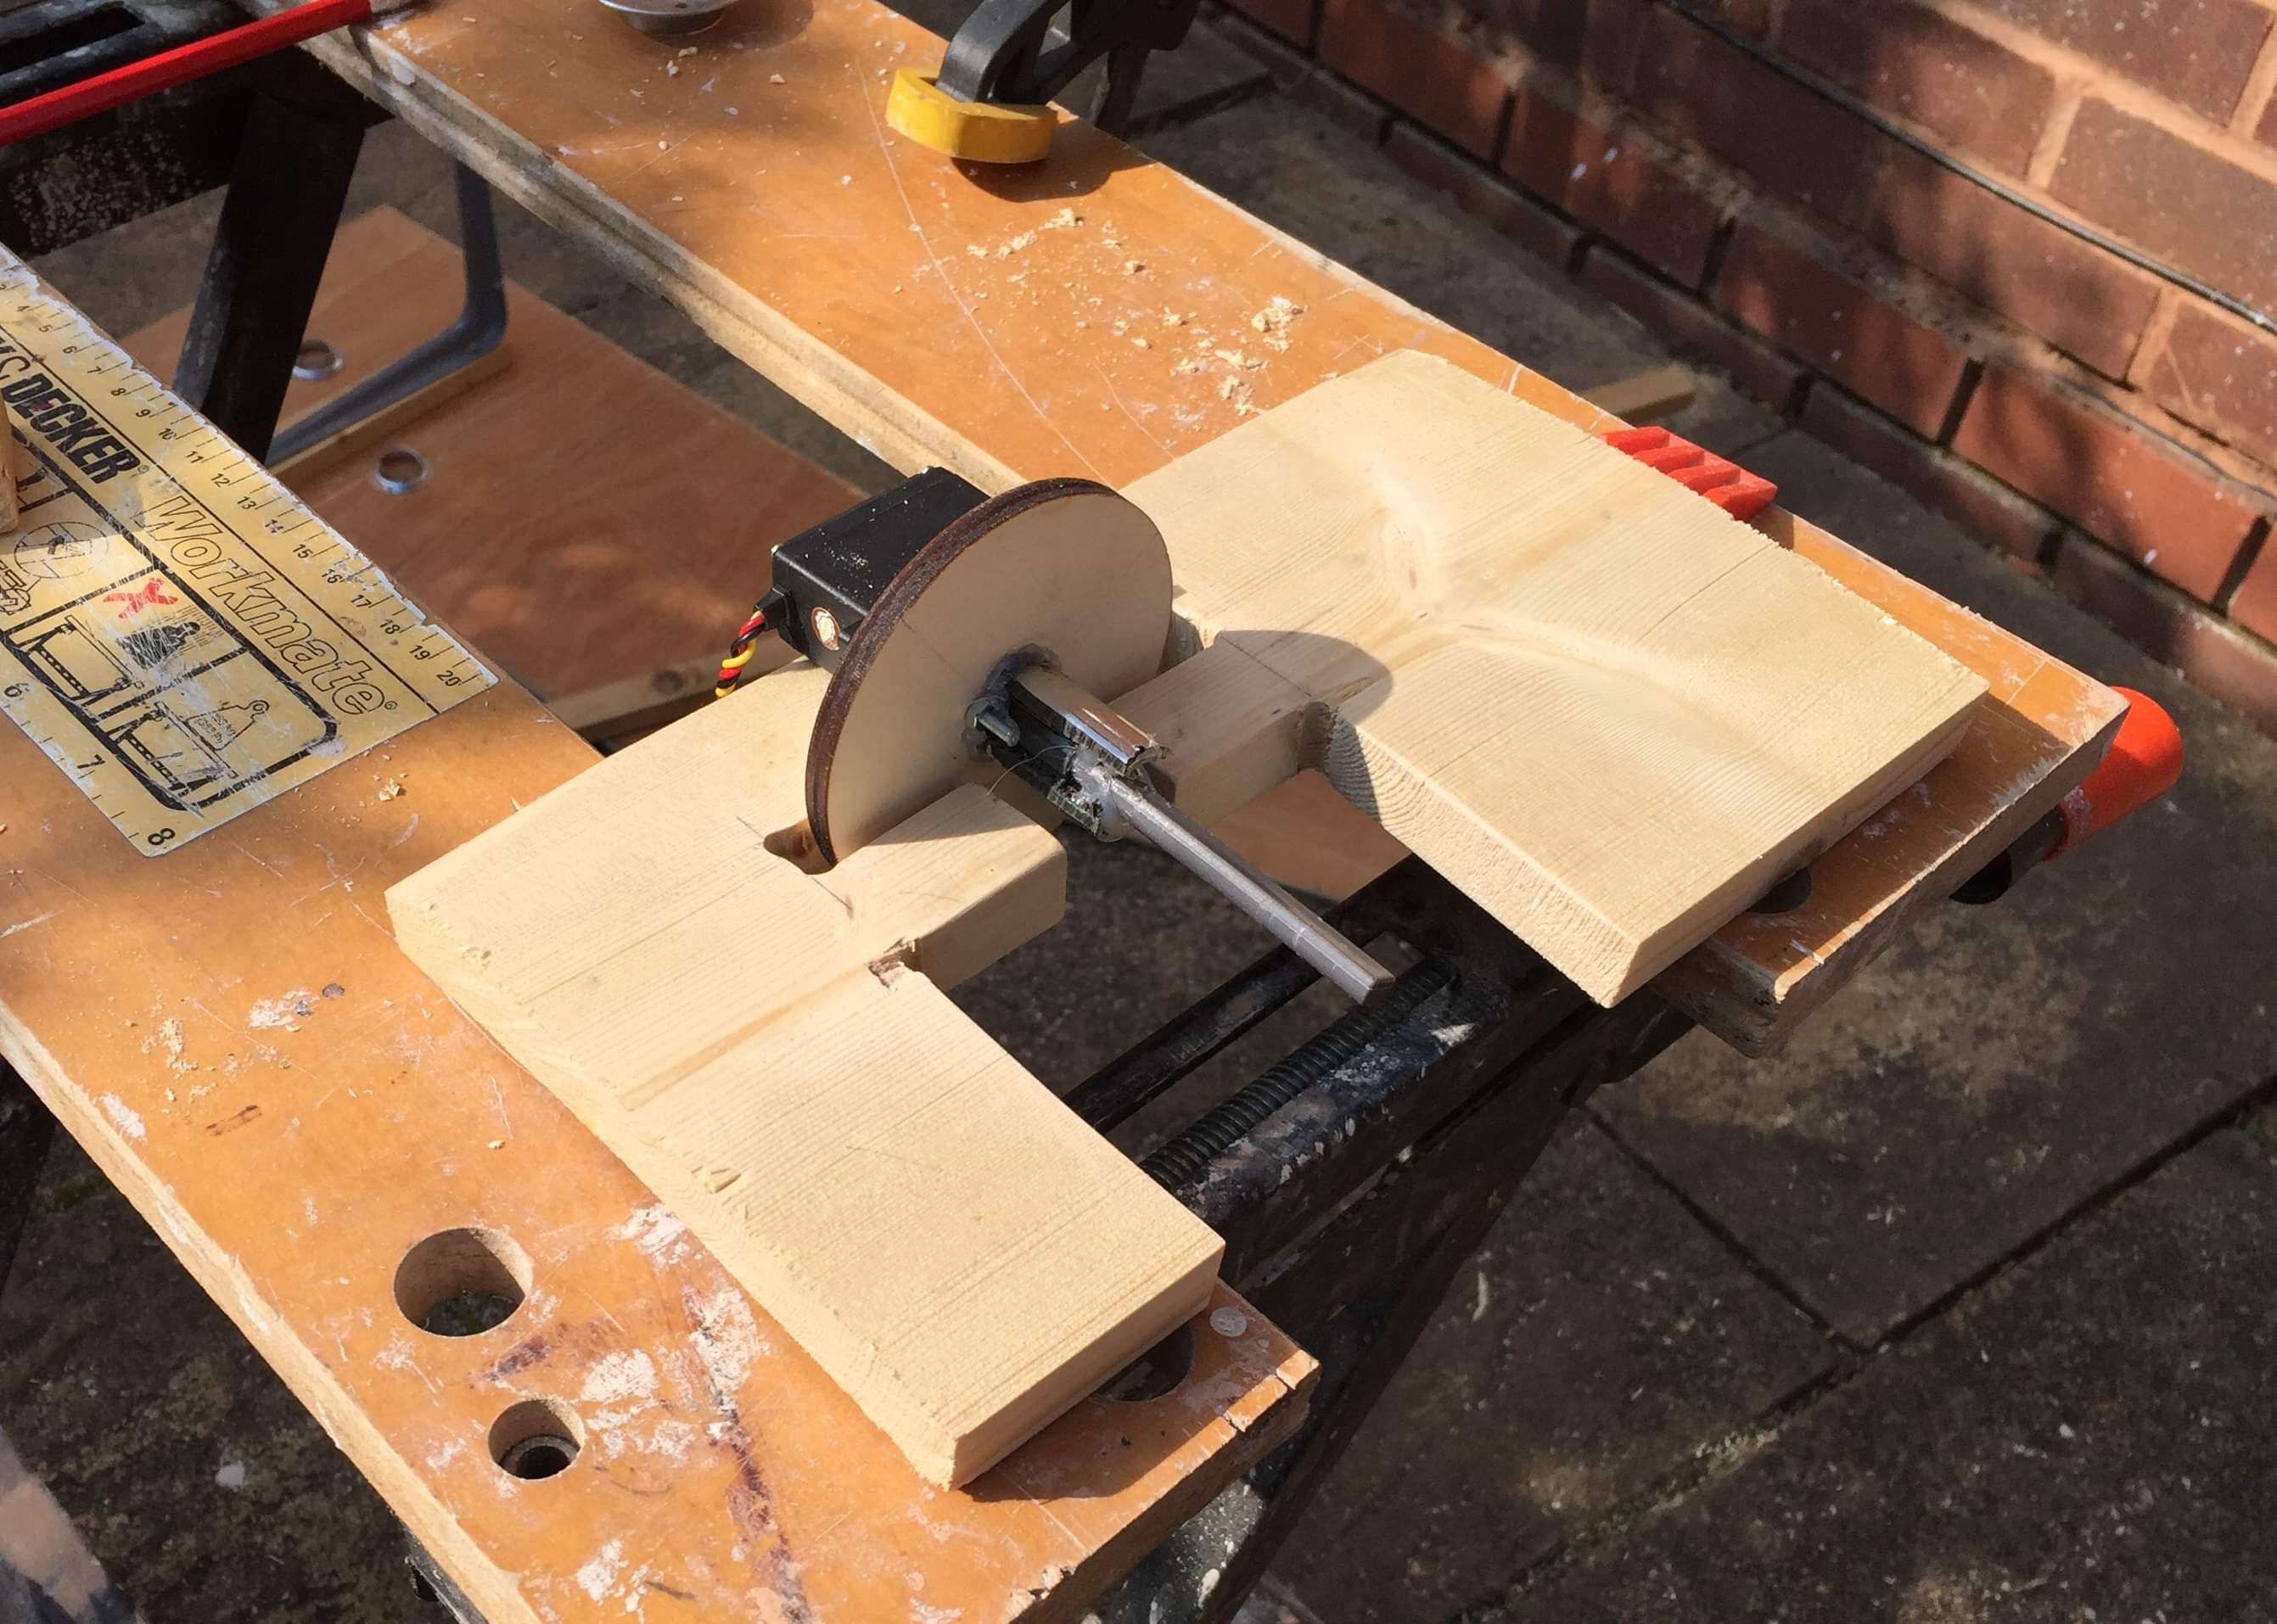
In order to be able to calibrate my load cell, I needed to make a basic structure that would enable the cell to be loaded and a weight to be taken.
First, saw off the handle of the cereal dispenser so that there is a flat base.
Laser cut a circle out of wood (I did 80mm, but this was slightly too larger) and mark the centre of the circle.
Drill two holes into the servo attachment to fit two bolts.
Mark the two drilled hole position on the circular wood and drill two holes the same place so that a bolt can be attached through the servo attachment and the circular wooden piece.
Bolt the servo attachment and piece of wood together.
Using a hot glue gun, glue the paddle wheel axis on the opposite side of the servo attachment in the centre.
One of the more simple parts of the build.
Cut to longer lengths of wood and shorter lengths of wood and mark the middle of the longer wood sections.
Using the four shorter lengths of wood, create a slot for the back on the feeder to slot into. This can be achieved by measuring the diameter of the back piece and securing the pieces of wood with a gap of the measured diameter between. The gap should lie at the marked middle of the longer piece of wood.
Secure the smaller pieces of wood to the longer piece with screws.

But why would you want to feed hedgehogs to things? They're all spikey!

Paddington is so super duper cute!!! Eeeee!
Otherwise, awesome work so far! Microcontrollers can seem daunting at first, but persistence is key. If you ever get stuck on something and need help, feel free to message me! I'd be more than happy to help.
I'm glad you found a load cell calibration routine -- they do require a bit of calibration, and compensation for temperature,etc. However, if all you are trying to answer is "Is this hedgehog weight?" then what you have is more than accurate enough.
Cheers and good luck!

Hi Abigail! Have you seen this automated feeder project? https://hackaday.io/project/72964-feeding-experimentation-device-fed-20
It may help in your research :)
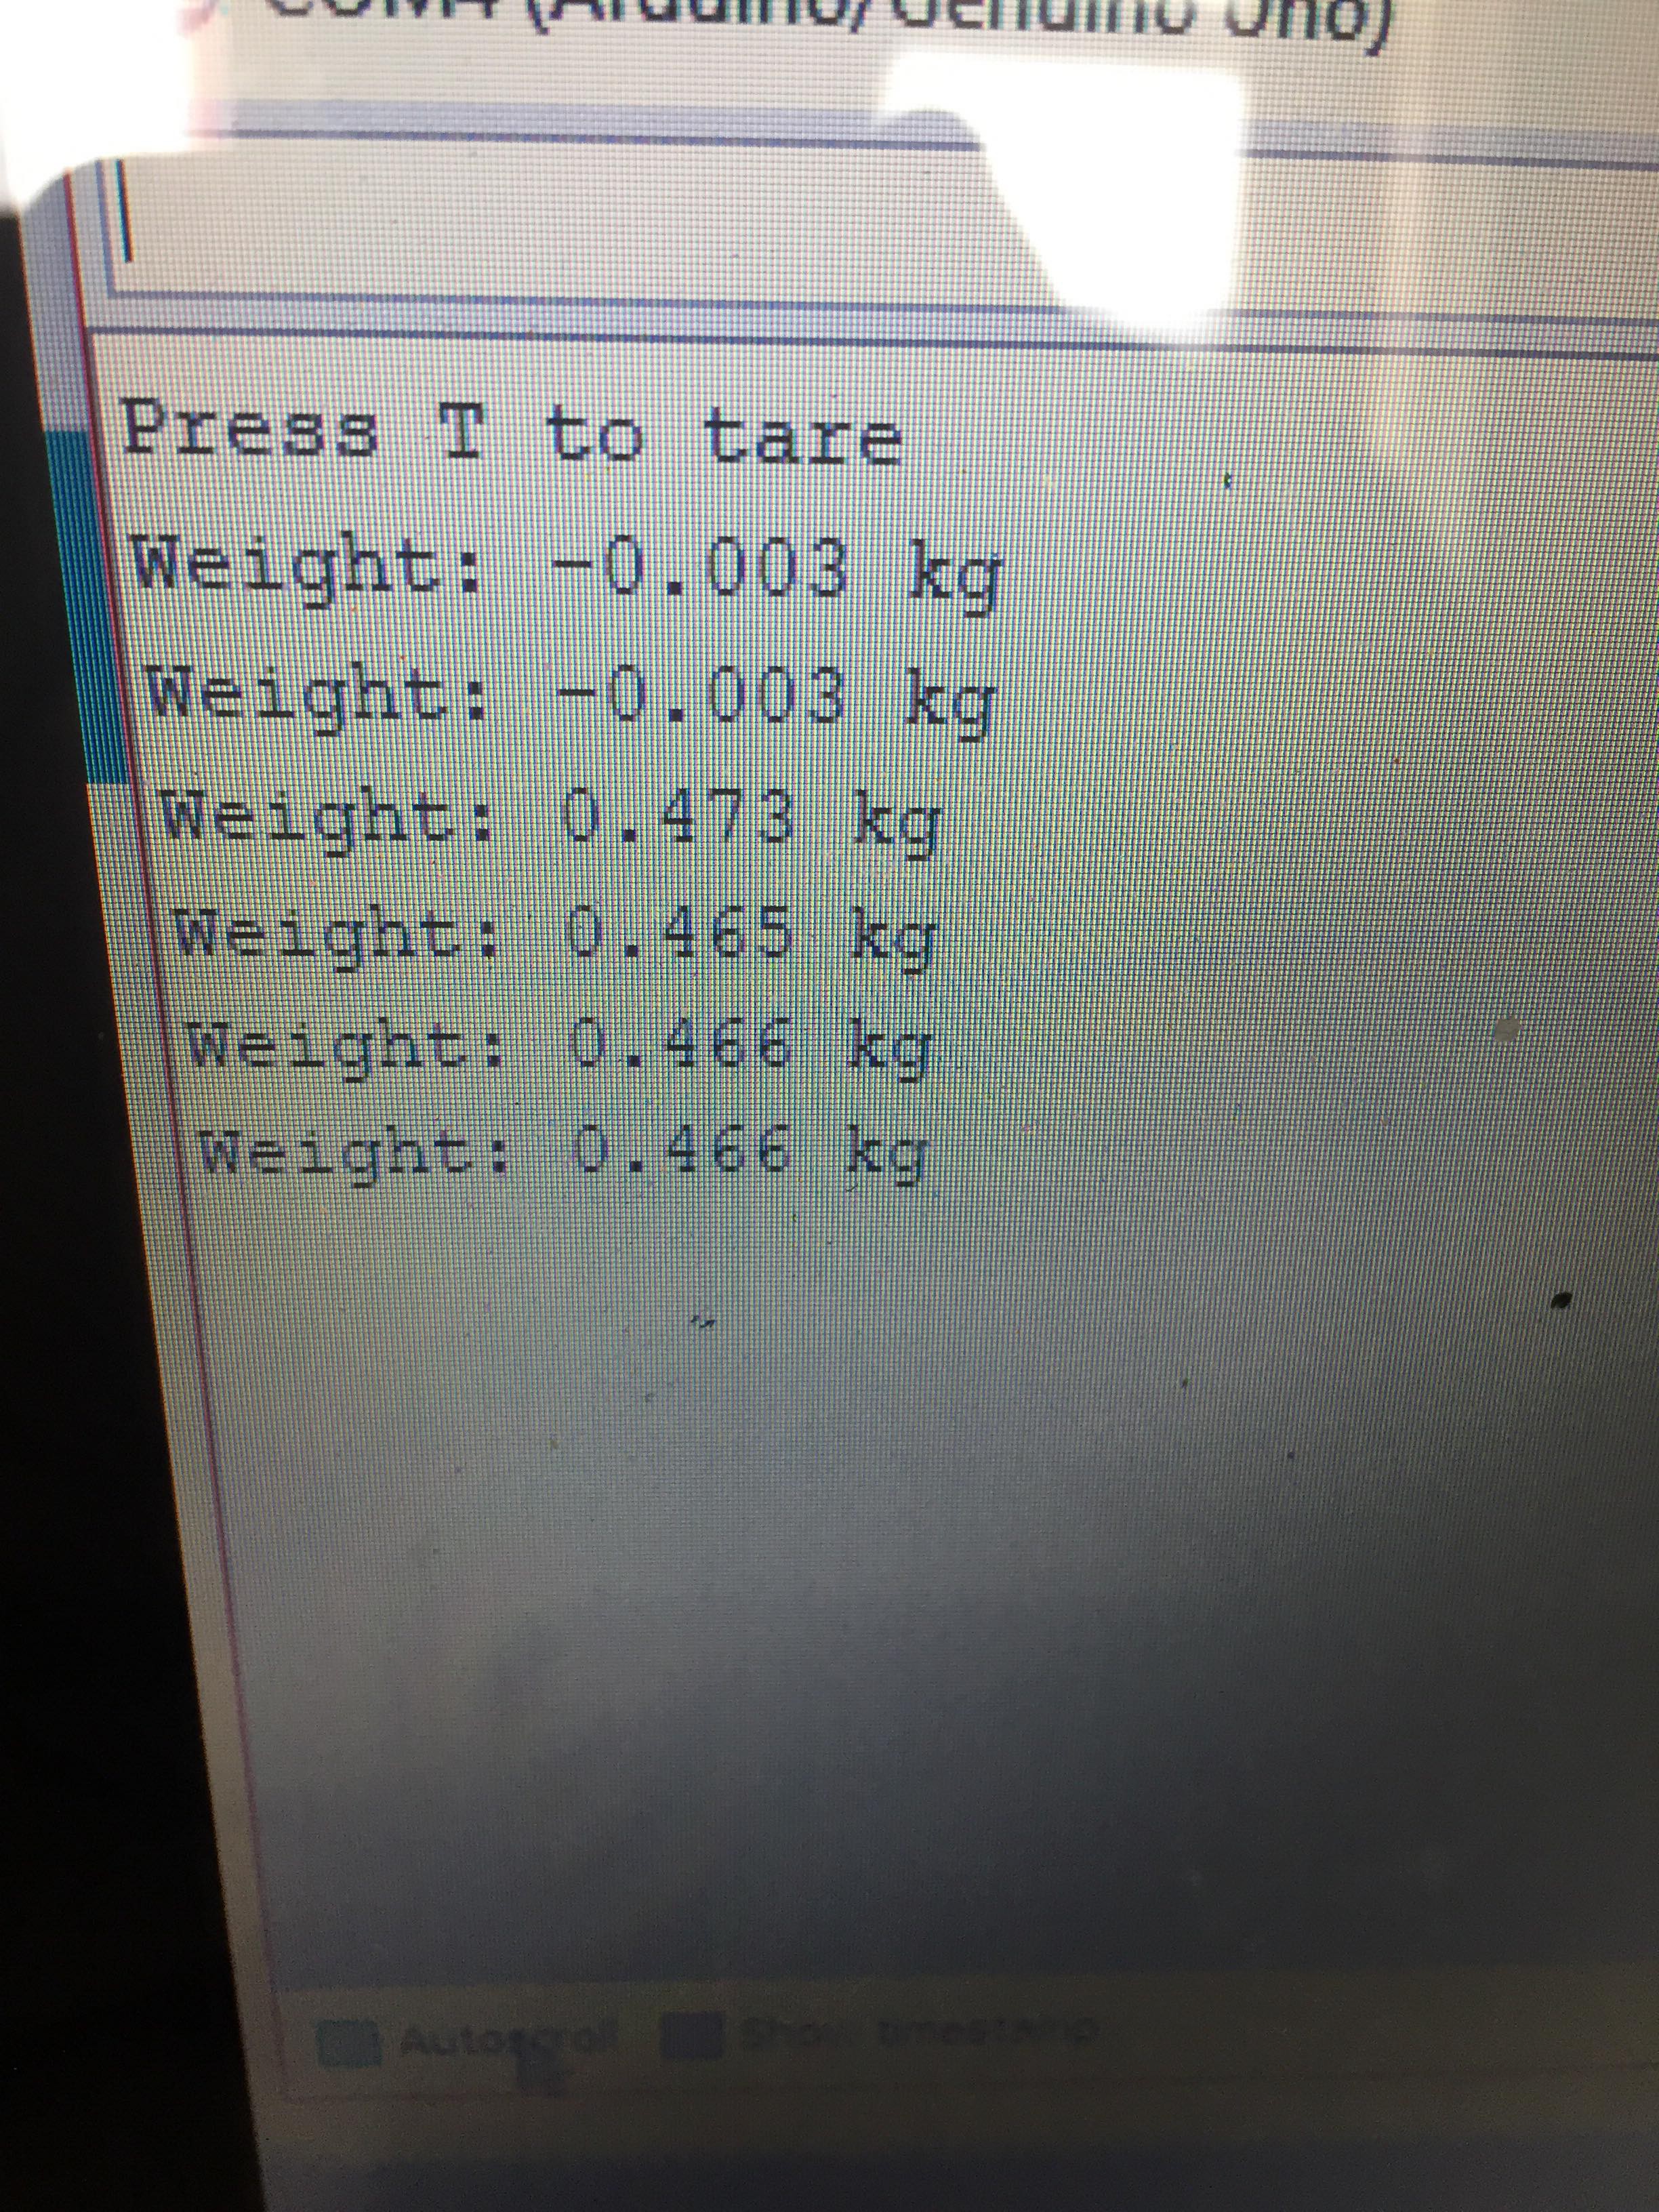 Using this data and data I collected using other items of various weights, I was able to calculate an average standard deviation which I used to create the normal distribution curve as shown below. Apologies, for the low quality images of the serial monitor and graph as I just took a photo of the computer screen.
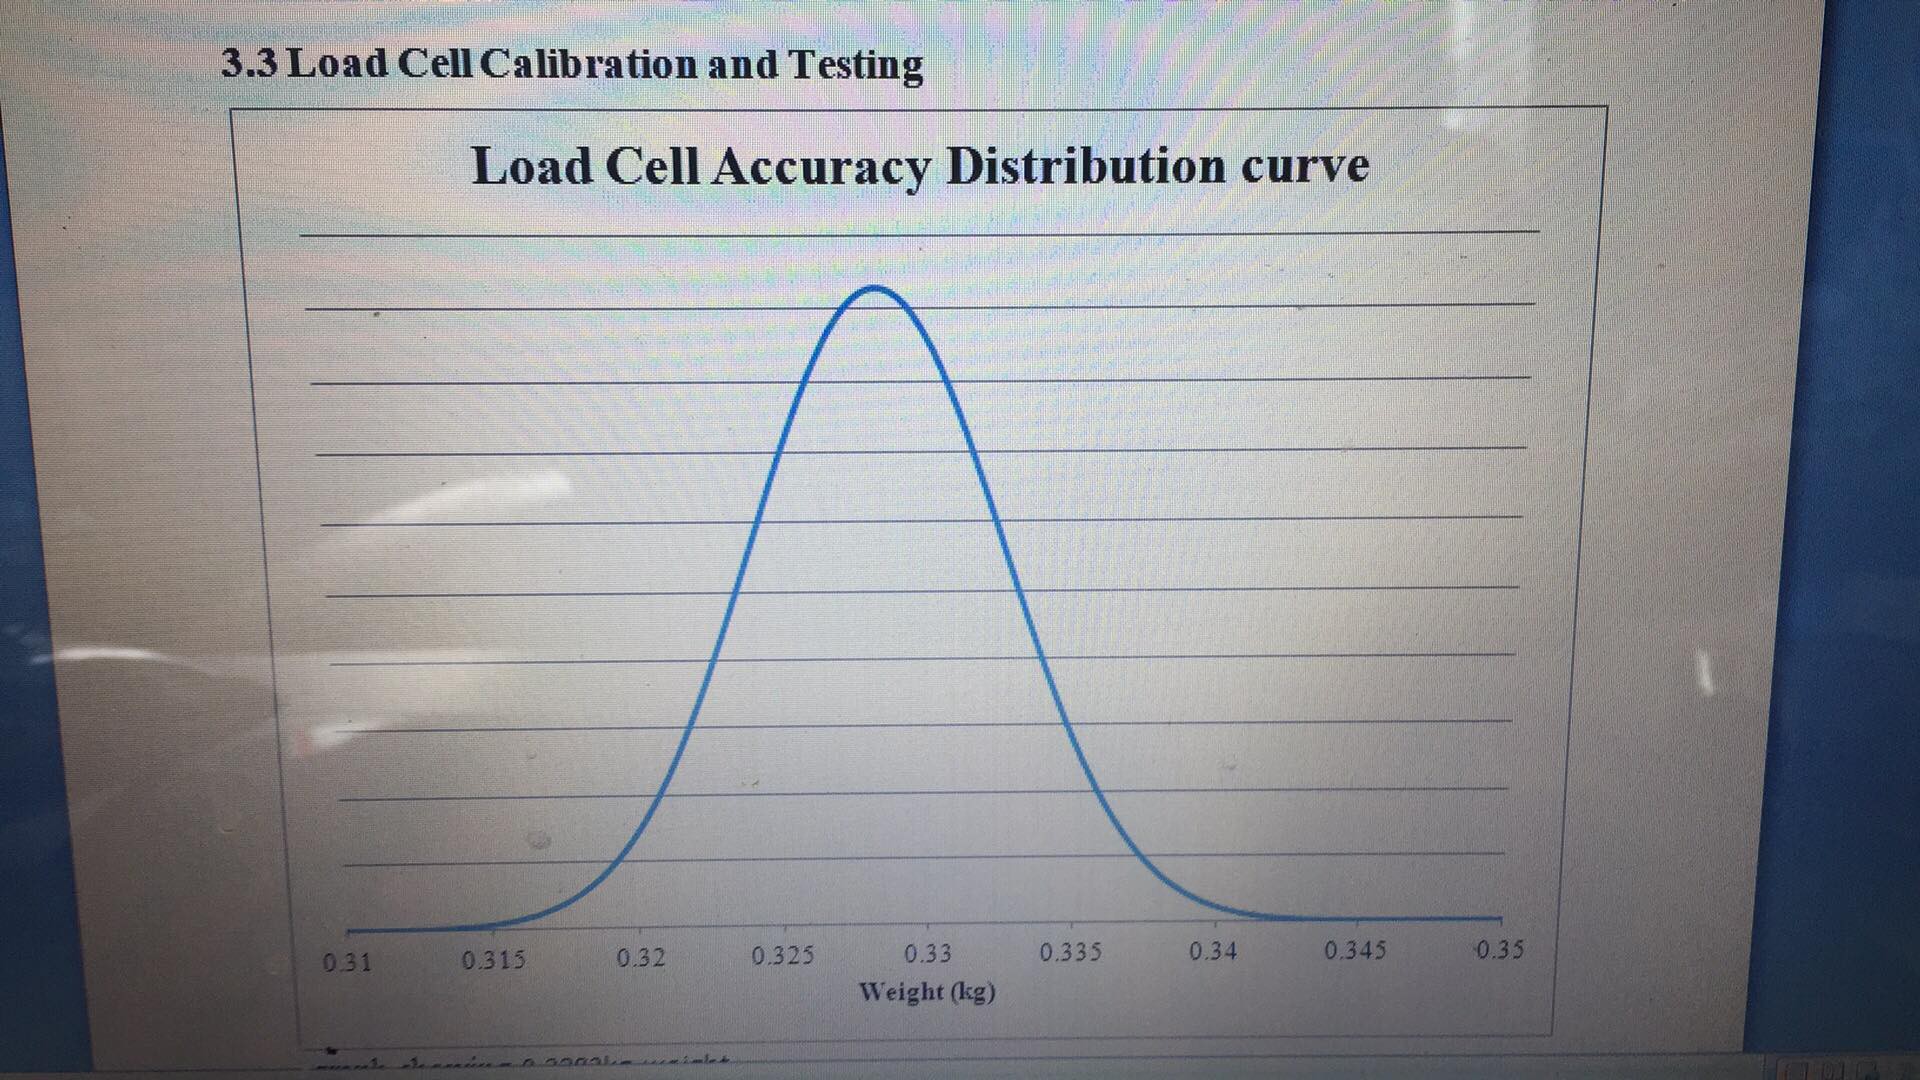

 Capt. Flatus O'Flaherty ☠
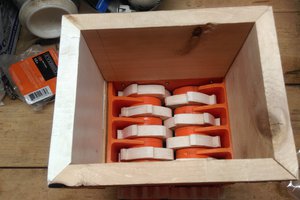
 Will F.
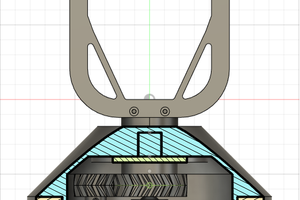
 caver.adam
I found the bug!! You are setting integer variables to a floating point value. These are truncated to 0. Just change 'int' to 'float'.