 Eugene
Some our experiments:
- The Art Of Stereoscopic Photo, Part 2
- The Art Of Stereoscopic Photo, Part 1
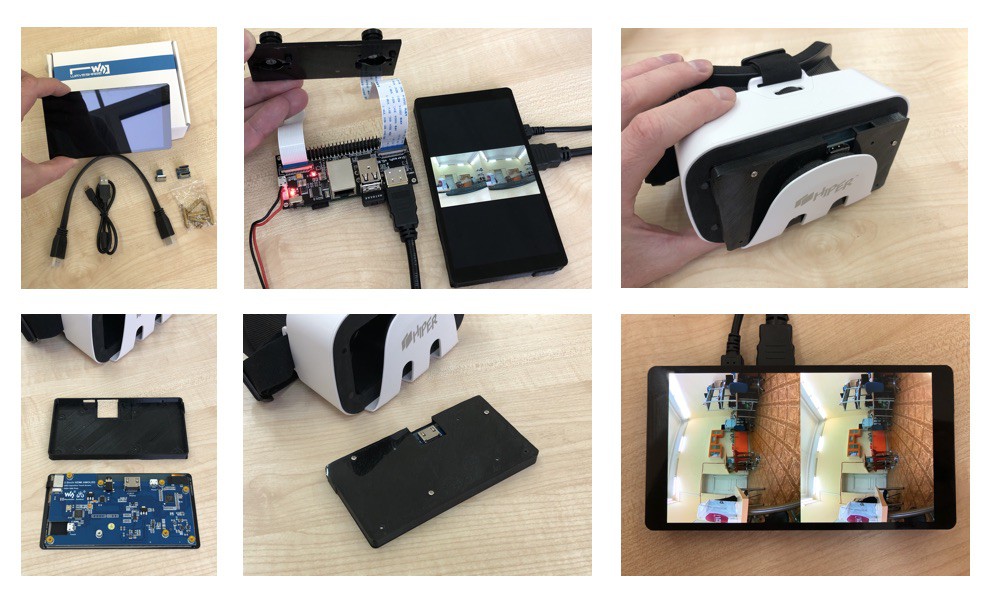
- Hacking Skybox on Oculus Go for StereoPi live streaming
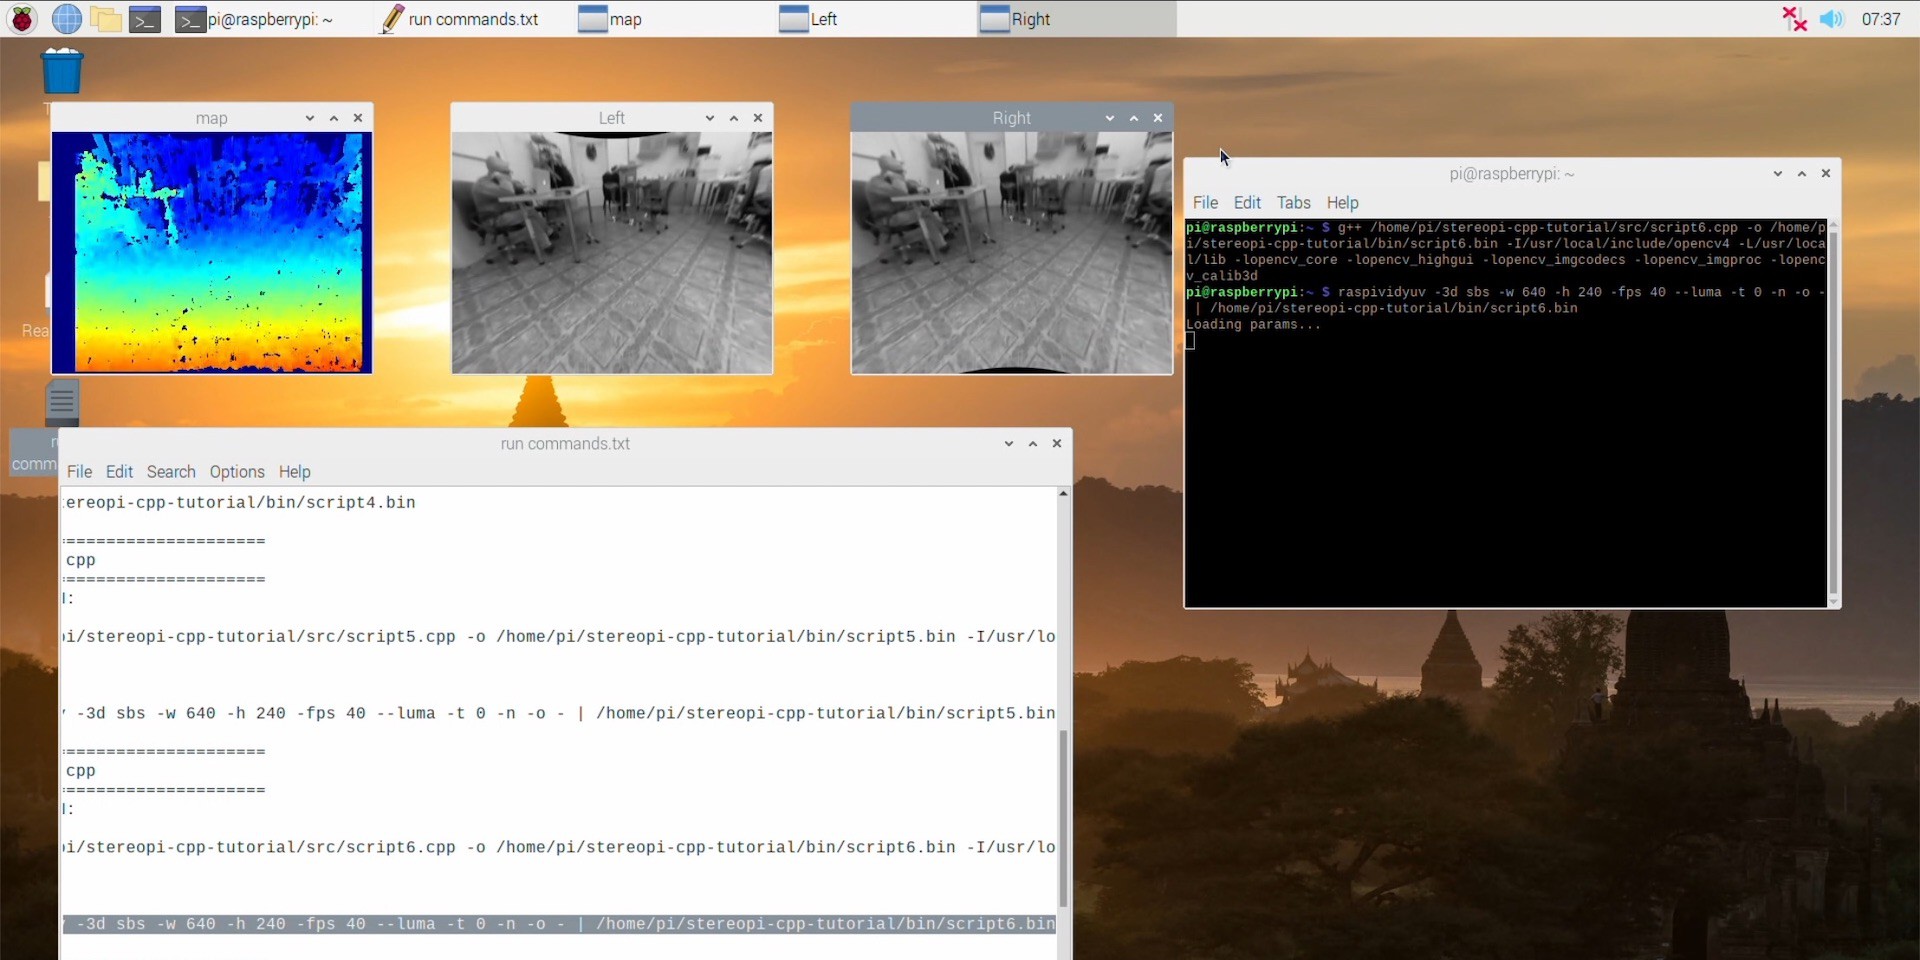
- OpenCV and Depth Map on StereoPi tutorial
- Stitching 360 panorama with Raspberry Pi CM3, StereoPi and two fisheye cameras. Step-by-step guide
- ROS: a simple depth map using StereoPi
- You from 3rd person view: StereoPi + Oculus Go
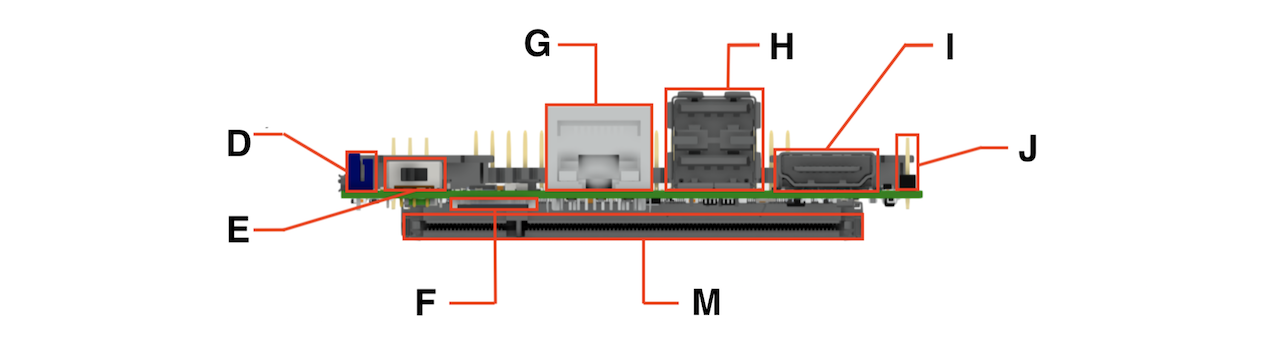
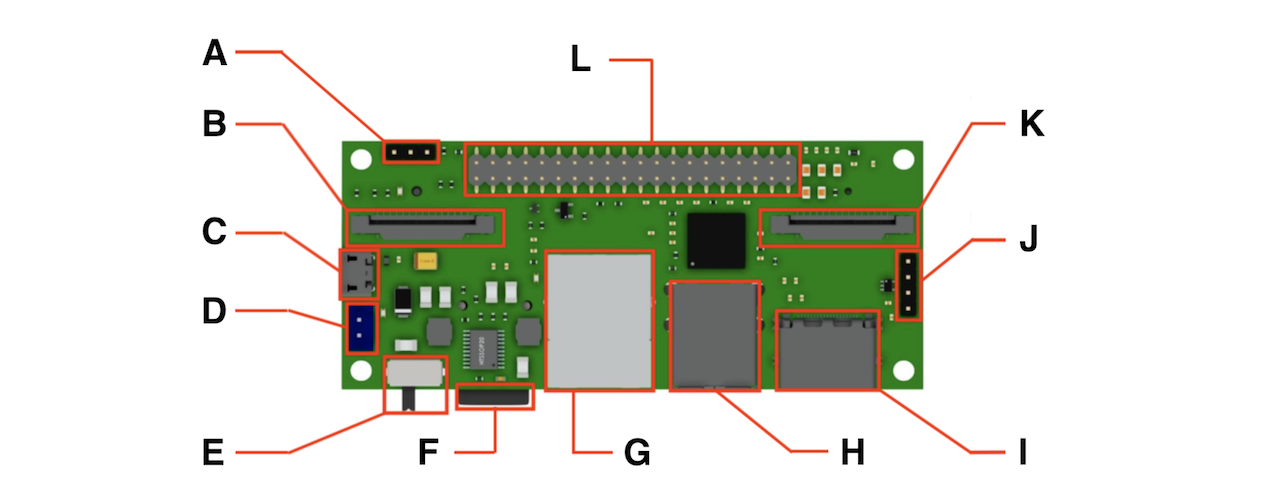
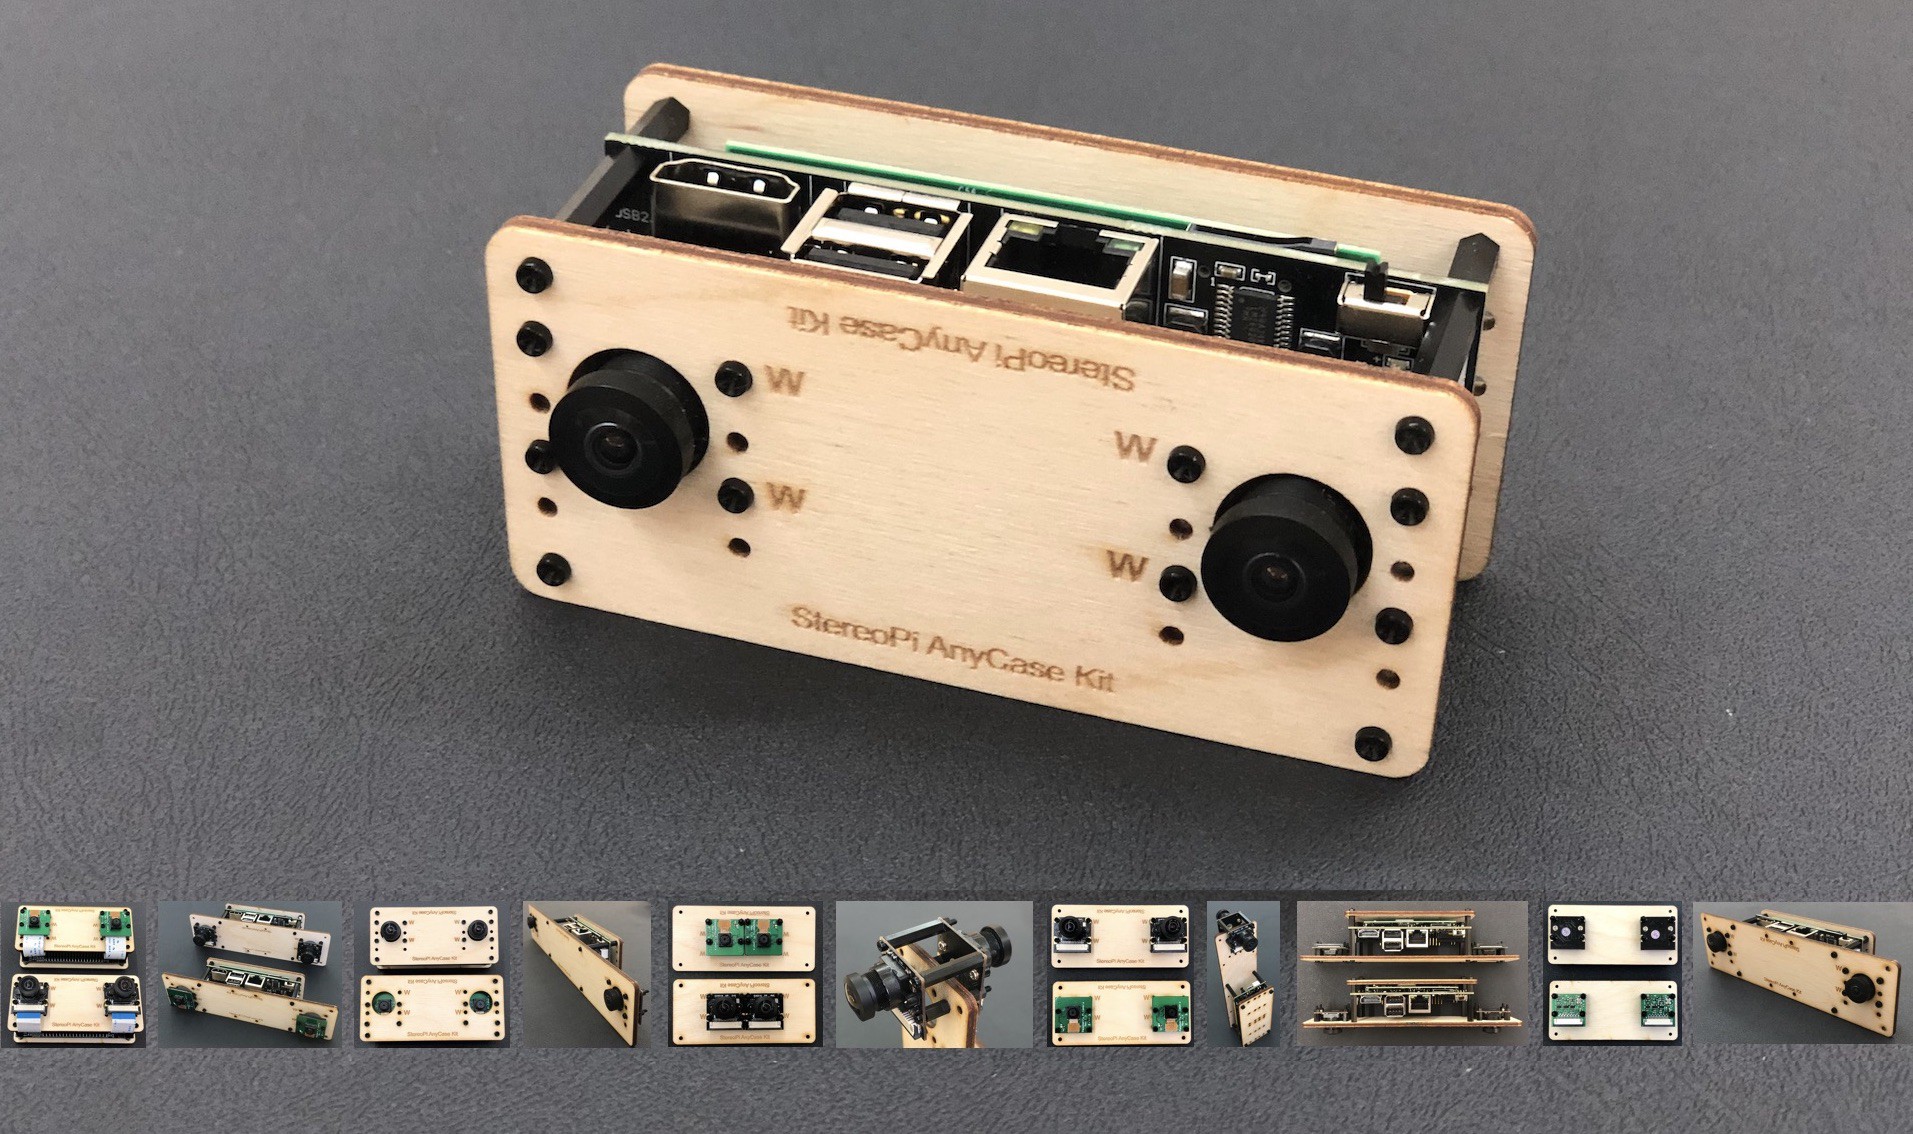
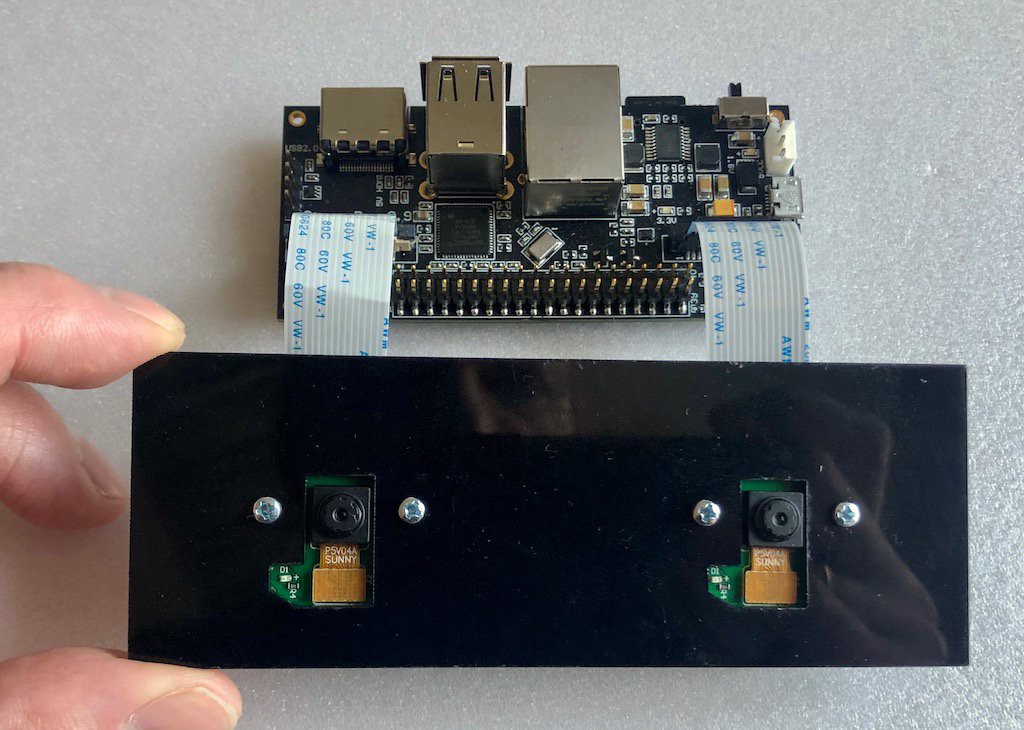
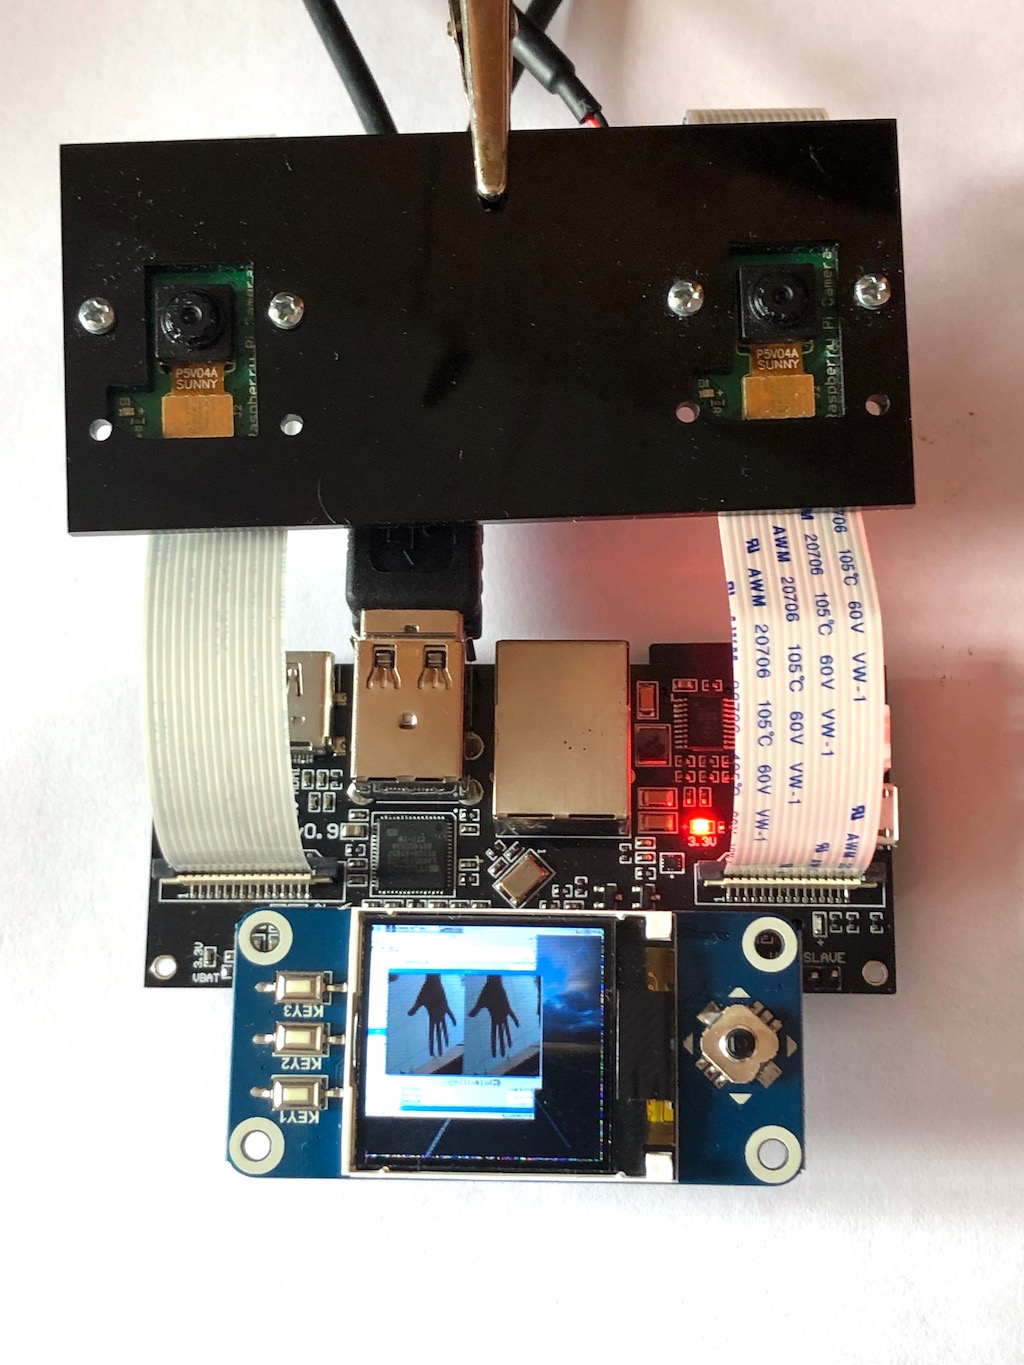
Front view:
| Legend | Info |
|---|---|
| A | Boot mode jumper |
| B | 1st Camera CSI connector |
| C | MicroUSB (for firmware upload) |
| D | Power connector (5V DC) |
| E | Power switch |
| F | MicroSD |
| G | Ethernet RJ45 |
| H | 2 x USB connectors |
| I | HDMI out |
| J | 3rd USB connector pins |
| K | 2nd Camera CSI connector |
| L | GPIO head |
| M | SO-DIMM connector for Pi Compute |
Specifications:
| Parameter | Info |
|---|---|
| Dimensions: | 90x40 mm |
| Supported Pi: | CM3, CM3 Lite, CM1 |
| Camera: | 2 x CSI 15 lanes cable |
| GPIO: | 40 classic raspberry PI GPIO |
| USB: | 2 x USB type A, 1 USB on a pins |
| Ethernet: | RJ45 |
| Storage: | Micro SD (for CM3 Lite) |
| Monitor: | HDMI out |
| Power: | 5V DC |


 Brenda Armour
 Kenny
Kenny

I posted this on the StereoPi forum but haven't received any replies. Sorry for posting here as well but I am kind of stuck right now and need some advice to make progress.
I have a 3D printer based on a Raspberry Pi and am trying to stream StereoPi video to Octoprint which is the server from my 3D printer. I can connect other webcams (e.g, Logitech) directly to an RPi USB port in the 3D printer and it just works in Octoprint. Octoprint is the RPi software allowing me to communicate with the 3D printer using a browser.
I am having trouble understanding how to set up a streaming server in StereoPi and select it in Octoprint. The Octoprint server as well as StereoPi are WiFi connected to the the access point on my network. I can connect to each of them separately thru a browser. I need to figure out which streaming option to use in StereoPi and what URL to set it to so I can set the same URL in Octoprint so it can receive the video stream. IOW, I am trying to make the StereoPi appears as a webcam to the 3D printer's RPi.
Has anyone done this and/or can provide some advice?