0%
0%
Design an 8 Bit Star Tree Topper in Fusion 360
How to design an 8 bit star tree topper in Fusion 360.
 Vladimir
Become a Hackaday.io member
Already have an account? Log in.
Just one more thing
To make the experience fit your profile, pick a username and tell us what interests you.
Pick an awesome username
hackaday.io/
Your profile's URL: hackaday.io/username. Max 25 alphanumeric characters.
Pick a few interests
Projects that share your interests
People that share your interests
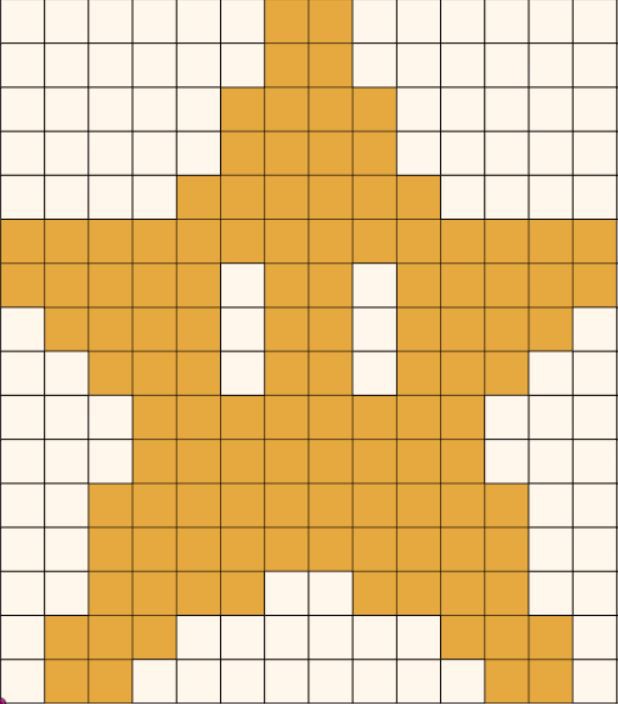 The approach we are going to take with this design is to bring in a picture for reference. We will then use the picture to guide our sketches and extrusions. Click
 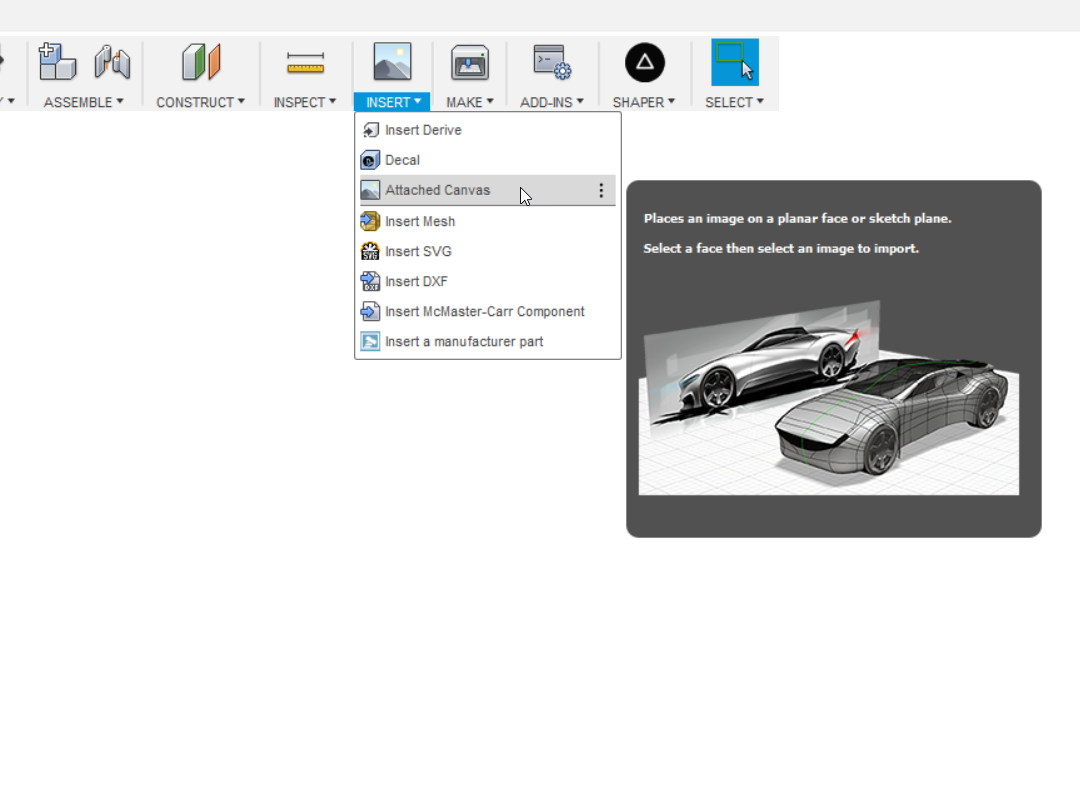 Open up Fusion 360 and go to the toolbar and select Insert - Attached Canvas. In the dialog box that pops up, select the X-Y (red, green) plane for Face and then click on the icon next to Select Image. Navigate to where you saved you the image (My8BitStar-Image) from the last step and select it. Bring the Opacity Slider to 30% and select Display Through and click OK.
 raasaa27
 Abd-el-rhman
 jsavidan