 Proton Gamer
Introduction
Before doing this project, I ask myself if we can work, watch videos or playing games on a small screen.
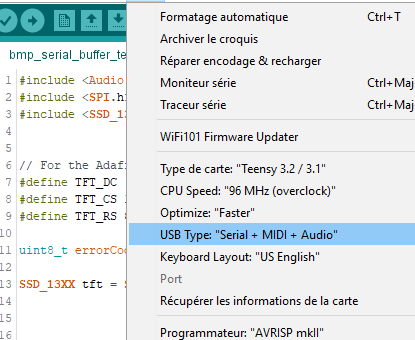
To do this project, I'm inspired by Paul Stoffregen's movie2serial project used with OctoWS2811 Leds to stream video playback.
I invite you to see this project : https://hackaday.com/2013/02/25/building-huge-displays-with-led-strips/
So the project consist to stream the desktop in a SSD1331(96x64 display).
I make a video test of the experience :
How it works ?
To explain how the video stream work, let me show you an example.
So we have desktop2serial wich capture a picture 8 pixels by 8 pixels and we have an Oled display 8 pixels by 8 pixels(yeah I preffer Oled display than TFT).
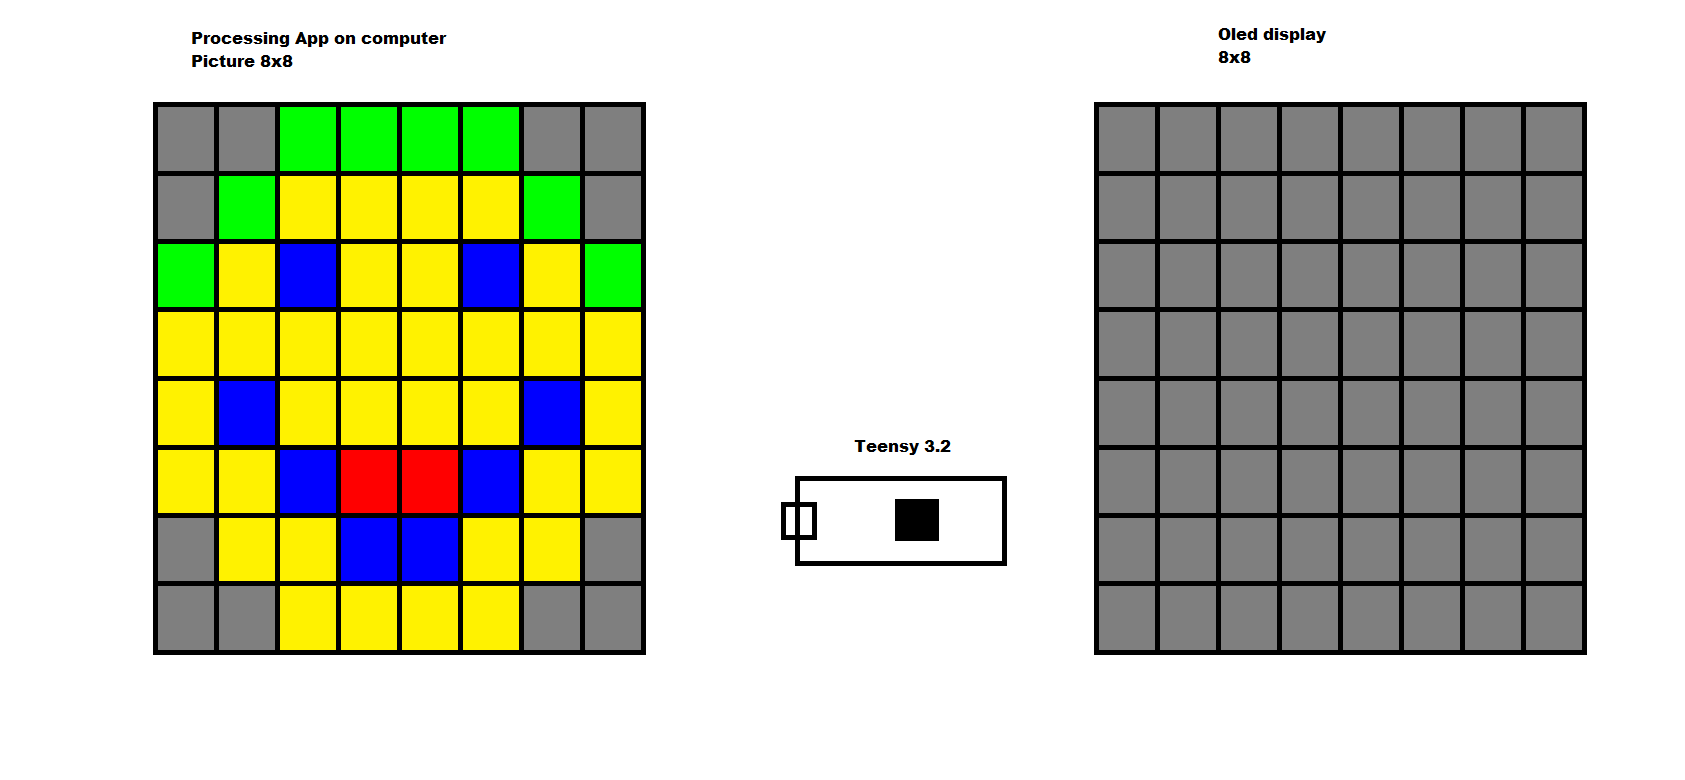
Once desktop2serial started, it capture the desktop as a picture first.
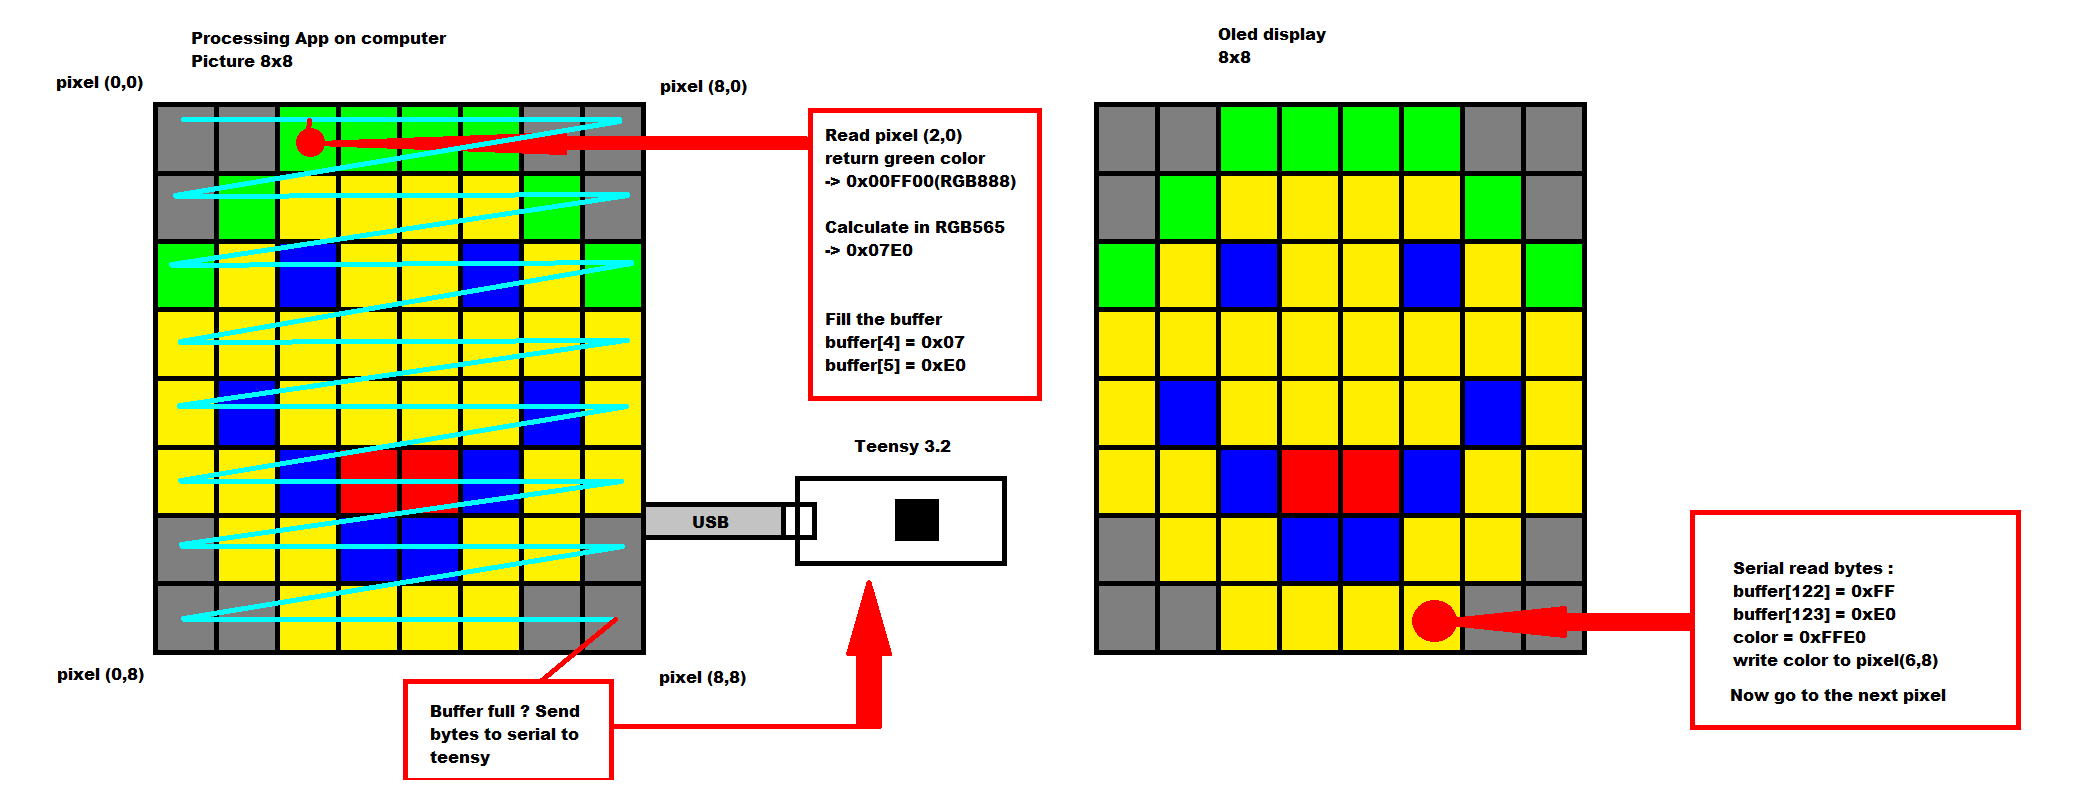
Next step, it read a pixel color at coordinates x and y and return RGB888 value.
Next step, it take the RGB888 value and convert it to RGB565 value to have a word(because the display that I used work in RGB565).
int color = get(x,y); //read color at coordinate x y and return RGB888 value

//color have this example value ==> 0x00FF00(Red = 0,Green = 255, Blue = 0)

int RED = (color >> 16);
RED = map(RED,0,255,0,31); //convert 8 bits to 5 bits
int GREEN = (color & 0xFF00) >> 8;
GREEN = map(GREEN,0,255,0,31); //convert 8 bits to 6 bits
int BLUE = (color & 0xFF);
BLUE = map(BLUE,0,255,0,31); //convert 8 bits to 5 bits

color = (RED << 6) | GREEN;
color = (color << 5) | BLUE;
//Finaly we have 0x07E0 word(RGB565)
Next step, it write the word in the buffer array of 1 dimension. So it makes bitwise to write 2 bytes in the array.
//We know color variable have 0x07E0 value.

buffer[first_byte] = color >> 8; //write the first byte(MSB)
buffer[second_byte] = color & 0xFF; //write the second byte(LSB)
When the word is written to the buffer, desktop2serial do the same thing to other pixels until it reached the last pixels of picture.
Once the buffer is full, desktop2serial write this buffer to the Teensy through the Serial.
Then Teensy simply just read the serial buffer and get the word color for each pixels and write it in display. The coordinates for pixels is calculated by increment of x and y variables.
if(Serial.available() > 0){//If we have serial buffer ready to read
//read bytes to Serial and write them to the buffer
Serial.readBytes(buffer, 128); //8px x 8px x 2bytes = 128 bytes

}

for(int b = 0; b < 128; b+=2){//read Buffer
//read Pixel color
//===> buffer[first byte] | buffer[second byte] = word color(RGB565)
c = (buffer[b] << 8) | buffer[b+1];

drawPixel(x,y,c); //write color  at coordinate x and y
x++;
if(x >= 8){//if coordinate x reached maximum width
  x = 0;
  y++;//increment y
  if(y >= 8){//if coordinate y reached maximum height
    y = 0;//back to 0
  }
}
}
Once the teensy has written to the display, desktop2serial can do the same process at first step.
For audio stream, I used PJRC Audio library and read audio through USB.
There is the audio diagram I've done using PJRC Audio System Design Tool.
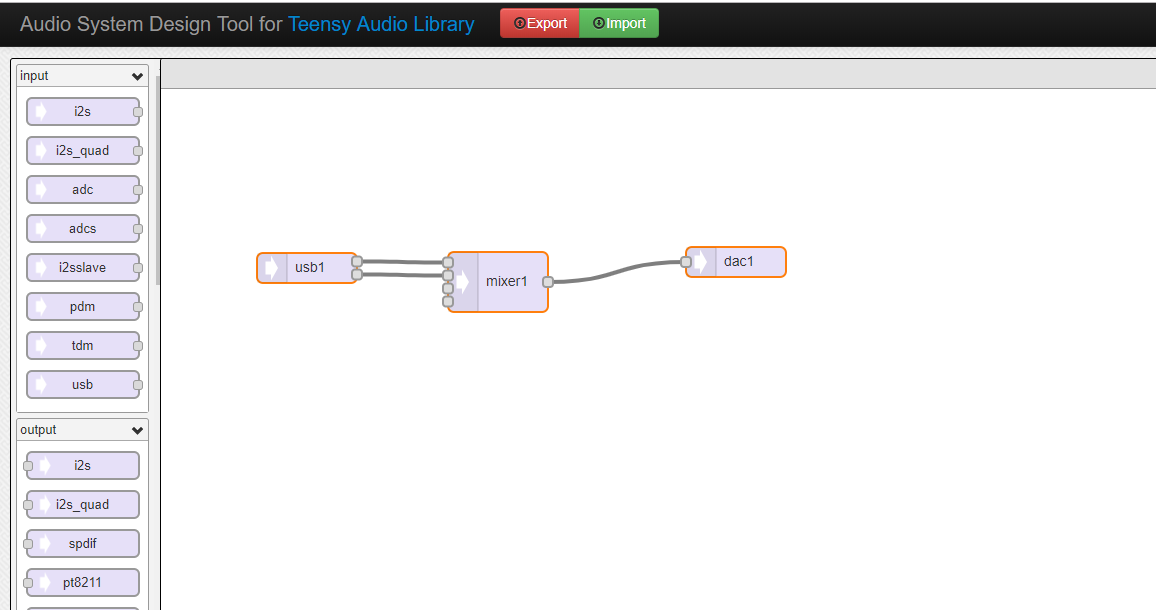
As you can see, I connected the 2 audio channels in a mixer wich connected to the DAC.
So finally the teensy mix the channels and output to a mono. And the resolution is 12 bit, not great as CD quality, but it's funny.


 SHAOS
SHAOS
 zpekic
 Electronoob
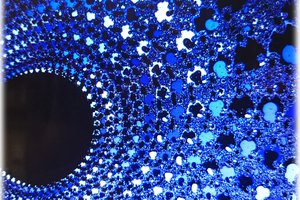
 Wancheng Zhou
Wow, that is really impressive! I would have thought there would be much slower transfer.
So the desktop is doing the downsizing for this? If you move to a higher-resolution screen, when will you start getting a slowdown? Would the bottleneck be the processing of the screen, the pushing through USB, or the Teensy's rendering of the array?