Sponsor Link:
UTSource.net Reviews
It is a trustworthy website for ordering electronic components with cheap price and excellent quality.
Hardware
The Seeeduino v4.2 board changed after the release of the Seeeduino v4.0, which includes more ports, additional pins, changes of part locations, more connecters, cancellations of soldering pads, etc.. A full hardware diagram of the Seeeduino v4.2 can be found in the image below:
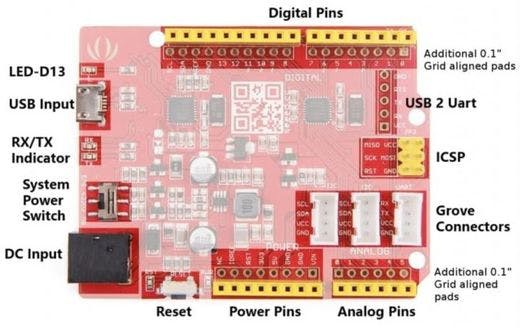
Between the Arduino Uno and the Seeeduino v4.2, there are a few changes of hardware which includes: a Micro-B USB input port, 3 on-board Grove connectors, a 3.3/5v system power switch, DC-DC circuit instead of LDO (Low Drop-Out) which includes better efficiency, and other circuit improvements as well as a surface-mount microcontroller and additional female pins. There are also pins for serial programming (USB to Serial) and changes in the placement of components.
Input connection
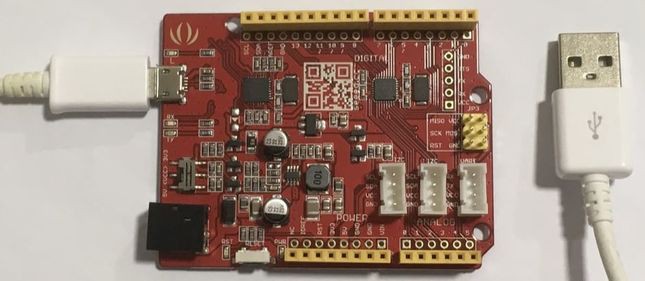
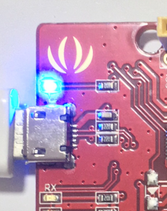
The Seeeduino v4.2 development board consists of a micro-USB port for programming as well as for power. Its only USB port is the micro-USB port and, for additional, serial communication, there are pins for a USB to Serial converter as well as pins for programming directly to the chip, the ATMEGA328 microcontroller. The Seeeduino v4.2 is based on the Arduino Uno bootloader, an ATmega16U2 as a USB to Serial converter (basically working like an FTDI USB to Serial chip). More of the product specifications will be at the product review page for the Seeeduino v4.2. For programming and uploading codes to the board, you will need a micro-USB data cable as seen in the image below:
Setting it up
The programming of the Seeeduino v4.2 may only occur if you first have drivers installed to your computer. For the Windows operating system, drivers are essential, but for the Mac OS, it doesn't really matter. A micro-USB cable is needed to program the board so make sure you plug your board in first. Once plugging in the board, its installation process will fail, thus, it won't appear in your computer's Device Manager. To start diagnosing this issue, make sure you download the driver which can be found below:
After unzipping the file, and extracting it, go into Device Manager and selecting/updating the driver by choosing the unzipped driver file. For more information and a walkthrough guide of the steps to install the driver, follow the pictures below:
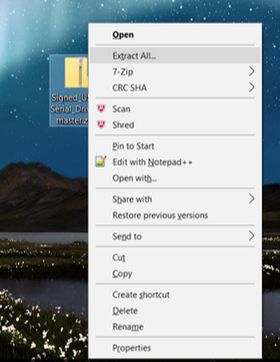
1. Extract the driver files out of its ZIP file.
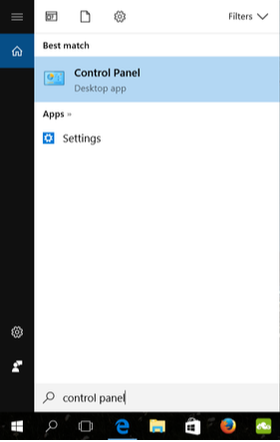
2. Go to "Control Panel".
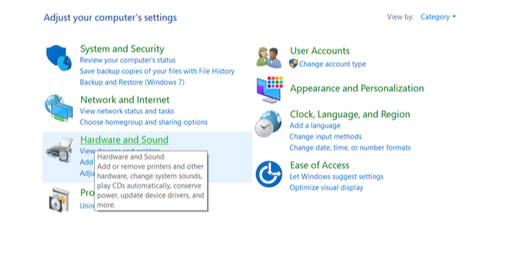
3. Once you're inside "Control Panel", click on "Hardware and Sound".
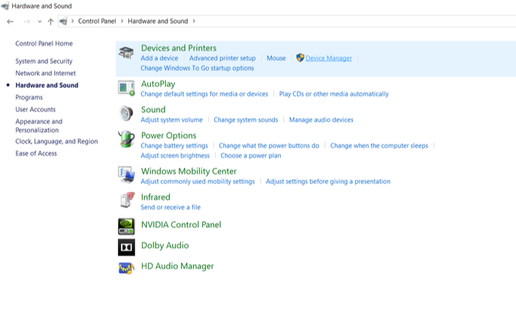
4. Once you're inside "Hardware and Sound", click on "Device Manager".
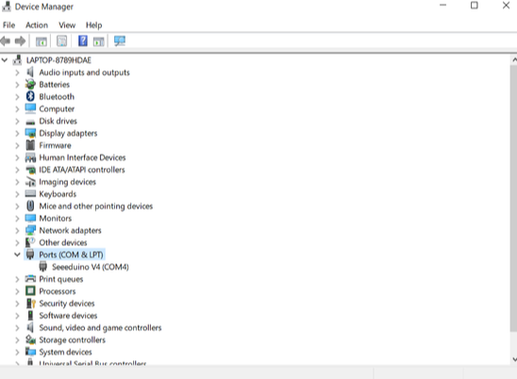
5. Look under "Ports (COM & LPT)". You should find an open port named “Seeeduino v4”. If there is no "Ports (COM & LPT)" option, look under "Other Devices" for 'Unknown Device'.
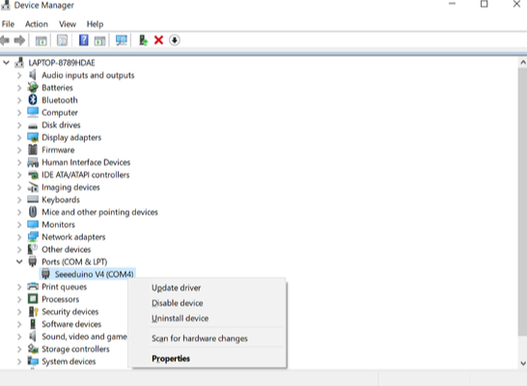
6. Where you find a device name such as "Unknown Device" or "Seeeduino v4" under one of the sections ("Ports" or "Other Devices"), right-click on the device name and click on "Update Driver".
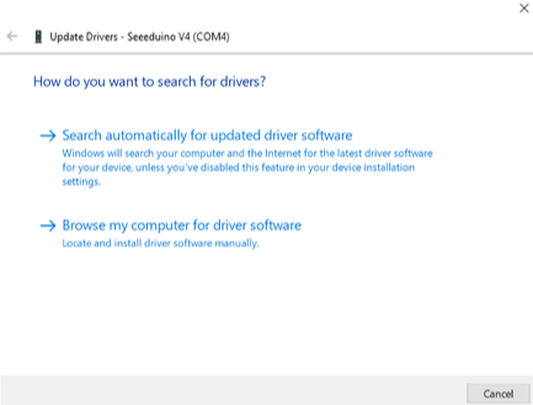
7. Once you have clicked on the "Update Driver" button, another tab will appear asking you whether you want the computer to search for the correct drivers or not, you would want to click on the "Browse my computer for driver software" option.
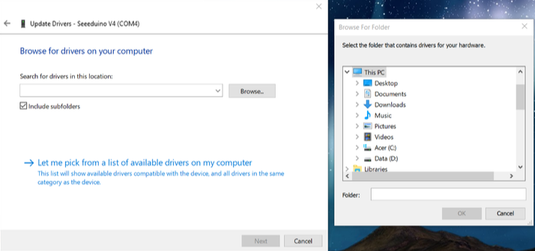
8. To browse your computer for the correct driver, you will have to click on the "Browse..." button in the page and search in your computer folders for the extracted file from the beginning that consists the driver.
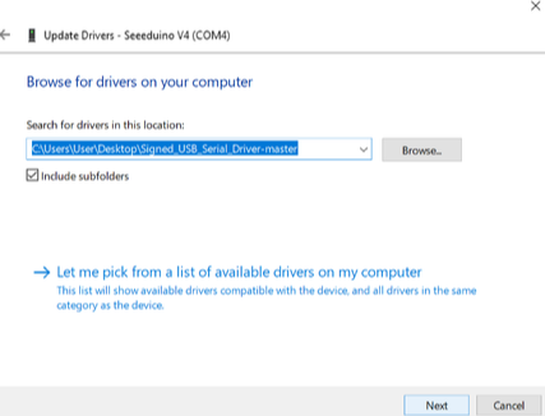
9. Once you've selected the file with the driver, click "Next" to continue.

10. Once you've continued to the end of the installation, this message should show up and that should be the end of the driver installation. Now you can check back at the "Device Manager" and you shouldn't see any error messages. If you plug the board in and go to the "Ports (COM & LPT)", a device named "Seeeduino v4" will be shown at a COM port which means that there are no more problems with drivers.
Using the Arduino IDE
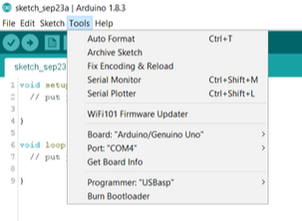
When using the Arduino IDE (Integrated Development Environment), after downloading the respective drivers for the Seeeduino v4.2, select the Arduino Uno as a board and select the COM port where your board is plugged into. Writing any codes and programming it into the Seeeduino v4.2 is as simple as programming codes into an Arduino Uno. Compiling and uploading codes are very simple and no error messages will come up during this process. An image of where you would set up this board in the Arduino IDE is shown below:
Testing the board
To test the board to see whether the board is working, and a little bit of its general functions, I decided to run a few modules and sensors to it. From these examples, we can test how well the Seeeduino v4.2 can handle the different components, like the D13 (digital pin 13) on-board LED and an i2c OLED. It already has a pre-programmed modified Blink sketch in the board when you first power it up. But, to test the board's capabilities with the Arduino IDE as well, I ran a simple modified Blink sketch pre-installed in the Arduino IDE (File > Examples > 1.Basics > Blink). You should immediately see that the blue LED above the micro-USB input will start blinking with one-second cycles.
Once I found out that the Seeeduino v4.2 development board perfectly works with the Blink sketch and the on-board/D13 LED works, I decided to test the board out with a 0.96" i2c OLED display to see whether the board can work through its i2c pins and its i2c Grove connectors. I used the Adafruit GFX library and the Adafruit SSD1306 library and I used the SDA (serial data), SCL (serial clock), 5V and GND pins. The Seeeduino v4.2 can handle an OLED display very well with ease. The example is demonstrated in the image below:
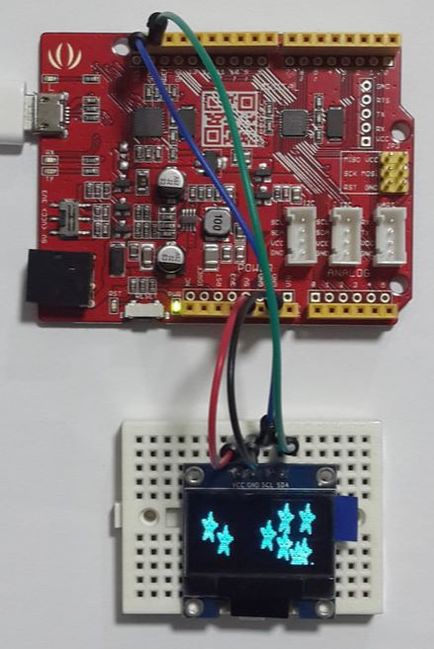
From the following tests, I am sure that the Seeeduino v4.2 can handle sensors and modules just like an Arduino Uno, but the additional feature are the Grove module connectors which not many Arduino-compatibles has. It also proves that this board can be utilised with multiple interfaces to operate different pieces of hardware. Plus, throughout its tests, there were no errors or obstacles which was blocking the board from running the devices and uploading the sketches to the board as shown above.
Conclusion
With the basic setup and configuration, you can use the Seeeduino v4.2 just like an ordinary Arduino Uno. Even though it is an Arduino-compatible, I feel like it has many more features than an ordinary Arduino Uno, which includes its Grove connectors, power switch and the female pin headers it consists of. Now, from here, there are many more projects which you can make by utilising this board, so make sure you don't miss out on our upcoming projects. You can also additionally use this board for all of our current projects posted so far with the variety of modules and sensors there are.
Amazing opportunities
Also, be sure to check out PCBWay, a leading manufacturer and distributor in PCB design and manufacturing. They have amazing prices and excellent quality in their services, so don't miss out on them! Plus, PCBWay has an amazing website, online Gerber viewer function and a gift shop so make sure to check out their links below:
PCBWay Free Online Gerber Viewer Function: https://www.pcbway.com/project/OnlineGerberViewer.html
PCBWay Gift Shop: https://www.pcbway.com/projects/gifts.html
Make sure you check out the review for this board by clicking here.
Enjoy! Contact us for any inquiries!