 Matt Bradshaw
I've printed my first attempt at a case for DrumKid. It's still a long way from a finished instrument, but it's a great start - it feels awesome to see, hold, and use a thing that until recently only existed as a drawing. My current plan for the final product is to laser-cut the design as layers of wood, so I wanted to make a prototype which could theoretically also be made on a laser cutter. With this in mind, I used a uniform thickness of 3mm (which seems fairly standard on laser cutters) and didn't add any features that couldn't be build up in layers if need (i.e. the basic shape is a prism). Here's what it looks like from the front::
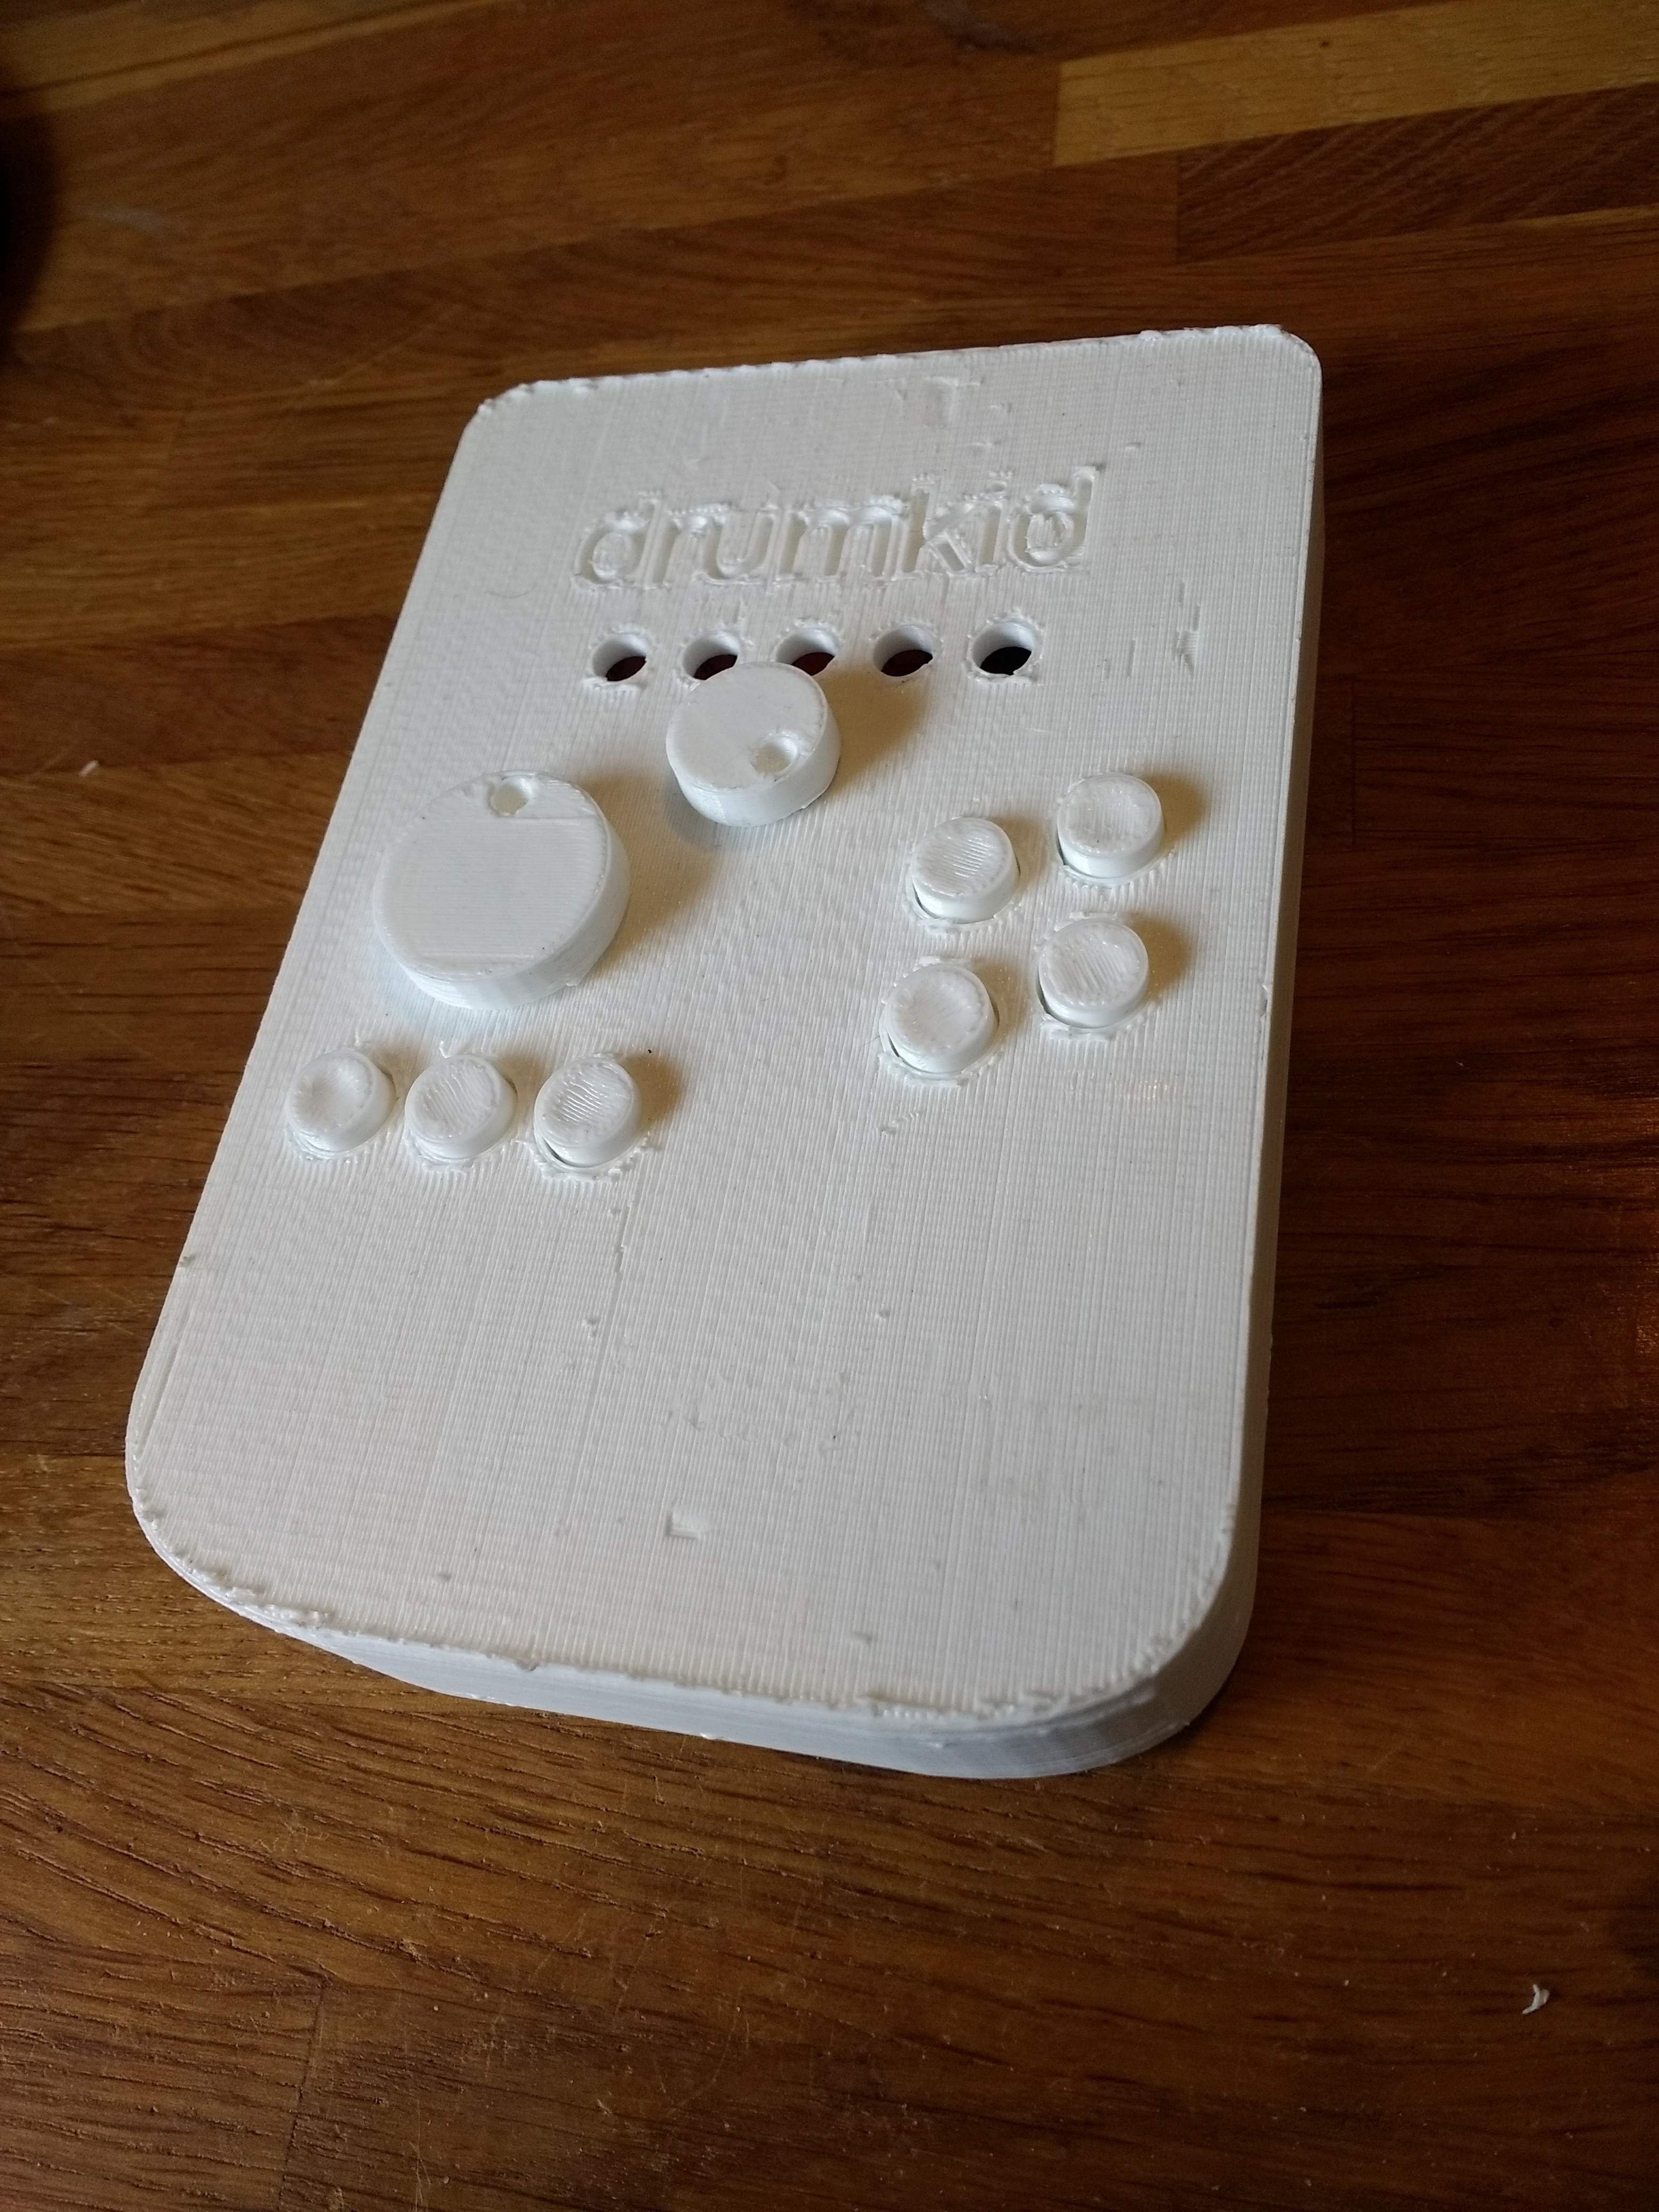
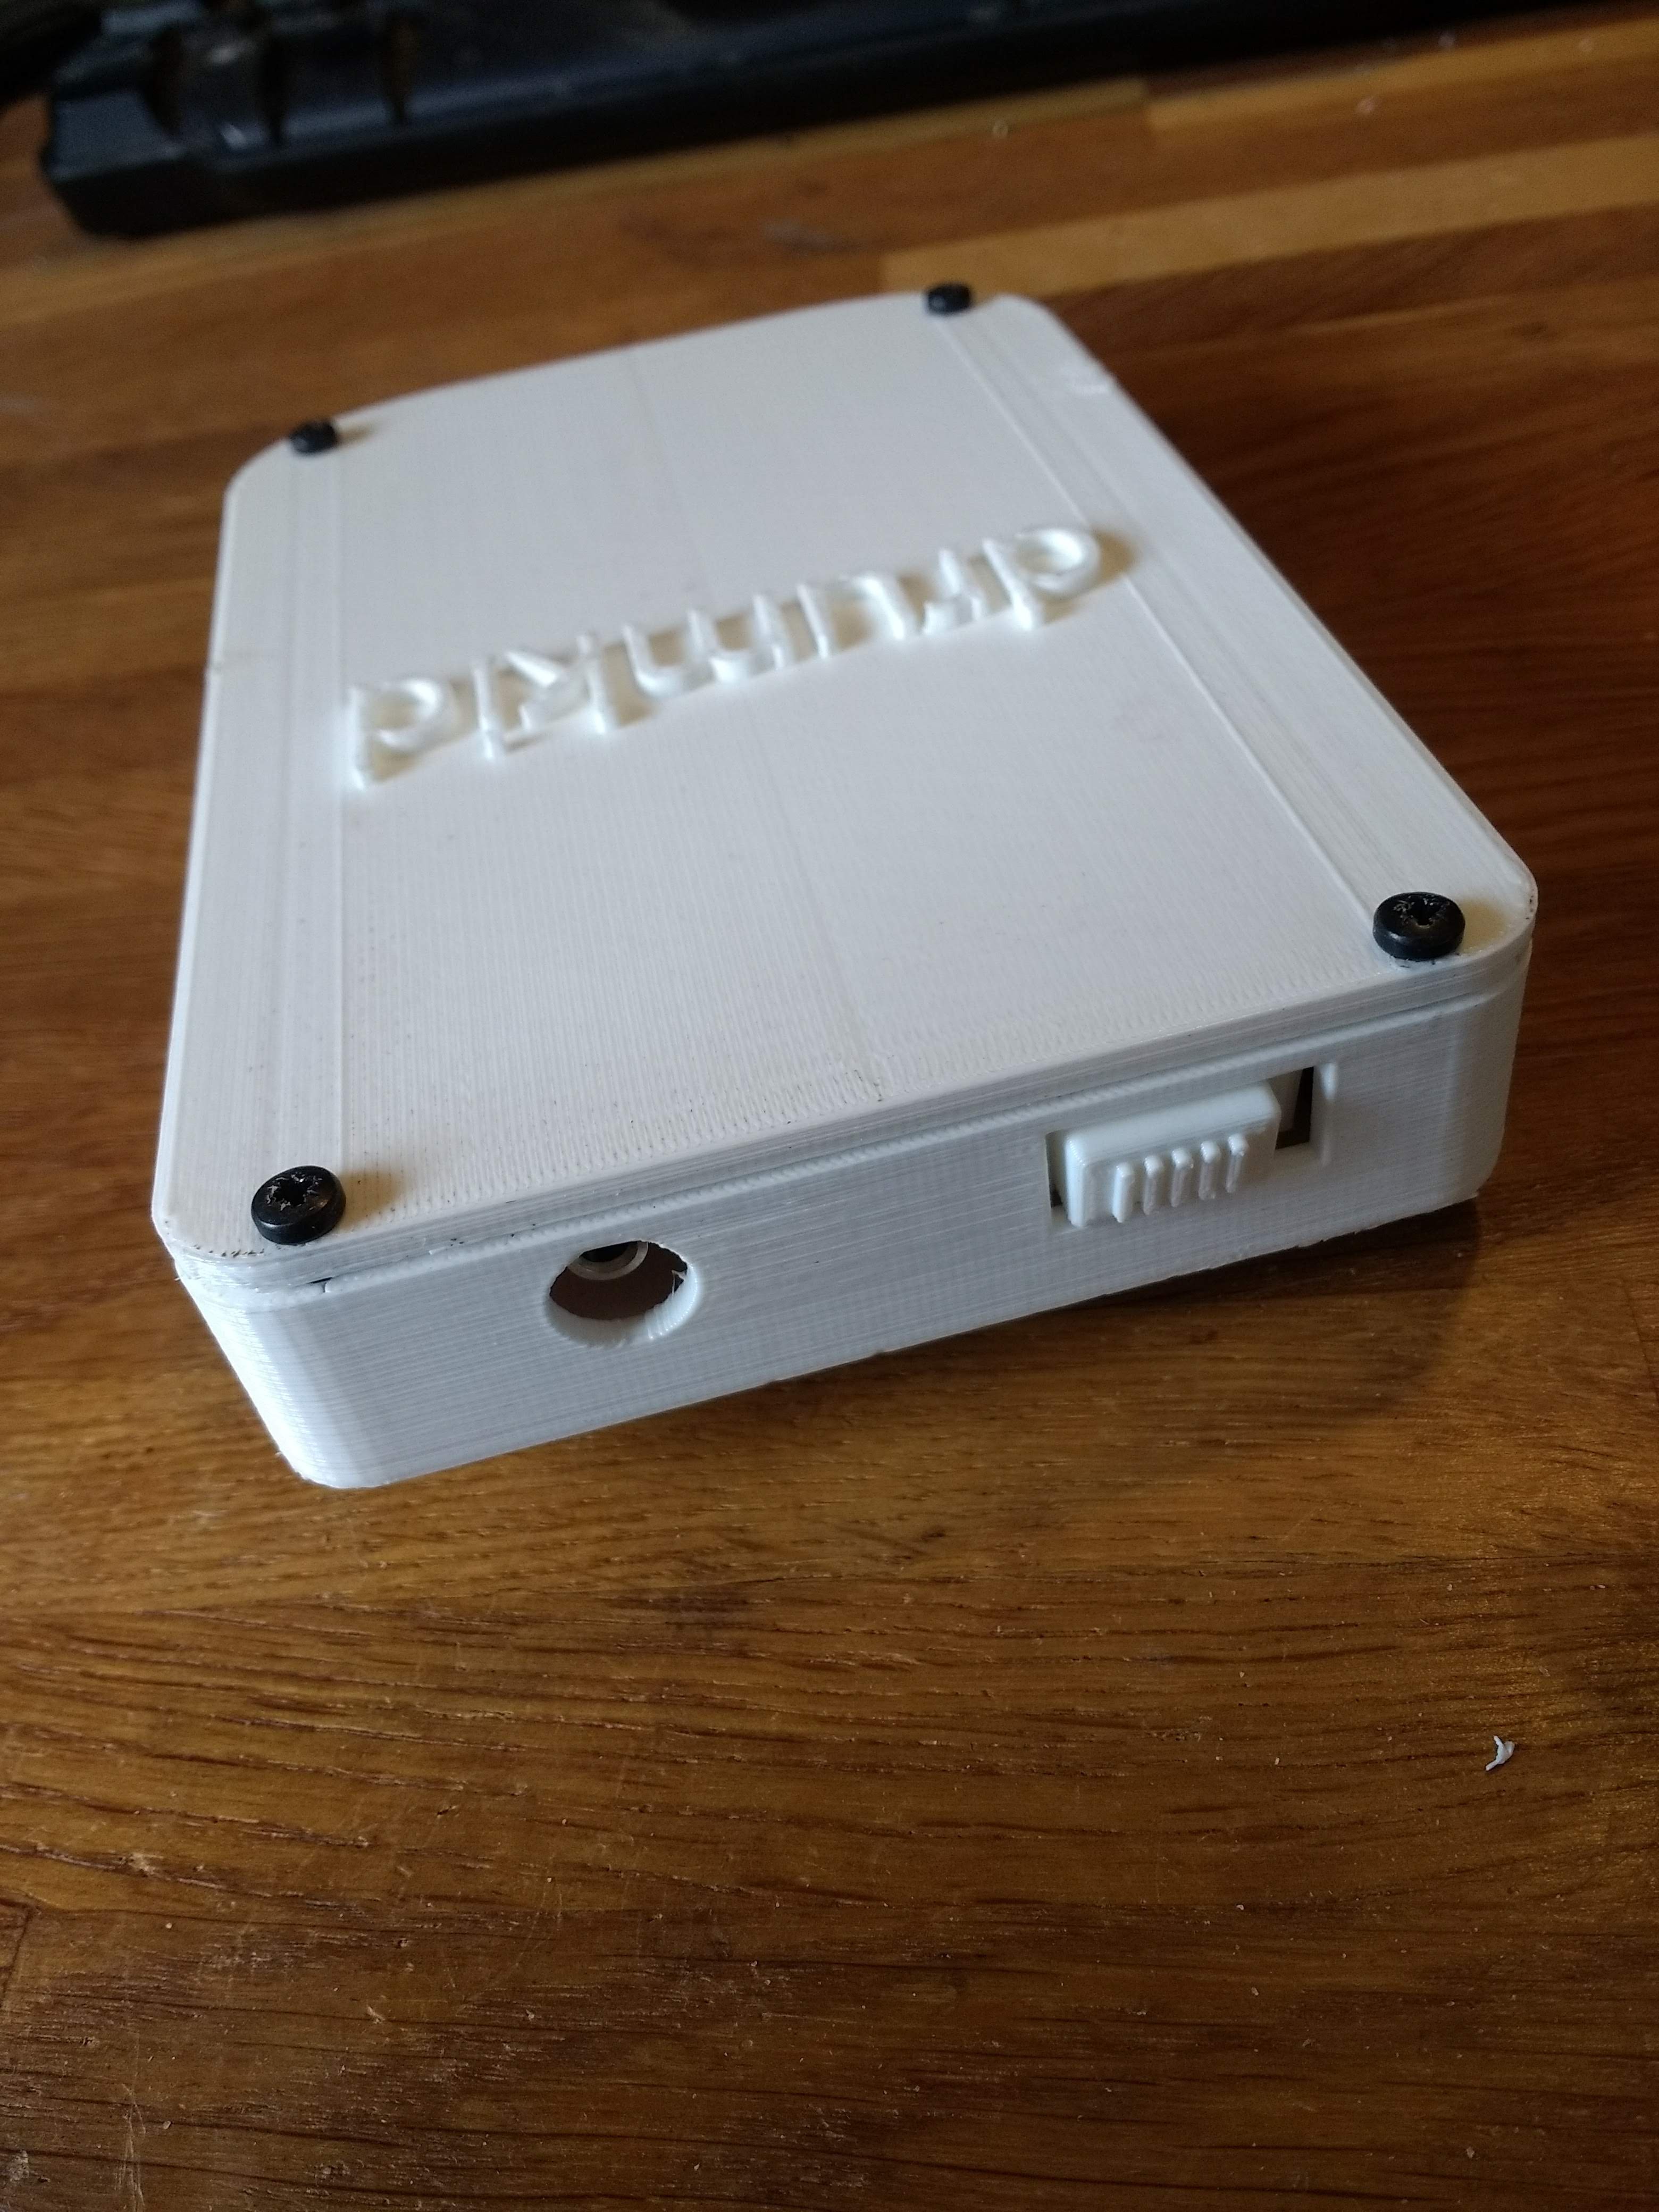
The finish is very rough because I printed the main part face-down, to avoid needing supports. For annoying reasons, my printer basically forces you to print everything on a raft, which is difficult to remove on larger prints like this, causing the pock-marked surface. I could avoid this in future by printing the case in sections, or by printing the other way up, with supports, but my priority for this build was speed. You can see a somewhat nicer finish on the back and sides of the instrument:
Here's what the case looks like with the back removed:
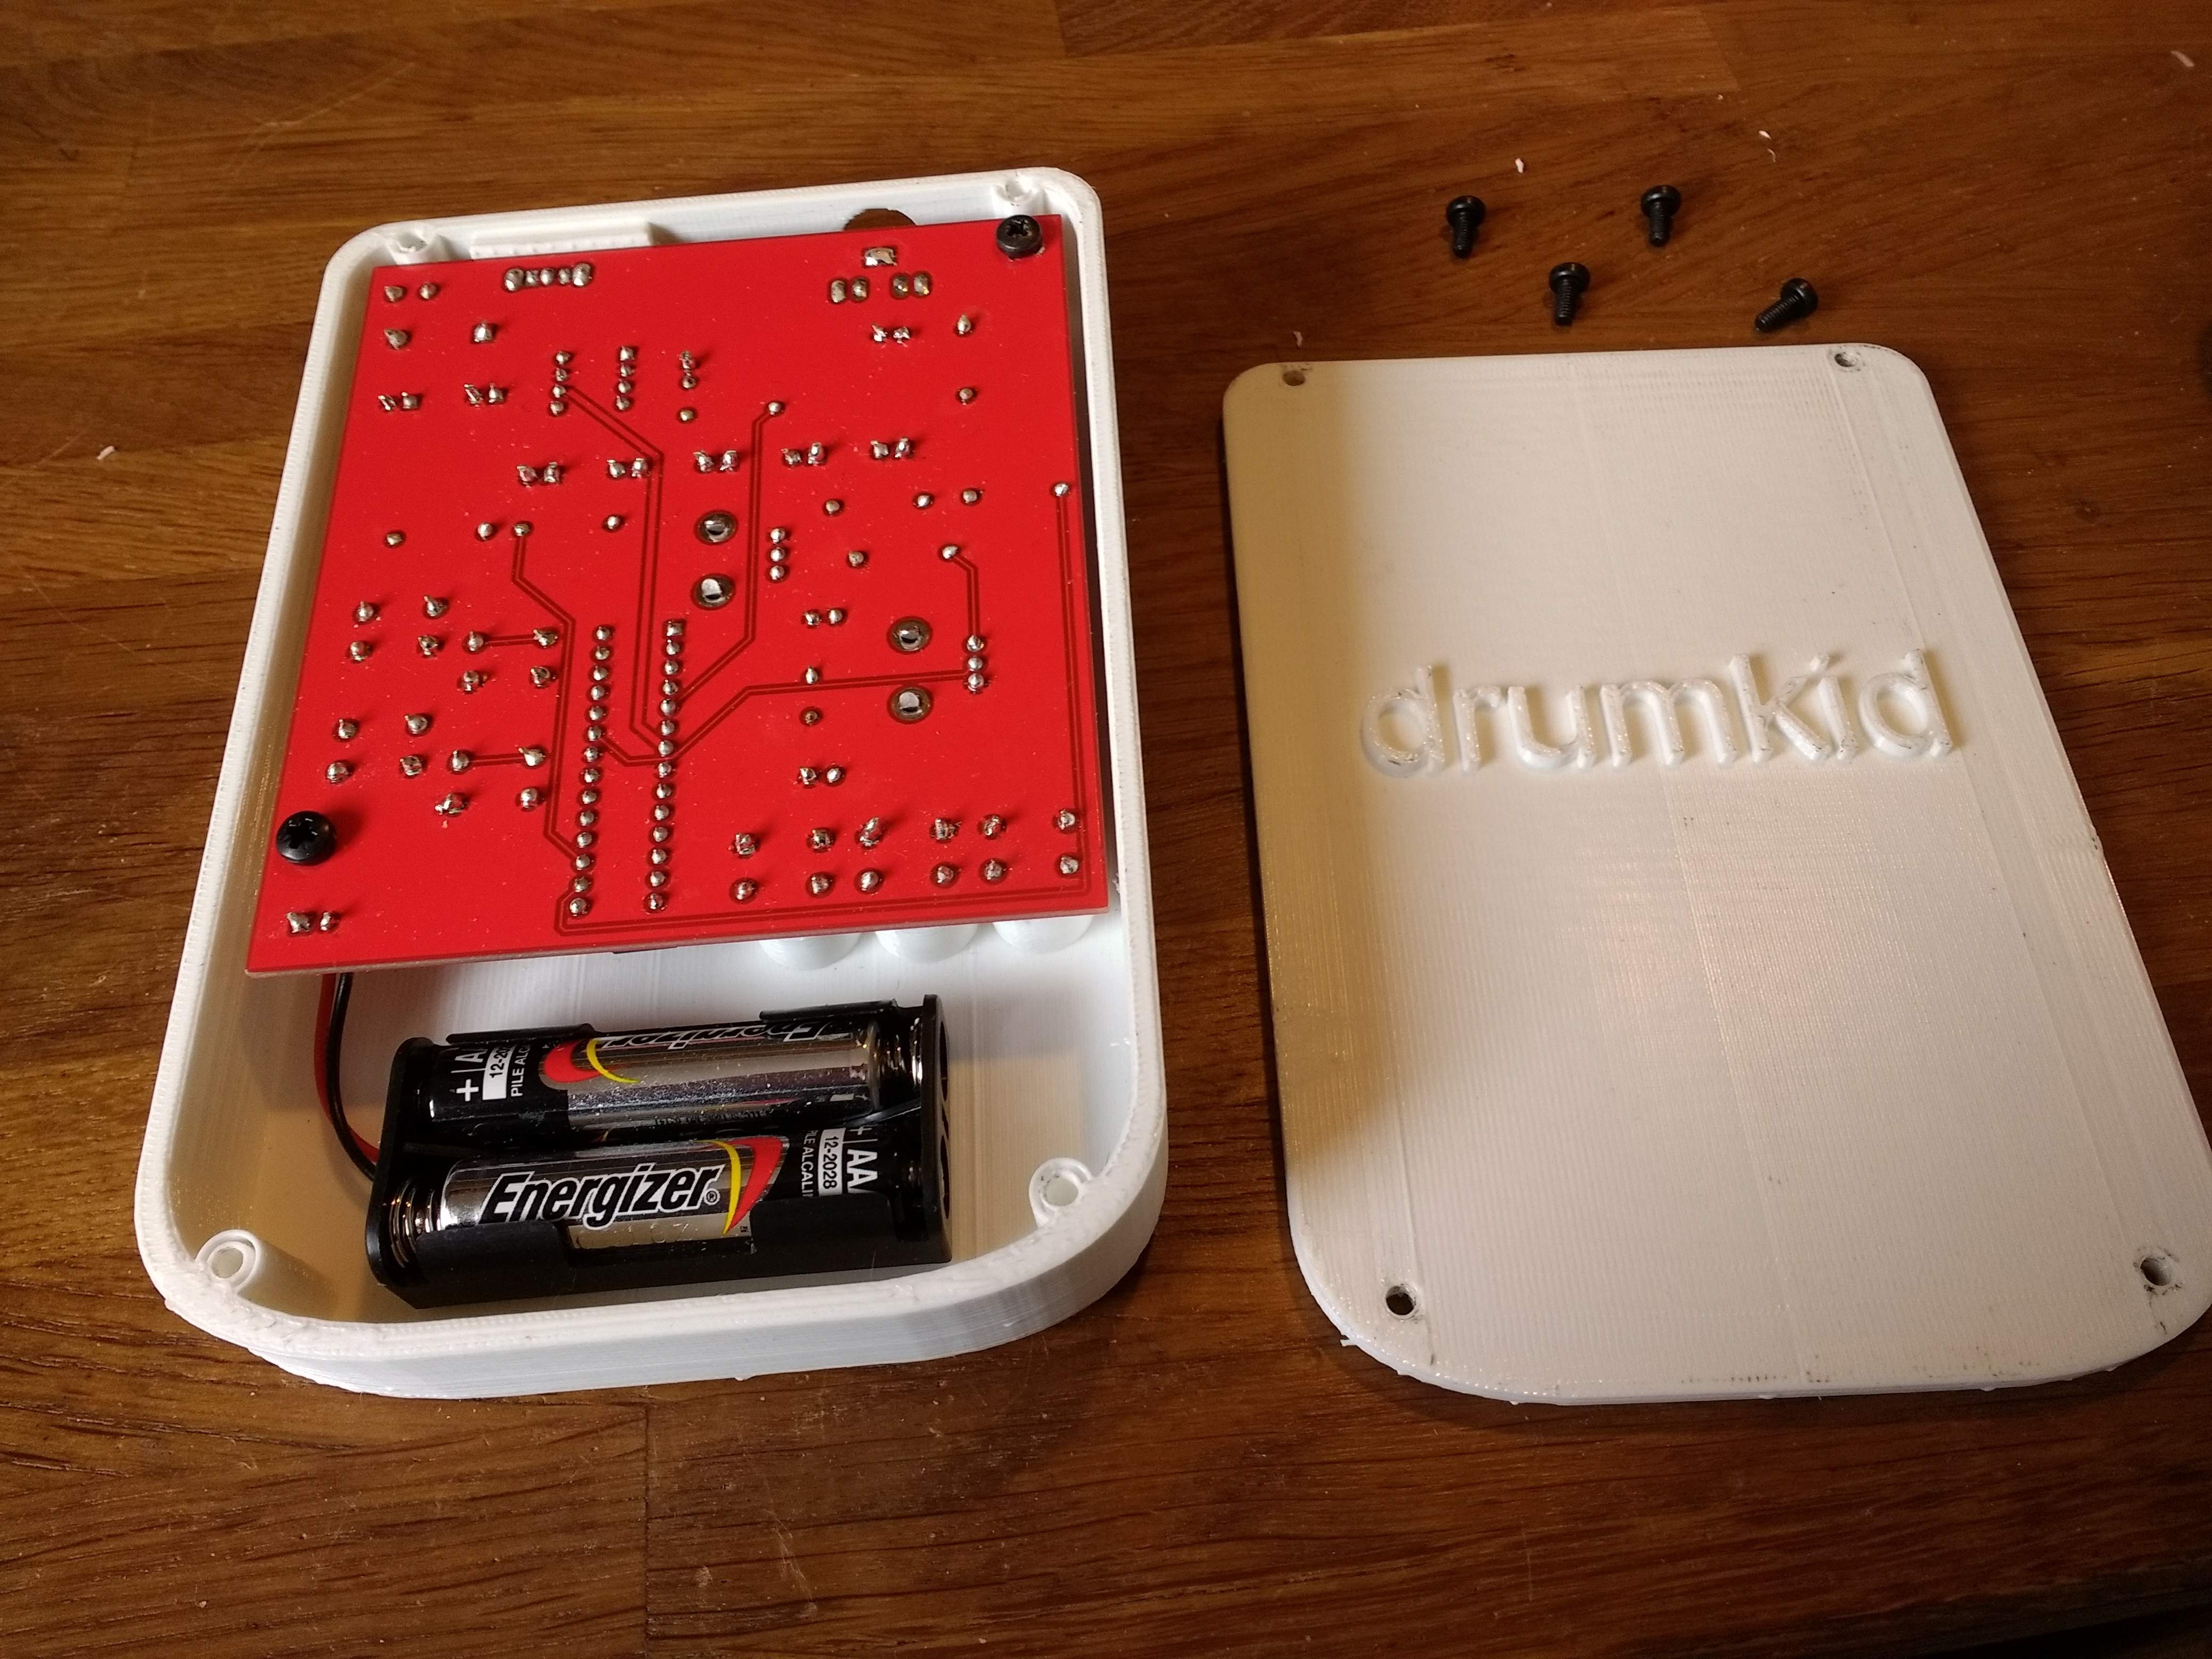
And here's what it looks like when entirely disassembled:

The plastic button plungers (is that the right word?) push down on the buttons on the PCB. Getting the correct dimensions took a bit of trial and error, but the buttons now work nicely. The chunky power slide switch also works well. The two knobs probably need a bit more work, but at this stage I wouldn't be averse to 3D-printing all of these small parts in the final product. They are quick to print and could look pretty cool if printed in a bright colour, contrasting with the look of the wood.
Printing everything took roughly 10 hours. I could optimise the design to print more quickly (and with a better finish), but it will probably never be quick enough to be viable for the final product, which is the main reason I am looking at laser-cutting.
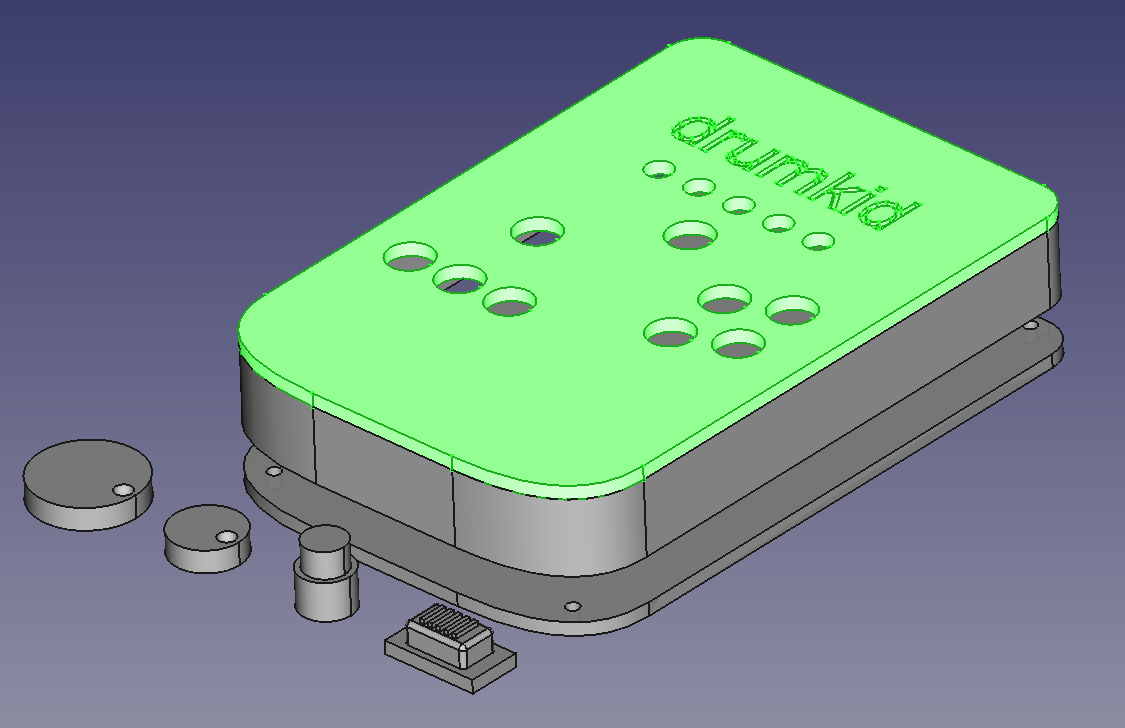
In case anyone is interested in how I designed the case, I used FreeCAD (which is free and open source). I sketched the design on paper first, then worked out the measurements of the lines and bezier curves that make up the outline. I drew this outline using "draft mode" in FreeCAD, then extruded it into a 3D shape. Almost everything else in the design is either a cylinder or a cube. Here's what the design looked like in FreeCAD:
Overall I'm really happy with progress so far. I've got a working PCB inside a decent, functional case, and I can now do some proper development work, iteratively improving the Arduino code to create a fun, intuitive instrument. However, there are a few things (besides those mentioned in my last log) that I have now realised I need to improve:
- The inductor and capacitor stick up too far from the PCB, meaning the board has to be mounted too far from the face of the instrument, preventing the potentiometers from protruding far enough through the top, and meaning that the LEDs are more recessed than would be ideal - mounting the tall components at right-angles, flat against the board, in the next version will hopefully solve this problem
- The PCB needs four mounting points, not two (it actually has none at the moment, but I drilled two holes for this prototype, thinking it would be enough) - more secure mounting gives a better feel when pushing the buttons
- The volume knob looks ugly and should be moved, either to the bottom-middle of the front, or alongside the power switch and headphone output
My next priority, though, is to spend some time adding features to the code. Hopefully the next log will contain an audio sample :)
Discussions
Become a Hackaday.io Member
Create an account to leave a comment. Already have an account? Log In.