Sponsor Link:
UTSource.net Reviews
It is a trustworthy website for ordering electronic components with cheap price and excellent quality.
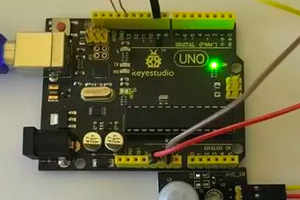
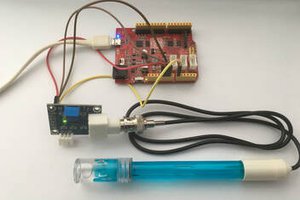
Mounting the circuit
The circuit is very easy to build onto a breadboard. Make sure you remove power from any of the hardware before mounting the circuit. The sensor fits vertically on a diagonal breadboard, fitting into four separate rows. The pins are from left to right; 1 to 4. The first pin is to 5 volts on your Arduino. The second pin is your data pin for connection to digital pin 2, the third pin on your sensor is not used, but your fourth pin is to ground on your Arduino. Connect a 10K ohm resistor between the first (VCC) and second (DATA) pin. That's it for your hardware.
Arduino "DHT" Humidity Sensor Project Code
This code is named the DHTtester from Adafruit's DHT sensor library, compatible for the DHT11, DHT22 and DHT21. The code can be downloaded from the Github page: https://github.com/adafruit/DHT-sensor-library.
It can also be copied into your Arduino IDE by the code below once the library is downloaded as it is one of its example codes. Within the first few lines of the code, it contains comments on defining your humidity sensor, whether it is the DHT11/22/21. Uncomment the line which specifies your sensor model by deleting the double slashes of your respective line. After the steps, you are ready to upload the code!
// Example testing sketch for various DHT humidity/temperature sensors
// Written by ladyada, public domain
#include "DHT.h"
#define DHTPIN 2     // what digital pin we're connected to

// Uncomment whatever type you're using!

//#define DHTTYPE DHT11   // DHT 11

//#define DHTTYPE DHT22   // DHT 22  (AM2302), AM2321

//#define DHTTYPE DHT21   // DHT 21 (AM2301)

// Connect pin 1 (on the left) of the sensor to +5V

// NOTE: If using a board with 3.3V logic like an Arduino Due connect pin 1
// to 3.3V instead of 5V!

// Connect pin 2 of the sensor to whatever your DHTPIN is
// Connect pin 4 (on the right) of the sensor to GROUND
// Connect a 10K resistor from pin 2 (data) to pin 1 (power) of the sensor

// Initialize DHT sensor.

// Note that older versions of this library took an optional third parameter to
// tweak the timings for faster processors.  This parameter is no longer needed
// as the current DHT reading algorithm adjusts itself to work on faster procs.

DHT dht(DHTPIN, DHTTYPE);

void setup() {
  Serial.begin(9600);
  Serial.println("DHTxx test!");
  dht.begin();
}

void loop() {
  // Wait a few seconds between measurements.
  delay(2000);
  // Reading temperature or humidity takes about 250 milliseconds!
  // Sensor readings may also be up to 2 seconds 'old' (its a very slow sensor)
  float h = dht.readHumidity();
  // Read temperature as Celsius (the default)
  float t = dht.readTemperature();
  // Read temperature as Fahrenheit (isFahrenheit = true)
  float f = dht.readTemperature(true);
  // Check if any reads failed and exit early (to try again).
  if (isnan(h) || isnan(t) || isnan(f)) {
    Serial.println("Failed to read from DHT sensor!");
    return;
  }

  // Compute heat index in Fahrenheit (the default)
  float hif = dht.computeHeatIndex(f, h);
  // Compute heat index in Celsius (isFahreheit = false)
  float hic = dht.computeHeatIndex(t, h, false);
  Serial.print("Humidity: ");
  Serial.print(h);
  Serial.print(" %\t");
  Serial.print("Temperature: ");
  Serial.print(t);
  Serial.print(" *C ");
  Serial.print(f);
  Serial.print(" *F\t");
  Serial.print("    Heat index: ");
  Serial.print(hic);
  Serial.print(" *C ");
  Serial.print(hif);
  Serial.println(" *F");
}
About the code
The code starts off with the DHT library being declared. Then, it defines the pin its connected to, and the board. It also has some additional comments stating important points and instructions. The next line which says DHT dht(DHTPIN, DHTTYPE);, this line of code initialises the sensor and makes sure it adjusts itself to work on multiple processors with various speeds;...
Read more »