 Steve Dearden
Let me start off with a statement of the obvious! Everyone on this site knows about solderless breadboards. What I’m going to describe in this article though is their Big Brother optical equivalent. Way back in the early 2000s I was playing around with some home-built spectrographs that I hooked up to both linear and array CCD detectors. (This was great fun and in fact I hope to publish a second short article on a couple of home-built spectrographs that I made during that time for all the amateur spectroscopists out there.) In order to decide on what configuration and type spectrograph I wanted to build at that time, I first decided to try my hand at constructing a simple optical table.
An optical table (or optical bench) is a very useful accessory to have for anyone who experiments with lenses, prisms, gratings and other optical components, enabling them all to be securely fixed to a rigid base. These components can be quickly unscrewed and relocated elsewhere on the table in order for you to try out different layouts during your experimenting.
Now commercial optical tables are available of course but they are all horrendously expensive, when you consider the relatively simple function they are required to perform, i.e. holding things still! Even a small table, say 3ft x 4ft (0.9 x 1.2m), will set you back hundreds of USD/GBP/EUR and possibly several thousand dollars depending on size and stability. These tables are also very heavy, requiring specialised installation and support. Amateur spectroscopists have more important things to spend their money on, and in any case, it is fairly easy to make one for yourself, with simple tools and easily obtainable materials. A table that I built and used regularly for my optical experiments several years back is described below. The following is for the construction of a 3 ft x 2 ft (0.9 m x 0.6 m) optical table. This size is compact enough to fit readily on a writing desk or kitchen table and is large enough to accommodate a number of components for designing spectrometers, and experiments in optical interference, fibre optics and so on.
Materials
You will need the following materials:
- A piece of chipboard or MDF (Medium Density Fibreboard) 3ft x 2ft by 0.75 inch thick. MDF should be your first choice since chipboard tends to splinter when being drilled. Plywood is another good alternative. The thickness of ¾-inch is a good compromise between weight and stiffness, ½ inch being a little too thin for a bench of these dimensions.
- A piece of acrylic sheet 5/16” (8 mm) thick, of the same size as the base board. Acrylic plastic sheet is very strong for its weight and is easier to work with than metal. If the 5/16” thickness is unavailable, ¼” will work fine.
- Metal sheet to go on top of the acrylic sheet (optional).
- Some standard DIY tools – electric hand-drill and bit, centre punch, ¼”-20 tap for threading the holes, contact adhesive, spray paint and lacquer, rubber feet.
Assembly
Baseboard and Top Surface
Cut the wood base to size ensuring that the edges are square and sand the edges and both sides. Cut the acrylic sheet to size (or preferably have it done at the time of purchase). When purchased, the acrylic plastic will be supplied with two protective peel-off paper sheets that should not be removed until ready to use. The acrylic surface will be glossy, and the side to be bonded will require a good sanding with medium, and then fine, sandpaper so as to form a good bond with the baseboard when glued. Using a paintbrush, apply a thin layer of acrylic contact adhesive (Bostik™ or similar) to both the wood and plastic sheet and carefully place the two pieces together making sure they are precisely aligned. Contact adhesive forms a bond immediately so there is no room for error. If you mis-align here, they will be very difficult to separate afterwards. Practice first...
Read more »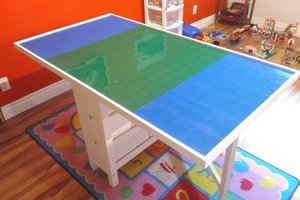
 Petri Varsa
 Scott Hasse
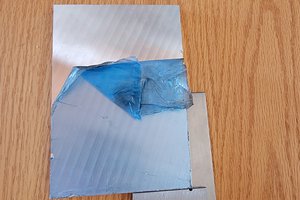
 Daniel Grace
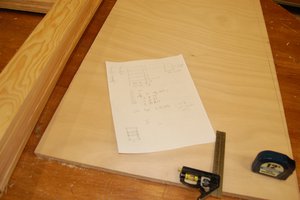
 Geoff Nicholson