I had my time completely occupied by lectures and exam, but today i finally found some time to continue from where I left off: understanding how the keypad works.
Smelting the problems away
Due to the age of the device, I wasn't able to get any output from the keypad, and the metallib back panel was held tight to the body of the device by some plastic pegs (which were still part of the body) molten and pressed tight against the back pane.
Clearly, getting access to the inside would be a destructive endeavour, right?
Well that's what I thought, but by heating the tip of a needlenose plier, I was able to elongate those molten rivets back into the original shape (mostly).
[There should be a photo here, but I totally forgot to take one before hand]
In the belly of the beast
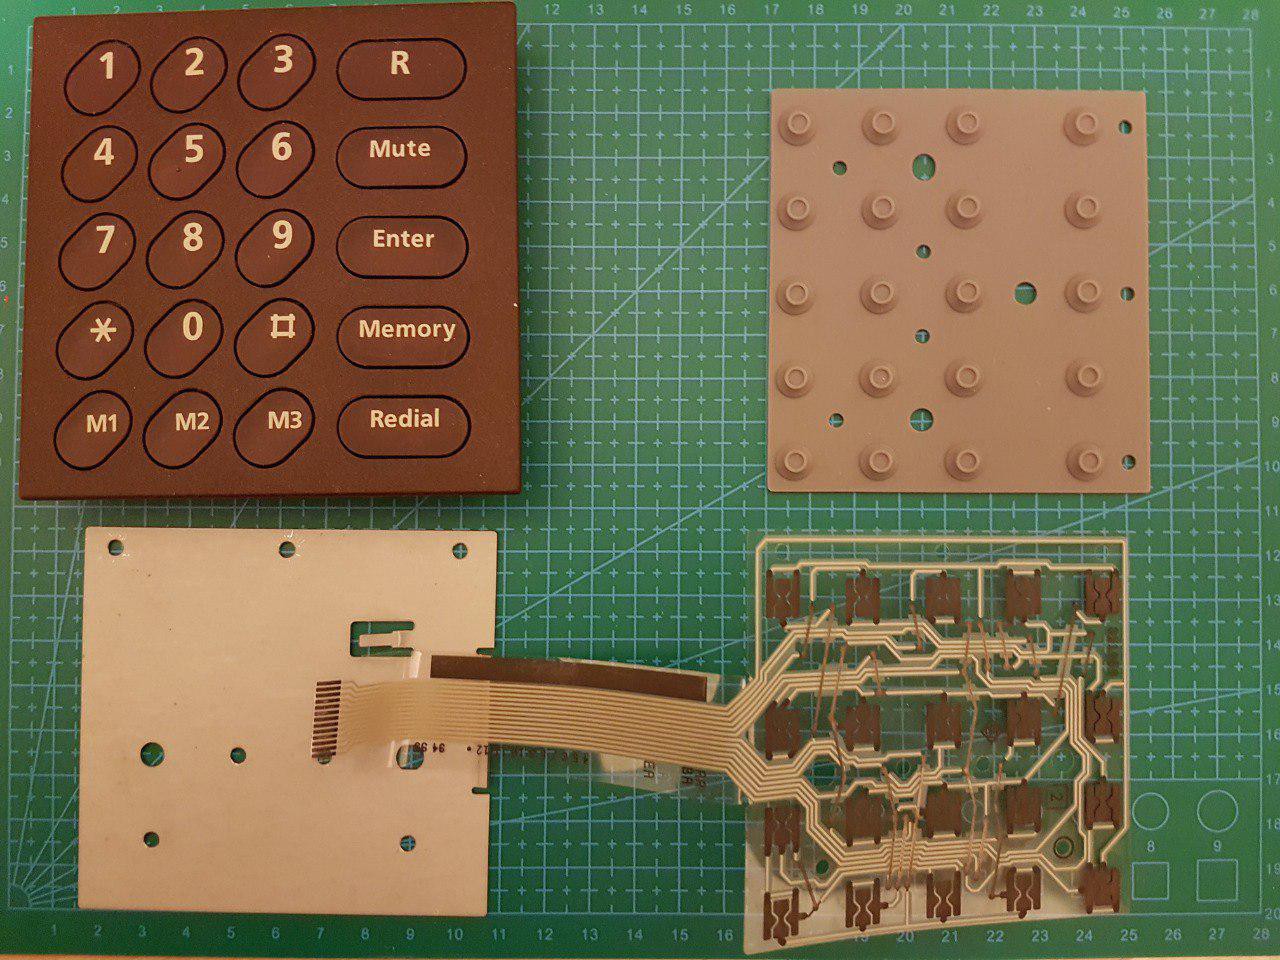
After prying the metal backplate, I was able to finally get access to the rubber membrane and the flexible PCB.
I then proceeded to scan that circuitboard with my printer and this is the result
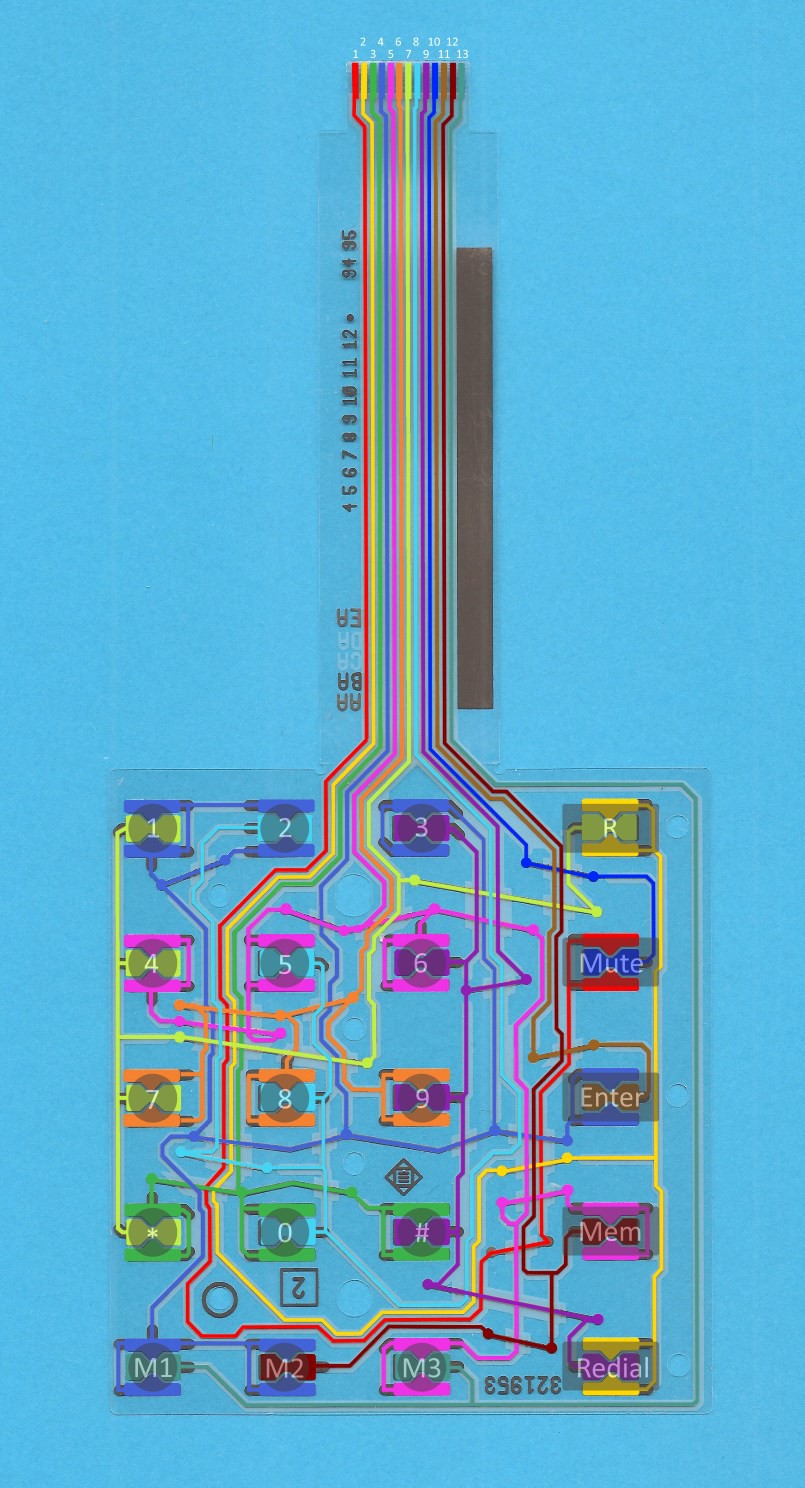
All I had to do then, was tracing by hand all the trace with different colours, which took almost 3 hours (trust me, the design is really convoluted on this one).
I've published a .pdn file (compatible with the Paint.net software) with all the individual traces, color coded and divided in layers.
Here's a table with the button and their corresponding pin on the connector, nubmered 1 to 13 from left to right:
| 1 [4 , 7] | 2 [4 , 8] | 3 [4 , 9] | R [2 , 7] |
| 4 [5 , 7] | 5 [5 , 8] | 6 [5 , 9] | Mute [1 , 10] |
| 7 [6 , 7] | 8 [7 , 8] | 9 [8 , 9] | Enter [4 , 11] |
| * [3 , 7] | 0 [3 , 8] | # [3 , 9] | Memory [5 , 12] |
| M1 [4 , 13] | M2 [4 , 12] | M3 [5 , 13] | Redial [2 , 9] |
The weirdness of this keypad matrix knows no bounds.
I've looked at this nice keypad matrix decoder IC from Texas Instruments, but i'm thinking about making my own with an atmega of some sort because of the pin arrangement.
Wrapping all up
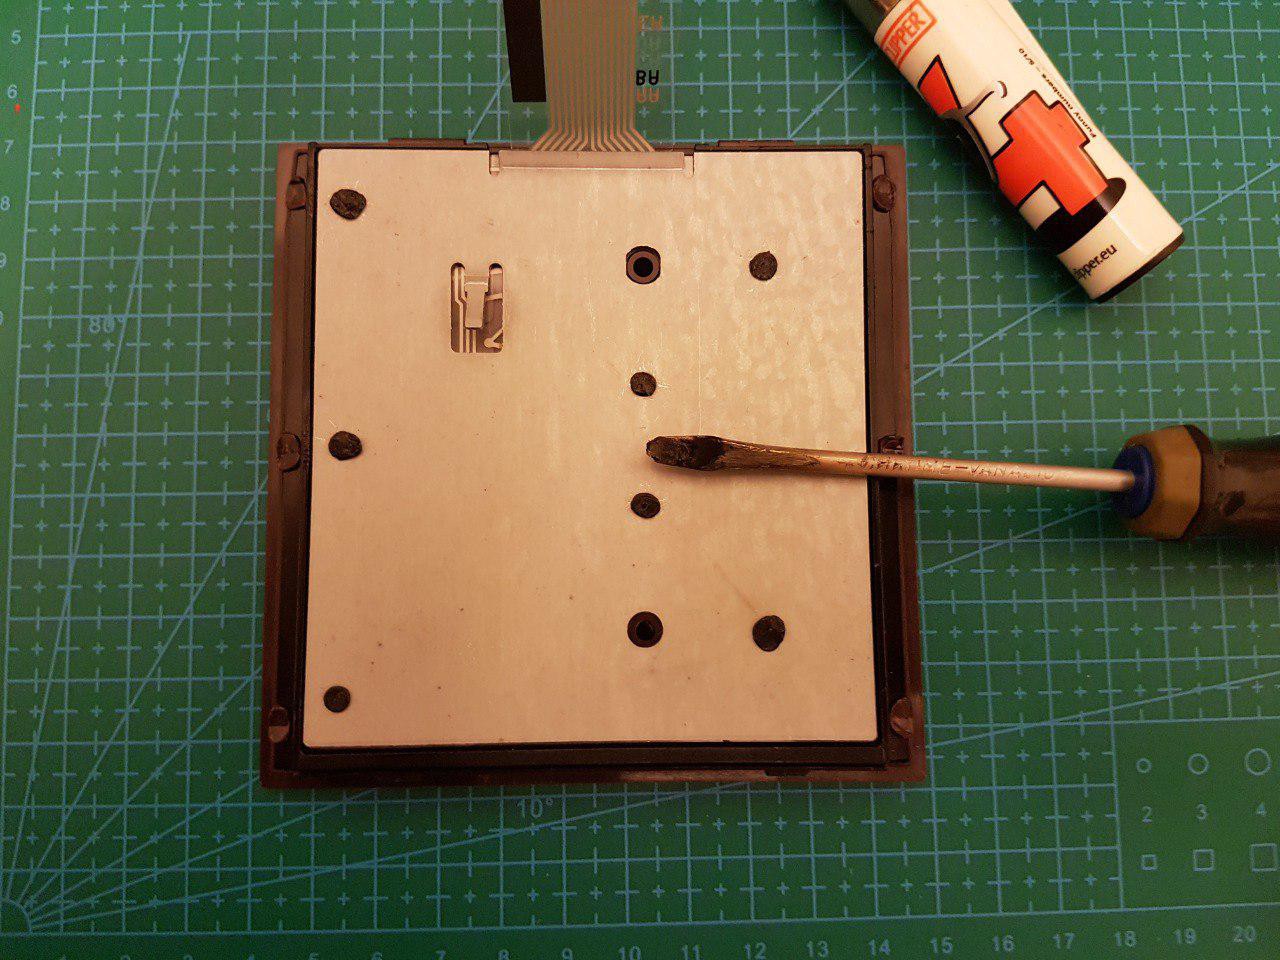
After cleaning the contacts, both on the flex and on the rubber pad to improve conductivity, the only thing I had to do was putting everything back the way it shound and then riveting back the back panel by heating the tip of a flat screwdriver and compressing these plastic pins.
Here it is, like new...
Discussions
Become a Hackaday.io Member
Create an account to leave a comment. Already have an account? Log In.