 Lixie Labs
LIXIE II - The #NewNixie for Arduino!
----> LAUNCH TRAILER <-----
CLICK HERE TO SEE LIXIES IN ACTION!
AVAILABLE FOR PURCHASE!
WHAT'S NEW?
Modular Panes
Our new Lixie allows the user to remove the panes for cleaning, or to add custom engraved panes in their place.
11th Pane
Lixie II is the only LED Nixie on the market currently offering an 11th pane in the stack. Included with the kit is a decimal point pane which can be replaced with a custom engraving or any one of Ponoko's 3mm acrylics. (A great use for this is their "Dark Grey Tint" acrylic which would allow for a Lixie display right up against a sunny window!)
Better Mounting
There are now 8 screws in the base - 4 for the PCB, and 4 just for fixing the Lixies onto a base! No more careful disassembly before mounting!
Even More Glow
As a result of the modular panes design, Lixie has gone topless! Now they cast even more colorful light into their surroundings.
Easy Kitted Assembly
To reduce the chance of damage during shipping to near-zero, we are not currently offering the Lixie II pre-assembled, as the original (fully-assembled) model would sometimes get broken by a careless postal worker. Don't worry though! The kit is very easy to assemble, and comes with thorough, graphic instructions for assembling the parts from color-coded bags. All of the hard stuff like the soldering is done for you, leaving just the act of removing the protective paper from the digits and screwing the housing together with a standard screwdriver. This is a solder-less kit, that requires no special tools!

How does it work?
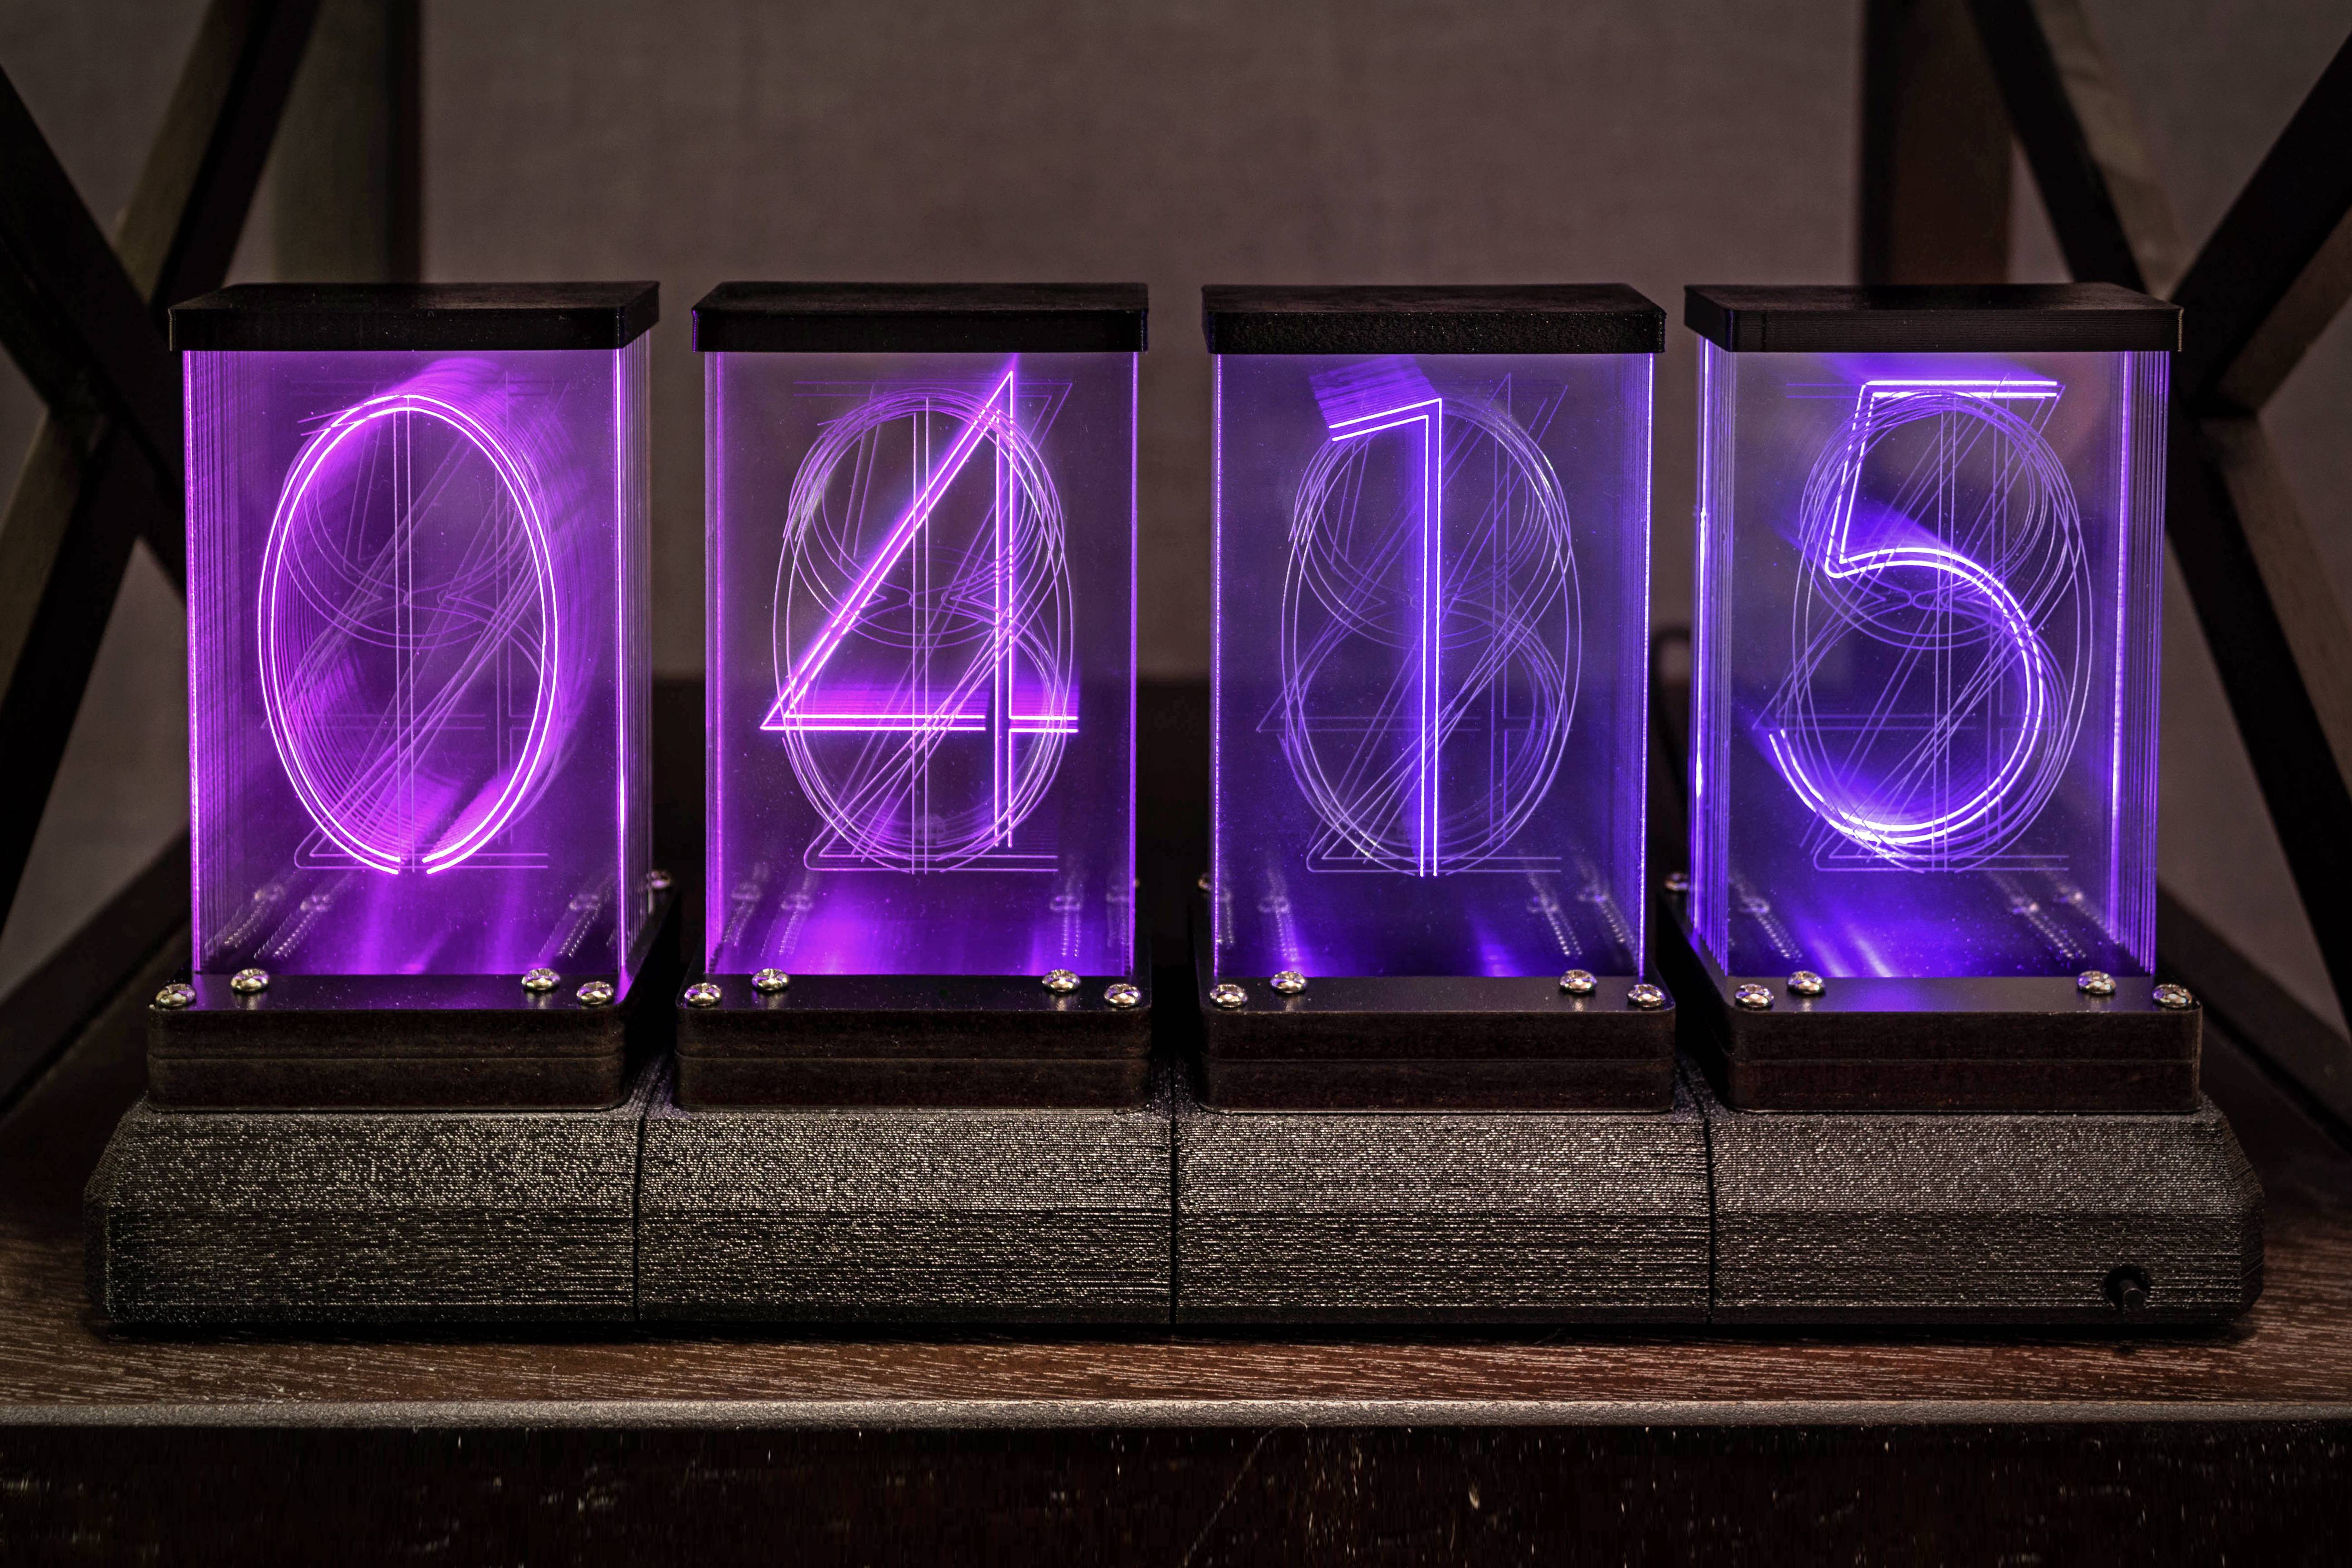
Lixie II works by shining light through the edge of a clear acrylic pane. When the light hits an engraving or edge, it scatters in a different direction and lands in your eye! This allows the flat surfaces of the acrylic to stay clear, and have only edges light up! Now put ten pieces in a stack, each marked with a different number 0-9, and you can show each number individually, on a clear surface!
What can it do?
Lixie is based on WS2812B LEDs, (or "Neopixels" Adafruit calls them) meaning it can display the following in any color:
- Date / Time
- Temperature / Humidity
- Website Views
- YouTube Views
- Tindie Sales
- Or any number in any Arduino Project!
What about the original model?
Need to finish an existing set? Don't worry! We'll still be selling the Lixie 1 again soon, and for the next few months. When we do, it will go up for sale at the same time as the Lixie II as a dropdown product option on this page, so you can still use the waiting list system Tindie has. However, our focus going forward will be on the II, and we will eventually be retiring the original model and only stocking parts at our discretion for repairs.
How do I use it?
PLEASE READ:
The Lixie II library was designed for ESP8266/Xtensa microcontrollers, but is backwards-compatible with traditional Arduinos. The new library uses non-blocking animation code, which is great if you're on a 160MHz system like the ESP8266, but (very slightly) affects performance on older 16MHz microcontrollers like the Arduino Uno.
Unlike the Nixie Tubes the Lixie II is based on, setup and use is EXTREMELY easy. Just connect the 5V & GND pins to your Arduino's, and connect the "DIN" pin to any of your digital pins. From there, it's just a matter of including the Lixie II library and simple functions!
For example:
#include "Lixie_II.h" // Include Lixie II Library

#define DATA_PIN   13
#define NUM_LIXIES 4
Lixie_II lix(DATA_PIN, NUM_LIXIES); // Set class name to "lix" and define your Lixie II setup

uint16_t count = 0; // Use this number to count up

void setup() {
  lix.begin();                   // Initialize LEDs
}

void loop() {
  lix.write(count);             // Write the count to the displays
  count++;                      // Increment count
  delay(1000);
}
Lixie II is designed as a WS2812B strip, meaning you can chain as many of these together as your power supply can handle! There are 22 LEDS on each board, but when used normally only two will be on at a given time.
The library also does all the work pushing each digit of an integer out to its own display, so that if you have 4 Lixies, calling lix.write(314) will show "314" on them!
What's Included?
- 1x Fully Assembled Lixie II PCB
- 10x 1.5mm Acrylic Panes (0-9)
- 1x 3mm Acrylic Pane (Decimal)
- Melamine-finished MDF base
- Nitrile Gloves (for clean acrylic handling)
- M3 Screw/Nut hardware
What else do I need?
- 1x ESP8266 or ESP32 Microcontroller
- 3x Female Jumper Wires (for each digit purchased)
- 20 minutes of prep/assembly time
- NO SOLDERING REQUIRED!
OPEN EVERYTHING
All hardware designs and software code has been made available on GitHub at the link below for anyone who wants to study its design and put me out of business! ;)
What makes Lixie II different?
Low Voltage
While traditional Nixie Tube displays took a dangerous 170V power supply, Lixie II runs on only 5 volts making it safe for children, pets, and new hobbyists!
Self Driving
Lixie II is based on WS2812B LEDs, which means that they don’t need any specialized drivers – just a microcontroller!
Chainable
You can simply connect one digit to the next, and drive them all with only three wires and the Lixie II Arduino library!
Who is the Lixie II for?
Lixie II was designed to be easy for makers of any experience level to use. Like the original, it's still cheaper than any Nixie Tube of the same size, and a thousand times cooler than a lame-ass 7-segment display!
What do I mount them to?
While a more customized base can be derived from the Lixie II CAD model on our GitHub, we have shared pre-made, modular, 3D-printable base pieces there too! (Printed in white filament in our photos above) Just print as many sections as you need, or have 3DHubs print them for you for cheap!
I want to make my own!
Well, shit. Okay. Here is all of the links you need to escape my Tindie Page. ;)
HARDWARE - EAGLE Schematic - EAGLE PCB Layout - Vector Cutting Files - CAD (Sketchup)
SOFTWARE - Arduino C++ Library