The existing SSD is a 256Gb Toshiba THNSNB256GMLJ and is getting a little old these days.
I have run a benchmark on the Vaio, and the SSD maxes out at some relatively low numbers...
Part of this will be the age of the drive, part of it will be due to the VAIO only supporting a PATA interface, hence the flat flex cable from the motherboard to the SSD contains a SATA to PATA converter chip.
I'm hoping the PATA bottleneck doesn't restrict the speed of the new SSD too much, but if the performance gains aren't great with the new SSD, well at least I had fun... :D
This SATA-PATA issue complicates things just a little, as not only do I need to adapt from one connector type (ZIF/LIF on the Toshiba SSD to mPCIe on the new mSATA SSD) to another, but I also have to include a SATA to PATA converter chip too.
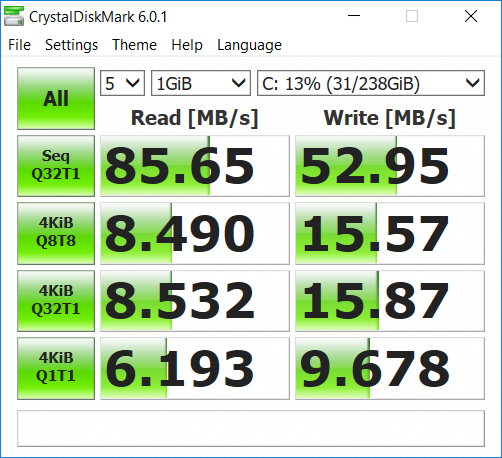
Here's the benchmark of the existing SSD shown above. Not too impressive by any stretch of the imagination...
Lets crack open the machine to see what we are up against.
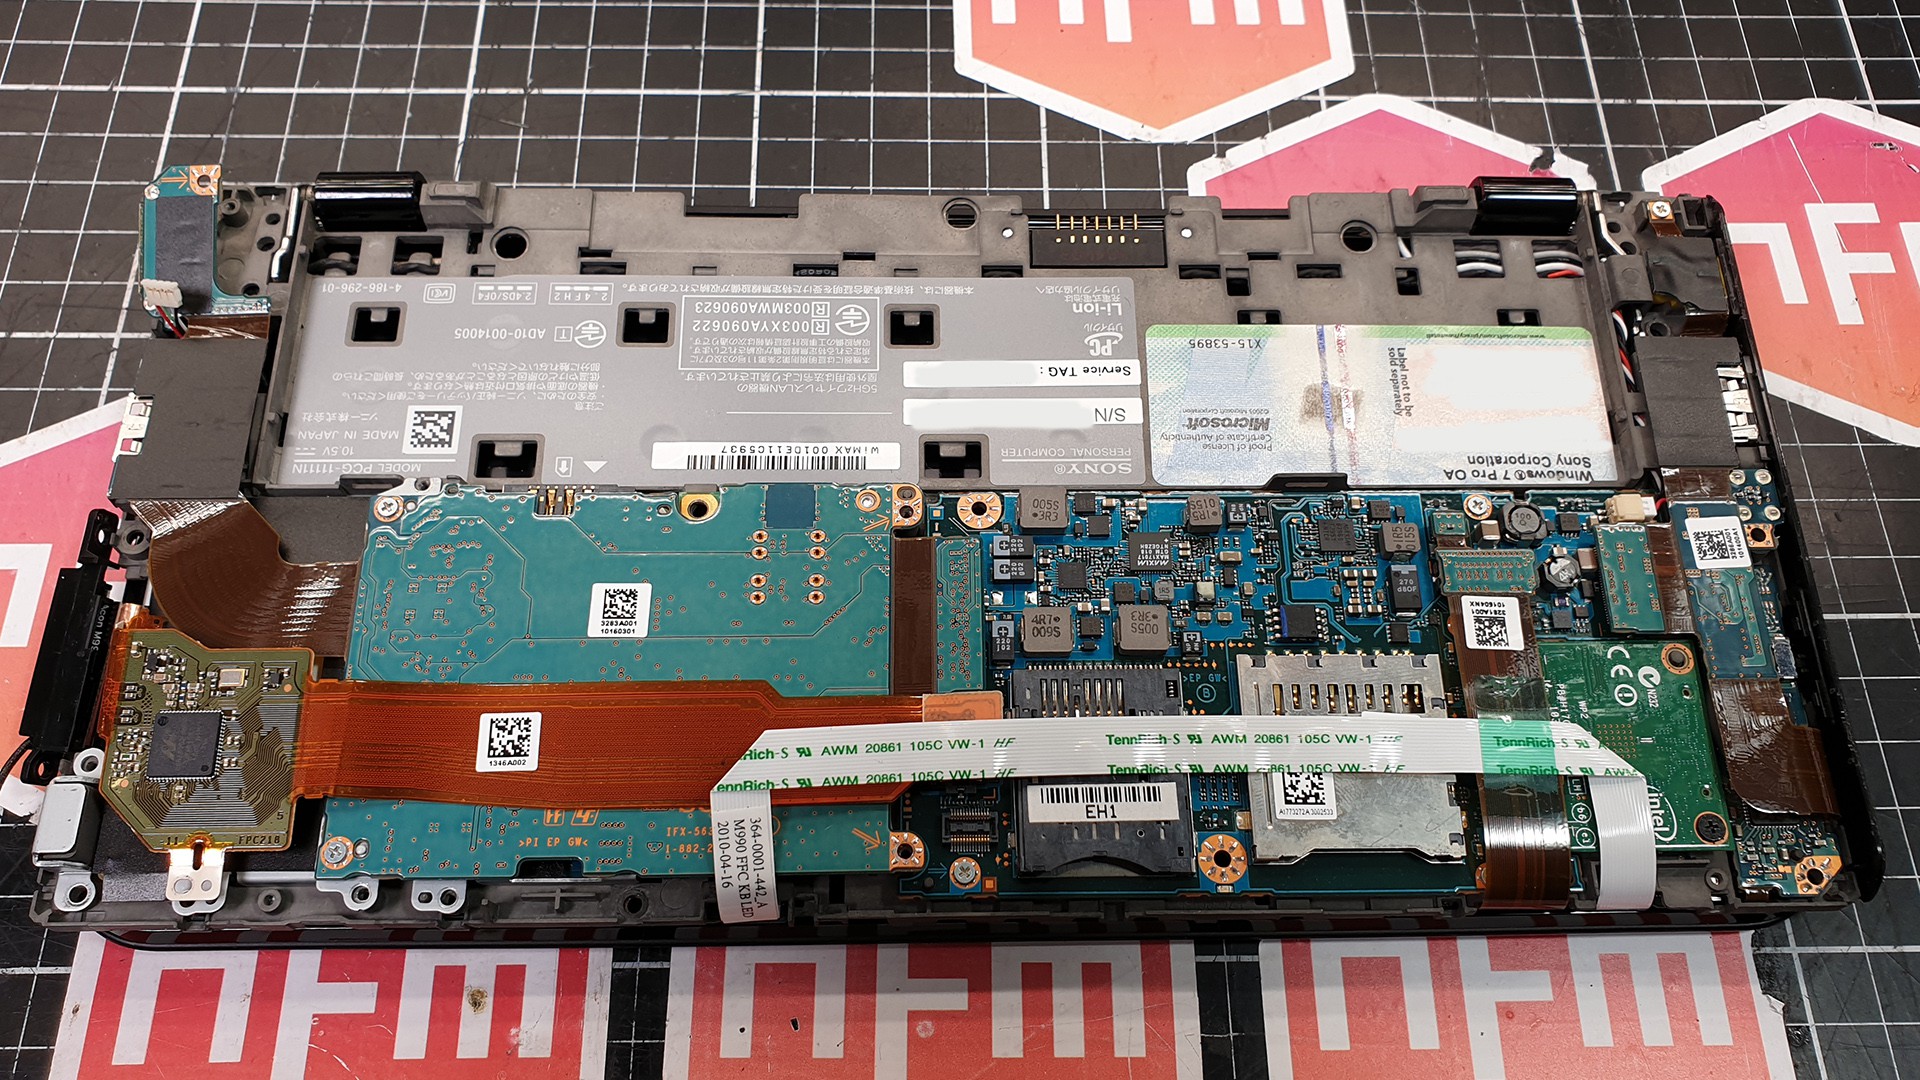
It's pretty tight inside as you would expect.
The new WiFi/Bluetooth card is the green PCB to the right.
The motherboard is the blue PCB to center right and the green PCB to center left is a daughterboard that contains the WWAN card, Bluetooth card and breaks out to the USB/VGA/Ethernet ports on the far left top.
The small green PCB to the far left is the SATA to PATA adapter, and the Toshiba SSD is sitting underneath, between the SATA-PATA and daughter PCB's and keyboard located on the other side of the Vaio.
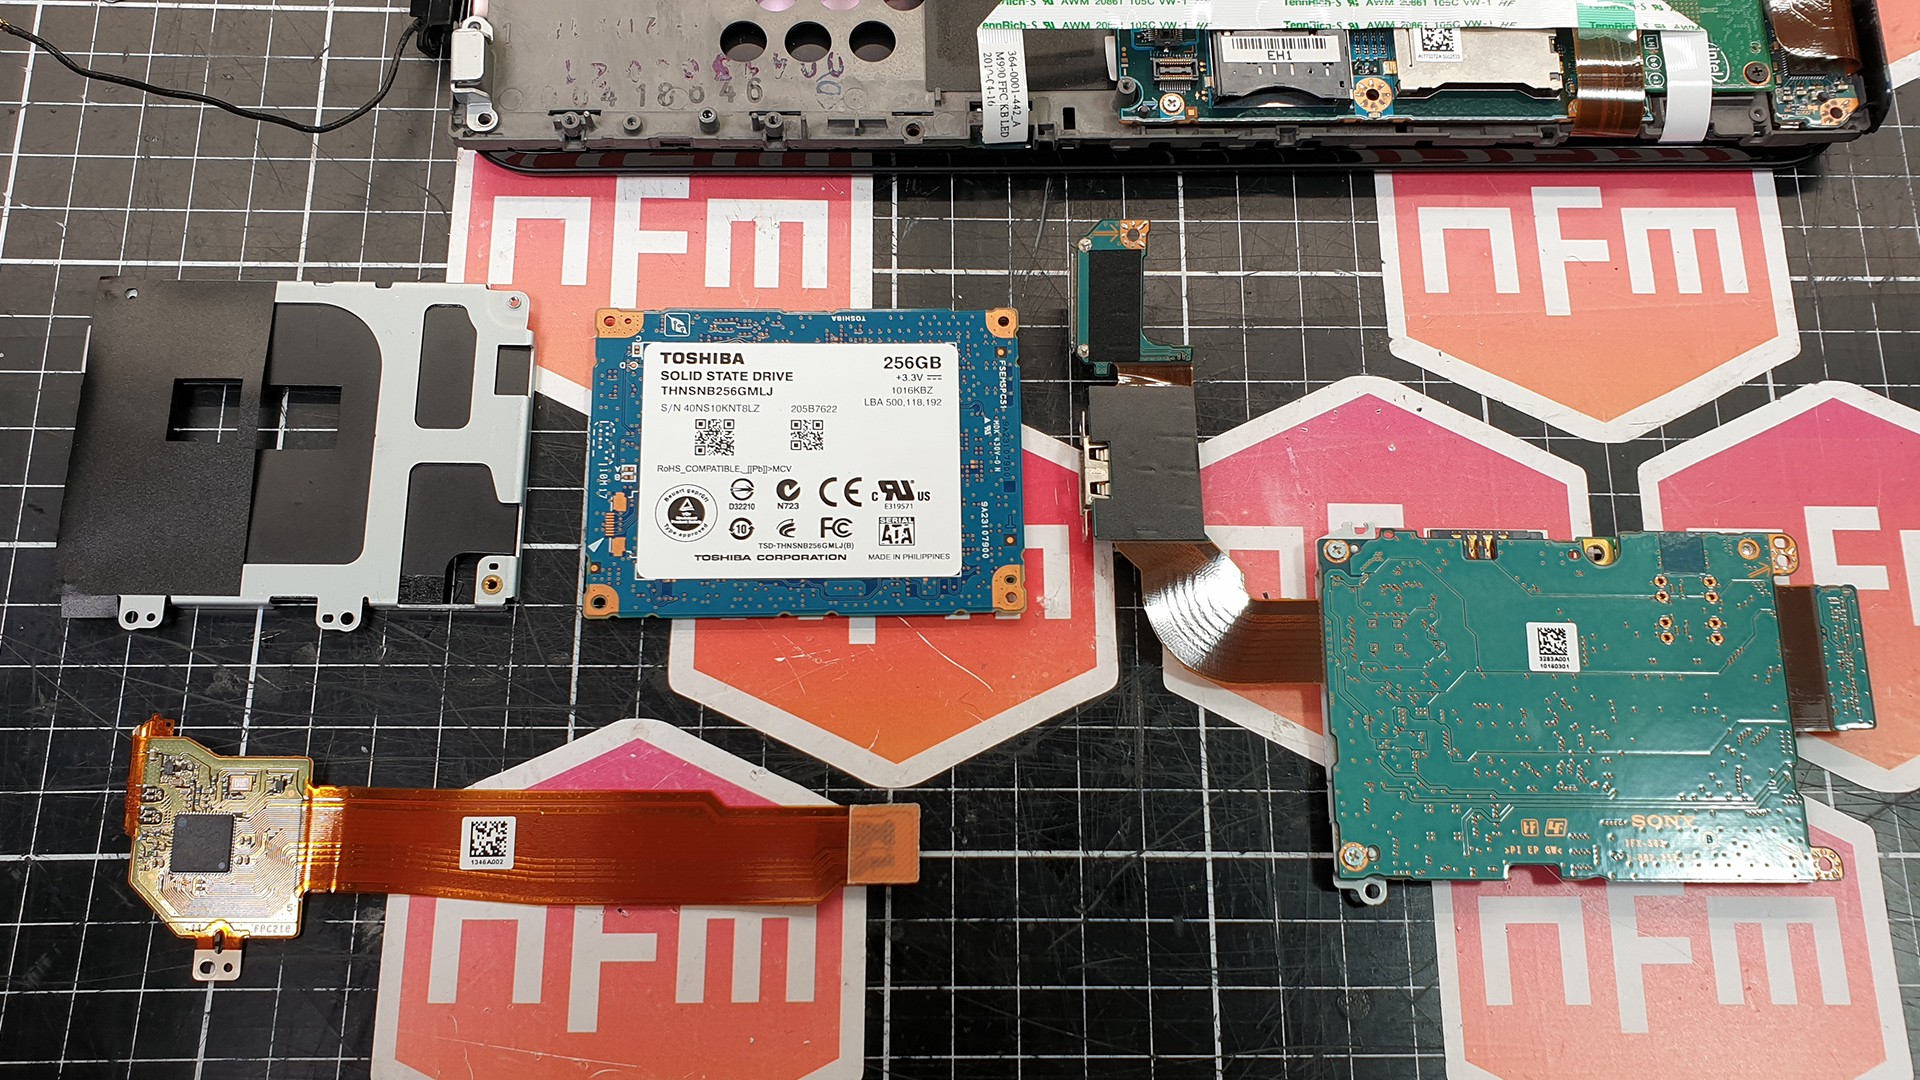
Here's the parts removed out of the way.
Clockwise from top left.
SSD carrier frame, Toshiba SSD, Daughterboard, SATA-PATA converter/flex interconnect.
I found that the SSD carrier frame can be left out along with the SSD with no ill effect, this machine came with a few HDD/SSD options so it seems to have been designed so that nothing else in the machine is dependent on that frame. This is good as it enables me to clear out as much space inside as I can.
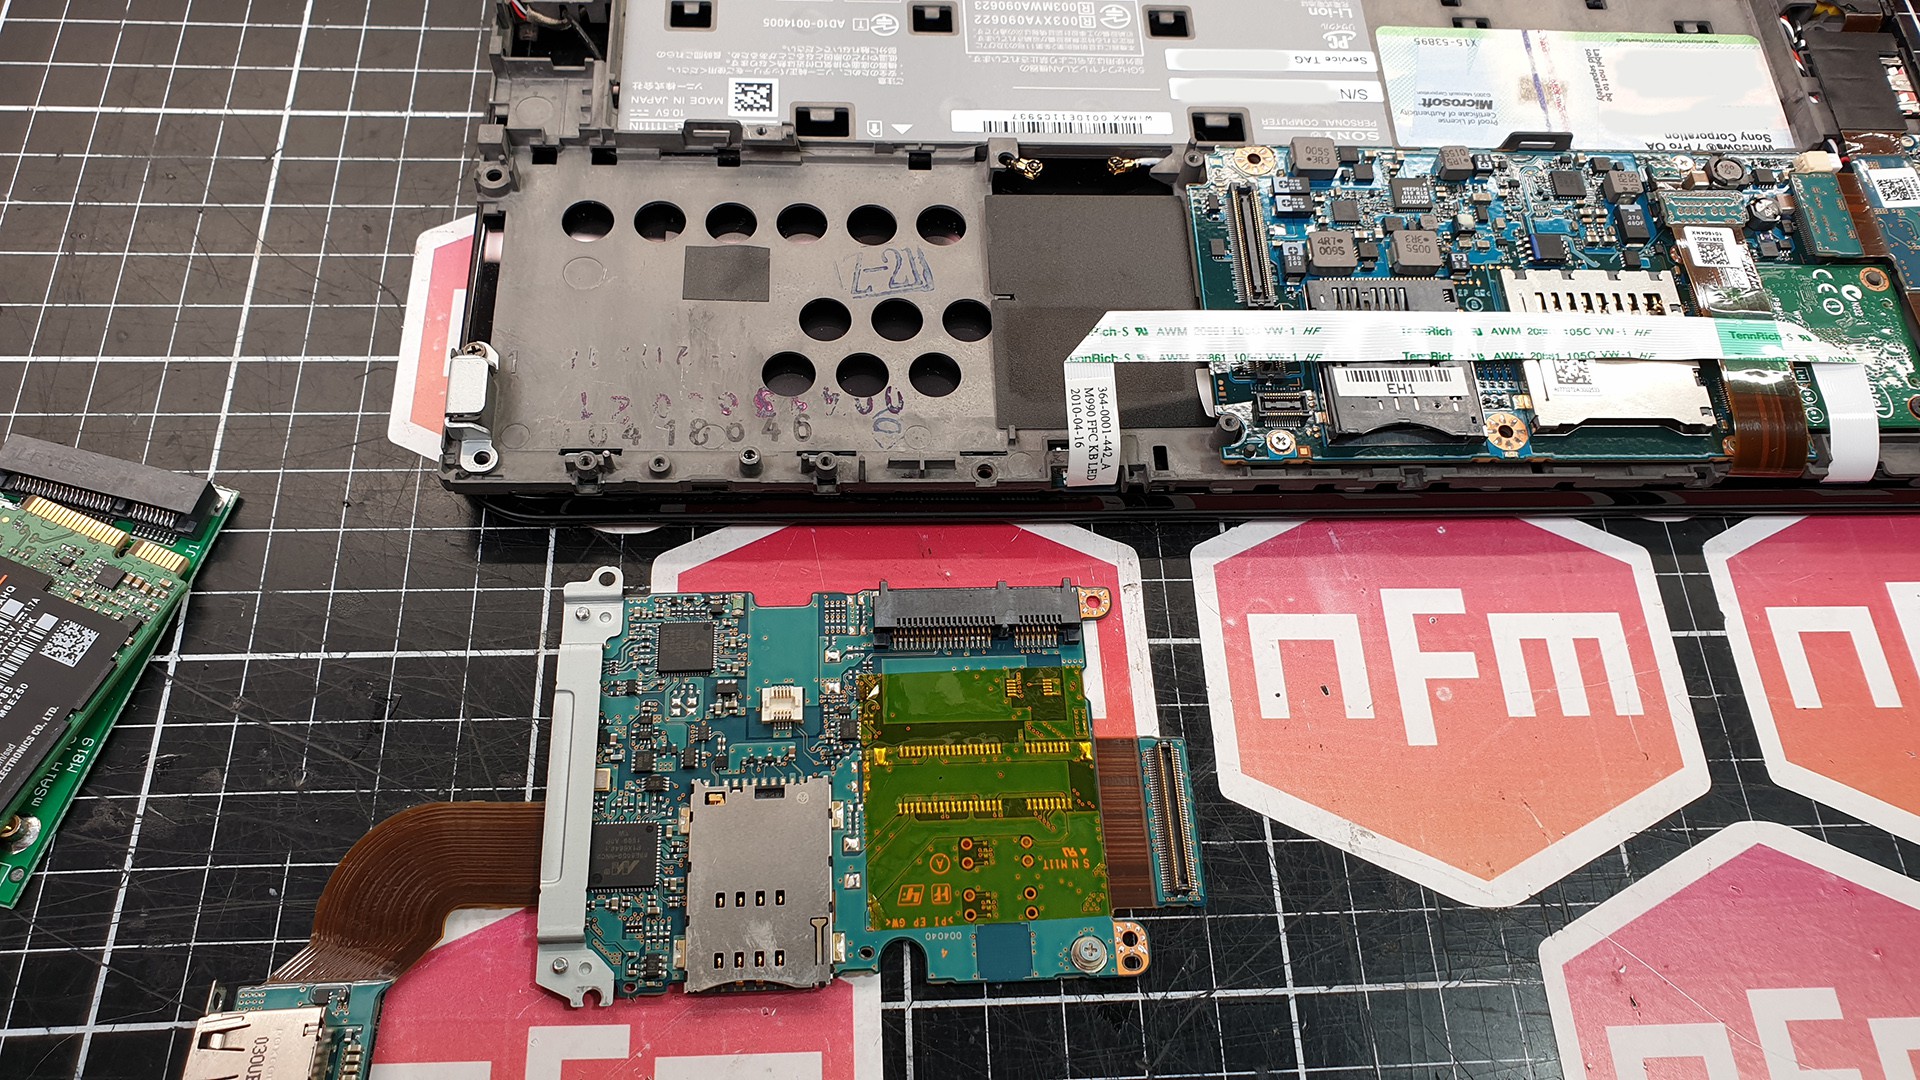
Here's the other side of the daughterboard. I have removed the WWAN card as I won't be using it and it'll leave some space for the new cable to run through if needed. Also, less parts = less power drain on the battery.
The small white connector near the middle was for the Bluetooth module. This was also removes and the new WiFi card has Bluetooth built in anyway (with newer drivers etc).
Also, before you ask, I did try the mSATA SSD in that mPCIe slot. No go at all. It doesn't have the required SATA connections, which is a bummer but not surprising seeing as this chipset only supports PATA.
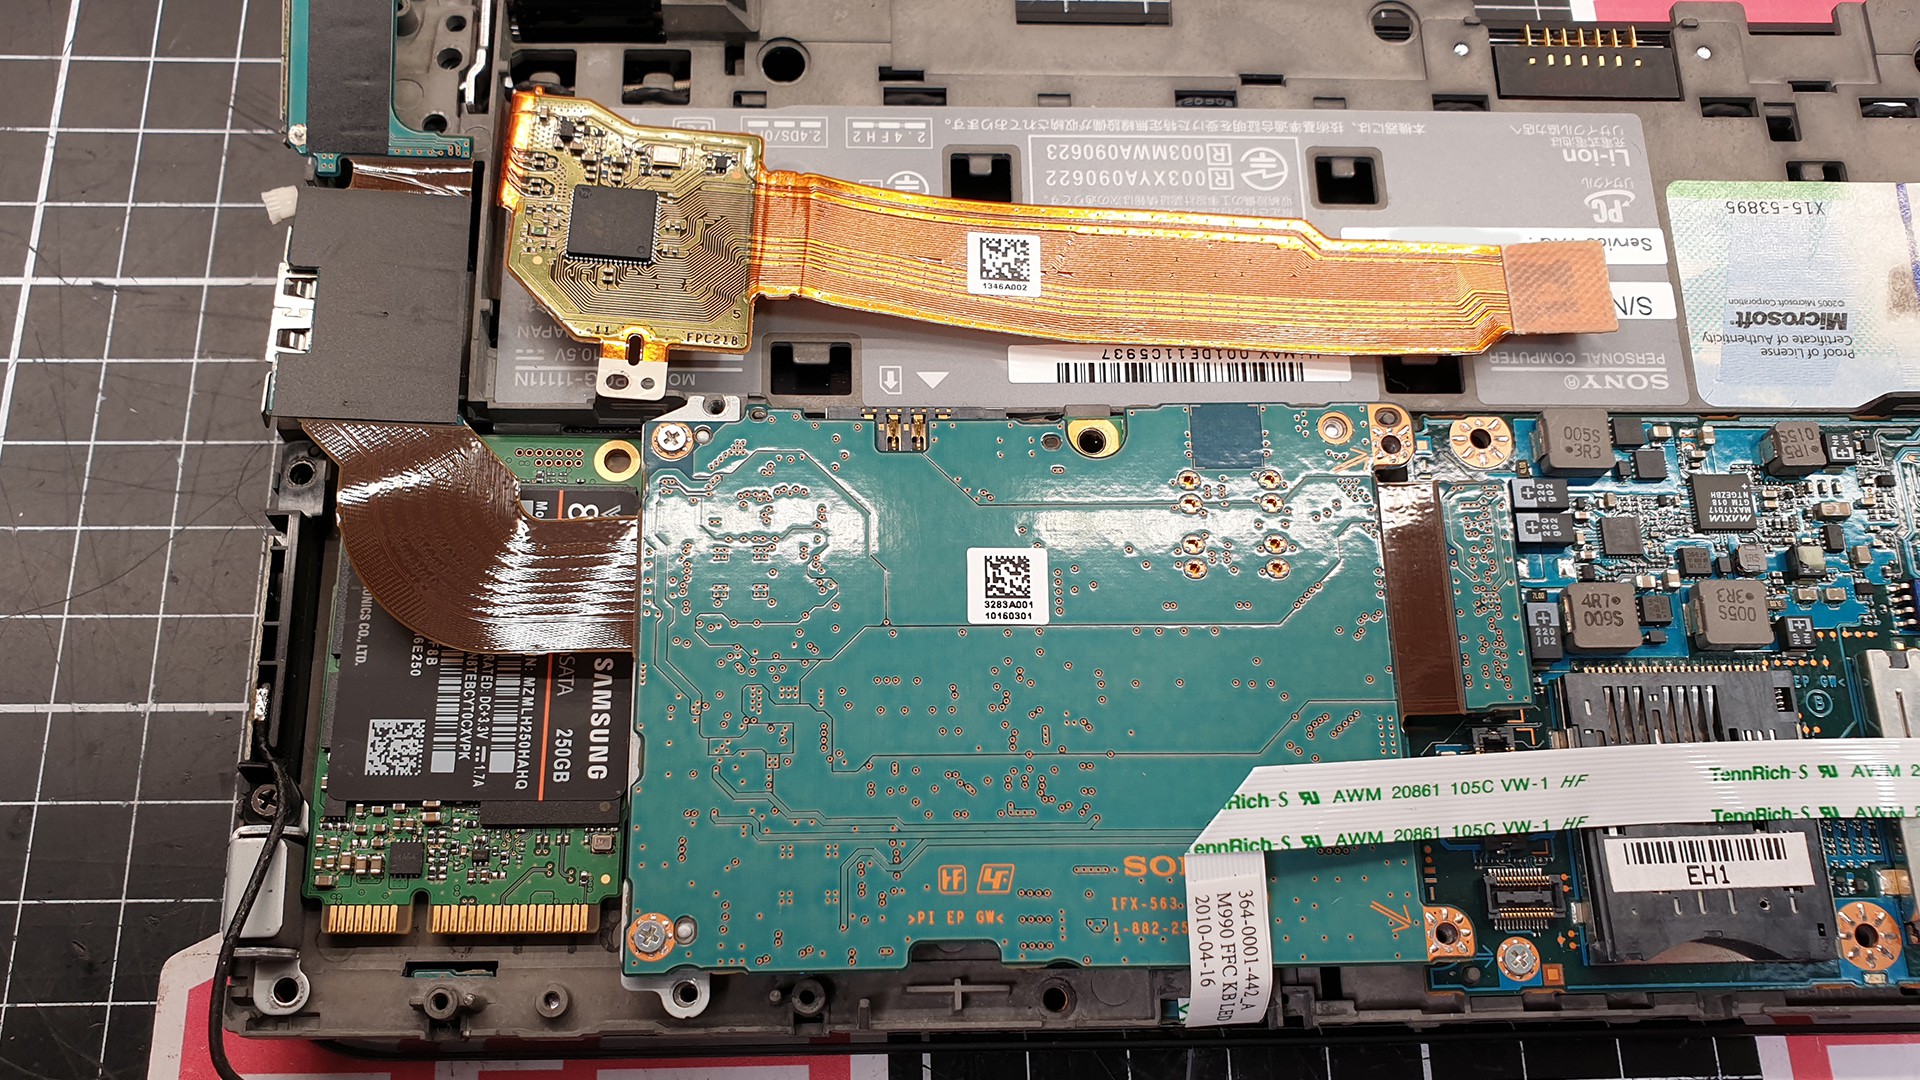
After measuring, test fitting, remeasuring, re-test fitting, etc, etc, I think this is where the new SSD will end up fitting.
It has more than enough height to fit in there even with a mPCIe connector, and it slots in next to the daughterboard perfectly.
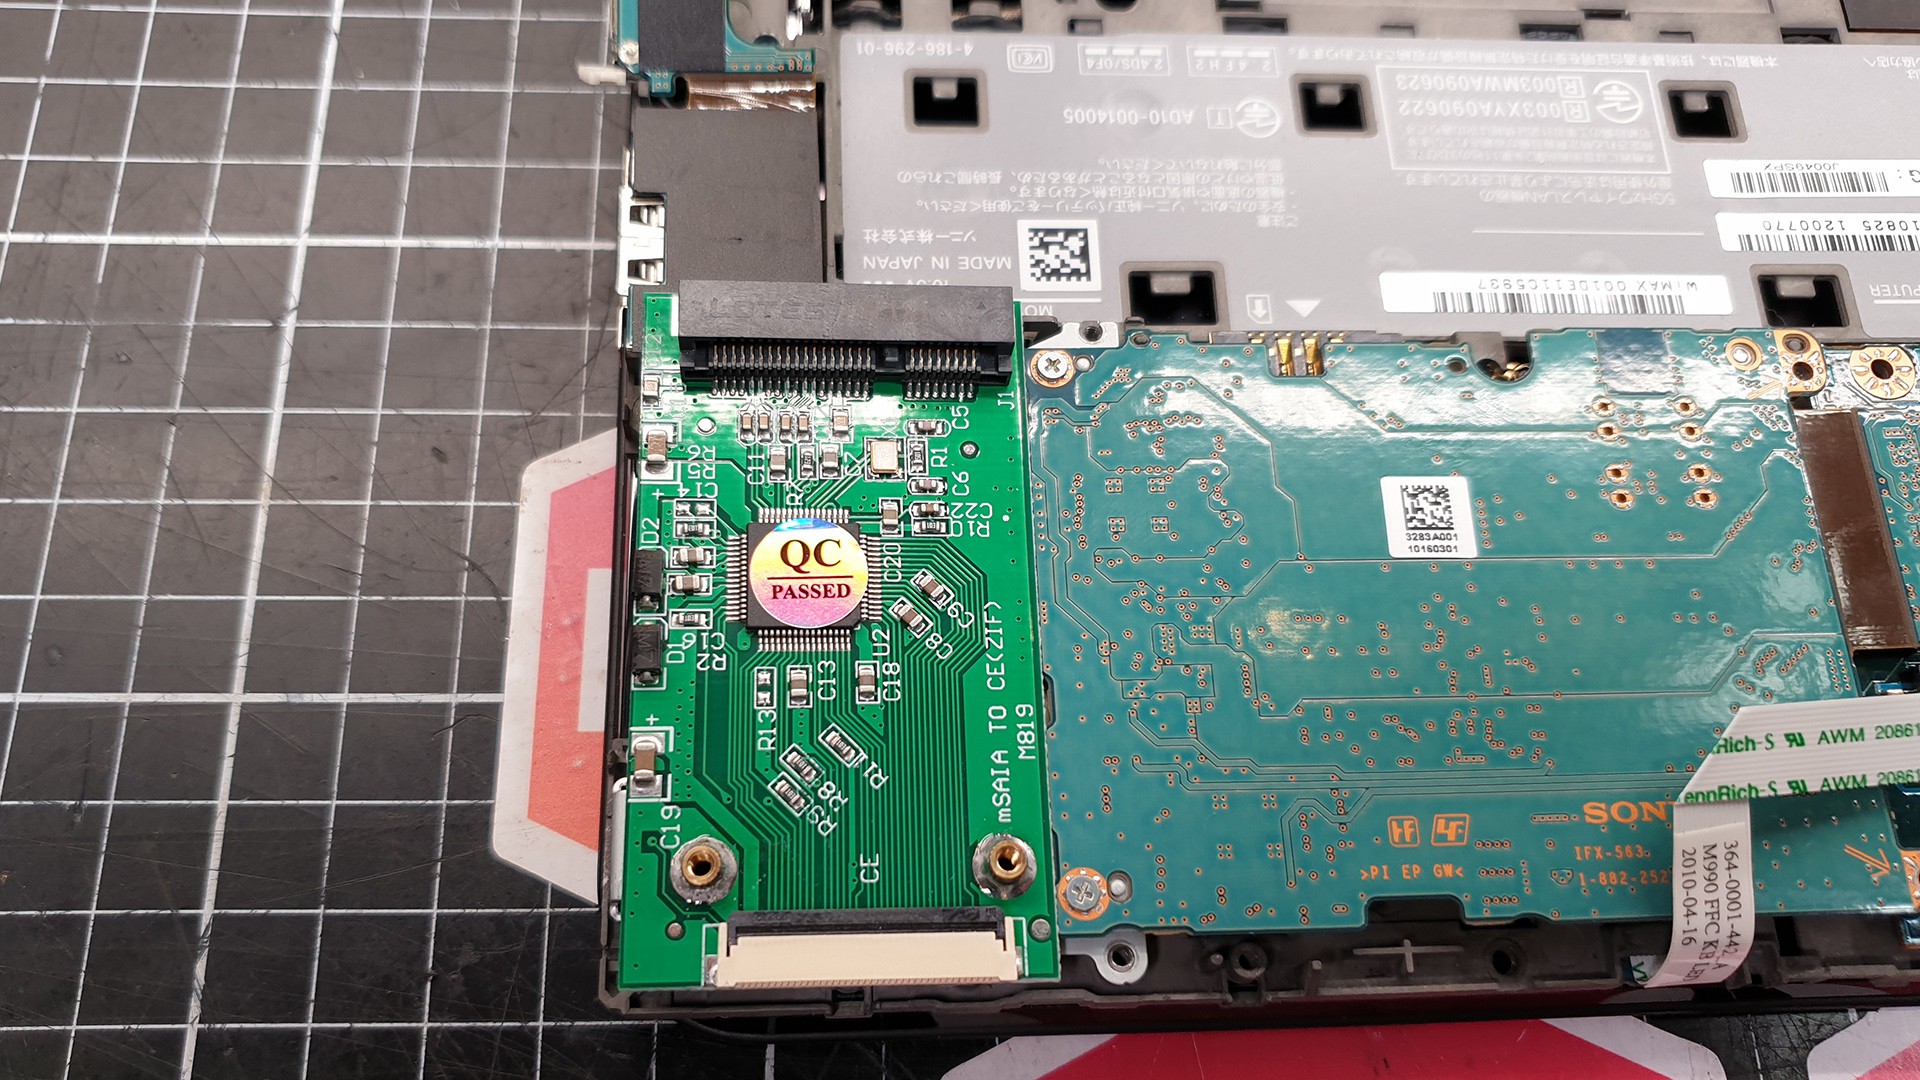
I purchased this flat-flex to mPCIe PATA-SATA adapter from eBay for a few dollars, but it just doesn't fit.
Unfortunately it is large enough that I can't even take a bit of a sneaky trim of the PCB either. It's also too tall to fit under the daughterboard too (That would have been too easy... :D )
I think I might have to fire up Diptrace to design up a custom PCB.
Having a think about it, if I were to make a 1mm thick PCB that is no wider than the mPCIe connector and if I put the flat-flex connector on the right-hand side, I reckon it'll fit just nice.
I have a decent (Hakko FM-206) rework station too, so salvaging and reusing that chip under the 'QC Passed' sticker and maybe even the mPCIe slot shouldn't be too hard.
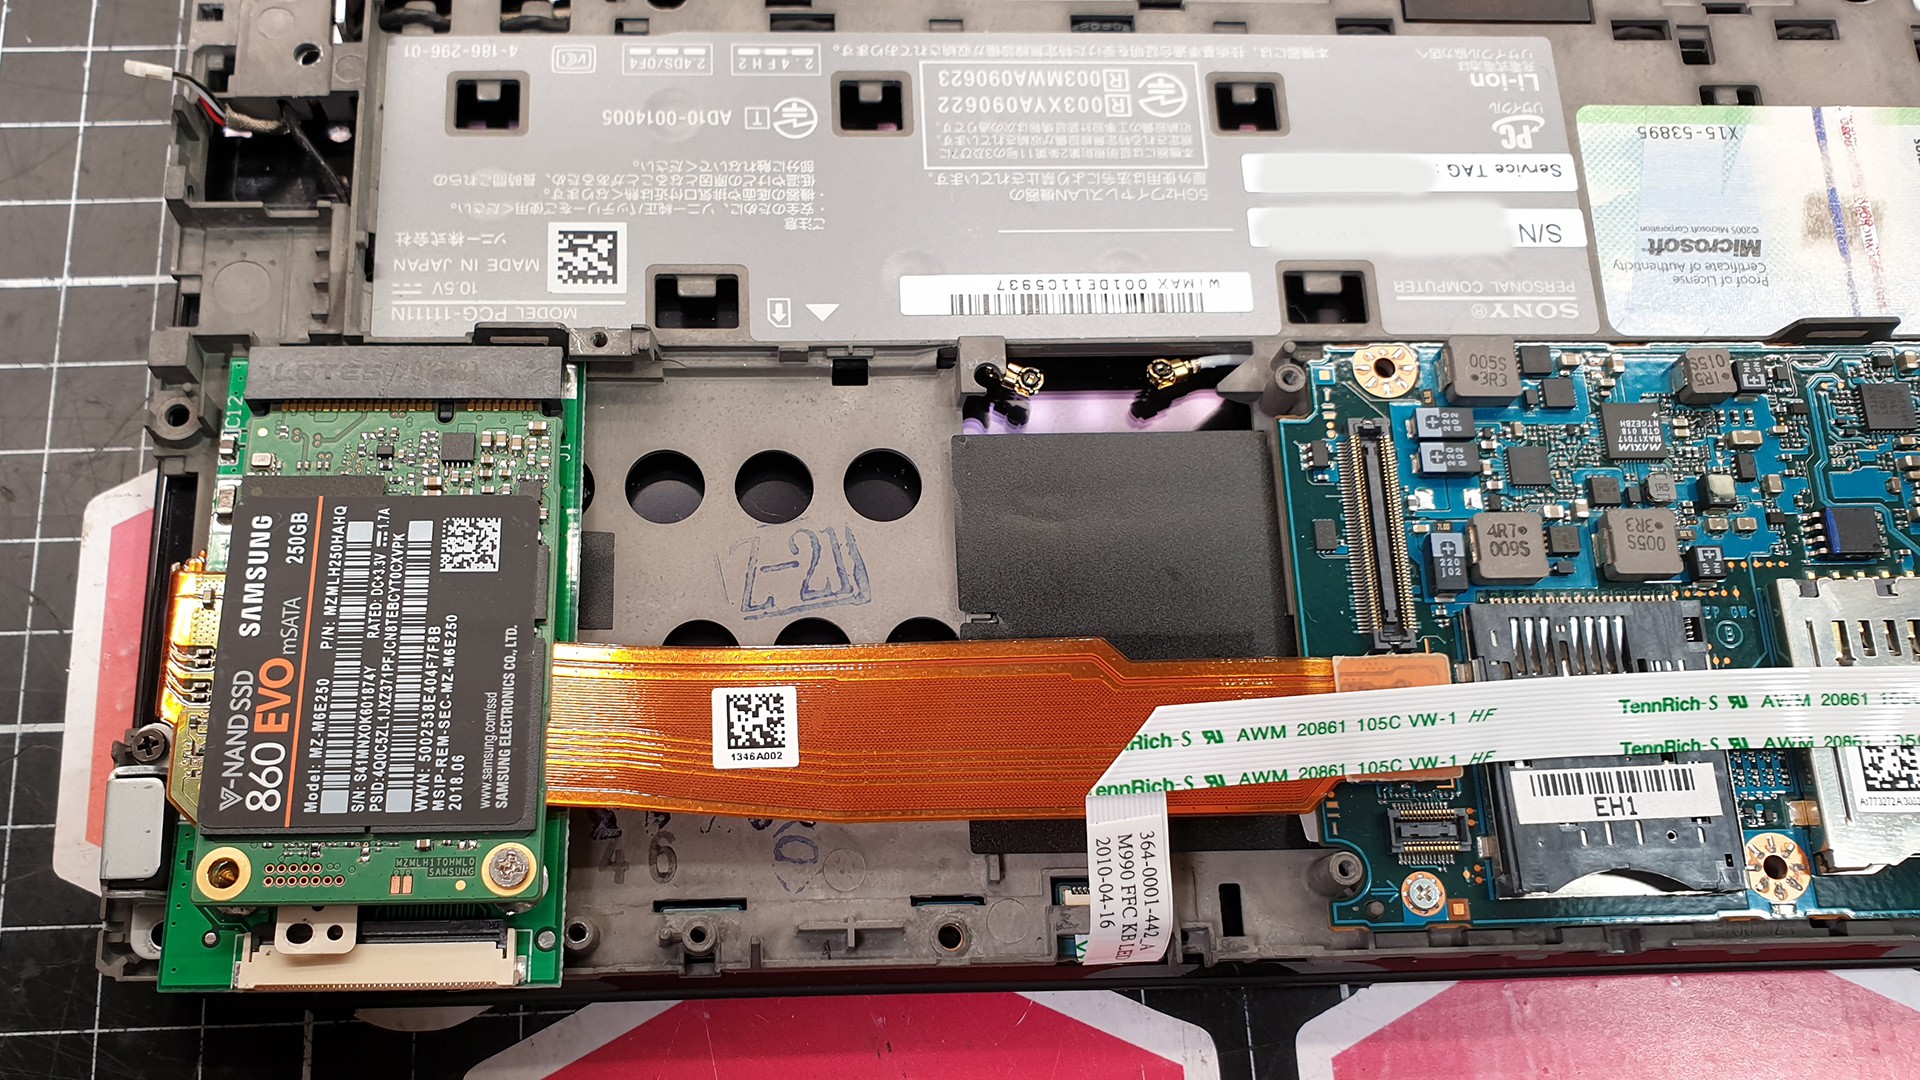
Here is where we sit now.
This is my idea mocked up roughly in place. I plan to have a flex PCB from the motherboard on the right, running over to the (to be built) SATA-PATA PCB and hooking into a flat-flex connector that will be on the right side of said PCB.
Then the new SSD will be installed as shown and the lot will be stuck down with some thin double sided tape.
I'll have to see if I can find the connector used for the flex-pcb to the motherboard, or attempt to salvage the one there. I'd rather not as that will be a point of no return and if I mess up, I'll end up with an unusable Vaio.......
More to come.........
 NFM
NFM