Close
0%
0%

LM80C Color Computer

A Z80 homebrew computer with 64KB SRAM & 32KB ROM (with BASIC), TMS9918A VDP (video) and AY-3-8910 PSG (audio)

Similar projects worth following
This is a full working 8-bit stand-alone home-computer based on the Z80 processor with built-in BASIC interpreter, a TMS9918A for video, AY-3-8910/YM2149F for sound, a Z80 SIO for serial communication, a Z80 PIO, and a Z80 CTC. A matrix-key keyboard is used to input commands. Can be connected to a TV through an RCA connector.

I always desired to build my own 8-bits computers. Back in the '80s I was a Commodore 16 user, and a lot of friends of mine had C64 and MSX computers. They had sprites and sound, I only had 121 colors. Now I want to build my own system, to bridge that gap. 

I looked around, started studying projects of other homebrew enthusiasts and eventually made my choices. So, I first designing my own computer that lead to the following specs:

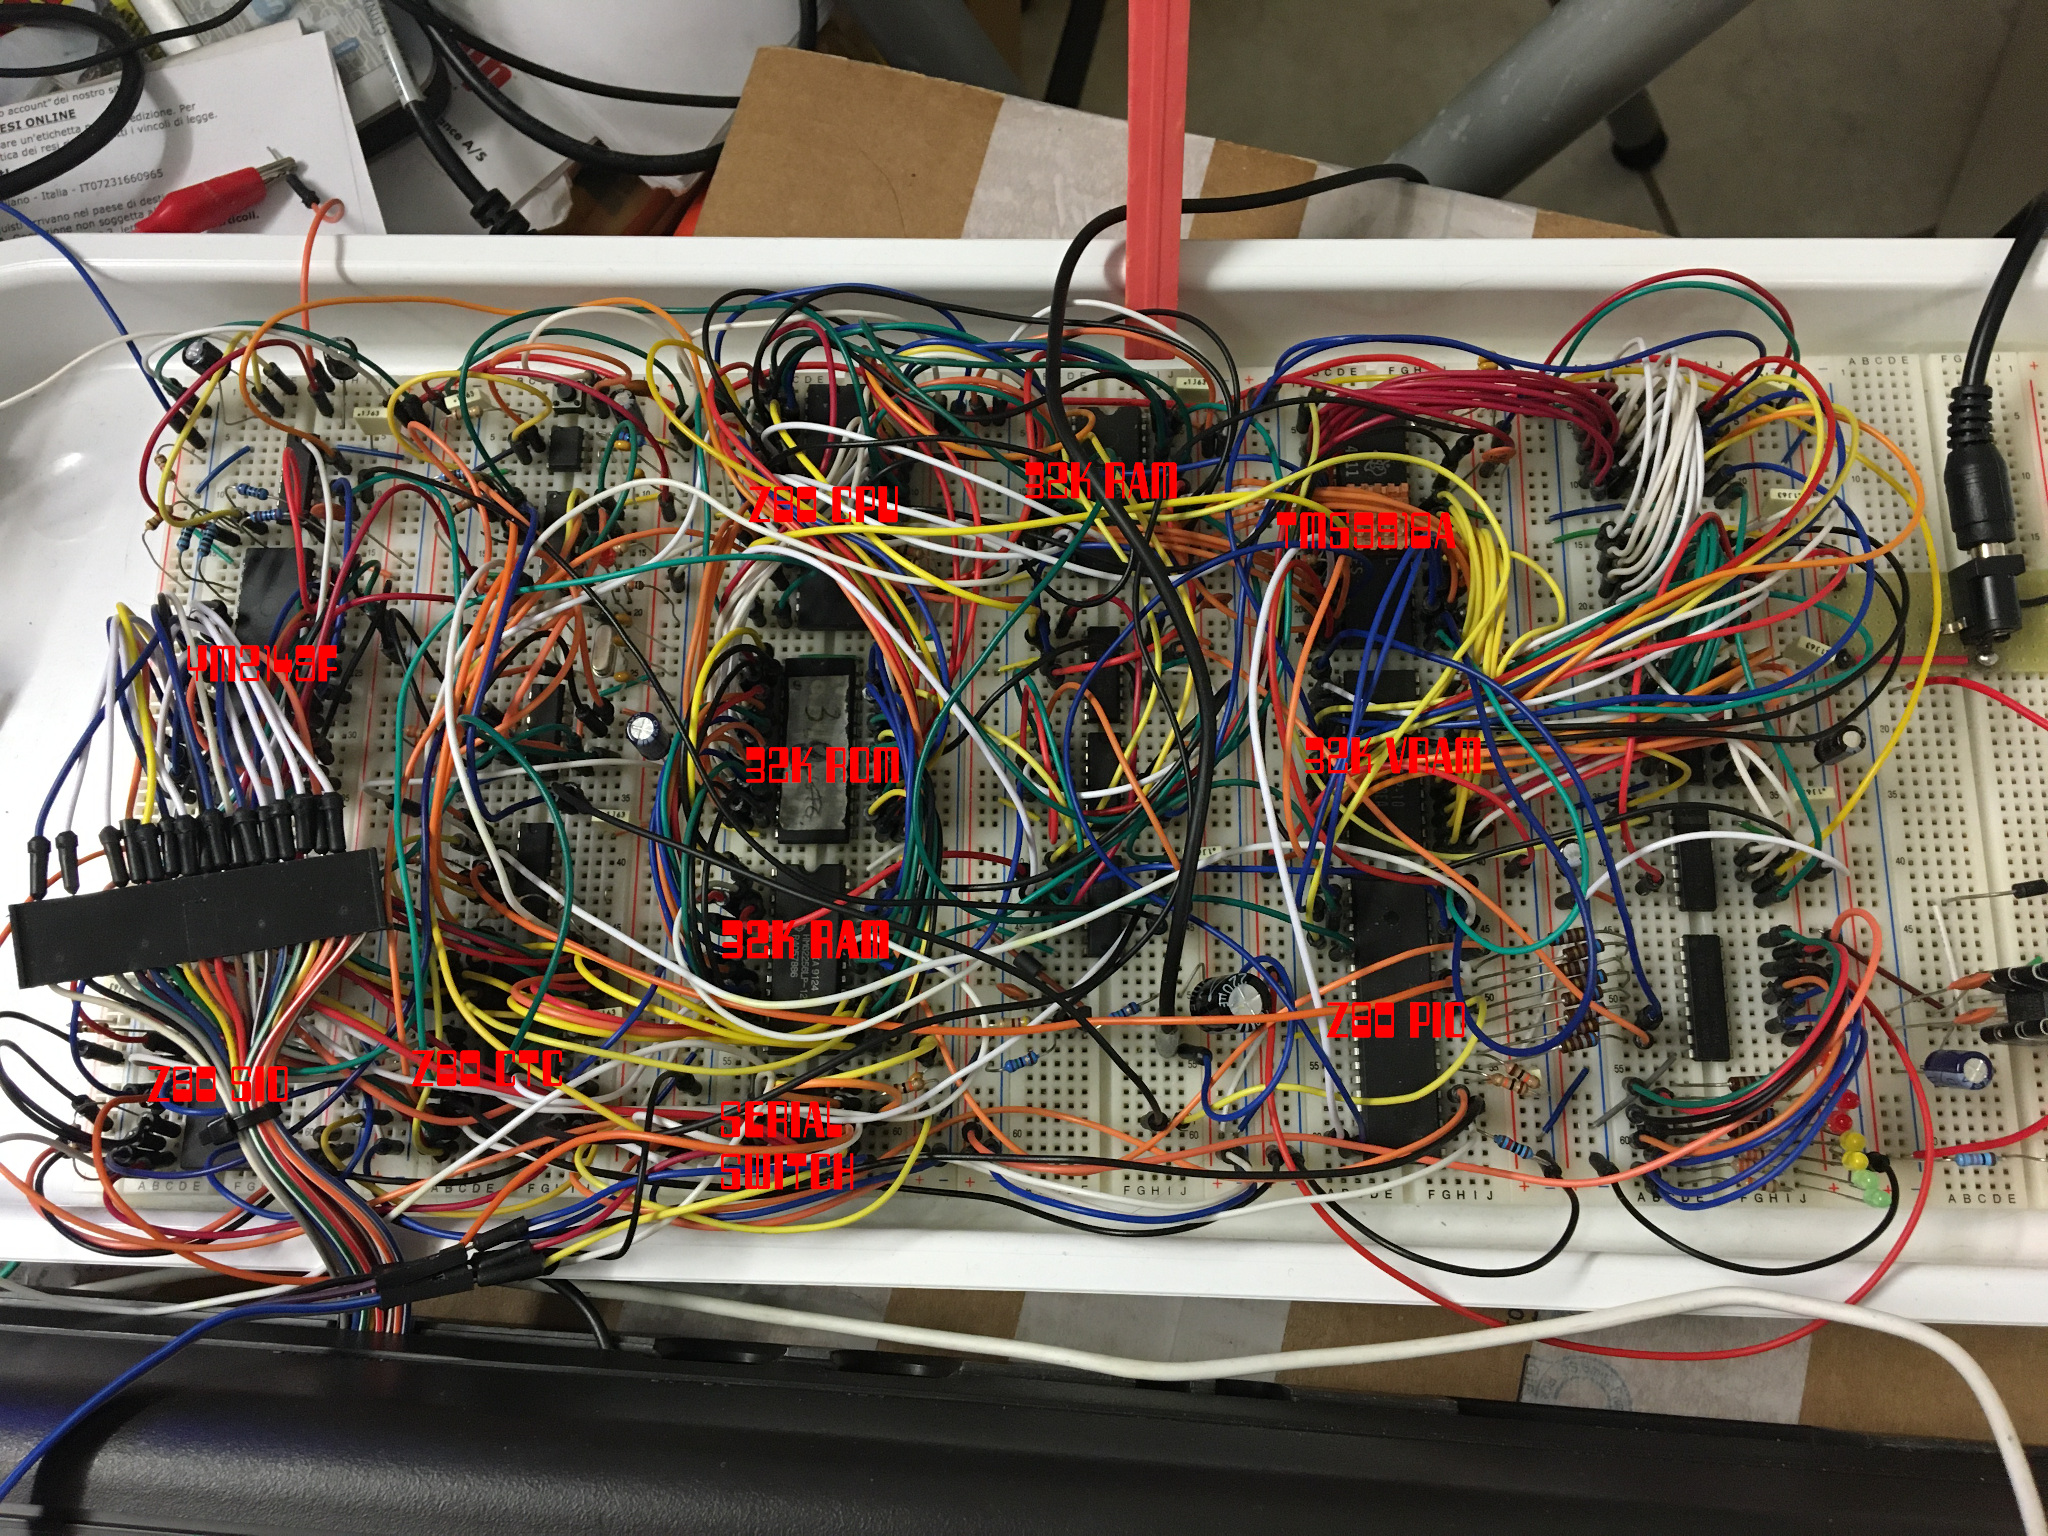
  • CPU: I chose a Zilog Z80 because it has a lot of registers, it has I/O features, it can set the stack anywhere into the RAM, it can handle interrupts in different ways.
  • RAM: 32KB of SRAM. I think that, at the moment, this amount of memory is enough to do some good programming.
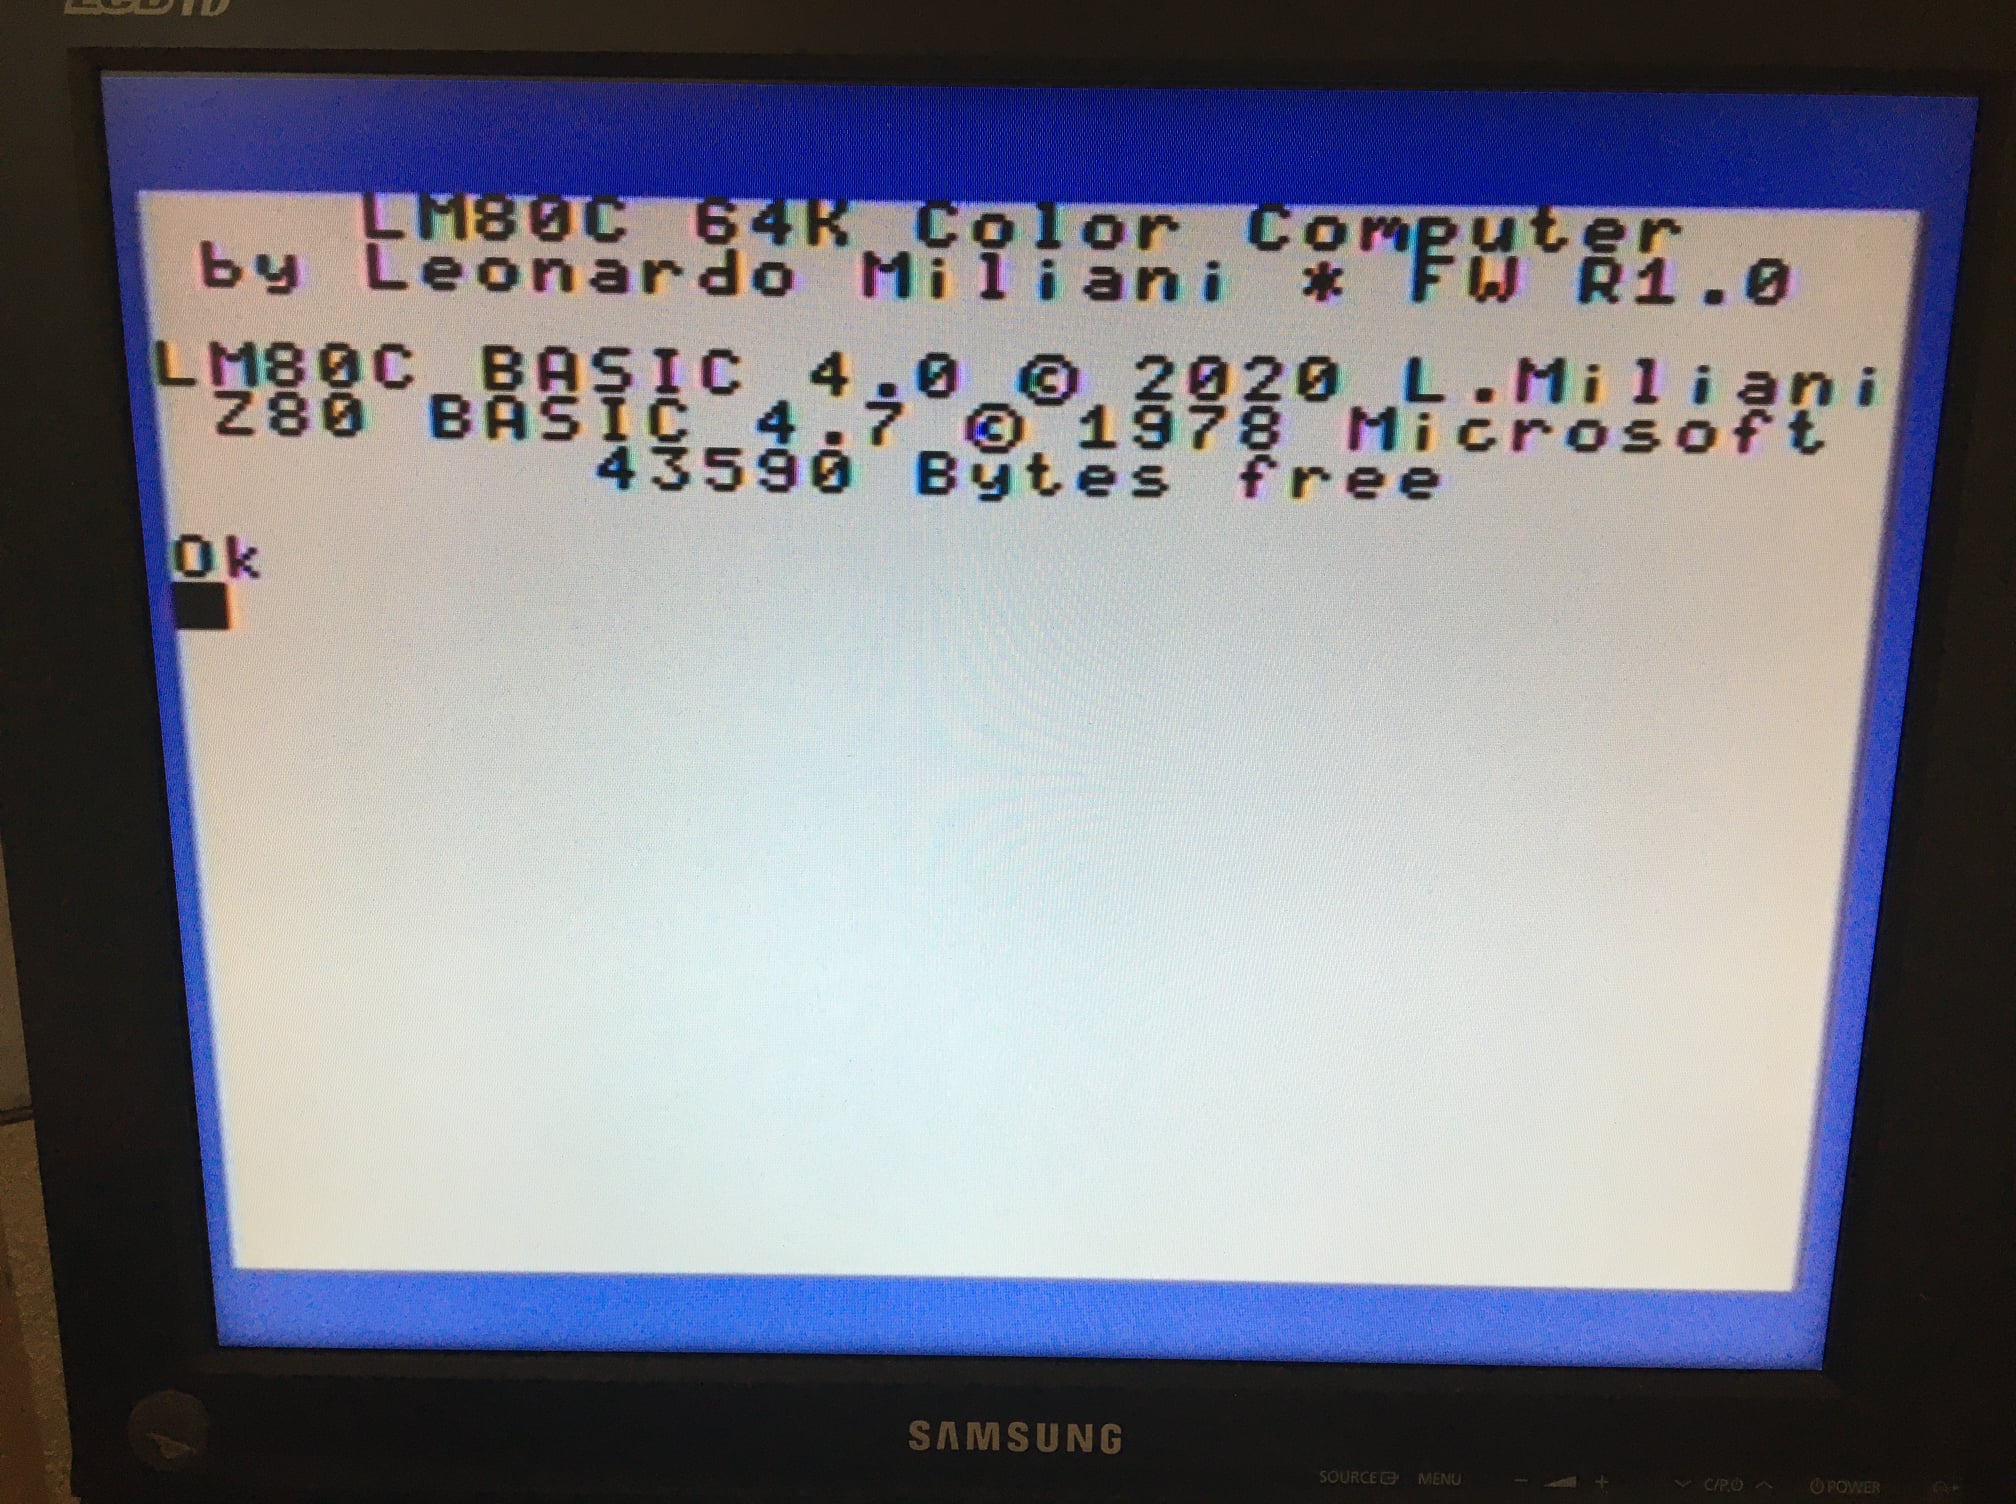
  • ROM: 32 KB of EEPROM. I chose an EEPROM chip because I can easily burn my firmware with an Arduino board connected to my computer. Also, 32KB are enough to store a BASIC interpreter and some other stuff.
  • VIDEO: TMS9918A. I wanted a video chip that was able to render a colorful image, with a good image size, easy to interface and that had support for hardware sprites. 
  • AUDIO: AY-3-8910 (or its variant from Yamaha, the YM219F). It features 3 voices with environment and white noise. It also has 2 input/output ports, that were used to read the keyboard or the joystick ports.
  • I/O
    • parallel I/O: a Z80 PIO that, at the moment, only drives some LEDs
    • serial I/O: a Z80 SIO/0, used to interface with a computer through a serial connection (FT232 serial/USB converter)
    • timer/counter: a Z80 CTC used to generate the serial clock and to increment a software timer counter

Why did I choose the Z80? Initially, I chose the Motorola 6809, then the 6502 but both of them had PROs and CONs. The 6502 has very few registers and it doens't support I/O instructions so every peripheral chip must be mapped into RAM, leading to complex address decoding systems. The 6809 is similar to the 6502 but it has some more registers, it has I/O instructions and a lot of addressing modes but it wasn't very used at its time so there aren't a lot of resources available. So I decided to use the Z80, because it's still manufactured by Zilog, it has a lot of peripheral chips specifically made for it (so that it's easy to interface each other), it can use I/O ports, it has a lot of registers, and so on.

The RAM and ROM are at the moment of 32 KB each: I think that this is a good amount of space, both for user programs and for firmware too. Maybe in the future I could implement a system to deactivate the system ROM and add another 32KB SRAM chip, to let the user to load very big programs (the same thing was done by engineers for the C64, where the ROM could be disabled, showing up the underlying RAM).

Video section. I only had few options. I discarded the MOS VIC-II from Commodore because it's very expensive online and it was developed to work with a 65xx processor. I also discarder the 6845 because it was just a video signal generator. I also discarded solutions based on moderm microcontrollers: I could have used an Atmel MCU and program it to geneate a VGA signal but I wanted to use only solutions that were available at that time. So I chose the TMS9918A, that is still available on Ebay at a resonable price, it's easy to interface since it only needs few lines between the CPU and itself and since it can generate an image of 256x192 pixels with 15 colors and 32 sprites.

For the audio section the choise was easy, the AY-3-8910: widely available, easy to interface, good to use as an I/O periphery too, and cheap. There is also the YM2149F: this is (almost) the same chip manufactured by Yamaha under license by GI. So that I could choose the one I was able to find first.

The I/O is the reachest part of the computer. Since Zilog made a lot of peripheral chips and since all of these chips are still in production, you can find parallel & serial interfaces very easily. I decided to add a Z80 PIO (Parallel Input/Output)  to drive 8 LEDs via an ULM2803,...

Read more »

TommyPROM.zip

Schematics and Arduino code to realize the EEPROM programmer used to burn the firmware for the LM80C computer.

Zip Archive - 1.15 MB - 05/01/2019 at 09:23

Download

LM80C.zip

This archive contains both the firmware source and the schematics of the computer at the current stage: PIO, SIO, CTC, TMS9918A fully working

Zip Archive - 203.68 kB - 04/29/2019 at 21:08

Download

  • 1 × Zilog Z80B CPU Possible product code: Zilog Z86C0006PEG (Z80 CPU in CMOS, 6MHz)
  • 1 × Zilog Z80 PIO Possible product code: Zilog Z84C2006PEG (Z80 PIO in CMOS, 6MHz)
  • 1 × Zilog Z80 SIO/0 Possible product code: Zilog Z80C4006PEC (Z80 SIO/0 in CMOS, 6MHz)
  • 1 × Zilog Z80 CTC Possible product code: Zilog Z84C3006PEG (Z80 CTC in CMOS, 6MHz)
  • 1 × GI AY-3-8910 or Yamaha YM2149F

View all 9 components

  • New LM80C firmware R1.16 with new LM80C DOS 1.05

    Leonardo Miliani03/28/2021 at 09:31 0 comments

    The development of my Z80 homebrew computer LM80C continues. This time the LM80C DOS 1.05 is out with newer BASIC statements to manage SEQUENTIAL FILES. with OPEN/CLOSE/PUT/GET/EOF. In this short video you can see the creation of a file, the storing of some data, and the following operation of reading. The new SEQ file has been added to distinguish such files.

    The new firmware is available from the official GitHub repo

  • LM80C DOS

    Leonardo Miliani03/08/2021 at 17:19 0 comments

    Here we are! The LM80C DOS is finally out! This is the first DOS (Disk Operating System) for my homebrew computer comes in an initial stage, maybe a little raw but almost functional. I've implemented the LOAD, SAVE, ERASE, FILES, and DISK commands:

    • LOAD & SAVE can load/save BASIC & binary (memory portions) files, and single disk sectors, too;
    • ERASE deletes a file on the disk;
    • FILES lists the files of a disk;
    • DISK can do several job: it's used to initialize (format) a disk, creating a new file system; it can rewrite the Master sector; it can rename the disk.

    Obviously, for "disk" I mean a Compact Flash card. More easier, faster, and bigger than an old floppy disk drive.

    LM80C DOS

    More functions will come, as I will have some spare time to expand the DOS.

    For the syntax of the commands please refer to the LM80C BASIC reference manual, for the details of the implementation, please refer to the Hardware reference guide, while for the wirings, please refer to the schematics.

    The new firmwares for LM80C Color Computer and the LM80C 64K Color Computer can be downloaded by the official GitHub repo.

  • New firmware releases for 32K and 64K models

    Leonardo Miliani01/01/2021 at 10:55 0 comments

    Happy new year and happy new firmwares for the LM80C Color Computers.

    LM80C: new firmware release 3.16:

    • Code revision to comply with the assembler SJASMPLUS
    • Moved equates for BASIC workspace area into a separated file
    • Serial buffer overrun revision
    • Fixed a bug into the serial code: the incoming chars were print on screen even if the cursor was off (i.e., in indirect mode)
    • Added key auto-repeat
    • Added support for INSERT key to insert a space between text by moving the chars after the cursor position
    • LIST now manage ending line number correctly, so that it won't list the line after the one passed as argument anymore
    • BASIC support for serial channel B
    • Preliminary support for external mass storage (stubs for ERASE, FILES, LOAD, SAVE commands)
    • Mechanism to enable/disable the 512-byte buffer for mass storage I/O operations (by pressing SHIFT while logo is shown on startup) - AT THE MOMENT, DISABLED BY DEFAULT INTO CODE

    LM80C 64K: new firmware release 1.01

    • Code revision to comply with the assembler SJASMPLUS
    • Moved equates for BASIC workspace area into a separated file

    LM80C 64K: new firmware release 1.02

    • Fixed a bug into the serial code: the incoming chars were print on screen even if the cursor was off (i.e., in indirect mode)

    Grab them at the official LM80C Github repo.

  • LM80C 64K Color Computer

    Leonardo Miliani12/29/2020 at 18:41 0 comments

    Very big XMas news for every fan of my LM80C Z80-based homebrew computer! After some months of development, today I finally released the firmware and schematics of a new version of my computer, the LM80C 64K Color Computer. As you can imagine, the main improvement is the RAM, grown from 32 to 64KB. After the BASIC has been loaded, about 43K are free for user programs. If you want to work with machine language, the whole amount of RAM is available to the user. Another improvement is the ability to switch between 2 VRAM banks, to keep at the same moment 2 complete video buffers ready to be used. 


    Also, there are several improvements on the software side:

    • improved mechanism to manage the serial buffer overrun, when the remote device sends data too quickly;
    • new key auto-repeat to help typing;
    • added support for INSERT key, to insert empty spaces into the text lines to add new chars w/o overwriting the rest;
    • improved LIST command: now, if the user asks to list until a line that it's not present into memory, now the listing is halted at the line immediately before the missing one;
    • added support to BASIC for serial channel B;
    • code revision to comply with the Z8DK assembler;
    • preliminary support for an external mass storage device (Compact Flash);
    • mechanism to enable/disable the I/O buffer of the DOS, to recover 512 bytes.

    Source code, precompiled firmware, and schematics are available at my Github repo.

    [caption id="attachment_1903" align="aligncenter" width="300"]LM80C 64K Color Computer: prototype on breadboard LM80C 64K Color Computer: prototype on breadboard[/caption]

  • New firmware R3.15 with ELSE statement

    Leonardo Miliani11/21/2020 at 17:32 0 comments

    Another firmware upgrade, the new R3.15 release introduces a simple yet important feature, the ELSE statement. So, now it is possible to write conditional branches on just 1 single row instead of having to divide them over multiple lines.

    Let's consider the code below:

    10 IF A<10 THEN PRINT "TOO LESS":GOTO 30
    20 PRINT "THAT'OK
    30 ... more code ... 

    It can now be put on a single line:

    10 IF A<10 THEN PRINT "TOO LESS":ELSE PRINT "THAT'S OK"

    Apart this, there is also a new man text displayed at boot, to inform the user about the firmware release, the copyright notices and the bytes free.

    The new firmware can be grabbed from the official LM80C Github repo.

  • New firmware R3.14 with Flood Fill

    Leonardo Miliani10/20/2020 at 17:36 0 comments

    Hello everybody. Nice release, today, for the LM80C Color Computer. The new firmware R3.14 comes with an interesting feature: the flood fill algorithm, to fill connected areas in graphic mode!

    Here's a little video to show the new PAINT command in action:

    Grab and burn the new firmware from the official Github repo.

  • New firmware R3.13.8

    Leonardo Miliani10/01/2020 at 14:33 0 comments

    Another firmware release, to fix a minor bug and to implement a new feature:

    • Fixed a little bug in COLOR statement: it didn't store the foreground color set by the user;
    • Now PLOT, CIRCLE, and DRAW statements accept color "0" to draw pixels with background color, i.e. reset pixels that are on;
    • Code cleaning

    Every single ROM is available ready-to-be-flashed on my Github repo.


  • New firmware R3.13.7

    Leonardo Miliani10/01/2020 at 14:30 0 comments

    New firmware release 3.13.7:

    • Fixed a bug into the new cursor management routine: now the cursor won't appear during PRINTing anymore;
    • Fixed a bug into the comma tabulation: now the max. allowed number of columns is   calculated dinamically, according to the screen width

    The new firmware is available from my GitHub repo, as usual.

  • New firmware R3.13.6

    Leonardo Miliani09/10/2020 at 15:58 0 comments

    Another minor release for the LM80C firmware. Let me introduce you the new 3.13.6:

    • Changed the cursor management routine: now the cursor is visible when being moved.
    • Now when the computer is software reset, the NMI is disabled before restart.
    • When printing with "comma" separator, 10 spaces are introduced  between items.

    As usual, the new firmware is available from my Github repo.

  • LM80C Color Computer 64K

    Leonardo Miliani08/30/2020 at 09:44 0 comments

    Hello everybody. After a while I’m back with interesting news! I’m glad to introduce you the LM80C Color Computer 64K. This is the V2 release of my homebrew computer built around the Zilog Z80 CPU. A lot of things are changed since V1 hardware, most importantly the main RAM, increased to 64K.

    LM80C 64K on video

    LM80C 64K

    Since the Z80 can address only 64K of memory, to be able to address the 32K ROM and the 64K RAM a trick has been used. Other computers of the past, like the C64 for example, had 64K of RAM but to let the computer be user-friendly the developers adopted bank switching mechanisms to disable the ROM or the RAM or to switch between them in particular conditions: on the C64, if the user tried to wrote in a memoery area used by the system, the operating system disabled the ROM, wrote on the underlying RAM, then re-enabled the ROM. I decided to solve the problem using a different approach: instead of jump between RAM and ROM according to the situation, I simply copied the whole ROM contents into the RAM.

    When the user powers up the computer, the usual check to see if it’s a cold or warm start is performed. For a cold start, the bootloader copies the firmware from the first bank of 32K memory (occupied at startup by a ROM  chip) into the second bank (from $8000). Then, jumps into the RAM continuing to execute the switching code, that disables the ROM bank and enables another 32K RAM bank. Now, it copies the whole firmware again on the first bank (from $0000) and then resume the original boot code. The bank switching is performed using a PIO line, so with just a simple OUT instruction. I also want to disappoint who thinks that the operation is too slow: by using the LDIR instrucion of the Z80, the double transfer (from ROM to RAM, and then from RAM to ROM) only takes 0.2 seconds!

    In this way, the BASIC interpreter can access all the memory left free (about 44K). If the user need the whole amount of memory RAM (64K) for his/her needs, he/she just has to write a little loader in a portion of the RAM and simply overwrite the original firmware.

    But that is not the only change. Now the VDP can benefit of 2x 16K VRAM banks to store 2 different video buffers and a serial switch to isolate the serial port in case the computer hasn’t opened the serial line yet. The trick is the same used for the ROM/RAM switching: a PIO line wired up to an address pin of the VRAM chip.

    Lastly, I’ve added a 4066 Switch to isolate the SIO pins when the serial line is not used or is disabled for any special event (i.e. buffer overrun).

    Here are the complet set of features of the new hardware:

    • CPU: Zilog Z80@3.68 MHz
    • Main memory:
      • 32K ROM with LM80C BASIC (an extended version of Microsoft BASIC 4.7) with special instructions to manage graphics and sound
      • 64K SRAM, of which 44K available under BASIC
    • Graphics:
      • VDP TMS9918A
      • 32K VRAM (2x 16K banks)
      • 256×192@15 colors
      • 32 sprites (monoc.)
    • Sound:
      • YM2149F (or AY-3-8910)
      • 3 analog channels
      • 8 octaves
      • 2×8-bit ports (used to read an external keyboard)
    • I/O:
      • Z80 SIO (2x serial ports with software-programmable bps)
      • Z80 PIO (2x 8-bit parallel ports – of which one is used to set up the system peripherals)
      • Z80 CTC (timer/counter, used to provide serial clock and system tick mechanism)

    LM80C 64K protoboard

    LM80C 64K protoboard

    Here is a little video of the power up of the system:

    Code and schematics will come soon on my Github repo.

View all 46 project logs

  • 1
    Z80 chips

    Choose CMOS versions of the Z80 family chips: they usually have a "C" in the middle of the produc's code, i.e. Z84C006PEG for the Z80 CPU.

    Also, choose 4MHz- or, better, 6MHz-compliant chips. You can see the different models by looking at the last number of the product's code, i.e. Z84C006PEG is 6MHz tolerant.

  • 2
    74HCTxx family

    Choose chips of the 74HCTxx family. The "HCT" indicates a type of circuitry that is 74LS-compatible (the "LS" series was the original 74 family). The chips of the HCT series are compatible with the LS ones, because they have the same logic levels (despite the HC series, that don't). Since the LS series is difficult to find, I suggest to use chips of the HCT series.

  • 3
    TMS9918 Vs. TMS9918A

    Pay attention when you buy the video chip. The "A" letter at the far right of the name of the chip indicates a newer variant of the chip that Texas Instruments released to add support for bitmap graphics. The TMS9918 only supports graphics 1 (tiles) mode, text mode and muticolor mode, while TMS9918A adds the bitmap support, in graphics 2. 

View all 4 instructions

Enjoy this project?

Share

Discussions

robertoianeselli wrote 01/05/2024 at 11:02 point

Buongiorno,qualcuno ha un pcb disponibile o i file gerber ?

Non ho nessuna esperienza nell'uso di kikad,stò cercando di imparare ma la vedo dura.

Grazie

Roberto

  Are you sure? yes | no

Jorisclayton wrote 08/08/2023 at 00:03 point

Hi friend, im building my own version of a z80 based computer and I used your project as inspirition, your and others like ben eater, rc2014 and Waagner Rambo. Im interesting on the TMS9918, Im building the graphics board now and I do not understand why to change the order of the address pins on the SRAM chip instead of put it in the right order. I saw the original post of the TMS9918 with the 32KB SRAM and the author do not put it in the same order that I found on your project, could you tell me why to do it? it influences on the final result of the graphics card?

  Are you sure? yes | no

Leonardo Miliani wrote 08/09/2023 at 16:28 point

hello and thank you for your interest in my project. I will answer your question: apparently there is no reason why i reversed the order of the links. However, let's start from the beginning. At first I, too, followed the diagram that is normally found on the net but it did not work. Then I found a circuit in which the connections were different, tried it and everything worked perfectly. I wrote to the author of that circuit who replied (if I remember correctly, but it has been a few years) that according to him there is no reason why they should not work in numerical order and that he had reversed them perhaps for some other reason. I tried at the time to put them back in numerical order but had problems, put them back in the order as you find them on the circuit board everything went smoothly: that's why I decided to leave them as they are. Moral of the story: try the connections in order first and if it doesn't work switch to the "shuffled" diagram.

  Are you sure? yes | no

Jorisclayton wrote 08/12/2023 at 13:03 point

OK,  there is somethings that dosent is to know here, lol
thankyou, very much 

  Are you sure? yes | no

aldolo wrote 03/28/2021 at 18:25 point

so the only way to enjoy a c16 is to swap the electronics with an msx board

  Are you sure? yes | no

Leonardo Miliani wrote 03/29/2021 at 15:44 point

Hello, thank you for you comment. I just used the keyboard of a C16 for convenience (it's an 8x8 key matrix) and HW similar, but not compatible with, to such of the MSX

  Are you sure? yes | no

marazm wrote 01/06/2021 at 09:00 point

Why 8 bit? Use 10 or 12 bit

  Are you sure? yes | no

Leonardo Miliani wrote 03/29/2021 at 15:41 point

Hello, thank you for your comment. 8 bits because it should have the look and feel of an old 8-bit home computer of the 80s

  Are you sure? yes | no

marazm wrote 04/20/2021 at 18:49 point

old computer have 10 or 12 bits not 8

  Are you sure? yes | no

mar-sim wrote 08/18/2020 at 08:20 point

Ciao Leonardo,

il progetto mi piace molto, ma non è che per caso hai un PCB disponibile? Che così mi evito gli sbattimenti delle generazione dei file, la stampa etc etc... se si fammi sapere quanto e come ti posso pagare.

Grazie

Simone

  Are you sure? yes | no

Leonardo Leoni wrote 05/30/2020 at 16:17 point

Hi, your project is great, there are several z80 system but yours is really complete. It deserves a nice case and a dedicated keyboard. Congrats

  Are you sure? yes | no

Leonardo Miliani wrote 02/28/2020 at 17:10 point

Hello. To draw the schematics I used a lib with footprints and symbols for the Z80 peripherals, VPD, PSG, and other ICs partially developed by me, so I would have to release both schematics and lib, but to do this I have to make some order in the files. Please keep patience, I think that I will release them soon.... I hope...

  Are you sure? yes | no

bmxpie wrote 02/20/2020 at 22:01 point

Ciao Leonardo,

molto interessante il tuo progetto LM80C, ma...è troppo avere gli schemi su files per Kicad?

Grazie,

Massimo.

  Are you sure? yes | no

Similar Projects

Does this project spark your interest?

Become a member to follow this project and never miss any updates