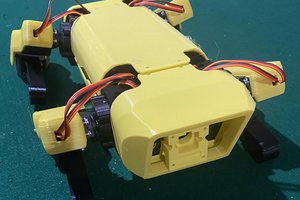
• Days 1-3: A concept and small beginning

    David05/10/2019 at 03:56 0 comments

    Robotics kits are expensive! Take a look at Vex robotics kits, it takes $500+ dollars to get a starter kit that includes a drive base, manipulator, robot controller and remote control! Don’t get me wrong, I grew up using Vex kits and I see it as the gold standard for learning robotics. However, the price tag is a huge barrier to entry.

    Additionally, if you want to start building bigger, badder robots, Vex is not the way to go!! In fact, there isn’t really a clear way to go. You have to start piecing together parts from a bunch of different locations, which gets real expensive quick. The electrical wiring starts getting way more complicated and dangerous. Plus now your having to cobble together code on an arduino or Raspberry Pi, not always an easy task that a beginner could do.

    If we truly want to see a future where robots are in every home making our lives easier, then we need a lot more people making them, even if it is just for fun! That’s the problem I’d like to solve. I want to create a fully functional robot kit for under $100, that includes a vex level robot base kit, robot controller, remote controller, and battery (cuz power is important!). Beyond that, I want to create the components to allow that kit to be able to grow into whatever robot you can imagine: a bigger power system, motor controllers, connectivity with things like Raspberry Pis to expand it computing ability, along with all the mechanical bits like motors and gearboxes.

    And a beginning!

    I decided I needed to make something move, and make it move now. Possibly not the most productive thing to do at the beginning of a large project, but it is what it is.

    Butttttt  what to make???

    I’ve got some servos....

    I’ve got a raspberry Pi and a PWM shield...

    I’ve needed to dust off the 3d printer...

    So, I made a two jointed robot arm that has a UDP server to accept commands sent over wifi!!!!!

    Started with drawing a quick part in Fusion 360 (my cad tool of choice for this project), printed it out with my Prusa 3d printer (awesome printer btw)

    Of course I didn’t plan for how the HS-645MG servos were going to slide in....

    Butttt a quick fix with the saw made things better!

    Also, the holes weren’t quite accepting of the M4 bolts I used to mount the servos so had to drill out the holes. I also used some nice 17mm metal servo horns that had m3 threaded holes.

    Here’s a top view with banana for scale.

    Electronics wise, I used a RaspberryPi 3 with a Adafruit pwm hat hooked up to 4 AA battteries to power the servos.

    After a bit of code....

    IT’S ALIVE!!!!!!!!!!!

    If you want to take a peek at the code (not well commented btw...), grab the stl for the arms, or look at the drawing for demininsions I setup up a github repo here.

    Out of curiosity, I pulled together the bill for what I just did:

        linklink

    Item

    url

    price

    quantity

    HS-645MG servo

    link

    $28.99

    2

    17 mm servo horn

    link

    $3.20

    2

    Raspberry Pi3

    link

    $35.00

    1

    SD card

    link

    $9.95

    1

    Battery holder

    link

    $2.95

    1

    servo hat

    link

    $17.50

    1

    total

    $129.78

    Holy crap! $130 to make a creepy crawly robot???

    Granted, it’d be easy to make something half as expensive and achieve the same funtionality, but still, spending at least $60 to just make a wirelessly controlled creepy crawly is a bit much! Thus why I want to do this project. Making a simple robot like that should be cheap and simple, and not take someone that has an engineering degree 5 hours to put together!

    Up next:

    While that was a fun exercise and serves to sorta prove that there is a problem (or that I have a problem since I just had all that stuff laying around), I really need to take a step back and evaluate what the requirements for competing in the Hackaday prize are and what my goals for the project truly are.