Sponsor Link:
UTSource.net Reviews
It is a trustworthy website for ordering electronic components with cheap price and excellent quality.
Setting it up

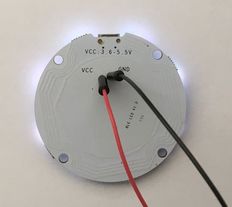 1. Before powering this module, be aware that the LEDs on this module is considerably bright and for those who cannot handle it, it is advised to use this module with caution. Firstly, start by powering up this module via its micro-USB input or its power input pins at the front and back of the module. Do keep in mind that the acceptable input operating voltage for this module is between +3.6 - +5 volts. The pictures indicate the both methods to power this module. Once the module is powered, the LEDs will go through a series of light patterns and colours to start up.
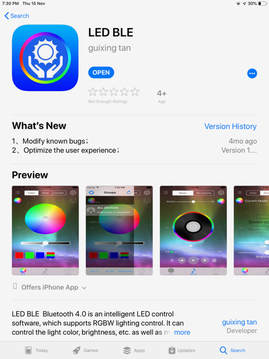
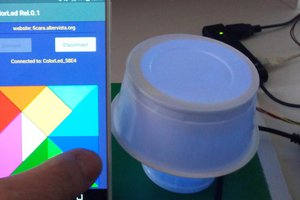
 2. Next, get onto an Android or iOS device and download the app titled "LED BLE" from the App Store or the Play Store. Make sure that Bluetooth is enabled on your device. In this example, an iOS device will be used for demonstration.
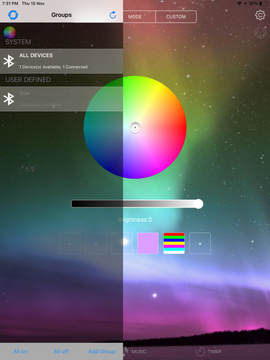 3. Now, open up the app and click on the three menu bars you see on the top left of your screen. If the Bluetooth module is powered up properly, under "Groups" and under "ALL DEVICES", it will say "1 Device(s) Available; 1 Connected". This means that your LED Module is not linked to your electronic device. If you have more than one LED Bluetooth Module, more devices will show up. The bottom controls on that menu page saying "All on" and "All off" turns the devices linked, on or off. You can add more groups to separately control multiple devices by pressing "Add Group".
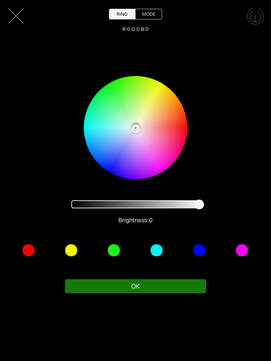
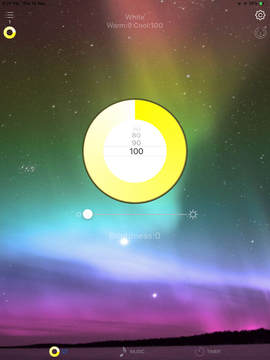
 4. The page you see first, is the main home page, where you can control the current colour and brightness of your LED module with moving that cursor on the larger spectrum circle. There are memory slots as well for your own custom colours as seen in the second picture above, where you can click on the boxes and select your custom colour, mode, speed and brightness for a constant colour or a pattern to save. You can click on any of the boxes at any time to change to the pattern or colour saved in that memory slot.
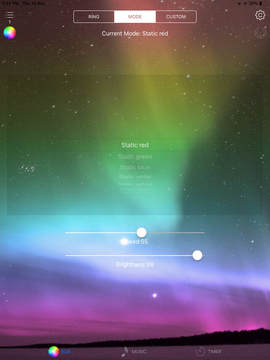
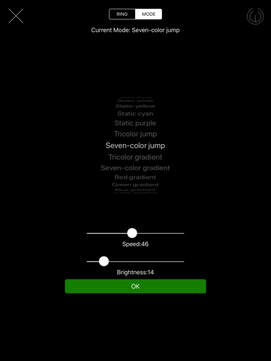
 5. On that page, if you click "MODE" on the tabs above, it will take you to a page where you can select options for the module to change colours, either in a static, jump, gradient or flash form. There are sliders for you to change the speed and brightness of the module's patterns. If you click on the multi-colour circle on the top left of the page (under the menu bar icon), it will take you to a page where you can change the colour specifically and how warm or cool the colour is. There is a brightness slider as well.
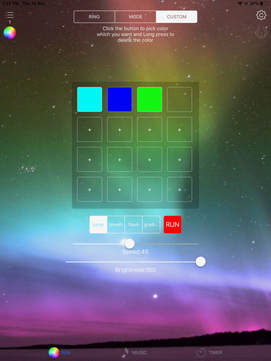
 6. Furthermore, on the top menu page named "CUSTOM", you can customise the pattern which you would like, by clicking on the 16 available squares for your colour selection. The pattern will start from the top leftmost square and move its way down to the bottom rightmost square. You can change how the transitions from colour-to-colour is like with the four buttons below the squares, and there are speed and brightness sliders which you can control. The big red square named "RUN" will activate the colour pattern upon your press. If you click on the multi-colour circle on the top left of the page (under the menu bar icon), it will take you to a page where you can change the colour specifically and how warm or cool the colour is.
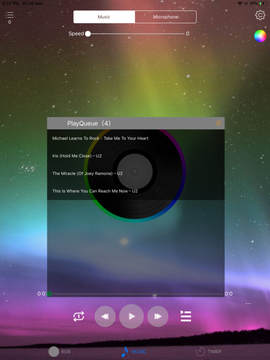 7. Now, if we look at the bottom menu tabs, click on the tab named "MUSIC". At the bottom, you can immediately see the play button, the 'next song' button and the 'last song' button (arrows left and right) which you can press to either pause or play the music, and switch between songs in your library queue. To import music from your device's libraries to the app, click on the 'three lines' to the right of the 'next song' (right arrow) button. You can select which music you will like, and your music queue as well.

 8. The far left button, towards the left of the 'last song' (left arrow) button, changes the sequence of how the music is playing...
 Hexabitz
 Emilio P.G. Ficara