 Alessandro Sottocornola
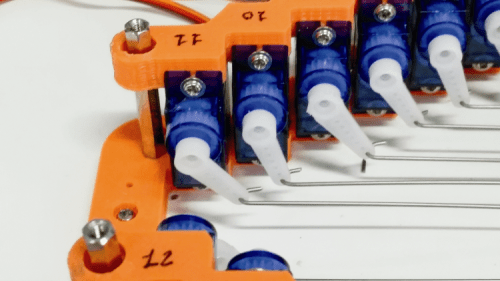
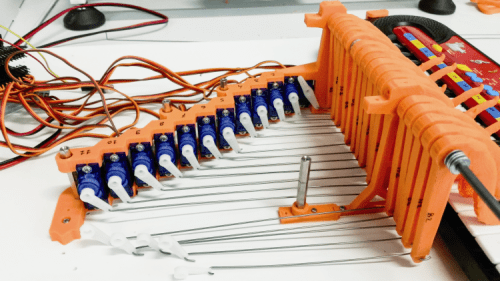
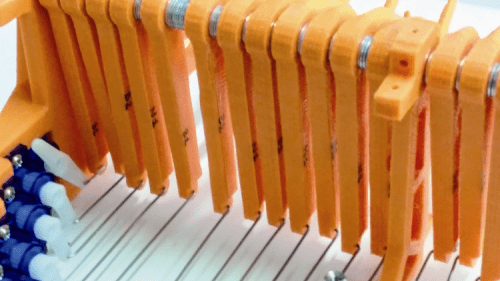
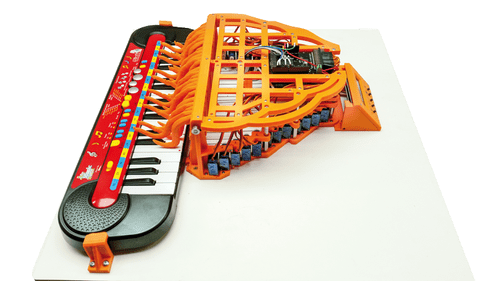
The whole structure necessary to sustain the 24 tentacles and host the just as many servomotors (each one equipped with an arm screwed on the small shaft using the provided screws), and the electronic boards (i.e. the frame…) has been designed using Google SketchUp and 3D-printed using PLA; the actual frame can be printed using the STL file. Then, you have to apply the metal details on the frame which are needed for assembling the various parts such as the tentacles fulcrum; more precisely, the frame is made of several parts (edges, lower junction element, front cross piece…) to be screwed together.
Each servo activates a tentacle (this also has been 3D printed and the STL file is available on our website along the other file for the project) through a conveniently shaped rod obtained by straightening a 0.9 mm stainless steel wire. The wire is then bent over in order to attach both on the servo shaft end and on the home provided for the corresponding tentacle.
Since it is possible that the keyboard will move around during the operation due to pressure applied by the tentacles, it is recommended to attach the frame to the keyboard itself, for instance, you can use some right-angled metal strips attached to the bottom of the musical instrument, or you can place and screw the mechanical section to a wooden or plastic base plate and, once determined the optimal position, attach it to the keyboard with conveniently 3-D printed small square that are going to be screwed on the baseplate.
Key functions
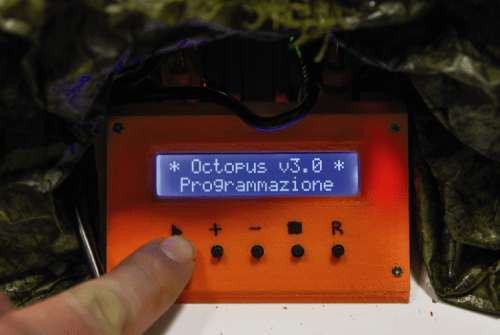
I can see how to use it and therefore how i can play our special instrument. Below, i describe keys functioning.
- Mem/PLAY: it allows to start execution of the tone in the position displayed. If held when turning on, it allows entering in “servo position setting mode”.
- Plus: it allows to move to the next tone. In “servo position setting mode” it allows modifying the tentacle position in order to press the key more or less. If held when turning on, it allows entering TEST mode.
- Minus: it allows to move to the previous tone. In “servo position setting mode” it allows modifying the tentacle position in order to press the key more or less. If held when turning on, it allows entering TEST mode.
- Exit/STOP: it allows to interrupt tone execution. If pressed in “servo position setting mode” it allows to exit that mode and go back to the main screen.
- R: it allows to reset and/or reboot the system.
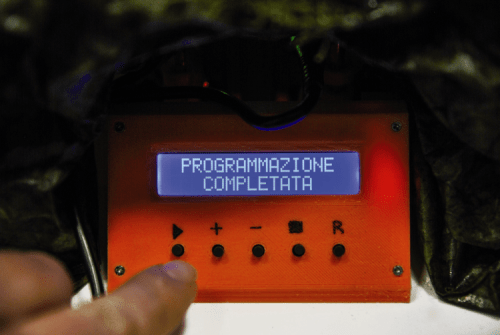
Reset of all servos’ positions
Before activating the control lever related to the tentacle on the pivot of each servo, we have to place all the servos at half run (central position, -90°); this operation is necessary in order to make sure that once the servos are brought to zero, all the arms are in resting position. In order to reset position of all the servos, we have to press and hold the Exit/STOP key and then power on; the display will show the message “reset in progress”, after that all the servos’ pivots will get in central position and the display will show “reset successfully”. Now release the key. After that, apply the respective lever on each pivot so that the related tentacle will stroke (without pressing) the corresponding key.
Programming mode
Let’s take a look at how to program pressure position of the key corresponding to every single tentacle. Each servo must be assigned a position that allows pressing the signed key.
Track selection/ PLAY / STOP
When the system is on standby, the display will show the message “track selection” followed by the actual track number (of the ringtone). In order to start execution of the track, press PLAY (the display will show for instance “Play track n° 1); to stop reproduction press STOP.
Firmware
Where you will find the ringtones to play and the instructions to do so. The system provides for 30 ringtones to be played: this is defined in the instruction ...
Read more »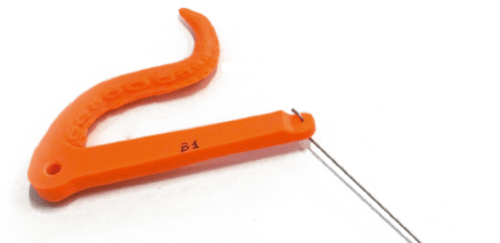


 Aaed Musa
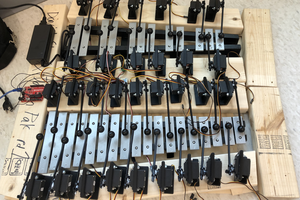
 Jason P.
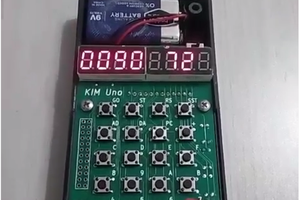
 Arduino Enigma
 Luke J. Barker
you need to try this out on a B. Meowsic keyboard !!!!!