 Michael Wessel
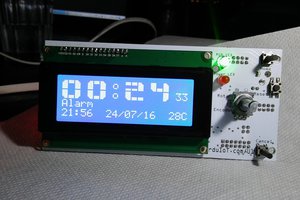
These are all off the shelf components. It is inexpensive and easy to assemble; I just soldered things on an Mega 2560 Arduino prototype board. Note that you can also use the Uno R3; but then, some pins change obviously. Just find the right places in the code.
The following ATmega / Arduino pins are being used:
- Analog TMP36 Temperature: A0
- Strobes for TM1638 modules: 31, 33, 35
- Clock for TM1638 modules: 27
- Data for TM1638 modules: 29
- I2C Clock for DS3231: SCL1 = 50
- I2C Data for DS3231: SDA1 = 52
- Speaker / toneAC output: 11 (12)
The ino sketch is in the files section of this page. Please make sure you have the corresponding standard Arduino libraries installed; the clock is using:
- DS3231.h
- toneAC.h
- TM1638.h
- EEPROM.h
and of course stdio.h
The code is a bit sloppy.... sorry for that. If you want to change the special date which is being used in the clock to show the number of days (hours, minutes) that passed since that special date, e.g., your date of birth, graduation or marriage, just change the hardcoded date in showStatus(), in the call to the "days" function (see the assignment to unsigned long diff in the showStatus() function). That should really be a constant and not be hardcoded - something for you to change and improve in the code ;-)
Please watch the YouTube video for some details regarding usage and the intuitive user interface:


 Dimitri Synodinos
 muzi
muzi
 Marcin Saj
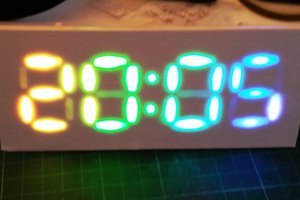
 David Hopkins
Nice. Having grown up on analog alarm clocks and then split flap clocks, I still get excited with 7-segment clocks. All the benefits of split flap without that tiny little noise of the flaps mocking me that another minute has passed and I am still awake.