 W. Jason Altice
Lets start off with my original thoughts on this project.
Original Project Requirements:
- Add more power to the Lamborghini
- Add 12V battery
- Replace 6V motor with 12V
- Keep the original 6V electronics
- Remote control still operational
- Sounds still operational
- Lights still operational
- Original 6V charger still operational
- Keep all batteries and electronics under seat
- Forward and reverse should still work
The first thing I purchased was the battery and new motor from Amazon. I originally used 12V automotive relays to power the new motor. In the video you can see this working. The rear wheel spun the entire time. It was a lot of power for a 4 year old with poor driving skills.
Knowing this would be too dangerous for him, I decided to control the power. I considered just doing a simple ramping of power but the top speed was still about 12Mph. The original top speed was 3Mph! So this lead me to developing speed limits. In order for me to get the speed feedback, I had to add wheel encoders of some type.
At this point the new requirements could have been complete but I usually do unnecessary things. So I thought it would be cool to add traction control. Its only one additional wheel encoder right!?
Modified Requirements:
- Add more power to the Lamborghini
- Add 12V battery
- Replace 6V motor with 12V
- Keep the original 6V electronics
- Remote control still operational
- Sounds still operational
- Lights still operational
- Original 6V charger still operational
- Keep all batteries and electronics under seat
- Forward and reverse should still work
- Add power management
- Ramp power according to Sport or comfort modes
- Micro controller should be ESP8266
- Wireless webpage user interface
- Sport, Comfort settings
- Top speed limiter select
- Report current wheel speeds
- Add 2 wheel encoders to detect top speed
- Wheel encoders will also detect wheel slip
- ESP8266 will limit top speed to selected value
- 3, 6, 8, 10, 12 Mph
I love writing code so programming the ESP8266 was fun for me. Possibly I made this project more complicated just for this reason?? Because of this personal problem, I also added graphical gauges for speed. These gauges were originally a clock tutorial I modified into a speed gauge. It can be found here:
https://www.w3schools.com/graphics/canvas_clock_start.asp
Of course you can also look at the final code if you want gauges too!
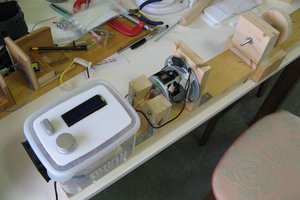
The next part of my life was not good. Trying to control the power going to the wheel was tough for me and like usual, I made it extra hard for myself. For some reason, I wanted to control the negative side of the motor with a TIP120. There was too much current going to the wheel so I changed it to a 30amp MOSFET.
The MOSEFT actually worked but blew out every time I would drive the Lambo forward and stop. I must have rebuilt this board 5 times, each adding more diodes and researching online for an answer. Eventually I understood that the MOSFET was trying to tell me to go a different direction. I went to my friend Amazon for an answer and it had one. There was a 43amp H-bridge controllers for about $15! So much time was wasted!
The H-bridge on Amazon was the HiLetgo BTS7960 43A High Power Motor Driver Module. It has a nasty huge heat sink too. Perfect for this project I could hardly wait the 2 days for it to arrive.
After changing to the H-bridge, life was good again and the sun came back out. But only for a moment. I connected the optical encoders to 5V and the ESP8266 did not agree with this. I murdered to ESP8266 before I realized what was wrong. Then I ordered 2 new ones from, yet again, Amazon. No this isn't an Amazon commercial. The ESP8266s I received were bigger than the ones I originally had so I had to rebuild the control board to make them fit. Ahhhh!!!
After the ESP8266 fiasco, I was finally able to start tuning the traction control. I originally used some 2nd order polynomial but found that a linear equation...
Read more »
 jipe_rey
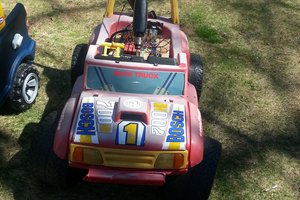
 shlonkin
Good project Jason, did you consider installing a second motor and gearbox? These are readily available and most of these cars have room for the second motor. Even with your traction control there will be a lot less wheel spin with 2 wheels driven...this could expand your project by having individual traction control for each driven wheel.