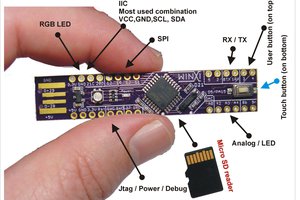
Close
0%
0%

192:LED redesign

Ultra tiny (15.8mm x 14.8mm) smart USB RGB LED display/matrix

Similar projects worth following

Compared to the original #192:LED design. Nearly everything did change

  • smaller: 15.8mm x 14.6mm
  • No complicated Multiplexing anymore! LEDs are WS2812 style ones in a metric 1515 package
  • smarter: MCU is a SAMD21
  • USB: quite more convienat and easier to connect
  • Bootloader is same as on Adafruit's Trinket M0
    • Easy Arduino IDE support
    • Easy Circuit Phython support
    • Using of Adafruits's Neopixel Library 
    • Programming and Powering via USB

  • Someone asked for some IR pictures....

    Alex07/28/2019 at 01:42 0 comments

    You may already saw them on Twitter. Thanks to fablab Munich I could take some IR pictures of a running matrix.

    Front at 15% brightness white:
    ImageBack at 15% brightness white:

    ImageFront at full brightness after ca. 5 sec. running... Than I unpluged it.

    Image
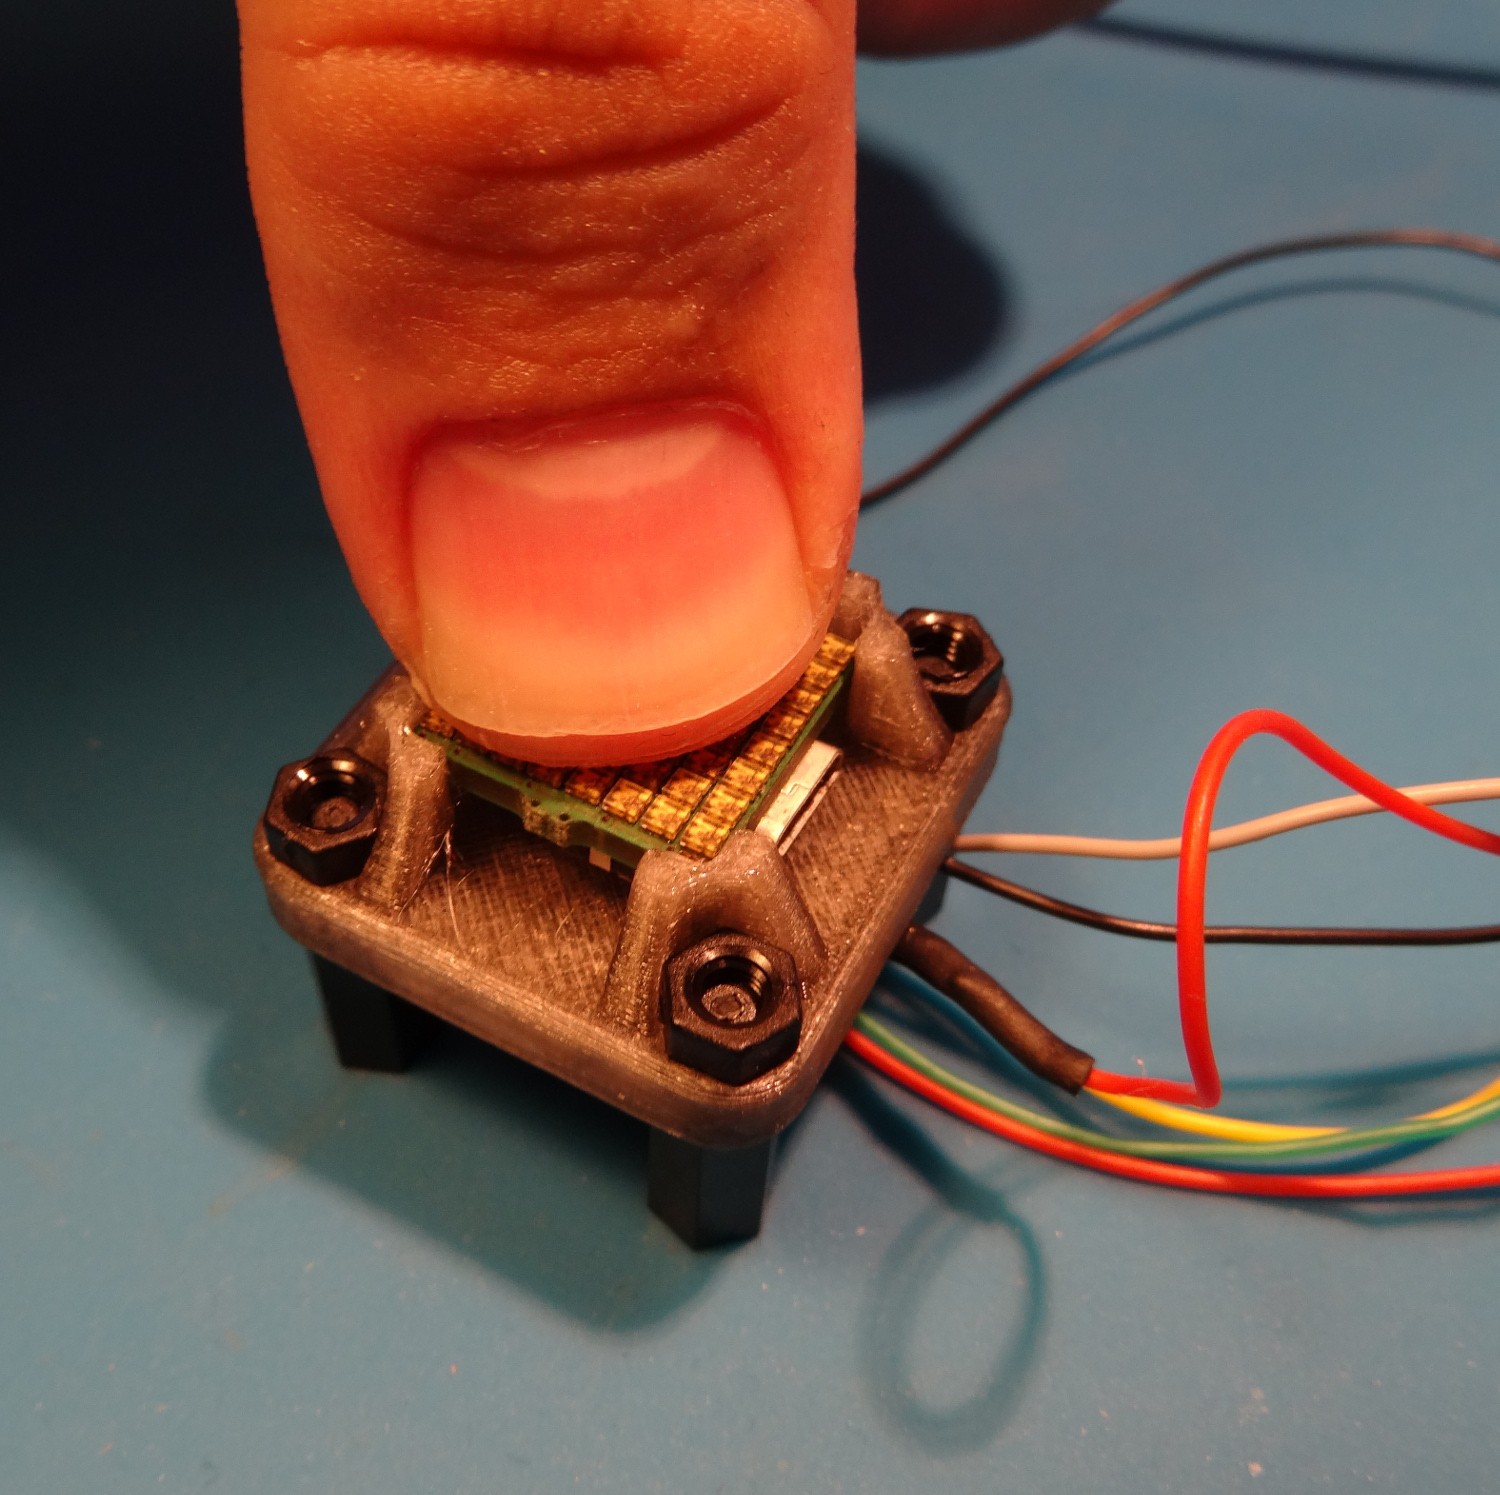
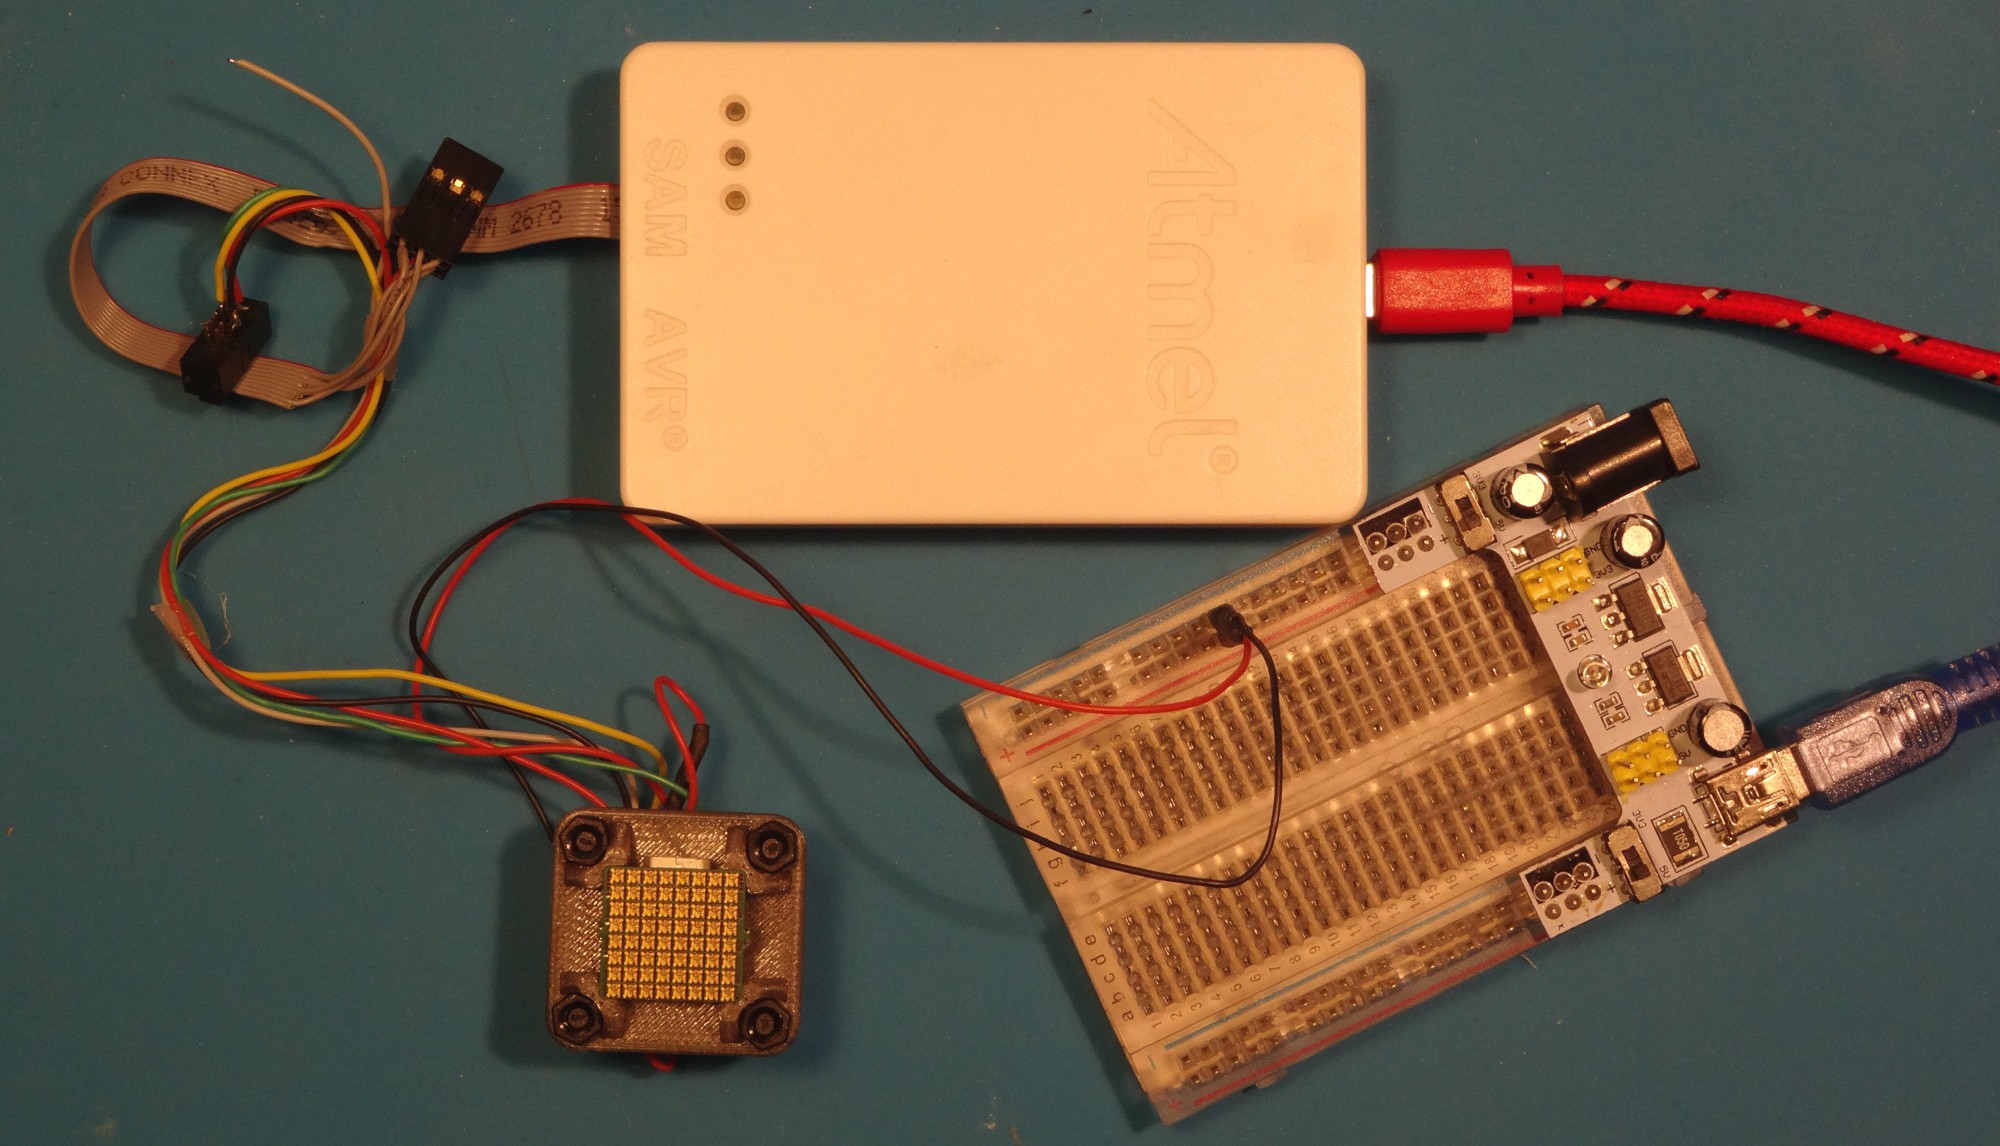
So it should not run a full brightness for a long time. I am thinking to use the SAMD21'S integrated Temperature Sensor to limit the Brightness to Maximum Board (/MCU) temperature - maybe to 70-80°C.
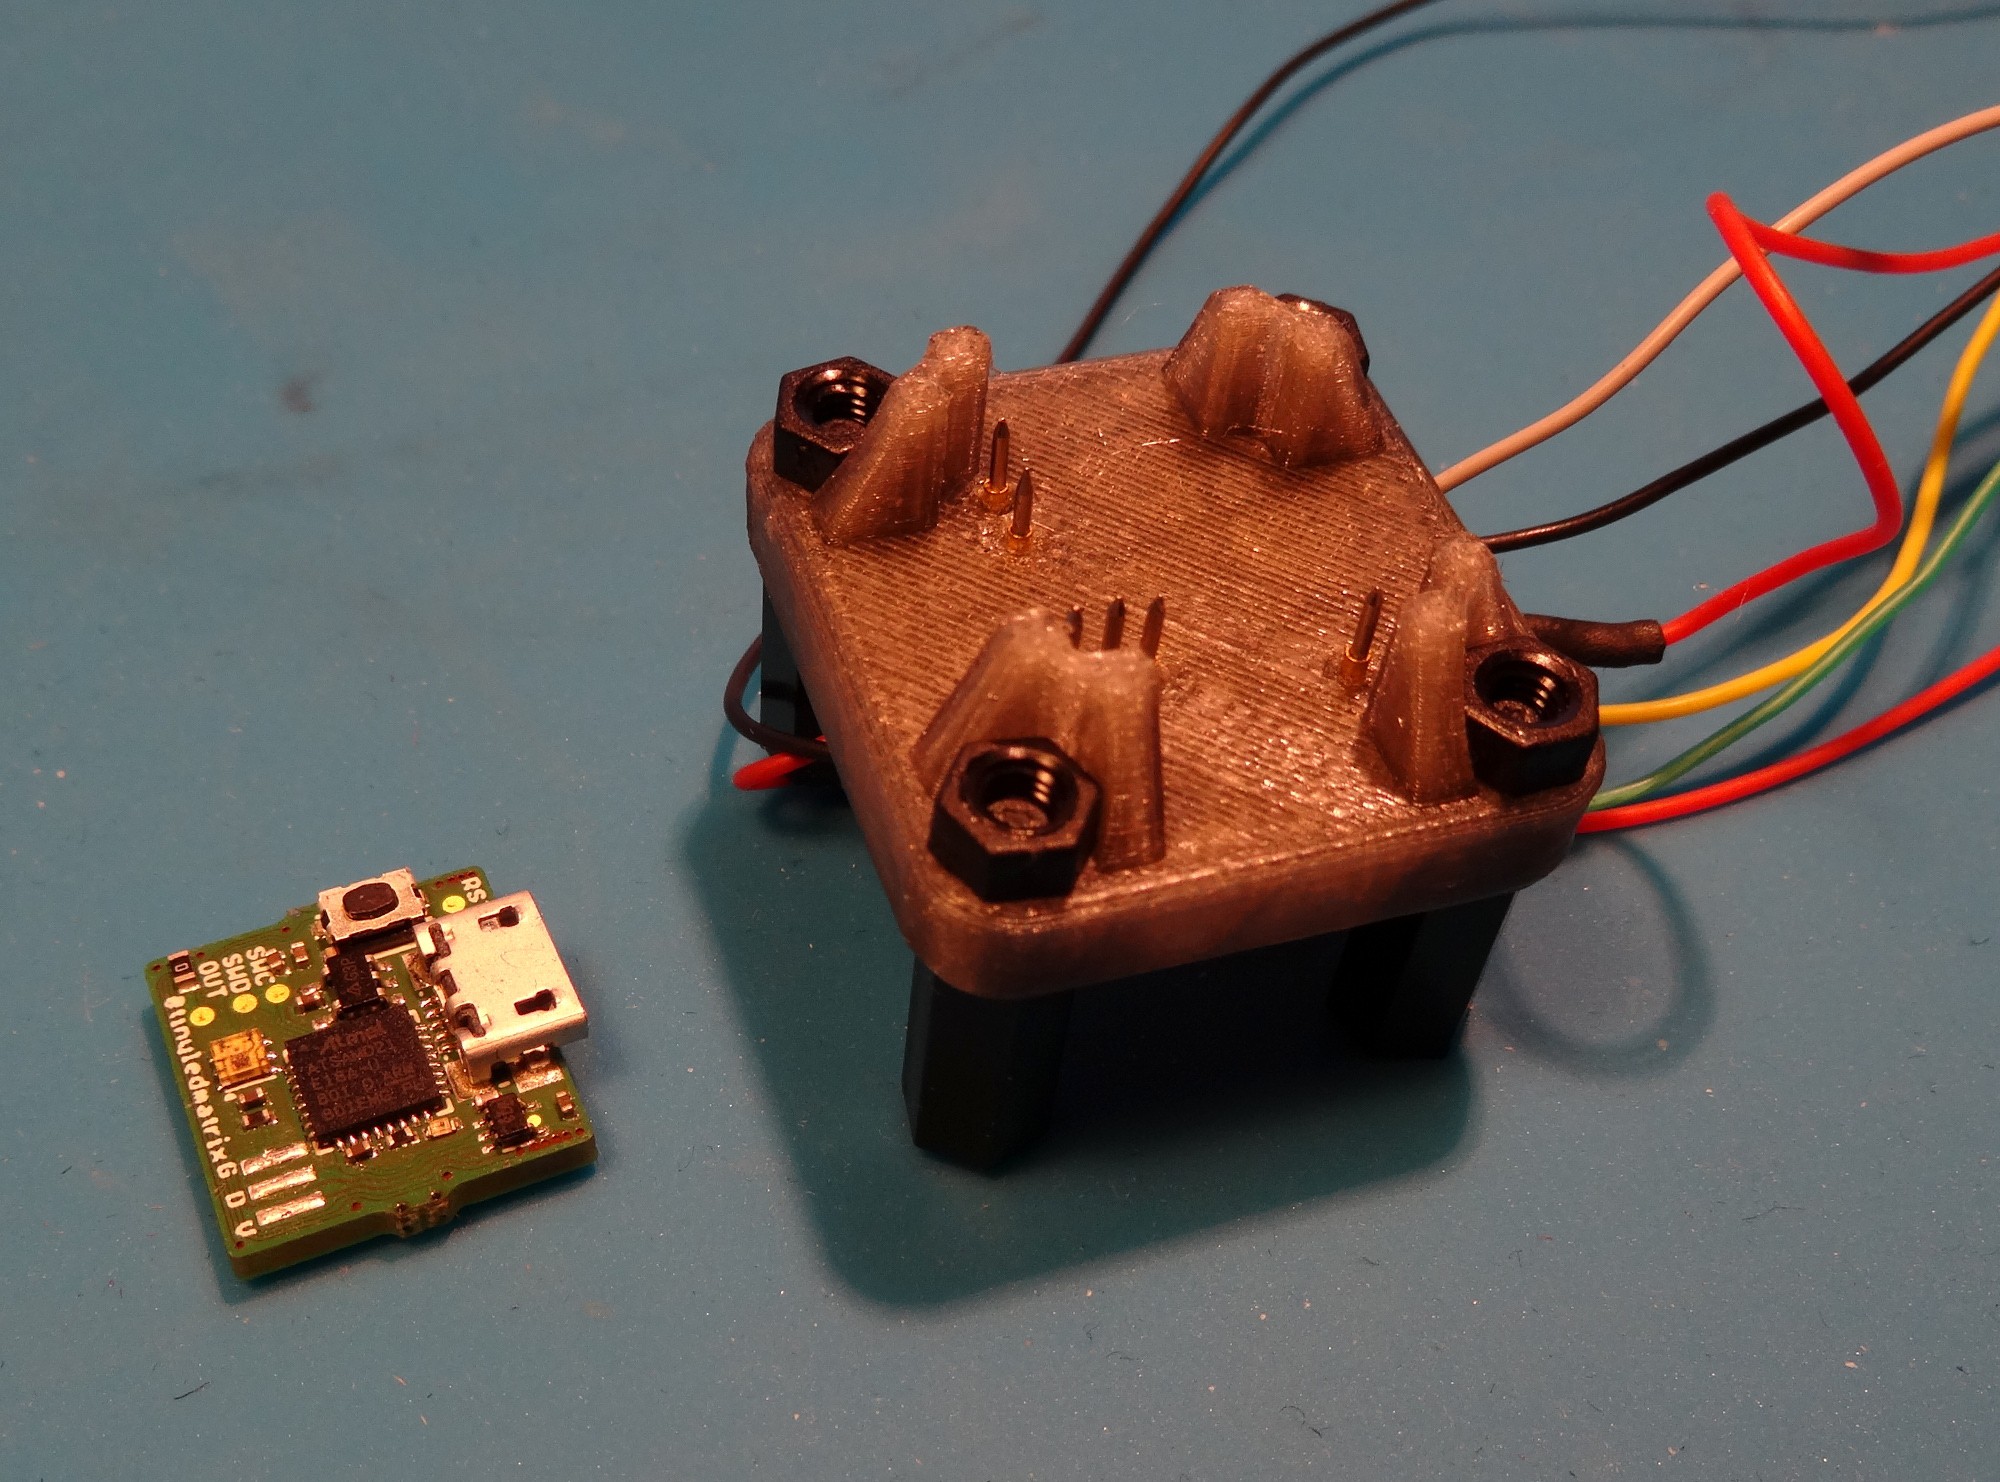
  • Test/programming Jig ​

    Alex07/10/2019 at 21:34 0 comments

    This small programming Jig was quite handy today

    I marked the positions of the Test pins in new Layer in eagle. Than I exported this Layer and the Outline as dxf. With this dxf and some work in Fusion i ended up with this small jig. Due to it small size (~3x3cm) it also prints in ~1/2hr. After redrilling the holes the test pins can be pushed in the plastic.

    Best part: it worked: And I now have the Trinket-M0-USB-Bootloader on the board. And now I can program it via USB! Pictures of working board will follow tomorrow. 

    Here is a picture of the whole setup needed to burn the bootloader. Beside the JIG some power source and a Programmer. I used the Atmel ICE. 

View all 2 project logs

Enjoy this project?

Share

Discussions

Mike Schwager wrote 03/25/2021 at 16:07 point

This is the coolest thing.

  Are you sure? yes | no

Ben Anderman wrote 04/25/2020 at 04:22 point

This is really cool! I'm curious, strips of similar LEDs typically have a capacitor per pixel or two, but you don't seem to be using any. Is it really not necessary? Also curious how you did the surface mount on both sides! I'm close to assembling a stand-alone game console with 10x20 display using WS2812-2020s. But now that I know these 1515s exist, I already want to make a new version! And if I didn't need all those capacitors, that would be great too...

  Are you sure? yes | no

Alex wrote 04/30/2020 at 22:25 point

It is not absolutely necessary if the power traces to the next capacitor are just short/big enough. At least with this design it is tested good working. When designing bigger Board (or longer strips) placing capacitors next to each LEDs is a good design method to keep the Power clean. If there is place you should add capacitors. I this board would be bigger would add some more on the back. There are three 1µF Cs on the back

  Are you sure? yes | no

Krister Johansson wrote 12/08/2019 at 15:11 point

How did you soder it?

  Are you sure? yes | no

Alex wrote 04/30/2020 at 22:17 point

Sorry for the late reply... In short: Apply solder paste for LED side with stencil - place LEDs - hot Air - repeat with other side. I start with the LED side to get a evan backside when doing the controller side.

  Are you sure? yes | no

Steve Shaffer wrote 08/21/2019 at 18:01 point

Good stuff! Any sellers of that LED on alibaba you'd reccomend?

  Are you sure? yes | no

Alex wrote 07/28/2019 at 01:30 point

Sorry for the late reply: Yes these LEDs do look like the one I ordered. MY listing is not available anymore.

  Are you sure? yes | no

Jonas Otto wrote 07/13/2019 at 17:53 point

Hi! Could you share your PCB footprint for the LEDs?

  Are you sure? yes | no

Alex wrote 07/28/2019 at 01:31 point

Sorry for the late reply.... I will upload it tomorrow..but it is basically according to the datasheet.

  Are you sure? yes | no

Xasin wrote 07/12/2019 at 12:28 point

HOLD ON
Tiny WS2812-Style LEDs? Sign me up for those, what part number can I find them as???

The smallest DigiKey holds is a 3535 package. This size of LED would be fantastic for some of my projects though, as much better tiny indicators <3

By the way, I love that programming jig. Nice way to save some board space and leave out a connector or SOIC-Bite :>

  Are you sure? yes | no

Alex wrote 07/28/2019 at 01:32 point

Thanks! You can fin the LEDs as SK6812-EC1515 on aliexpress.

  Are you sure? yes | no

Jan wrote 07/12/2019 at 10:37 point

I soooooo wanna build one of those :)
Did you use a stencil to apply solderpaste? I imagine placing all those LEDs is quite the tedious work?

  Are you sure? yes | no

Alex wrote 07/28/2019 at 01:34 point

Yes I used the stencil also made by Aisler for the solder Paste. Placing the LEDs was indeed quite difficult. I had to drop them on the PCB, because the tweezers tips do not fit between two LEDs.

  Are you sure? yes | no

arturo182 wrote 08/02/2019 at 10:50 point

Mad respect!

  Are you sure? yes | no

Stephen Ludgate wrote 07/12/2019 at 09:01 point

Brilliant work Alex!

  Are you sure? yes | no

davedarko wrote 07/03/2019 at 22:08 point

Erm, isn't that 195:LED now?

  Are you sure? yes | no

Alex wrote 07/03/2019 at 22:39 point

196:LED to be exactly. There is also one discrete LED beside the APA102 on the back. But I decided that only LED chips on the LED side do count.

  Are you sure? yes | no

deʃhipu wrote 07/03/2019 at 21:55 point

Yay Python!

  Are you sure? yes | no

Similar Projects

Does this project spark your interest?

Become a member to follow this project and never miss any updates