Close
0%
0%

Unpluginator

A useless box that doesn't like its own plug. When plugged in, it retracts its socket, therefore unplugging itself and powering down.

Similar projects worth following
Designed and built for the Macrofab Useless Machine competition, this box simply unplugs itself.
Drawn up on Fusion 360 and printed on a Prusa i3.

The idea of the Macrofab competition is to design and build a useless machine. This build has exactly zero uses, as all it does is unplug itself.

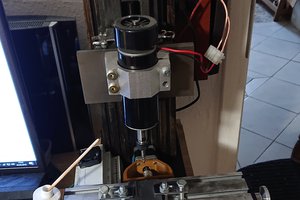
It consists of an arduino, a motor, and some 3d printed gears. The arduino flashes its LED a few times, then uses PWM to soft-start the motor. The motor turns a few gears, retracting the carriage holding the socket. The plug is restricted by the outer case, therefore is unplugged from the internal carriage. 

There were some issues on the border of plugged and unplugged, where the arduino would essentially just have a boot loop due to intermittent power supply. This has been fixed by a few capacitors, holding the power on for just long enough to fully unplug. 

VID_20190707_184005[1].mp4

Lid removed, and prior to arduino controller, just to show what happens.

MPEG-4 Video - 9.86 MB - 07/10/2019 at 19:11

Download

VID_20190710_192844[1].mp4

Completed thing.

MPEG-4 Video - 26.67 MB - 07/10/2019 at 19:08

Download

plug unplugger v13.zip

3D design - for Inventor

x-zip-compressed - 5.34 MB - 07/07/2019 at 22:03

Download

Unplugginator.ino

Arduino Code - very simple, could be made more efficiently, but there is no need to.

ino - 564.00 bytes - 07/07/2019 at 22:02

Download

  • 1 × Arduino Nano Any arduino/avr etc would do.
  • 1 × Motor Salvaged from an RC car - unknown spec, but made it work.
  • 1 × 3D printed parts As per upload
  • 1 × Motor controller A transistor of some sort. I used a ULN2003, as it's all I had lying around that would take lots of current.

View project log

  • 1
    Print parts

    My motor already had a gear attached, but it was tiny and would have caused some issues with a normal 3d print. For the matching gear, I halved the extruded line thickness on the outer edge, to ensure tolerances were ok. Worked fine. For the remaining gears, I used a larger set of teeth, so tolerances were not an issue.

  • 2
    Assemble Printed Parts

    Put them together, check they mesh well enough. Fit motor in, and fit the socket into its carriage.

  • 3
    Program Arduino

    Program arduino with the included code. Easy enough with an Arduino Nano. 

View all 5 instructions

Enjoy this project?

Share

Discussions

Similar Projects

Does this project spark your interest?

Become a member to follow this project and never miss any updates