Rajbir Singh
Things used in this project
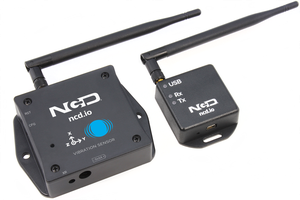
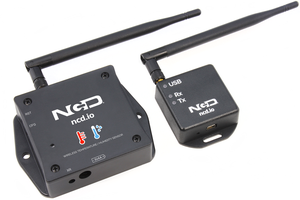
- IoT Long Range Wireless Temperature Humidity Sensor with power source Battery Or External DC.
- Zigmo/Router for PC
- XAMPP
- PC/Laptop with an OS installed or Any IoT Embedded Device.
Story
Introducing NCD’s long-range wireless temperature humidity sensor, boasting up to a 28 Mile range using a wireless mesh networking architecture. Incorporating the Honeywell HIH9130 temperature humidity sensor transmits highly accurate temperature and humidity samples at user-defined intervals.
The on-board temperature sensor is rated for -25°C to 85°C or -13°F to 185°F and the humidity sensor is rated for 0 to 100% RH. It can be powered by just 2 AA batteries and an operational lifetime of 500,000 wireless transmissions. Battery life can be extended up to 10 years depending on environmental conditions and the data transmission interval. Optionally, this sensor may be externally powered.
With an open communication protocol, this IoT wireless temperature humidity product can be integrated with just about any control system or gateway. Data can be transmitted to a PC, a Raspberry Pi, to Microsoft Azure® IoT, or Arduino. Sensor parameters and wireless transmission settings can be changed on the go using the open communication protocol providing maximum configurability depending on the intended application.
The long-range, price, accuracy, battery life and security features of Long Range Wireless Temperature Humidity Sensor make it an affordable choice which exceeds the requirements for most of the industrial as well as consumer market applications.
Setting up XAMPP
XAMPP is most prevailing, free an open-source cross-platform which is one solution to run your web services. XAMPP is developed by ApacheFriends which released in May 2002. XAMPP Stands for Cross-Platform(X), Apache(A), MySQL(M) also Sometimes (M) refers to MariaDB, PHP(P) and Pearl(P).
XAMPP allows you to work on a local server and test local copies of websites using PHP code and MySQL databases. Once XAMPP is active, you can access your local copy with a browser using an URL like http://localhost/ or http://127.0.0.1/
Downloading and Installing XAMPP
Go to XAMPP web site and download the installer based on your operating system. Installation should be similar to a normal software installation you do in your operating system.
When installing, there would be an option to select whether you want to run Apache and MySQL as services. If you chose it, Apache and MySQL will start at system boot-up which may not need if your computer is tight with memory resources or if you are not doing PHP development frequently. You can change these settings after installation.
Starting Apache and MySQL
- Go to the location where you installed XAMPP (usually C:\Program Files\xampp) and double click on XAMPP Control Panel (xampp-control.exe). This will bring you the following screen. Click on Start buttons next to Apache and MySQL for starting them.

- Now open up your browser and type http://localhost/ or http://127.0.0.1/

- This will open up the following page. Click on the phpMyAdmin.

- This will bring you the following screen. Now click on the “New” button as shown in the picture below to create a new database.

- Now create a new database as shown in the picture below.

- Now create a table to visualize data as shown in the picture below.

- Now name the first column as “id”.

- Now scroll to the right side of the screen you will see “A_I Comments” i.e. Auto Increments and it is used setting primary key which uniquely identifies each record within the table. Click on the checkbox below it.

- This will bring you the following screen. Now click on the “Go” button.

- Now enter the values of other three columns Name = temperature, Type...