 lokthelok
The Calendar Printer has several components which have the following functions:
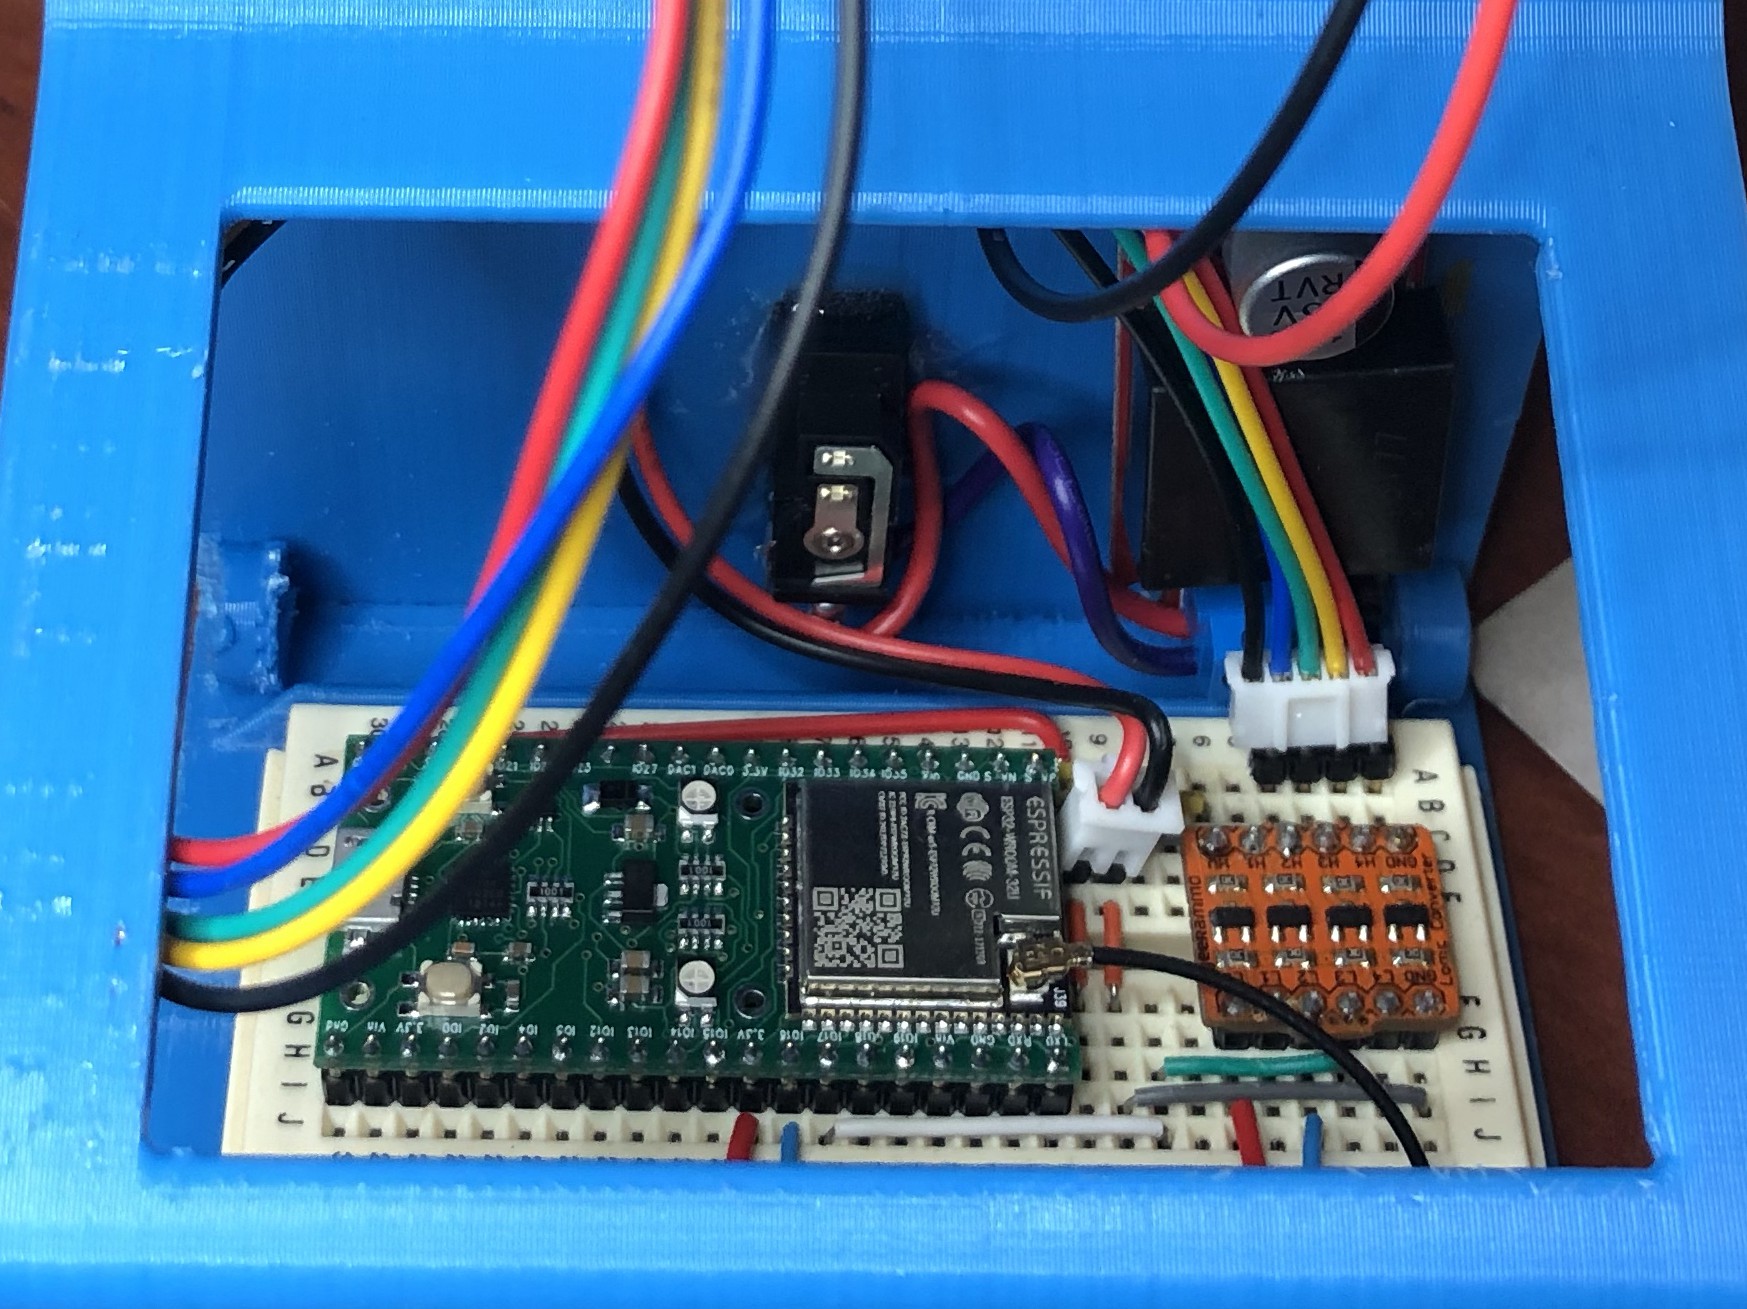
ESP32 (EzSBC ESP32_ANT-01):
An ESP32 microcontroller is used as the main processor for this project. Firmware was written in Visual Studio Code with the PlatformIO extension (see GitHub). When powered on, the ESP32 connects to WiFi, choosing the first available network from a list. It then sends a HTTP GET request to a Google Apps Script (see below). The execute link to the Google Apps Script issues a redirect notice which is decoded and followed. The redirected address returns formatted text containing the events from the calendar specified in the script for only the current day. The text also contains the current date to eliminate the need for the ESP32 to fetch time from a NTP server.
First the date is pulled from the returned text and stored as an Arduino String for printing later. Then each line of the text is used as the initialising argument to a calEvent class object which decodes the line and stores event name, location, time etc. in separate Arduino String variables.
With all calendar events in calEvent objects, each piece of information is then pulled back out and stored in separate Arduino String arrays. The random_shuffle() function is then used to shuffle the information randomly before it is assigned back to the calEvent objects.
Using the Adafruit Thermal library to interact with the thermal receipt printer, a logo is first printed, then the date. Each event is then iterated through to print a formatted summary of the less than useful event. An all day event will be displayed with only title and location. Likewise, an event with no location or guests will not display that field on the printout.
If there are no events in a given day, to give you something to do, the logo and date will print and then feed the remainder of the paper roll out at you.

Google Apps Script (Google Apps)
The Google Apps Script is largely based off the work of MickMake's Project-mmClock (available on GitHub). The script is called when a HTTP GET request is received for the execute URL of the script. This URL contains a long random 'key' making it "secure" through obscurity. Do be aware that the information that is returned from the script should not be sensitive as this is not good security. The Google Apps Script being within the Google eco-system is able to be authorised to have access to Google Calendars, so access between the app and calendar is secure. Perhaps consider the script an API to your calendar, dependent on what you program.
The script first connects to the calendar specified by name in the script. A string is initialised which will be built up with the information to be returned. The current day is added as the first line of the string, formatted in human readable text. A variable is populated with all events for the current day, which are then written in a CSV type format. The guests of an event are also added, separated by colons if there are any.
The string is then returned at the end of the function. This string is read as plain text when received by the ESP32.
Thermal Printer
The thermal printer is controlled by a 9600 baud serial connection to the ESP32. The Adafruit Thermal library was used to facilitate simple communication with the printer. The bitmapImageConvert Processing utility included in the Adafruit Thermal library was used to generate an array containing the logo image.
Wiring and Power
The Calendar Printer is powered from a nifty switched 2.1mm barrel jack. This feeds a cheap 5V 3A regulator to power the thermal printer and the VIN of the ESP32. The ground of the thermal printer, ESP32 and voltage regulator are all connected. When developing, I found it useful to disconnect the 5V supply from the ESP32 and have it supplied by the USB cable to the computer. This allowed the printer to be powered externally (too much power for USB) and the printer to be turned off when printing was not needed.
The serial connection from the ESP32 (3.3V logic) to the thermal printer (5V logic) was run through a logic level converter supplied also with 3.3V from the ESP32, 5V and ground.
3D Printed Enclosure
The enclosure is 3D printed (requiring 180g material) in three parts. The two side panels print flat with the outside upward. The main body prints on its side with support material for the printer opening and side panel fastener tabs. I found the support material under the bottom most tabs challenging to remove so the side panel would fit flush.

Calendar Response Format
The format which the Google Apps Script uses to return the calendar information is as follows:
<current date>
<name>,<location>,<start time>,<end time>,<all day?>,<guest 1>:<guest 2>:...<guest x>
...
For example:
Fri Jul 19 2019
Write Project,hackaday.io,10:30:00 AM ACST,11:30:00 AM ACST,notday
Public Holiday,,12:00:00 AM ACST,12:00:00 AM ACST,allday