 Redgeneral
Requirements:
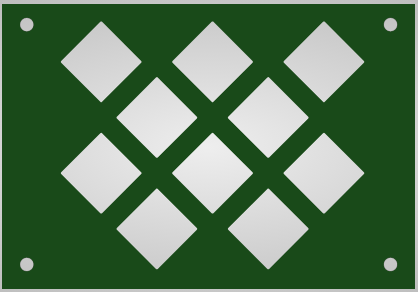
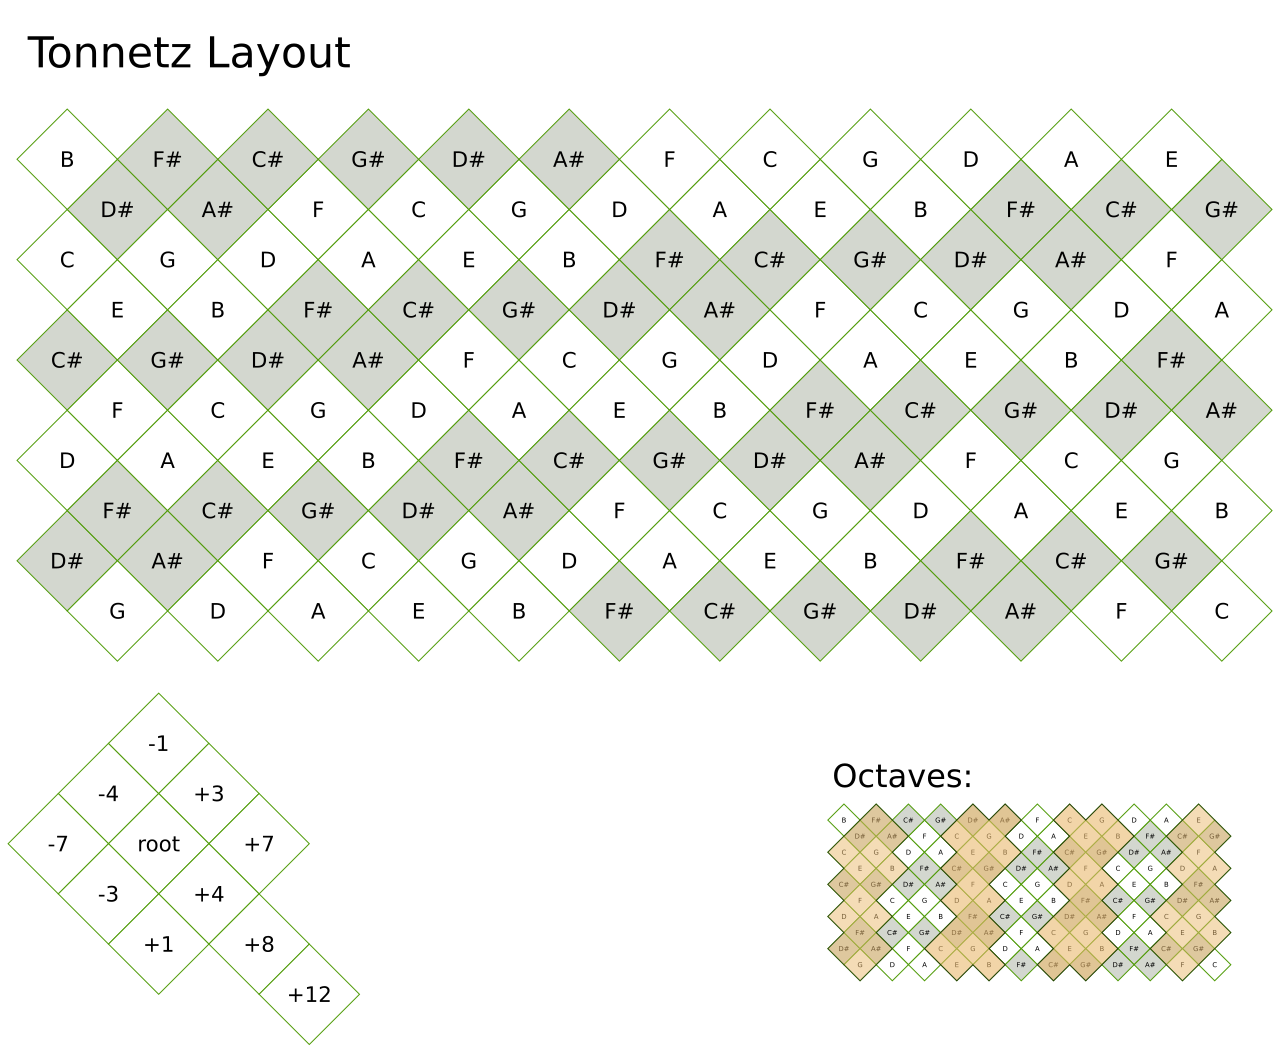
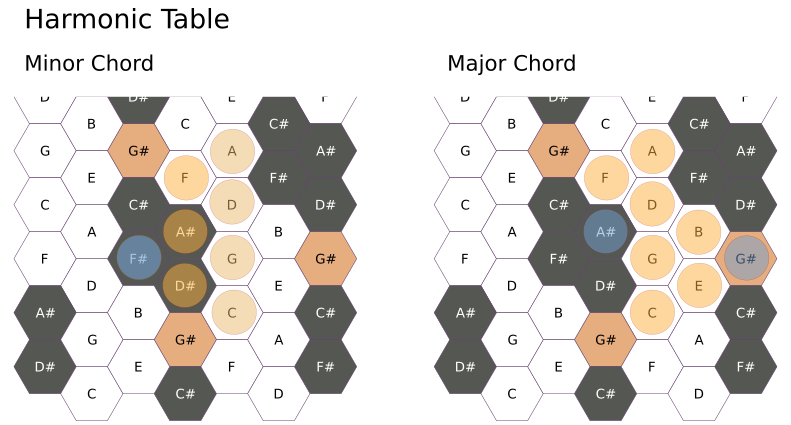
- Compact chord shapes
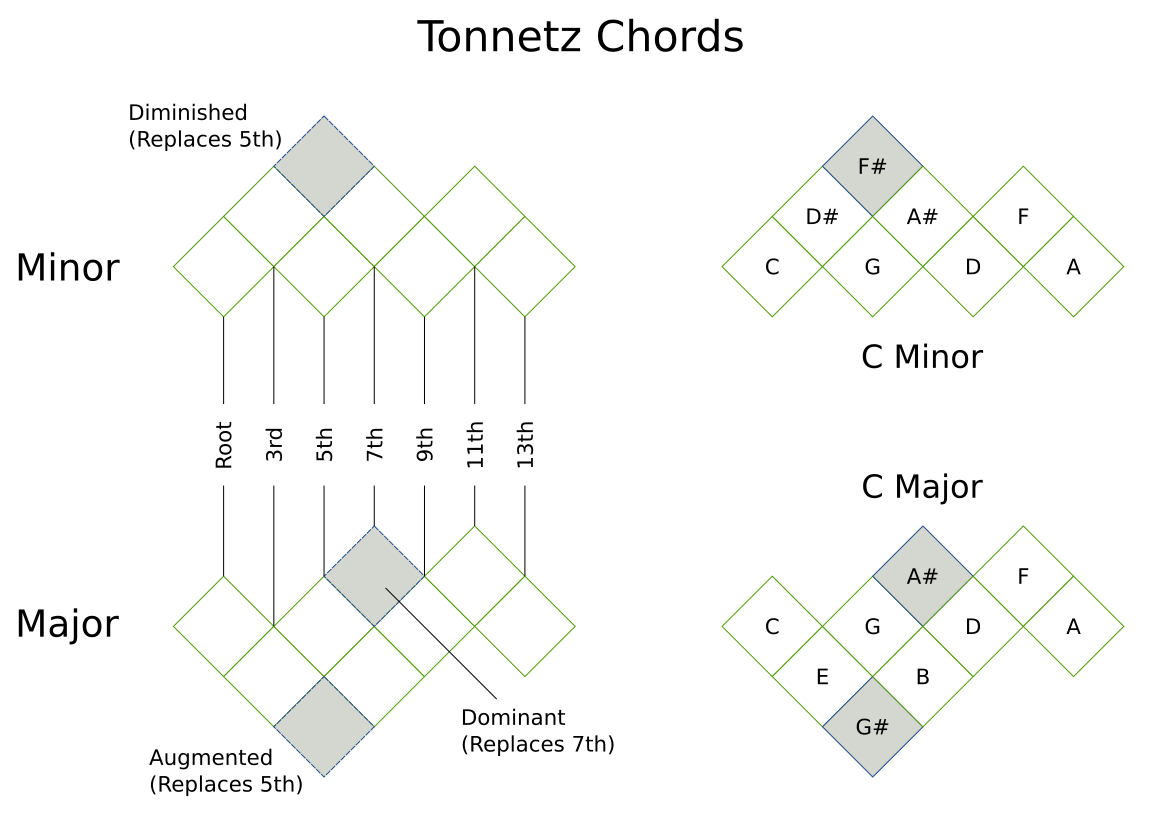
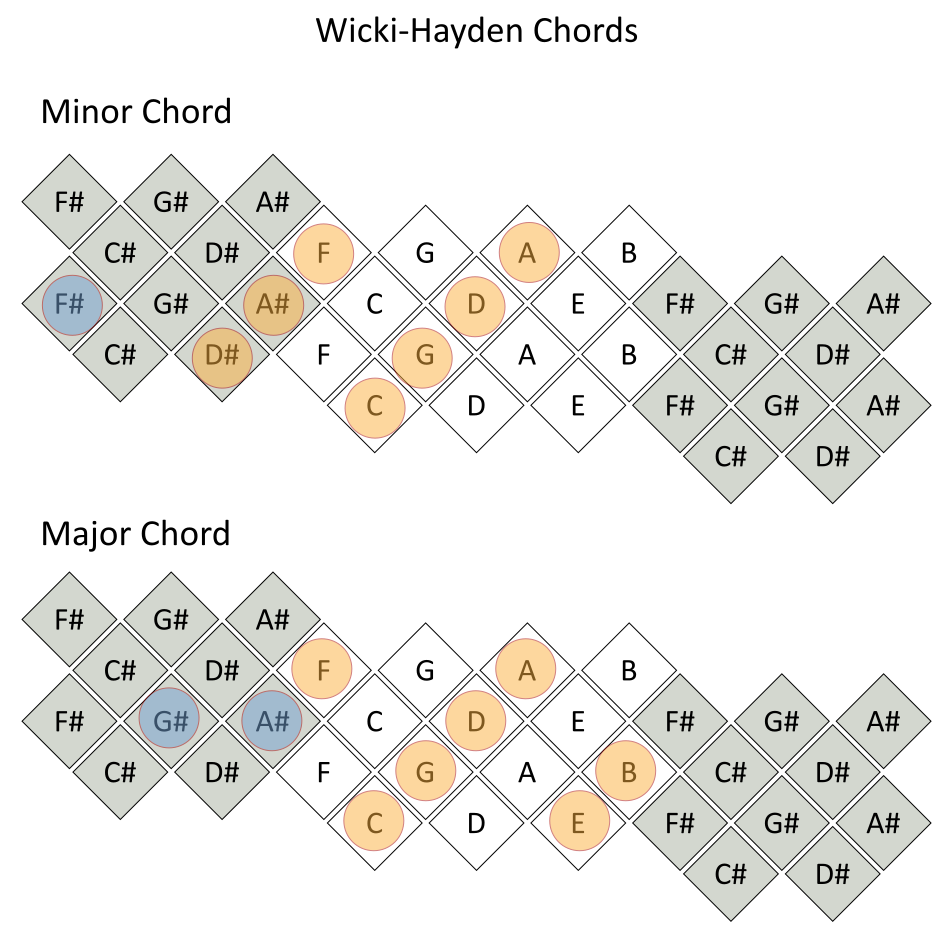
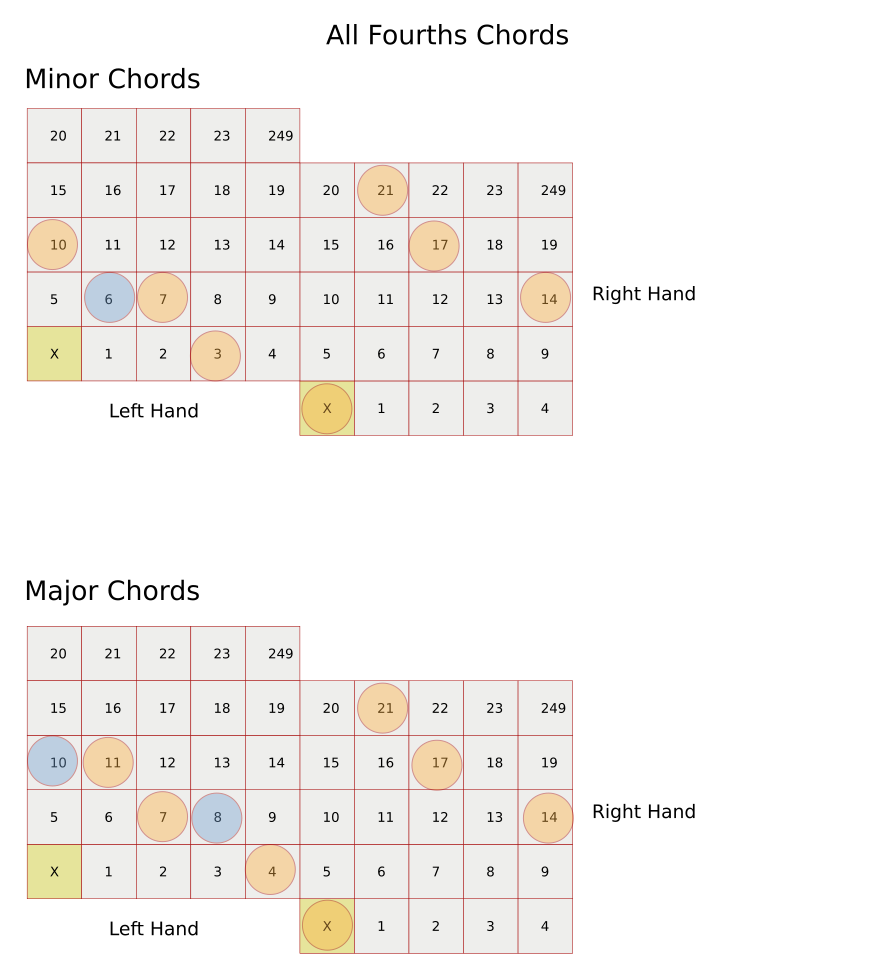
- Isomorphic chord shapes reduces the number of shapes to memorise
- Compact shapes make it easier to hold more keys with fewer fingers
- Cannot spread fingers well, closer is better
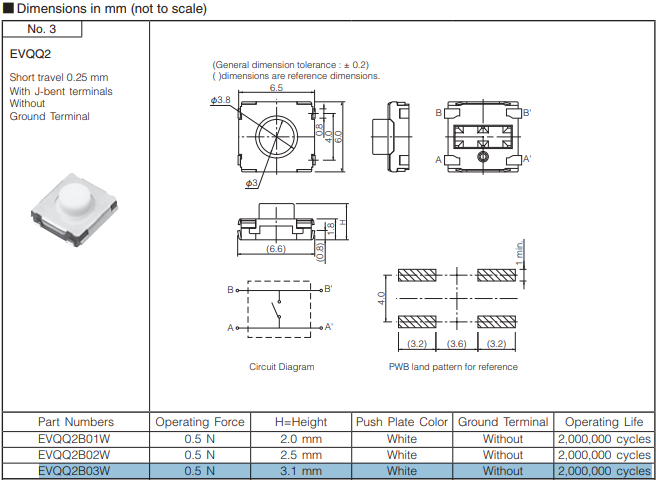
- Light keys
- Less tiring on hands
- Velocity keys
- Velocity produced by time between two switches
- Min 7 octaves
- Compact and lightweight
- USB Midi
Status:
- Analysis and design of keyboard layout [Complete]
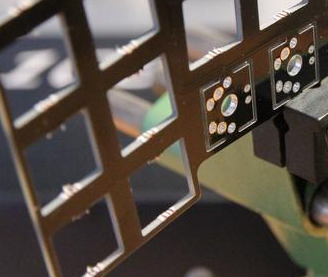
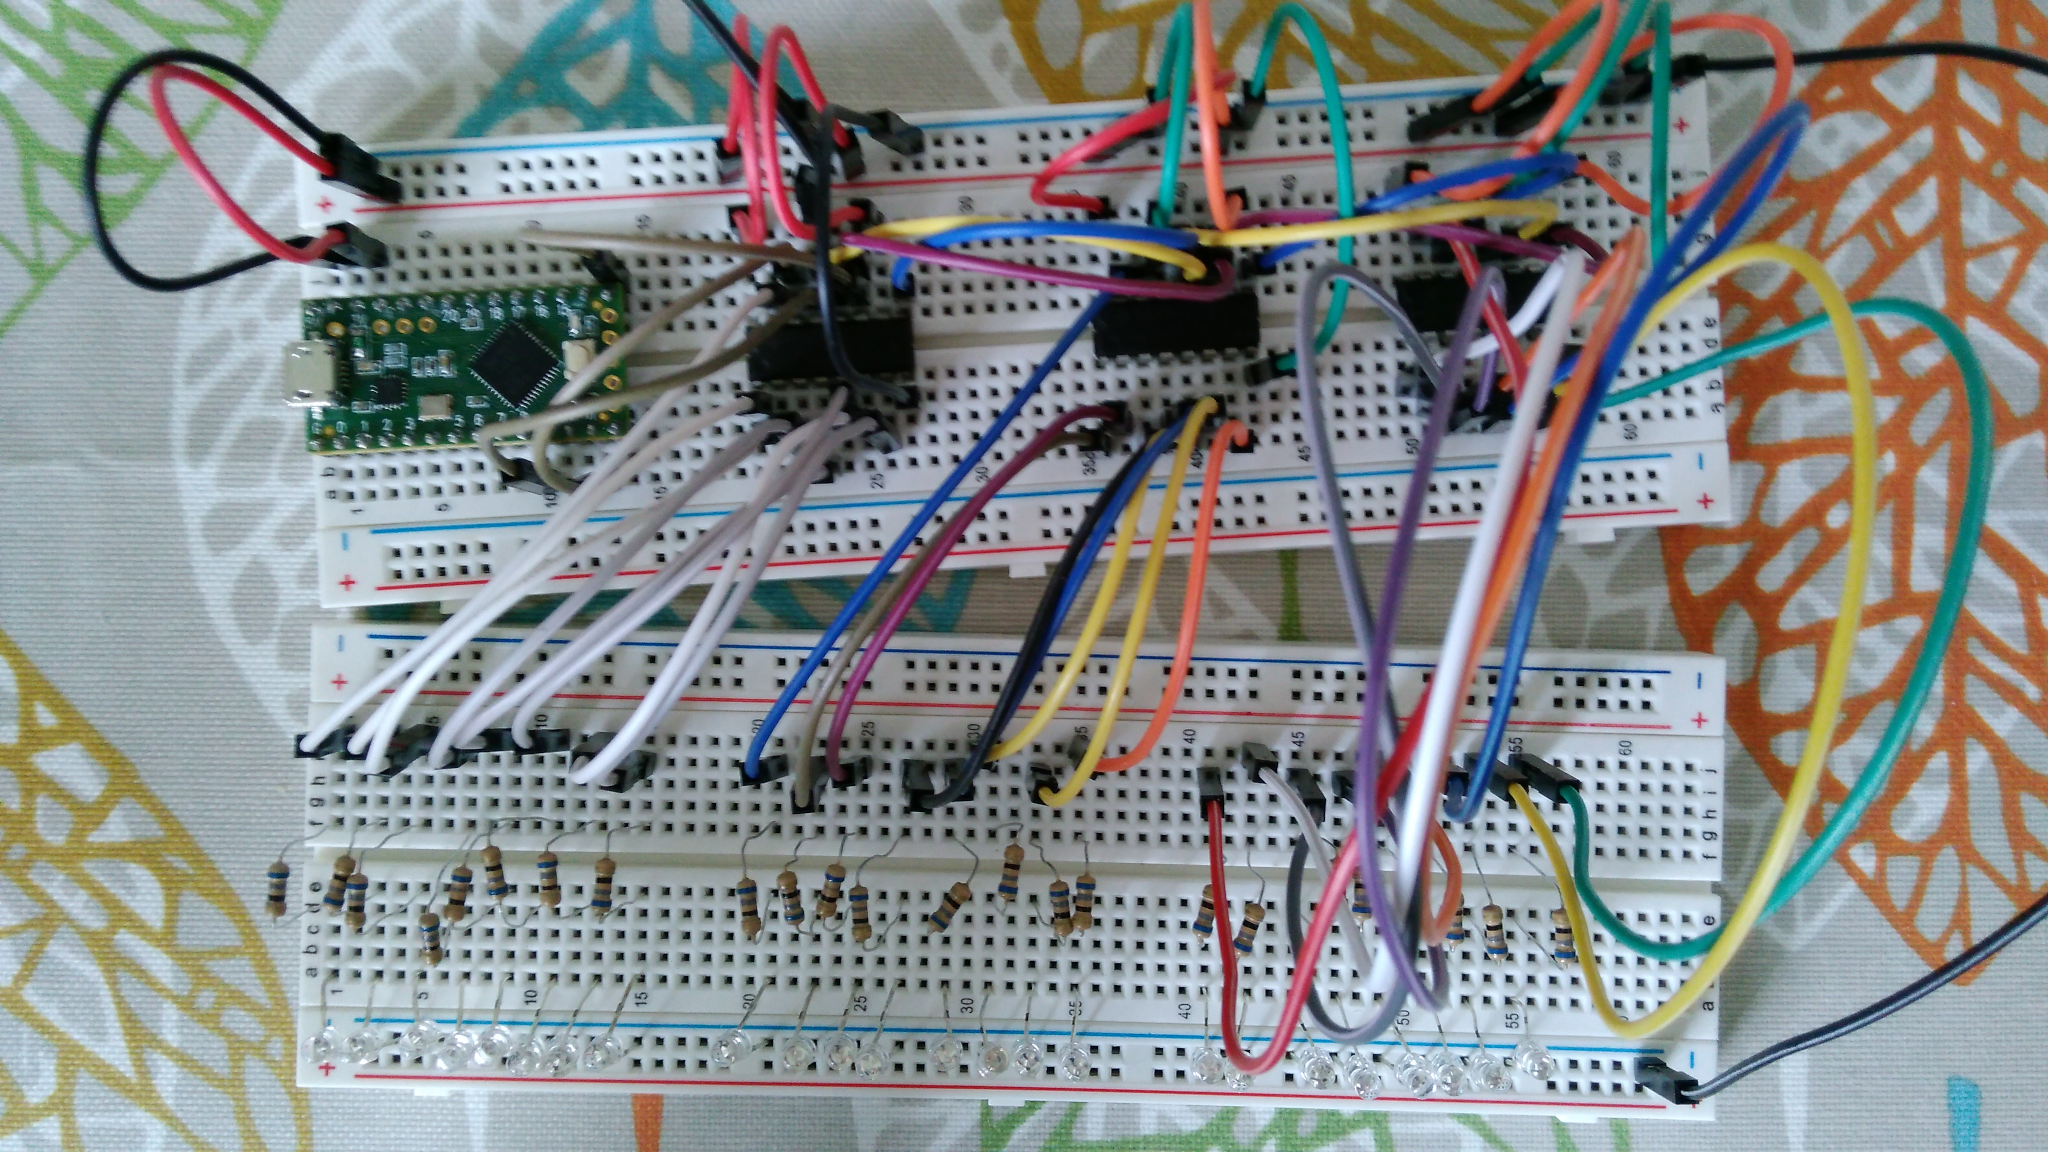
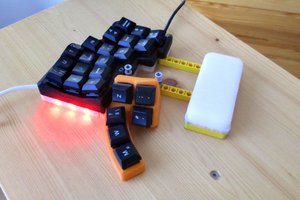
- Prototype A - Key Mechanism Prototype [Complete]
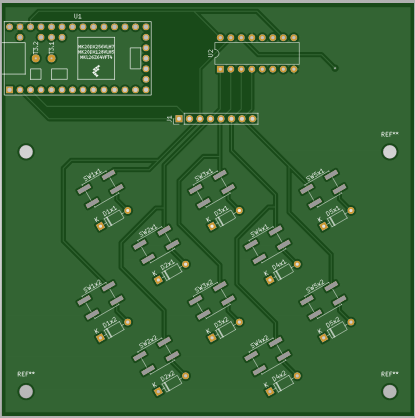
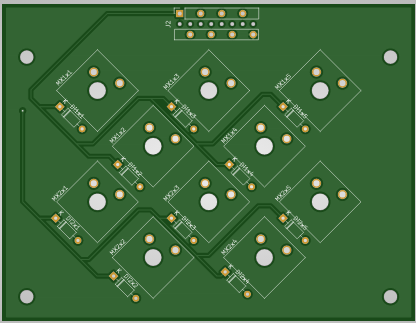
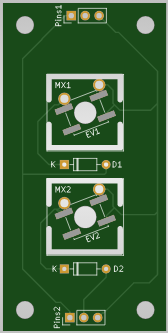
- Prototype B - Small section test [Awaiting PCBs]
- Full Keyboard - TODO
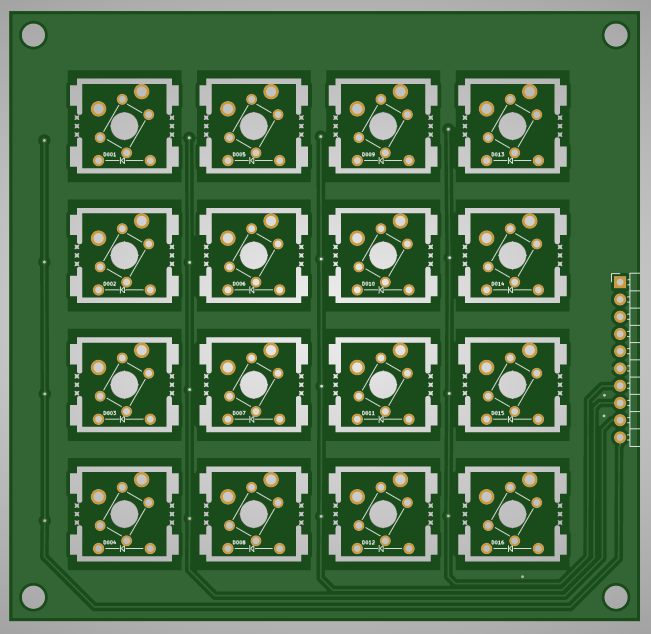
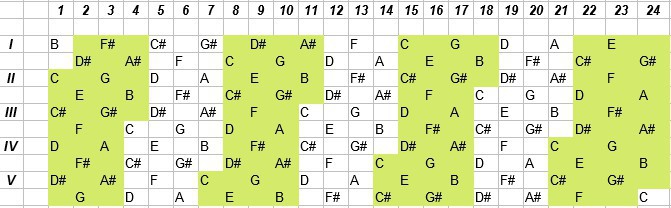
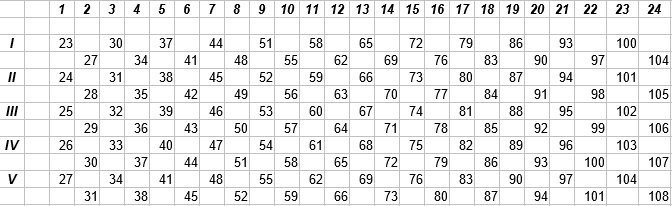
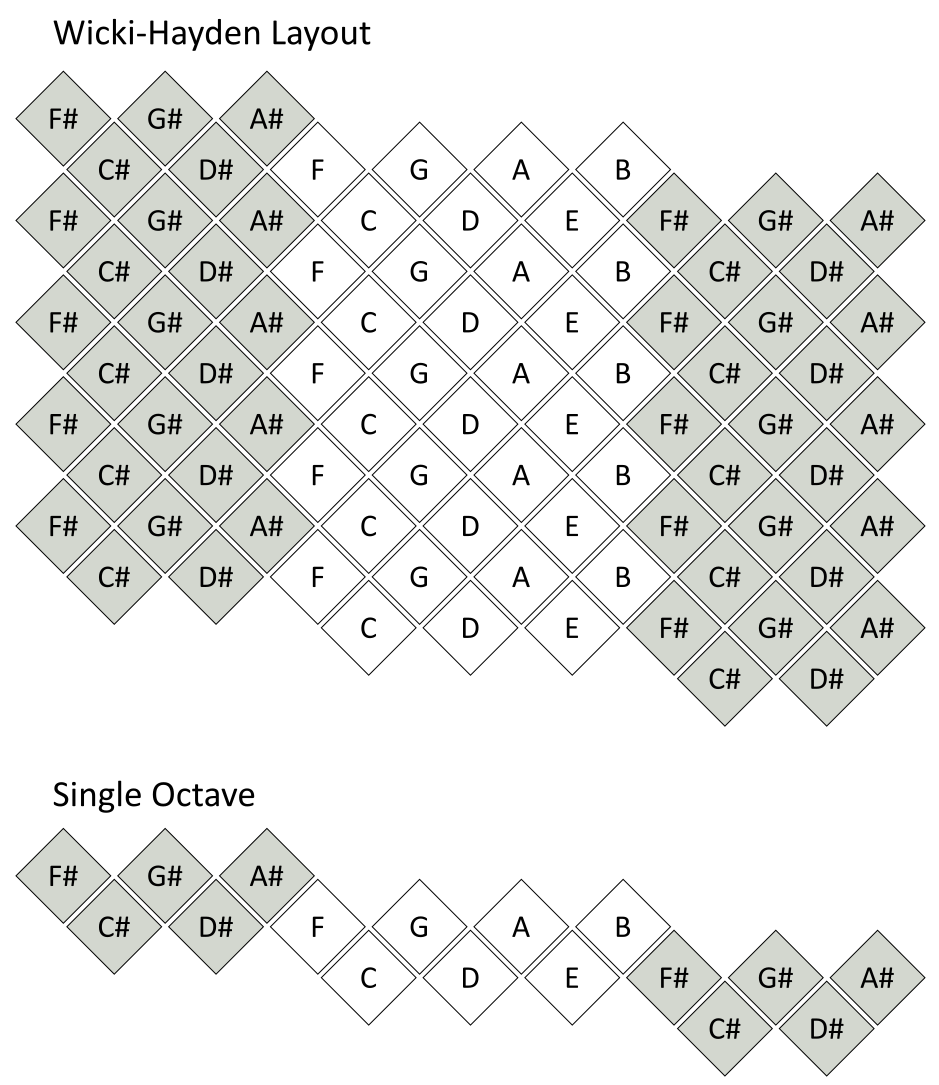
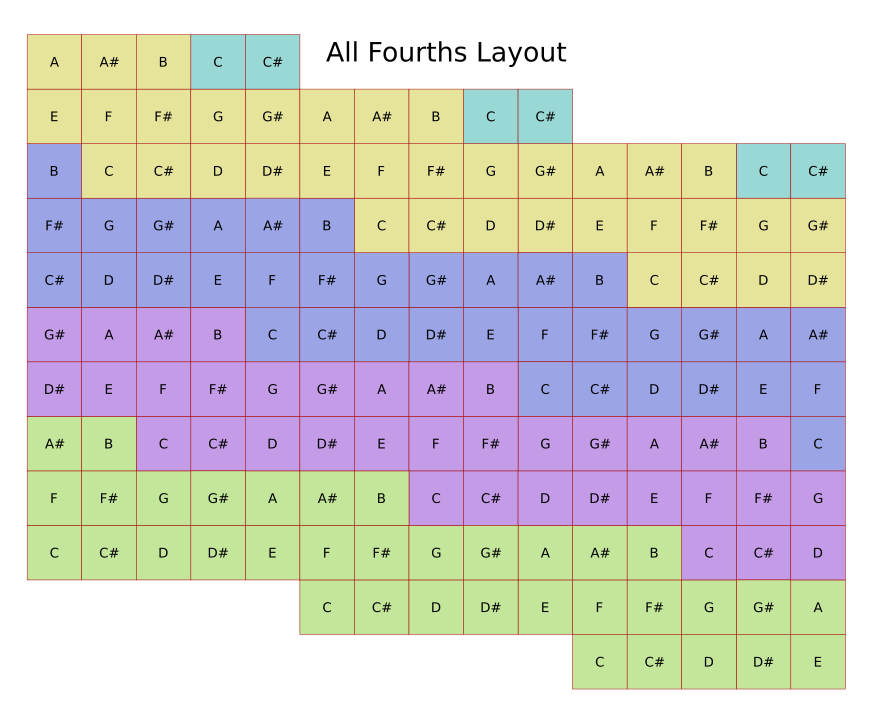
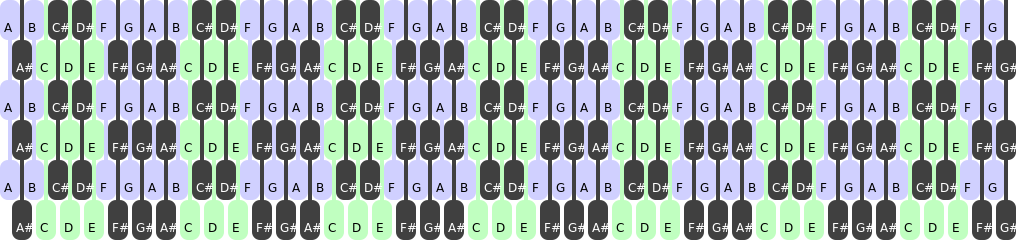
Current layout design:


 JohSchneider
 TEC.IST
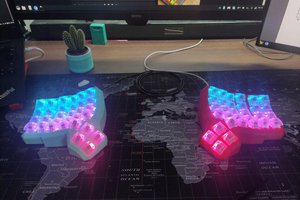
 Pedro Barbero
 Mx. Jack Nelson
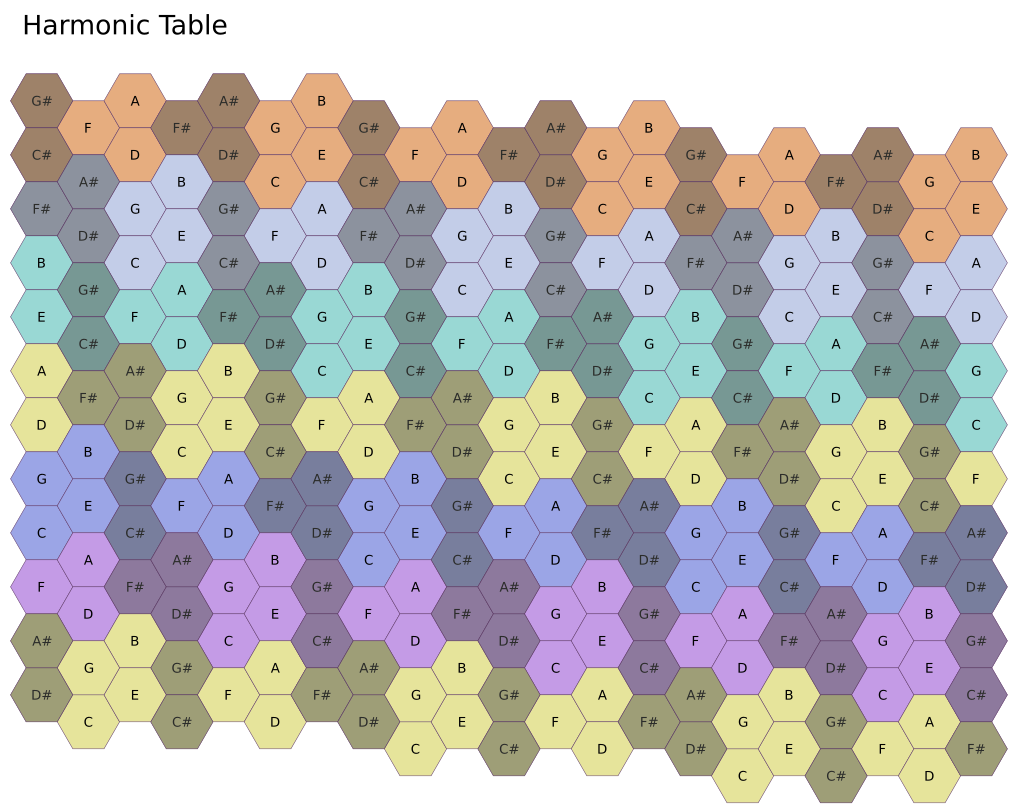
I just became aware of Tonnetz charts and started thinking along similar lines recently. How is this project coming along?